WNW GB 2009 -10 Junkers J.I Stephen
Colorado, United States
Joined: January 25, 2004
KitMaker: 11,669 posts
AeroScale: 11,011 posts
Posted: Wednesday, September 30, 2009 - 07:33 PM UTC
It all started
here. 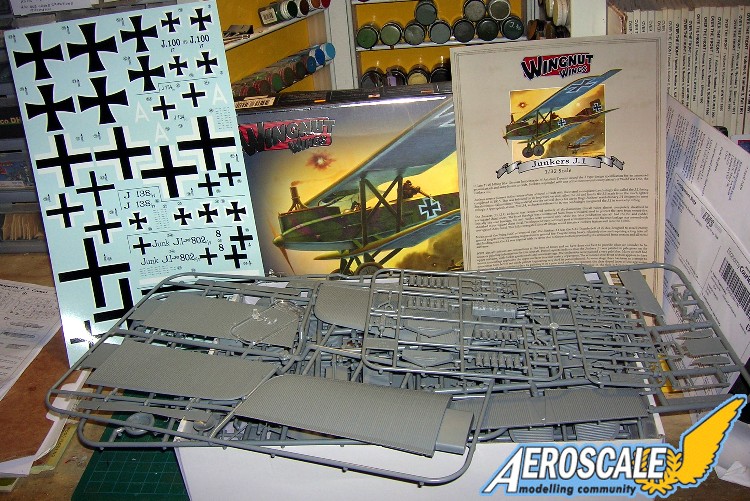
Along time in the making but it seems the newest aircraft model manufacturer is the brain child of Wingnut productions owner Peter Jackson (LotR) fame. They have opened with a bang and the subject matter is 1/32 WWI plastic model aircraft kits. The prototype of this kit was up on their site for almost a year giving us all a hint of the things to come.
Assembling a group of 3D artists for his movies Mr. Jackson added some of the contemporary greats to his staff. Now we see them contnuing in their service to the lord of the wings. This Rogue's gallery of artists are listed in the info section on the website. One of the most immediately recognizable is the superb fellow Mark Miller. His Virtual graphics in the modeling venue have been the stuff of inspiration for years. Ronny Bar, Steve Anderson and so many others.
It is with a great sense of joy I crack the box and lay hands on this behemoth.
". . .The most important thing is to know why you build and then get the most that you can out of building." via D.D.
Colorado, United States
Joined: January 25, 2004
KitMaker: 11,669 posts
AeroScale: 11,011 posts
Posted: Wednesday, September 30, 2009 - 07:39 PM UTC
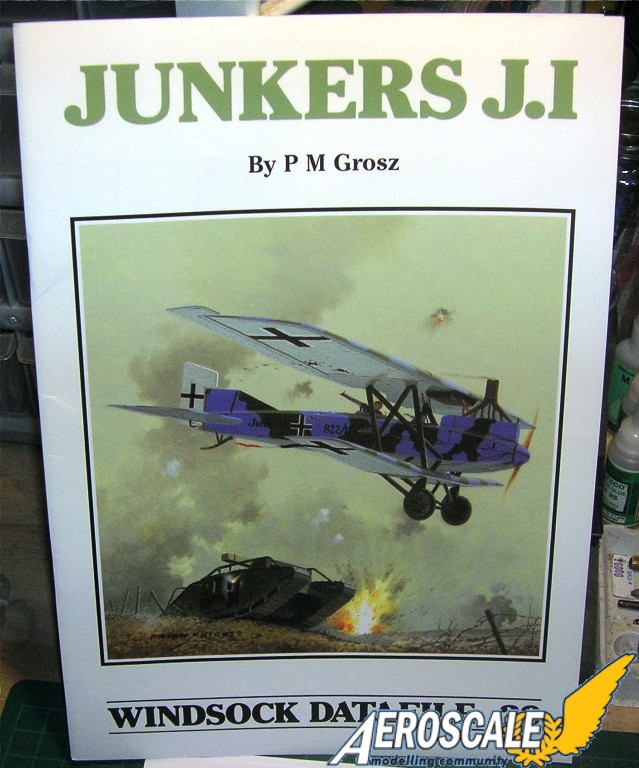
Wingnut productions has a website concerming Vintage Aviation subjects and they had this and several other images up for almost a year before the actual release of their first four kits.

". . .The most important thing is to know why you build and then get the most that you can out of building." via D.D.
Alberta, Canada
Joined: January 19, 2008
KitMaker: 6,743 posts
AeroScale: 6,151 posts
Posted: Sunday, October 11, 2009 - 02:44 AM UTC
Stephen , how goes the kit so far ?
Colorado, United States
Joined: January 25, 2004
KitMaker: 11,669 posts
AeroScale: 11,011 posts
Posted: Sunday, October 11, 2009 - 02:54 AM UTC
Research and prep, research and prep.
". . .The most important thing is to know why you build and then get the most that you can out of building." via D.D.
Colorado, United States
Joined: January 25, 2004
KitMaker: 11,669 posts
AeroScale: 11,011 posts
Posted: Thursday, November 12, 2009 - 04:24 AM UTC
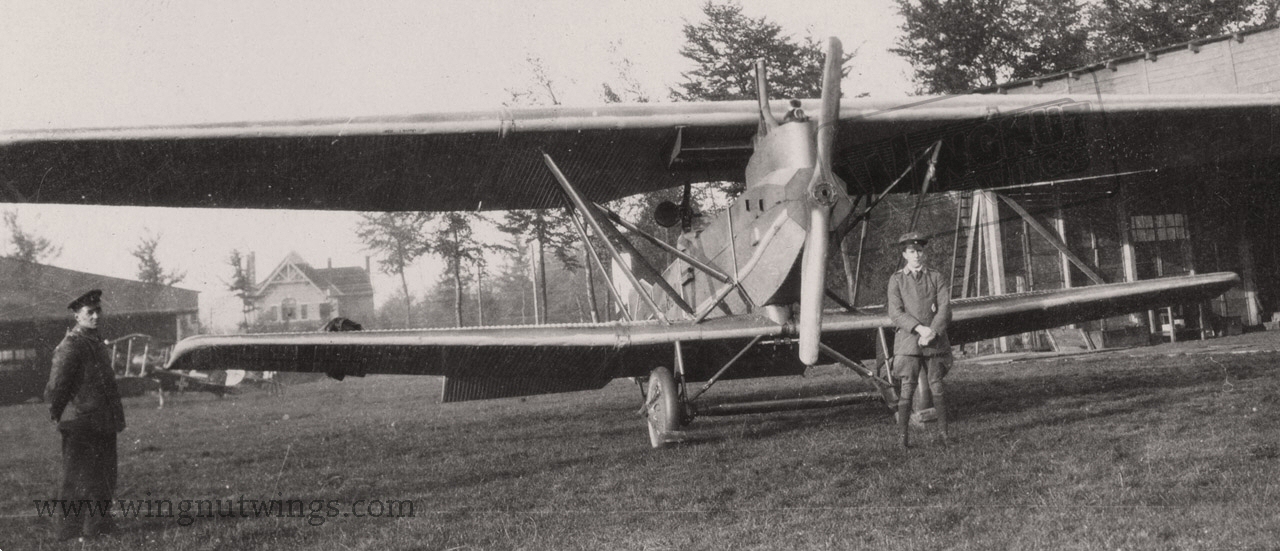
Just to start I go where WNW began its research into the kit.
". . .The most important thing is to know why you build and then get the most that you can out of building." via D.D.
Indiana, United States
Joined: May 14, 2007
KitMaker: 3,117 posts
AeroScale: 2,270 posts
Posted: Tuesday, November 17, 2009 - 12:50 PM UTC
Any progress, or are you still researching? I am anxious to see what you do with this kit.
"Treat 'em Rough", Current Builds--Wingnut Rumpler
I am frequently seen with blood shot eyes from staying up past my nap time to get the right colour scheme on my latest WWI model?
Alberta, Canada
Joined: January 19, 2008
KitMaker: 6,743 posts
AeroScale: 6,151 posts
Posted: Tuesday, November 17, 2009 - 12:58 PM UTC
Your not the only one Carl !

Colorado, United States
Joined: January 25, 2004
KitMaker: 11,669 posts
AeroScale: 11,011 posts
Posted: Wednesday, November 18, 2009 - 06:29 PM UTC
You know me I am just a tease. Signed Eyegore.
". . .The most important thing is to know why you build and then get the most that you can out of building." via D.D.
Colorado, United States
Joined: January 25, 2004
KitMaker: 11,669 posts
AeroScale: 11,011 posts
Posted: Saturday, December 19, 2009 - 08:07 AM UTC
". . .The most important thing is to know why you build and then get the most that you can out of building." via D.D.
Stockholm, Sweden
Joined: March 25, 2007
KitMaker: 78 posts
AeroScale: 53 posts
Posted: Sunday, December 20, 2009 - 04:16 AM UTC
Hi Stephen,
Nice to see you're on your way with the build!
Funny about the wing sections: I didn't have that problem, all I did was glue, sand the seams. I can mount the outer wing panels and detach them with a very satisfying "plop" suction sound

/Hans
http://www.hobbybokhandeln.net
Alberta, Canada
Joined: January 19, 2008
KitMaker: 6,743 posts
AeroScale: 6,151 posts
Posted: Sunday, December 20, 2009 - 04:22 AM UTC
Nice to see a close-up of the detail on the wing . Didn't know that it had rivet detailing as well .
Looking forward to your build Stephen , I know you will not disappoint us

Stockholm, Sweden
Joined: March 25, 2007
KitMaker: 78 posts
AeroScale: 53 posts
Posted: Sunday, December 20, 2009 - 06:32 AM UTC
Quoted Text
Nice to see a close-up of the detail on the wing . Didn't know that it had rivet detailing as well .
Looking forward to your build Stephen , I know you will not disappoint us
Terri,
The rivet detail is just insanely nice: There's even rivet detail on the backend of the stabilizers.
/Hans
http://www.hobbybokhandeln.net
Colorado, United States
Joined: January 25, 2004
KitMaker: 11,669 posts
AeroScale: 11,011 posts
Posted: Saturday, January 09, 2010 - 05:15 PM UTC
Continuing on with the build I am prepping the interior faces and bulk heads / fuselage formers to represent wood, bare or painted metal sections. I am getting the sense that this will be a fairly easy build.
Also maybe a bit of brain teasing here. Since there is less air pressure at a mile above sea level. . . I wonder if this causes the tighter union tolerances? Hans remarked about his ease of the wing assembly and this kit was made slightly above sea level. One of those things that make you go hhhhhhhhhhmmmmmmm. . .
". . .The most important thing is to know why you build and then get the most that you can out of building." via D.D.
Alberta, Canada
Joined: January 19, 2008
KitMaker: 6,743 posts
AeroScale: 6,151 posts
Posted: Monday, January 11, 2010 - 04:29 AM UTC
You could be on to something here Stephen .
New South Wales, Australia
Joined: March 26, 2009
KitMaker: 366 posts
AeroScale: 309 posts
Posted: Monday, January 11, 2010 - 04:28 PM UTC
Hi Stephen.
Regarding the wing union problem you experienced, I had no problem at all with the fitment of my wings during my build. All outer wings fitted perfectly into the centre sections with no sanding required. Maybe the sea level versus altitude may have merit, I live on the coast vitually at sea level - does make you wonder???????????????
Des.
Check my site for 1:32 scale WW1 aircraft model build logs, build techniques, how to make turnbuckles and eyelets plus much more, plenty of photos of my finished models
Stockholm, Sweden
Joined: March 25, 2007
KitMaker: 78 posts
AeroScale: 53 posts
Posted: Thursday, January 14, 2010 - 09:14 AM UTC
Haha, Stephen: that must be it!
Actually, what I've learned - the hard way - with these Nutty things, is one cannot use ones old and tested ways all the way. I've for example sanded off too much in places, and that just meant me having to putty the damn thing, if I'd kept the trimming to an absolute minimum, I'd have saved myself a lot of unnecessary work!
/Hans
http://www.hobbybokhandeln.net
Colorado, United States
Joined: January 25, 2004
KitMaker: 11,669 posts
AeroScale: 11,011 posts
Posted: Saturday, January 30, 2010 - 01:34 AM UTC
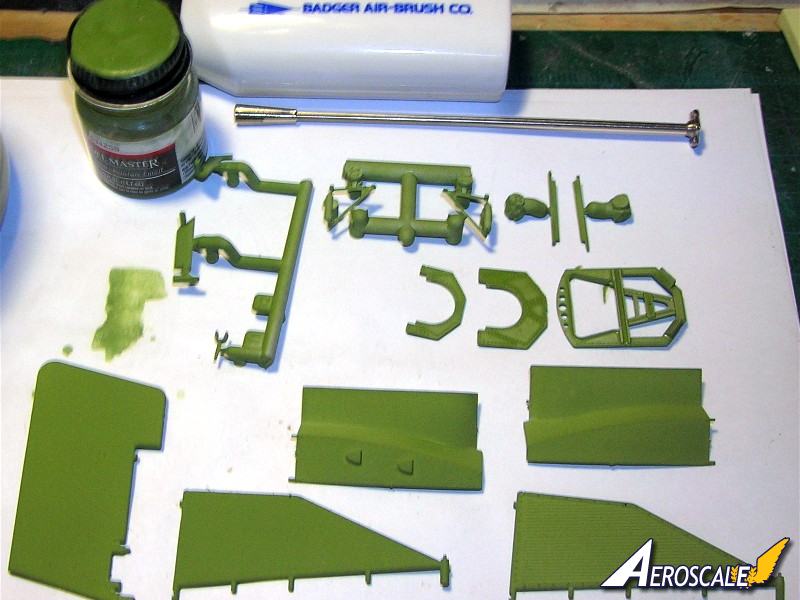
Working on a bit of plumbing and its routing before I start installing things permanently.
". . .The most important thing is to know why you build and then get the most that you can out of building." via D.D.
Colorado, United States
Joined: January 25, 2004
KitMaker: 11,669 posts
AeroScale: 11,011 posts
Posted: Friday, February 05, 2010 - 03:47 PM UTC
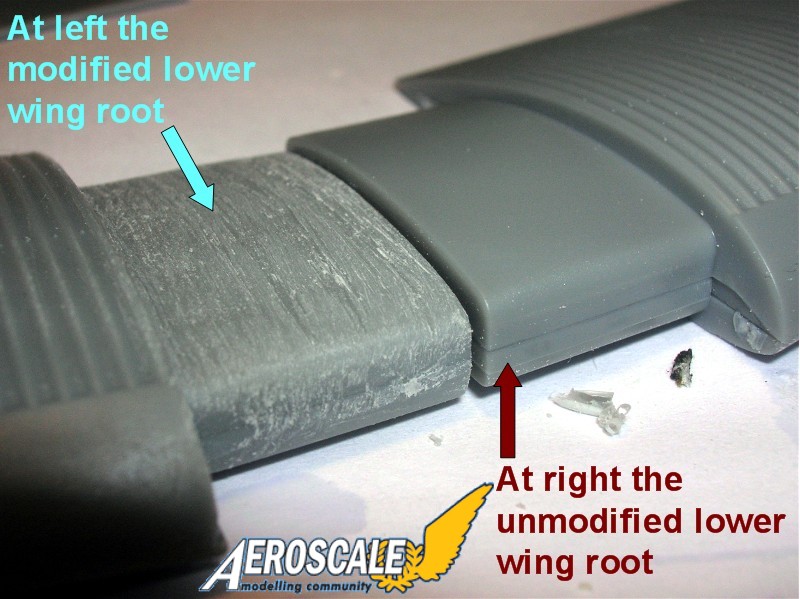
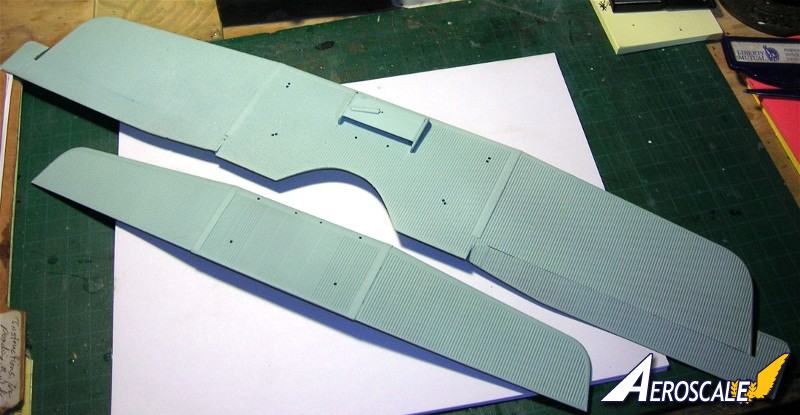
One other issue here on the top wing. The kit has a decided dihedral on the outer wing panels. Images on this subject seem to show an anhedral. One source says 1.5 degrees.
". . .The most important thing is to know why you build and then get the most that you can out of building." via D.D.
Colorado, United States
Joined: January 25, 2004
KitMaker: 11,669 posts
AeroScale: 11,011 posts
Posted: Friday, February 05, 2010 - 04:09 PM UTC
Even in the comparison shot from the WNW site the Dihedral has been removed.
.jpg)
". . .The most important thing is to know why you build and then get the most that you can out of building." via D.D.
Colorado, United States
Joined: January 25, 2004
KitMaker: 11,669 posts
AeroScale: 11,011 posts
Posted: Friday, February 05, 2010 - 04:10 PM UTC
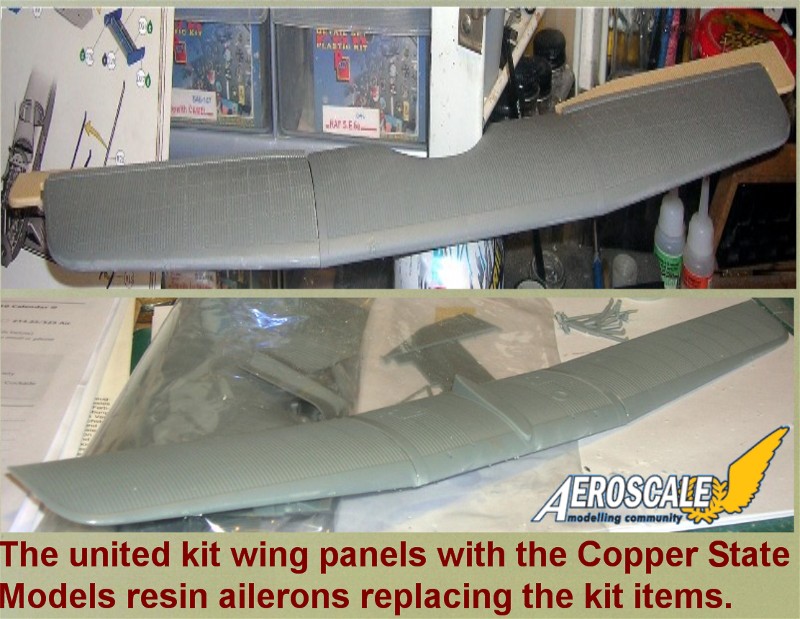
Here the is the wing straight out of the box.
". . .The most important thing is to know why you build and then get the most that you can out of building." via D.D.
Colorado, United States
Joined: January 25, 2004
KitMaker: 11,669 posts
AeroScale: 11,011 posts
Posted: Monday, February 08, 2010 - 01:04 AM UTC
Greetings gentle folk,
To start the day let me praise WNW for their diligence and help.
Quoted Text
". . .Hi Stephen,
I note on Aeroscale that you are making some progress with your Junkers J.1. We look forward to seeing what you can achieve with it.
Unusual that you should have the wing fit issues you did as they have not occurred elsewhere (to the best of my knowledge) and altitude should not have any real effect on styrene plastic.
One thing I would like to comment on is your note "Even in the comparison shot from the WNW site the Dihedral has been removed."
If you feel that the upper wing dihedral/anhedral in the model/archive comparison photo looks OK then you may be interested to know that the wingwas not modified in any way. That is how the wing builds straight from the box. The highly tapering outer wing sections cause optical illusions depending on the viewing angle.
Interestingly, others have commented on that very same model (photographed from a slightly different angle) saying that we had fixed the 'aileron gap' for the photographs, which we didn't. This is another example of the viewing angle causing the viewer to see something that wasn't there (or in this case, was still there).
Anyway, keep up the good work.
Regards
Richard
". . .The most important thing is to know why you build and then get the most that you can out of building." via D.D.
Alberta, Canada
Joined: January 19, 2008
KitMaker: 6,743 posts
AeroScale: 6,151 posts
Posted: Sunday, March 14, 2010 - 03:38 PM UTC
Well Stephen , every one seems to be coming along fine with their GB projects , but we are still waiting for some new up-date progress on your build ..............You haven't forgotten about us kind kinder folks have you ?

Colorado, United States
Joined: January 25, 2004
KitMaker: 11,669 posts
AeroScale: 11,011 posts
Posted: Sunday, March 14, 2010 - 03:57 PM UTC
Terri you are unforgetable. As to my meager efforts in this arena, I can honestly say I have made some good progress. I may even be able to post some images in the next few days. (Have been so busy behind the scenes). Justy about to kick out the 373 piece Trumpeter 1:32 Fairey Swordfish review - what a kit!
As to my WNW Junkers. As most of you know I have an itch to get basic materials covered so if there is scuffed or worn paint it is representative of the original. Pulpinator's and Wombat's builds were a tremendous inspiration. So now I can say that most of the metal areas have been given a righteous coating of baremetal and a clear barrier. I have let it cure for about 10 days while I painted fabric areas since then. There are multiple sinkholes inside the engine covers that have to be dealt with. The top wing has turned out better than I hoped. Again Kudos to WNW and their engineering.
I still have many parts that need the basic metal coat before I start applying paint to them. In the mean time I have been trying to devise a non plastic set of hinges for the same engine covers I mentioned earlier. As for the details of my behind the scenes activities, I just finished the end of Feb report. The hurrier I go the behinder I get.
". . .The most important thing is to know why you build and then get the most that you can out of building." via D.D.
Colorado, United States
Joined: January 25, 2004
KitMaker: 11,669 posts
AeroScale: 11,011 posts
Posted: Saturday, May 08, 2010 - 12:17 AM UTC
". . .The most important thing is to know why you build and then get the most that you can out of building." via D.D.
Alberta, Canada
Joined: January 19, 2008
KitMaker: 6,743 posts
AeroScale: 6,151 posts
Posted: Saturday, May 08, 2010 - 02:18 PM UTC
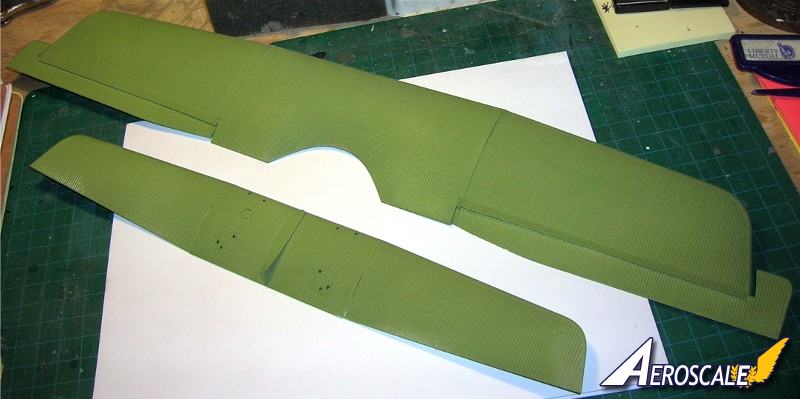
Nice progress so far Stephen , even though green isn't one of my favorite colours . This shade has a nice feel to it . Would this be moss green ?