

Early Aviation
Discuss World War I and the early years of aviation thru 1934.
Discuss World War I and the early years of aviation thru 1934.
Hosted by Jim Starkweather
Fly 1:48 Macchi M5

JackFlash

Joined: January 25, 2004
KitMaker: 11,669 posts
AeroScale: 11,011 posts
Posted: Friday, October 22, 2010 - 01:02 AM UTC
Louis I have to say this is a most impressive build. Some of it very old school and shows us what great things can come from the imagination and some planning. Magnificent!

edoardo

Joined: November 30, 2007
KitMaker: 642 posts
AeroScale: 382 posts
Posted: Friday, October 22, 2010 - 02:01 AM UTC
Hi Louis!
As the other have said: most impressive! Really!
By the way: I saw somewhere else the wonderful job you did on the Aviatik Berg... you should post it also here, I am sure it will draw much attention!
Ciao
Edo
As the other have said: most impressive! Really!
By the way: I saw somewhere else the wonderful job you did on the Aviatik Berg... you should post it also here, I am sure it will draw much attention!
Ciao
Edo

Louis

Joined: May 21, 2006
KitMaker: 472 posts
AeroScale: 471 posts
Posted: Friday, October 22, 2010 - 06:54 AM UTC
Thank you very much!
Quoted Text
saw somewhere else the wonderful job you did on the Aviatik Berg... you should post it also here, I am sure it will draw much attention!
Ciao
Edo
I'm not sure Aeroscale has needed my Aviatik Berg. There are already plenty of beautiful models here.
Regards.
JackFlash
Joined: January 25, 2004
KitMaker: 11,669 posts
AeroScale: 11,011 posts
Posted: Friday, October 22, 2010 - 04:47 PM UTC
Always room for one more Louis! Bring them on. I really liked your 1:48 Aviatik Berg D.I. I have referenced it here several times.
Louis
Joined: May 21, 2006
KitMaker: 472 posts
AeroScale: 471 posts
Posted: Saturday, October 23, 2010 - 11:00 AM UTC
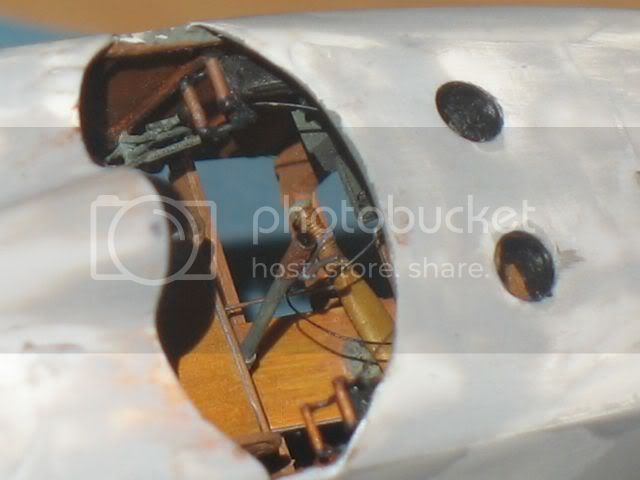
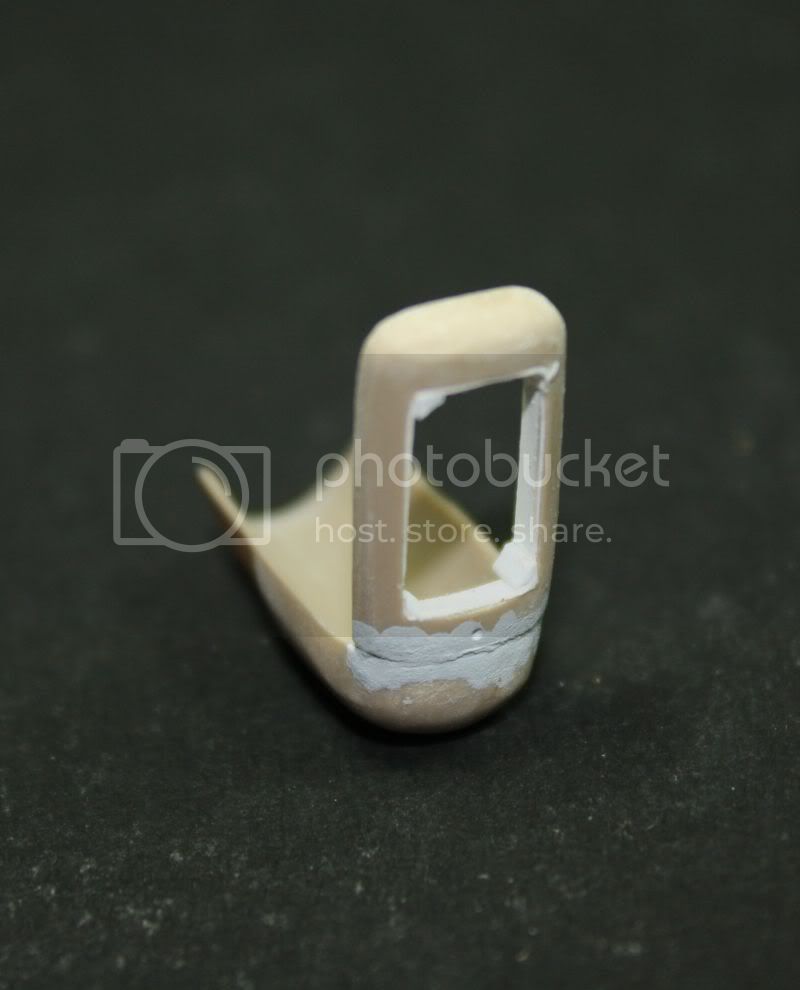
The second machine gun and the ammo box are glued.
The "floor" and the rudder bar are glued on the cross bars and the small piece of the longitudinal axis (which was cut).


The missing bars (under the seat) will be glued later.
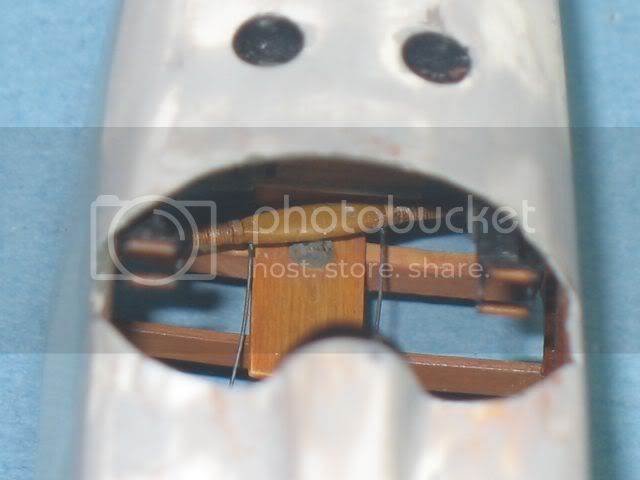
The cable for the rudder will go into the seat box. Two holes (one on each side) are drilled.
Regards
The "floor" and the rudder bar are glued on the cross bars and the small piece of the longitudinal axis (which was cut).
The missing bars (under the seat) will be glued later.
The cable for the rudder will go into the seat box. Two holes (one on each side) are drilled.
Regards

thegirl

Joined: January 19, 2008
KitMaker: 6,743 posts
AeroScale: 6,151 posts
Posted: Monday, October 25, 2010 - 05:32 AM UTC
Most impressive Louis ! Excellent attention to the details 
Louis
Joined: May 21, 2006
KitMaker: 472 posts
AeroScale: 471 posts
Posted: Friday, October 29, 2010 - 02:50 AM UTC
Thank you Terri.
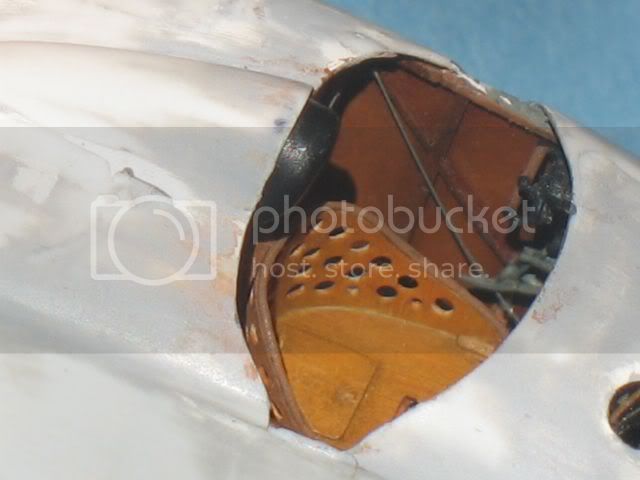
Everything is in place exept seat belt.
I'm using Macchi M7 picture when I had no picture from M5.
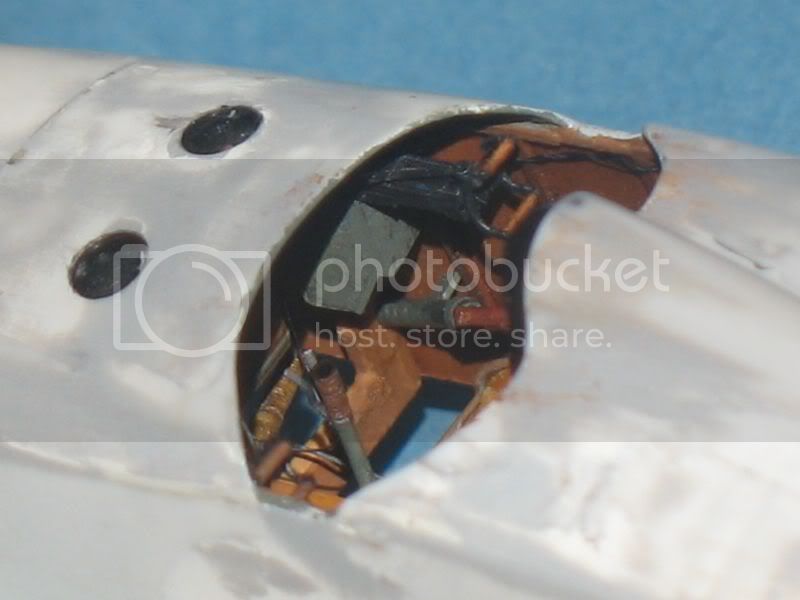
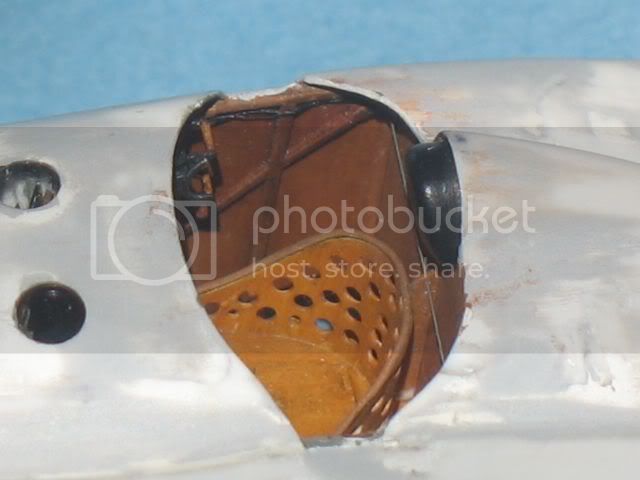
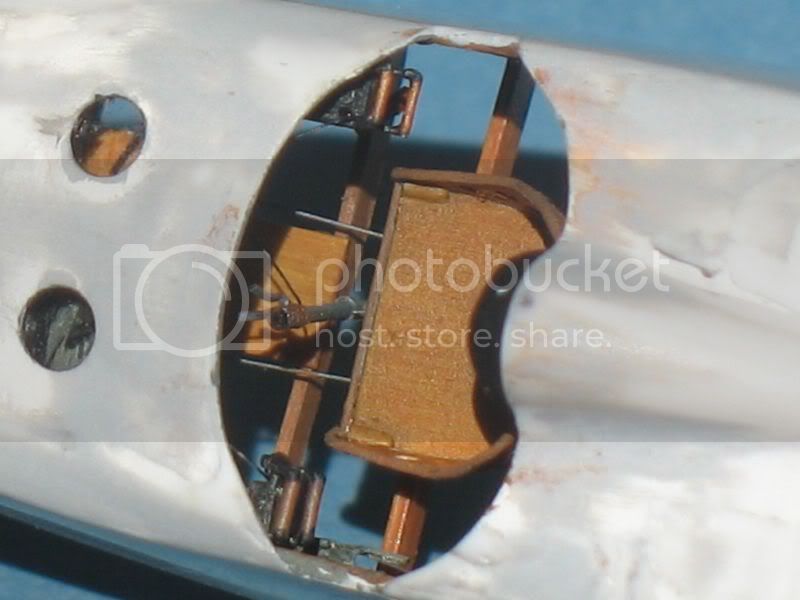
Regards.
Everything is in place exept seat belt.
I'm using Macchi M7 picture when I had no picture from M5.
Regards.
thegirl
Joined: January 19, 2008
KitMaker: 6,743 posts
AeroScale: 6,151 posts
Posted: Friday, October 29, 2010 - 04:30 PM UTC
Most excellently done Louis ! 
Louis
Joined: May 21, 2006
KitMaker: 472 posts
AeroScale: 471 posts
Posted: Wednesday, November 17, 2010 - 09:58 AM UTC
Thank you very much Terri.
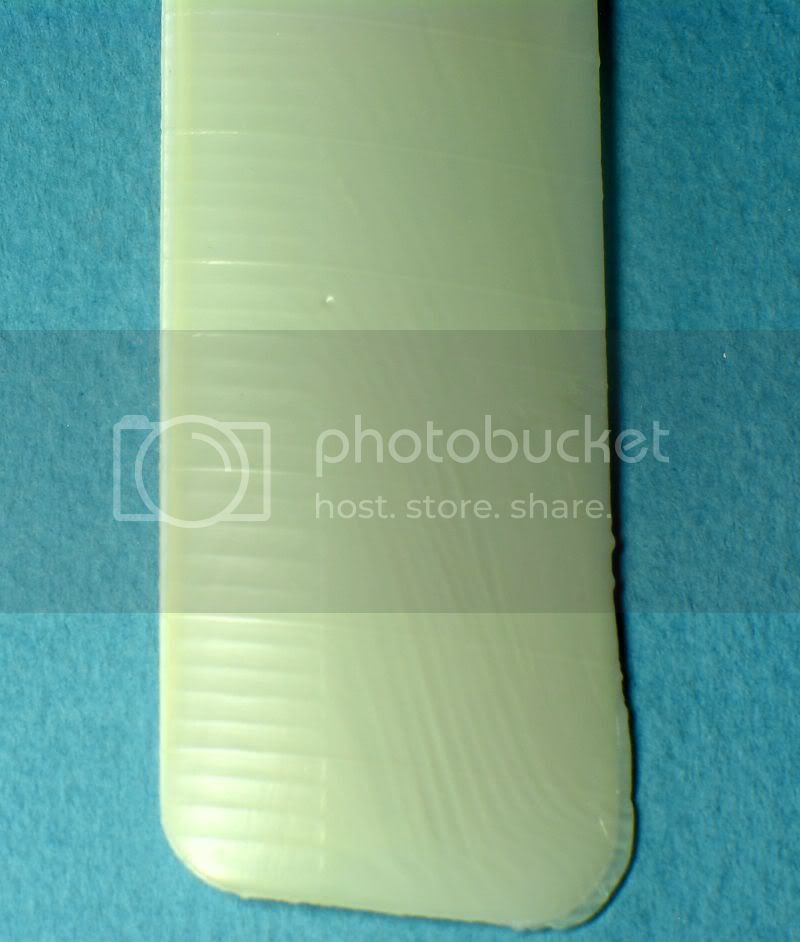
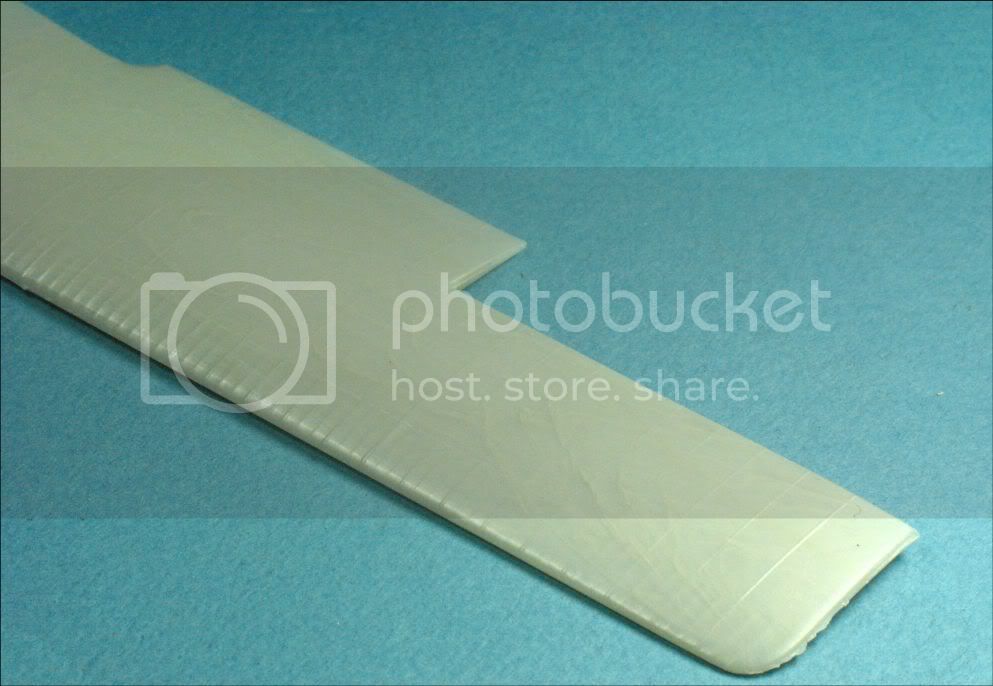
Wings:
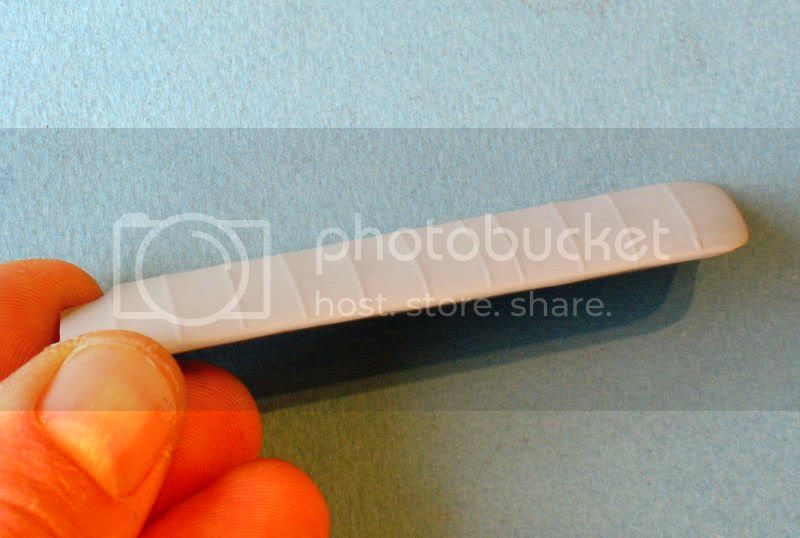
The hollow between the ribs are too strong. So I tried to plug them with putty. Unfortunately I damaged by sanding the ribs and they have become irregular (especially shorters ).
So I sanded everything. I left a slight ripple on the surface of the wing (in short, I removed all the ribs).
New ribs are cut from the aluminum tape with a razor blade. They are glued on the wing and "smoothed" gently with the handle of a brush to remove the marks on their surface. With the plastic card, even the thinnest, they appear too pronounced (it's ok with 1/32).
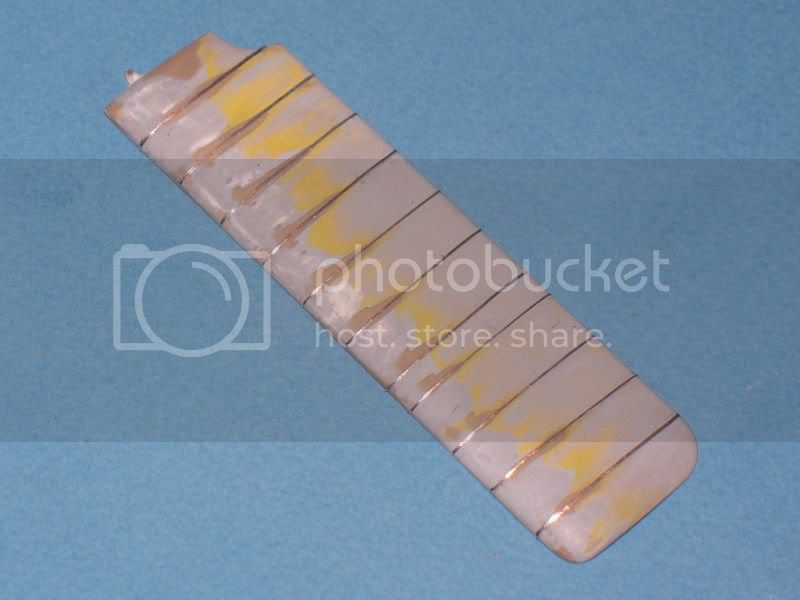
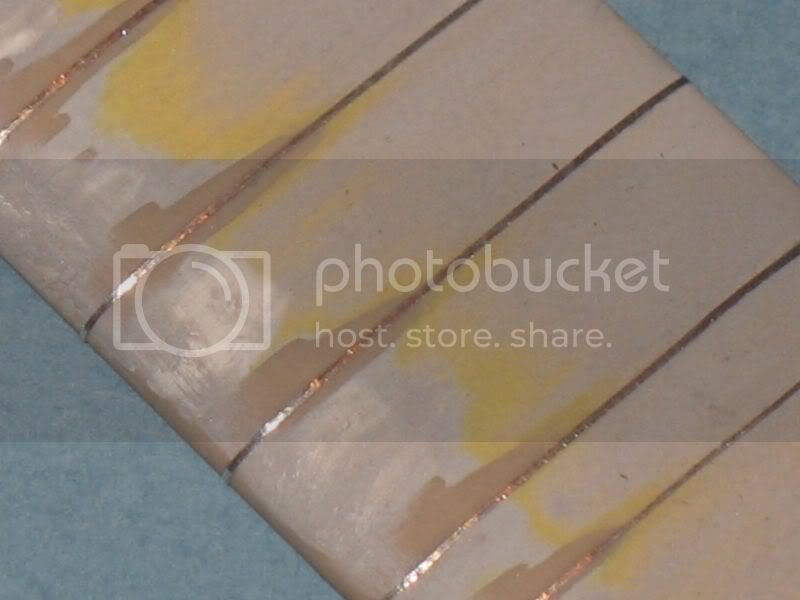
A large piece of aluminum tape was sanded on a clean glass plate to make it thinner. Beware, any "dust" is a scratch. And then it stuck on it. If you faile you must remake everything. The putty comes off with the tape if you try to remove it.
Then, you "smooth" with the fingers or with a cotton swab to make it follow the contour of the wing. Here attention to nails too long to easily mark the surface. The edges are cut to the razor blade.
Small folds may appear on the rounded end of the wing. They are flattened with a smooth object (handle of the brush, toothpick). Then one little sanding with sandpaper the latest folds.

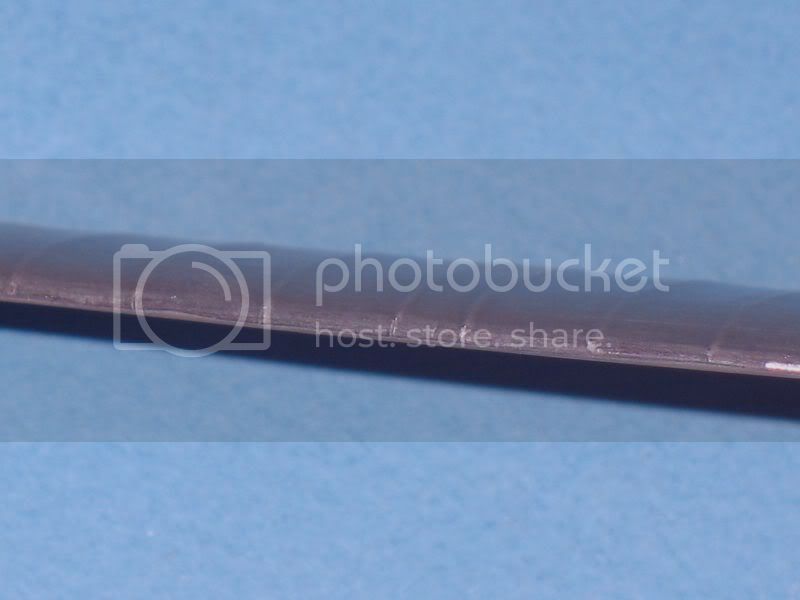
Of course the glue under this piece of tape has streaks.
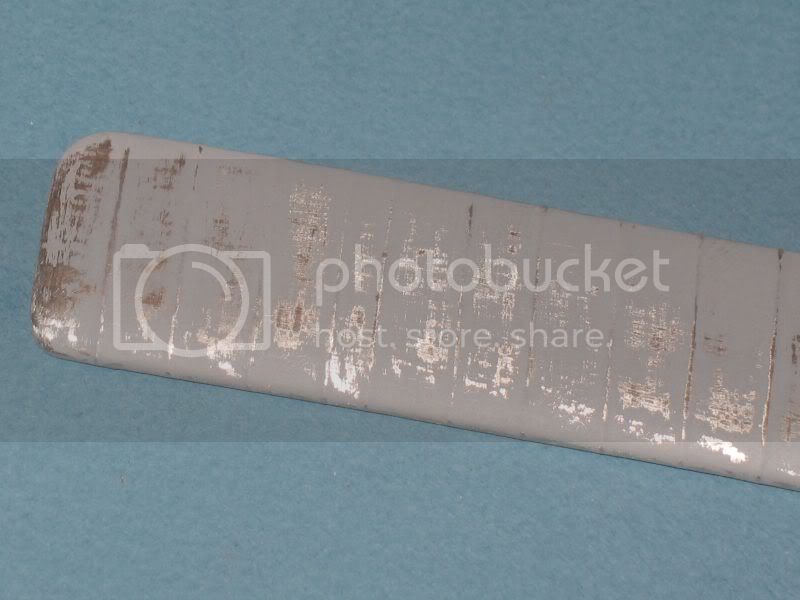
I have not had this problem with the second wing.
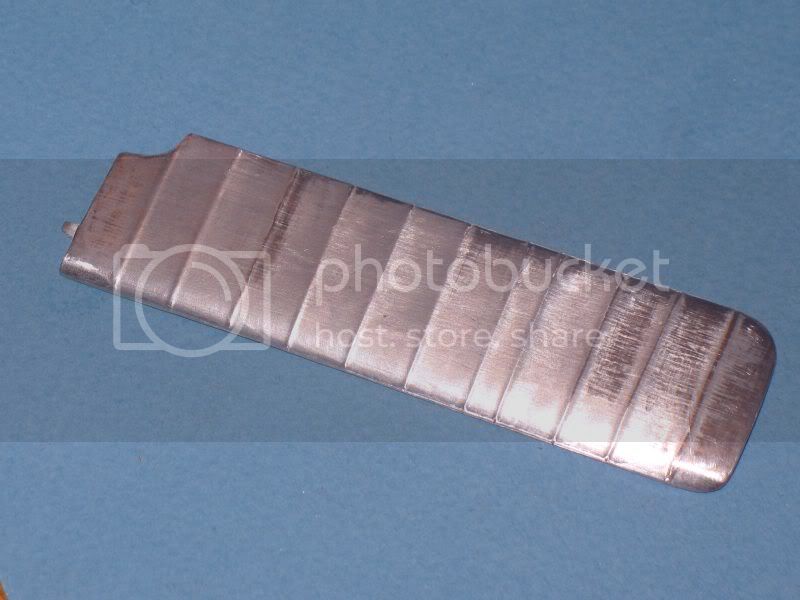
A little Surfacer 1200 to equalize the surface:

I will make corrections.
All the "tape stage" is made in 2 or 3 hours. I put a lot more time to damage the wing and try to repair it with putty ...
I did not do the the small ribs. I would try them with pieces of decal to give a thickness .... or I'll buy her new wings "BlueMax".
I tried that 6 years ago on a biplane at 1 / 32, it works much better than 1 / 48. We can then use the plastic card or plastic stretched to the ribs. If I remember correctly the look "stretched canvas" is much stronger and pretty.
I'll see if she is still into the box.
Regards.
Wings:
The hollow between the ribs are too strong. So I tried to plug them with putty. Unfortunately I damaged by sanding the ribs and they have become irregular (especially shorters ).
So I sanded everything. I left a slight ripple on the surface of the wing (in short, I removed all the ribs).
New ribs are cut from the aluminum tape with a razor blade. They are glued on the wing and "smoothed" gently with the handle of a brush to remove the marks on their surface. With the plastic card, even the thinnest, they appear too pronounced (it's ok with 1/32).
A large piece of aluminum tape was sanded on a clean glass plate to make it thinner. Beware, any "dust" is a scratch. And then it stuck on it. If you faile you must remake everything. The putty comes off with the tape if you try to remove it.
Then, you "smooth" with the fingers or with a cotton swab to make it follow the contour of the wing. Here attention to nails too long to easily mark the surface. The edges are cut to the razor blade.
Small folds may appear on the rounded end of the wing. They are flattened with a smooth object (handle of the brush, toothpick). Then one little sanding with sandpaper the latest folds.
Of course the glue under this piece of tape has streaks.
I have not had this problem with the second wing.
A little Surfacer 1200 to equalize the surface:
I will make corrections.
All the "tape stage" is made in 2 or 3 hours. I put a lot more time to damage the wing and try to repair it with putty ...
I did not do the the small ribs. I would try them with pieces of decal to give a thickness .... or I'll buy her new wings "BlueMax".
I tried that 6 years ago on a biplane at 1 / 32, it works much better than 1 / 48. We can then use the plastic card or plastic stretched to the ribs. If I remember correctly the look "stretched canvas" is much stronger and pretty.
I'll see if she is still into the box.
Regards.
Louis
Joined: May 21, 2006
KitMaker: 472 posts
AeroScale: 471 posts
Posted: Sunday, November 28, 2010 - 03:43 AM UTC
Bluemax wings arrived. Colin has offered me.
The upper wing is separated into two parts. It is larger than FLY's wings.
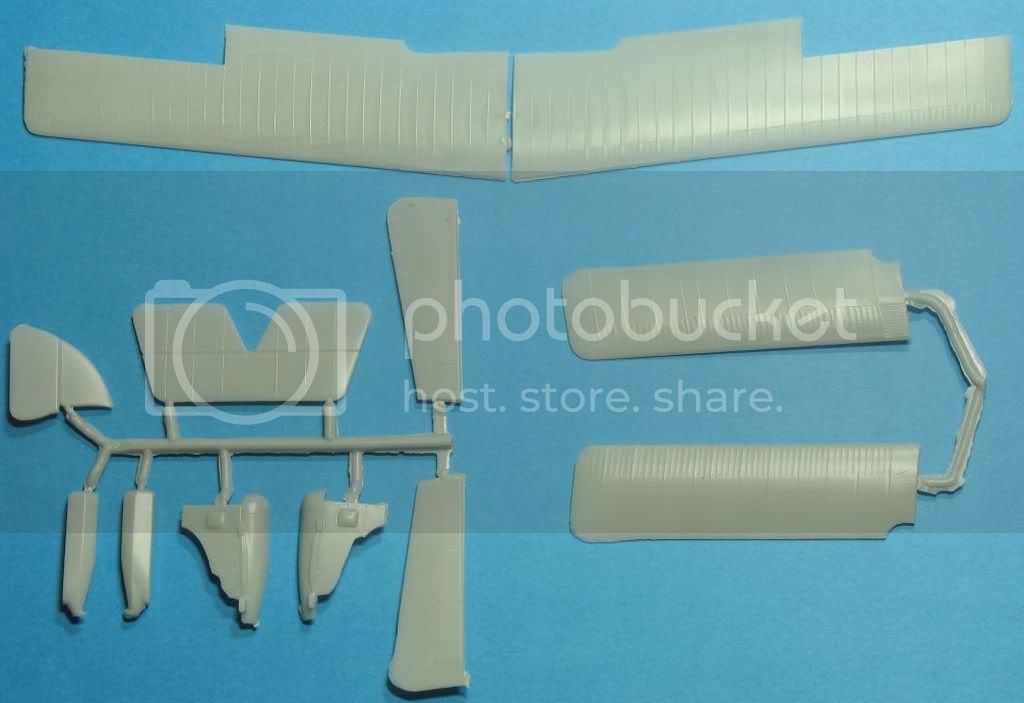

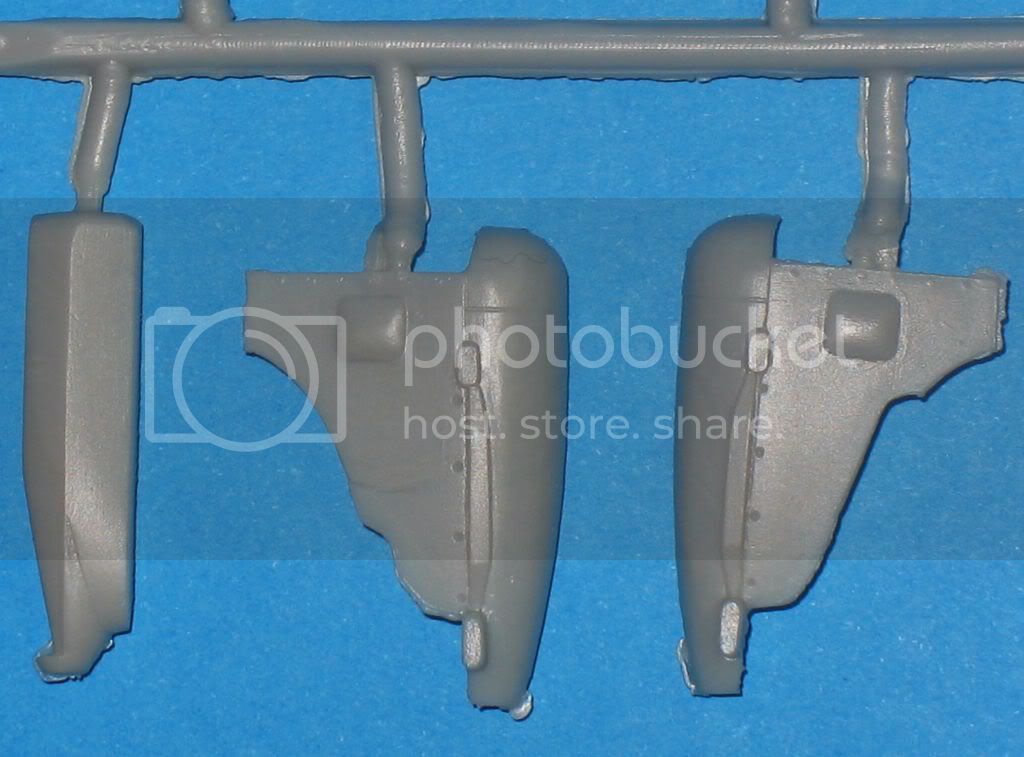
The engine "blocks":

The lower wing:
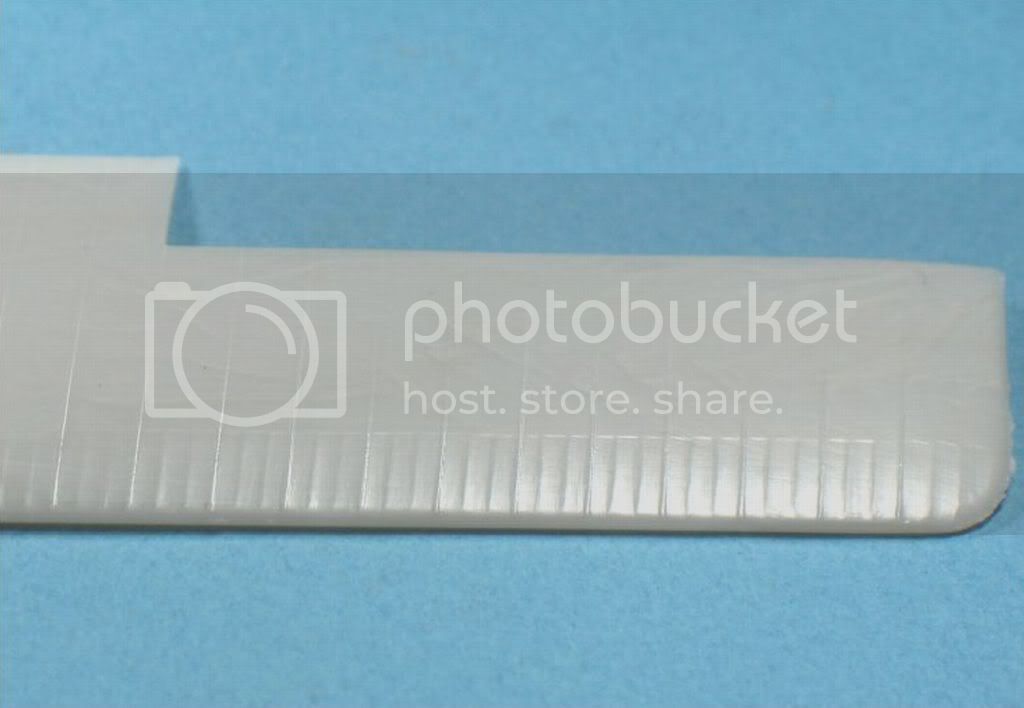

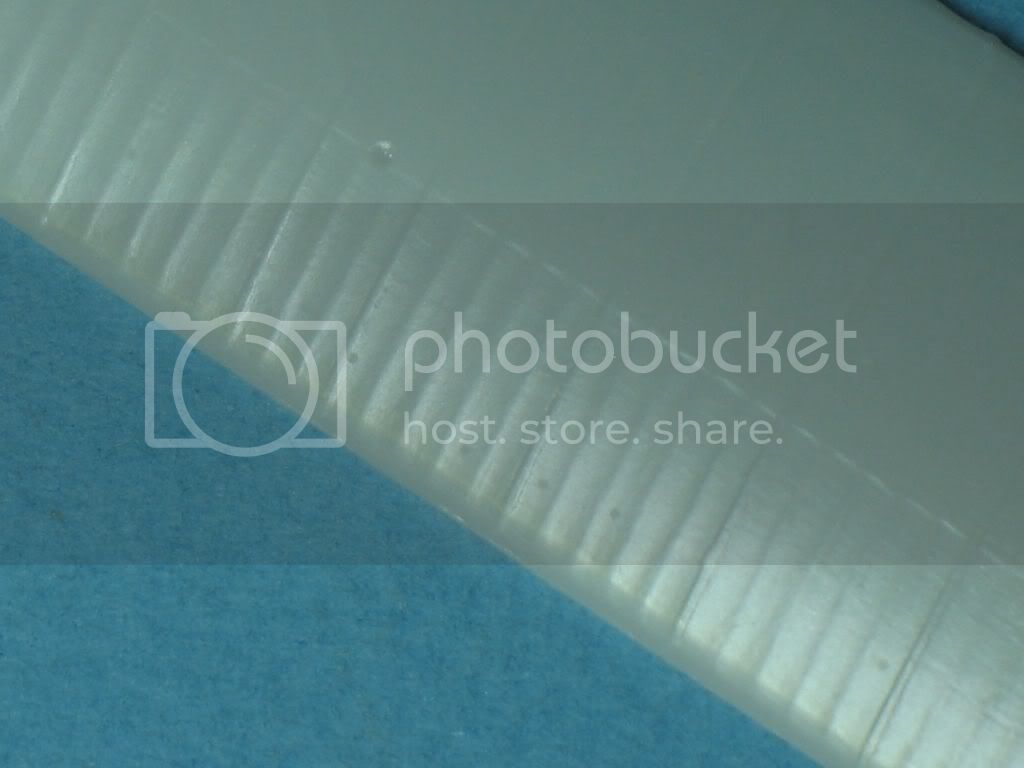
May be it is too flat between ribs...
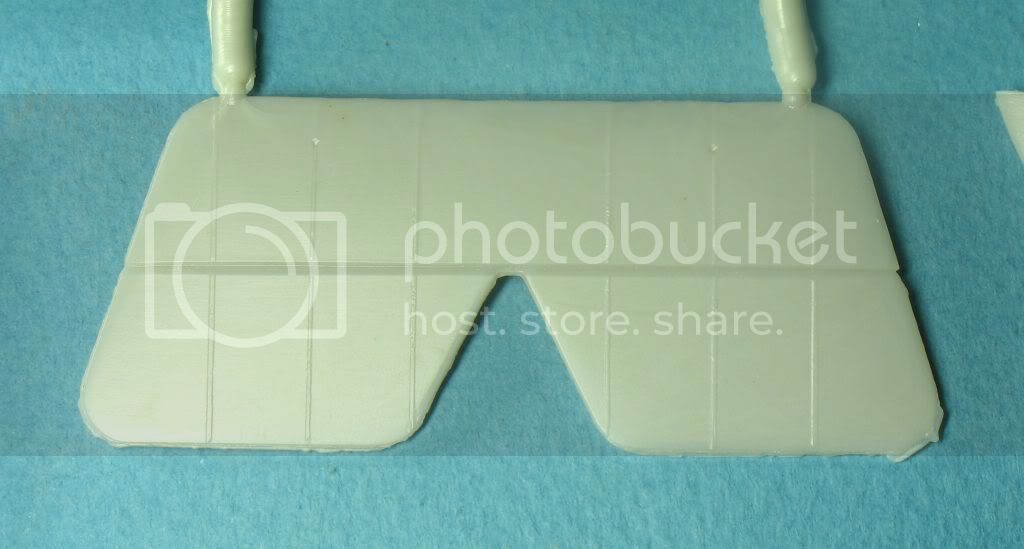
The upper wing, two parts.
The "mottled" are not in the plastic surface.
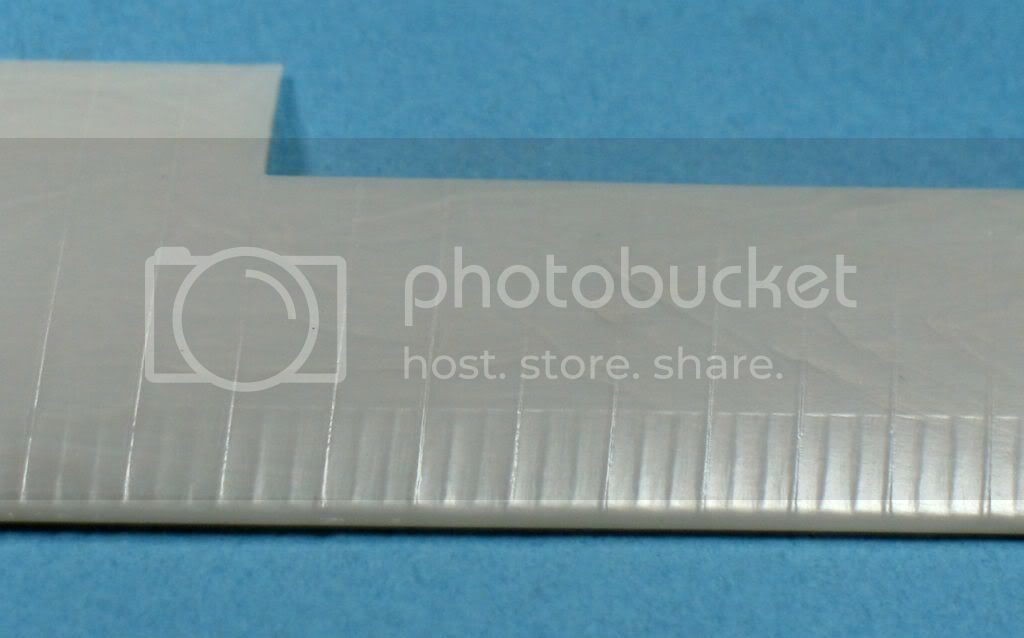
The preparation of the parts should be done fairly quickly.
Thank you Colin (Mr. BlueMax)
Regards.
The upper wing is separated into two parts. It is larger than FLY's wings.
The engine "blocks":
The lower wing:
May be it is too flat between ribs...
The upper wing, two parts.
The "mottled" are not in the plastic surface.
The preparation of the parts should be done fairly quickly.
Thank you Colin (Mr. BlueMax)
Regards.
guitarlute101
Joined: December 18, 2006
KitMaker: 1,121 posts
AeroScale: 1,063 posts
Posted: Sunday, November 28, 2010 - 04:19 AM UTC
Great work, Louis. Great idea with the aluminum tape.
Mark
Louis
Joined: May 21, 2006
KitMaker: 472 posts
AeroScale: 471 posts
Posted: Saturday, December 18, 2010 - 02:12 AM UTC
Louis
Joined: May 21, 2006
KitMaker: 472 posts
AeroScale: 471 posts
Posted: Monday, January 31, 2011 - 09:11 AM UTC
Hello and happy new year!
l'article en français
The engine is almost finished ....
I redid the opening of the radiator that was not high enough and whose corners were square instead of rounded.
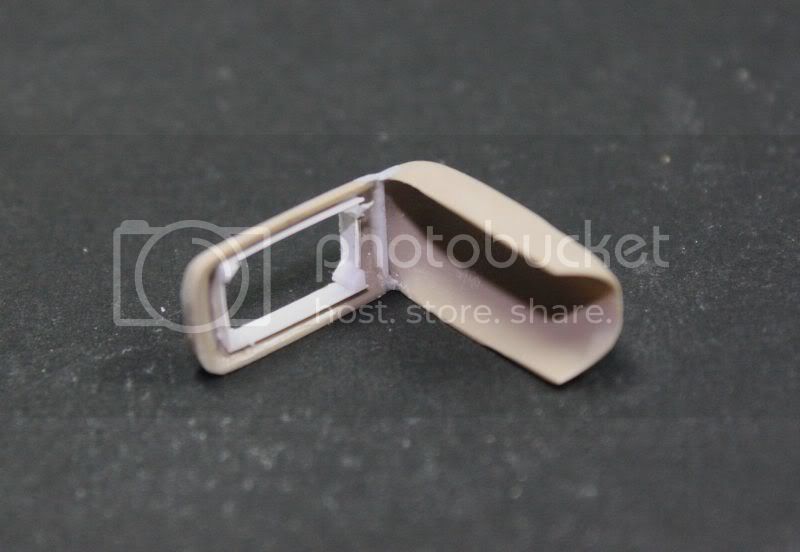
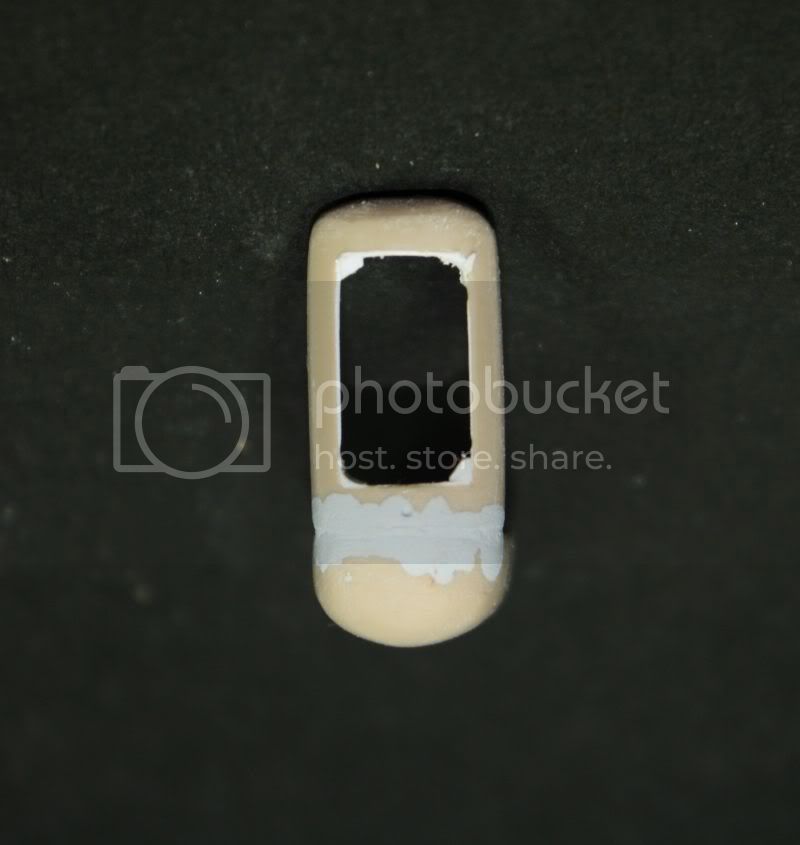
So I stuck in the corner a block and then sanded and filed down (the bottom left is over.)
The top cover is cut and rounded to have a fairer form.

I think it leans....
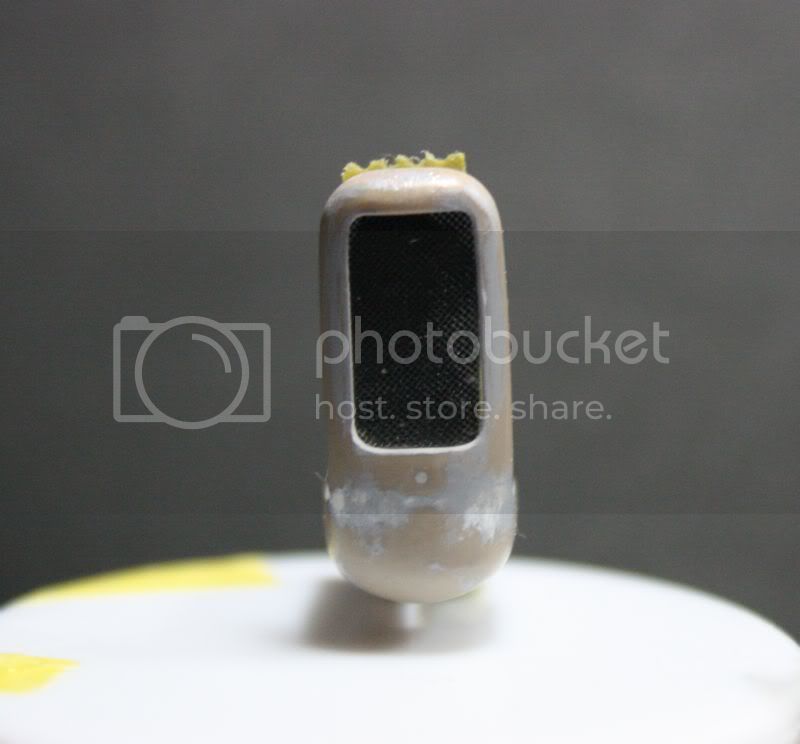
The grille of the radiator is a piece of tea bag.
The plate protects the bottom of the engine is cut. The rearward portion is deleted as part of the engine block which carries the propeller is not protected by this cover.

Despite this, the engine does not fit properly ... I'll find something else.
The cylinders are glued, I lost the last... I had to redo it. The triangular braces at the bottom are plastic card and plastic bolt head stretched sliced. The four engine supports have been redesigned to become triangular.
I tried to use the engine block "blue max" but it is much too wide and too long too ...
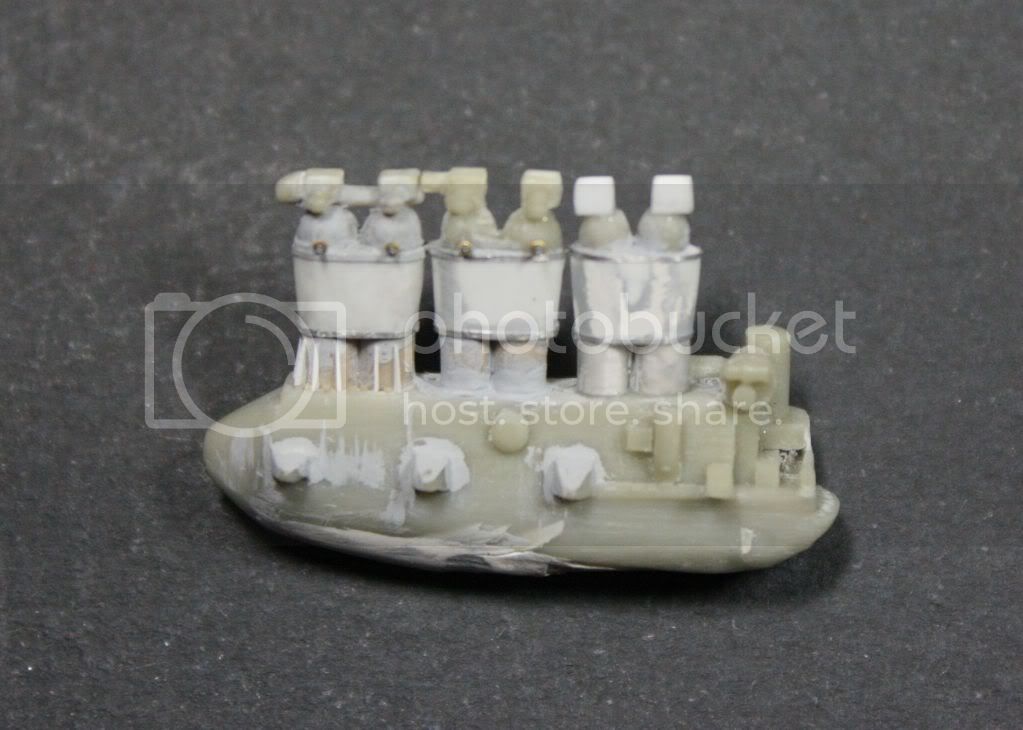
After a bit of "surfacer 1200":
The pipes are replaced with soldering wire:


The arms that carry the engine:
Regards.
A +
For those interested there is an article on the Macchi M5 in the magazine "Avion" this month and another into the nextone.
l'article en français
The engine is almost finished ....
I redid the opening of the radiator that was not high enough and whose corners were square instead of rounded.
So I stuck in the corner a block and then sanded and filed down (the bottom left is over.)
The top cover is cut and rounded to have a fairer form.
I think it leans....
The grille of the radiator is a piece of tea bag.
The plate protects the bottom of the engine is cut. The rearward portion is deleted as part of the engine block which carries the propeller is not protected by this cover.
Despite this, the engine does not fit properly ... I'll find something else.
The cylinders are glued, I lost the last... I had to redo it. The triangular braces at the bottom are plastic card and plastic bolt head stretched sliced. The four engine supports have been redesigned to become triangular.
I tried to use the engine block "blue max" but it is much too wide and too long too ...
After a bit of "surfacer 1200":
The pipes are replaced with soldering wire:
The arms that carry the engine:
Regards.
A +
For those interested there is an article on the Macchi M5 in the magazine "Avion" this month and another into the nextone.
thegirl
Joined: January 19, 2008
KitMaker: 6,743 posts
AeroScale: 6,151 posts
Posted: Monday, January 31, 2011 - 01:50 PM UTC
Nice to see you back up with this project Louis . Yes you are right , the rad housing does lean to the one side ....
Looking forward to the next up date .
Looking forward to the next up date .
Louis
Joined: May 21, 2006
KitMaker: 472 posts
AeroScale: 471 posts
Posted: Wednesday, February 23, 2011 - 09:24 PM UTC
Hello,
thank you Terri and good luck for your M5.
en français ici
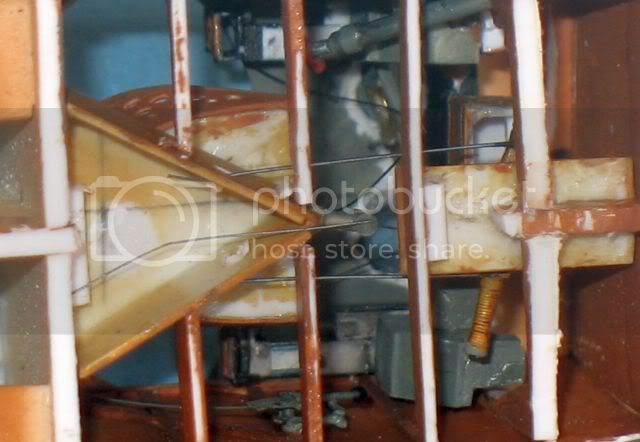
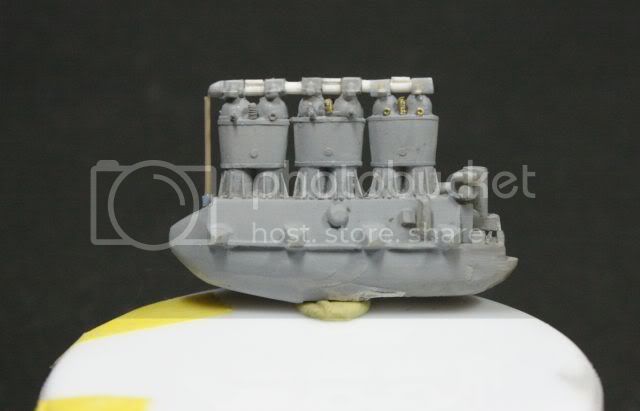
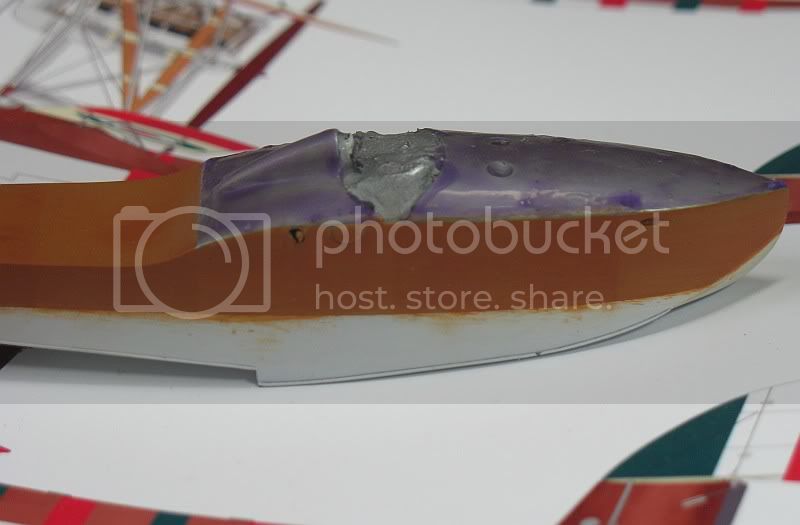
The protection of the engine block is splited to reduce its width. The sheet and the engine block was very near .

The edges are glued together and sanded to get these "hollow cheeks".
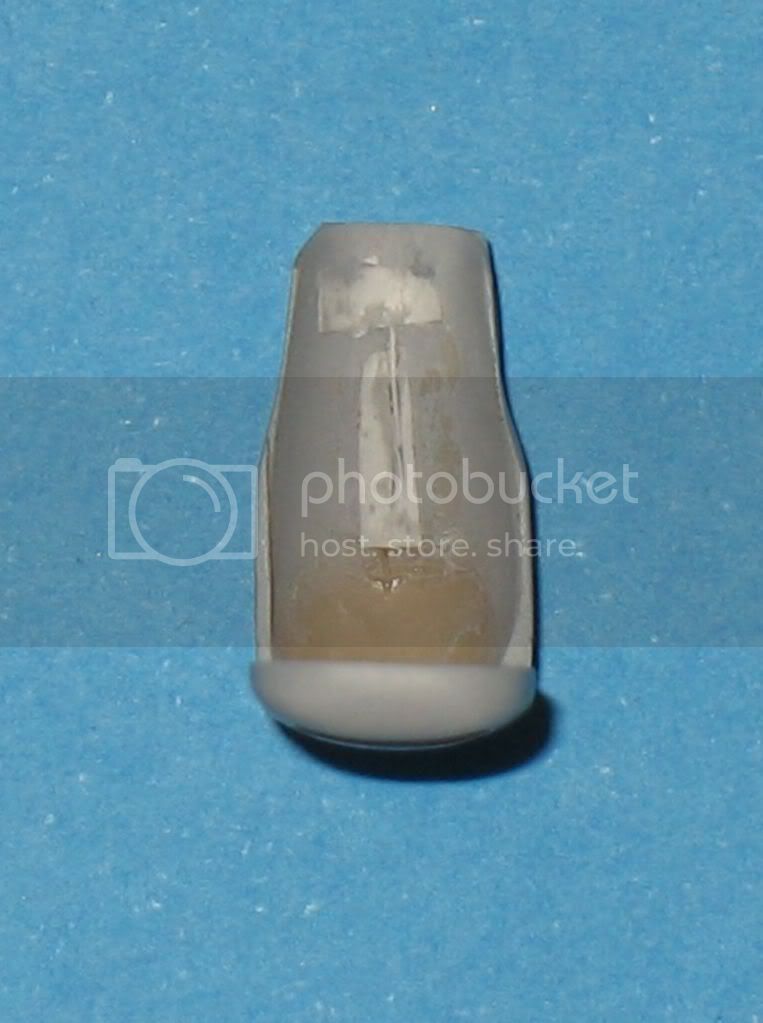

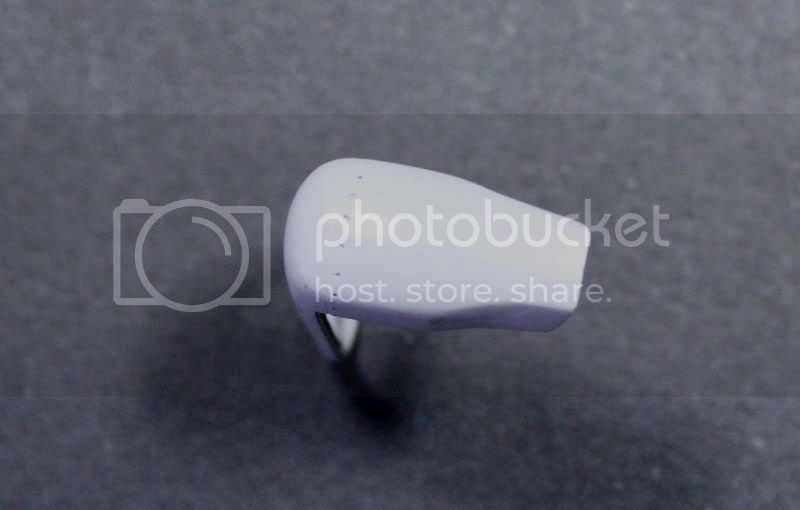
The folds of the sheet is made with a piece of tin wire glued to the surface and take shape with putty. The folds protected a pipe under the engine.
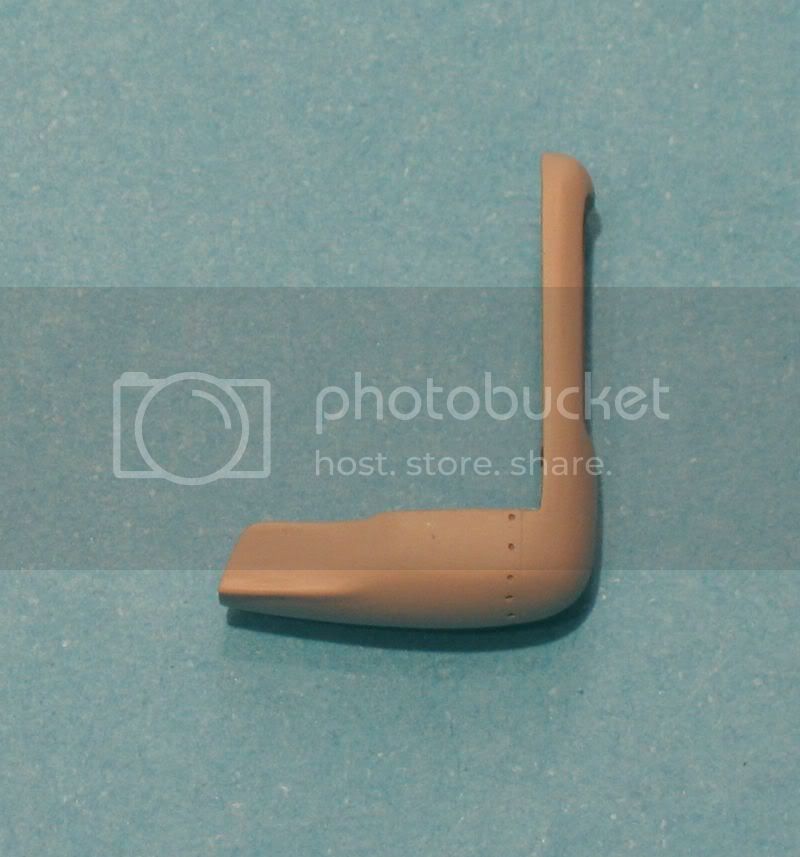

The arm carrying the engine will be glued to the protection.
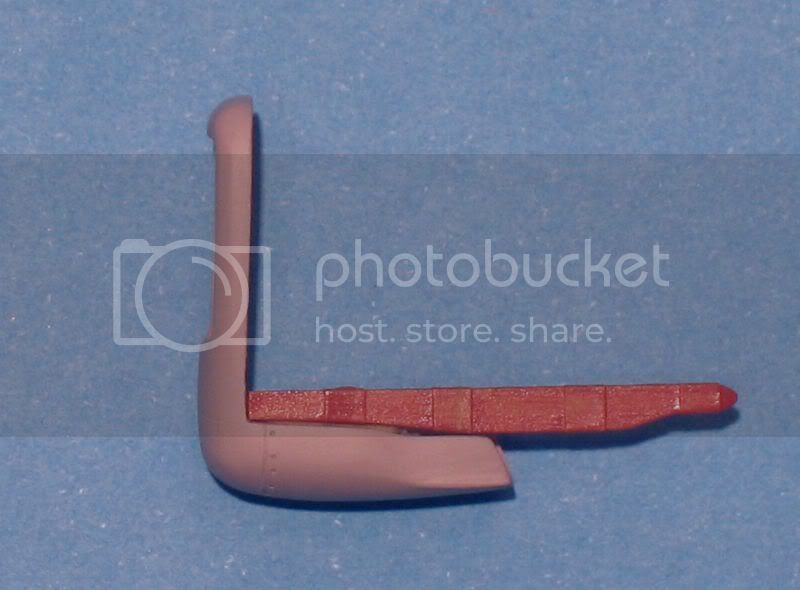
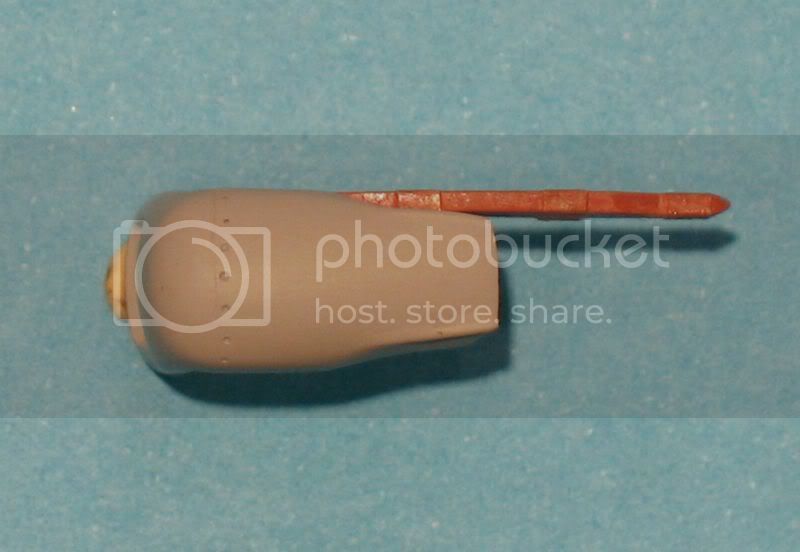
The rear of protection (in blue) on each side is folded and attached underneath the wooden support of the engine:
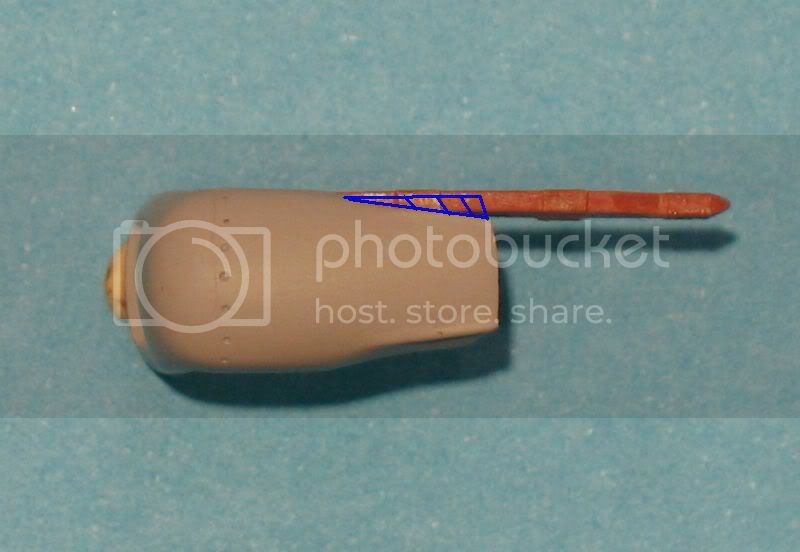
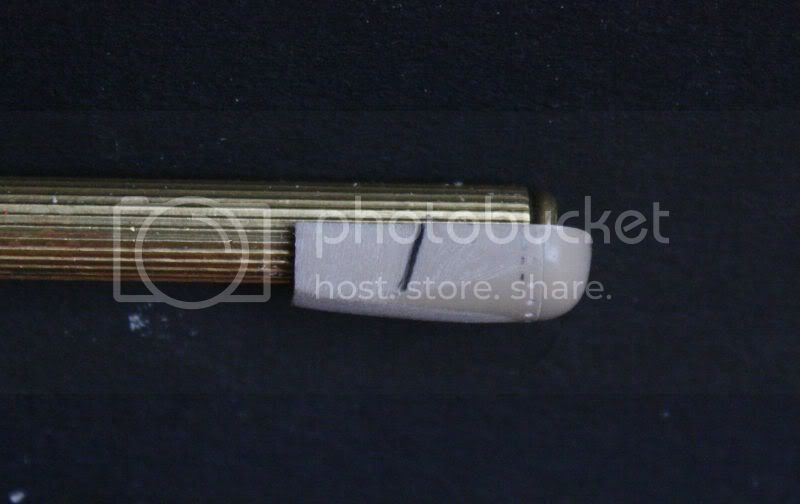
Masts are extended to the rear 3mm . The right mast is expanded. It contained the rods (or cables?) from engine controls.

Regards.
thank you Terri and good luck for your M5.
en français ici
The protection of the engine block is splited to reduce its width. The sheet and the engine block was very near .
The edges are glued together and sanded to get these "hollow cheeks".
The folds of the sheet is made with a piece of tin wire glued to the surface and take shape with putty. The folds protected a pipe under the engine.
The arm carrying the engine will be glued to the protection.
The rear of protection (in blue) on each side is folded and attached underneath the wooden support of the engine:
Masts are extended to the rear 3mm . The right mast is expanded. It contained the rods (or cables?) from engine controls.
Regards.

Mgunns
Joined: December 12, 2008
KitMaker: 1,423 posts
AeroScale: 1,319 posts

Posted: Thursday, February 24, 2011 - 01:04 AM UTC
Hi Louis:Your work on this model is truly amazing. When I saw a picture the wing half in your hand, it further impressed upon me the sizes you are working with. Glad to see you back here with it, and do show us pictures of your Aviatik Berg.
Best
Mark
thegirl
Joined: January 19, 2008
KitMaker: 6,743 posts
AeroScale: 6,151 posts
Posted: Thursday, February 24, 2011 - 01:15 PM UTC
Very nicely done Louis ! This project so far is coming long super with ever up-date 
Thank-you as well , My focus will be on the detailing the cockpit and some on the engine and over all on the finishing . I do have the blue max kit , which would be better suited .
Thank-you as well , My focus will be on the detailing the cockpit and some on the engine and over all on the finishing . I do have the blue max kit , which would be better suited .
Louis
Joined: May 21, 2006
KitMaker: 472 posts
AeroScale: 471 posts
Posted: Saturday, February 26, 2011 - 07:18 AM UTC
thegirl
Joined: January 19, 2008
KitMaker: 6,743 posts
AeroScale: 6,151 posts
Posted: Sunday, February 27, 2011 - 02:56 AM UTC
That is a nice view of the rear decking ...........
Louis
Joined: May 21, 2006
KitMaker: 472 posts
AeroScale: 471 posts
Posted: Thursday, April 14, 2011 - 09:55 AM UTC
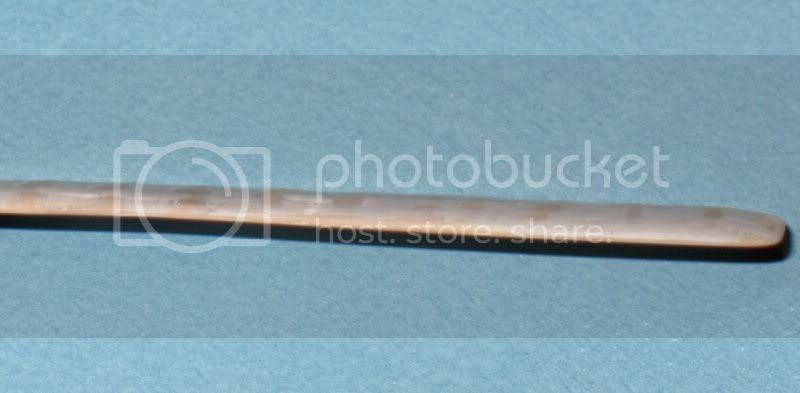
Little time to glued piece of plastic ...
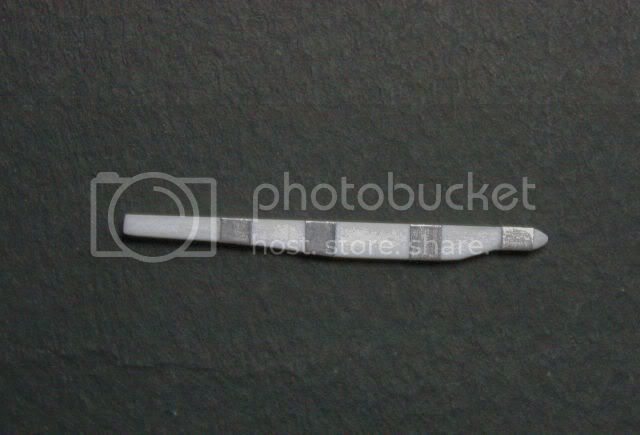
After a long ponsage of the deck I took a lot of time to place the stringers in the hull and find a right angle.
I spent a layer of aluminum to look for the default. I do not know what color it was. Gray? or natural metal? (it should not be discrtet and quickly attacked by salt water ....).

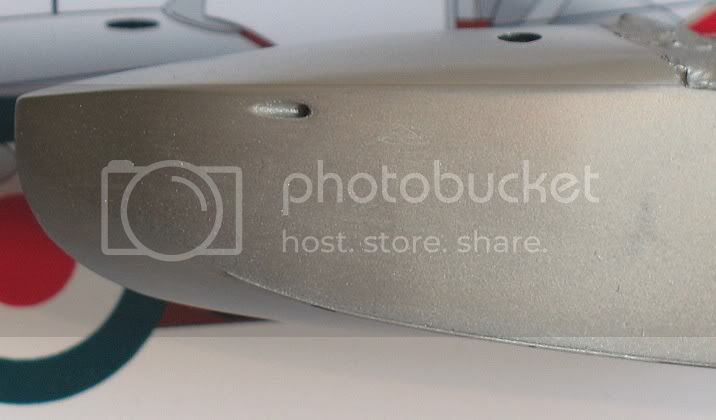
This one is sometimes on the left sometimes on the right of the plane:
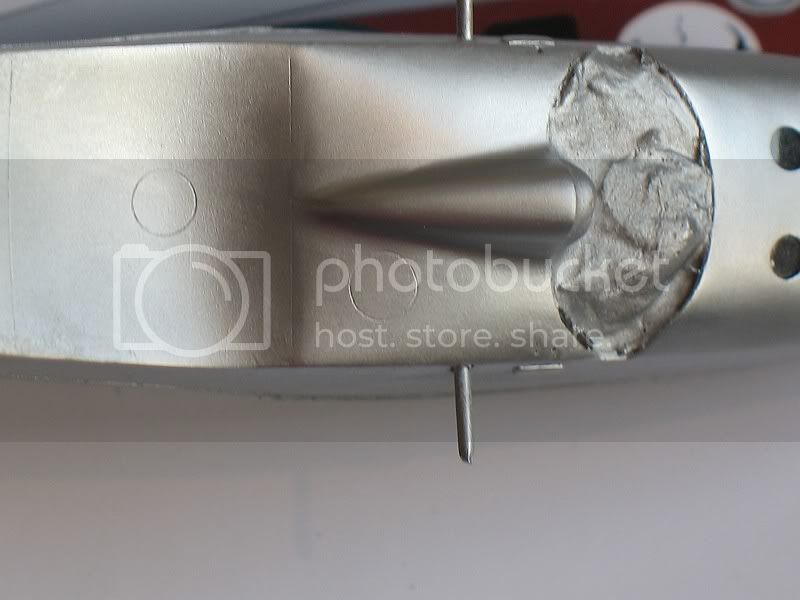
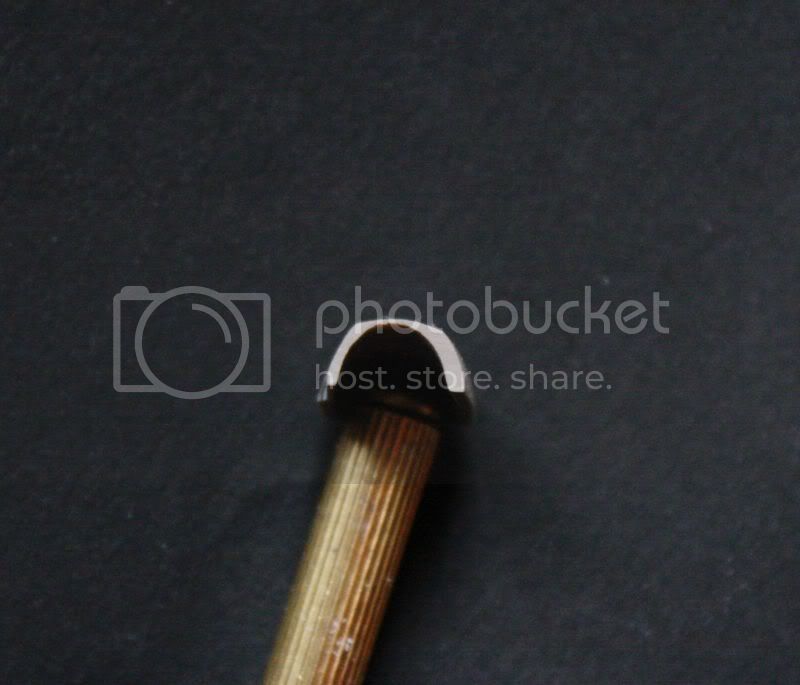
I glued the tin wire along the hull and covered with surfacer.
Traps are engraved and a cap will be stuck on them. They are too much thick.


Regards.
After a long ponsage of the deck I took a lot of time to place the stringers in the hull and find a right angle.
I spent a layer of aluminum to look for the default. I do not know what color it was. Gray? or natural metal? (it should not be discrtet and quickly attacked by salt water ....).
This one is sometimes on the left sometimes on the right of the plane:
I glued the tin wire along the hull and covered with surfacer.
Traps are engraved and a cap will be stuck on them. They are too much thick.
Regards.
thegirl
Joined: January 19, 2008
KitMaker: 6,743 posts
AeroScale: 6,151 posts
Posted: Saturday, April 16, 2011 - 02:56 AM UTC
Excellent job on the fuselage Louis !
Louis
Joined: May 21, 2006
KitMaker: 472 posts
AeroScale: 471 posts
Posted: Saturday, April 16, 2011 - 05:58 AM UTC
Thank you!
JackFlash
Joined: January 25, 2004
KitMaker: 11,669 posts
AeroScale: 11,011 posts
Posted: Saturday, April 16, 2011 - 07:40 AM UTC
Nicely done Louis!
Louis
Joined: May 21, 2006
KitMaker: 472 posts
AeroScale: 471 posts
Posted: Thursday, May 26, 2011 - 09:34 AM UTC
Hello,
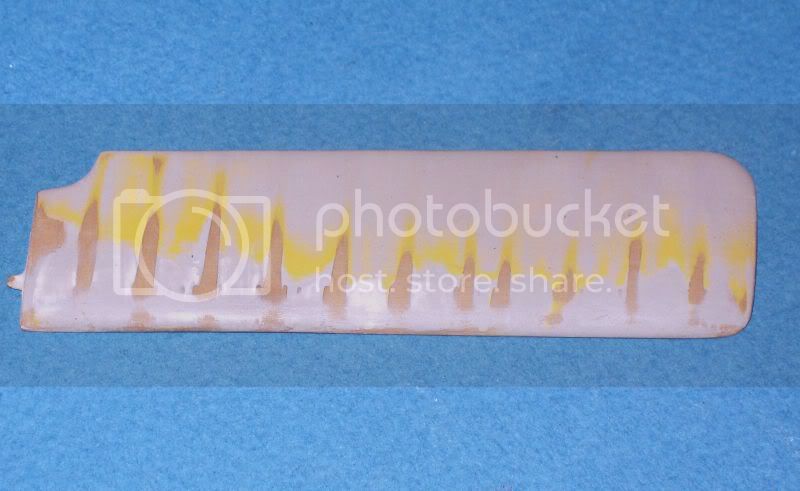
A little paint:
The background is acrylic paint with light wood color. A second layer of oil paint is used to make ribs. They are very few vissibles.

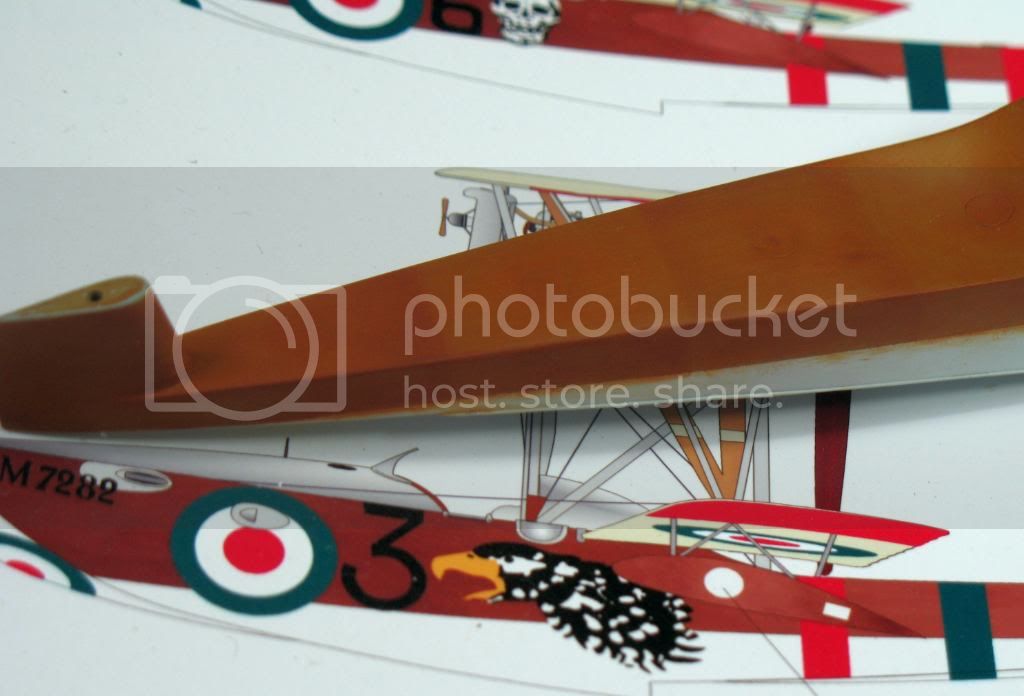


The wood is glossy varnish to lay the decals easily.
The varnish is colored orange transparent Tamiya X-26 and color ink tobacco.
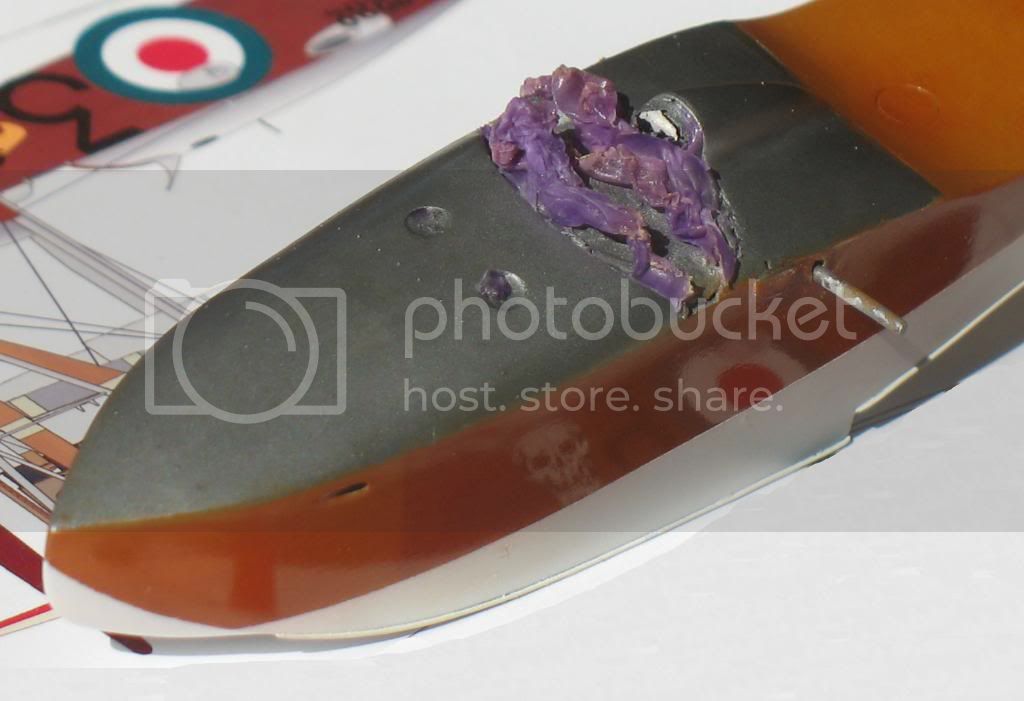
corrections will be done... of course:
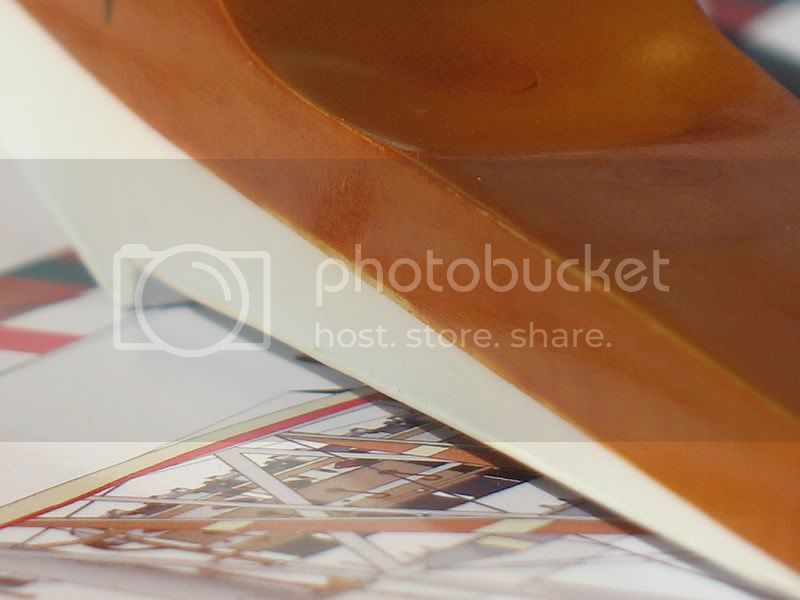
Best regard.
Louis
A little paint:
The background is acrylic paint with light wood color. A second layer of oil paint is used to make ribs. They are very few vissibles.
The wood is glossy varnish to lay the decals easily.
The varnish is colored orange transparent Tamiya X-26 and color ink tobacco.
corrections will be done... of course:
Best regard.
Louis
Louis
Joined: May 21, 2006
KitMaker: 472 posts
AeroScale: 471 posts
Posted: Friday, May 27, 2011 - 09:52 AM UTC
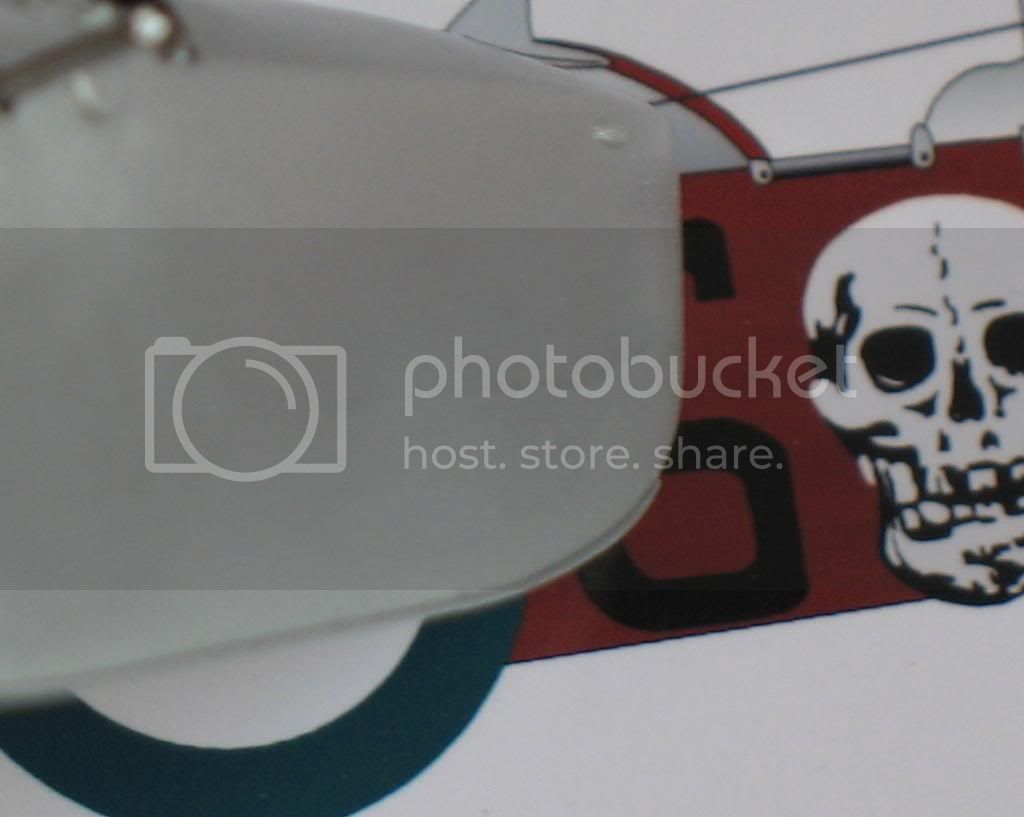
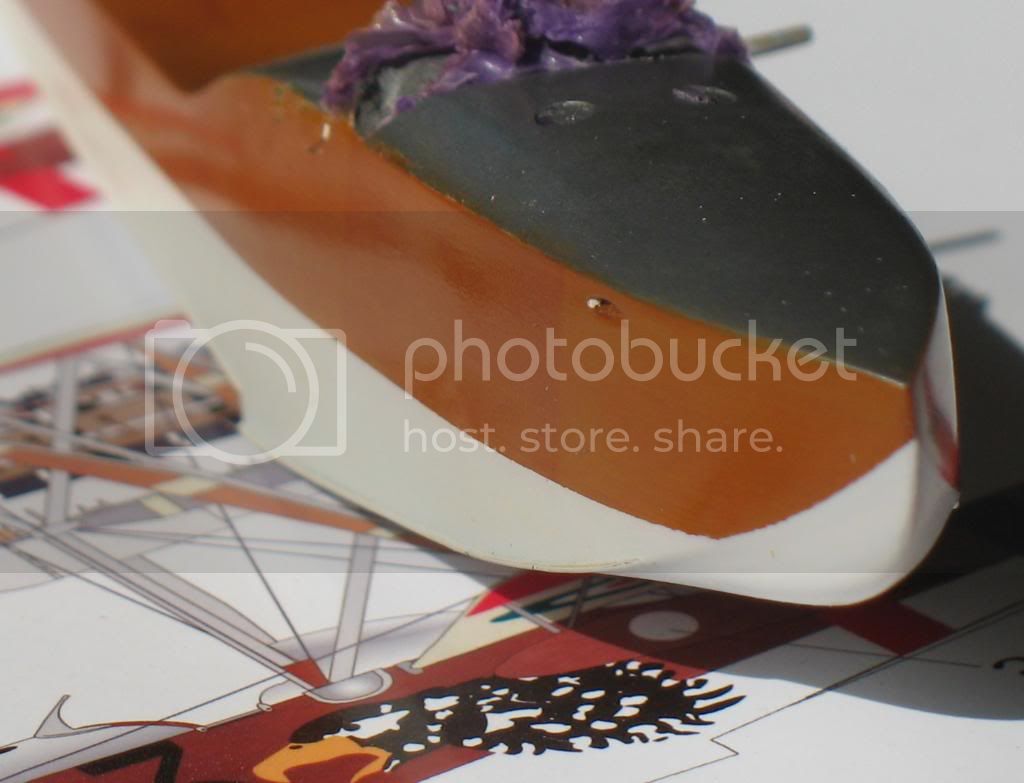
I used the Pheon decals to protect the output of the machine guns. They are very thin and easy to apply.
Protecting metals corner of the deck is a strip of aluminum decal (1mm).
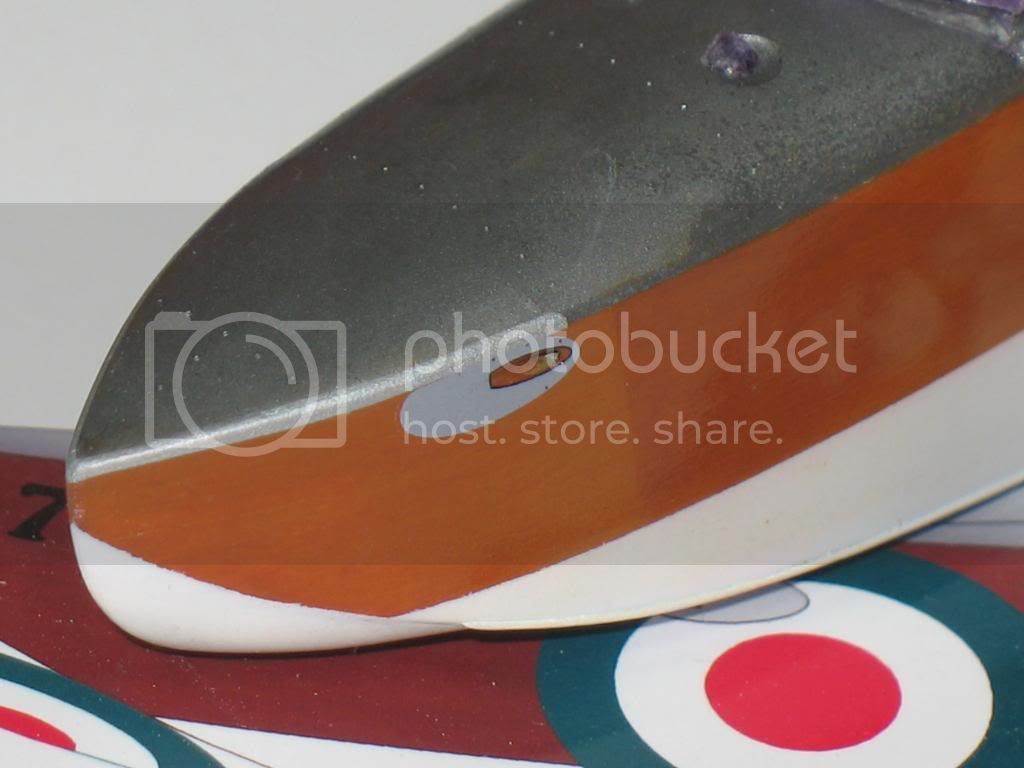
The weathering will be made later.
Best regard
Protecting metals corner of the deck is a strip of aluminum decal (1mm).
The weathering will be made later.
Best regard
 |

WEB HOSTING BY


Copyright ©2021 AeroScale and Kitmaker Network, a subsidiary of Silver Star Enterprises
All Rights Reserved. Please read our Conditions of Use and Privacy Policy.
All Rights Reserved. Please read our Conditions of Use and Privacy Policy.