Bas-Rhin, France
Joined: May 21, 2006
KitMaker: 472 posts
AeroScale: 471 posts
Posted: Friday, March 19, 2010 - 10:23 AM UTC
Hi,
I did not find much information on the Macchi M5:
- Windsock datafiles
- this book with drawings and plan:
http://www.avioebooks.com/welcome%20page.htm and an other with engine information.
- For decorations you could be inspired by Pheon Models decals :
http://www.britmodeller.com/forums/index.php?showforum=227 but it can not be used on this model if it is not changed.
- Macchi M5 1/32 Scale WIP
http://www.theaerodrome.com/forum/models/46256-macchi-m5-1-32-scale-wip.html https://aeroscale.kitmaker.net/forums/148255#1239419The kit is beautiful and unless you have a plan with you, you will not see anything shocking about this kit.
http://aeroscale.kitmaker.net/news/4235 http://aeroscale.kitmaker.net/review/3580 The hull:
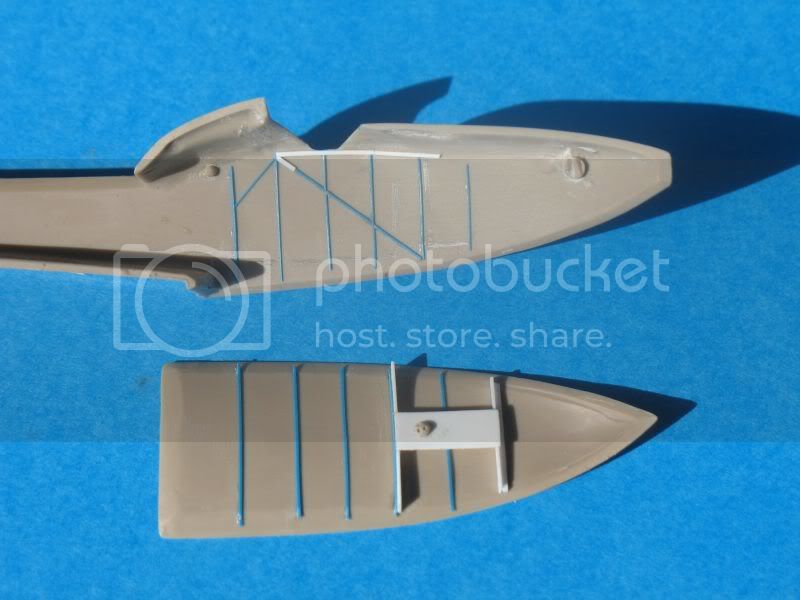
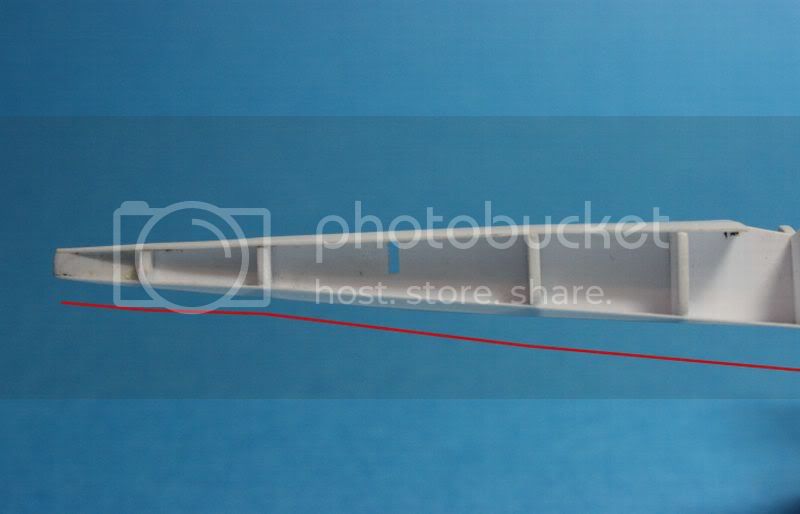
I decided to try to change the forward fuselage and make the hull more round.
After thinking for a long time, I believe I will cut the red part and twist the bottom of the hull to make the foward fuselage into a round shape:
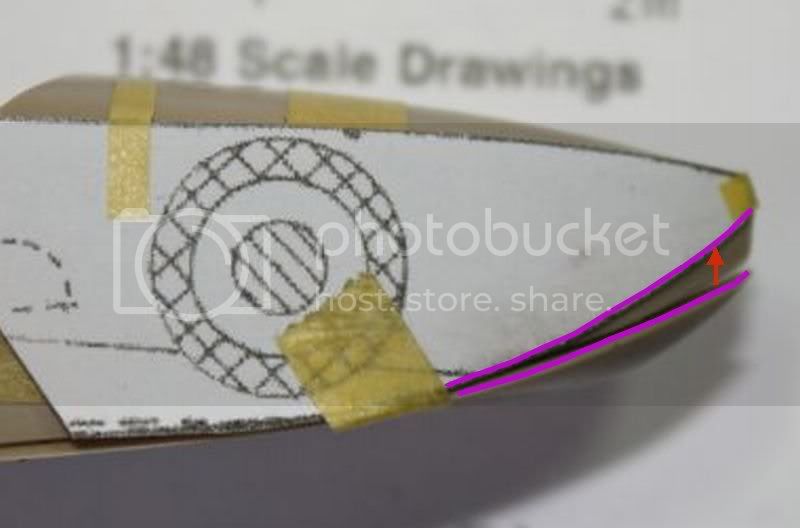
It is probably unnecessary but ...
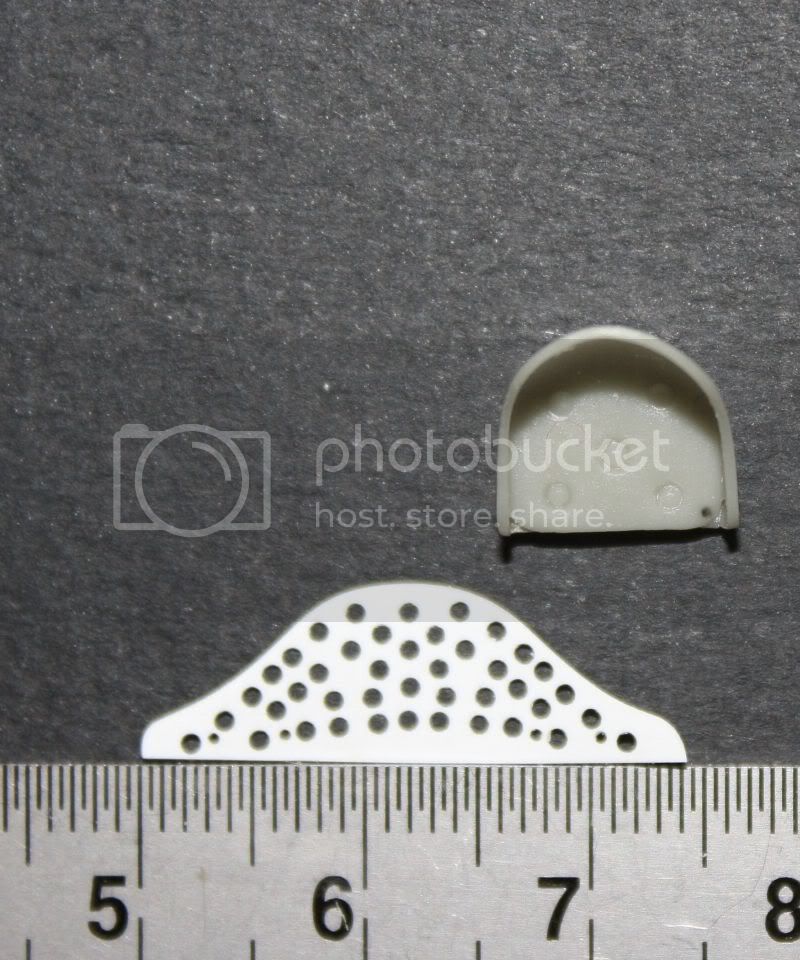
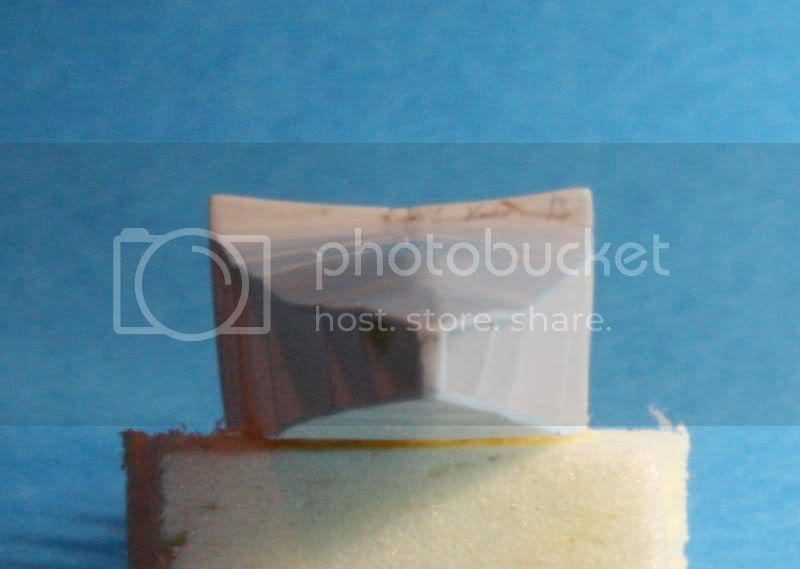
The cockpit:
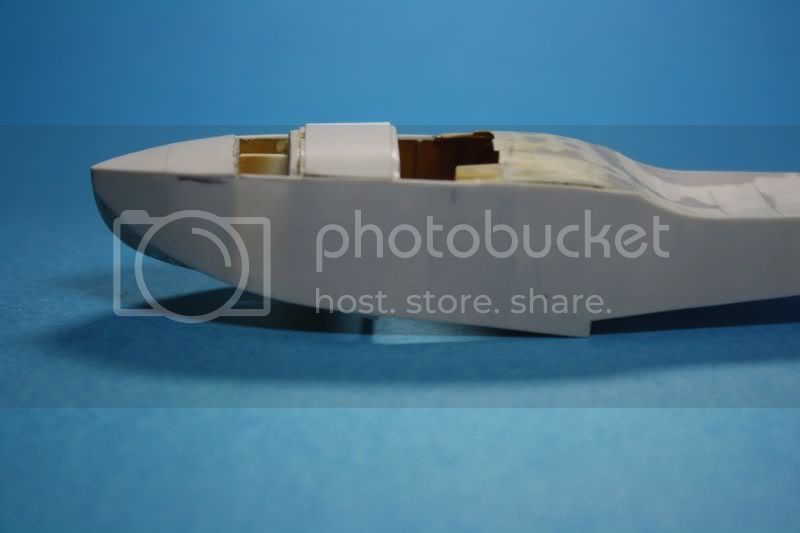
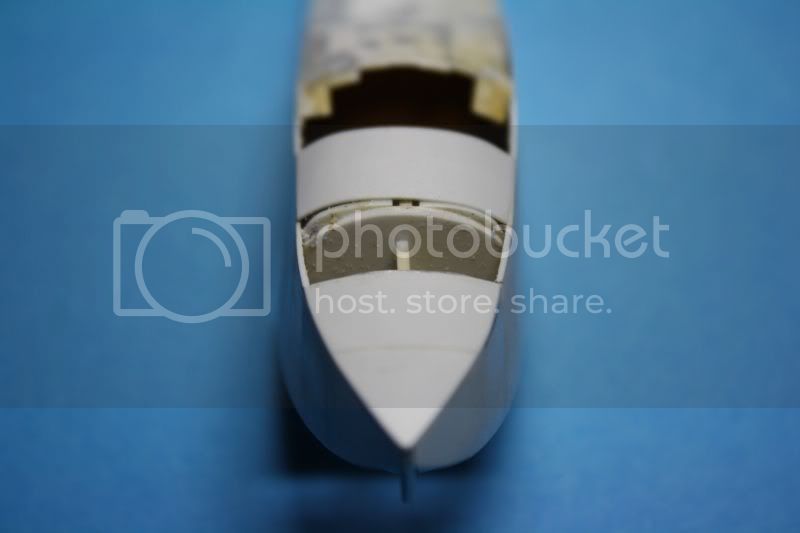
The opening into the cockpit needs to be sanded:
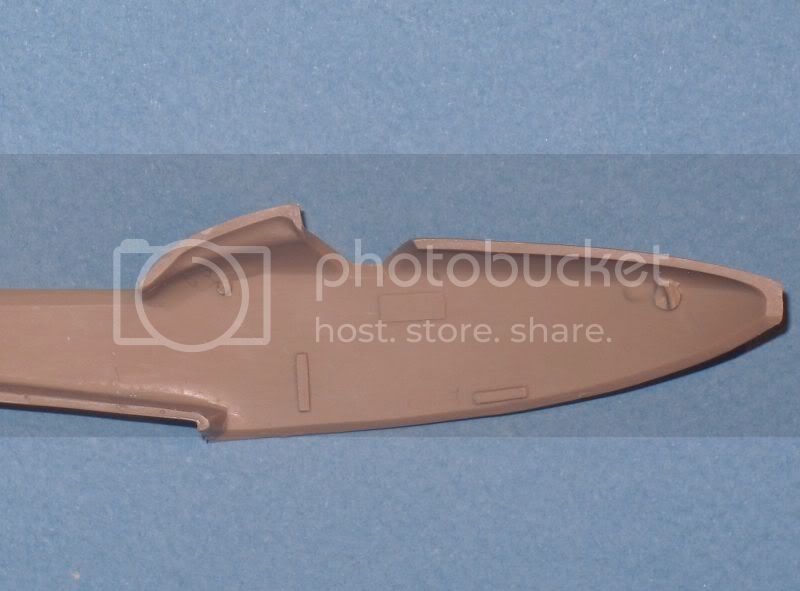
I'm stretching square section plastic to make reinforcement of the both side. The square section remains square when it is stretched.
Regards.
West Virginia, United States
Joined: December 18, 2006
KitMaker: 1,121 posts
AeroScale: 1,063 posts
Posted: Friday, March 19, 2010 - 10:56 AM UTC
Nice work Louis, I was hoping someone would build this kit online. I look forward to your next post.
Mark
United Kingdom
Joined: February 26, 2010
KitMaker: 74 posts
AeroScale: 71 posts
Posted: Saturday, March 20, 2010 - 07:40 AM UTC
48010 & 72007 Macchi M.5
This colourful sheet is, I think, one of the best pieces of work we've produced so far but like the Lafayette SPAD VII set, it contains ten colours, so is expensive to produce, particularly as it is being done in such small numbers.
We hope to have this available as a November release. I can also say that we have been cooperating with Freightdog Models (http://www.freightdogmodels.co.uk/) in producing decals, artwork and other items for the new Blue Max kit of the M5, which should be released in the next few months. Many of the decals in the 48th scale set have been specifically designed to fit this new kit.
I had originally hoped that the Fly kit would provide a suitable canvass', but the front of the fuselage requires some work as it is too shallow for much of the artwork to fit correctly. This is not impossible to correct however and time permitting I intend to attempt this improvement and a number of others - I have two of the kits waiting!
This is a bit of a dilemma ?
United Kingdom
Joined: February 26, 2010
KitMaker: 74 posts
AeroScale: 71 posts
Posted: Saturday, March 20, 2010 - 08:05 AM UTC
The previous post was from Pheon models,originally from Internet modeller.
Removed by original poster on 04/29/10 - 18:09:22 (GMT).
Bas-Rhin, France
Joined: May 21, 2006
KitMaker: 472 posts
AeroScale: 471 posts
Posted: Thursday, April 29, 2010 - 07:24 AM UTC
Hello,
After much hesitation I decided to redo the hull in order to have a more just and on which decals
"Pheon model" could adapt.
Rowan Broadbent (which publishes decals
Pheon model) very kindly gave me the plan he want to join with his decal for Macchi M5 (to anyone who buys the decal sheet and want plans for a small extra payment).
http://www.britmodeller.com/forums/index.php?showtopic=37430 This is a first for me ...
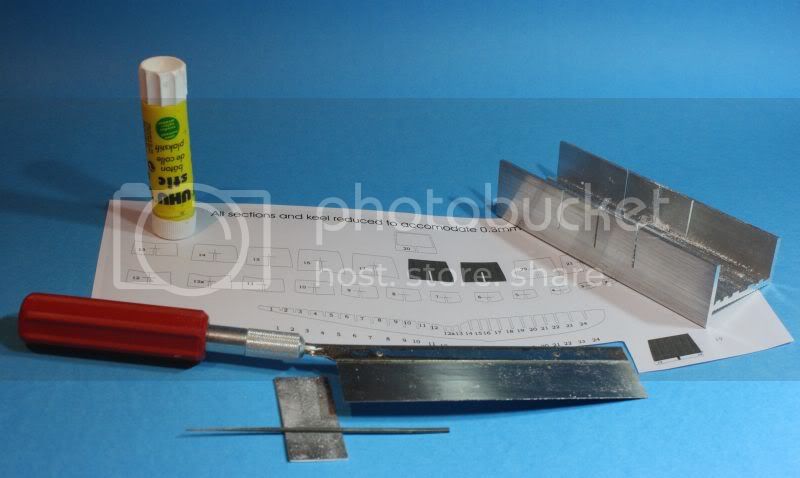
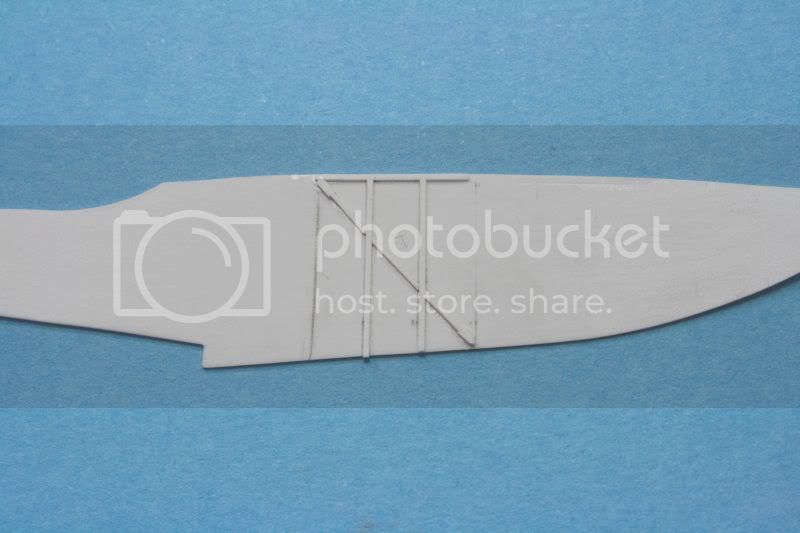
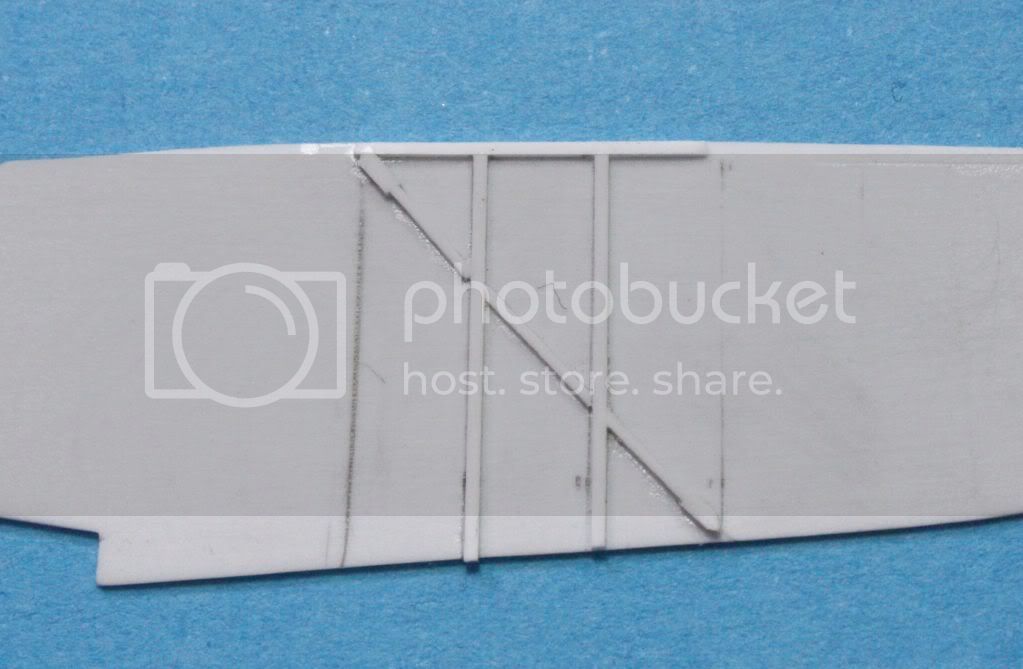
I pasted the plan on a sheet of plastic 1 mm and cut everything with saw and knife.
The inevitable lack of precision of my cutting make the construction rough, especially at 1 / 48.
The cut is not complicated but the rigidity of the "keel" is inadequate. It will straighten when the establishment of the wall (0.3mm).
New plans are available now with an empty space for the cockpit and the top of the hull.
Regards.
Louis.
Alberta, Canada
Joined: January 19, 2008
KitMaker: 6,743 posts
AeroScale: 6,151 posts
Posted: Saturday, May 01, 2010 - 03:32 AM UTC
This is going to be a interesting build . Looking forward to how the hull turns out .
Bas-Rhin, France
Joined: May 21, 2006
KitMaker: 472 posts
AeroScale: 471 posts
Posted: Tuesday, May 11, 2010 - 09:12 AM UTC
Thank you Terri.
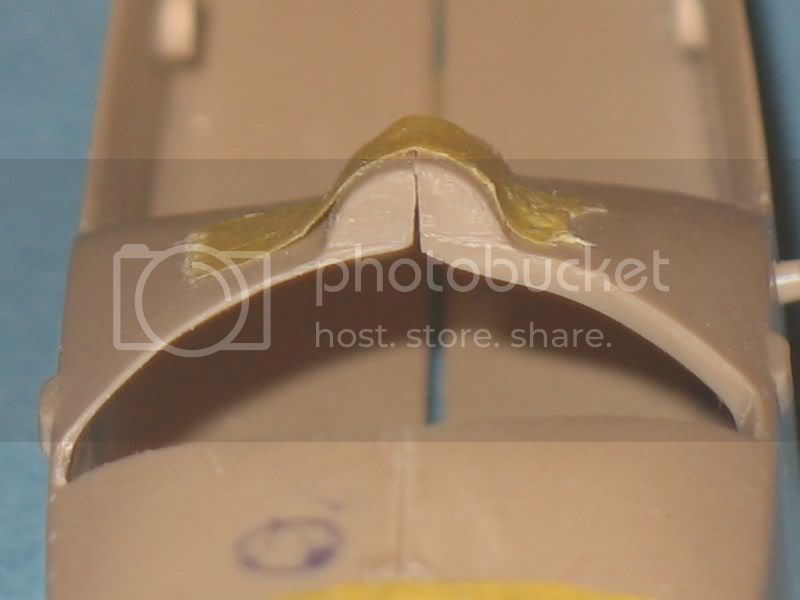
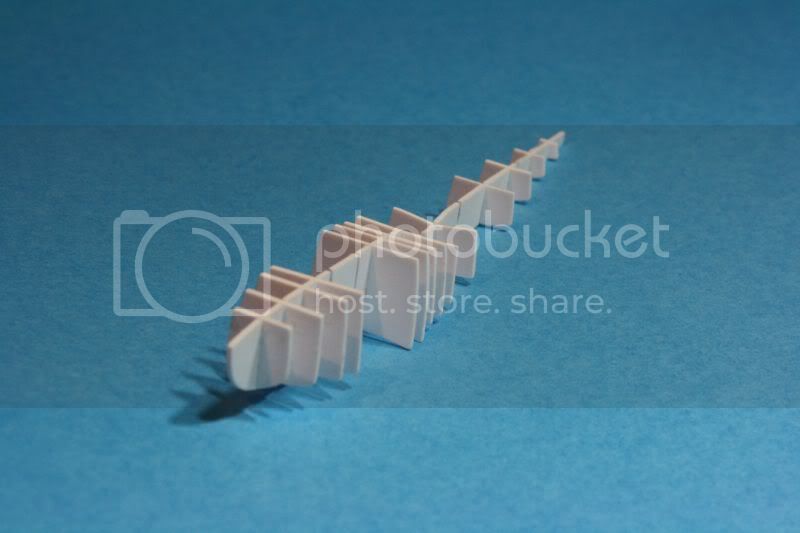
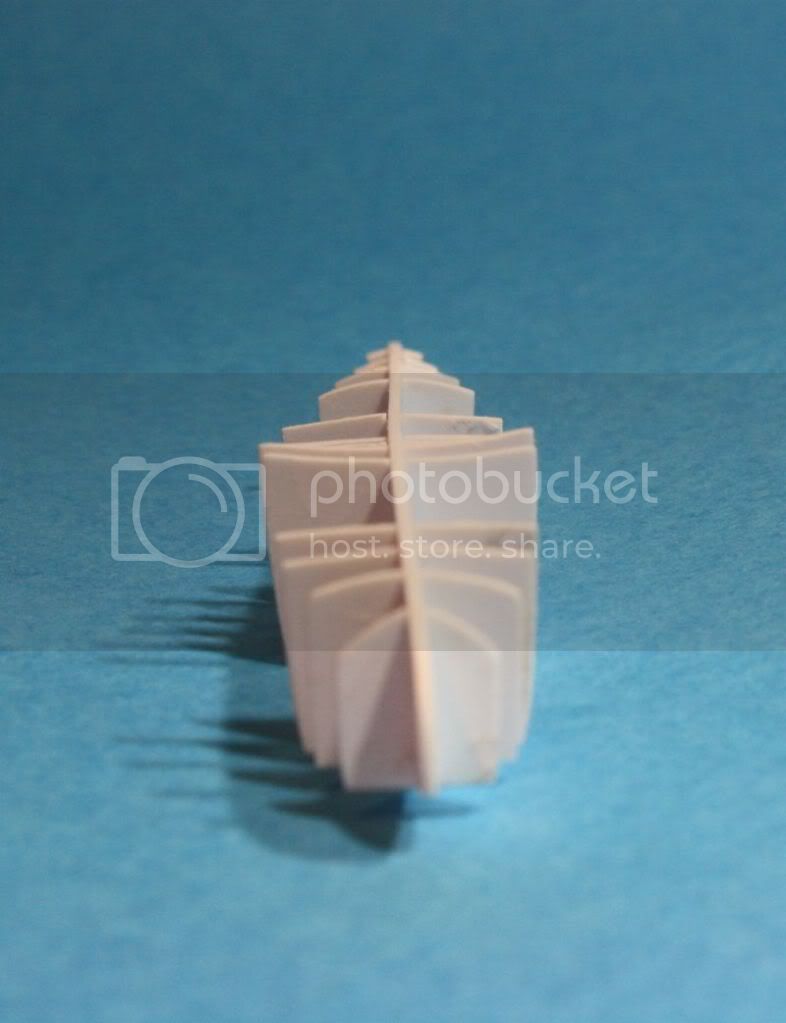
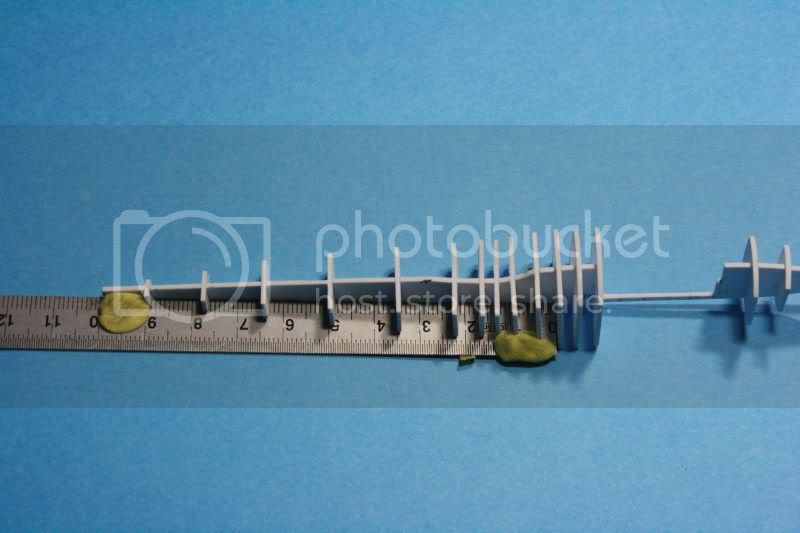
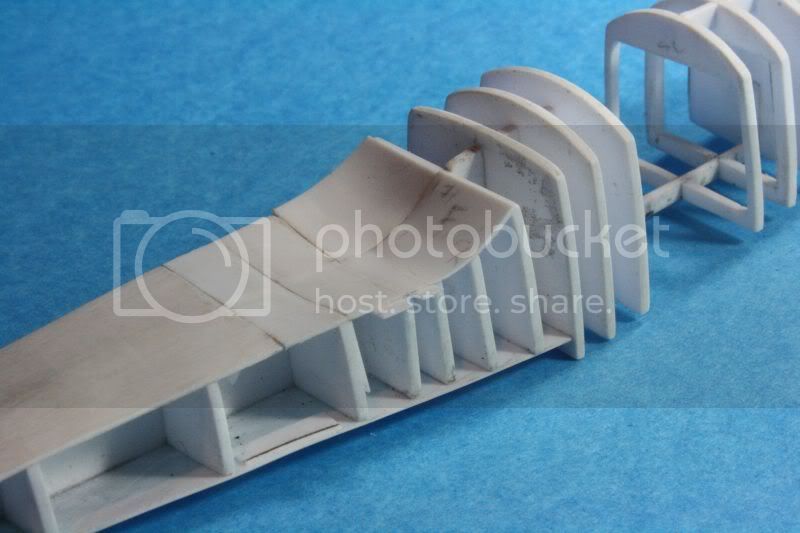
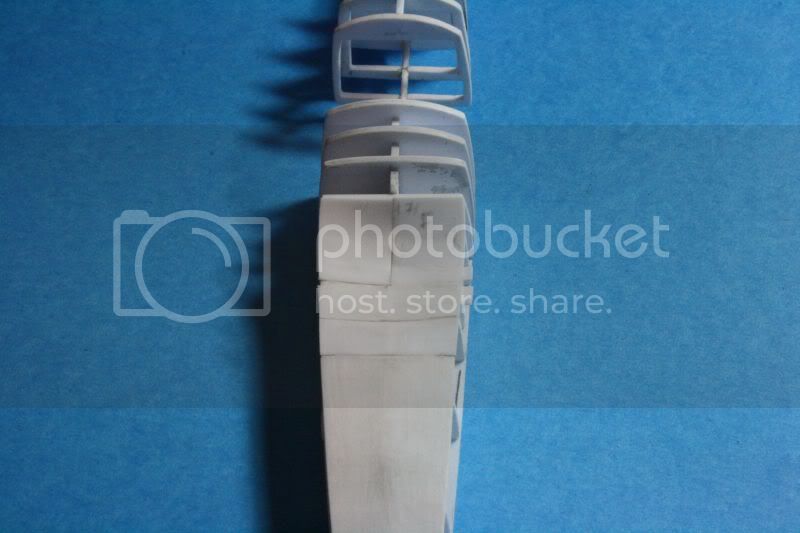
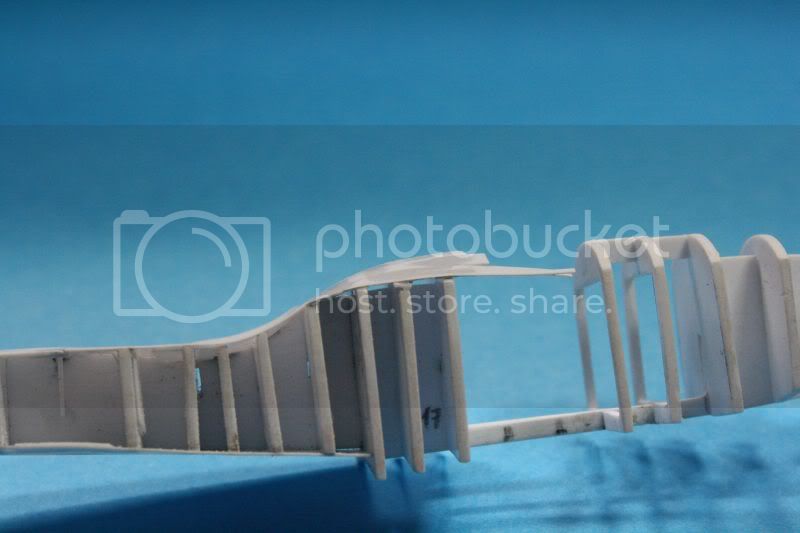
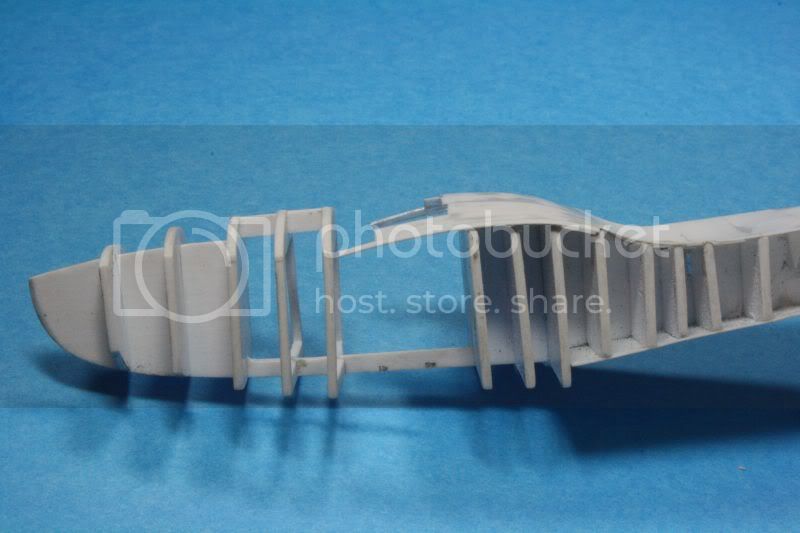
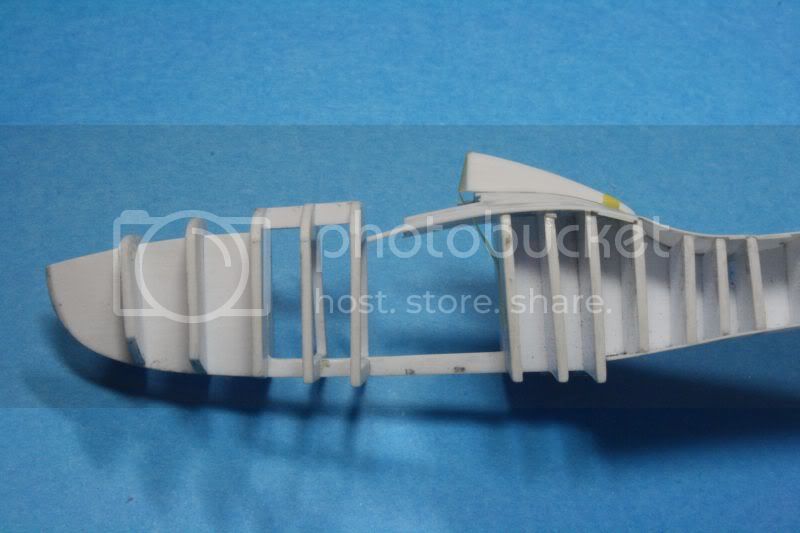
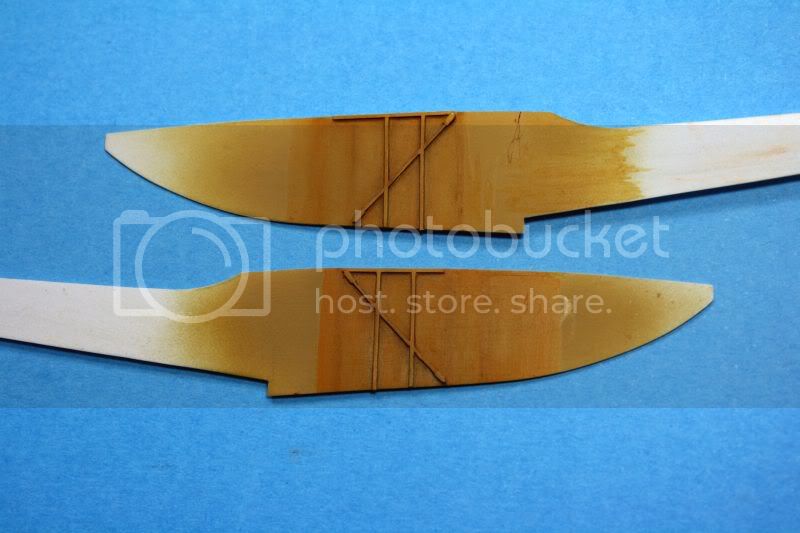
The whole frame is made.
The two cross sections in front of the cockpit are dug but it will not be enough.
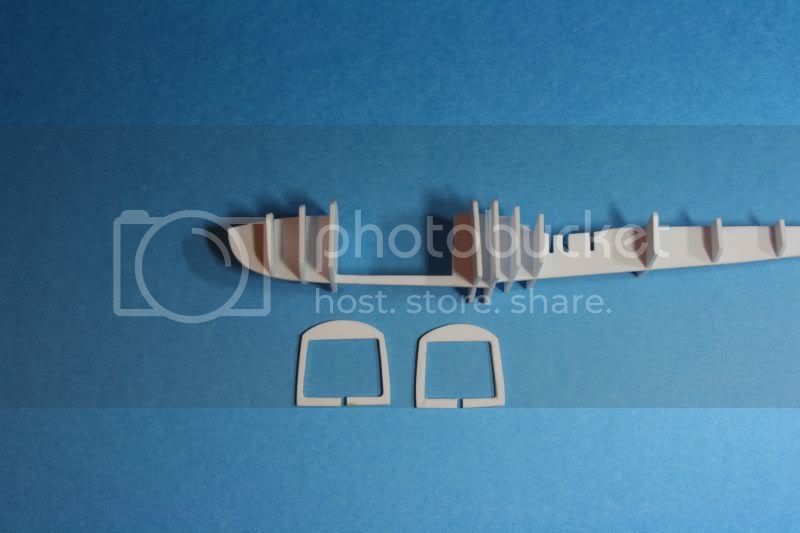
It will be put in place by small pieces of plastic card. It still lacks the two frames that pass through the cockpit opening and will be done later.
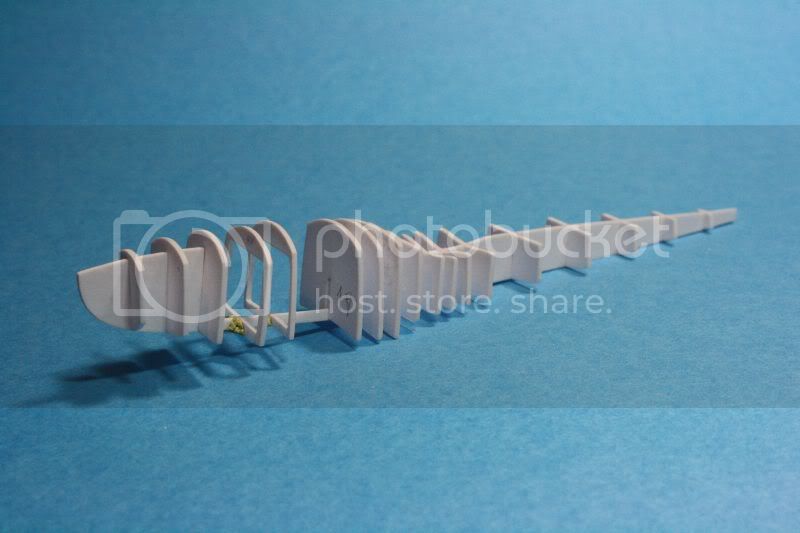
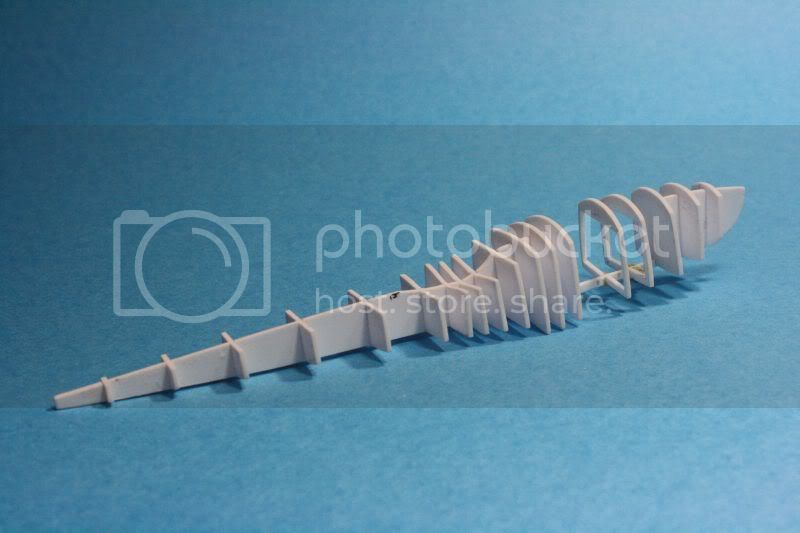
The seat is made based on the original plan. My holes are not quite the right place....

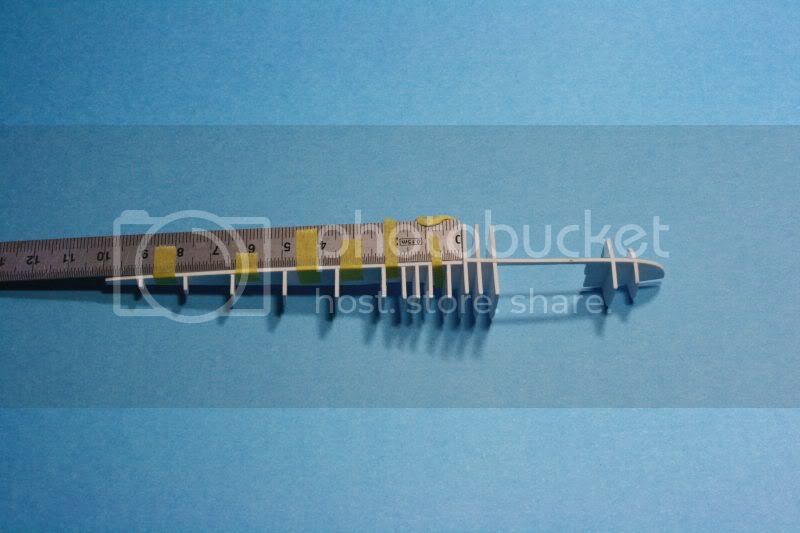
The frames are glued and the rear deck and the bottom of the hull are fixed.
The keel must be straight before sticking the parties. I do it with a ruler, tape and plasticine.
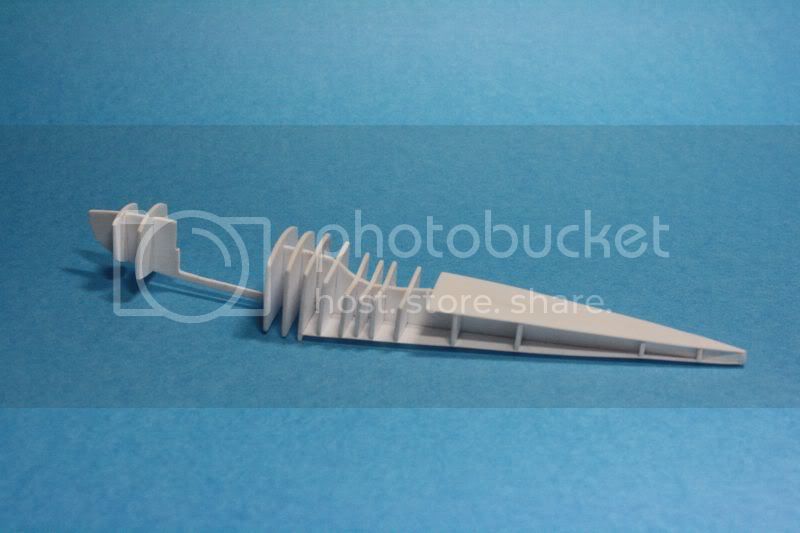
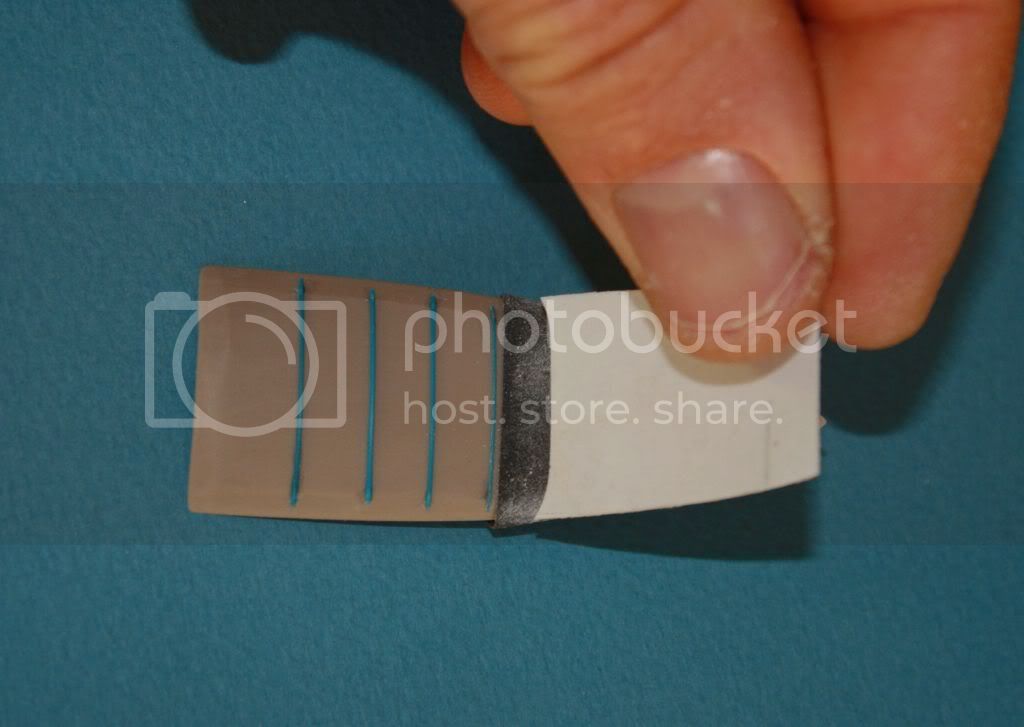
The bottom of the hull is in two parts. I had better make a unique piece for not having an edge which must be sanded to regain its round shape.

Off course this is not perfect and I should repair that...
Regards.
West Virginia, United States
Joined: December 18, 2006
KitMaker: 1,121 posts
AeroScale: 1,063 posts
Posted: Tuesday, May 11, 2010 - 09:40 AM UTC
Great work Louis! Looks like a lot of fun. Hope to see more soon.
Mark
Bas-Rhin, France
Joined: May 21, 2006
KitMaker: 472 posts
AeroScale: 471 posts
Posted: Wednesday, May 26, 2010 - 08:46 PM UTC
Thank you Mark.
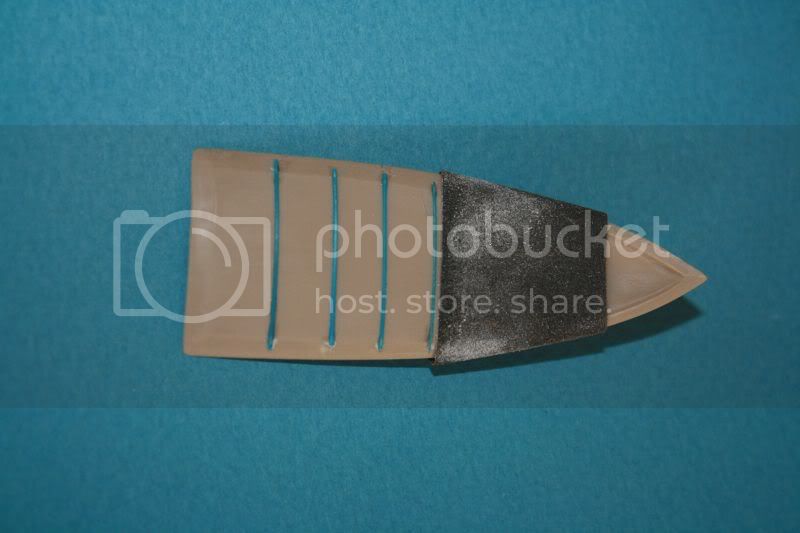
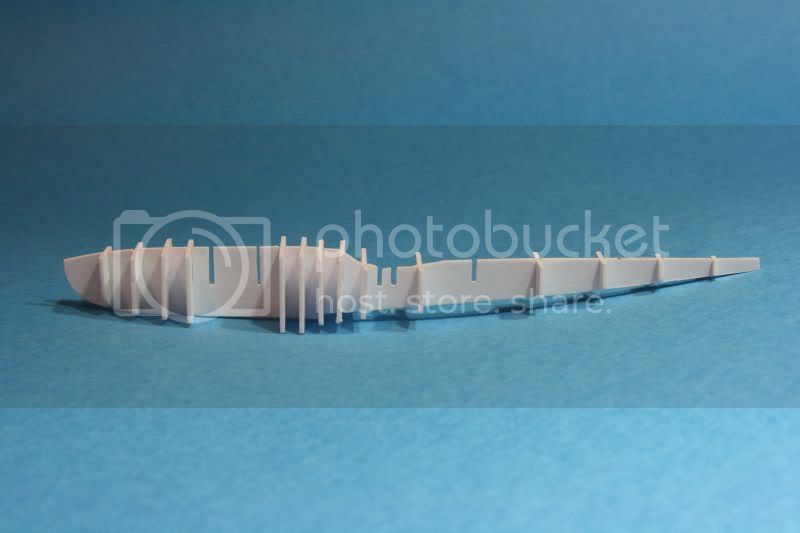
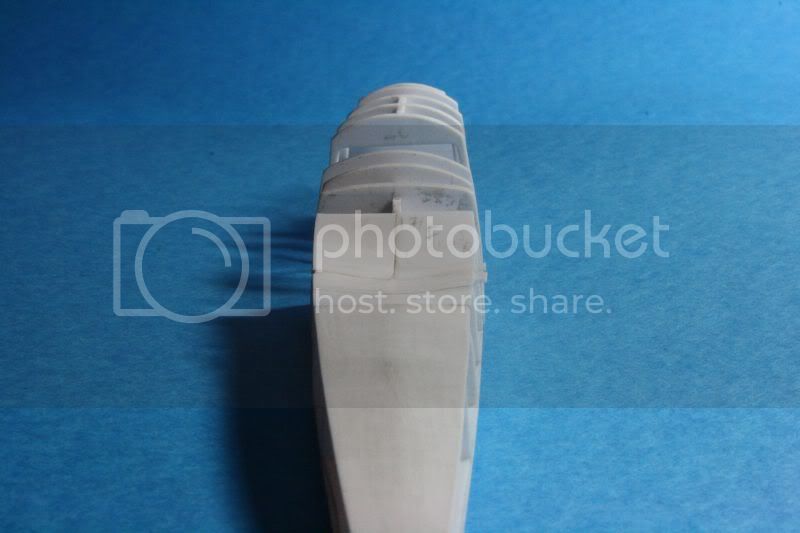
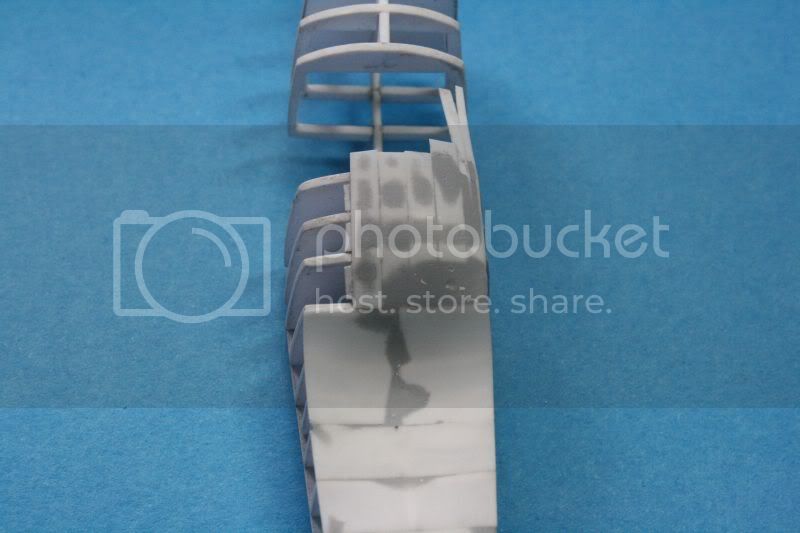
I made a new bottom of the hull. Only one part, it's not better.
I believe it should be better (round) with 0.4mm plastic card.
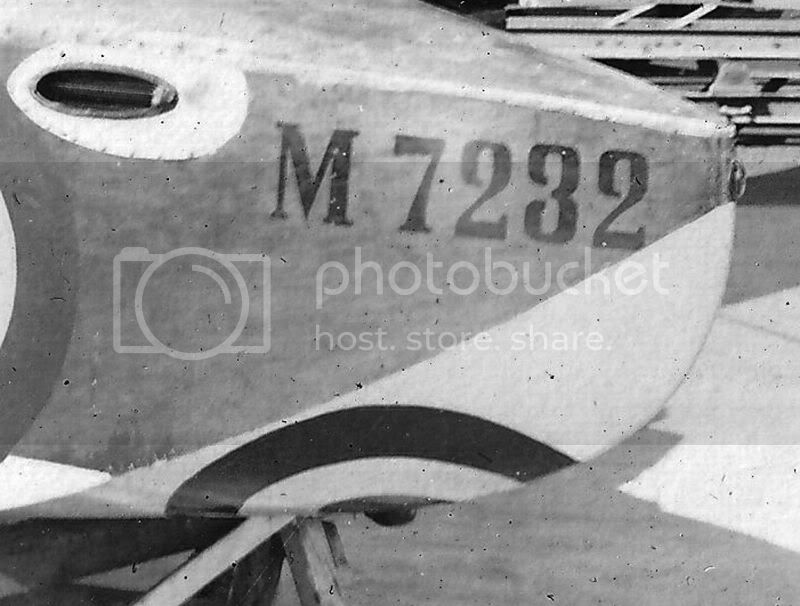
I 'm using the windsock datafile and the photo p30 N°74, p29 N°70-71, p13N°26.
p8 N°18 The hood (hollow area ) looks like it was removed ....
and plan N5400
I do not have pictures of the hollow area so I made the simplest possible. The hollow looks like a spoon, but we can not see from the photographs.
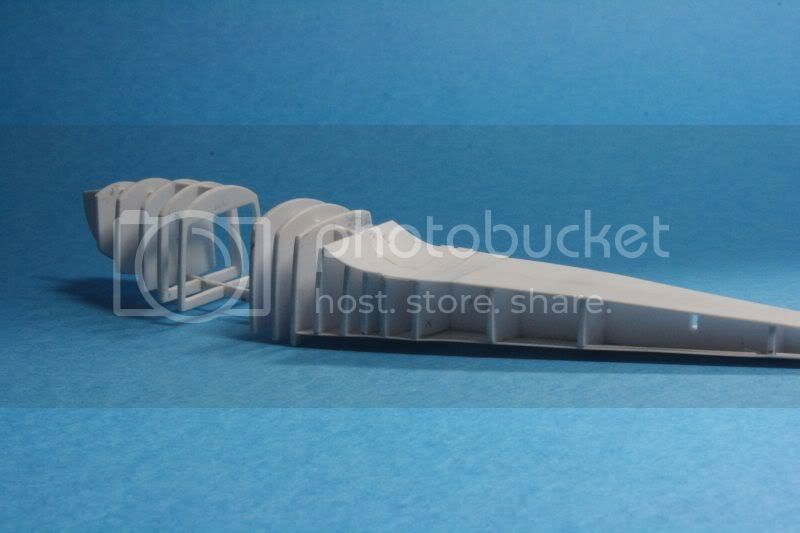
The hollow must be masticated and sanded so I glued reinforcement
against cross section (12 and 12a
Rowan Broadbent plans
Pheon models).
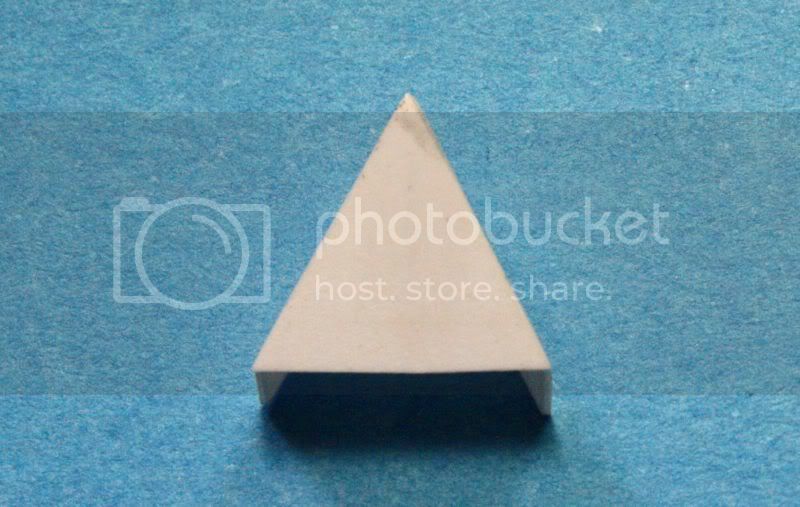
The deck is reinforced with plastic triangle.
Regards.
Bas-Rhin, France
Joined: May 21, 2006
KitMaker: 472 posts
AeroScale: 471 posts
Posted: Thursday, June 03, 2010 - 09:14 PM UTC
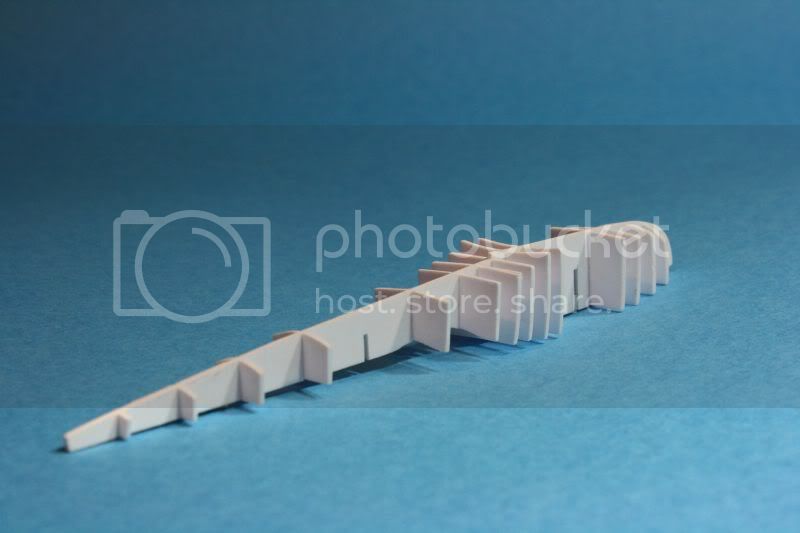
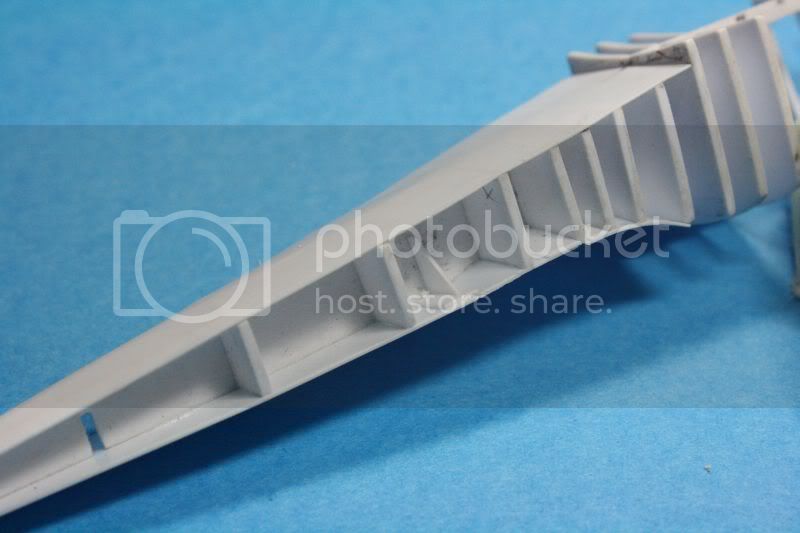
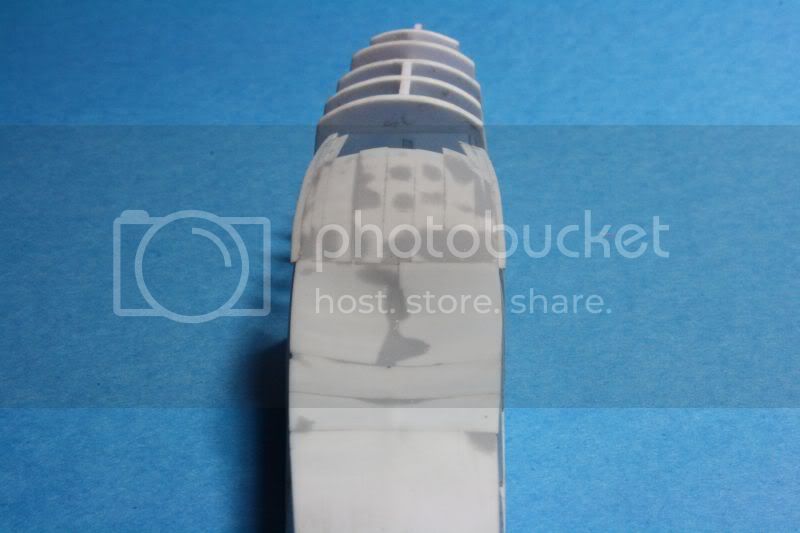
I covered the back starting with the middle. The plastic makes flat areas between the cross section instead of round up. You should use the putty and round the area.
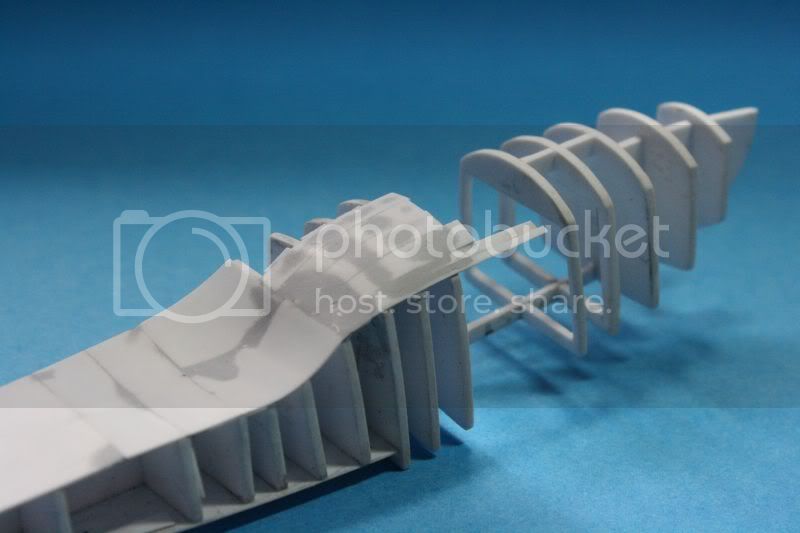
I finished sanding the back
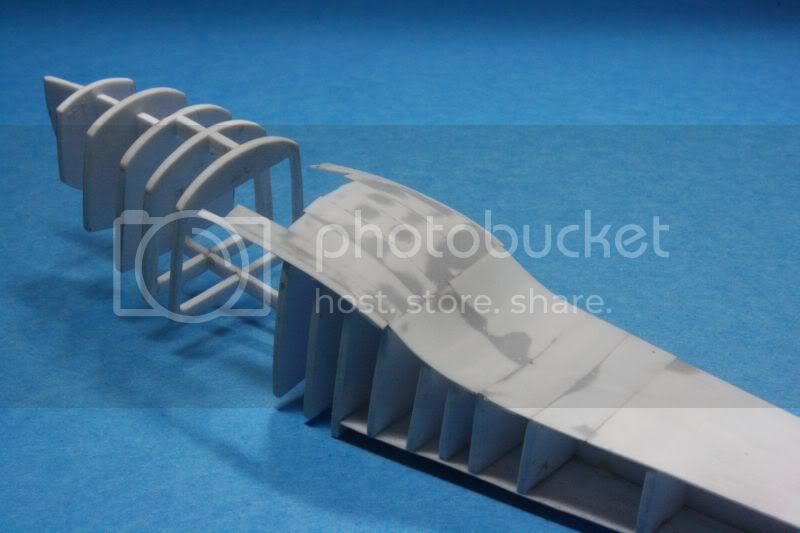
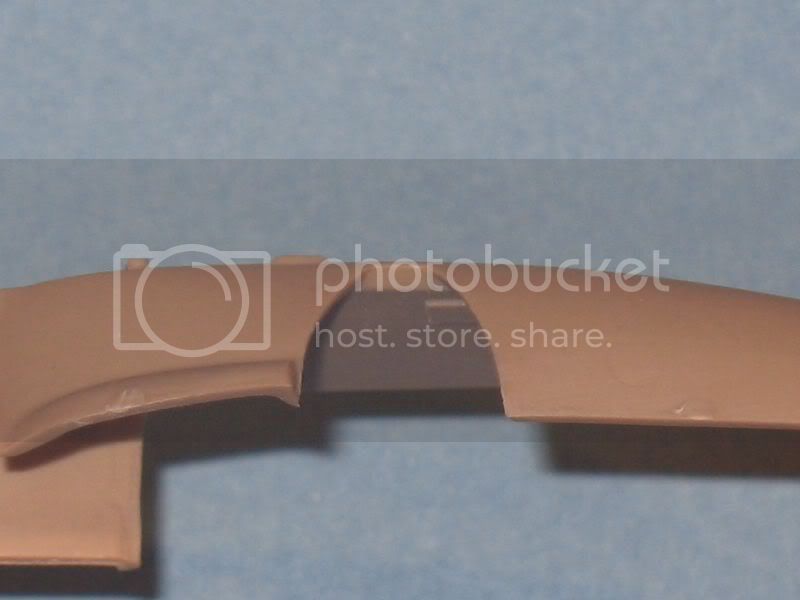
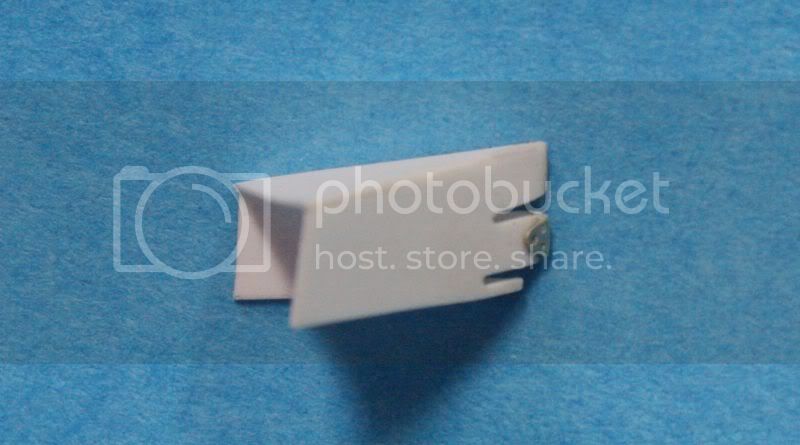
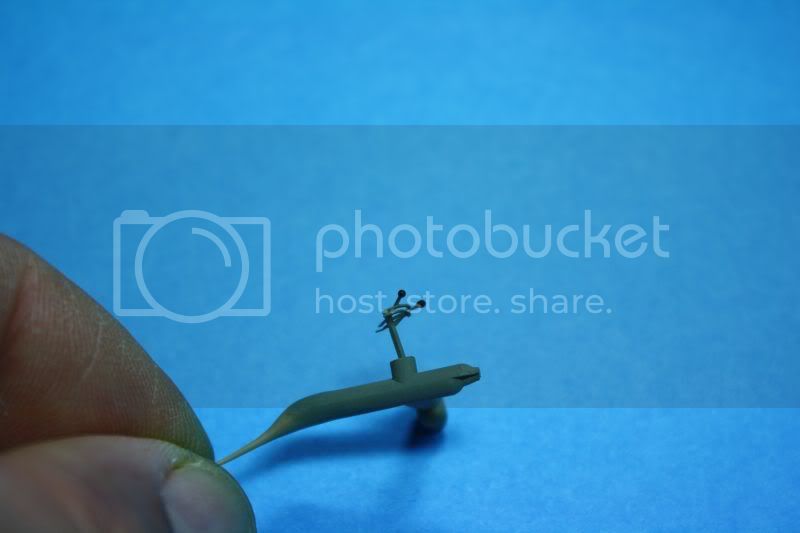
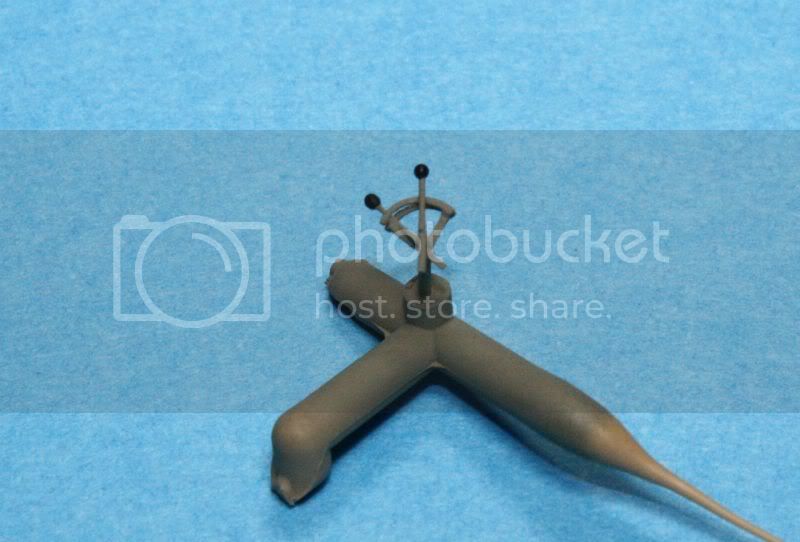
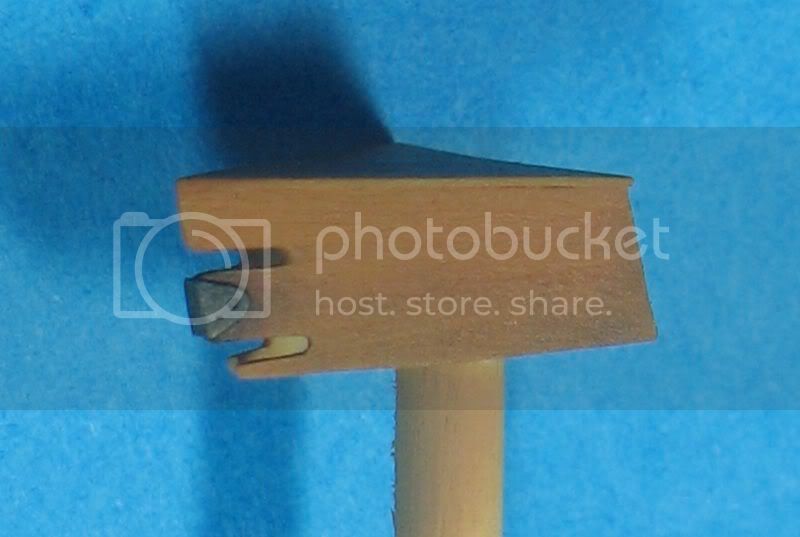
I make a new headrest:
On your left the headrest from the Kit. On your right the last one, it must be cut again.
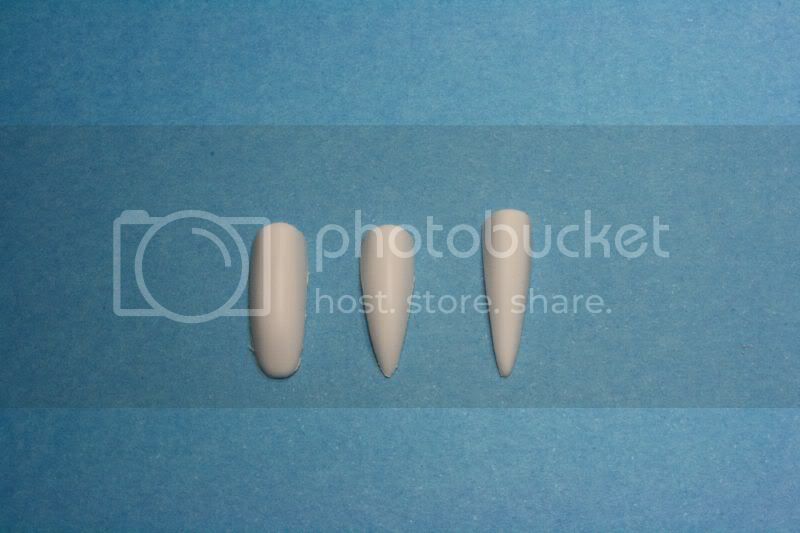
plane with the "center headrest":
plane with the "right headrest":
Regards
Bas-Rhin, France
Joined: May 21, 2006
KitMaker: 472 posts
AeroScale: 471 posts
Posted: Wednesday, June 09, 2010 - 04:55 AM UTC
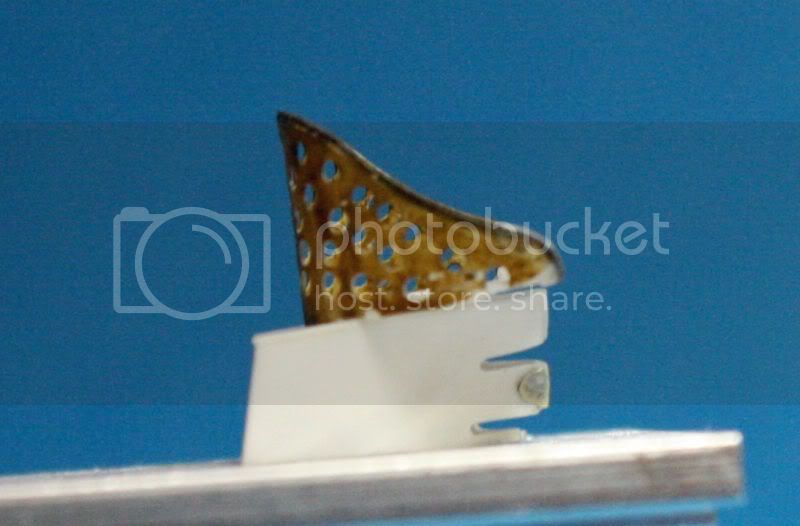
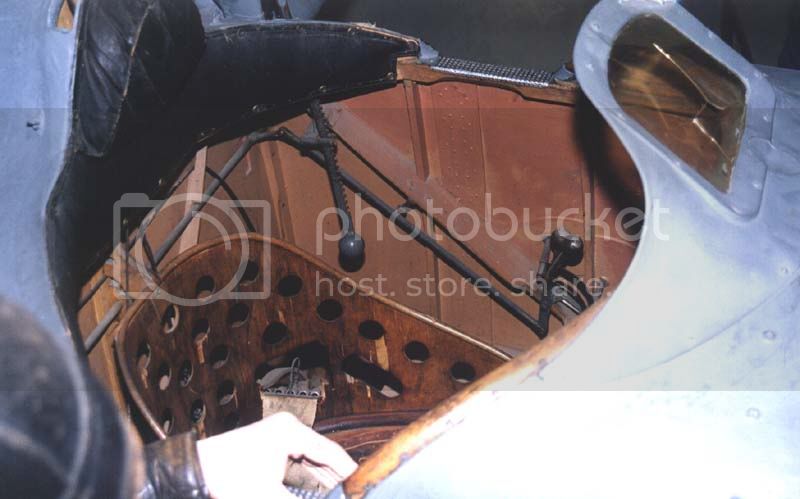
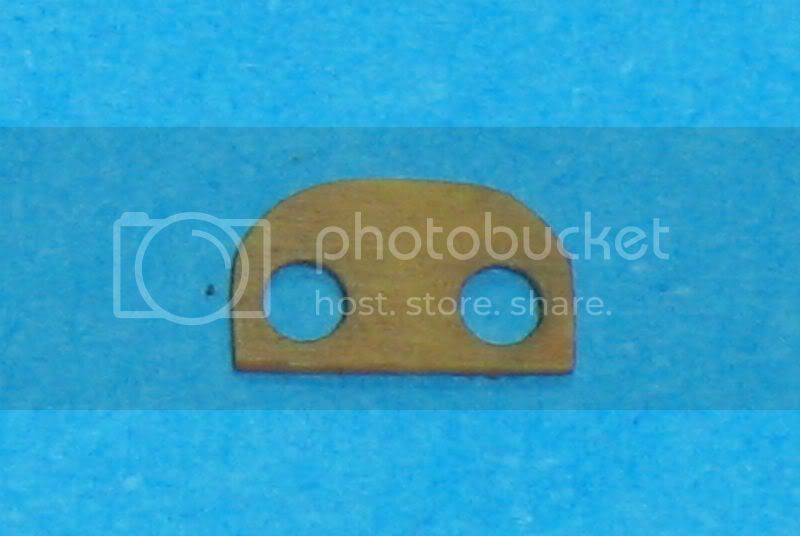
I (re) started the cockpit.
The seat base is made from the plan. The slots allow the cables to the rudder and the control column. The piece of metal on the front is PE part designed for a DVII. The control column will fixed on the piece of metal. The seat is fixed 2mm in front of the base of the triangle (12.5 x 11.4 mm).
You can see the photographe P30 N°74 on Windsock.
Regards.
West Virginia, United States
Joined: December 18, 2006
KitMaker: 1,121 posts
AeroScale: 1,063 posts
Posted: Wednesday, June 09, 2010 - 05:12 AM UTC
I love this build, Louis. You're doing a great job.
Mark
Bas-Rhin, France
Joined: May 21, 2006
KitMaker: 472 posts
AeroScale: 471 posts
Posted: Saturday, June 19, 2010 - 11:17 AM UTC
Hello.
Thank you very much Mark!
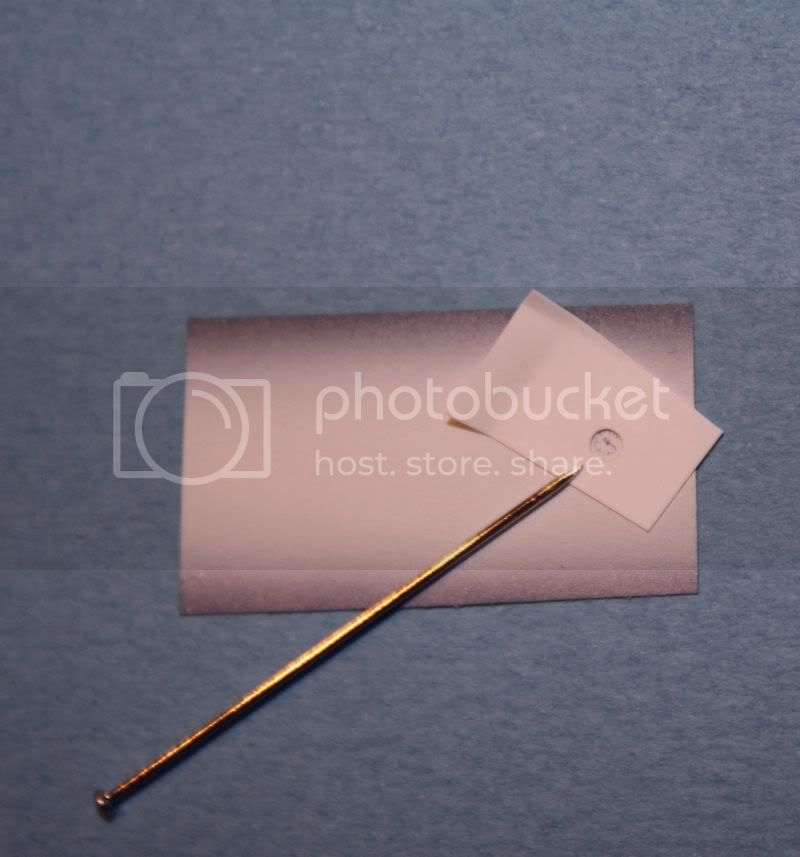
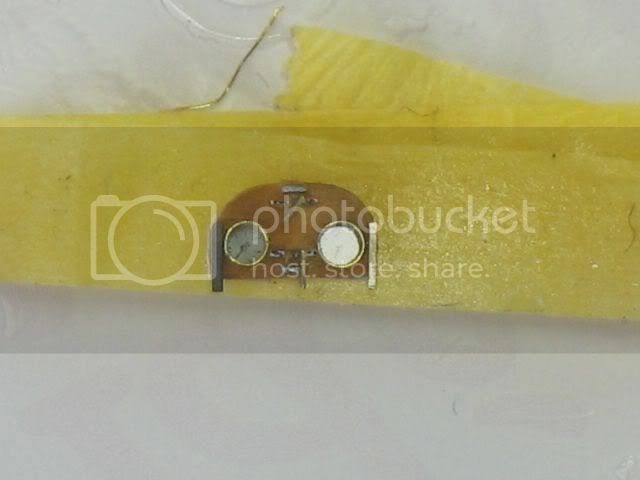
I finished the cockpit. I could glue the sides. An undercoat of Tamiya and oil painting drawing heavily toward orange.
The throttle is a plastic card and plastic stretched. Both guides rounded tin wire formed on a round shank and flattened under a steel ruler. All painted in "green".
Before and after "flattened":

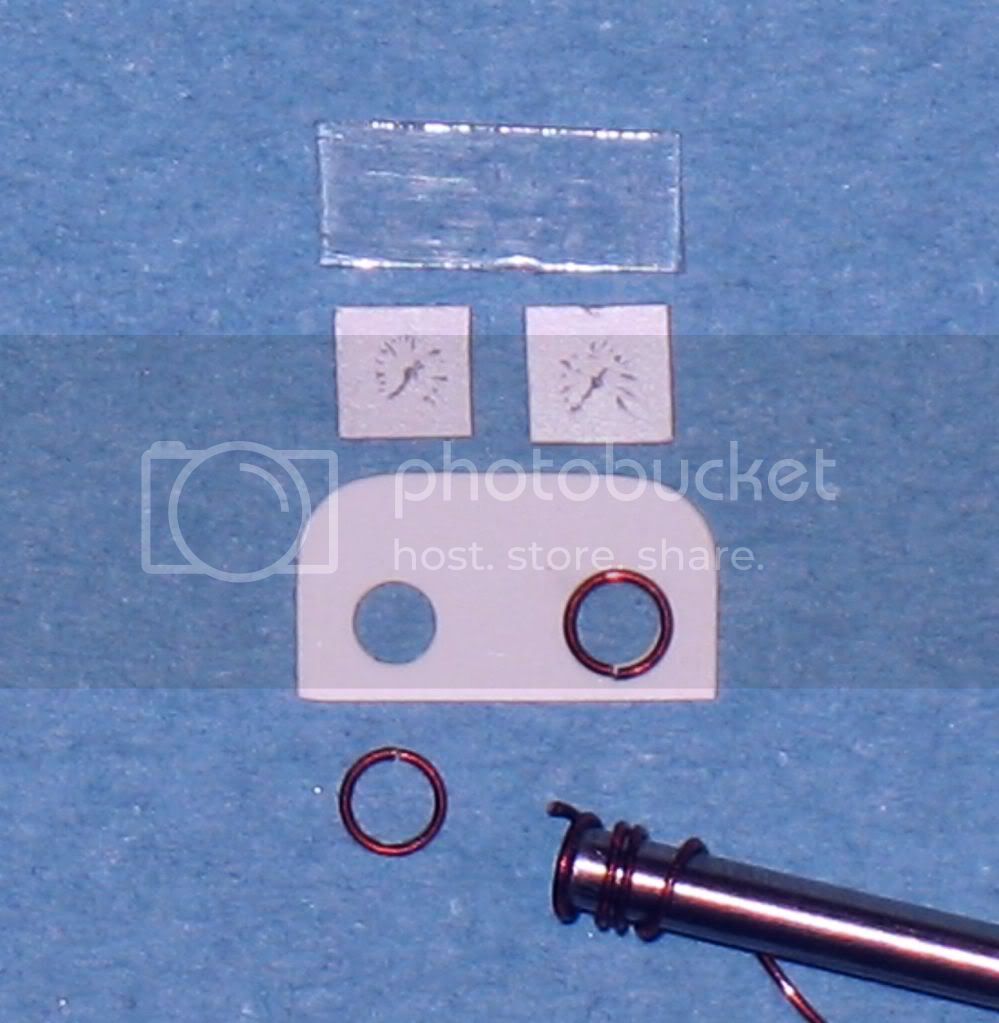
The very small instrument panel (5.4mm X 3.3mm):
A new seat and the finished base:
Hidden at the bottom of the cockpit that should do the trick.
A+
Alberta, Canada
Joined: January 19, 2008
KitMaker: 6,743 posts
AeroScale: 6,151 posts
Posted: Sunday, June 20, 2010 - 04:21 AM UTC
Fantastic job so far Louis ! Your attention to the details is outstanding .
Bas-Rhin, France
Joined: May 21, 2006
KitMaker: 472 posts
AeroScale: 471 posts
Posted: Tuesday, June 22, 2010 - 09:47 PM UTC
Thank you Terry
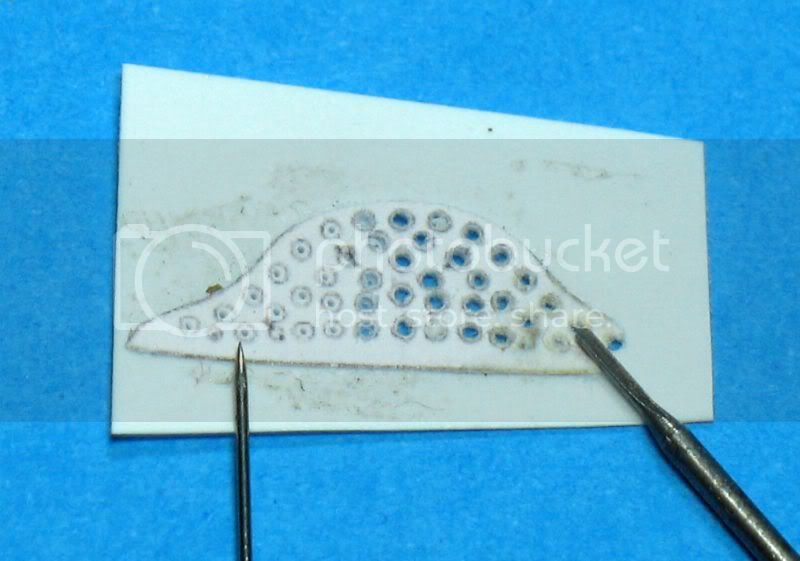
In former times, when Eduard was not..., I painted a piece of plastic in black and white after. Then, I engraved dial with a needle:
The prototype:
The instructions are white decals and PE parts with black ink. Levers are PE, thank you eduard.
Regards.
Colorado, United States
Joined: January 25, 2004
KitMaker: 11,669 posts
AeroScale: 11,011 posts
Posted: Tuesday, June 22, 2010 - 09:59 PM UTC
". . .The most important thing is to know why you build and then get the most that you can out of building." via D.D.
Alberta, Canada
Joined: January 19, 2008
KitMaker: 6,743 posts
AeroScale: 6,151 posts
Posted: Wednesday, June 23, 2010 - 02:49 AM UTC
Excellent job on the instrument panel Louis . In the past I have tried doing it the same way , but didn't fare well and went with decals instead . Looking forward to your next up-date


Cluj, Romania
Joined: January 31, 2008
KitMaker: 32 posts
AeroScale: 32 posts
Posted: Wednesday, June 23, 2010 - 06:36 PM UTC
Excellent work, that's the real deal.
Congrats,
Billica

Bas-Rhin, France
Joined: May 21, 2006
KitMaker: 472 posts
AeroScale: 471 posts
Posted: Saturday, July 03, 2010 - 08:03 AM UTC
Thank you for your nice words.
Hello,
I just received the
pheon models decals that
Rowan Broadbent very kindly sent me .....
Wowww! What is beautiful!
A small booklet in English explaining the history of Macchi M5, the history of every driver M5, the description of kits available and future (BlueMAX) and changes to make. 6 sheets (21X30) showing each color decoration to 1 / 48, and profile views from above and below, showing a Macchi at 1 / 32 (I think) and one seventh smaller.
Decals are very beautiful.
All this well protected in plastic in an envelope "bubble" reinforced with cardboard.
it's luxurious in here!
Thank you to Rowan for everything he does.
Britmodeller.com -> Pheon ModelsAeroScale :: First Look Review: Macchi M.5 flying boat fighter by James FaheyRegards.
Bas-Rhin, France
Joined: May 21, 2006
KitMaker: 472 posts
AeroScale: 471 posts
Posted: Saturday, July 03, 2010 - 07:13 PM UTC
Hello.
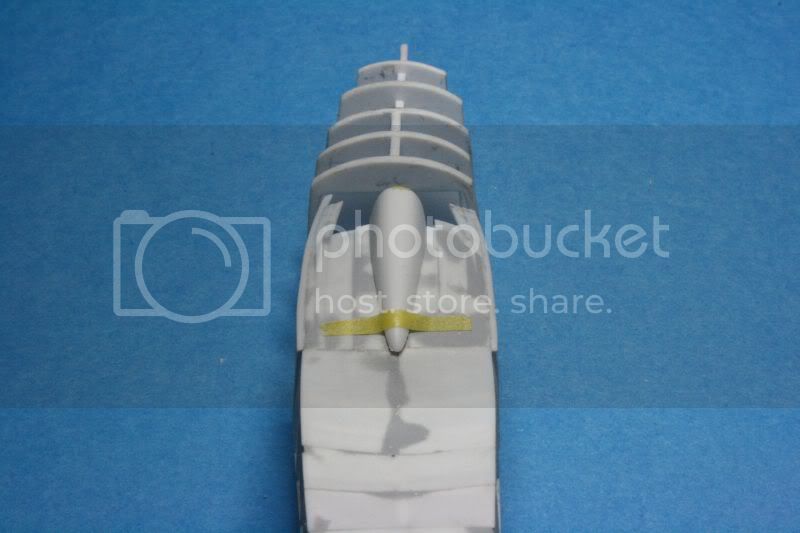
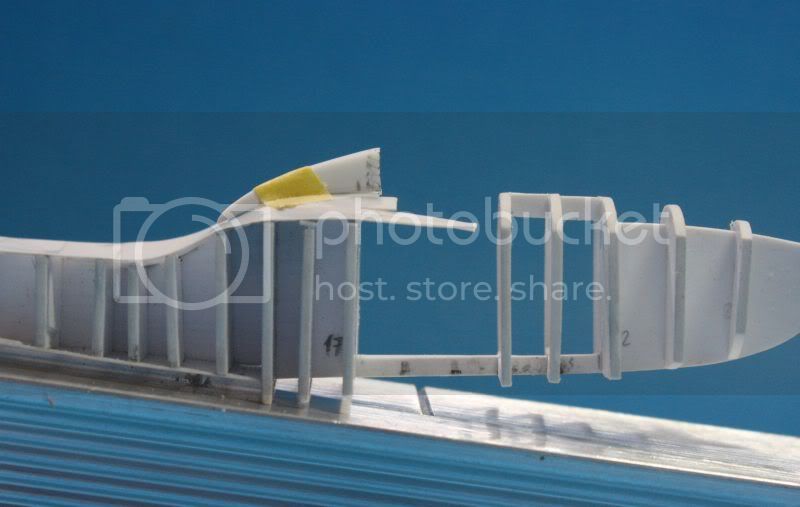
I started to glue the deck.
It's hard to find the correct form.

The bridge is almost flat at the top.
I rounded the end of the plates on the handle of a brush. It is not enough and I should correct form (with putty ? ).

Finally I glued the sides very badly and my body is out of alignment ....Now I must correct it.
Regards.
Louis
Slovenia
Joined: August 23, 2007
KitMaker: 86 posts
AeroScale: 75 posts
Posted: Saturday, July 03, 2010 - 10:44 PM UTC
Outstanding job Louis.
Looking at youre build makes me want to scratch my own model
Bas-Rhin, France
Joined: May 21, 2006
KitMaker: 472 posts
AeroScale: 471 posts
Posted: Monday, July 12, 2010 - 07:44 PM UTC
Thank you.
Hello,
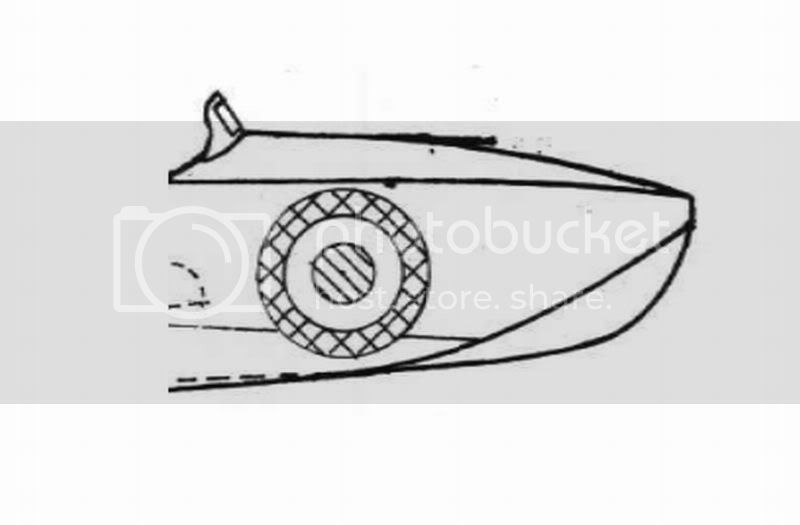
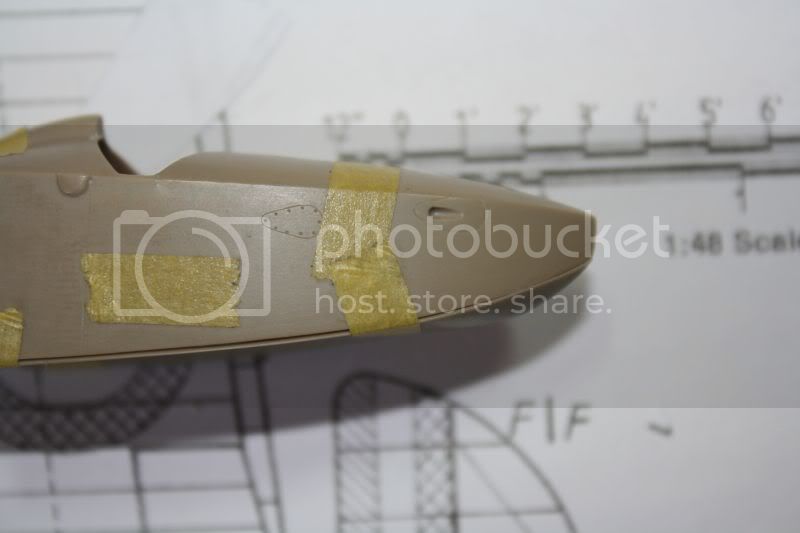
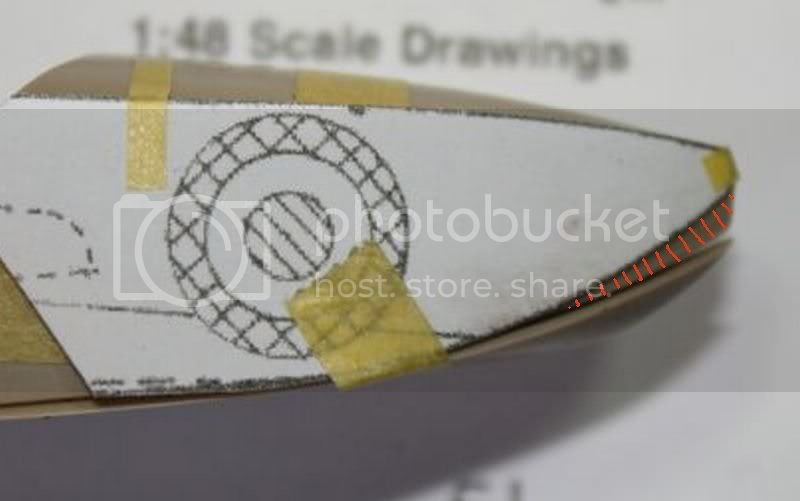
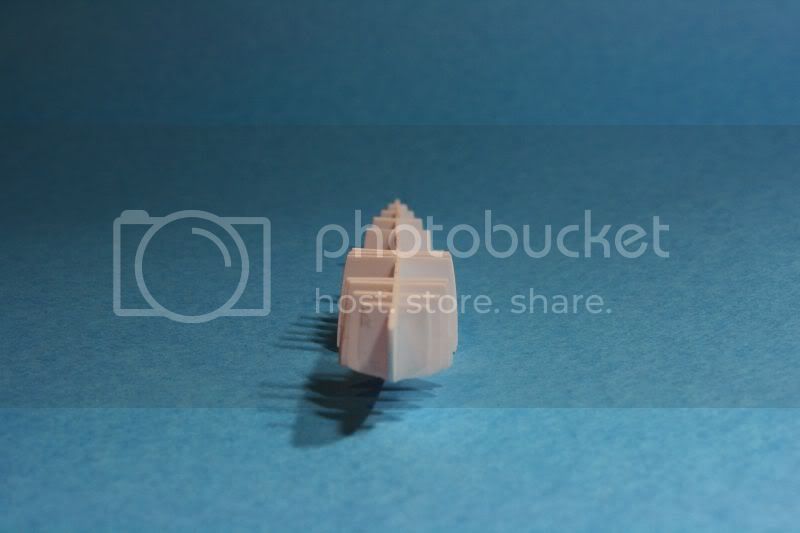
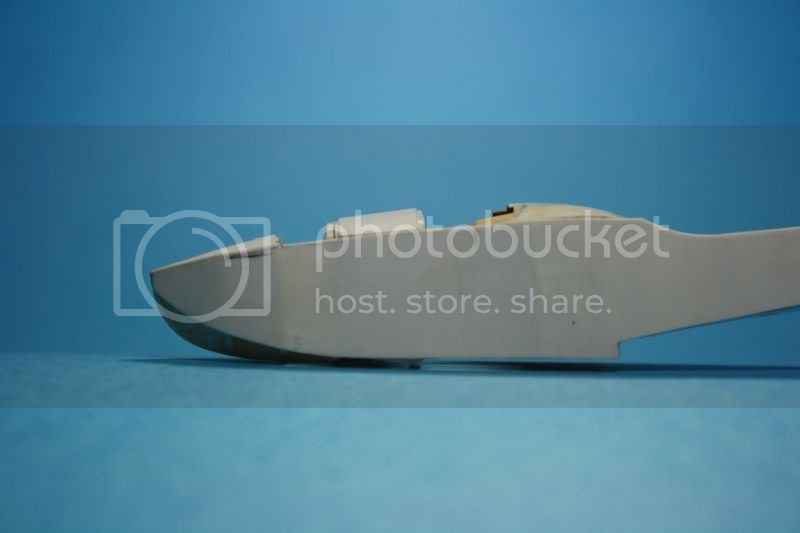
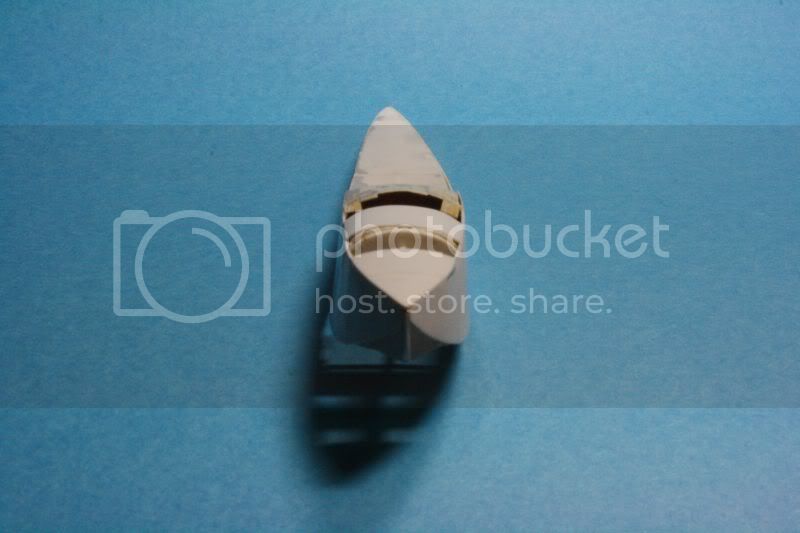
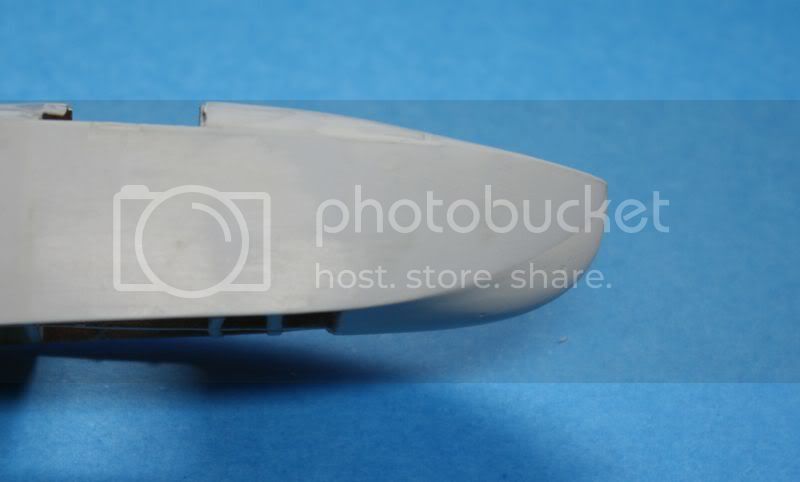
The front part of the hull:
It seems from the pictures, that there were several different forms....

The sides of the hull also seem more or less vertical depending on the plane ...
An earlier version:

Could they be from the same version?
Regards.
Bas-Rhin, France
Joined: May 21, 2006
KitMaker: 472 posts
AeroScale: 471 posts
Posted: Tuesday, July 13, 2010 - 04:48 AM UTC
The front part of the hull (putty part below) is almost finished but it seems from the pictures, that there were several different forms.... The sides of the hull also seem more or less vertical depending on the plane ...

[/IMG]

[/IMG]
I filled the holes with extruded polystyrene (hard) and covered everything with a lot of putty. The hull is sanded.


[/IMG]
Regards.
Alberta, Canada
Joined: January 19, 2008
KitMaker: 6,743 posts
AeroScale: 6,151 posts
Posted: Tuesday, July 13, 2010 - 04:59 AM UTC
Your project is coming along very well Louis !
Wish I could help you with info requarding the hull on whether it was different form type to type .