Hi all - I am indeed humbled by your nice words

To answer the queries:
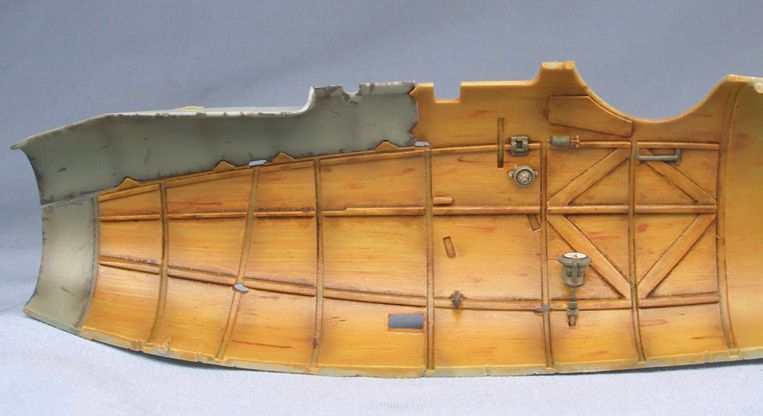
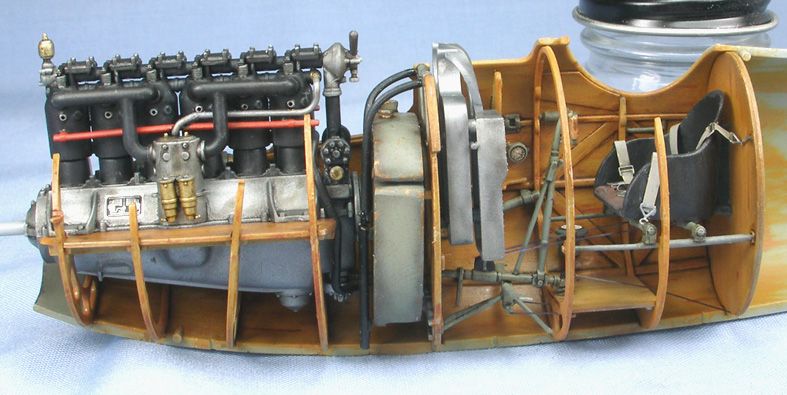
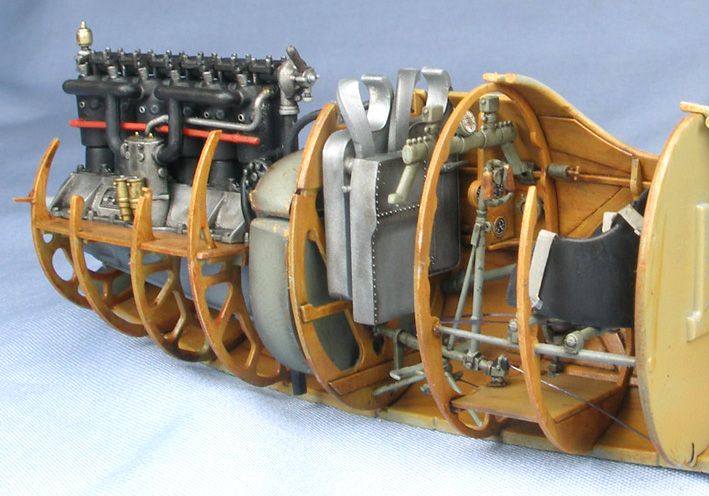
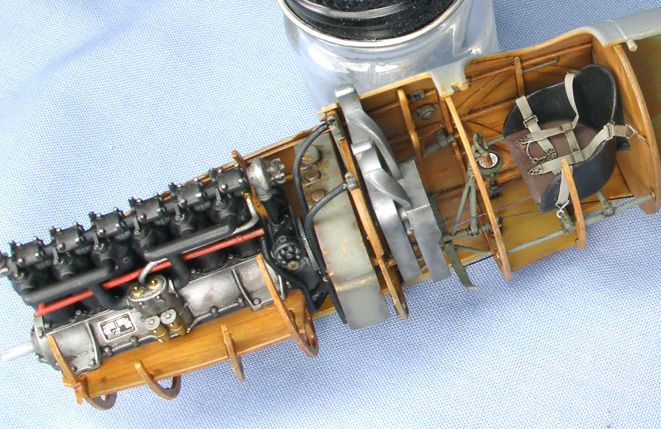
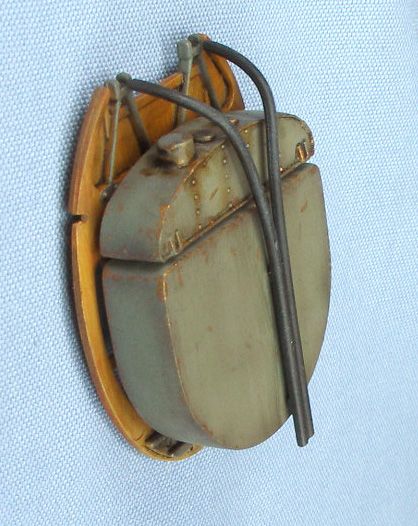
First, the plywood. This was done the same way as the interior using my usual technique. I didn't take any progress shots for this build, so I will use progress shots and description from my last build, the 1:48 Jager Albatros CX, to illustrate my technique. The only difference with this build is that I used a slightly more orange final coloring for the wood prior to panel line shading.
Firstly, the fuselage is painted a uniform light colour - in this case, Gunze "Sail Colour". I then mix up some yellow ochre, burnt sienna, and white windsor and newton oil paints, slightly thinned, and streak these back in the direction of the grain. I also add a little linseed oil to help drying (though this does also add more yellow to the paints). I try and keep the colours and texture different for each panel. I also like to dob small dots of burnt sienna on some panels and streak them back in the direction of the grain to give the impression of different plywood batches. I try to have variation in colour, tone and texture across and between each panel. This is what it looks like once this is done:
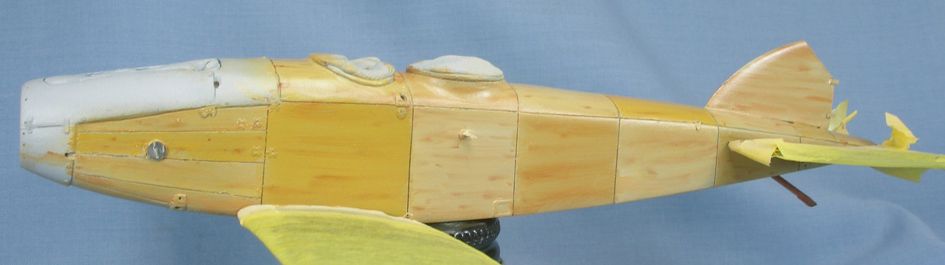

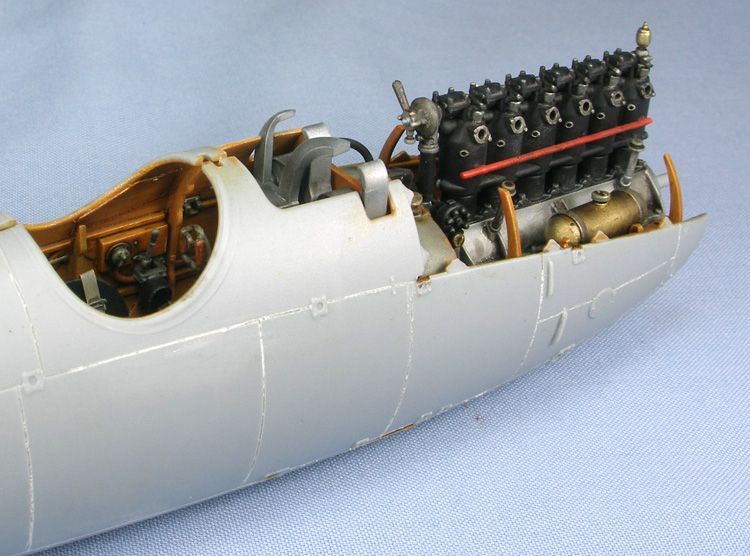
You can see there is quite a marked difference between the panels, which looks ugly and overdone. This is actually what I try to aim for, as it will help with the final look. Once the oil paints are dry (can take up to a week), I then spray a number of coats of Tamiya clear yellow over the panels. This gives the wood the nice yellow tone and helps to blend the different panels in together. I try to aim for the final coats to be heavy enough to look uniform but also give the hint of differently coloured panels.
I then clear coat, apply remaining paint and decals, then lightly spray thinned Tamiya Smoke around the panel lines. I find this helps to visually "bind" everything together. Then another clear coat, and an oil wash, then done.

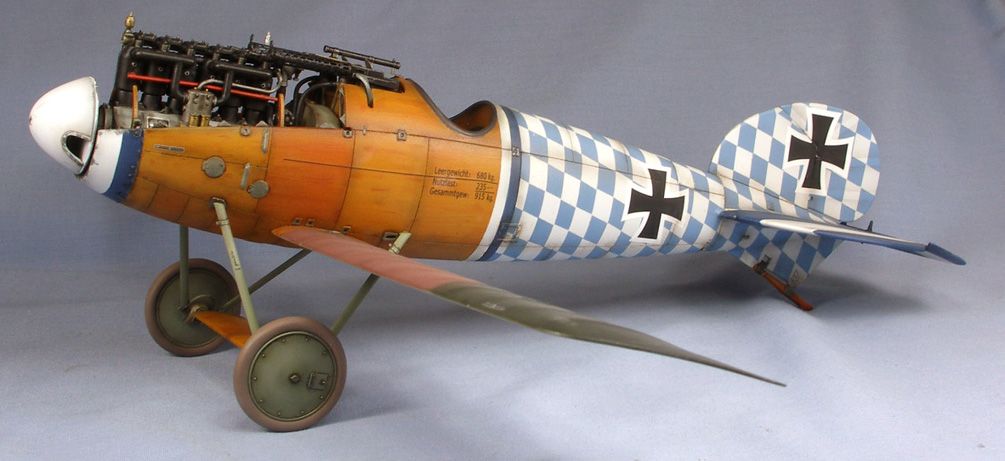
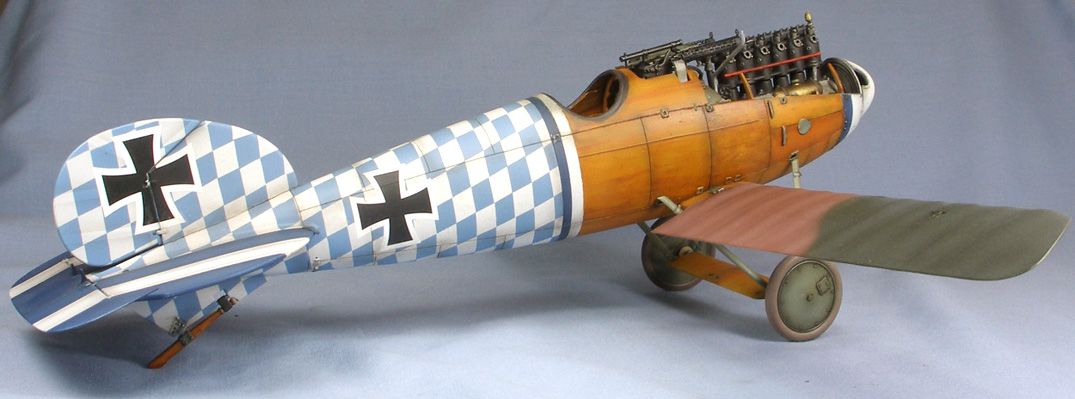
The technique is the same as on my DVa, though the final clear yellow coat had some clear orange mixed in.
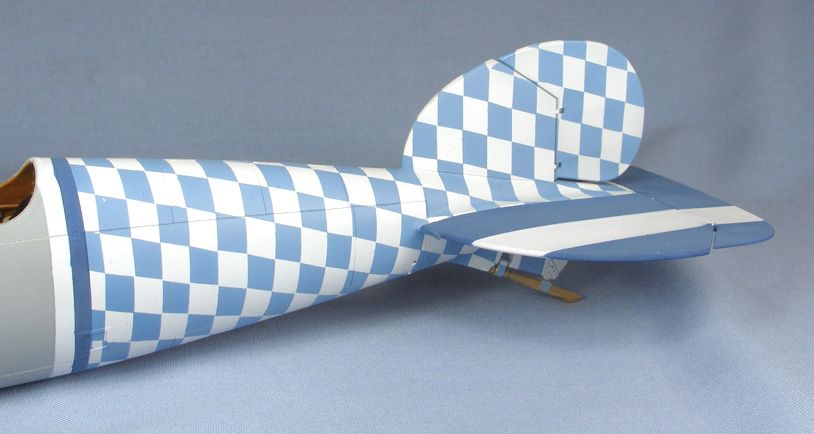
The diamonds were also fairly easy, though a little tedious. Firstly, some notes on the pattern. I cheated with the diamonds - no matter how I tried there was no way they could wrap them around the fuselage completely and continuously whilst maintaining the same diamond size. The inside cover page and a picture on page 83 of Osprey's Albatros Aces Part 1 shows the painter kept everything reasonably uniform on the port side, with some gradual reductions in diamond size (but not much), but had to make some substantial compromises on the starboard side with lots of different shaped diamonds (though this is based on an almost rear on shot so things are not easy to see). I guess he didn't figure it out either
I thought that if I tried to replicate this, then it would look like a mistake more than anything else, even with what I can see in the photos. So I decided to make the diamonds mirror image on both sides. That way everything is even, and much easier to mask, if not actually accurate. But hey, no one will ever know, right....?
The first step was to spray the fuselage white. The diamond masks were mass produced using strips of Tamiya 6mm tape, all laid parallel, with the lines for the diamonds all cut parallel to each other, but at an angle to the length of tape, with a straight edge, measuring to make sure the cuts were all roughly evenly spaced. I had to cut the angle in the opposite direction for opposite sides given I mirrored the diamonds on either side of the fuselage.
The diamonds were each placed on by hand (hence why it took so long to mask!) - once a few are "locked" in place, the pattern is relatively easy to produce. However, there are indeed some areas where the diamonds were "altered" slightly to fit, so everything is not 100% uniform, but as close to it as I could get. This is the most apparent at the top and bottom of the fuselage where the patterns meet - in some cases they do not meet exactly. Masking took a good two and a half hours.
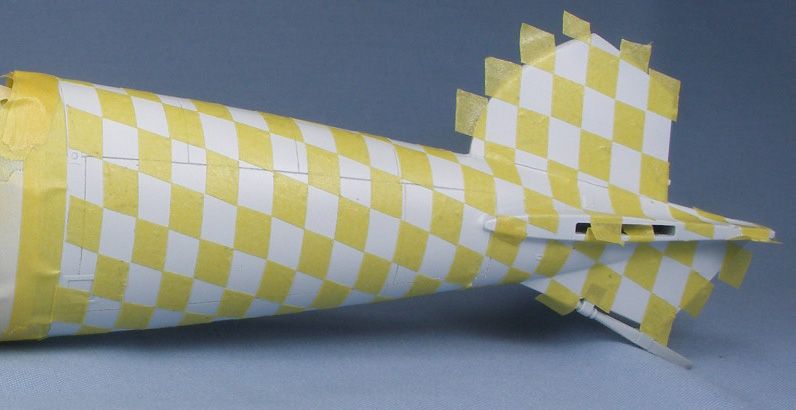
Then it was a simple 5 minutes of spraying, and the tedious removal of the masks, and done.
I painted the diamonds before the wood grain - that way, if they didn't work out, I could remove them and try another scheme.
Sorry for the long winded explanations! Hope this all makes sense.
Thanks again!
BC