Thank you Jack and Lars.
I think my plane will have a "dark repared patched" wing...
Regards.
Early Aviation
Discuss World War I and the early years of aviation thru 1934.
Discuss World War I and the early years of aviation thru 1934.
Hosted by Jim Starkweather
Techmod 1:48 Friedrichshafen FF-33E
Louis

Joined: May 21, 2006
KitMaker: 472 posts
AeroScale: 471 posts

Posted: Wednesday, December 05, 2012 - 05:04 AM UTC

Louis

Joined: May 21, 2006
KitMaker: 472 posts
AeroScale: 471 posts

Posted: Tuesday, December 25, 2012 - 09:52 PM UTC
Merry Christmas !!!!
Leather protection is made with a lead wire
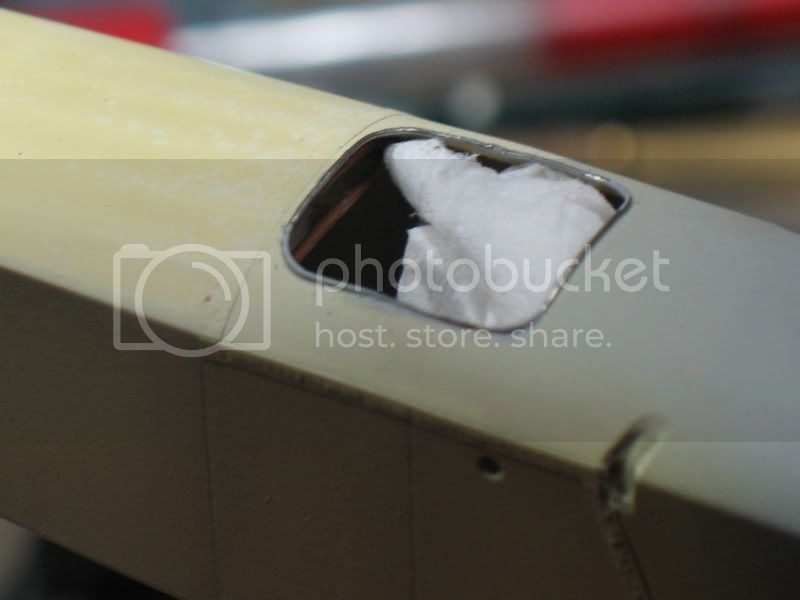
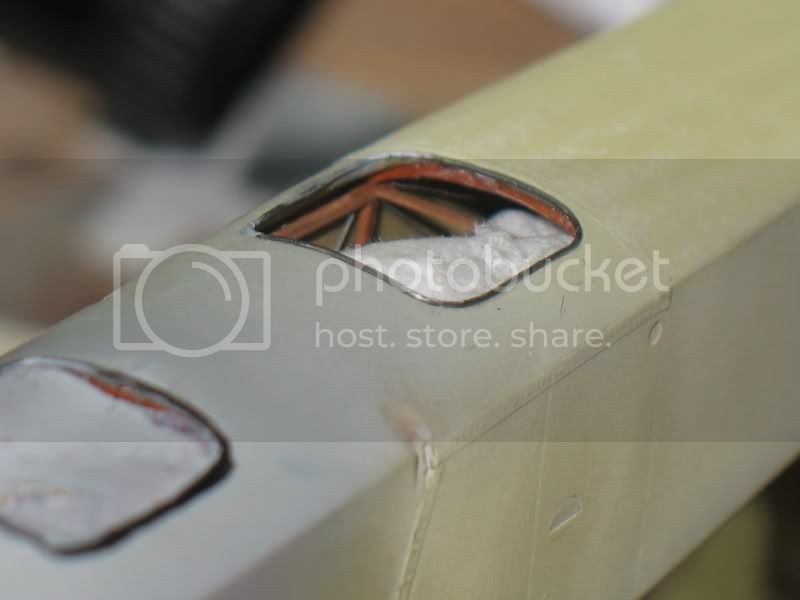
I can not make a proper seal as I had expected. So I have to stick the engine immediately.
I already damaged by sanding ...
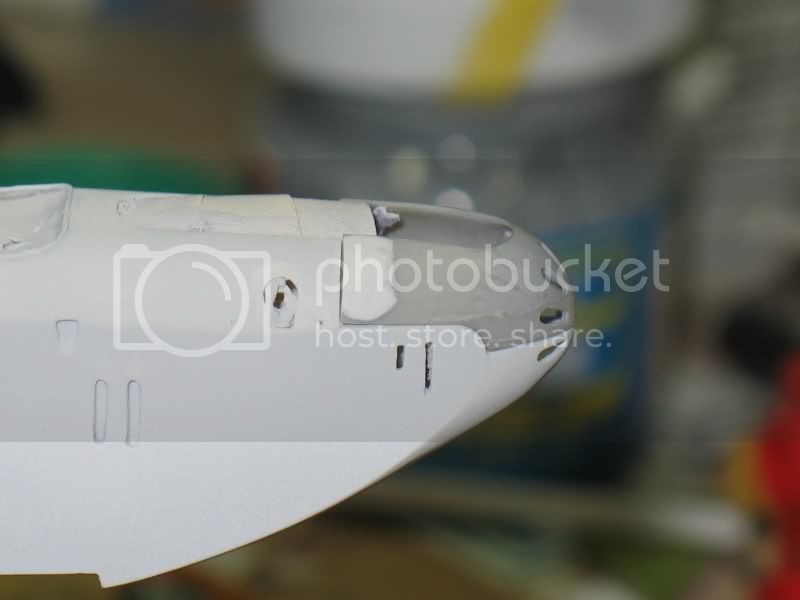
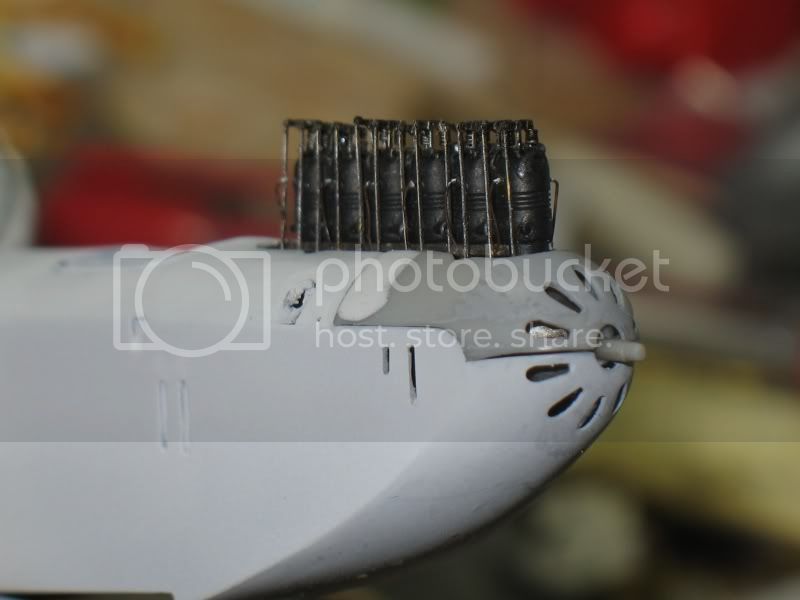
The indentation are added for the two pipes. On the other side there too. Two pipes seem to come through these holes.
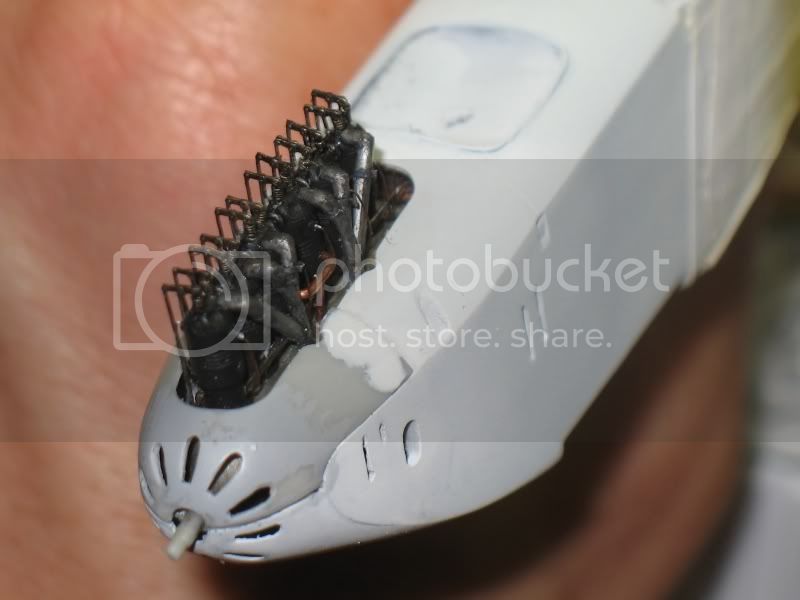
The gap between the two covers is hidden by a plastic strip
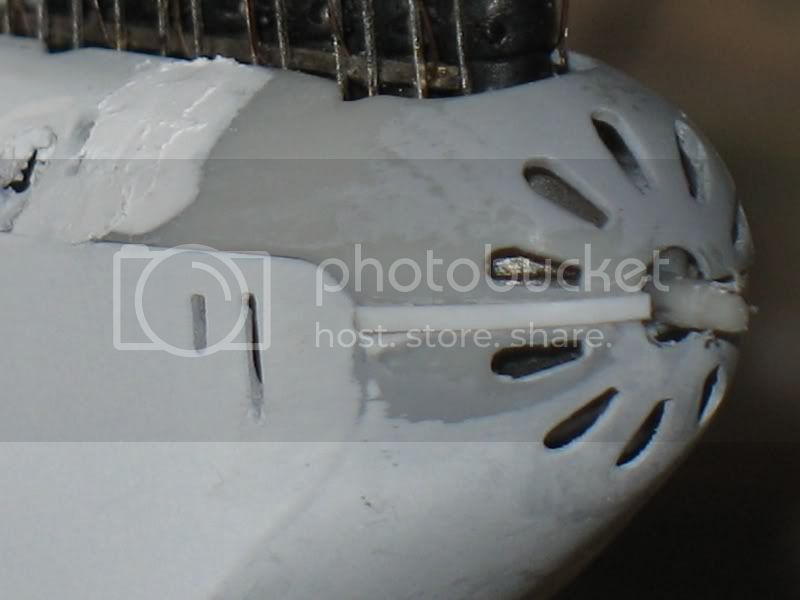
I finnished the edge of the hood:
A lead wire ( bottom) is rolled under a reglet iron on a glass plate. I made it thinner (at the beginning 3cm, 4cm after elongation) and pointed (top).
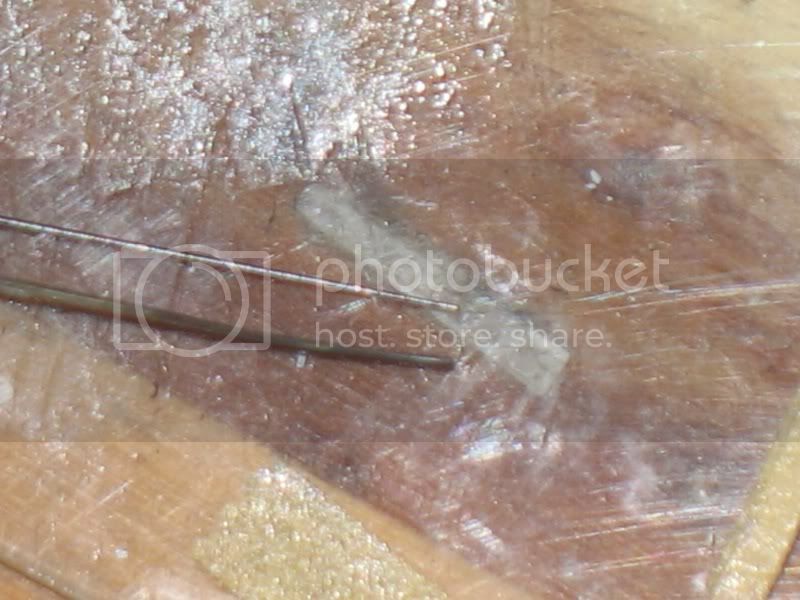
It is placed on the pieces of tape.
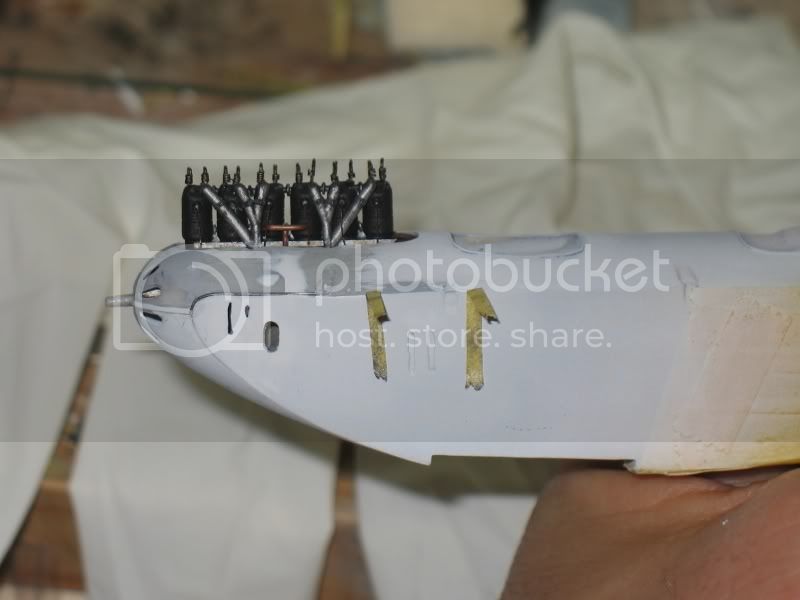
I glued below the lead wire so we can not see the traces of glue.
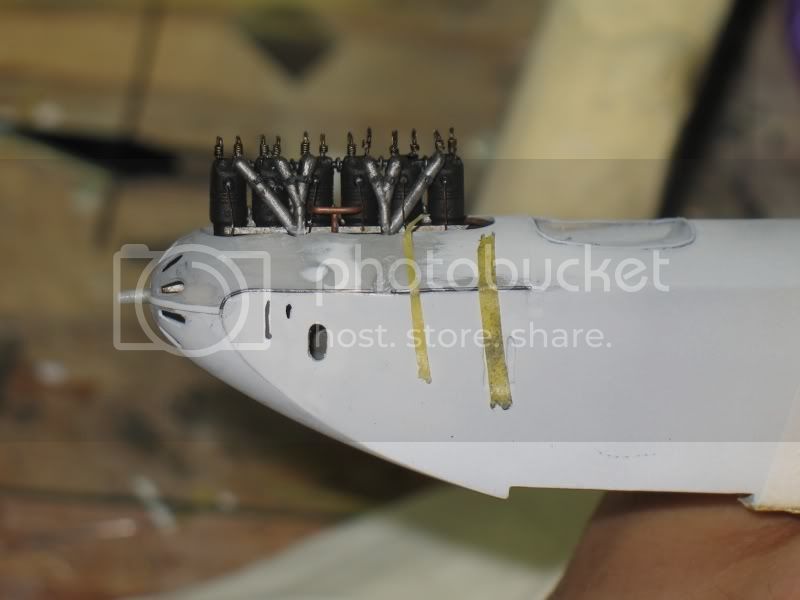
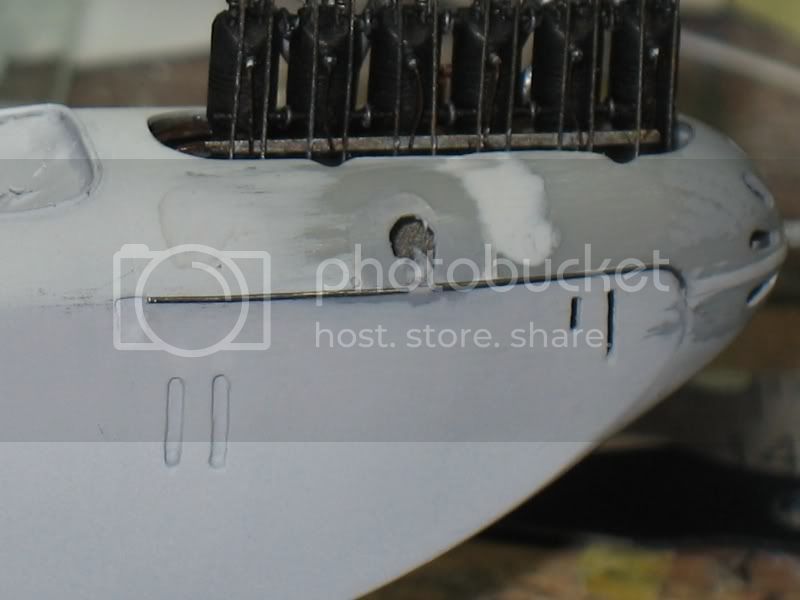

Regards.
Leather protection is made with a lead wire


I can not make a proper seal as I had expected. So I have to stick the engine immediately.
I already damaged by sanding ...


The indentation are added for the two pipes. On the other side there too. Two pipes seem to come through these holes.

The gap between the two covers is hidden by a plastic strip

I finnished the edge of the hood:
A lead wire ( bottom) is rolled under a reglet iron on a glass plate. I made it thinner (at the beginning 3cm, 4cm after elongation) and pointed (top).

It is placed on the pieces of tape.

I glued below the lead wire so we can not see the traces of glue.


Regards.

JackFlash

Joined: January 25, 2004
KitMaker: 11,669 posts
AeroScale: 11,011 posts

Posted: Wednesday, December 26, 2012 - 02:52 AM UTC
Very decent work Louis. Simple but effective.

Louis

Joined: May 21, 2006
KitMaker: 472 posts
AeroScale: 471 posts

Posted: Thursday, December 27, 2012 - 11:39 AM UTC
Thanks,
wings are glued but joints are "catastrophic". A plastic plate cover all
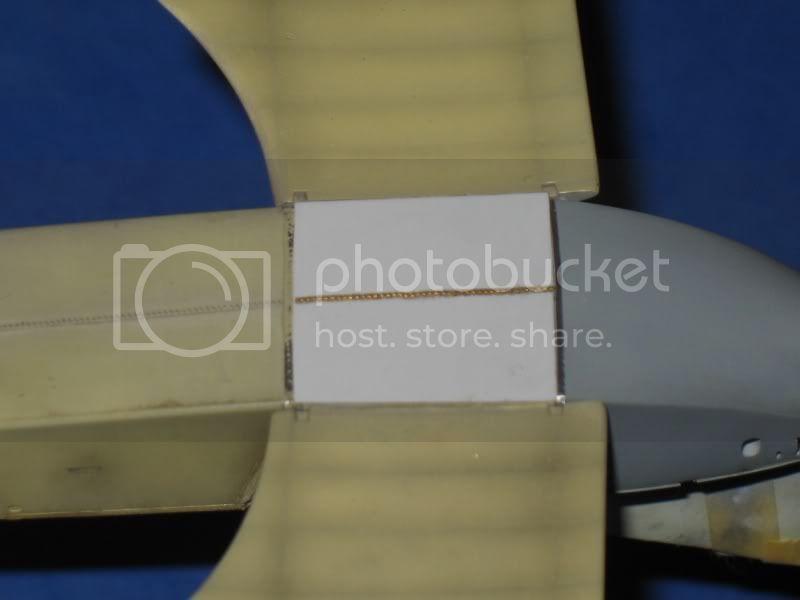
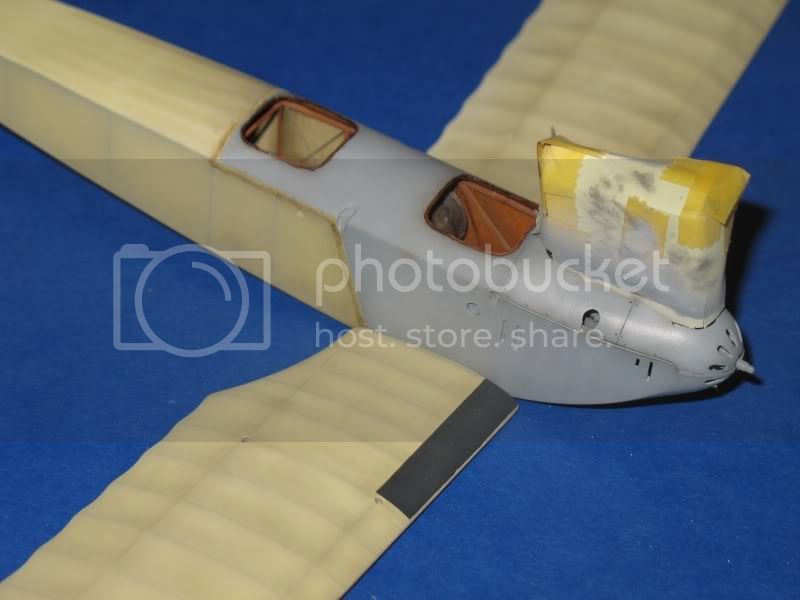
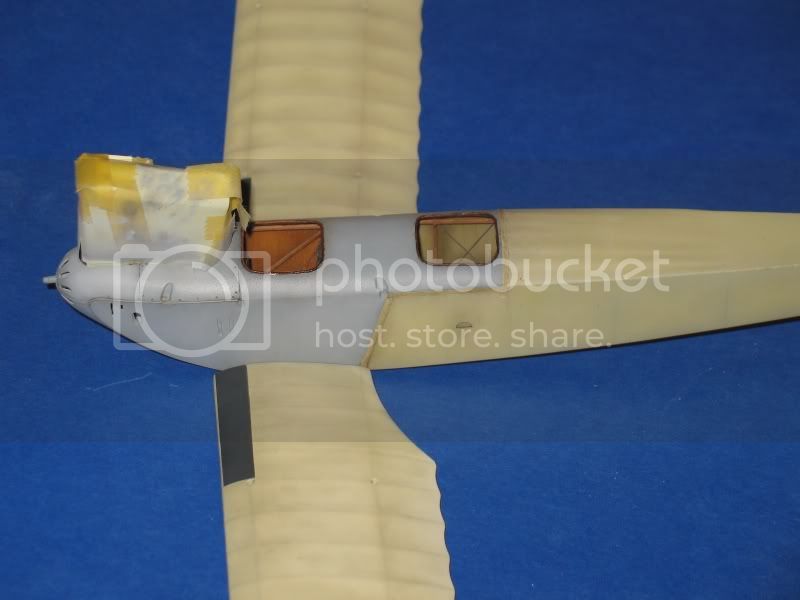
There is a big window under the nose of the aircraft. I just see the pictures .... I probably cut off.
Regards
wings are glued but joints are "catastrophic". A plastic plate cover all


There is a big window under the nose of the aircraft. I just see the pictures .... I probably cut off.
Regards

Louis

Joined: May 21, 2006
KitMaker: 472 posts
AeroScale: 471 posts

Posted: Saturday, December 29, 2012 - 04:59 AM UTC
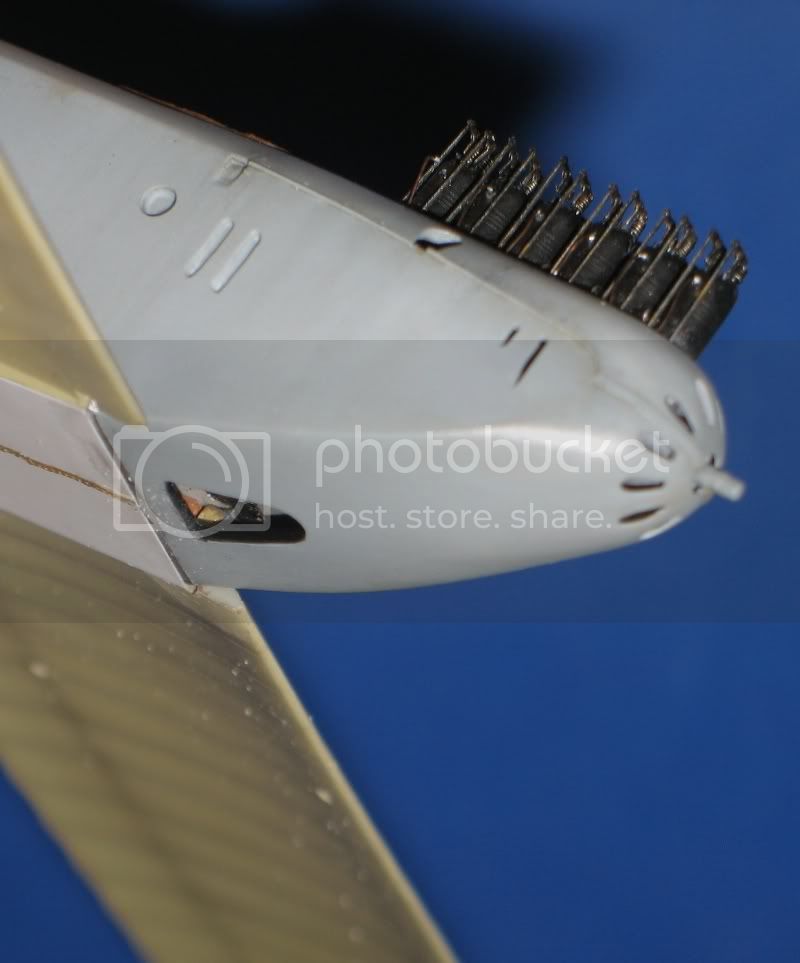
Two photos: the window below an airplane and the same plane out of the water.
look at the first 1/3 of the page...
http://pommerschespionier.com/index.php/collection/various/history-from-zeebrugge/
Regards.

strongarden

Joined: May 14, 2012
KitMaker: 730 posts
AeroScale: 15 posts

Posted: Saturday, December 29, 2012 - 05:55 AM UTC
Just discovered this build log...
Following w/ interest Louis you are doing a tremendous job. Excellent WIP pics and descriptions - Thank You!
Dave
Following w/ interest Louis you are doing a tremendous job. Excellent WIP pics and descriptions - Thank You!
Dave

RYSZARD

Joined: August 21, 2010
KitMaker: 486 posts
AeroScale: 485 posts

Posted: Sunday, January 06, 2013 - 07:13 AM UTC
Super! job, congratulations
I'm impressed!


Especially since this is not the best model
I'm impressed!


Especially since this is not the best model

GhostHawk

Joined: January 27, 2011
KitMaker: 268 posts
AeroScale: 264 posts

Posted: Sunday, January 06, 2013 - 11:46 AM UTC
Hello,
Very enjoiable post...!!!
Another teaching experience...
Thanks
Diego
Very enjoiable post...!!!

Another teaching experience...

Thanks
Diego

warreni

Joined: August 14, 2007
KitMaker: 5,926 posts
AeroScale: 2,201 posts

Posted: Sunday, January 06, 2013 - 12:47 PM UTC
Hi Loius.
You are doing a fantastic job on a bit of a rough kit.
I am hoping for my sake that WNW bring out one in 1/32 scale.
Cheers mate
Warren
You are doing a fantastic job on a bit of a rough kit.
I am hoping for my sake that WNW bring out one in 1/32 scale.

Cheers mate
Warren

Louis

Joined: May 21, 2006
KitMaker: 472 posts
AeroScale: 471 posts

Posted: Wednesday, February 27, 2013 - 09:43 PM UTC
Hi,
Thank you for your nice words.
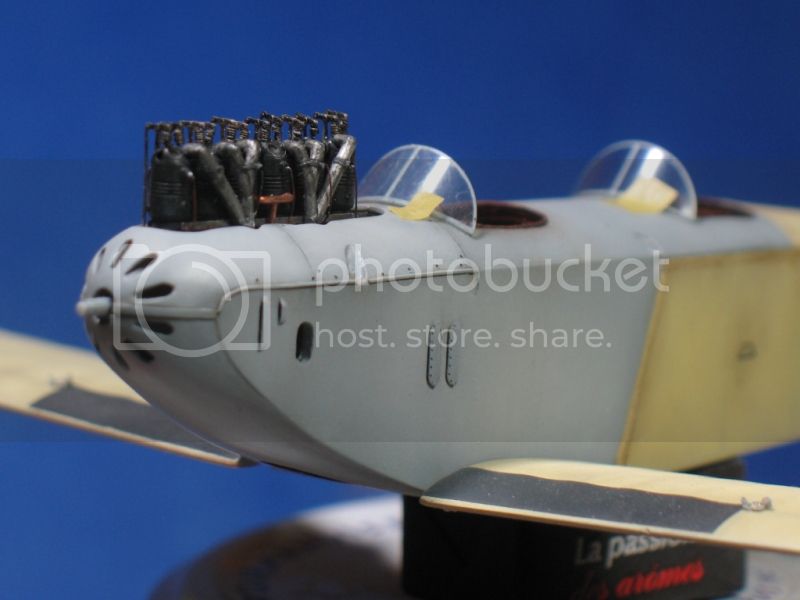
So ... all the painting is finished, the air intake are glued, the propeller painted and all the mats ready to be installed.
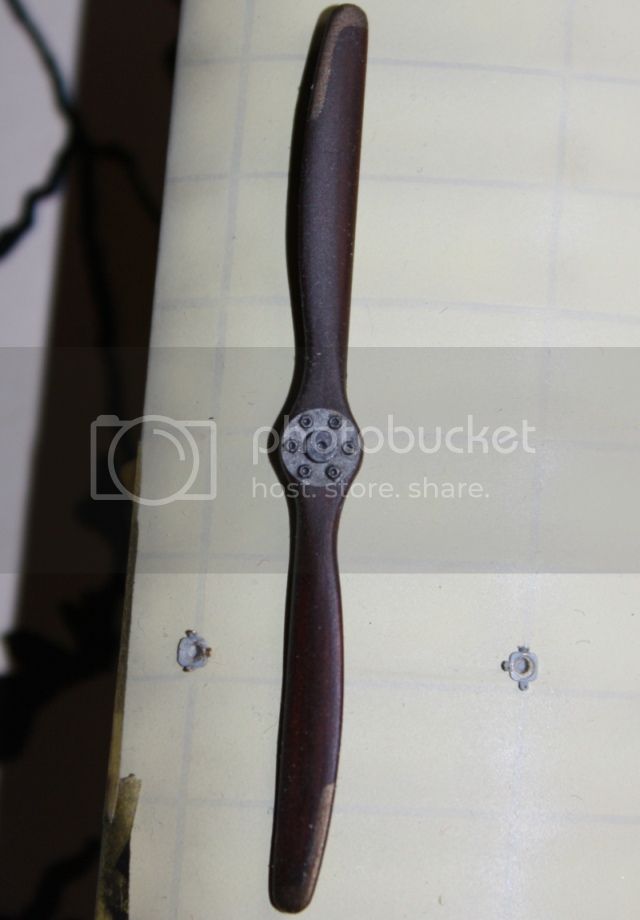
But first I must paint the cross, and of course they are different from TECHMOD:
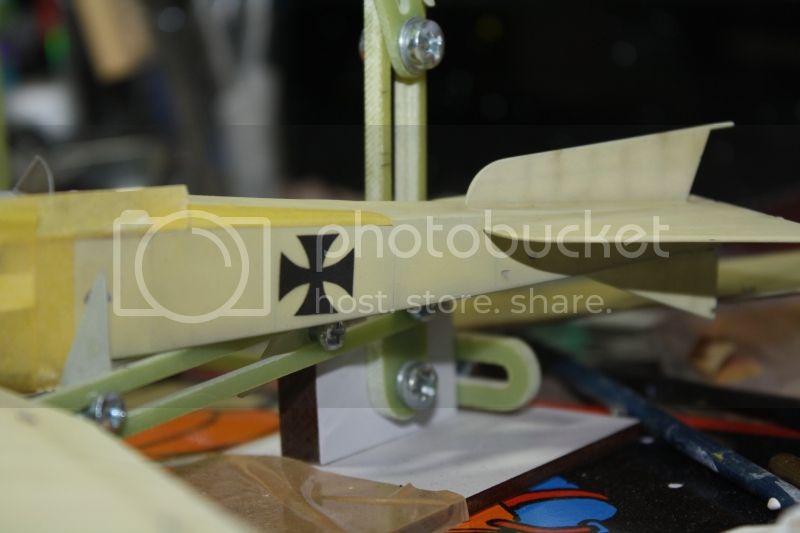
So I made a stencil.
Then two big 884 on each side.
I do not have 884 decal!
Stencil I did not succeed.
So I decided to use decals to print with my new Samsung clp320 laser.
I ordered decals "bare metal" and I receives Holi (which is brand new Bare metal it seems). I spend many hours on my PC to do a beautiful 884 (Inkscape freeware).

The printer is configured to "Thick Paper" and .......... my beautiful sheet (6euros anyway) is destroyed in the printer. It remains blocked, I think, it began to melt ....
3 hours to remove it!
If someone has some experience in the matter I am ready to listen to his advice.
There is no explanations from HOLI to configure the printer, no printer settings, not thick paper, no instructions for the printer to use or not use.
I'll try stencils ...
The window is placed:
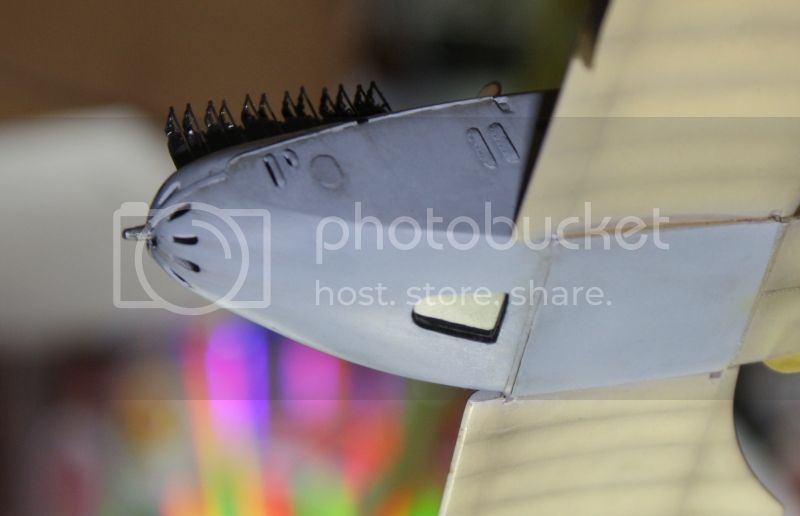
Part of footboard with flattened lead wire:
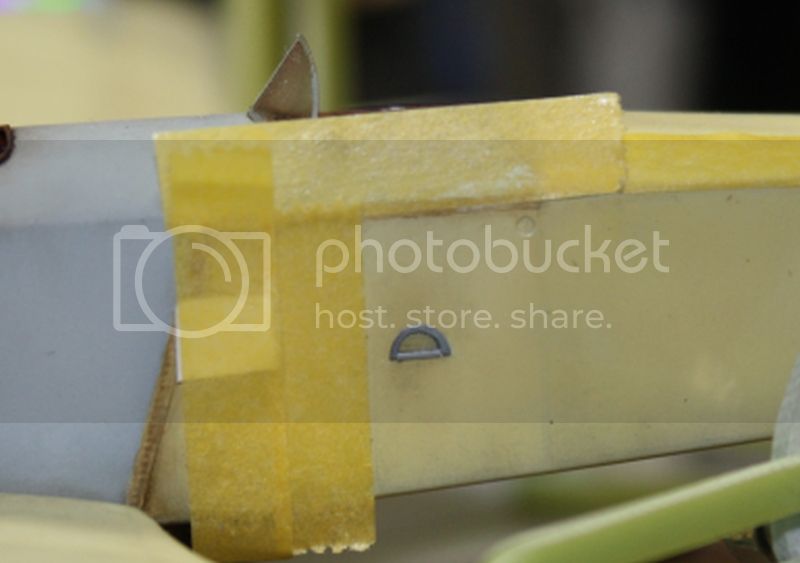
The windshield is made with plastic. I used photoetched as a guide to cut caches to paint the uprights.
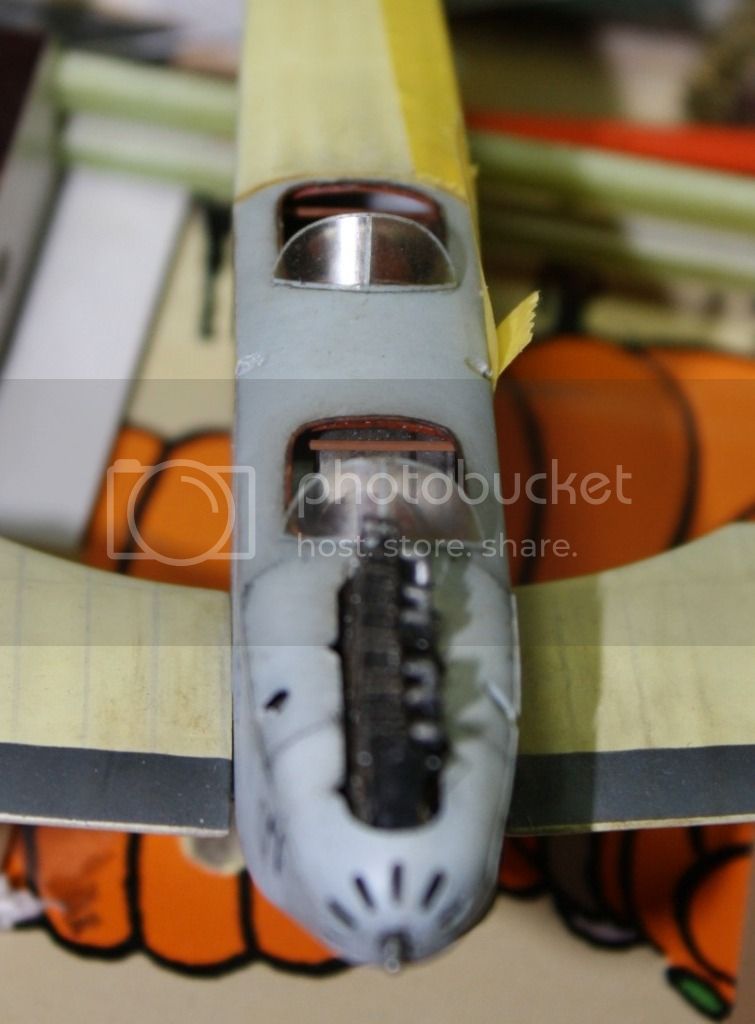
Regards.
Thank you for your nice words.

So ... all the painting is finished, the air intake are glued, the propeller painted and all the mats ready to be installed.

But first I must paint the cross, and of course they are different from TECHMOD:

So I made a stencil.
Then two big 884 on each side.
I do not have 884 decal!
Stencil I did not succeed.
So I decided to use decals to print with my new Samsung clp320 laser.
I ordered decals "bare metal" and I receives Holi (which is brand new Bare metal it seems). I spend many hours on my PC to do a beautiful 884 (Inkscape freeware).

The printer is configured to "Thick Paper" and .......... my beautiful sheet (6euros anyway) is destroyed in the printer. It remains blocked, I think, it began to melt ....
3 hours to remove it!
If someone has some experience in the matter I am ready to listen to his advice.
There is no explanations from HOLI to configure the printer, no printer settings, not thick paper, no instructions for the printer to use or not use.
I'll try stencils ...
The window is placed:

Part of footboard with flattened lead wire:

The windshield is made with plastic. I used photoetched as a guide to cut caches to paint the uprights.

Regards.

Louis

Joined: May 21, 2006
KitMaker: 472 posts
AeroScale: 471 posts

Posted: Thursday, February 28, 2013 - 04:45 AM UTC
I finished my stencils. 8 was a real real nightmare.
The 4 ....easy.
I must finish with a brush
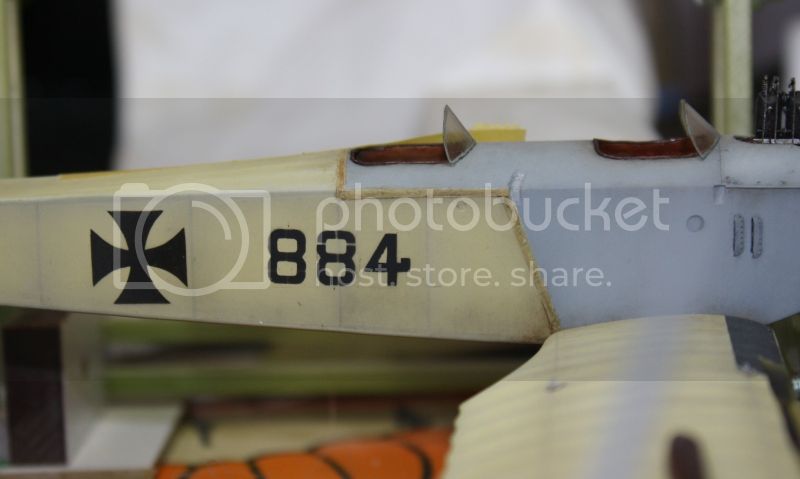
This is almost what I wanted
Regards.
The 4 ....easy.
I must finish with a brush

This is almost what I wanted
Regards.
RYSZARD

Joined: August 21, 2010
KitMaker: 486 posts
AeroScale: 485 posts

Posted: Thursday, February 28, 2013 - 06:36 AM UTC
SUPER!!!! 


Jessie_C


Joined: September 03, 2009
KitMaker: 6,965 posts
AeroScale: 6,247 posts

Posted: Thursday, February 28, 2013 - 08:33 AM UTC
Quoted Text
So I decided to use decals to print with my new Samsung clp320 laser.
I ordered decals "bare metal" and I receives Holi (which is brand new Bare metal it seems). I spend many hours on my PC to do a beautiful 884 (Inkscape freeware).
The printer is configured to "Thick Paper" and .......... my beautiful sheet (6euros anyway) is destroyed in the printer. It remains blocked, I think, it began to melt ....
Could it have perhaps been inkjet paper? There are decal papers made for laser printers. You have to be careful to get the right ones, as you found out

Your recovery from adversity is fantastic. Many people would have given up...

Louis

Joined: May 21, 2006
KitMaker: 472 posts
AeroScale: 471 posts

Posted: Thursday, February 28, 2013 - 09:54 AM UTC
Quoted Text
Could it have perhaps been inkjet paper? There are decal papers made for laser printers. You have to be careful to get the right ones, as you found out
Your recovery from adversity is fantastic. Many people would have given up...
Thank you Terri.
It was laser printer paper. Maybe he did not melt .... In any case, the instructions should be improved. It is expensive laser printers...
Regards.

Louis

Joined: May 21, 2006
KitMaker: 472 posts
AeroScale: 471 posts

Posted: Thursday, February 28, 2013 - 10:17 AM UTC
8 parts for the stencil. For the central part remains well placed I made of plastic. The tape is not accurate enough.
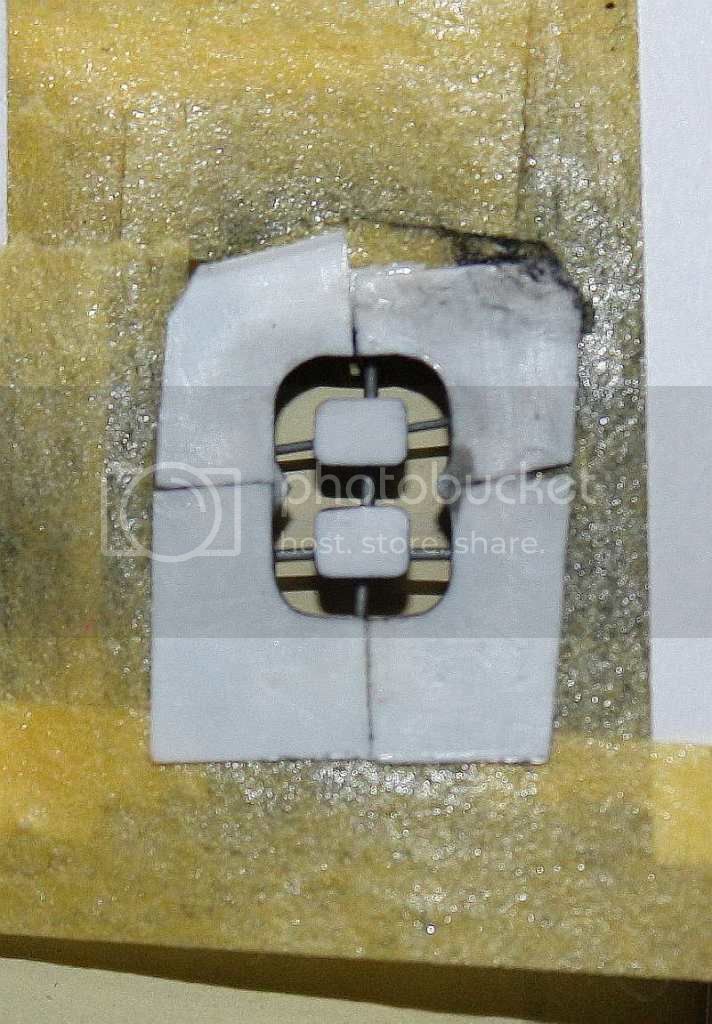
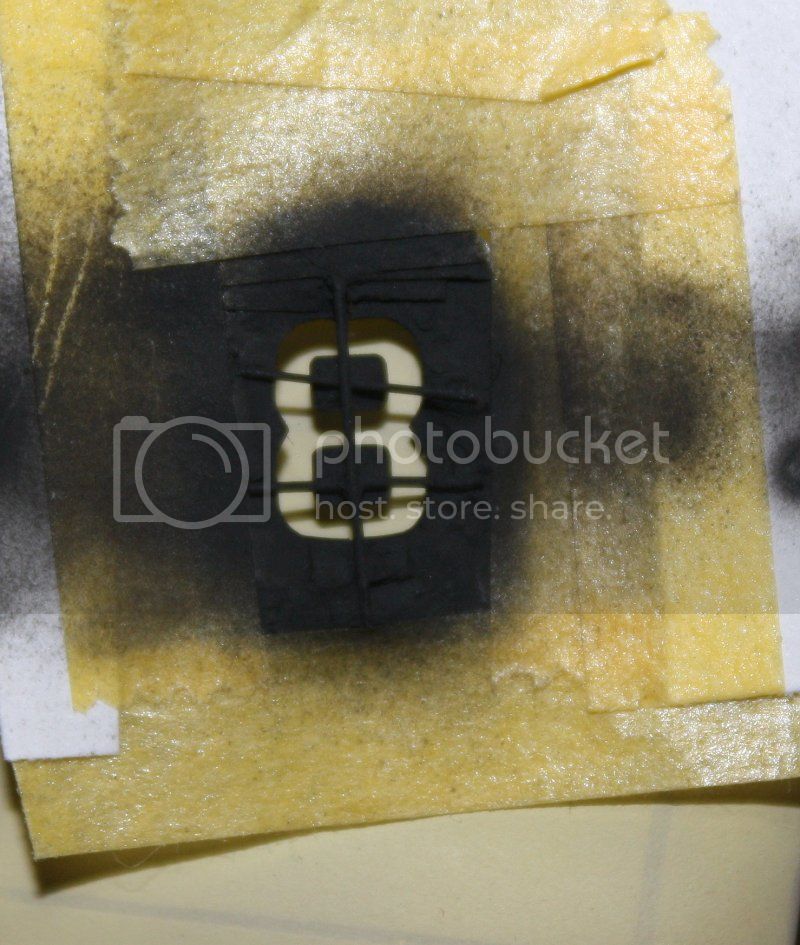
Regards


Regards
BoRoss78

Joined: February 28, 2013
KitMaker: 36 posts
AeroScale: 36 posts

Posted: Thursday, February 28, 2013 - 11:13 AM UTC
First post. Man, have I got a lot to learn.

Louis

Joined: May 21, 2006
KitMaker: 472 posts
AeroScale: 471 posts

Posted: Monday, December 30, 2013 - 11:21 AM UTC
Hi ,
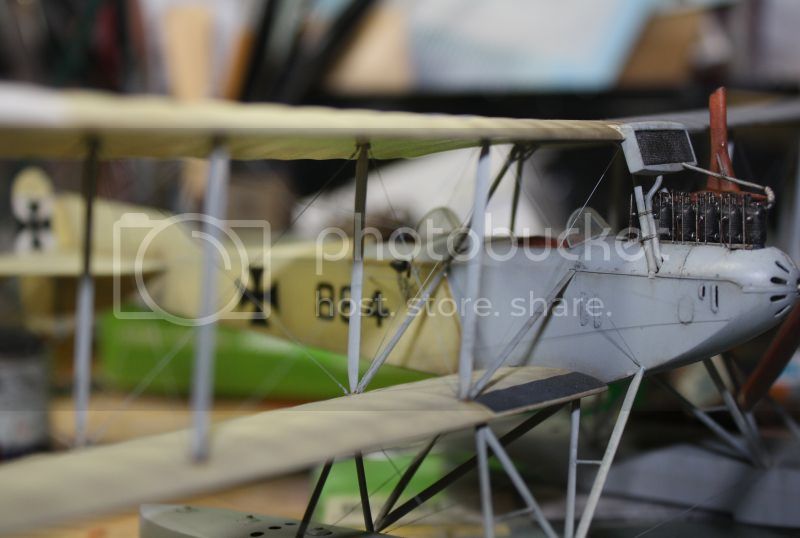
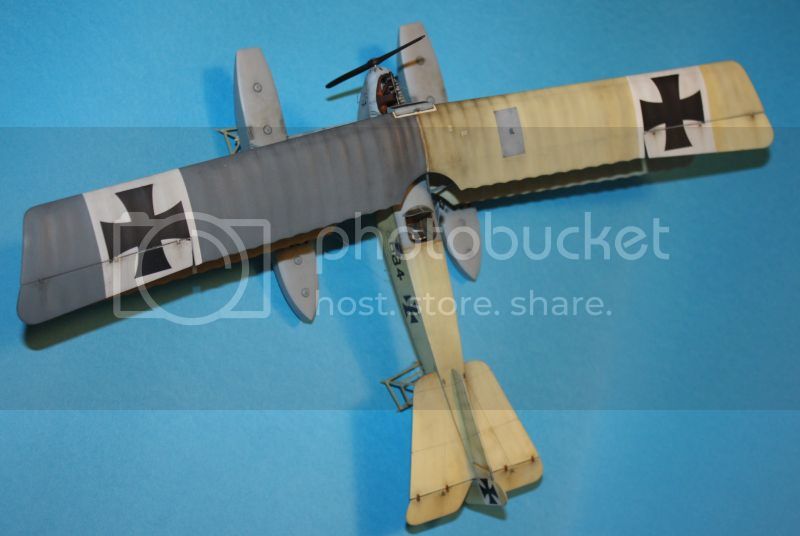
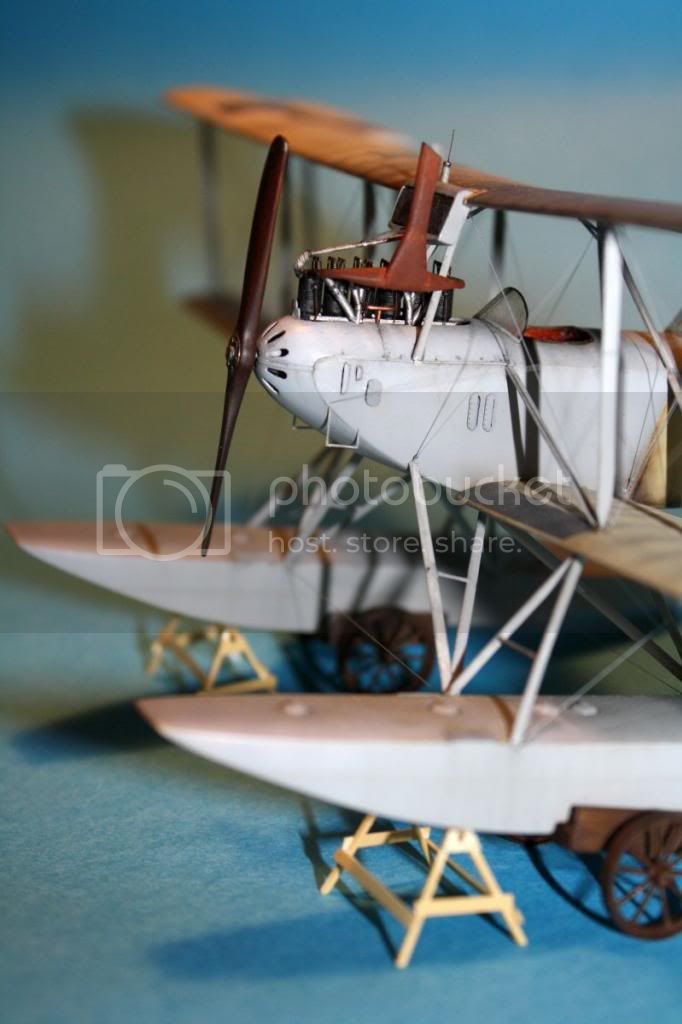
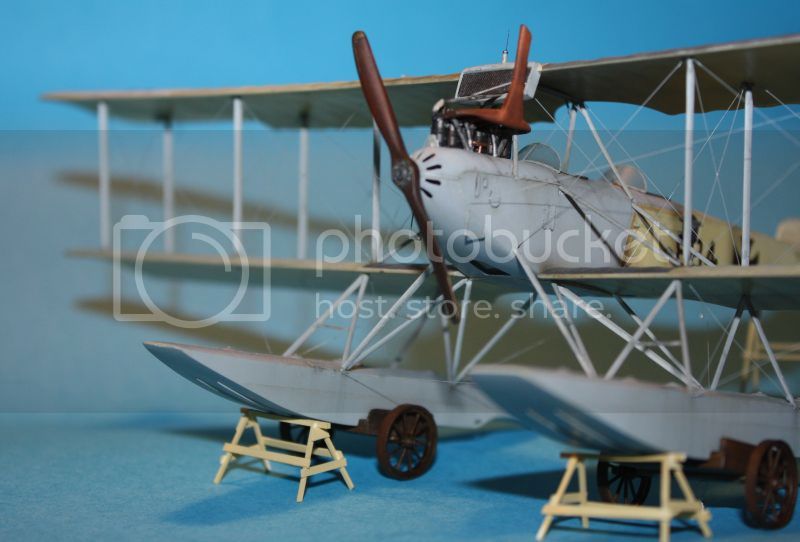
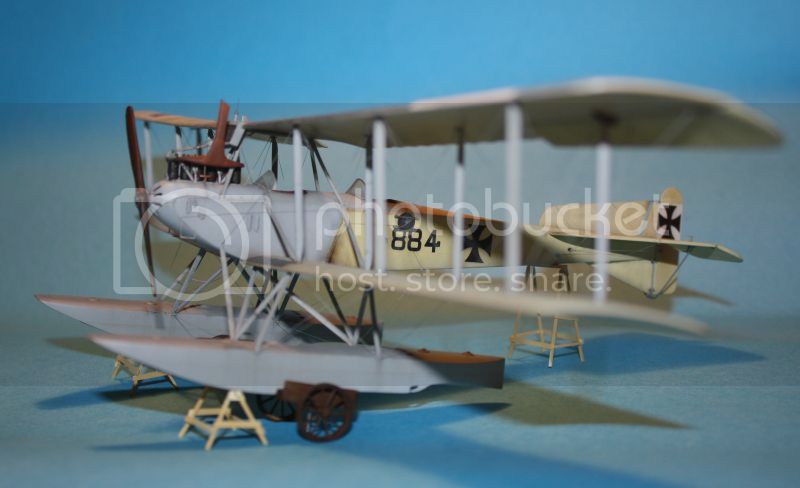
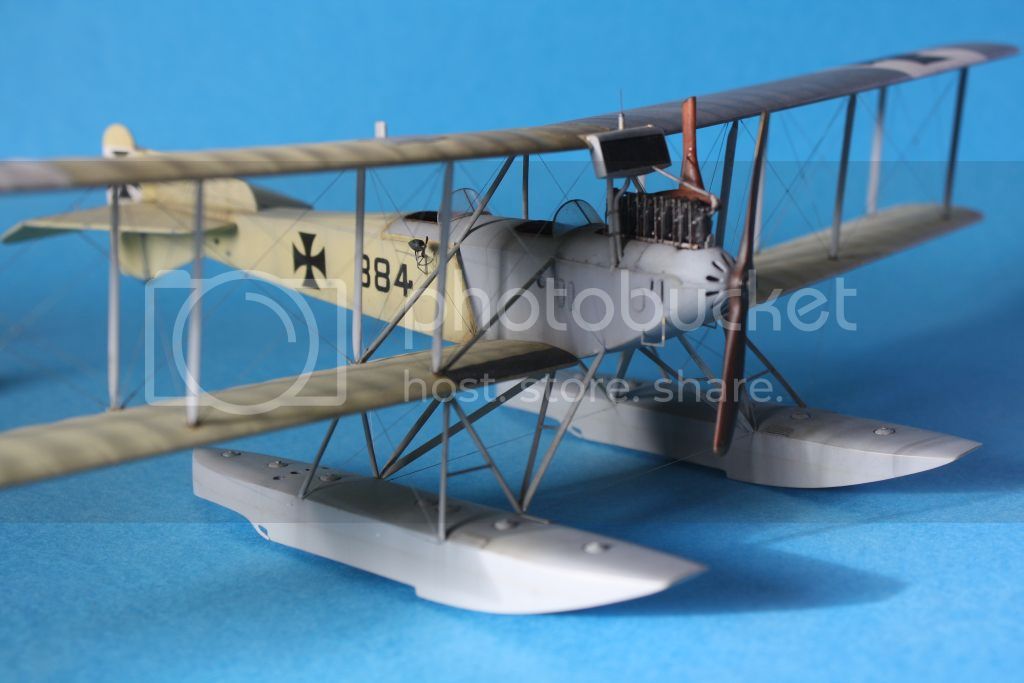
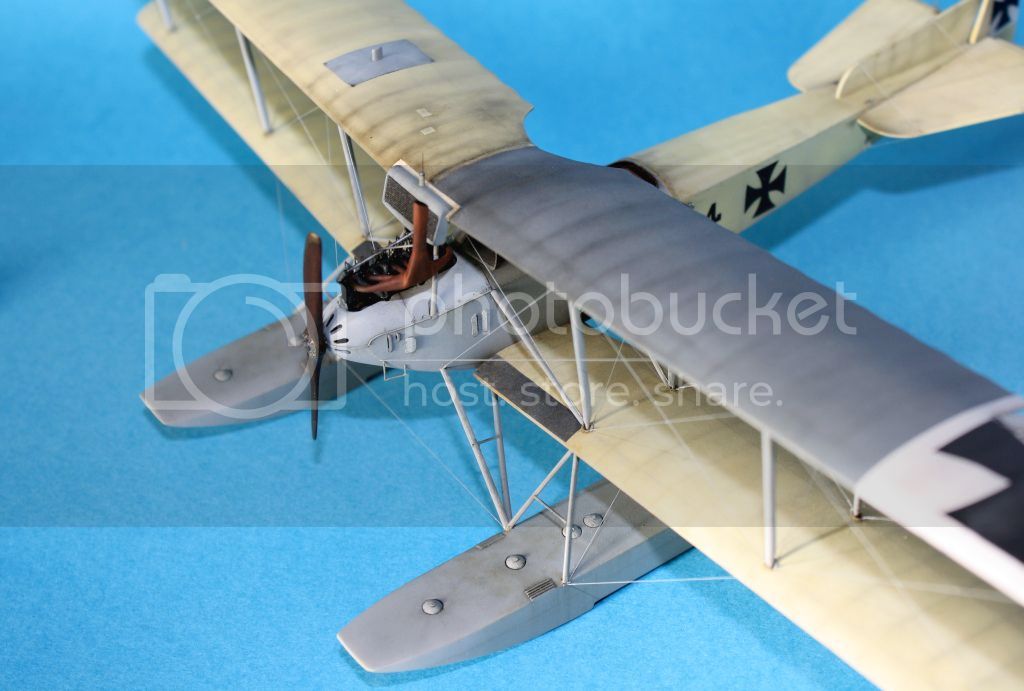
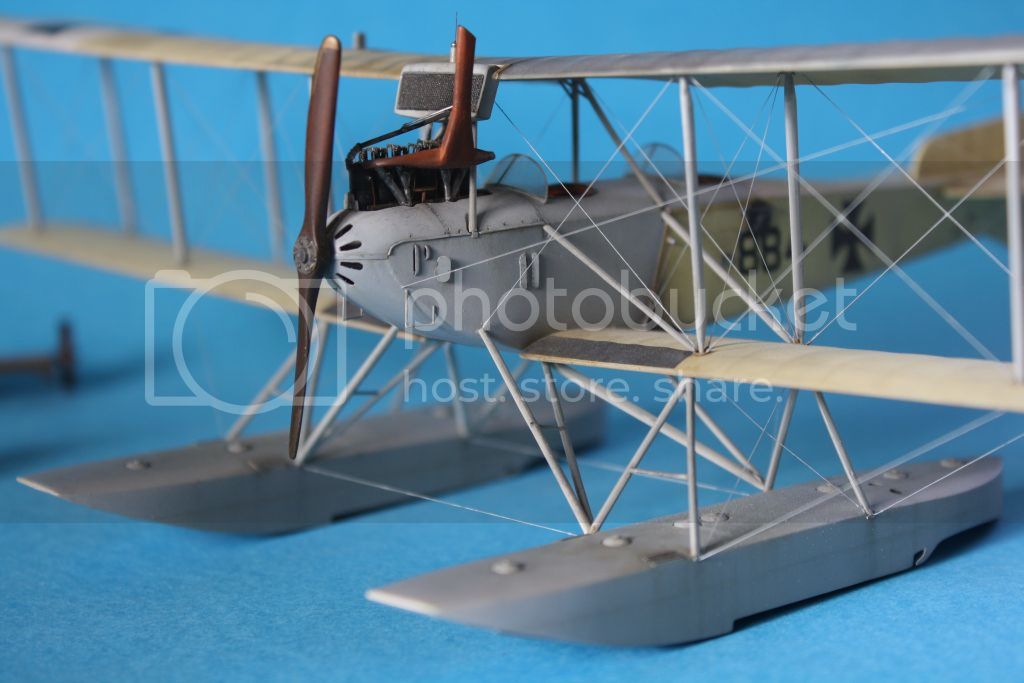
this is it! She is finished !
- The upper wing : it is my opinion too high pitched . Radiator almost touches the top of the engine actually ...
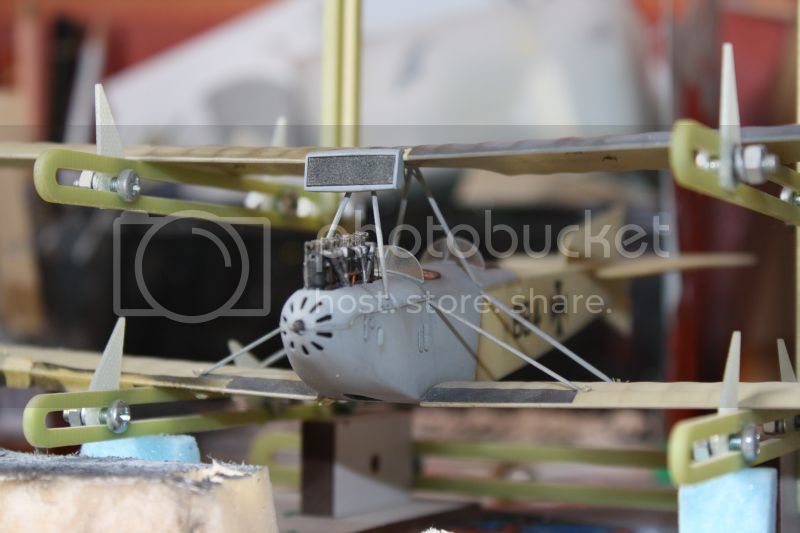
Should be this:
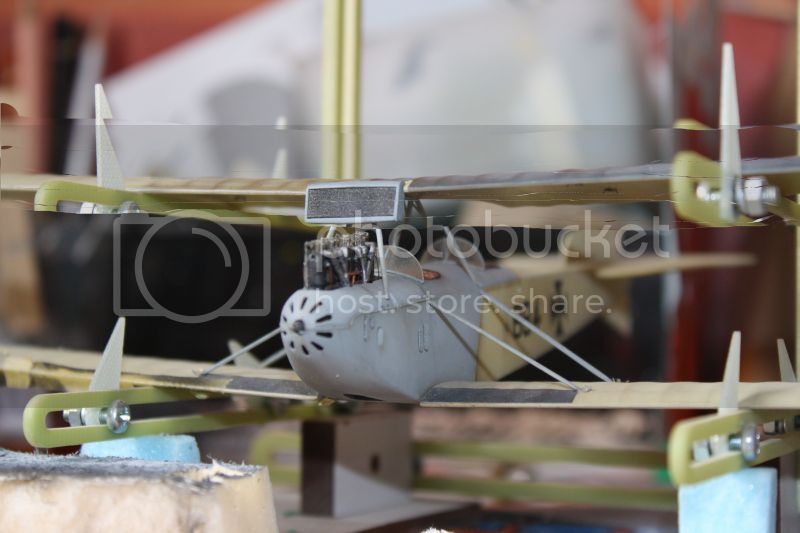
So I cut the mats around 2mm .
I redid the radiator to match the model better represented . I get this:
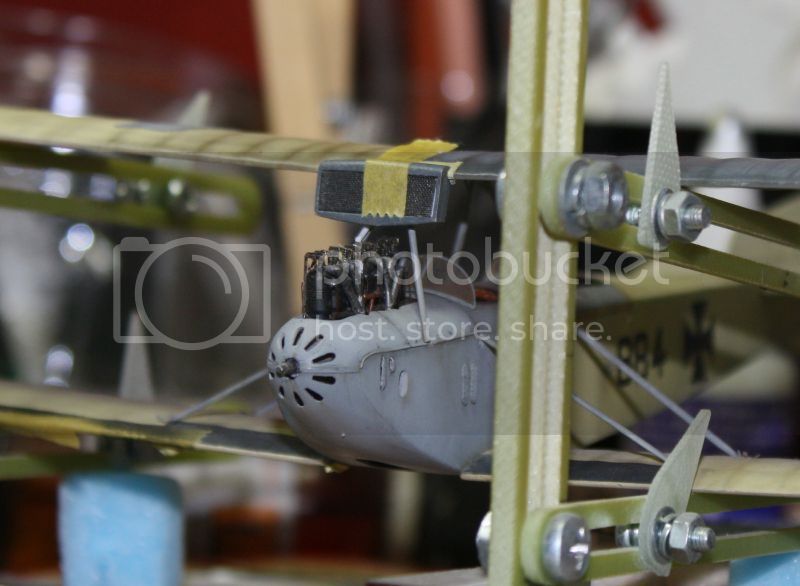
It's better .
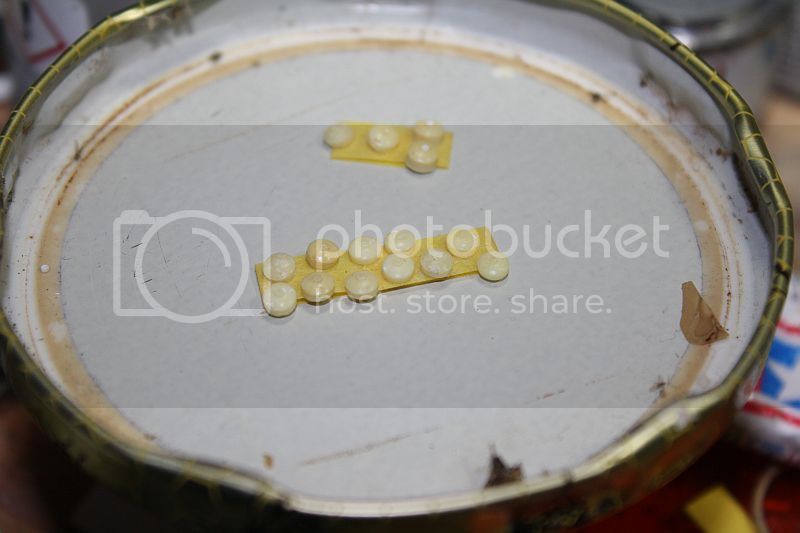
- "Plugs" floats are ready to paint . There are only 14 , very small and slippery ...
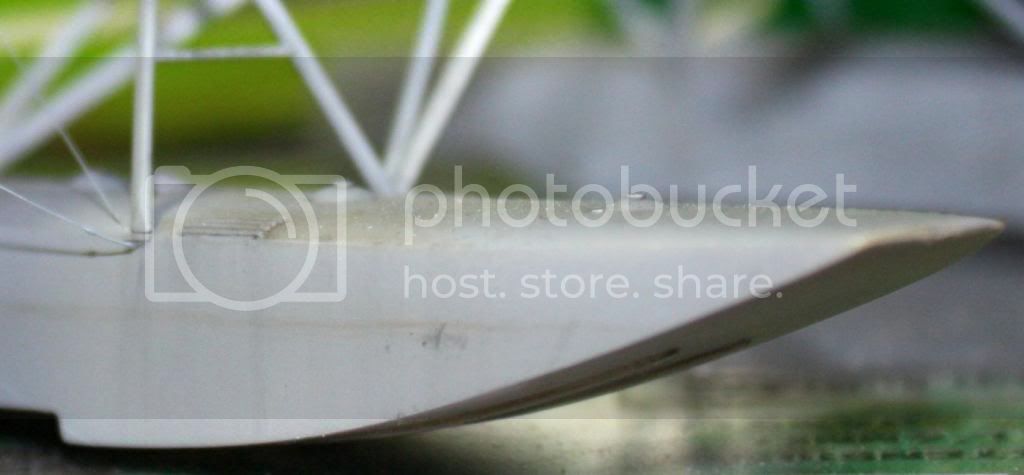
- The float are weathered with black oil paint ( vertical streaks ) and brown ink diluted to the mark at the waterline. I used a guide Tamiya tape so that it is perfectly horizontal .
Glued the floats is not simple. Only two mats inverted V ( fender mounted ) are used . All others are much too short. So I remade some of the mats in the evergreen rod. The longer the kit are used for shorter again (it's not clear ?) . So I redid the half mats .
- The little dynamo kit is oval and has not the right shape . It is turned on a plastic part . If you do not have to turn my first test was done with a rocket and suited me perfectly. It has unfortunately disappeared... On the board PART support was provided, also disappeared with the first dynamo.
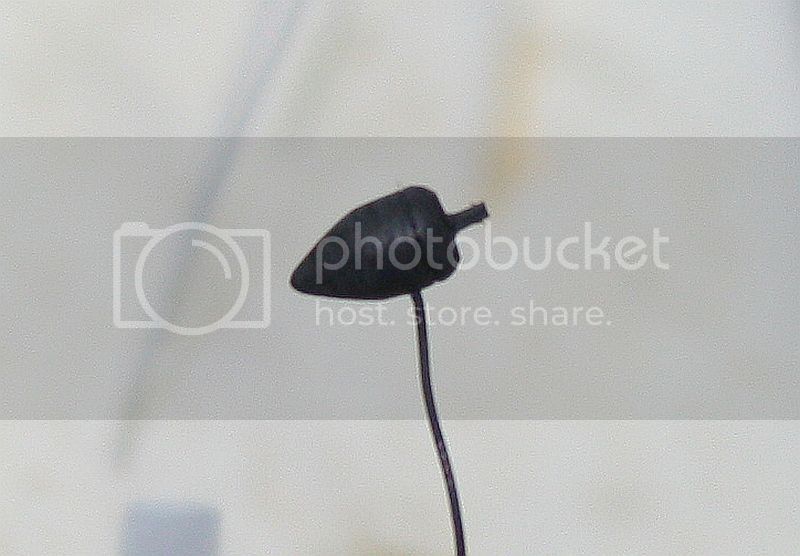
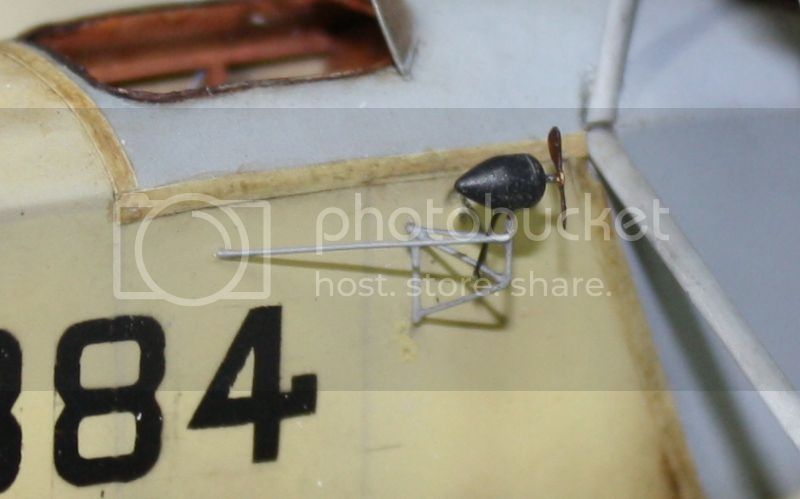
It remains too small ( approx 2.5mm diameter) but I think she likes me. The propeller is from PART.
- The support is made of copper wire bonded.
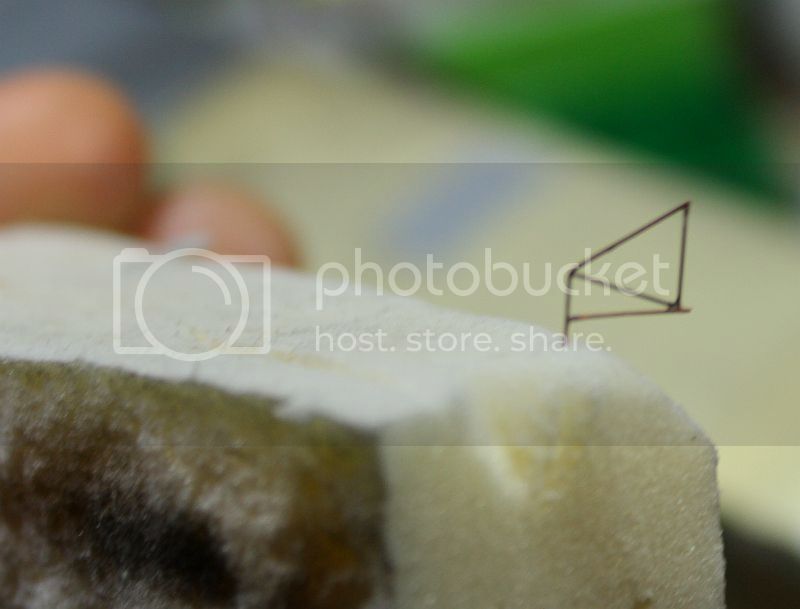
Cable out of the dynamo and enters the cockpit through a small hole
- The radiator is set up with all the accessories. I lose of course a pushrod ...
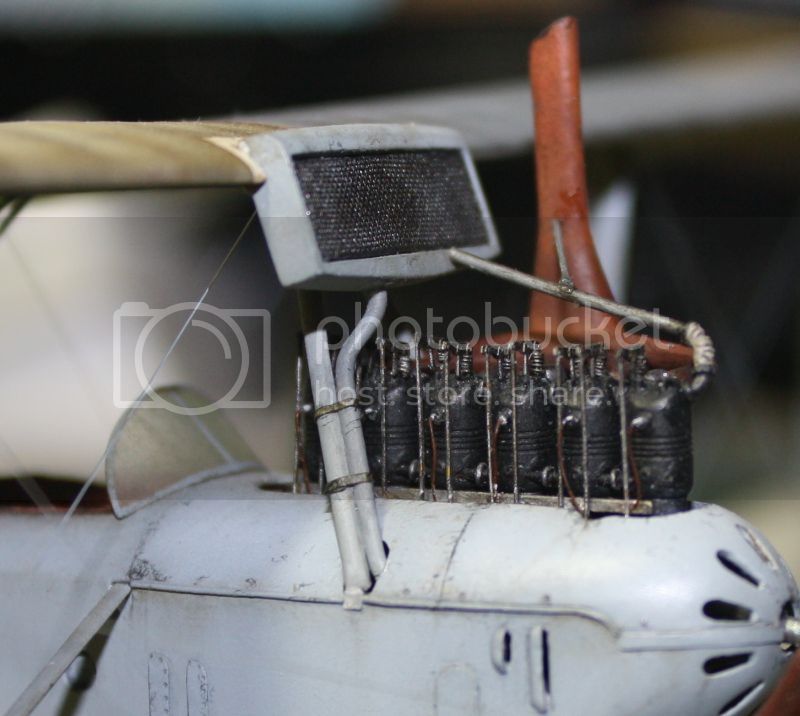
At the rear of the engine, it probably lacks a hose that brings the liquid to the radiator but I do not see any picture on time.
The exhaust is painted dark brown and weathered with matte varnish mixed with pigments MIG.
- For the rest nothing special tensioning wire nylon 4/10 , there are many. Hot glued and stretched .
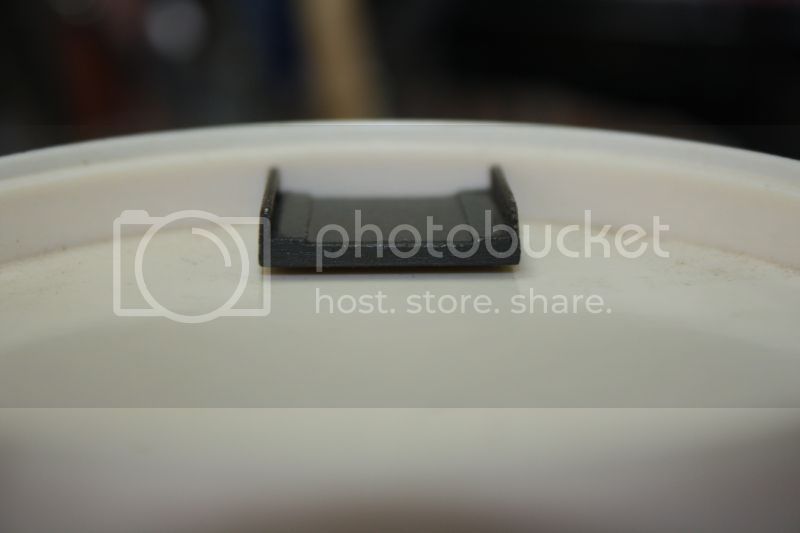
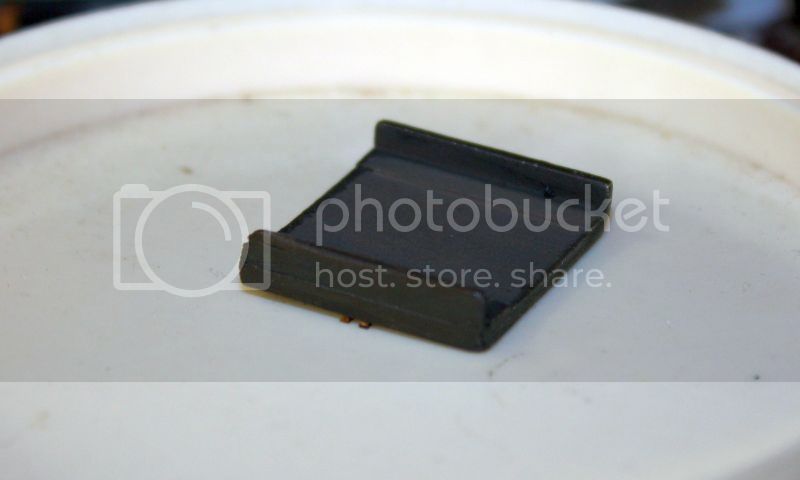

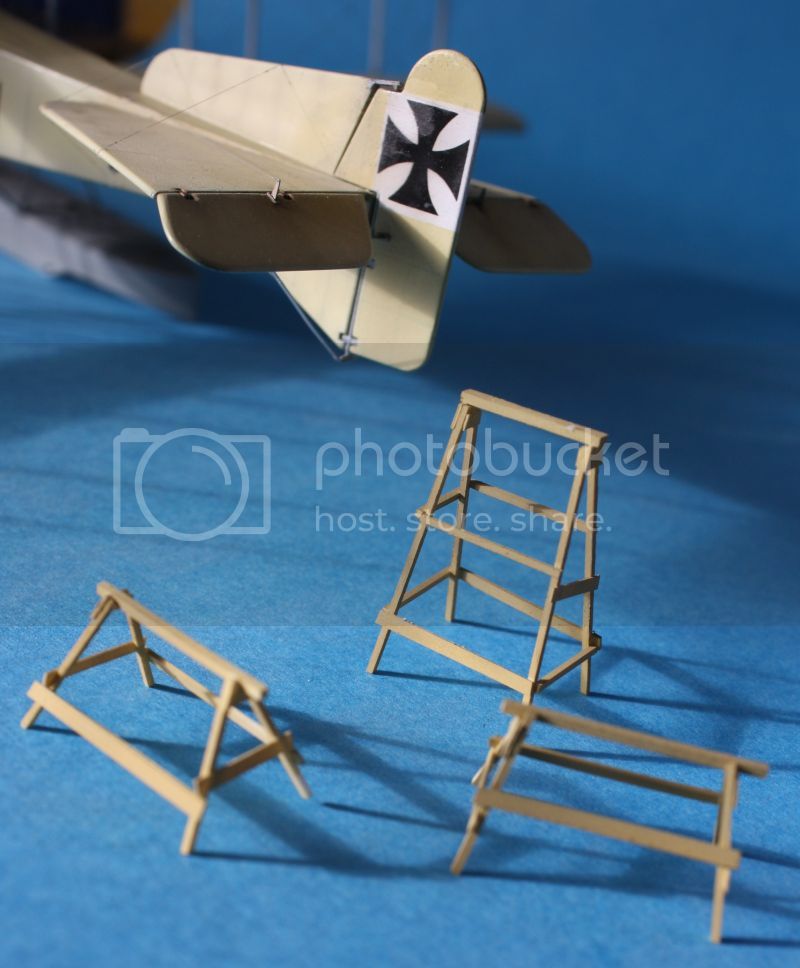
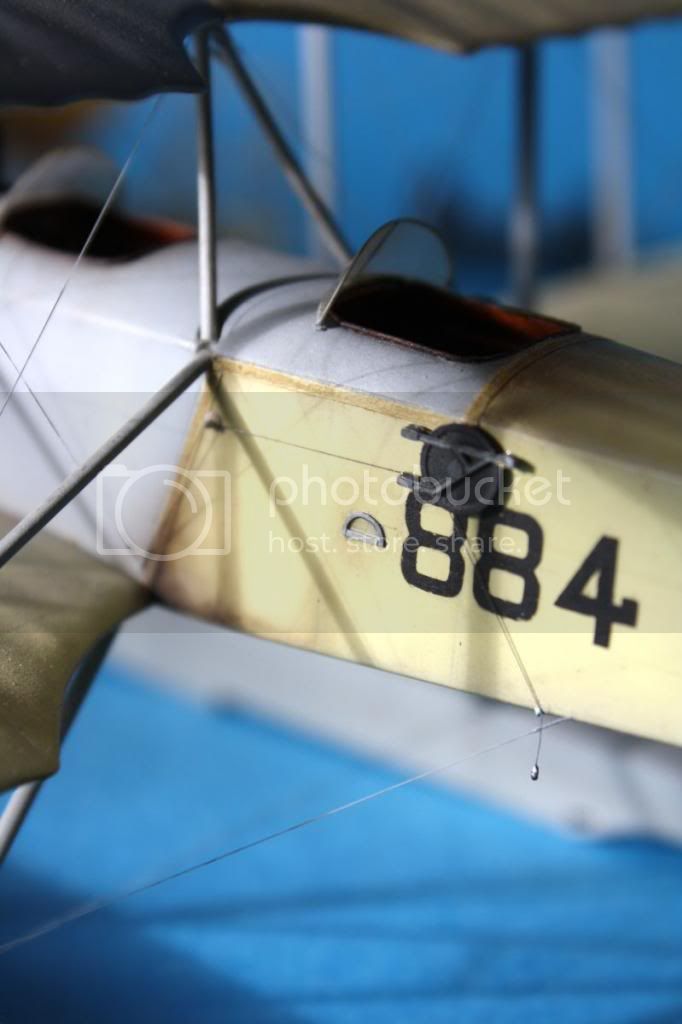
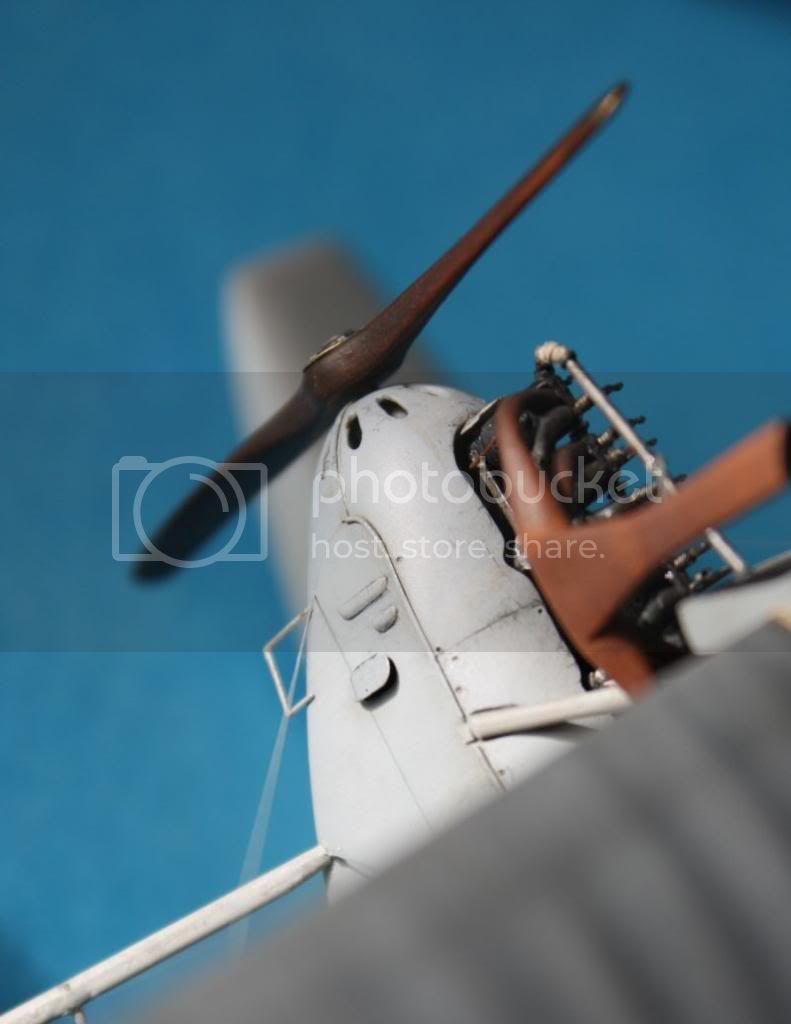
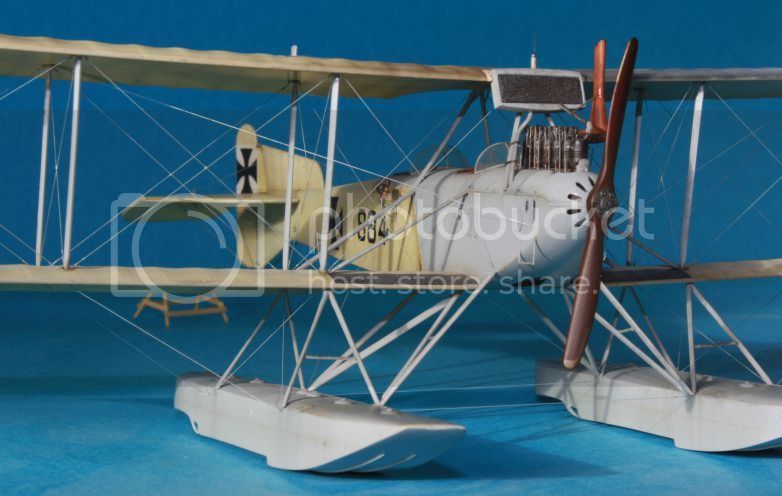
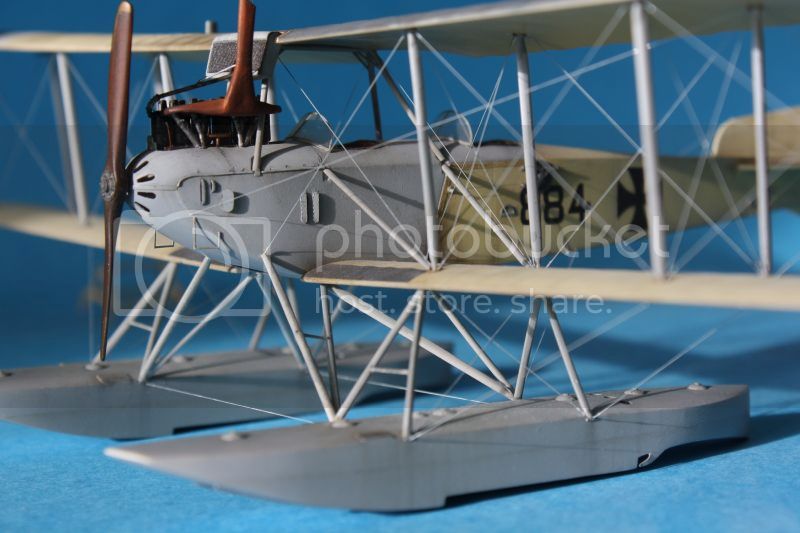
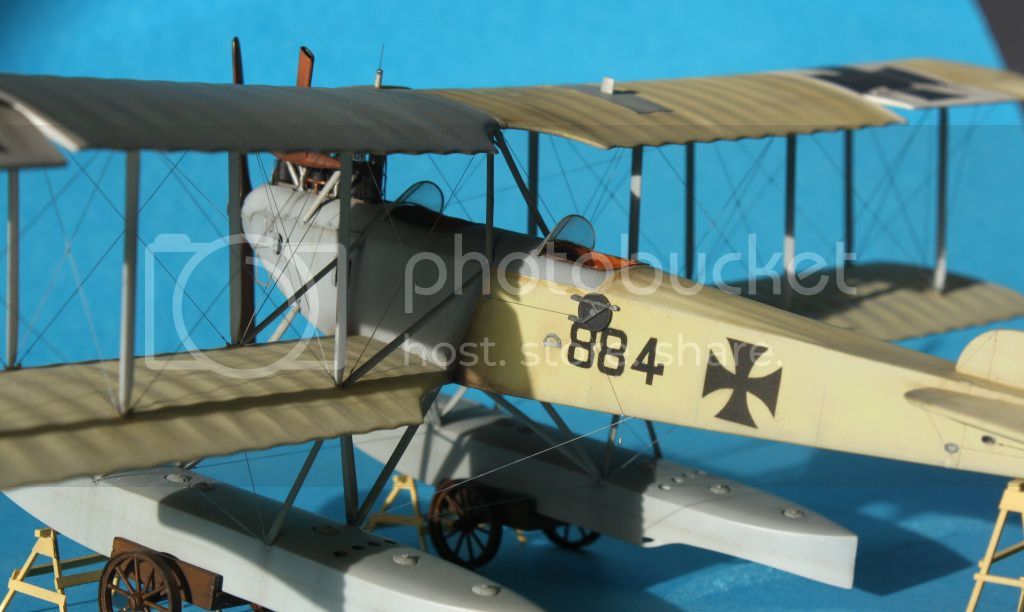
Best regards and happy new year !
Le même montage en français:
http://www.master194.com/forum/viewtopic.php?f=4&t=69004
this is it! She is finished !
- The upper wing : it is my opinion too high pitched . Radiator almost touches the top of the engine actually ...

Should be this:

So I cut the mats around 2mm .
I redid the radiator to match the model better represented . I get this:

It's better .
- "Plugs" floats are ready to paint . There are only 14 , very small and slippery ...

- The float are weathered with black oil paint ( vertical streaks ) and brown ink diluted to the mark at the waterline. I used a guide Tamiya tape so that it is perfectly horizontal .

Glued the floats is not simple. Only two mats inverted V ( fender mounted ) are used . All others are much too short. So I remade some of the mats in the evergreen rod. The longer the kit are used for shorter again (it's not clear ?) . So I redid the half mats .
- The little dynamo kit is oval and has not the right shape . It is turned on a plastic part . If you do not have to turn my first test was done with a rocket and suited me perfectly. It has unfortunately disappeared... On the board PART support was provided, also disappeared with the first dynamo.


It remains too small ( approx 2.5mm diameter) but I think she likes me. The propeller is from PART.
- The support is made of copper wire bonded.

Cable out of the dynamo and enters the cockpit through a small hole
- The radiator is set up with all the accessories. I lose of course a pushrod ...

At the rear of the engine, it probably lacks a hose that brings the liquid to the radiator but I do not see any picture on time.
The exhaust is painted dark brown and weathered with matte varnish mixed with pigments MIG.
- For the rest nothing special tensioning wire nylon 4/10 , there are many. Hot glued and stretched .


Best regards and happy new year !
Le même montage en français:
http://www.master194.com/forum/viewtopic.php?f=4&t=69004

JackFlash

Joined: January 25, 2004
KitMaker: 11,669 posts
AeroScale: 11,011 posts

Posted: Monday, December 30, 2013 - 11:36 AM UTC
Beautiful Louis! And I don't say that often. You are a steely-eyed modeler!

GhostHawk

Joined: January 27, 2011
KitMaker: 268 posts
AeroScale: 264 posts

Posted: Monday, December 30, 2013 - 12:29 PM UTC
Hi...!
Really nice model...! Congrats...!!!
Diego
Really nice model...! Congrats...!!!

Diego


Jessie_C


Joined: September 03, 2009
KitMaker: 6,965 posts
AeroScale: 6,247 posts

Posted: Monday, December 30, 2013 - 01:37 PM UTC
After watching this build I think I'm just going to hide my box on the back of the shelf. This is modelling at its very best and this deserves a place on the front page. Are you willing to send in the pictures for a feature article?
thegirl

Joined: January 19, 2008
KitMaker: 6,743 posts
AeroScale: 6,151 posts

Posted: Monday, December 30, 2013 - 02:45 PM UTC
Your best to date Louis ! Congrats on a truly outstanding build 
Terri

Terri
Posted: Monday, December 30, 2013 - 03:41 PM UTC
Louis,
I am simply amazed with your work! That engine is a model in itself - fascinating! My sincere compliments on your excellent model!
The FF-33E -- such a graceful design.


I am simply amazed with your work! That engine is a model in itself - fascinating! My sincere compliments on your excellent model!
The FF-33E -- such a graceful design.


Louis

Joined: May 21, 2006
KitMaker: 472 posts
AeroScale: 471 posts

Posted: Monday, December 30, 2013 - 08:28 PM UTC
Thank you very much.
I will send pictures for a feature article.... next year.
Regards.
Louis
I will send pictures for a feature article.... next year.
Regards.
Louis

OEFFAG_153

Joined: February 19, 2010
KitMaker: 1,473 posts
AeroScale: 1,450 posts

Posted: Monday, December 30, 2013 - 10:36 PM UTC
Beautiful build Louis, Congratulations on finishing!
Mikael
Mikael

Louis

Joined: May 21, 2006
KitMaker: 472 posts
AeroScale: 471 posts

Posted: Saturday, January 11, 2014 - 12:28 AM UTC
Thank you very much!
Youtube: Contact German submarine and a Friedrichshafen seaplane in the first world war
http://www.youtube.com/watch?v=kGOgZNo3z2c
Regards
Youtube: Contact German submarine and a Friedrichshafen seaplane in the first world war
http://www.youtube.com/watch?v=kGOgZNo3z2c
Regards
 |


