F-80/T-33 Duo Review Build (1:32)
Merlin
 Senior Editor
#017
United Kingdom
Joined: June 11, 2003
KitMaker: 17,582 posts
AeroScale: 12,795 posts
Posted: Wednesday, August 18, 2010 - 08:43 AM UTC
Hi again
I thought 'd better show some evidence that I have at least started!

I'm blocking in the main colours of the cockpit - then I'll shade and highlight it a bit before picking out the details again where needed:
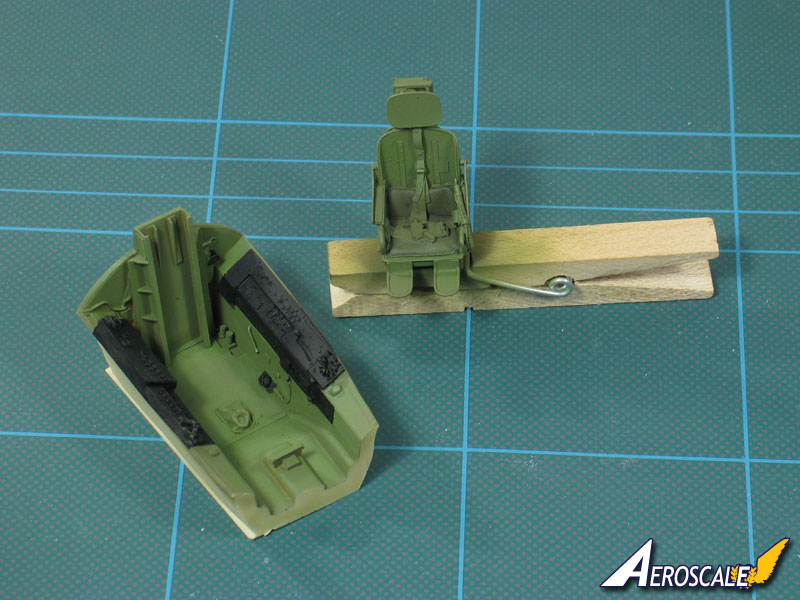
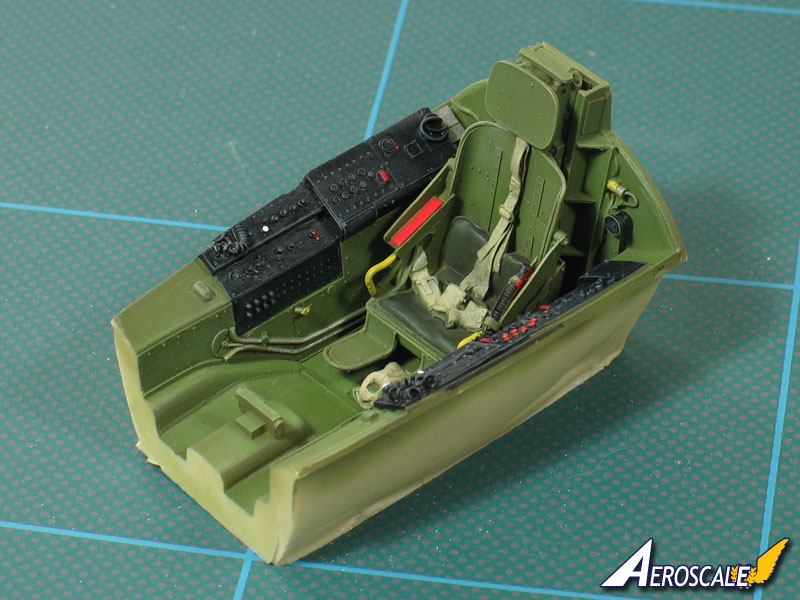
What I could really use is a nice colour photo of the right side of the cockpit to try to get the switches etc about right.. Frustratingly, the link on
US Cockpits is broken.
All the best
Rowan

BEWARE OF THE FEW...
As I grow older, I regret to say that a detestable habit of thinking seems to be getting a hold of me. - H. Rider Haggard
Moselle, France
Joined: May 15, 2005
KitMaker: 5,653 posts
AeroScale: 4,347 posts
Posted: Wednesday, August 18, 2010 - 10:43 AM UTC
Hi Rowan,
Looks great already.

I have just finished the first sanding session. I have applied another coat of filler here and there to eliminate the last imperfections. Tomorrow I will be away so you will have some time to catch up...

Jean-Luc

Better think one hour and build five minutes...
Than think five minutes and build an hour!
Merlin
 Senior Editor
#017
United Kingdom
Joined: June 11, 2003
KitMaker: 17,582 posts
AeroScale: 12,795 posts
Posted: Wednesday, August 18, 2010 - 11:20 AM UTC
Hi Jean-Luc
I love the way you say "the first sanding session"! With a n/m finish waiting for me, I can tell I've plenty to look forward to!

A day off? - I'll probably be home and dry by the tme you get back! NOT!

All the best
Rowan

BEWARE OF THE FEW...
As I grow older, I regret to say that a detestable habit of thinking seems to be getting a hold of me. - H. Rider Haggard
Merlin
 Senior Editor
#017
United Kingdom
Joined: June 11, 2003
KitMaker: 17,582 posts
AeroScale: 12,795 posts
Posted: Thursday, August 19, 2010 - 03:49 AM UTC
Hi again
Alongside painting the cockpit, I've been messing about with the intakes. Just as Jean-Luc discovered with his T-33, those on the F-80 aren't the greatest fit in the world. There's also a rather obvious seam inside that'll be tricky to fill after they are attached to the fuselage, so I've broken with the suggested assembly sequence and attached the sides of the inner trunking first:
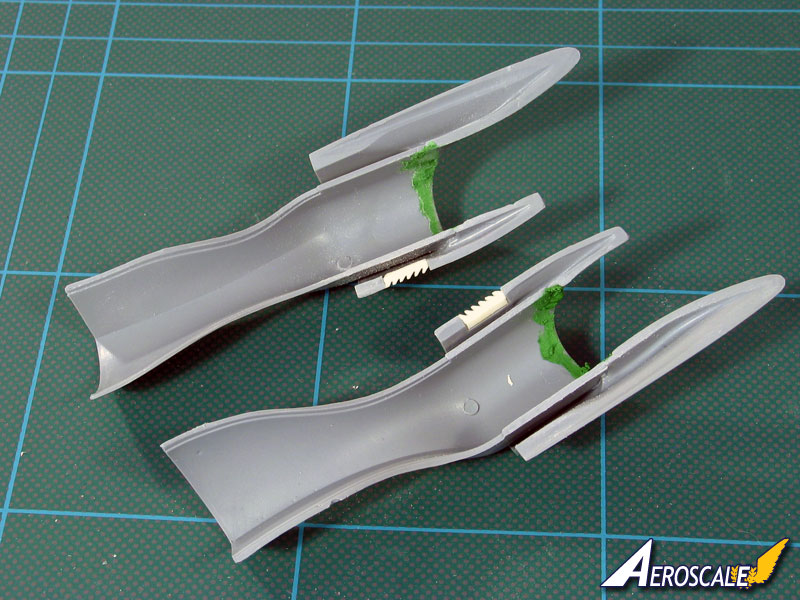
This will allow me to take care of the seams, and it doesn't appear to make the intakes any harder to fit to the fuselage - they're going to need a fair bit of filler, whatever order I do things in.
Planning ahead a bit, I think I'm going to assemble the fuselage before inserting the nose and cockpit parts. Based on dry-fits, this should work OK and let me get a straight rear edge to the cockpit opening before inserting the tub. Even the tail pipe works as a pop-in fit after the fuselage halves are joined.
That's the current plan anyway...

All the best
Rowan

BEWARE OF THE FEW...
As I grow older, I regret to say that a detestable habit of thinking seems to be getting a hold of me. - H. Rider Haggard
Moselle, France
Joined: May 15, 2005
KitMaker: 5,653 posts
AeroScale: 4,347 posts
Posted: Friday, August 20, 2010 - 01:30 AM UTC
Hi Rowan,
Different variants but same problems...

In the T-33 kit there are four areas which require some hard scraping, careful filling, heavy sanding, etc... These are the wing roots, the wing to fuselage joint at the rear, the air intakes (of course) and last but not least the bottom of the fuselage. The latter area is where the fuselage, the air intake, the wing underside and the air brake parts meet together. Not quite a digestive cocktail...


The rudder and the engine exhaust hole also need to be refined a lot. I chose not to glue the exhaust pipe piece before assembling the fuselage halves for two reasons: first it wouldn't have allowed me to properly thin down the rear opening of the fuselage and secondly it would have been too far inside it. In real the exhaust pipe is not flush with the opening but it goes out a little...

I forgot to add that there is a small curvature ahead of the air intakes which have to be eliminated. On the real aircraft the surface was much smoother. The curve only start with the air intake fairing...

Next step will be to restore the lost panel lines, fill the last imperfections and then... get the thing ready for painting at last!
Jean-Luc

Better think one hour and build five minutes...
Than think five minutes and build an hour!
Merlin
 Senior Editor
#017
United Kingdom
Joined: June 11, 2003
KitMaker: 17,582 posts
AeroScale: 12,795 posts
Posted: Friday, August 20, 2010 - 02:05 AM UTC
Hi Jean-Luc
Thanks for the heads-up on the tail-pipe - I'll double check it's projecting far enough on the F-80.
Nice work on all the filling and smoothing! I have to admit I'm not looking forward to tackling the area under the intakes/ahead of the wing - using the resin wheel well certainly complicates the fit there...
All the best
Rowan

BEWARE OF THE FEW...
As I grow older, I regret to say that a detestable habit of thinking seems to be getting a hold of me. - H. Rider Haggard
Merlin
 Senior Editor
#017
United Kingdom
Joined: June 11, 2003
KitMaker: 17,582 posts
AeroScale: 12,795 posts
Posted: Friday, August 20, 2010 - 08:48 AM UTC
Hi again
OK - Brace yourselves for exactly the sort of picture you don't want to own up to in front of an art teacher!

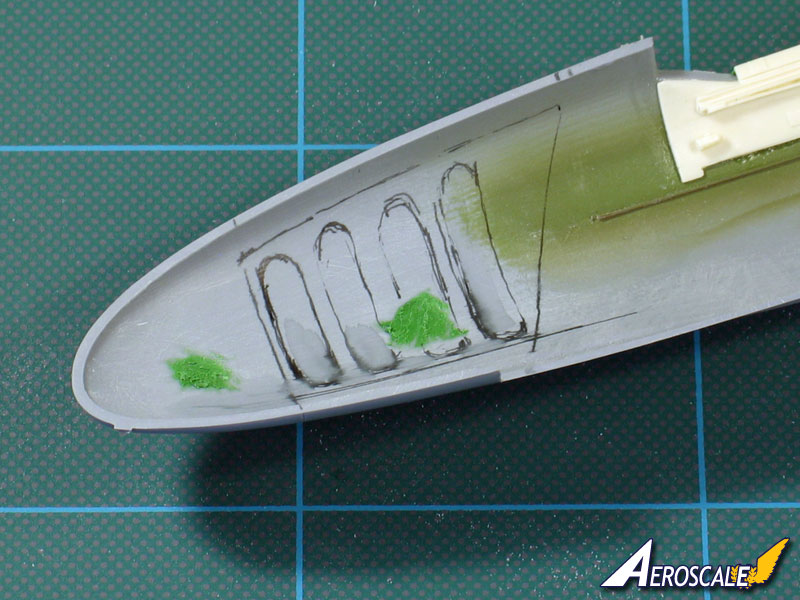
So... 0/10 for sketching! But you probably get the idea... I'm only going to open up one side of the nose for the machine guns so, just to be on the safe side, I'm going to hint at the detail on the far side in case anything is visible beyond the ammunition canisters. I'll cut some oval masks and paint a sort of trompe d'oeil shading to give a bit of interest.
Incidentally, can anyone help with the colours of the nose bay? Yellow or Green Zinc Chromate with some N/M? - or a mixture of the lot?...
All the best
Rowan

BEWARE OF THE FEW...
As I grow older, I regret to say that a detestable habit of thinking seems to be getting a hold of me. - H. Rider Haggard
Joined: December 23, 2007
KitMaker: 1,596 posts
AeroScale: 1,275 posts
Posted: Friday, August 20, 2010 - 10:34 PM UTC
Great build guys, as usual I'm watching carefully trying to catch some tricks from of your work. I think I have seen an article in the latest Tamiya Model Magazine International which a build of this model, maybe it will be some usefull in some kind for you.
Moselle, France
Joined: May 15, 2005
KitMaker: 5,653 posts
AeroScale: 4,347 posts
Posted: Friday, August 20, 2010 - 11:57 PM UTC
Hi Michal,
Quoted Text
I think I have seen an article in the latest Tamiya Model Magazine International which a build of this model, maybe it will be some usefull in some kind for you.
For me it's too late I'm afraid. I have almost reached the painting stage. But there is also a thread over at Large Scale Planes which is very interesting for the T-33:
T-33 just landedRowan, don't be too hard on yourself, the sketching looks great!


Jean-Luc

Better think one hour and build five minutes...
Than think five minutes and build an hour!
Moselle, France
Joined: May 15, 2005
KitMaker: 5,653 posts
AeroScale: 4,347 posts
Posted: Saturday, August 21, 2010 - 01:58 AM UTC
Hi all,
I have finished restoring the lost panel lines and I will now proceed to the painting stage...


I have placed a 1:48 scale Macchi MC.200 from Italeri I am currently working on aside the T-33 for size comparison. I will need a lot of space on my display shelve!

Jean-Luc

Better think one hour and build five minutes...
Than think five minutes and build an hour!
Germany
Joined: September 07, 2005
KitMaker: 5,609 posts
AeroScale: 5,231 posts
Posted: Saturday, August 21, 2010 - 02:18 AM UTC
Quoted Text
I will need a lot of space on my display shelve! 
Jean-Luc 
Selber Schuld, warum baust du auch Modelle in einem so seltsamen Maßstab ...

cheers
Steffen
DULCE ET DECORUM EST PRO HOBBY MORI
Moselle, France
Joined: May 15, 2005
KitMaker: 5,653 posts
AeroScale: 4,347 posts
Posted: Sunday, August 22, 2010 - 12:13 AM UTC
Hi Steffen,
Yes I know it's my fault...

But since I do a Luftwaffe aircraft maybe it could land near Ettlingen when it is finished...

Jean-Luc

Better think one hour and build five minutes...
Than think five minutes and build an hour!
Germany
Joined: September 07, 2005
KitMaker: 5,609 posts
AeroScale: 5,231 posts
Posted: Sunday, August 22, 2010 - 12:46 AM UTC
Hi J-L
so you're going to donate it to Marc?
all the best
Steffen
DULCE ET DECORUM EST PRO HOBBY MORI
Merlin
 Senior Editor
#017
United Kingdom
Joined: June 11, 2003
KitMaker: 17,582 posts
AeroScale: 12,795 posts
Posted: Sunday, August 22, 2010 - 10:22 PM UTC
Hi Jean-Luc
I think Steffen's really saying you should build more stuff in 1:32!

The "big" PCM Macchi Mc 200 would make a very nice shelfmate for the T-33.

All the best
Rowan

BEWARE OF THE FEW...
As I grow older, I regret to say that a detestable habit of thinking seems to be getting a hold of me. - H. Rider Haggard
Moselle, France
Joined: May 15, 2005
KitMaker: 5,653 posts
AeroScale: 4,347 posts
Posted: Sunday, August 22, 2010 - 10:28 PM UTC
Hi Steffen,
Quoted Text
so you're going to donate it to Marc?
No, I was thinking of you since it will be a German aircraft. Marc is French...
Before proceeding with the painting I wanted to see how the fit of the clear parts was. Fortunately it is very good. One only has to help a little at the rear were the hinge mechanism is located. The clear part must be thinned down and the fuselage area must be narrowed a little. I takes five minutes and the fit is almost perfect...


Now it's painting time...
Jean-Luc

Better think one hour and build five minutes...
Than think five minutes and build an hour!
Moselle, France
Joined: May 15, 2005
KitMaker: 5,653 posts
AeroScale: 4,347 posts
Posted: Sunday, August 22, 2010 - 10:31 PM UTC
Hi Rowan,
Quoted Text
The "big" PCM Macchi Mc 200 would make a very nice shelfmate for the T-33. 
No thanks, I still prefer 1:48 scale. Each time I do a 1:32 scale model I think it is really too big. But I keep doing one per year...
Jean-Luc

Better think one hour and build five minutes...
Than think five minutes and build an hour!
Merlin
 Senior Editor
#017
United Kingdom
Joined: June 11, 2003
KitMaker: 17,582 posts
AeroScale: 12,795 posts
Posted: Sunday, August 22, 2010 - 10:39 PM UTC
Quoted Text
Now it's painting time... Jean-Luc 
Hi again
I'm afraid it's only "Try to remember where I'd got to" time for me - I've been under the weather with a stomach bug for the last couple of days and I've made no progress at all.
I've got a few reviews to work on, so I'll hope to get back to the F-80 tomorrow.
All the best
Rowan

BEWARE OF THE FEW...
As I grow older, I regret to say that a detestable habit of thinking seems to be getting a hold of me. - H. Rider Haggard
Germany
Joined: September 07, 2005
KitMaker: 5,609 posts
AeroScale: 5,231 posts
Posted: Sunday, August 22, 2010 - 10:48 PM UTC
Cheers Guy's
NO 32 scale model will ever touch my display shelves!
Rowan you did not get that right ... maybe you should train your German a bit more ... just come over and we discuss this with a Bier (I mean the real stuff not that brew you get outside "Deutschland" ***) or Apfelschorle


all the best
Steffen
*** meant is the area where "Germans" were 500 years ago when the "Deutsche Reinheitsgebot" was established .. but there was no unified Deutschland in that time frame, so e.g. Prague had the first German University
DULCE ET DECORUM EST PRO HOBBY MORI
Missouri, United States
Joined: November 24, 2008
KitMaker: 564 posts
AeroScale: 510 posts
Posted: Tuesday, August 24, 2010 - 01:43 AM UTC
lol and all I build is 1/32!
These look great btw, going to see a T-33 perform next month at the local airshow.
Nothing quite like getting lost in plastic
On the bench:Revell 1/48 P-38 Lightning built as an F-5B
Next:??
Moselle, France
Joined: May 15, 2005
KitMaker: 5,653 posts
AeroScale: 4,347 posts
Posted: Tuesday, August 24, 2010 - 07:24 AM UTC
Hi all,
I have started the painting. First I did pre-shade all the model in black...

...then I have applied the light grey on the underside (Tamiya XF-80 Royal Light Grey) and then the two tone upperside (XF-25 Light Sea Grey and XF-67 NATO Green). I have also applied a lighter and a darker shade of each color to give to the aircraft a patchy appearance like some I've seen on photos...

Uhu Patafix was used for the demarcation between the underside and upperside colors. The two tone camouflage was done freehand.
Jean-Luc

Better think one hour and build five minutes...
Than think five minutes and build an hour!
Merlin
 Senior Editor
#017
United Kingdom
Joined: June 11, 2003
KitMaker: 17,582 posts
AeroScale: 12,795 posts
Posted: Tuesday, August 24, 2010 - 09:02 AM UTC
Hi Jean-Luc
Nice!

That's some seriously patchy paintwork!
I managed to do a little bit of work on the F-80 today. Nothing to show, I'm afraid, but I started painting the nose bay and filling the gap ahead of the resin mainwheel bay. If I'm lucky I might have the interior finished this week - no guarantees though.

All the best
Rowan

BEWARE OF THE FEW...
As I grow older, I regret to say that a detestable habit of thinking seems to be getting a hold of me. - H. Rider Haggard
Moselle, France
Joined: May 15, 2005
KitMaker: 5,653 posts
AeroScale: 4,347 posts
Posted: Wednesday, August 25, 2010 - 09:24 PM UTC
Hi all,
After having applied the basic camouflage I have masked the aircraft to apply the orange glow fuselage band and fuel tank halves (Tamiya X-6 Orange + XF-3 Yellow + X-21 Flat Base), the red wing root (XF-7 red), the dark grey walkways and fuselage nose (XF-24 Dark Grey) and the light grey rudder tip (White added to the previous color)...


The model starts to look like a Bundesluftwaffe T-33 now. For sure it will be even more the case with a coat of Klir (Future) and the decals added.
Jean-Luc

Better think one hour and build five minutes...
Than think five minutes and build an hour!
Merlin
 Senior Editor
#017
United Kingdom
Joined: June 11, 2003
KitMaker: 17,582 posts
AeroScale: 12,795 posts
Posted: Thursday, August 26, 2010 - 12:03 AM UTC
Hi Jean-Luc
It's funny - I was thinking my Korean war scheme would look heavily weathered compared with your peacetime trainer, but I reckon the reverse will be true!

Of course, your a/c will have done many more years' service.
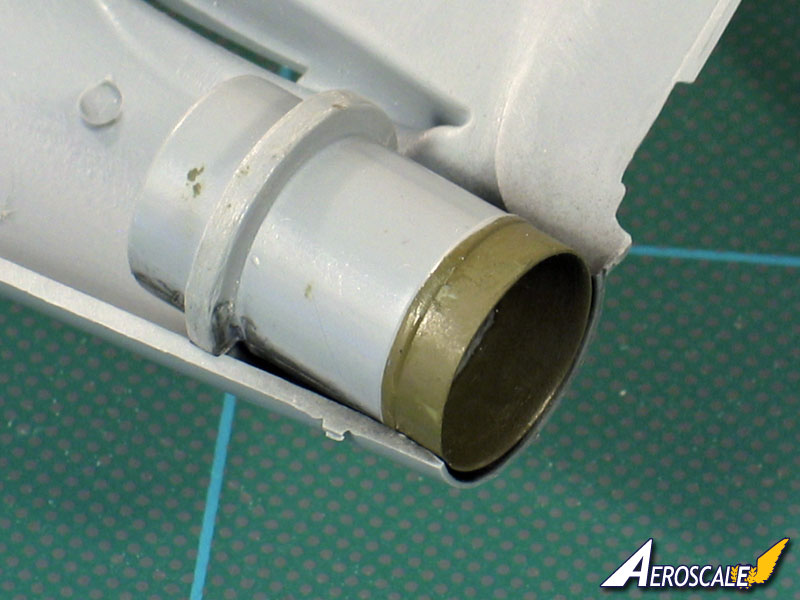
I found the same problem as you with the jet-pipe - it doesn't project at all on the F-80, so I'll have to fix that (the weird green is just where I dipped it in paint as a sort of filler prior to smoothing out the seam):
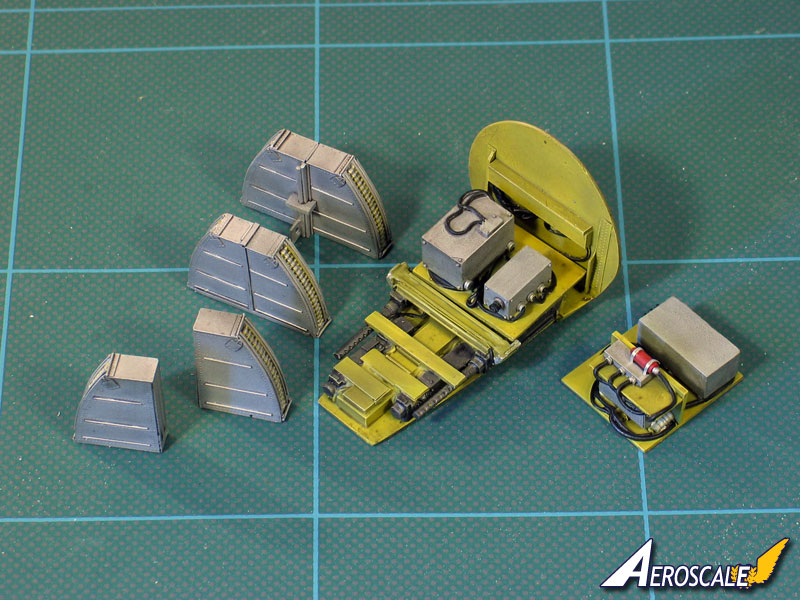
I'm about half-way through painting the nose parts. I need to shade and highlight a bit, and then I'll be able to start to think about closing up the fuselage:
Hopefully, I'll start to make more noticeable progress soon - but then I expect I'll have all that filling and sanding ahead of me!

All the best
Rowan

BEWARE OF THE FEW...
As I grow older, I regret to say that a detestable habit of thinking seems to be getting a hold of me. - H. Rider Haggard
Moselle, France
Joined: May 15, 2005
KitMaker: 5,653 posts
AeroScale: 4,347 posts
Posted: Friday, August 27, 2010 - 12:25 AM UTC
Hi Rowan,
Wow, the resin nose parts look great!

Did you add the wires?
For the jet pipe I have proceeded this way: I have eliminated the ring which acts as a locator using a saw and glued the resulting two pieces together. The jet pipe will be shorter by a few millimeters but it is not really noticeable in the end. The advantage of this is that one can glue the part after the fuselage has been completed.
On my model the decals have been applied after two coats of Klir (Future) have been sprayed on the surface...

The decalling went on without problems and I only needed some Mr. Mark softer for some od the smaller stencils...

Now something I forgot to mention earlier. The wing root panel lines, if you leave them as they are on the kit, are wrong. I have noticed this on pictures of the real aircraft so I have filled the wrong ones (In yellow on the picture) and rescribed new ones (blue). This will also give the flaps' contours the right shape on the upperside. Funny is that I expected to have to modify the red "no step" line decals since they should have been too large after the modification but it wasn't the case. The decals printed by Cartograf just have the perfect size!

The end is near...

Jean-Luc

Better think one hour and build five minutes...
Than think five minutes and build an hour!
Merlin
 Senior Editor
#017
United Kingdom
Joined: June 11, 2003
KitMaker: 17,582 posts
AeroScale: 12,795 posts
Posted: Friday, August 27, 2010 - 12:29 AM UTC
Hi again
Rethink time!

Test-fitting the unfinished nose-guns assembly, it does slide in quite neatly with the fuselage halves taped together - but it'll need a little trim on the far side because of the thickness of the plastic as I'm not opening both access covers:
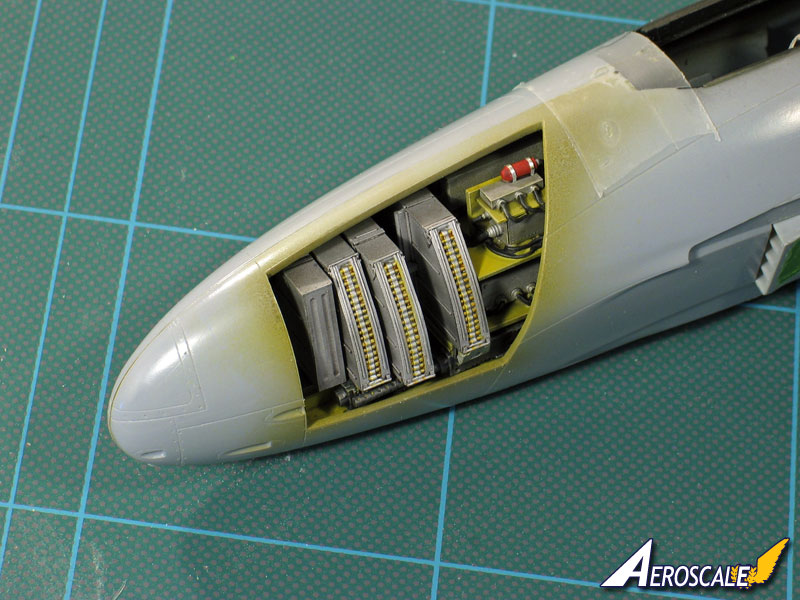
But I think I add the interior before joining the fuselage after all. This is because I want to add the intakes early, as I just don't fancy clamping them with the resin parts installed - if anything pops loose, it'll be a devil to sort out.

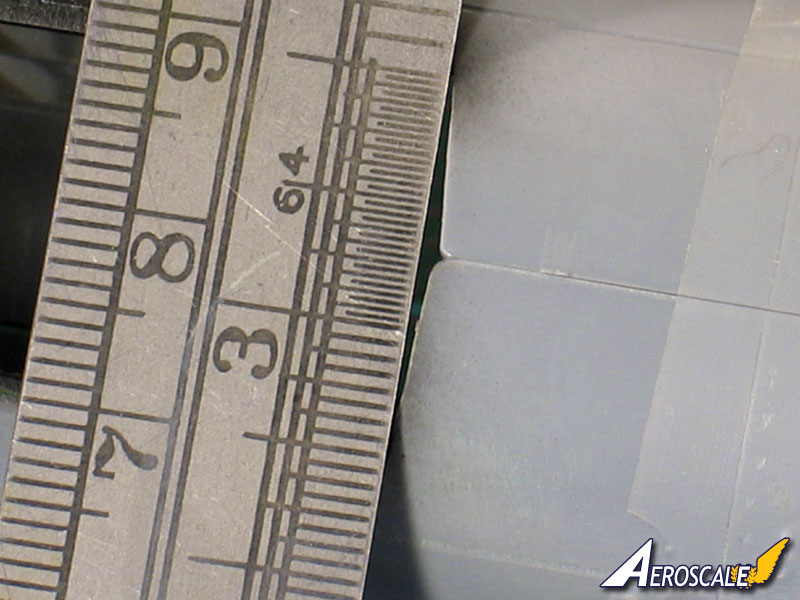
So, the next tasks will be to straighten up the rear of the cockpit opening:
and then begin to tackle the intakes - I think I'll glue them in stages with a "hot" cement.
All the best
Rowan

BEWARE OF THE FEW...
As I grow older, I regret to say that a detestable habit of thinking seems to be getting a hold of me. - H. Rider Haggard


