_GOTOBOTTOM
Early Aviation
Discuss World War I and the early years of aviation thru 1934.
KotS GB 2011 Roland D.VIa Kb
Kornbeef
_VISITCOMMUNITY
England - South East, United Kingdom
Joined: November 06, 2005
KitMaker: 1,667 posts
AeroScale: 1,551 posts
Posted: Sunday, January 16, 2011 - 06:14 AM UTC
I said much here. about my first impessions so I won't bore you repeating them.

Working in my own stupid way I never follow instructions so here goes.

Brief details and findings on different areas I've worked on

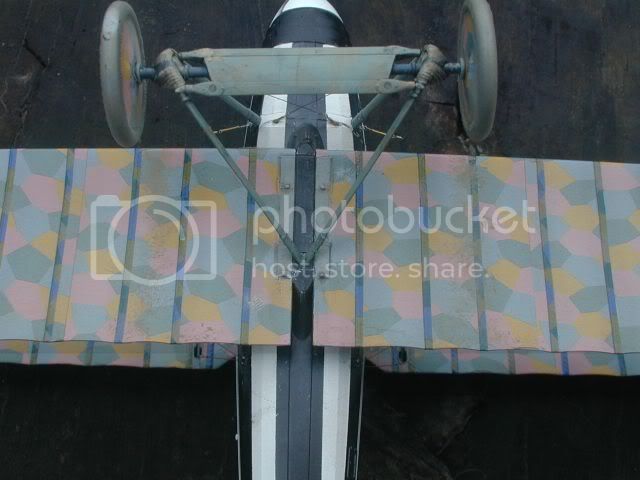
Flying surfaces.. apart from the large moulding stubs *understandable it needed little clean up (just like all other flying surfaces.) On the upper wing I cut a groove around the radiator to wing join on the lower surface, theres little to show any join on the otherwise beautifully moulded surface. I would have liked to see a seperate part here like the DVa has. I also opened up with a sharp blade the shroud that covers the roller mechanism for the radiator screen *which will be added later* .
On the upper side I opened up the area around the rad, this often was quite a gap by pics and WNWs own reference.
Little else needed doing to flying sufaces other than very minor cleanup.

Cockpit assembly
I would advise care to get part F8 the right way round its easy to get it wrong.
As I'm building her buttoned up theres no need to detail the are ahead of this part though much of the build is structural...the fuel tank is nicely done..pity it so out of sight.


Very much ongoing, little to say apart fom beautifully engineered and thought out.

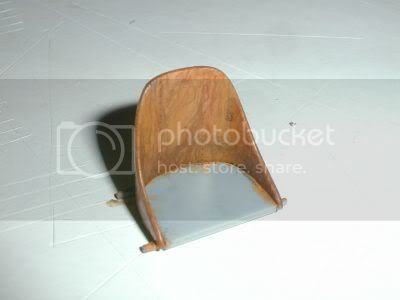
The seat is a little 2 part gem, has nail detail even on the back and a choice of cushioned or uncushioned pad. I chose uncushioned for a change and it was late war and parachutes were more widely used.


Wheels are nice, detailed with valve, rim and spokes inside and tyres have logo's on them too.

Unfortunately the shots of the rest are too fuzzy to use..will try to grab some tomorrow if the weather holds.


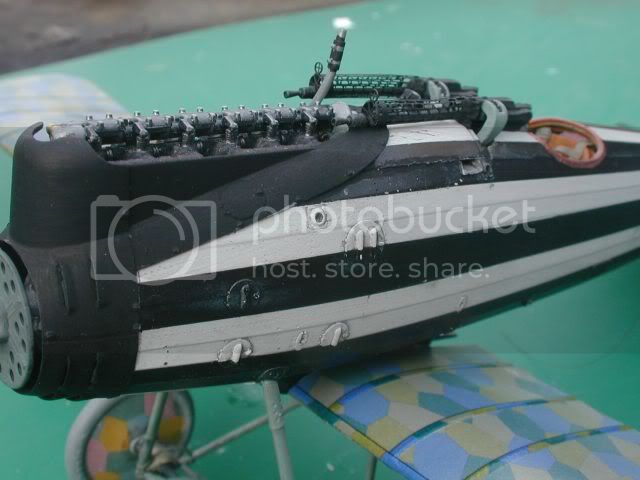
Bits n bobs, Cowl is nicely done, though the fasteners may need detailing better (moulding limitations) at least WNW shows them where others might just omit and unless you are AMS afflicted they are nicely done.
Ammo Magazine is nicely done though I woul have liked the option not to show the open door and exposed rounds, the addition ot the seam edges upon the feed chutes is a lovely touch. Nice one WNW.
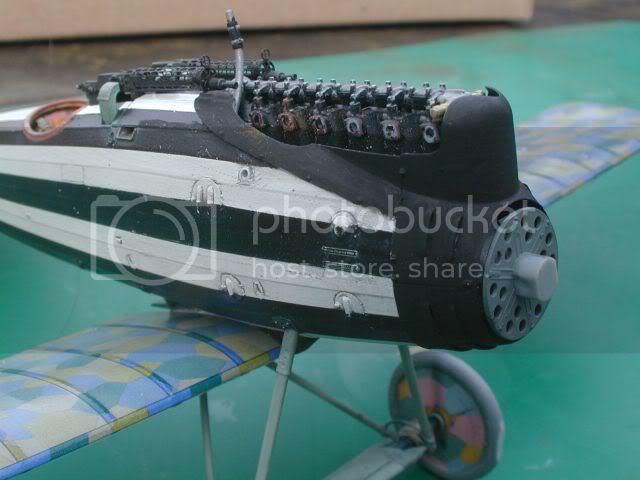
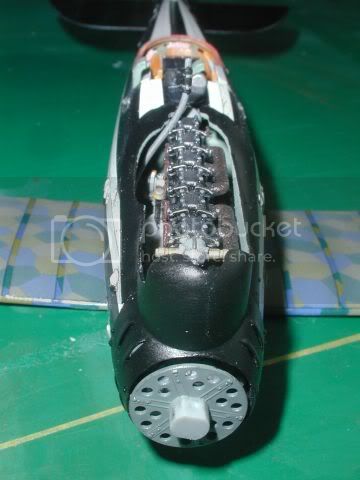
I would advise care on alignment though when building the Engine bay/ mounts. I fitted the engine out of my DVa to ensure they sat correct whilst setting. Jackflash had alerted me to someone else having issues later in their build which may be attributed to this point.

Exhaust...nicely done and in 2 parts to show the exhaust open...theres even fine weld detail shown on the joints. I added the lip and thinned it further.


Lozenge


I had an issue or two here...an these shots are very WIP.
I'll highlight the issues later, times short now unfortunately.
but just to say..I have oversprayed the loz to get a faded look...see the pic on profile D to see why...whether this works out we shall see.
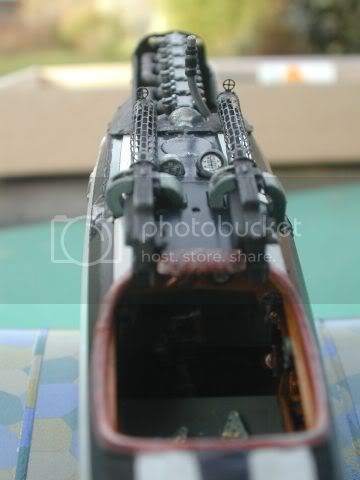
Gun jackets

WNWs are so fine and to scale they are very femer, I wrecked one in a moments innattention I would love to see WNW include a spare jacket in later releases as now I have to choose whether to use the Karaya..as illustrated or pillage m DVa spares.


Now attention to detail is ace with this kit..see the tiny stencils..nice

Must dash now but will give more details of Lozenge issues and any other pointers, feel free to ask anything of course.

TTFN
Kb

Editted my bad spolling mishtooks.

Kornbeef
_VISITCOMMUNITY
England - South East, United Kingdom
Joined: November 06, 2005
KitMaker: 1,667 posts
AeroScale: 1,551 posts
Posted: Sunday, January 16, 2011 - 06:19 AM UTC
Oh Bum..Stephen could you make this a blog...I forgot to tick it..doh!
JackFlash
_VISITCOMMUNITY
Colorado, United States
Joined: January 25, 2004
KitMaker: 11,669 posts
AeroScale: 11,011 posts
Posted: Sunday, January 16, 2011 - 07:10 AM UTC
Greetings all. Now you have done it Keith. You started a build and I just finished the kit review, So naturally I had to include your blog URL with the review. Guess you will have to finish this now. Muuuuuhhahahah. . .(In my best Dr. evil laugh!)
thegirl
_VISITCOMMUNITY
Alberta, Canada
Joined: January 19, 2008
KitMaker: 6,743 posts
AeroScale: 6,151 posts
Posted: Sunday, January 16, 2011 - 08:20 AM UTC
A side from having a mishap with PE jackets , nice progress so far Keith
Kornbeef
_VISITCOMMUNITY
England - South East, United Kingdom
Joined: November 06, 2005
KitMaker: 1,667 posts
AeroScale: 1,551 posts
Posted: Sunday, January 16, 2011 - 09:15 AM UTC
Yes the jackets were very unfortunate, the first rolled perfectly. I started the second and was rolling it smugly when my daughter asked me something...instead of stopping to answer her I looked up and heard a little crunch...the brass is so thin but the one that worked looked incredible..

gajouette
_VISITCOMMUNITY
Texas, United States
Joined: February 01, 2007
KitMaker: 365 posts
AeroScale: 356 posts
Posted: Sunday, January 16, 2011 - 10:22 AM UTC
Keith,
Excellent thread to date my friend.I'll be following you closely.No doubt your build and insights will prove to be of great import to me on my Roland.
Highest Regards,
Gregory Jouette
Mgunns
_VISITCOMMUNITY
Arizona, United States
Joined: December 12, 2008
KitMaker: 1,423 posts
AeroScale: 1,319 posts
Posted: Sunday, January 16, 2011 - 05:03 PM UTC
Hi Keith:

Did you anneal the PE Gun jackets, or just roll them out of the box. I ran the PE out of the NINAK over a candle flame a few times just to see how it would go, the seat belts folded like paper. Good luck with your jackets, looking good so far and looking forward to more.

Best

Mark
OEFFAG_153
_VISITCOMMUNITY
Västra Götaland, Sweden
Joined: February 19, 2010
KitMaker: 1,473 posts
AeroScale: 1,450 posts
Posted: Sunday, January 16, 2011 - 07:58 PM UTC
Hi Keith  – Excellent start on the Roland, it seems to come together quite fast – the faded Lozenge does looks pretty good to my eye from your shots – did it behave well? Pitty about the gunjacket, but I do think WNW PE has been a bit on the thick side in previous kits...

BTW – Are you going to need a new display cabinet once you've finished all the builds you've got going at the moment?

I'll keep watching with great interest

All the best

Mikael
edoardo
_VISITCOMMUNITY
Milano, Italy
Joined: November 30, 2007
KitMaker: 642 posts
AeroScale: 382 posts
Posted: Sunday, January 16, 2011 - 08:44 PM UTC
Hi Keith!
Fast progress indeed!

I like the wood grain on the seat best! Real good job... How did you do that?

Ciao
Edo
Kornbeef
_VISITCOMMUNITY
England - South East, United Kingdom
Joined: November 06, 2005
KitMaker: 1,667 posts
AeroScale: 1,551 posts
Posted: Sunday, January 16, 2011 - 08:48 PM UTC
Hi again and thanks all for the kind comments,

Mark
Yes I did anneal them (it may be better not to actually). I remember the DVa ones being rather stiff and brittle, these however are quite the opposite, someone with lee sausage fingers than I could really work them well. One thing I would recommend too, once rolled keep them around something to hold their shape...they are very easily crushed.

Mikael,
As for my display cabinet, no not really I have space or can make it, I have a lot of Starwars kits (pre episode 1) that though I still love can make space when needed. Though if I had a moment of inspiration and finished every project then Yes

Kornbeef
_VISITCOMMUNITY
England - South East, United Kingdom
Joined: November 06, 2005
KitMaker: 1,667 posts
AeroScale: 1,551 posts
Posted: Sunday, January 16, 2011 - 11:44 PM UTC
Back again, a few catch up shots.


First a comparison shot for fun. Note howw dinky the Roland is when compared to a DVa.


Basic interior sited in the fuselage half...still lots to add though before cables are in... love the ability to position the seat how you want like the real thing too


The undercarriage...yes it could be given a dose of AMS makeover but I for one decided not to..the bungee detail is reasonable, unless you are planning on displaying her upturned though its fine and really very robust. A nice touch would have been seperate axles and the covering flap but I personally don't think it needed unless you want to go all out. Brackets hinges etc are all nicely done. maybe it could benefit from the bungee's being sharpened up but I'm happy as it is once its dirtied in.

Now to just clarify my issues with the lozenge.

1 I have a few adhesion issues with it..it seems rather keen to lift..not saying it's WNW faults but likely more my method of application. when handling I have to pay attention and watch for edges lifting trying to paste them down with PVA as they happen...It's a lot better looking than the loz for my LVG was

2 The pattern of application on the profiles should be approached cautiously, I found the bolts of decal were not as wide as the profile indicates..of course I did the upper top wing first before it came to light. So I would advise working from the outer tips in for the upper wing...the lower works fine as it is working centre outwards.

3 There is still the edge issue, yes you need to trim a thin sliver off the edges. see the pics above to show the edge on the ribtapes. of course these shots look about 3 times the size of the real parts so highlight it.

The colours really are quite vibrant I over sprayed mine with a mix of Tamiya clear, desert yellow and gloss white to fade it. As this is the appearance in the photo of the profile I have selected. The grain in the print seems more random (I didnt like the DPI type pattern in the LVG's) in appearance and I do like the slight overlaping between some of the colours, just like the real thing may have done.

Anyway..a minor issue in a beautiful kit..I'm sure someone less clumsy can master them well and I used no setting solution, a cloth soaked in hot water helped shape them around the curves wonderfully.

Keith

thegirl
_VISITCOMMUNITY
Alberta, Canada
Joined: January 19, 2008
KitMaker: 6,743 posts
AeroScale: 6,151 posts
Posted: Monday, January 17, 2011 - 01:46 AM UTC
Nice to see that AMS hasn't total taking over here so far and you are giving a honest intrupition of what you are seeing inside the kit . Not very many folks are able to this , or they are affraid to . Now I'm sure you will add detail here and there ( little evil voice in the back of your mind ) ( Stephen's voice ) and this I look forward to .

One day Keith will do an out of box build
Mgunns
_VISITCOMMUNITY
Arizona, United States
Joined: December 12, 2008
KitMaker: 1,423 posts
AeroScale: 1,319 posts
Posted: Monday, January 17, 2011 - 02:36 AM UTC
Hi Keith:

I like the toning down of the lozenge, gives it a slight weathered look but not overdone. The interior shots are nice especially compared to the Albatros, nice comparison.

This is coming along nicely and I am looking forward to more.

Best
Mark
Kornbeef
_VISITCOMMUNITY
England - South East, United Kingdom
Joined: November 06, 2005
KitMaker: 1,667 posts
AeroScale: 1,551 posts
Posted: Wednesday, February 02, 2011 - 10:45 PM UTC
just to let you all know, Kb is still working on this, hopes to post a few pics later, camera permitting.

Only real issue with her so far is side cowlings, I'll say more when I post pics but minor surgery was required.
CaptainA
_VISITCOMMUNITY
Indiana, United States
Joined: May 14, 2007
KitMaker: 3,117 posts
AeroScale: 2,270 posts
Posted: Thursday, February 03, 2011 - 12:23 AM UTC
Can the fit issue with the side cowlings be due to tight tolerances?

The faded loz looks like faded loz. I am anxious to see them release their loz decals. I think I can find a few places to use this stuff. I like to put the texture decals over the loz, like I did on my LVG. It really makes a big difference. It doesn't do much to make a faded look, but it does protect the loz and makes it look like real linen. It might help with your lifting issue. (I did the texture on my SE5a, then superglued some PE to it. I had to take the PE off. So I used a knife to scrape off the blobs of superglue. The texture, and the finish beneath remained unaltered. It took all this abuse, and looked like nothing had been glued there. On top of that, it looks great. I love that stuff.)

Your build looks great. Your coment that it looked demure has me wondering how small it is. Can you shoot a picture of the fuselage next to the fuselage of another build for comparrison? I love how this guy is turning out.

Mr. Captain to Mrs Captain SWMBO. "Honey, look at this build.Isn't that a cool looking airplane? I really need a Roland. Remember that nice grill I put together for you yesterday? Yes, I really NEED a Roland...
Kornbeef
_VISITCOMMUNITY
England - South East, United Kingdom
Joined: November 06, 2005
KitMaker: 1,667 posts
AeroScale: 1,551 posts
Posted: Thursday, February 03, 2011 - 04:28 AM UTC
Right attempt 2, got everything ready to post and somehow it vanished AGAIN.
So just the shots and a few pertinant notes.

Carl I will take a shot next to the Albi next time I do.
There is a comparison shot a few posts up tho of the fuselage agains the DVa fuselage. Coling issues I noted below. It maybe a tollerence issue though partly aesthetic for me, they fitted but just looked a little too out of scale, the exhaust side though through one in the works. (wish the camera had been working as I progressed)


I thinned the inside edges of the lip where it sits over the planking, to my eye it looked far too pronounced and they sat high at the rear. A little sanding and tweaking of the mating edge was needed. On the carb side this had the advantage of setting the panel a little back so it looks overlapped by the nose cowl. On the exhaust side I had an issue with the front, I shaved the lip as this side but the vertical section behind the front cowl sat too far in and I had to remove and replace with plasticard about 1.5mm out.. I've brush painted them to see how they look, and still have the fasteners to scratch.


Pilots eye view, try not to notice the slightly squished jackets please. One minor note here Fuel guage as fitted by WNW instructions is too high, theres shots of the D.VIa and b (easy to tell the diff by the magneto switch location) the a is set lower the b as the kit, simple, just drill the hole out and push the guage down. Pics seem to show the tops of the belt chutes open so I reproduced this or at least attempted to.


Tail. predrilled and prefitted the cables before assembling. I love how the complete tail just snaped into place. (since this shot I've finished the elevator cabling.


eagle eyes will see my repair, I predrilled the control horn, some time between then and now the end vanished, likely while painting, a short brass tube sorted it hopefully.

Okay lots of little bits done that I havent snapped.

Anyway, small issues aside I am still beaming from ear to ear about this kit.

Keith
OEFFAG_153
_VISITCOMMUNITY
Västra Götaland, Sweden
Joined: February 19, 2010
KitMaker: 1,473 posts
AeroScale: 1,450 posts
Posted: Thursday, February 03, 2011 - 07:36 AM UTC
Glad to see you back at it again Keith

Most excellent progress too – this paintscheme and lozenge will make for a real eyecatcher for sure.

Know what you mean about "beaming" – My WNW Hansa and RE8 turned up in the post yesterday, and I've been "beaming" since – I mean – WOW

Looking forward to more updates of this very good looking bird!

Mikael
Mgunns
_VISITCOMMUNITY
Arizona, United States
Joined: December 12, 2008
KitMaker: 1,423 posts
AeroScale: 1,319 posts
Posted: Thursday, February 03, 2011 - 07:42 AM UTC
Hi Keith:

Really is looking good. I like how you did the control horn on the rudder assembly. Once it is together, only the most nitpicky of modelers will ever notice the jackets.

Looking forwad to more.

Best

Mark
CaptainA
_VISITCOMMUNITY
Indiana, United States
Joined: May 14, 2007
KitMaker: 3,117 posts
AeroScale: 2,270 posts
Posted: Thursday, February 03, 2011 - 08:22 AM UTC
I dont know how i missed the comparrison picture up above. I guess it is a bit smaller than the Albatros.

Your paint job looks great.
Kornbeef
_VISITCOMMUNITY
England - South East, United Kingdom
Joined: November 06, 2005
KitMaker: 1,667 posts
AeroScale: 1,551 posts
Posted: Tuesday, February 15, 2011 - 01:49 AM UTC
Minor update, I havent had much time on her these past few weeks.

But got the rudder in place, rear control wires done, national insignia in place and I'm on detailing parts and weathering in.


tail all cabled up. yes I spotted the small touch up needed under the tail when I took the pic.


Decals on, and I've sprayed a thinned coat of smoke over the ribs to try to tone them in, once this was dry I picked out with Tensacrom smoke the detail in the ribbing. I've to overspray the black with a pale off white yet and try to just lose the brightness of the decals (I'm unsure if this A/C had modified crosses or not so won't try to replicate the underlying iron crosses. Uper wing control surfaces are fitted


some of the touchups done, still have the padding to do properly. piced out the nails etc with tensacrom smoke I've a few details to add then its prerigging all the points and attaching the lines before assembly this time I think.

Still loving this, even if i have spent more time on the Tripehound which has been a little dissappointing.

Anyway minor update as I said.


Keith
thegirl
_VISITCOMMUNITY
Alberta, Canada
Joined: January 19, 2008
KitMaker: 6,743 posts
AeroScale: 6,151 posts
Posted: Wednesday, February 16, 2011 - 01:11 AM UTC
Love the scheme !

Looking really sweet Keith
Kornbeef
_VISITCOMMUNITY
England - South East, United Kingdom
Joined: November 06, 2005
KitMaker: 1,667 posts
AeroScale: 1,551 posts
Posted: Tuesday, March 01, 2011 - 06:52 AM UTC
I've been quietly working on this while struggling to keep enthusiasm up on the tripe...hope if weathers okay to take some snaps, but the upper wing is on and she is rigged apart from the U/C which is fixed and setting overnight.

I've had 1 or 2 small setbacks, all my own fault and somehow managed to rip a great piece of Loz off the underside of the wing..and I mean big. . . though when I havent a clue. Field repair coming up. So basically to do. . .rad. . .pipework...cowling catches and final rigging though I need to redo one of the aerleron control cables. Cryo set too early when fitting it.

Still all in all. I'm loving this kit...a few minor issues but nothing to throw my toys out the pram for...unlike a certain 3 winged one I wont mention
thegirl
_VISITCOMMUNITY
Alberta, Canada
Joined: January 19, 2008
KitMaker: 6,743 posts
AeroScale: 6,151 posts
Posted: Tuesday, March 01, 2011 - 11:49 AM UTC
I for one am looking forward to seeing the final results . Sounds like you are close to wrapping her up !

Just might have to pull down the Bluemax kit and add it to this years starting projects ..........
JackFlash
_VISITCOMMUNITY
Colorado, United States
Joined: January 25, 2004
KitMaker: 11,669 posts
AeroScale: 11,011 posts
Posted: Tuesday, March 01, 2011 - 12:30 PM UTC
Keith, give us a list of the minor issues and I'll make sure they show up in the kit review with you being credited for their discovery.
Kornbeef
_VISITCOMMUNITY
England - South East, United Kingdom
Joined: November 06, 2005
KitMaker: 1,667 posts
AeroScale: 1,551 posts
Posted: Tuesday, March 01, 2011 - 10:23 PM UTC
Okay, heres a few pics of her so far.

Stephen I will compile a list of things, trust me they are all pretty minor, the only real issue requiring real thought was the engine mountings alignment and the side cowls for the engine. when I list them I'll add what I thought and did to fix....Now I'm not saying any are WNWs errors but care is needed especially with the engine mount assy and lots of dryfitting of assemblies.

Anyhow pics time,


Okay, you might notice in the last pic the missing patch of lozenge? there is a much larger patch vanished unexplainably from the underside of one wing...A few field repairs are in order. Also the left side aerleron control cables, I tried to make it easier by prethreading the turnbuckle before securing the cable to its anchor point in the fuselage..wrong move...they need revisiting. I learned from that and did the right side the long way.


Top shot you see the missing strip of lozenge, when it happened I have no idea..no bits of decal ever appeared drifting around..looks like I'll let a patch repair in.. CDL or doped or Lozenge, anyone have any idea? Did they carry a stock of Loz fabric at the frontline?

Hopefully though you see the attempt to weather in the decals and a pointer to the upper rear rigging point...this is one where theres a turnbuckle at the top...I added one at the bottom before realising it didnt have one. Its in such an innaccessable point I left well alone after ripping the lozenge once.

Middle pic shows the centre underside, seethe small access panels and strip between them? Well I may be getting old but I see no reference to them in the instructions, erring on the side of caution I painted them gret/green assuming it the safest bet. Eagle eyes might notice a couple of fingerprints...care should be taken the decal is very susceptable to glue etc, a tiny smear on a finger melted the finish...more mud or oil stains to be applied here.

bottom pic shows the centre underside of the upper wing. I added the radiator blanking , guessing at the colour of the canvas, likely well wrong I imagine and added the control line for it, this runs through a bracket at the rear of the winf (PofP Camel rigging point) down through the top of the fuselage to I presume the little handle with no description on the cockpit side. I tried to replicate the way the rigging in this area was done after much head scratching some parts are thin stainless steel wire that I use for rigging eyelets stretched under tension. this seemed to work quite well except for the afore mentioned control cables which wll be redone. I used this method to prerigg the control horns before fitting to the wings and was pleased with the result as it gives a variation to the rigging I think.

Anyway...still to do...the prop laminations, the guns, the windscreen, I have yet to scratch cowling latches...looking for some thin copper wire I have somewheres about. Minor details, repairwork (mainly loz) and fitting of upper rad and pipework, the rear view mirror left till after the rigging is done.
After that its final weather and wearing in.

I have to say again, this might not be my favourite A/C of the era but it is by far the best kit I've built, I wish I had the skill to bring the best out i it.

Rgds Keith

All comments as always welcome.. good bad or constructive.

 _GOTOTOP