Early Aviation
Discuss World War I and the early years of aviation thru 1934.
KotS GB 2011 Albatros D.III Mtnflyer
lcarroll
_VISITCOMMUNITY
Alberta, Canada
Joined: July 26, 2010
KitMaker: 1,032 posts
AeroScale: 1,025 posts
Posted: Sunday, May 01, 2011 - 04:04 PM UTC

Quoted Text

Guy, Yes I totally agree, PE is evil but wonderful stuff. Nice work though, good to see the Aber set used in all its glory and shows why its that bit more expensive than the Master product. You get all the breech detailing stuff.

If you don't mind a bit of advice, use your best Maxim on the right side, the cocking mechanisms are more visible on that side of the build.

One thing though, even WNW got wrong, Albatros Maxim's dont use the long cocking handle, they employ a slightly different mechanism. It's a minor thing though all in all.


I can't wait to see your progress on the rest of the build either. Keep us posted


Keith


Guy / Keith,
The guns are impressive. I have the Master version "front and center" and certainly there's a lot less detail in the bag then I see in your photos. Looks like I'll be delving into some other stuff (fortunately I have a few Eduard and Tom's 1/32 German Guns Sets to grab the extra details from) Not hard to see why the Aber Product appears to be most recommended.
As for your build Guy, keep at it. I've kind of hit the wall myself; seems the filling required after the mis-aligned fuselage halves obliterated the fine panel lines which, when re-scribed, were a disaster thus I'm back several steps! I will, however get there, as will you. Are we still having fun?!?

Cheers,
Lance
mtnflyer
_VISITCOMMUNITY
Alberta, Canada
Joined: March 08, 2009
KitMaker: 394 posts
AeroScale: 360 posts
Posted: Monday, May 02, 2011 - 04:41 AM UTC
During the night, snuggled up to my wife, I had a dream about the finish of my guns.

I'm thinking I'll prime them with grey - then I'll spray them silver completely. Following that, I'll wash them with Gun Metal until effect is reached. Maybe it was just a bad dream, but I'm thinking it will work.

Looking for any input on how to finish guns. Guy
Kornbeef
_VISITCOMMUNITY
England - South East, United Kingdom
Joined: November 06, 2005
KitMaker: 1,667 posts
AeroScale: 1,551 posts
Posted: Monday, May 02, 2011 - 07:21 AM UTC
Guy Maxims were always finished in black, but I'd use a dark bluegrey, just light enough to show shadow then dust it with graphite or drybrush sparingly with gunmetal/steel.
mtnflyer
_VISITCOMMUNITY
Alberta, Canada
Joined: March 08, 2009
KitMaker: 394 posts
AeroScale: 360 posts
Posted: Friday, May 13, 2011 - 02:16 PM UTC

Quoted Text

Maxims were always finished in black, but I'd use a dark bluegrey,


Thankyou Keith; I did take your advice.

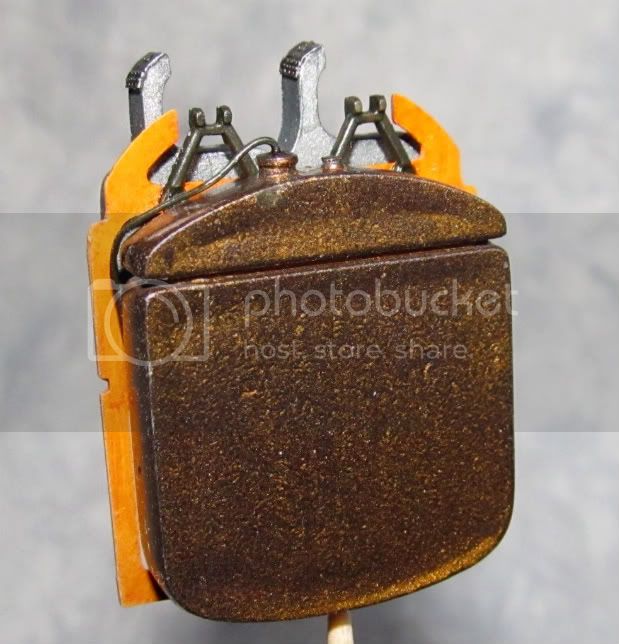
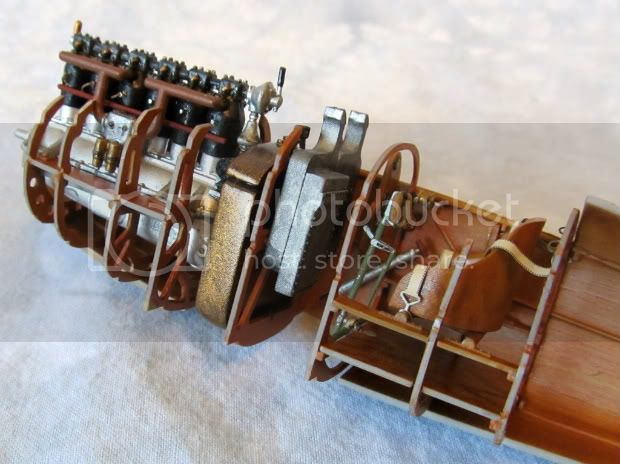
On the interim, I've been working on the fuselage interior modules. Here is the fuel tank up front of a module. Tamiya X-33 bronze as base, followed by a brass enamel wash. I did a little playing with the top, adding a fill port and some wire fuel line. Just my playing; don't take it as accurate representation.


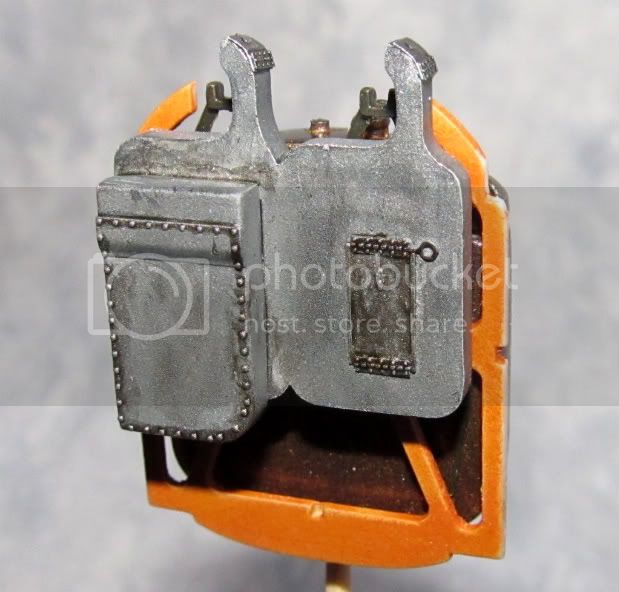
On the back side, the ammunition feed and spent casing canister. Tamiya XF-16 base followed with Testors Gun Metal wash and Tamiya Smoke detail:


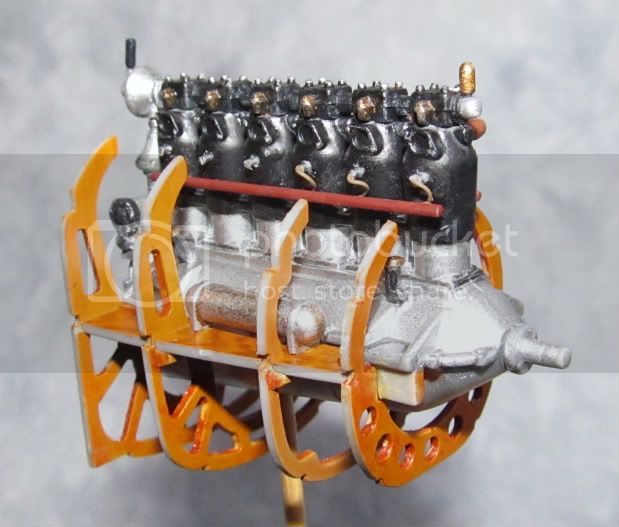
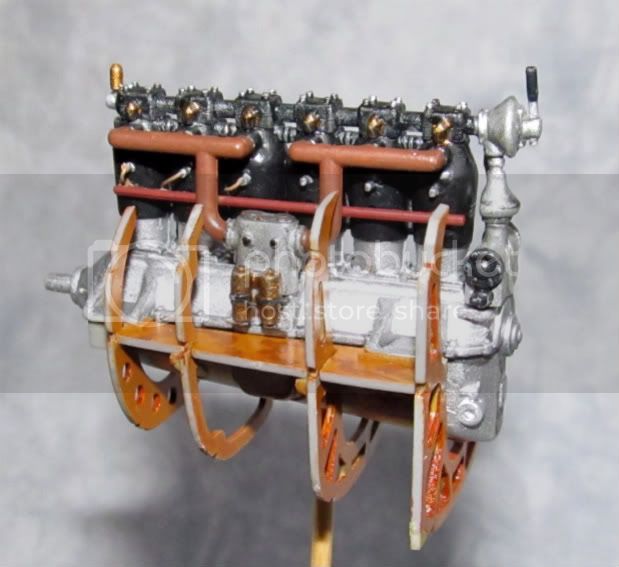
The engine slid into its new home. I suffered head pain putting this prehistoric contraption together:


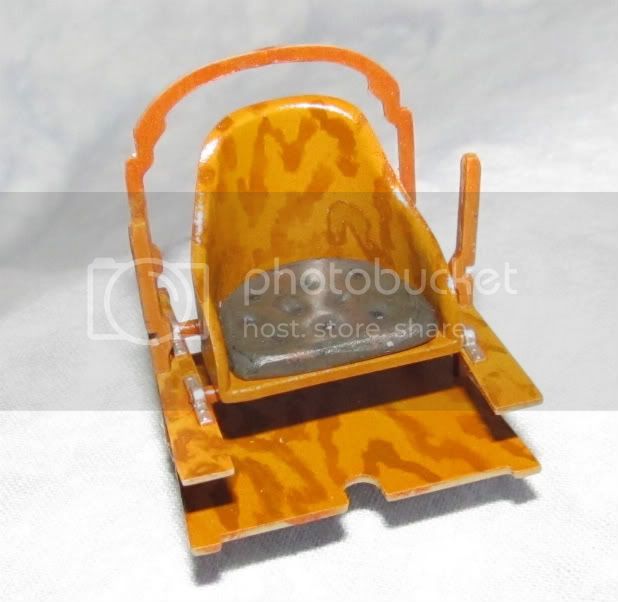
I'm still working on the cockpit module. Contemplating a small error in construction sequence. I should have put in the Eduard seat harnesses before I installed fuselage ribs. Now, its going to be all that much more difficult:


Ah Well!!! At least I have all weekend to work on this project; unless the wife puts me in the garden with shovel and rake. I feel the need to 'Rain Dance', followed with prayer.
wing_nut
_VISITCOMMUNITY
New Jersey, United States
Joined: June 02, 2006
KitMaker: 1,212 posts
AeroScale: 468 posts
Posted: Friday, May 13, 2011 - 03:17 PM UTC
Hey Guy... looking real good.
mtnflyer
_VISITCOMMUNITY
Alberta, Canada
Joined: March 08, 2009
KitMaker: 394 posts
AeroScale: 360 posts
Posted: Saturday, May 14, 2011 - 01:46 PM UTC
Thankyou for the comment, Marc.

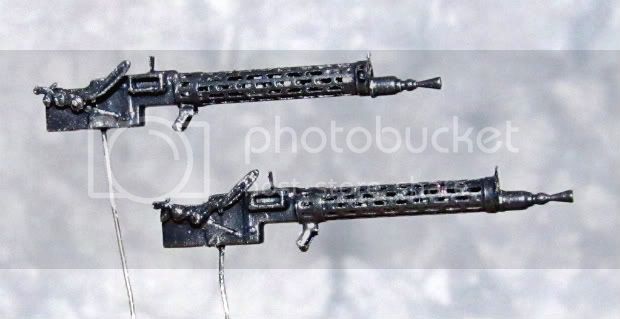
Just an update as to what I got done today. I finished my guns. None of that girly double barrel shotgun stuff; I'm going in with Maxims:


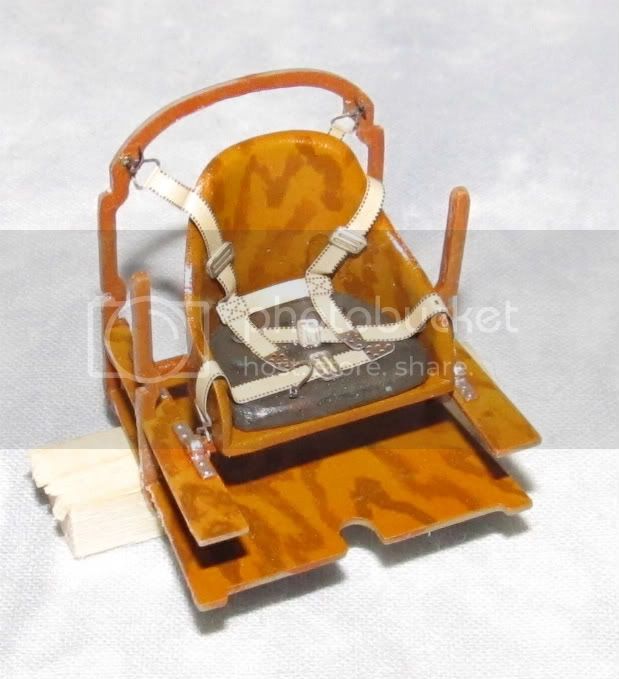
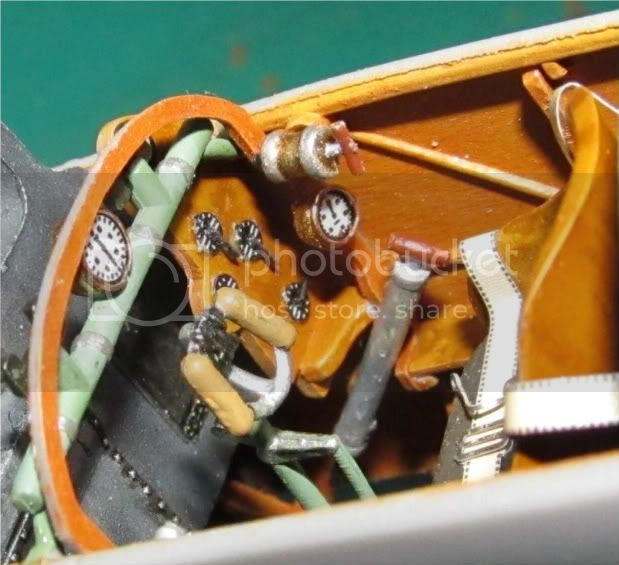
I also put in the seat harnesses, and wonder if Eduard got it right. They look fairly sophisticated and busy. Somehow, I mentally pictured a pilot tying himself in with a rope during the Great War. But, if it's Eduard, it has to be right.


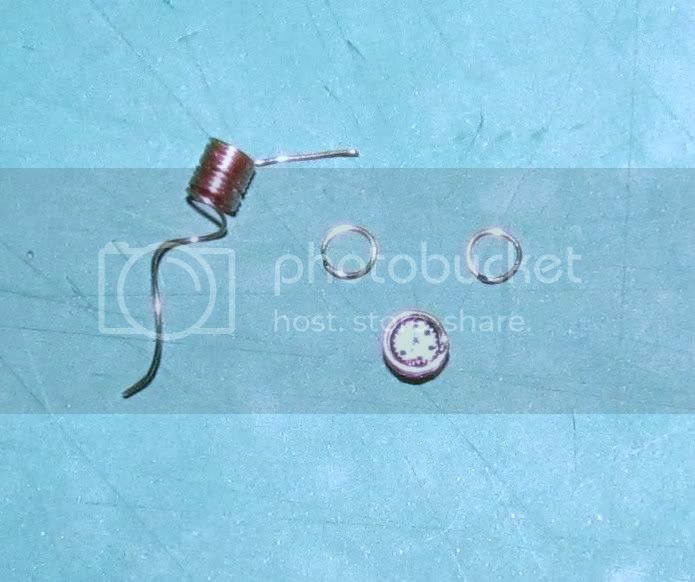
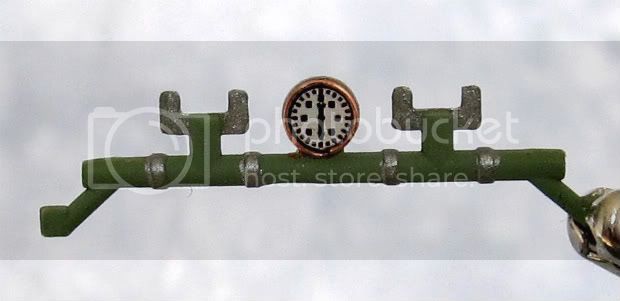
I also thought I'd like to show you how I'm messing with the few instruments. The experts may well know all about this, however, it is my first try. This little display is for the benefit of other beginners like myself, who may want to give it a try.

I found some small copper wire. Each strand of copper is like a thicker hair. These I wrapped (tightly) around a drill bit approximating the diameter of an instrument face.
Then, using a #11 blade, I cut each individual loop off the coil. The resulting ring was carefully centered on the instrument face, and then a drop of 'Future' was placed on the dial. 'Future' is all the adhesive necessary to secure that tiny ring. I feel it creates a very cool effect on the face of the instrument:


By the way, the dial face is from Eduard. Thanks for looking. Guy
lcarroll
_VISITCOMMUNITY
Alberta, Canada
Joined: July 26, 2010
KitMaker: 1,032 posts
AeroScale: 1,025 posts
Posted: Sunday, May 15, 2011 - 03:53 AM UTC
Guy,
Your instrumment technique is not one I''ve personally seen before; it is, however, one I'm going to add to my tickle trunk! Really makes the instrument stand out, good work ! Your DIII project is coming along very well, mine is really slow right now as I'm wrapped up in a million strips of tape for pre-shading and the dreaded Photo Etch phase that I view much the same as you stated. The stuff is possessed, evil, and at times nearly too much for aged eyes and fingers.
Given the beautiful weather today which seems to be right across the Province I'm hoping to find at least a short time to get at it despite the long list of Spring clean up and outdoor tasks managed by SWMBO, cost of ending Winter I guess.

Cheers,
Lance
mtnflyer
_VISITCOMMUNITY
Alberta, Canada
Joined: March 08, 2009
KitMaker: 394 posts
AeroScale: 360 posts
Posted: Sunday, May 15, 2011 - 01:08 PM UTC

Quoted Text


one I'm going to add to my tickle trunk! Really makes the instrument stand out,


Thankyou Lance, for the kind words and support.

With the garden going in, I failed to get alot of modeling done today. But I did manage to squeeze in a second instrument face using the technique earlier described. I still have to touch up the paint somewhat, but all-in-all it looks pretty good. I'm getting better.


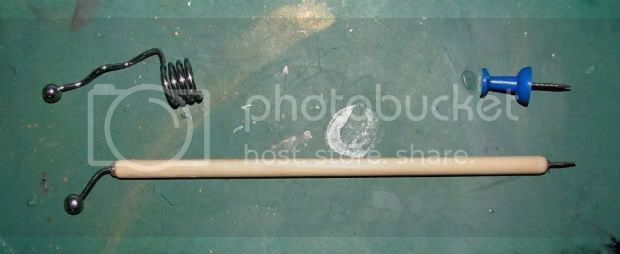
Also, I was getting tired of using my fingers, one pair of tweezers, and razor blades to manipulate tiny PE. It was completely frustrating. I knew I needed more to work PE.

So I dug around in my junk box and manufactured these cheap, manipulating hold down tools for PE. Goes to show you don't need expensive tools to have fun in this hobby. The photos show the tool, and what I used to make them with.


I hope your liking this thread, its up against a great deal of very stiff competition with others.
OEFFAG_153
_VISITCOMMUNITY
Västra Götaland, Sweden
Joined: February 19, 2010
KitMaker: 1,473 posts
AeroScale: 1,450 posts
Posted: Monday, May 16, 2011 - 02:00 AM UTC
Nice thread, and very nice progress  – don't see it as competition, its just fun, and sharing tips  – which you just did. Those PE tools of your look quite nifty, I'll try that in future (PE and me are not the best of friends).

Best Regards

Mikael
mtnflyer
_VISITCOMMUNITY
Alberta, Canada
Joined: March 08, 2009
KitMaker: 394 posts
AeroScale: 360 posts
Posted: Monday, May 16, 2011 - 02:18 AM UTC
Thanks Mikael

I've learned a lesson to let things dry properly. I tried working with my new instrument affair too early, and now it looks like I have an instrument with broken glass. I'm going to try and fix it, but I fail its a lesson well learned.
wing_nut
_VISITCOMMUNITY
New Jersey, United States
Joined: June 02, 2006
KitMaker: 1,212 posts
AeroScale: 468 posts
Posted: Monday, May 16, 2011 - 04:50 AM UTC
Really nice work Guy. The instrument look terrific. For an extra bit of detial.... use an appropriately sized punch instead of a drill bit. Wrap the wire for the bezel then with the same punch, make a clear plastic disk. It will fit perfectly into the bezel for the instrument glass face. A tiny drop of Future fills the airspace and makes it crystal clear.


I love making my own tools. Many time they are better than some of the store bought stuff and WAAAY cheaper.

Mgunns
_VISITCOMMUNITY
Arizona, United States
Joined: December 12, 2008
KitMaker: 1,423 posts
AeroScale: 1,319 posts
Posted: Monday, May 16, 2011 - 09:00 AM UTC
Hi Guy:

Great stuff and progress since I last posted. Your bezels look outstanding, the engine really looks nice, the whole thing is progressing nicely. Looking forward to more.


Best

Mark
mtnflyer
_VISITCOMMUNITY
Alberta, Canada
Joined: March 08, 2009
KitMaker: 394 posts
AeroScale: 360 posts
Posted: Monday, May 16, 2011 - 11:01 AM UTC

Quoted Text

.... use an appropriately sized punch instead of a drill bit. Wrap the wire for the bezel then with the same punch, make a clear plastic disk. It will fit perfectly into the bezel for the instrument glass face. A tiny drop of Future fills the airspace and makes it crystal clear.


Thankyou so much, Marc. I knew there had to be a better way than my primitive method. From now on, it will be done the way you suggest.

This is why Aeroscale towers above other forums. You get all the help in the world without the distasteful bickering.

Guy
lcarroll
_VISITCOMMUNITY
Alberta, Canada
Joined: July 26, 2010
KitMaker: 1,032 posts
AeroScale: 1,025 posts
Posted: Monday, May 16, 2011 - 03:54 PM UTC

Quoted Text


Quoted Text

.... use an appropriately sized punch instead of a drill bit. Wrap the wire for the bezel then with the same punch, make a clear plastic disk. It will fit perfectly into the bezel for the instrument glass face. A tiny drop of Future fills the airspace and makes it crystal clear.


Thankyou so much, Marc. I knew there had to be a better way than my primitive method. From now on, it will be done the way you suggest.

This is why Aeroscale towers above other forums. You get all the help in the world without the distasteful bickering.

Guy,
I really like the PE Tools, I have inadvertantly "jettisoned " a few PE bits over the last several days efforts while trying to mask, pre-shade, and touch up my "beast" so I'll construct a reasonable clone of your implements for the fix-up/re-do stage.
Totally agree with your comments on help, advice, and lack of bickering etc. Great site we have here, invaluable and so enjoyable....

Cheers,
Lance

Guy

mtnflyer
_VISITCOMMUNITY
Alberta, Canada
Joined: March 08, 2009
KitMaker: 394 posts
AeroScale: 360 posts
Posted: Wednesday, May 18, 2011 - 06:26 AM UTC
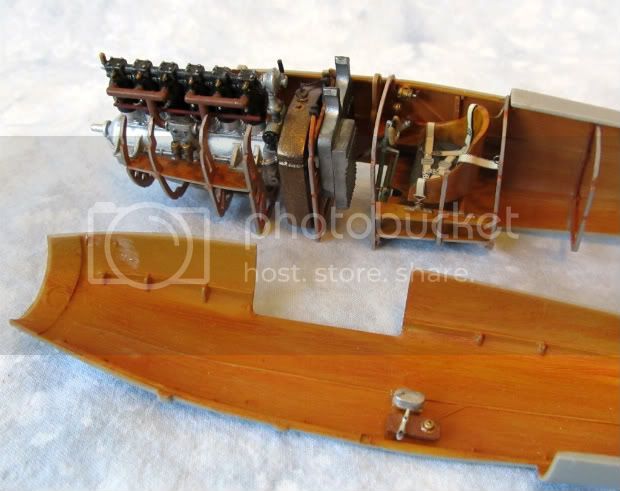
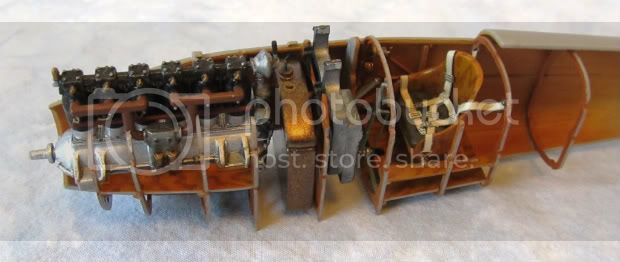
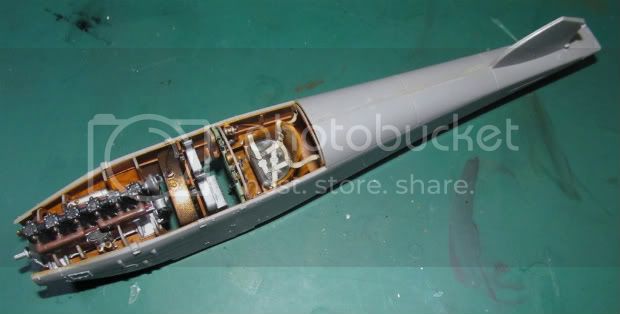
Well, I believe I'm about ready to button up the fuselage. Somehow, the following photographs look familiar; almost copies from other excellent builds that came before me:


I have 5 full days to model on, and then must give it a rest as duty calls. We'll see how far I can get in that time. Guy
lcarroll
_VISITCOMMUNITY
Alberta, Canada
Joined: July 26, 2010
KitMaker: 1,032 posts
AeroScale: 1,025 posts
Posted: Wednesday, May 18, 2011 - 08:32 AM UTC

Quoted Text

Well, I believe I'm about ready to button up the fuselage. Somehow, the following photographs look familiar; almost copies from other excellent builds that came before me:


I have 5 full days to model on, and then must give it a rest as duty calls. We'll see how far I can get in that time. Guy


Guy,
Looks really good. Your interior woodgrain looks better every time I see it and much the same in "tone" as mine except you've got a very much cleaner result....well done! I envy you the 5 days; I've been called to work an extra shift tomorrow however should get a week or so break until the next interuption. Keep those updates coming as, like with many other builds, I learn a lot from them.

Cheers,
Lance
wing_nut
_VISITCOMMUNITY
New Jersey, United States
Joined: June 02, 2006
KitMaker: 1,212 posts
AeroScale: 468 posts
Posted: Wednesday, May 18, 2011 - 09:06 AM UTC
Are you going to do a 5 day modeling marathon? Phew! My knees just got a little weak thing about that. Hope you rest isn't too long. This is too good the be put aside.
mtnflyer
_VISITCOMMUNITY
Alberta, Canada
Joined: March 08, 2009
KitMaker: 394 posts
AeroScale: 360 posts
Posted: Thursday, May 19, 2011 - 03:51 AM UTC

Quoted Text

Are you going to do a 5 day modeling marathon? Phew!


Not anymore, Marc! I made a mistake and answered the telephone.

Anyway, I like to take photos as I'm going along; for a record of events. The spade grip was broke in 3 places when I removed it from the sprue. Lucky I was able to put it back together. I think it all looks OK. Next time, I think I shoukd pay more attention to shading for a realistic variation in colors.


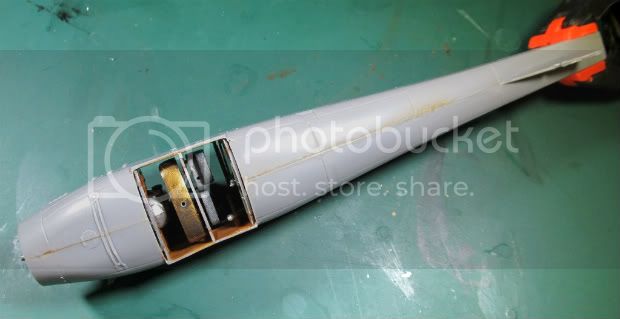
Here's a photo series with the main fuselage buttoned up. A little work sanding and filling, although I'm very happy with the way it went together. Just took my time, glue bead by glue bead, and let it set overnight.


I'm going to sand off the hatches and louvres; replace them with PE. Next step, though, is to install the front bonnet. I think thats going to give me trouble.

I was trying to get some fuselage wood work done before I have to travel. It looks like thats not going to happen.
RAGIII
_VISITCOMMUNITY
North Carolina, United States
Joined: June 19, 2007
KitMaker: 604 posts
AeroScale: 600 posts
Posted: Thursday, May 19, 2011 - 09:58 AM UTC
Your Albie is looking great! Keep the pics coming,
RAGIII
lcarroll
_VISITCOMMUNITY
Alberta, Canada
Joined: July 26, 2010
KitMaker: 1,032 posts
AeroScale: 1,025 posts
Posted: Thursday, May 19, 2011 - 12:10 PM UTC
Guy,
Looking better every time you post more. Keep the updates coming and hope your trip goes well.
Cheers,
Lance
mtnflyer
_VISITCOMMUNITY
Alberta, Canada
Joined: March 08, 2009
KitMaker: 394 posts
AeroScale: 360 posts
Posted: Saturday, June 04, 2011 - 06:41 AM UTC
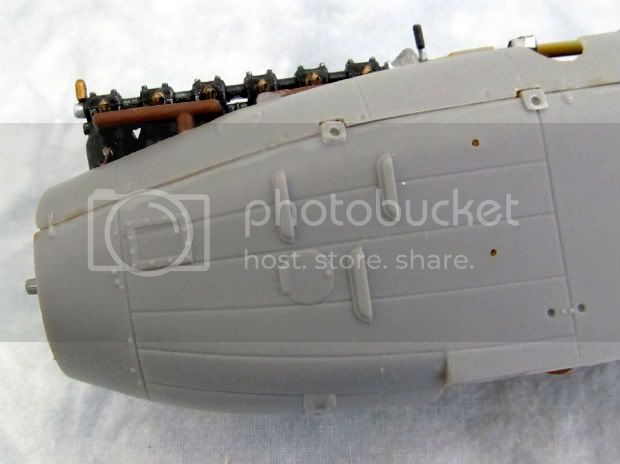
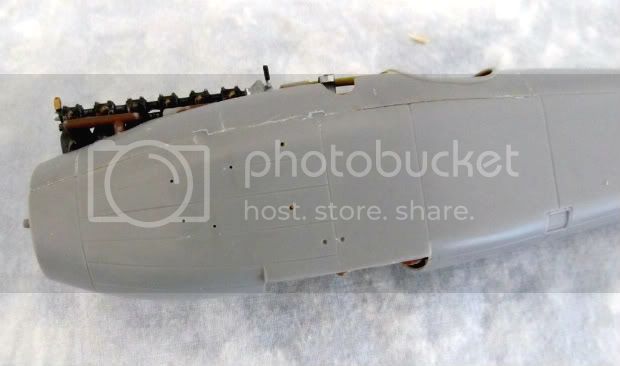
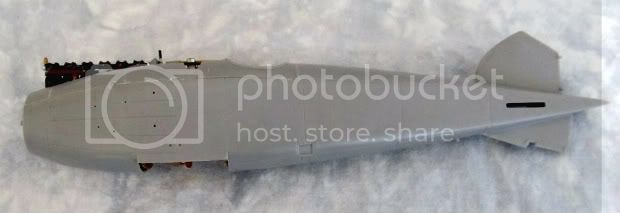
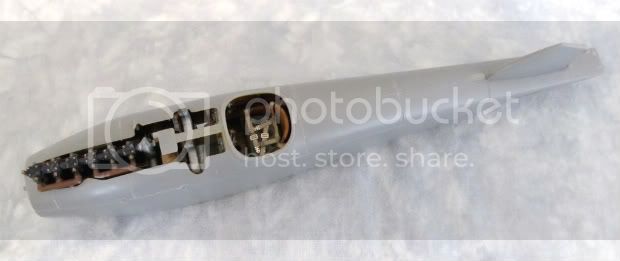
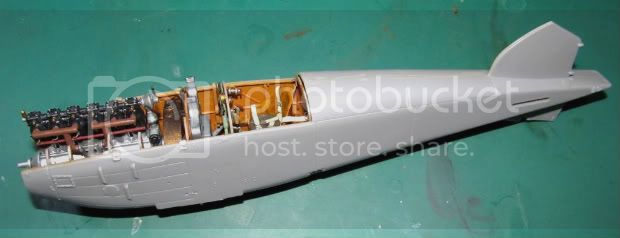
Just thought I'd post over coffee, and let you know how slowly the D.III is moving along. I took a photo series of the kits molded-in details, so I could note location. My intentions were to remove most every detail to replace with PE. So, the camera went all around the fuselage, and took photos like this from different angles:


Then I sanded off all the detail after drilling tiny holes in the center of each fixture; further reminders of exact location.


I also did some filling and rescribing. Apparantly, I need to hone my personal scribing technique. I'm not very good at it right now.


Since I've got the weekend, I hope to get details sanded off the lower wing and attach it. Perhaps I can get primer on soon, and prepare for woodwork. My misguided plan is to do the wood and then attach the PE; I thought it best to go that route. Guy

Kornbeef
_VISITCOMMUNITY
England - South East, United Kingdom
Joined: November 06, 2005
KitMaker: 1,667 posts
AeroScale: 1,551 posts
Posted: Saturday, June 04, 2011 - 07:37 AM UTC
looking good Guy.

I was happy with the plastic louvres personally, just opened up the edge with a sharp no11 but I can see the attraction of PE. one small thing to note before you get her primed though.

See the teo indents a third of the way up above the lower wing? Theyre rigging points and they should be just above the lower wing and theres two holes with eyelets and two external rigging points. Not sure why Roden put them so out of place but an easy fix.


Do love your work.
K
lcarroll
_VISITCOMMUNITY
Alberta, Canada
Joined: July 26, 2010
KitMaker: 1,032 posts
AeroScale: 1,025 posts
Posted: Saturday, June 04, 2011 - 08:18 AM UTC
Guy,
Your nose section went together nicely.............tells me I probably did something wrong when I separated mine. Let me know how you make out with those PE cooling louvres; I could not figure them out at all. Keith gave me a heads up on the two rigging points above the wing root as well, they are much too high as supplied but an easy fix.
Looking very good; I'm tempted to stop work for a while, let you surge ahead, and then follow in your tracks! I am really not looking forward to mounting the upper wing, especially installing the "N"struts to the fuselage. The PE attachment brackets are very frail and tiny, any tricks in mind??

Cheers,
Lance
mtnflyer
_VISITCOMMUNITY
Alberta, Canada
Joined: March 08, 2009
KitMaker: 394 posts
AeroScale: 360 posts
Posted: Saturday, June 04, 2011 - 09:40 AM UTC

Quoted Text

I'm tempted to stop work for a while, let you surge ahead, and then follow in your tracks! Cheers,Lance


Now don't be doing that, Lance. You'll be waiting a looooong time. But, thanks for the kind support. Guy
wing_nut
_VISITCOMMUNITY
New Jersey, United States
Joined: June 02, 2006
KitMaker: 1,212 posts
AeroScale: 468 posts
Posted: Sunday, June 05, 2011 - 12:46 PM UTC
No waitng... keep working... wanna see more!