_GOTOBOTTOM
Early Aviation
Discuss World War I and the early years of aviation thru 1934.
KotS GB 2011 Albatros D.III Mtnflyer
mtnflyer
_VISITCOMMUNITY
Alberta, Canada
Joined: March 08, 2009
KitMaker: 394 posts
AeroScale: 360 posts
Posted: Thursday, February 03, 2011 - 05:31 PM UTC
Hi, This is what I'm going to try and build. You should be aware that I'm going to take lots of photos, and post them here.


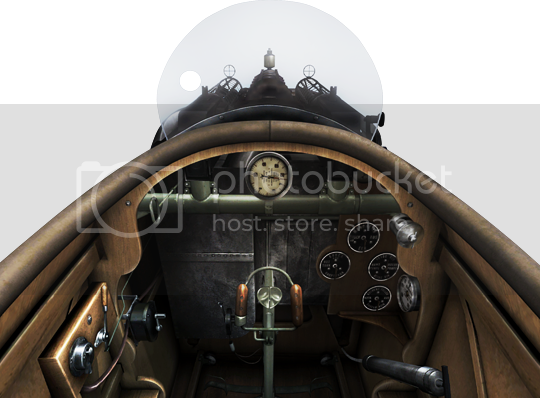
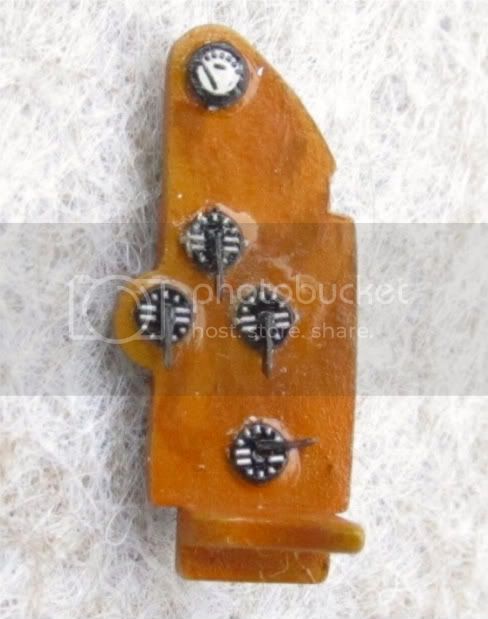
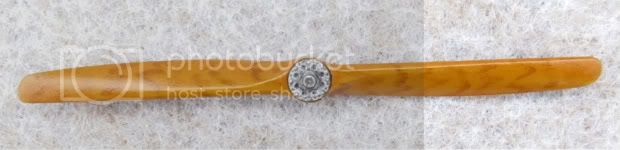
I'm going to go for the top one of these three:


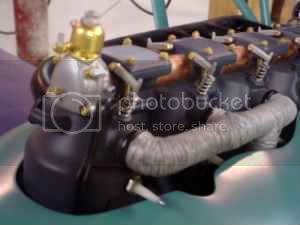
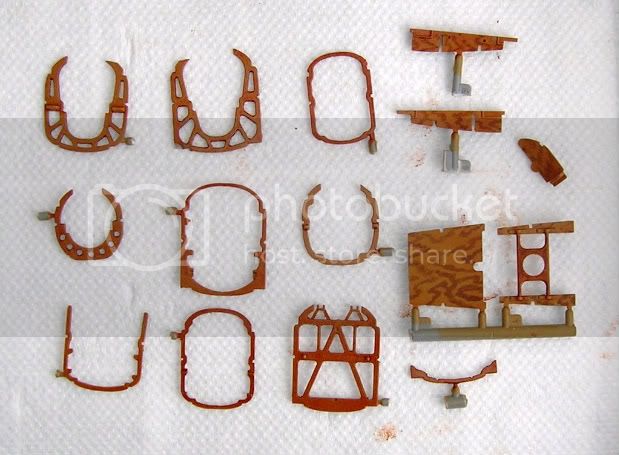
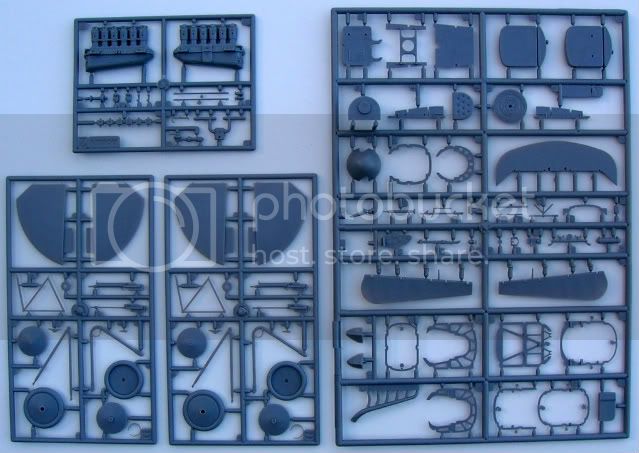
This is what I have to work with:


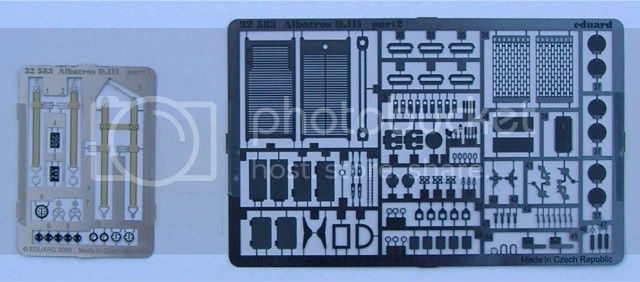
Tonight, I tried to put together a couple of guns using the PE. Obviously, it was my first attempt ever to champion this easier-said-than-done little niche of the hobby. My efforts were met with absolute and irreversible failure.


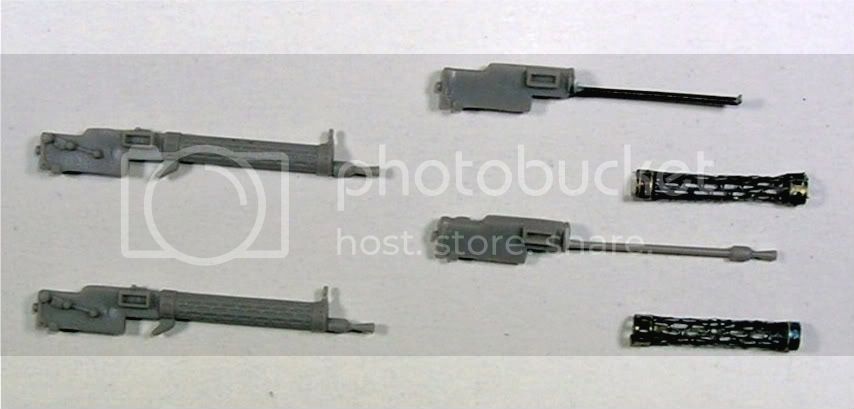
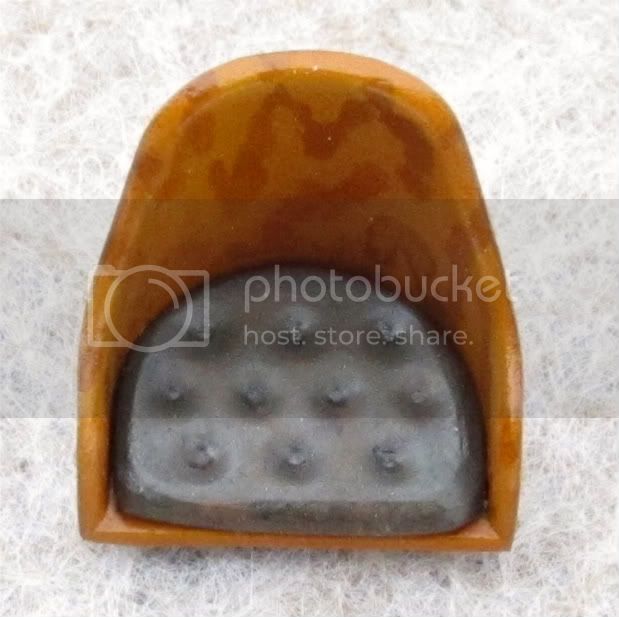
The molded gun jackets were measured with a micrometer at 2.68mm. I rolled the annealed PE jackets onto a 2.38mm brass tube, which I thought was 'close enough'. It turned out not.
The jackets were mutilated while trying to fit them onto the guns, they were too tight.

I'm just going to have to try again, and again, and again. Until I get it.

Guy
OEFFAG_153
_VISITCOMMUNITY
Västra Götaland, Sweden
Joined: February 19, 2010
KitMaker: 1,473 posts
AeroScale: 1,450 posts
Posted: Thursday, February 03, 2011 - 08:03 PM UTC
Hi Guy

You've chosen a very nice kit for the GB – looking forward to your build.

A tip for the jacket rolling, may be to use a larger tube, first, sort of half rolling them into a semi circle – then progressing to a slimmer tube, til you have the barrels closed, taking your time.

Works for me – and my first attempt at this looked way much worse than yours

Best Regards

Mikael
Kornbeef
_VISITCOMMUNITY
England - South East, United Kingdom
Joined: November 06, 2005
KitMaker: 1,667 posts
AeroScale: 1,551 posts
Posted: Thursday, February 03, 2011 - 08:33 PM UTC
Guy, Hi and welcome.

Albatros, wonderful. It is a lvely kit, panel line a little heavy and the interior is incorrect but that only worried AMS sufferers like myself. She builds nicely.

Barrel jackets, got to love them and hate them, looking at your pic you might be able to salvage them with care. Like Mikael I tend to roll them stage by stage but till they are slightly too small then open them out with a larger dia former (I use drill bits and punch bits).

you can spring and pinch them gently around the plastic circle at the front of the breech.

Just so you know I'm still merrily destroying barrel jackets, so you are not alone and it's no failure on your part.

If you need pointers with this kit, just holler, several of us have built it.

Keith
thegirl
_VISITCOMMUNITY
Alberta, Canada
Joined: January 19, 2008
KitMaker: 6,743 posts
AeroScale: 6,151 posts
Posted: Thursday, February 03, 2011 - 11:38 PM UTC
Nice to see you here taking part Guy in the GB !
Excellent choice of subject matter and very colourful ! I like it ! No worries on the gun jackets we all do it from time to time . As to what has been pointed out , start with a larger tube and work your way to a smaller one to the dia you are looking for .

We like pictures , so the more the merrier ! If you have any questiona lot's here to lend a hand
CaptainA
_VISITCOMMUNITY
Indiana, United States
Joined: May 14, 2007
KitMaker: 3,117 posts
AeroScale: 2,270 posts
Posted: Friday, February 04, 2011 - 12:36 AM UTC
I did a build review of this kit. It is a great kit.

Link to Item

Also, If you need replacement jackets, Eduard has a PE set for the D.III.
Mgunns
_VISITCOMMUNITY
Arizona, United States
Joined: December 12, 2008
KitMaker: 1,423 posts
AeroScale: 1,319 posts
Posted: Friday, February 04, 2011 - 01:43 AM UTC
Hi Guy:

Welcome to the KotS GB 2011, an exciting time for us WWI a/c builders as there is a lot to choose from in any scale. I built this kit, my second foray into 1/32nd scale kits, and did it in the candy stripe. It is a fun build, not a lot of fit problems, and if you aren't into AMS, looks great right out of the box.
Looking forward to seeing what you do with it. As Terri mentioned, we like pictures. Don't feel too bad about the jackets, I don't use them unless I have to.

Best

Mark
mtnflyer
_VISITCOMMUNITY
Alberta, Canada
Joined: March 08, 2009
KitMaker: 394 posts
AeroScale: 360 posts
Posted: Friday, February 04, 2011 - 06:20 PM UTC
Thankyou all for the warm greetings.

Carl, I've saved a bunch of photos from your build for reference. Hope you don't mind. You did a wonderful job on your build, and the link was so helpful. I read every word, studied every photo.

As far as the gun jackets go, so be it. I've ordered a couple sets of Aber Spandau's. Their the type with brass barrels and rolled jackets along with the PE. I'll record how not to model Spandau's, and post the photos when they arrive.

For now, I'm trying to get an engine together, and have a question. The following photo of a D.III describes a visual for my question, What is that on the front top of the engine? Is that a water pump?


Roden has an excellent molding, but, this part is not done. Studies of D.III photos show it there on a lot of aircraft, including the one I'm trying to build. I want to try and scratch it.

Thankyou for your help and tolerance. Guy
JackFlash
_VISITCOMMUNITY
Colorado, United States
Joined: January 25, 2004
KitMaker: 11,669 posts
AeroScale: 11,011 posts
Posted: Friday, February 04, 2011 - 08:28 PM UTC

Quoted Text

". . . For now, I'm trying to get an engine together, and have a question. The following photo of a D.III describes a visual for my question, What is that on the front top of the engine? Is that a water pump?


Roden has an excellent molding, but, this part is not done. Studies of D.III photos show it there on a lot of aircraft, including the one I'm trying to build. I want to try and scratch it.

Thank you for your help and tolerance. Guy"


It is an Air pump. The water pump us under the engine at the rear next to the oil pump.
mtnflyer
_VISITCOMMUNITY
Alberta, Canada
Joined: March 08, 2009
KitMaker: 394 posts
AeroScale: 360 posts
Posted: Saturday, February 05, 2011 - 05:51 AM UTC

Quoted Text

It is an Air pump. The water pump us under the engine at the rear next to the oil pump.


Thankyou Stephen. You can see on the artist's rendition below, how prominent this little water pump really is, and it stands out in real photos as well.


I'll try to get this little engine together today, and report on it later.
CaptainA
_VISITCOMMUNITY
Indiana, United States
Joined: May 14, 2007
KitMaker: 3,117 posts
AeroScale: 2,270 posts
Posted: Saturday, February 05, 2011 - 01:19 PM UTC
You should check out the WNW sight. On the kits that have this engine (Pfalz, Albatros DV / DVa), the instructions have some nice photos of the engines. There is also a nice thread on the diferent Mercedes engines which you may find helpful.

Link to Item

One word of warning. Once you do an Albatros, it seems to lead to another, and another... Apparently, Terri is the only one around here that is imune to its charm. While you are at the WNW site, you might find yourself getting a few. I think we love this thing becase it was so colorful, aesthetically pleasing, and its contributions to the Germans war effort are probably greater than any other aircraft of that era. WNW also has some wonderful decals available.
mtnflyer
_VISITCOMMUNITY
Alberta, Canada
Joined: March 08, 2009
KitMaker: 394 posts
AeroScale: 360 posts
Posted: Saturday, February 05, 2011 - 02:20 PM UTC
Thankyou Carl. Those are outstanding references.
Kornbeef
_VISITCOMMUNITY
England - South East, United Kingdom
Joined: November 06, 2005
KitMaker: 1,667 posts
AeroScale: 1,551 posts
Posted: Saturday, February 05, 2011 - 10:25 PM UTC
Guy,

If you are feeling like tinkering, know that the rocker assys need modding too, they should be the later with the arms on the front faces of the rocker boxes (as per the pic posted) for the Diii (OAW).
Stephen alerted me to this on my still ongoing (slumbering but not forgotton) build blog. I just thought I'd mention this as you are going to the trouble of sorting out the air pump.

Heres a link to my build, if you want to check it out, Stephen and others posted some nice snippets of info that just might help you too
here.

K
mtnflyer
_VISITCOMMUNITY
Alberta, Canada
Joined: March 08, 2009
KitMaker: 394 posts
AeroScale: 360 posts
Posted: Sunday, February 06, 2011 - 09:03 AM UTC
Yesterday, I was able to do a very little bit. Progress is at a snails pace.

I realized that I would have to fill a few sink-holes on the rocker boxes and in the fuselage sides:


For this, I used the Mr Surfacer/ nail polish remover/ Q-Tip technique:


I also tried to make some valve springs by wrapping a small piece of copper wire around a syringe. It works well, but is way out of scale, so is unusable. After this little expeiment, I read Kornbeefs build article and realized a guitar string would work for springs. So now, I have to find a quitar somewhere.
I also have a small piece of .010 rod that I'm going to use for spark plugs.


We'll have company today, but tonight I hope to spray Tamiya desert yellow on the formers and fuse interior. Soon, I'm going to try to make wood.
Mgunns
_VISITCOMMUNITY
Arizona, United States
Joined: December 12, 2008
KitMaker: 1,423 posts
AeroScale: 1,319 posts
Posted: Sunday, February 06, 2011 - 12:17 PM UTC
Looks like you are makeing progress. Even though a little it is still progress.

Looking forward to more.

Best

Mark
thegirl
_VISITCOMMUNITY
Alberta, Canada
Joined: January 19, 2008
KitMaker: 6,743 posts
AeroScale: 6,151 posts
Posted: Sunday, February 06, 2011 - 02:43 PM UTC

Quoted Text

You should check out the WNW sight. On the kits that have this engine (Pfalz, Albatros DV / DVa), the instructions have some nice photos of the engines. There is also a nice thread on the diferent Mercedes engines which you may find helpful.

Link to Item

One word of warning. Once you do an Albatros, it seems to lead to another, and another... Apparently, Terri is the only one around here that is imune to its charm. While you are at the WNW site, you might find yourself getting a few. I think we love this thing becase it was so colorful, aesthetically pleasing, and its contributions to the Germans war effort are probably greater than any other aircraft of that era. WNW also has some wonderful decals available.


I like it's charm , just that the D.III I have in the stash , and their is a few of them . All the wheels are to small . I really wish Eduard would fix this issue with the kit . I have built two D.V so far . The Pfalz D. III/a how ever is a different story . Almos finished another one done up in my own persoal markings . SO far it has lozenge on the wings and every thing else is black . Just not sure what to do for a making
thegirl
_VISITCOMMUNITY
Alberta, Canada
Joined: January 19, 2008
KitMaker: 6,743 posts
AeroScale: 6,151 posts
Posted: Sunday, February 06, 2011 - 02:57 PM UTC

Quoted Text

Yesterday, I was able to do a very little bit. Progress is at a snails pace.

I realized that I would have to fill a few sink-holes on the rocker boxes and in the fuselage sides:


For this, I used the Mr Surfacer/ nail polish remover/ Q-Tip technique:


I also tried to make some valve springs by wrapping a small piece of copper wire around a syringe. It works well, but is way out of scale, so is unusable. After this little expeiment, I read Kornbeefs build article and realized a guitar string would work for springs. So now, I have to find a quitar somewhere.
I also have a small piece of .010 rod that I'm going to use for spark plugs.


We'll have company today, but tonight I hope to spray Tamiya desert yellow on the formers and fuse interior. Soon, I'm going to try to make wood.


Nice start so far Guy ! If you have a music shop in your area you by just the string , they also work well for making pins when pinning wings or struts .

I use a drill bit the size of the spring I'm making one size smaller and will wrap the wire and this . I use wire from all kinds of stuff . Old phone cords , power cords , ones off of computers etc, etc . This gives me a whole range of different sizes .

Once the wire is wrap around the bit tightly pack , before sliding it off lighty pull on bothe ends to open up the coil a bit . Now side it off and cut the spring to lenght .
mtnflyer
_VISITCOMMUNITY
Alberta, Canada
Joined: March 08, 2009
KitMaker: 394 posts
AeroScale: 360 posts
Posted: Sunday, February 27, 2011 - 12:13 PM UTC
Well, I have been tinkering. I'm no match for the experts that frequent this forum, but, theres nothing wrong with learning. I've tried to make some wood, using Tamiya Desert Yellow, Floquil Leather, and Burnt Sienna mixed with Yellow Ocrhe oils.

Certainly, I'm not unhappy with it, and I did have fun trying. Its clear to me, that this will be an extended build, riddled with new learning experiences.


I borrowed the painted plywood idea from one of CaptainA's excellent tutorials. Thankyou.

I would like to learn how to laminate the prop, that will come in time. I'm considering using masking tape and a darker oil. Just letting you know that I'm trying, even though I travel extensively. I've been bringing a little hobby kit with me, so I can keep it up. Guy
Mgunns
_VISITCOMMUNITY
Arizona, United States
Joined: December 12, 2008
KitMaker: 1,423 posts
AeroScale: 1,319 posts
Posted: Monday, February 28, 2011 - 08:06 AM UTC
Hi Guy:

For laminating you may want to try working with a ultra fine artists Pen. I found a set at Michaels craft shop, I think Stabillo makes them. Naturally experiment with a photo of a prop with laminate, it takes a little practice but the results can be favorable.

Best

Mark
mtnflyer
_VISITCOMMUNITY
Alberta, Canada
Joined: March 08, 2009
KitMaker: 394 posts
AeroScale: 360 posts
Posted: Monday, February 28, 2011 - 10:31 AM UTC
Thankyou Mark, I may just try your idea out.
thegirl
_VISITCOMMUNITY
Alberta, Canada
Joined: January 19, 2008
KitMaker: 6,743 posts
AeroScale: 6,151 posts
Posted: Monday, February 28, 2011 - 12:06 PM UTC
You know Guy , your wood grain turn out pretty well ! Not to bad at all . In time you will improve on this method . There is so many ways on how folks do this giving the option to try out a few of them . I'm still learning how to get better results with my . I did a small article on how I do my using acrylics . It's in my profile and is also pinned in General Aircraft .

Looking forward to your next up-date
mtnflyer
_VISITCOMMUNITY
Alberta, Canada
Joined: March 08, 2009
KitMaker: 394 posts
AeroScale: 360 posts
Posted: Sunday, April 17, 2011 - 11:33 AM UTC
WHOA! I'm crawling at such a snails pace here that my thread was pushed way back to the 4th page! Oh Well, I'm a tinkerer.

And I am further tinkering. You can see I'm a little heavy with the glue, and not all that straight:


And some other slow progress:


I purchased this Aber set to replace my earlier mess on the Eduard Spandau's, and have a question. Should these be annealed prior to glueing them with Super Glue??


Currently working on the engine. Guy

Kornbeef
_VISITCOMMUNITY
England - South East, United Kingdom
Joined: November 06, 2005
KitMaker: 1,667 posts
AeroScale: 1,551 posts
Posted: Sunday, April 17, 2011 - 12:32 PM UTC
Hi Guy, good to see you progressing with this.

No you don't need to anneal the aber parts, probably better not to actually as the parts are preformed and annealing would soften them.


Keith.
mtnflyer
_VISITCOMMUNITY
Alberta, Canada
Joined: March 08, 2009
KitMaker: 394 posts
AeroScale: 360 posts
Posted: Sunday, April 17, 2011 - 12:46 PM UTC

Quoted Text

No you don't need to anneal the aber parts, probably better not to actually as the parts are preformed and annealing would soften them.
Keith.


Keith, thankyou for the intel! Guy
thegirl
_VISITCOMMUNITY
Alberta, Canada
Joined: January 19, 2008
KitMaker: 6,743 posts
AeroScale: 6,151 posts
Posted: Sunday, April 17, 2011 - 02:17 PM UTC
I really like how your seat cushion turned out !
Bigrip74
_VISITCOMMUNITY
Texas, United States
Joined: February 22, 2008
KitMaker: 5,026 posts
AeroScale: 2,811 posts
Posted: Sunday, April 17, 2011 - 02:26 PM UTC
Guy, I have been trying to imulate your seat but no luck so far. Great job on your floor wood work!

Bob
 _GOTOTOP