Hi all fellow GB builders
– My subject has arrived in the post. Its the Wingnut Wings 1:32 Hansa Brandenburg W.29 – and all I can say is WOW what a kit! A larger than normal box, stuffed with fantasticly moulded trees – This is going to be fun!
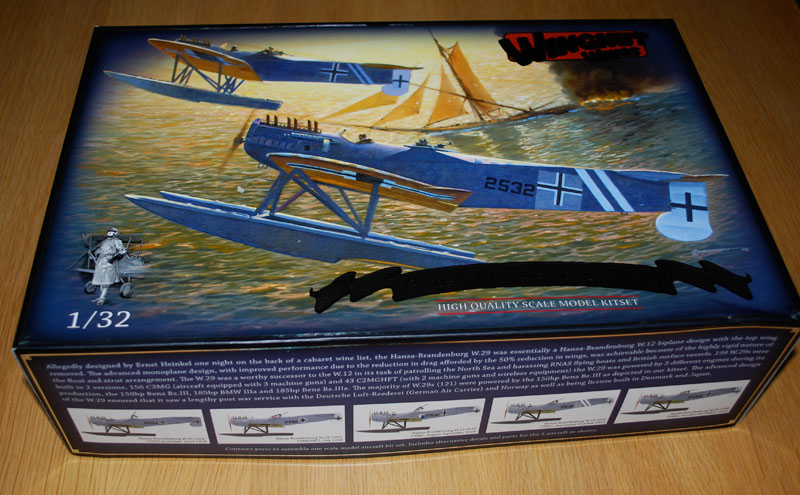
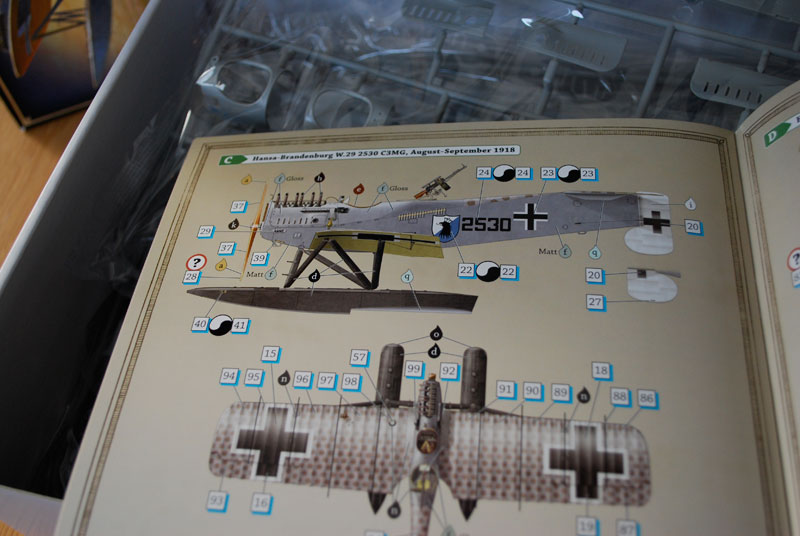
This is the profile I will be doing – partly because it is to my eye the most "colourful" profile – and because there is a very nice photograph in the Albatros Datafile on p. 8 of this plane on a rail trolley on the dockside at Zeebrugge, with two naval pilots sitting and leaning on the wing.
This is the scene I want to try partly recreate. Now – I guess the vignette of this build will not be a part of the GB itself, but I really like the idea of setting a scene with this build – so bear with me
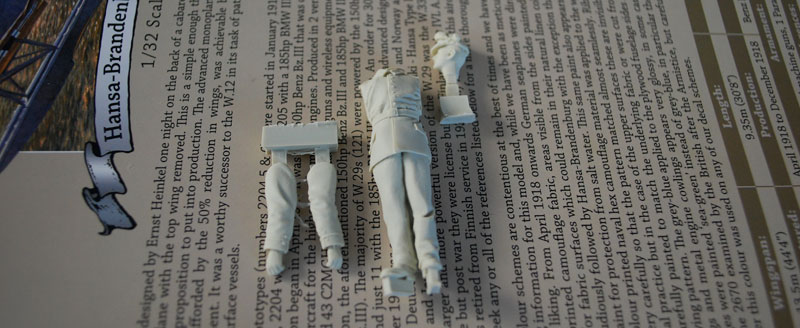
Here's one of the figures I'll be using, its a figure from Jon Smith Modellbau – the other one is a WW2 Uboat capatin of Andrea miniatures Captain Obviously they will need some work to be more in keeping with the setting. But Naval pilots of this time wore a very varied wardrobe of both filed grey and naval blue garments, so it should not be too difficult.
There we are – build will start for real once the DH2 is finished.
Best Regards
Mikael
Early Aviation
Discuss World War I and the early years of aviation thru 1934.
Hosted by Jim Starkweather
KotS GB 2011 Hansa B. W.29 OEFFAG_153
OEFFAG_153
Västra Götaland, Sweden
Joined: February 19, 2010
KitMaker: 1,473 posts
AeroScale: 1,450 posts
Joined: February 19, 2010
KitMaker: 1,473 posts
AeroScale: 1,450 posts
Posted: Friday, February 04, 2011 - 12:13 AM UTC
CaptainA
Indiana, United States
Joined: May 14, 2007
KitMaker: 3,117 posts
AeroScale: 2,270 posts
Joined: May 14, 2007
KitMaker: 3,117 posts
AeroScale: 2,270 posts
Posted: Friday, February 04, 2011 - 12:50 AM UTC
I have this kit, and seriously considered doing it for the GB. But there are so many Albatri out there waiting for me. So, I am happy to see you jump into the GB with this kit. I am anxious to see what you can do with this big beautiful kit.
Kornbeef
England - South East, United Kingdom
Joined: November 06, 2005
KitMaker: 1,667 posts
AeroScale: 1,551 posts
Joined: November 06, 2005
KitMaker: 1,667 posts
AeroScale: 1,551 posts
Posted: Friday, February 04, 2011 - 01:24 AM UTC
I look forward to seeing this one take shape, I've toyed with the idea of buying this too, but as Carl says, so many Albatri out there and I have 3 albi part builts plus a host of other kits unfinished.
I'm sure you will wring the best out of her though, and yes this one just begs for a vinette.
K
I'm sure you will wring the best out of her though, and yes this one just begs for a vinette.
K
Mgunns
Arizona, United States
Joined: December 12, 2008
KitMaker: 1,423 posts
AeroScale: 1,319 posts
Joined: December 12, 2008
KitMaker: 1,423 posts
AeroScale: 1,319 posts
Posted: Friday, February 04, 2011 - 02:11 AM UTC
Hi Mikael:
I am glad to see that you are doing this. I have this as well, almost did it for the build, and as the build goes to December of 2011, I may do it as an additional build. I am looking forward to seeing your progress on this kit and what you eventually do with it for the vignette. Now..........get that DH-2 done! I am getting a DH-2 this month from Roll Models at our local club meeting on the 19th.
Best
Mark
JackFlash
Colorado, United States
Joined: January 25, 2004
KitMaker: 11,669 posts
AeroScale: 11,011 posts
Joined: January 25, 2004
KitMaker: 11,669 posts
AeroScale: 11,011 posts
Posted: Friday, February 04, 2011 - 04:46 AM UTC
Mine just arrive yesterday. This will be a thread I use for reference.
badwolf
England - East Anglia, United Kingdom
Joined: November 16, 2009
KitMaker: 79 posts
AeroScale: 75 posts
Joined: November 16, 2009
KitMaker: 79 posts
AeroScale: 75 posts
Posted: Friday, February 04, 2011 - 07:16 PM UTC
Well after a six week wait, mine also arrived yesterday, i know the postage was free, but some packing inside the box might have helped it stop moving around while its on its travels, i haven't removed it from the plastic bag to have a closer look, seems ok, but with the vat and handling charge, taking it close to £80.00 sorry this will be my last one i buy, what will the credit crunch and cut backs. But i look forward to see your build,
OEFFAG_153
Västra Götaland, Sweden
Joined: February 19, 2010
KitMaker: 1,473 posts
AeroScale: 1,450 posts
Joined: February 19, 2010
KitMaker: 1,473 posts
AeroScale: 1,450 posts
Posted: Sunday, February 06, 2011 - 08:12 PM UTC
Thank You all for your encouraging words I hope I can do this kit the justice it deserves...
Keith and Carl – One can never have too many Albies in ones collection, looking forward to your builds!
At the moment I'm studying the instructions and reading up on the W.29. Building will start as soon as...
Best Regards
Mikael
Keith and Carl – One can never have too many Albies in ones collection, looking forward to your builds!
At the moment I'm studying the instructions and reading up on the W.29. Building will start as soon as...
Best Regards
Mikael
JackFlash
Colorado, United States
Joined: January 25, 2004
KitMaker: 11,669 posts
AeroScale: 11,011 posts
Joined: January 25, 2004
KitMaker: 11,669 posts
AeroScale: 11,011 posts
Posted: Monday, February 07, 2011 - 11:22 AM UTC
I tried the websites you mention but can't pinpoint the figures. Like you I try to have figures next to or interactive with the builds.
OEFFAG_153
Västra Götaland, Sweden
Joined: February 19, 2010
KitMaker: 1,473 posts
AeroScale: 1,450 posts
Joined: February 19, 2010
KitMaker: 1,473 posts
AeroScale: 1,450 posts
Posted: Monday, February 07, 2011 - 08:35 PM UTC
Quoted Text
I tried the websites you mention but can't pinpoint the figures. Like you I try to have figures next to or interactive with the builds.
Greetings Stephen – Ah yes, I see the problem – that site does not seem to work quite as it should in my opinion... It goes back to a default page, rather than showing my search link...
Try this instead: Uboat Captain There are some more Uboat crew members on this site that I think could be used with a bit of rework. If you put in the words U boat in the search – you should get some results.
Best Regards
Mikael
CaptainA
Indiana, United States
Joined: May 14, 2007
KitMaker: 3,117 posts
AeroScale: 2,270 posts
Joined: May 14, 2007
KitMaker: 3,117 posts
AeroScale: 2,270 posts
Posted: Tuesday, February 08, 2011 - 12:29 AM UTC
That is a good looking figure. If he sits in the cockpit with his arm outside, it would be great. Let us know how he fits.
JackFlash
Colorado, United States
Joined: January 25, 2004
KitMaker: 11,669 posts
AeroScale: 11,011 posts
Joined: January 25, 2004
KitMaker: 11,669 posts
AeroScale: 11,011 posts
Posted: Tuesday, February 08, 2011 - 12:30 AM UTC
Excellent! I have it now. The standing figure is a John Modellbau?
OEFFAG_153
Västra Götaland, Sweden
Joined: February 19, 2010
KitMaker: 1,473 posts
AeroScale: 1,450 posts
Joined: February 19, 2010
KitMaker: 1,473 posts
AeroScale: 1,450 posts
Posted: Tuesday, February 08, 2011 - 01:49 AM UTC
Quoted Text
Excellent! I have it now. The standing figure is a John Modellbau?
Yes – Jon Smith is in my opinion one of the best figurine makers of the WWI period there is...
Unfortunately he does not do any pilot figures in this scale, but with a bit of work I think I can make this one look like he fits. Here is a link: Jon Smith Modellbau
Check out his work in 120 mm – some really great subjects there if you're so inclined
Mikael
badwolf
England - East Anglia, United Kingdom
Joined: November 16, 2009
KitMaker: 79 posts
AeroScale: 75 posts
Joined: November 16, 2009
KitMaker: 79 posts
AeroScale: 75 posts
Posted: Sunday, February 20, 2011 - 09:46 PM UTC
Just wanted to know has anyone got any comments on the Lozenge, takling to a few fellow w.w1 ers, and they seem to thing like me the Lozenge is the wrong colour, or to brown, they did two types brown was the earlier type and then started using the blue/grey for rest of war, and reading the booklet nothing about painting wings before appling the decal, like one did with the Flashback kit, so what do you think is the Lozenge correct! and as there's no surviving W29 with Naval Lozenge on to say who is correct and who isn't,
but it doesn't look right to me! but what do i know!
JackFlash
Colorado, United States
Joined: January 25, 2004
KitMaker: 11,669 posts
AeroScale: 11,011 posts
Joined: January 25, 2004
KitMaker: 11,669 posts
AeroScale: 11,011 posts
Posted: Monday, February 21, 2011 - 03:45 AM UTC
I have an e-mail out to Dan San Abbott on the hex loz. I may have to do Lozenge 301 for the Naval applications.
Repainted
Östergötland, Sweden
Joined: April 04, 2006
KitMaker: 1,058 posts
AeroScale: 1,004 posts
Joined: April 04, 2006
KitMaker: 1,058 posts
AeroScale: 1,004 posts
Posted: Wednesday, March 16, 2011 - 11:47 PM UTC
This will be interesting I say. Are we painting figs for this one? I will follow you´r progress.
Do not ask, I´m lazy and never can get something finished nowadays
//Larsa
Do not ask, I´m lazy and never can get something finished nowadays
//Larsa
OEFFAG_153
Västra Götaland, Sweden
Joined: February 19, 2010
KitMaker: 1,473 posts
AeroScale: 1,450 posts
Joined: February 19, 2010
KitMaker: 1,473 posts
AeroScale: 1,450 posts
Posted: Thursday, March 17, 2011 - 04:19 AM UTC
Hi Larsa,
Great to hear from you again
Yup there will be figure painting going ons with this project – I have a couple on order from Modelcellar, and another one from Andrea, that I will convert a bit to suit... Pitty I don't have too much time on my hands to build thogh
Best Regards
Mikael
Great to hear from you again
Yup there will be figure painting going ons with this project – I have a couple on order from Modelcellar, and another one from Andrea, that I will convert a bit to suit... Pitty I don't have too much time on my hands to build thogh
Best Regards
Mikael
Repainted
Östergötland, Sweden
Joined: April 04, 2006
KitMaker: 1,058 posts
AeroScale: 1,004 posts
Joined: April 04, 2006
KitMaker: 1,058 posts
AeroScale: 1,004 posts
Posted: Thursday, March 17, 2011 - 04:31 AM UTC
Looking forward on thoose figs
/Larsa
/Larsa
OEFFAG_153
Västra Götaland, Sweden
Joined: February 19, 2010
KitMaker: 1,473 posts
AeroScale: 1,450 posts
Joined: February 19, 2010
KitMaker: 1,473 posts
AeroScale: 1,450 posts
Posted: Monday, March 21, 2011 - 04:25 AM UTC
Hi all
Finally time for a proper build update pics and all. I've been busy – mostly with the "W" thing (well kits cost money so not a lot of choice there), but also a lot of things happening at home – so building has been very slow, but at least I've got some things done.
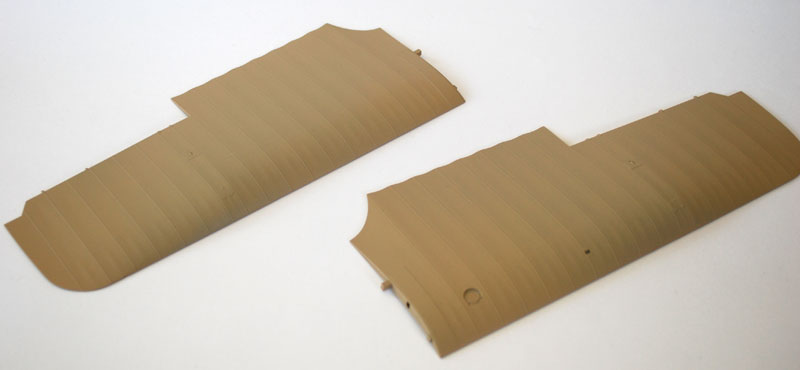
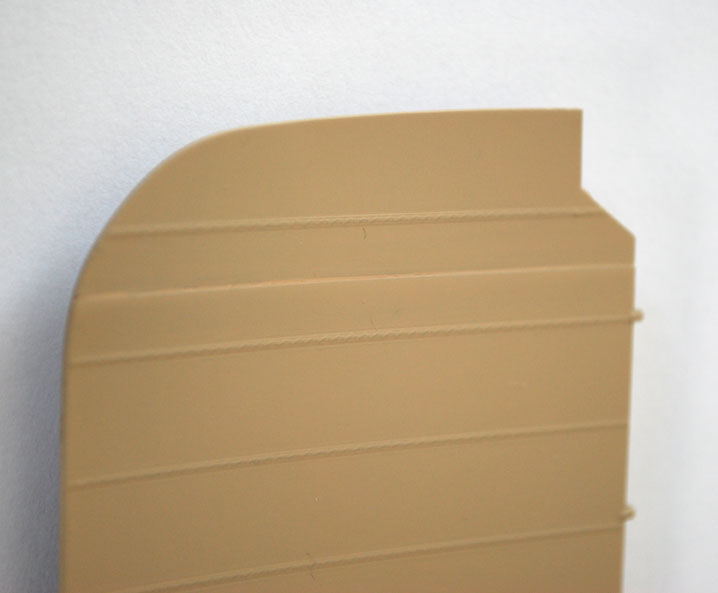
So far its been pretty straightforward, with only one slight hitch – as I primed the asssembled wings I noticed a slight step where they meet at the seam underneath – see pics below.
I am building this pretty much out of the box, and will only ad some bits an pieces like fulelines, and plugleads. I also plan to dress it up a bit with throttle linkage and such. The tolerances are as usual very tight, and I had to scrape away some paint in the joints, but it does not seem quite as tight as in their first kit batch.
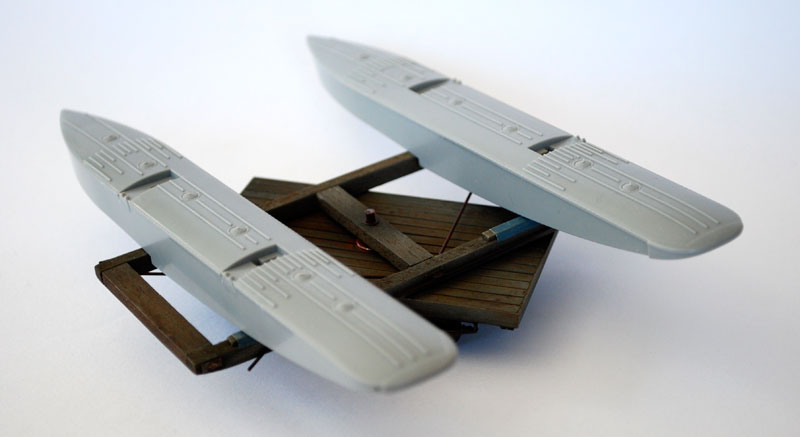
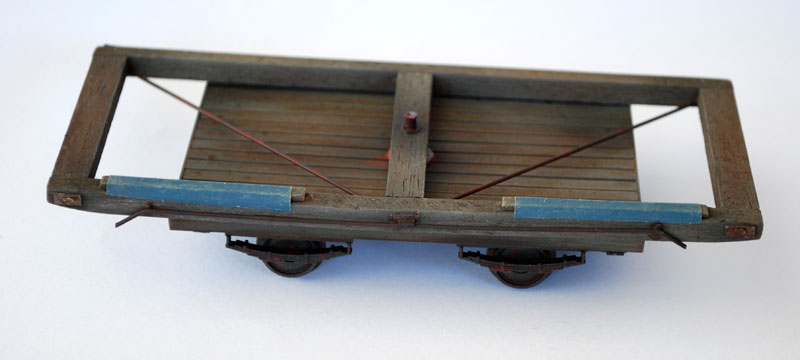
With this build I kind of started from the bottom up... As I will put it into a small diorama at Zeebrugge – I also wanted to recreate the railcarts – so heres what I came up with:
I scratched most of it from styrene stock and balsa wood. The wheels are HO items and the springs comes from the WNW kit (I think they are for another kind of trolley) Measurements are not exact as I could not find any clear pics of it – but I used the people in the pics to get a notion of the size – I think its about right...
And this is what it looks like with the assembled pontoons on:
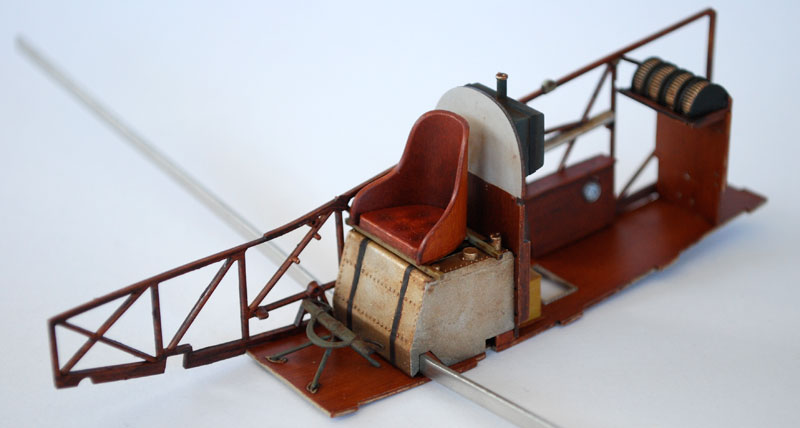
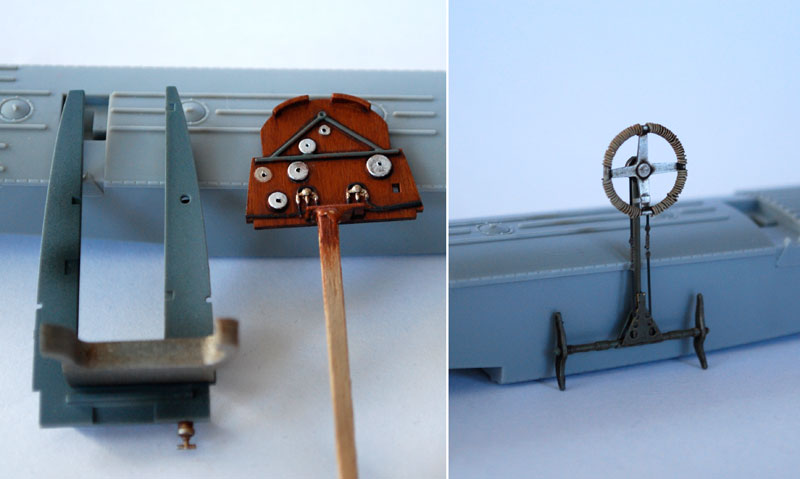
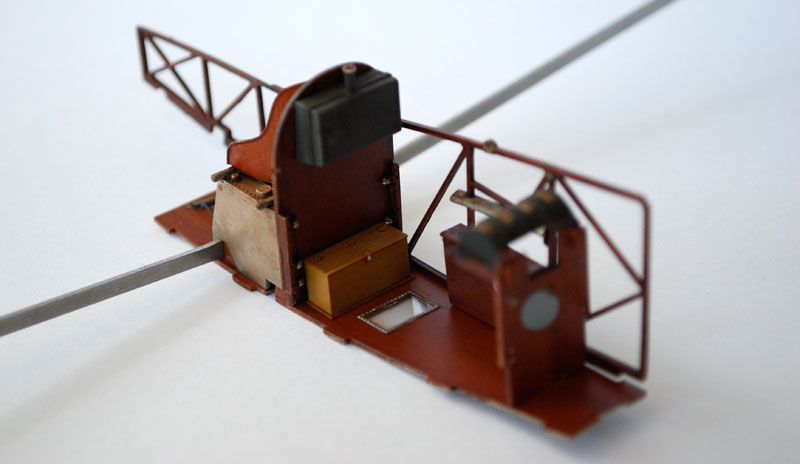
Here are some interior bits and pieces – still some to go in, and then some more pipes and leads...
The steering wheel got some copper wires wound round the rim, to ad some more detail (I saw Des do the same on his build over at the drome)
The wings are really massive, and beautifully detailed – with a bit of future on they'll be ready for the naval hex (BTW – has there been any answers as to what is corrcet here or not?)
Heres the troublesome joint – I need to do a bit of filing to get it all even...
There – hopefully it will not be as long before the next update.
Any and all comments and suggestions are as usual most welcome.
Best Regards
Mikael
Repainted
Östergötland, Sweden
Joined: April 04, 2006
KitMaker: 1,058 posts
AeroScale: 1,004 posts
Joined: April 04, 2006
KitMaker: 1,058 posts
AeroScale: 1,004 posts
Posted: Monday, March 21, 2011 - 05:04 AM UTC
That´s a really nice start there my friend. I did not order that kit My guess is that was a mistake, but you can´t build them all or ......?
//Larsa
//Larsa
dmopath
Kentucky, United States
Joined: July 02, 2010
KitMaker: 175 posts
AeroScale: 174 posts
Joined: July 02, 2010
KitMaker: 175 posts
AeroScale: 174 posts
Posted: Monday, March 21, 2011 - 05:59 AM UTC
The build looks outstanding so far. I really like the rail trolly. I also will be keeping this thread as a reference.
OEFFAG_153
Västra Götaland, Sweden
Joined: February 19, 2010
KitMaker: 1,473 posts
AeroScale: 1,450 posts
Joined: February 19, 2010
KitMaker: 1,473 posts
AeroScale: 1,450 posts
Posted: Tuesday, March 22, 2011 - 08:27 AM UTC
Quoted Text
That´s a really nice start there my friend. I did not order that kit My guess is that was a mistake, but you can´t build them all or ......?
//Larsa
Thank You Larsa my friend
– I used to have the ambition to build all 1:32 kits there was – but this was when Roden only had a few and WNW was just a dream in Sir Jacksons mind Now I'm having a hard time keeping up with all the new releases in this scale, nevermind building them – so I think you need to pick the raisins of the cake. The Hansa is one of my raisins
Quoted Text
The build looks outstanding so far. I really like the rail trolly. I also will be keeping this thread as a reference.e
Thank You Dennis – the rail trolly was really good fun to do
Best Regards
Mikael
Neomega
England - East Midlands, United Kingdom
Joined: August 15, 2010
KitMaker: 43 posts
AeroScale: 35 posts
Joined: August 15, 2010
KitMaker: 43 posts
AeroScale: 35 posts
Posted: Tuesday, March 22, 2011 - 04:52 PM UTC
Any aeroplane with a steering wheel gets my vote!
Keep up the good work!
Gordon.
Keep up the good work!
Gordon.
thegirl
Alberta, Canada
Joined: January 19, 2008
KitMaker: 6,743 posts
AeroScale: 6,151 posts
Joined: January 19, 2008
KitMaker: 6,743 posts
AeroScale: 6,151 posts
Posted: Wednesday, March 23, 2011 - 02:03 PM UTC
Very , very nice Mikael !
Love the trolly on how it turned out , how did you do the weathering on her ?
Mgunns
Arizona, United States
Joined: December 12, 2008
KitMaker: 1,423 posts
AeroScale: 1,319 posts
Joined: December 12, 2008
KitMaker: 1,423 posts
AeroScale: 1,319 posts
Posted: Thursday, March 24, 2011 - 12:29 AM UTC
HI Mikeal:
I like your subtle weathering on the fuel tank, your interior really looks clean and orderly. The trolley is really neat and will really add interest to the model.

Looking forward to more.
Best
Mark
I like your subtle weathering on the fuel tank, your interior really looks clean and orderly. The trolley is really neat and will really add interest to the model.
Looking forward to more.
Best
Mark
vulkanizer
Croatia Hrvatska
Joined: December 26, 2009
KitMaker: 144 posts
AeroScale: 109 posts
Joined: December 26, 2009
KitMaker: 144 posts
AeroScale: 109 posts
Posted: Thursday, March 24, 2011 - 10:56 AM UTC
Very precisely and realistically painted interior, and like the others have said trolley is 1/1