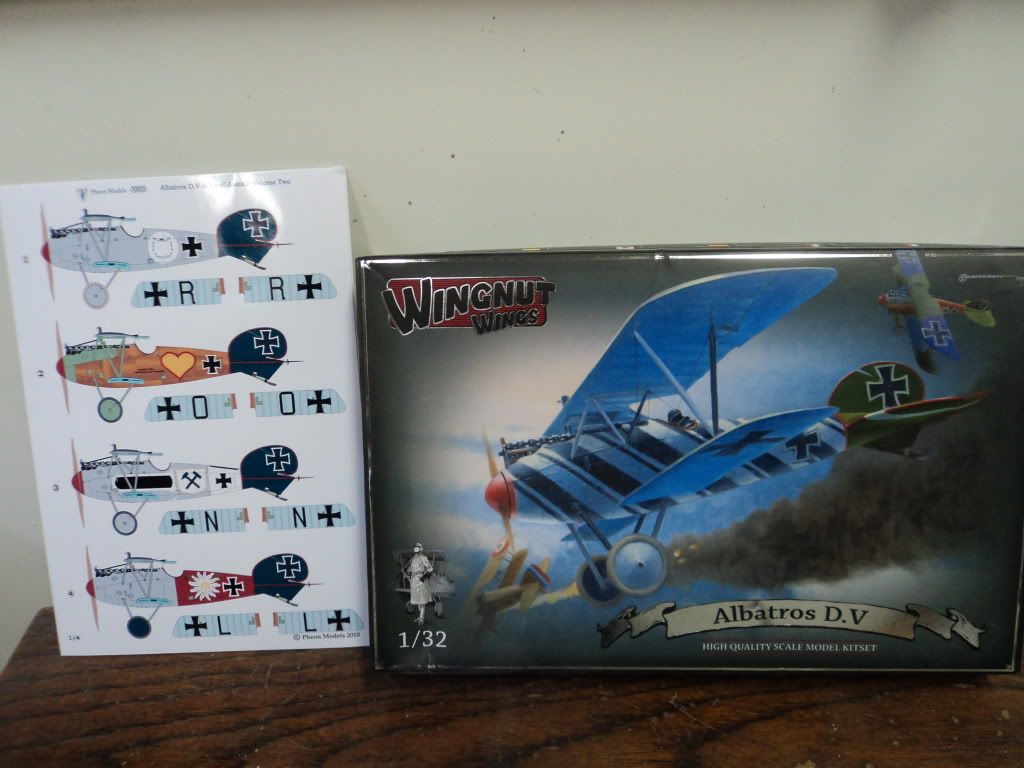
_GOTOBOTTOM
Early Aviation
Discuss World War I and the early years of aviation thru 1934.
KotS GB 2011 Albatros D.V MGunns
Mgunns
_VISITCOMMUNITY
Arizona, United States
Joined: December 12, 2008
KitMaker: 1,423 posts
AeroScale: 1,319 posts
Posted: Saturday, February 26, 2011 - 05:52 AM UTC
Greetings all:

I will be doing a second GB this time WNW's Albatros DV in Wilhelm Lehman's Jasta 5 Markings, using the PHEON models Decal sheet.
It is pictured at the bottom of the sheet, in the Edelweiss markings. I will also be using the Windsock Data File on the WNW Albatros Build, the Squadron "Albatros" in action, the WNW instructions for references.


Work has begun on the engine, with pictures to follow.

Best

Mark
CaptainA
_VISITCOMMUNITY
Indiana, United States
Joined: May 14, 2007
KitMaker: 3,117 posts
AeroScale: 2,270 posts
Posted: Saturday, February 26, 2011 - 06:32 AM UTC
Great choice for a second build.
thegirl
_VISITCOMMUNITY
Alberta, Canada
Joined: January 19, 2008
KitMaker: 6,743 posts
AeroScale: 6,151 posts
Posted: Sunday, February 27, 2011 - 02:47 AM UTC
Will be looking forward to this one Mark

Nice colour scheme as well ..
This post was removed.
Mgunns
_VISITCOMMUNITY
Arizona, United States
Joined: December 12, 2008
KitMaker: 1,423 posts
AeroScale: 1,319 posts
Posted: Monday, February 28, 2011 - 02:40 AM UTC
Thanks Terri: It will be slow until I get settled into the house, I am looking forward to it.

Carl:
Thanks for the heads up, I have the D.Va as well, I can also consult that kit for proper placement, but will print out your post with the updated placements.

Thanks

Mark
Mgunns
_VISITCOMMUNITY
Arizona, United States
Joined: December 12, 2008
KitMaker: 1,423 posts
AeroScale: 1,319 posts
Posted: Monday, February 28, 2011 - 01:36 PM UTC
Okay Folks:

Here are the references and the extra's I will be using.


The HGW Seat belts are the fabric one featured on this site, and the Other PE is left over from the Encore Albatros DII Boelcke Kit I did last spring.

Thanks for stopping by.

Best

Mark

JackFlash
_VISITCOMMUNITY
Colorado, United States
Joined: January 25, 2004
KitMaker: 11,669 posts
AeroScale: 11,011 posts
Posted: Monday, February 28, 2011 - 05:39 PM UTC
Greetings all we have input from Richard Alexander at WnW today on the issue of the kit decals.

"Hi Stephen,

I note there is some confusion starting on Aeroscale about 32009 Albatros D.V decal placement. While we are not perfect I do not believe we have got this many decal numbers incorrect.

I believe this confusion is being caused by someone trying to use the
instructions from 32009 Albatros D.V to place decals from 32015
Albatros D.Va. It is important to note that these are different models
with different decal sheets.

I would hate for too many people to be mislead by your forum. Anyone looking for decal numbers 72, 73, 74, 75 and 76 on their 32009 Albatros D.V decal sheet they will have a hard time finding them when they only go up to 71.

May I suggest that a quick check of the review samples you have on hand should clear matters up.

If not, please feel free to let me know.

Regards
Richard"
CaptainA
_VISITCOMMUNITY
Indiana, United States
Joined: May 14, 2007
KitMaker: 3,117 posts
AeroScale: 2,270 posts
Posted: Tuesday, March 01, 2011 - 11:38 PM UTC
on 2011-03-02 05:10, JackFlash wrote:
Richard Alexander sent this along.

'I note there is some confusion starting on Aeroscale about 32009 Albatros D.V decal placement. While we are not perfect I do not believe we have got this many decal numbers incorrect.

I believe this confusion is being caused by someone trying to use the
instructions from 32009 Albatros D.V to place decals from 32015
Albatros D.Va. It is important to note that these are different models
with different decal sheets.

I would hate for too many people to be mislead by your forum (and now
your review). Anyone looking for decal numbers 72, 73, 74, 75 and
76 on their 32009 Albatros D.V decal sheet they will have a hard time
finding them when they go up to 71.

May I suggest that a quick check of the review samples you have on hand should clear matters up.

If not, please feel free to let me know.

Regards
Richard "

Well good folk, in response to this.

I noticed the decals that go on the dashboard were not the all black switches that appear on the dashboard on the pictures and on the D.Va. Also, there is one guage that goes on the dashboard, which was way oversized, and would not fit on the dashboard. I can't remember, but I think it is the ammo counter. These did not match up, which caused me to have to switch a lot of decals around.

I see the point he is making. I do not have the D.V decals. It is possible the mix up is because the decals might be numbered differently between the two kits. I will go back and make this notation on my post. I will also make an apology as I feel this is my mistake.

So let me be humble and admit my mistake. The decals are numbered correctly in the kits. My notation about incorrect decals is only correct if you are using the D.V instructions with the D.Va kit (and decals). I am sorry if I caused any confusion. These are two wonderful kits that beg to be built, so go out and build them.

I was unable to edit the post which stated this. So let me make clear, the decals are correct unless you are interchanging one kits decals with the other kits instructions.
Mgunns
_VISITCOMMUNITY
Arizona, United States
Joined: December 12, 2008
KitMaker: 1,423 posts
AeroScale: 1,319 posts
Posted: Wednesday, March 02, 2011 - 01:17 AM UTC
Hi Carl:

Apology accepted : Now, get down and give me 20

Thanks Richard for pointing this out bringing it to our attention.

Best

Mark
CaptainA
_VISITCOMMUNITY
Indiana, United States
Joined: May 14, 2007
KitMaker: 3,117 posts
AeroScale: 2,270 posts
Posted: Wednesday, March 02, 2011 - 01:22 AM UTC

Quoted Text

Now, get down and give me 20


Can I spread those out over three weeks, and start in about 6 months? I got a profile.
Kornbeef
_VISITCOMMUNITY
England - South East, United Kingdom
Joined: November 06, 2005
KitMaker: 1,667 posts
AeroScale: 1,551 posts
Posted: Wednesday, March 02, 2011 - 03:19 AM UTC
Humble pie...nice with custard.
lcarroll
_VISITCOMMUNITY
Alberta, Canada
Joined: July 26, 2010
KitMaker: 1,032 posts
AeroScale: 1,025 posts
Posted: Wednesday, March 02, 2011 - 04:40 AM UTC

Quoted Text

on 2011-03-02 05:10, JackFlash wrote:
Richard Alexander sent this along.

'I note there is some confusion starting on Aeroscale about 32009 Albatros D.V decal placement. While we are not perfect I do not believe we have got this many decal numbers incorrect.

I believe this confusion is being caused by someone trying to use the
instructions from 32009 Albatros D.V to place decals from 32015
Albatros D.Va. It is important to note that these are different models
with different decal sheets.

I would hate for too many people to be mislead by your forum (and now
your review). Anyone looking for decal numbers 72, 73, 74, 75 and
76 on their 32009 Albatros D.V decal sheet they will have a hard time
finding them when they go up to 71.

May I suggest that a quick check of the review samples you have on hand should clear matters up.

If not, please feel free to let me know.

Regards
Richard "

Well good folk, in response to this.

I noticed the decals that go on the dashboard were not the all black switches that appear on the dashboard on the pictures and on the D.Va. Also, there is one guage that goes on the dashboard, which was way oversized, and would not fit on the dashboard. I can't remember, but I think it is the ammo counter. These did not match up, which caused me to have to switch a lot of decals around.

I see the point he is making. I do not have the D.V decals. It is possible the mix up is because the decals might be numbered differently between the two kits. I will go back and make this notation on my post. I will also make an apology as I feel this is my mistake.

So let me be humble and admit my mistake. The decals are numbered correctly in the kits. My notation about incorrect decals is only correct if you are using the D.V instructions with the D.Va kit (and decals). I am sorry if I caused any confusion. These are two wonderful kits that beg to be built, so go out and build them.

I was unable to edit the post which stated this. So let me make clear, the decals are correct unless you are interchanging one kits decals with the other kits instructions.


Hey Carl,
Be easy on yourself.........I remember being wrong once as well!
Big thing is, as with all your contributions, your comments were offered to provide a heads up to all of your compadres out there and in a constructive nature. As for your comment about the kits and getting them built absolutely correct. I have the Va (and a pile of after market stuff) and will be ordering the DV shortly. Based on what I've seen on site and the incredible quality I see every (Often!) time I open the box during the planning/research process they represent "the" standard of quality that other manufacturers will find difficult to attain.
Looking forward to more on your build.

Cheers,
JackFlash
_VISITCOMMUNITY
Colorado, United States
Joined: January 25, 2004
KitMaker: 11,669 posts
AeroScale: 11,011 posts
Posted: Wednesday, March 02, 2011 - 05:19 AM UTC

Quoted Text

Well good folk, in response to this.

I noticed the decals that go on the dashboard were not the all black switches that appear on the dashboard on the pictures and on the D.Va. Also, there is one guage that goes on the dashboard, which was way oversized, and would not fit on the dashboard. I can't remember, but I think it is the ammo counter. These did not match up, which caused me to have to switch a lot of decals around.

I see the point he is making. I do not have the D.V decals. It is possible the mix up is because the decals might be numbered differently between the two kits. I will go back and make this notation on my post. I will also make an apology as I feel this is my mistake.

So let me be humble and admit my mistake. The decals are numbered correctly in the kits. My notation about incorrect decals is only correct if you are using the D.V instructions with the D.Va kit (and decals). I am sorry if I caused any confusion. These are two wonderful kits that beg to be built, so go out and build them.

I was unable to edit the post which stated this. So let me make clear, the decals are correct unless you are interchanging one kits decals with the other kits instructions.


No worries Carl.
thegirl
_VISITCOMMUNITY
Alberta, Canada
Joined: January 19, 2008
KitMaker: 6,743 posts
AeroScale: 6,151 posts
Posted: Wednesday, March 02, 2011 - 12:49 PM UTC
No worries at all Carl , look how many times I'm wrong here and I still hold my head up high . Also nice to know that the decals for the DV and DVa are two different sheets altogether .
Mgunns
_VISITCOMMUNITY
Arizona, United States
Joined: December 12, 2008
KitMaker: 1,423 posts
AeroScale: 1,319 posts
Posted: Thursday, March 10, 2011 - 01:22 AM UTC
Greetings all:

Keeping the thread alive. I am still moving my wifes stuff into my house. Like stuffing 10lbs of stuff into a 5 lb bucket. We should be done this weekend, two weeks worth of packing and moving. I am beat! So the modeling is on hold until at least next week. I do have some work done on the engine, but nothing noteworthy at this point. Stay tuned.

Thanks

Mark
Kornbeef
_VISITCOMMUNITY
England - South East, United Kingdom
Joined: November 06, 2005
KitMaker: 1,667 posts
AeroScale: 1,551 posts
Posted: Thursday, March 10, 2011 - 05:18 AM UTC
Hope to see you back at the bench soon and progress being made. Life as always has to take preference.
CaptainA
_VISITCOMMUNITY
Indiana, United States
Joined: May 14, 2007
KitMaker: 3,117 posts
AeroScale: 2,270 posts
Posted: Thursday, March 10, 2011 - 12:16 PM UTC

Quoted Text

Life as always has to take preference.


So very true. But I am sure we all don't mind waiting.

Removed by original poster on 03/11/11 - 01:20:16 (GMT).
Mgunns
_VISITCOMMUNITY
Arizona, United States
Joined: December 12, 2008
KitMaker: 1,423 posts
AeroScale: 1,319 posts
Posted: Monday, March 21, 2011 - 02:55 PM UTC
Okay Folks:

Made a little progress over the weekend and today. I finished the engine up. I didn't super detail it as I am going to button up the cowlings so just enough to show through.


I also picked up the Tiger Models Exhaust for the Albatros. The fit is perfect:

You can compare the Tiger Models exhaust with the Kit Exhaust. The kit provided exhaust is nice in itself, but; the Tiger Models is already hollowed out at the exhaust end, has nice flange detail and with the exhaust already open, it saves the modeler the grief of trying to open the kit exhaust.


Thanks for stopping by, more later.

Best

Mark
OEFFAG_153
_VISITCOMMUNITY
Västra Götaland, Sweden
Joined: February 19, 2010
KitMaker: 1,473 posts
AeroScale: 1,450 posts
Posted: Monday, March 21, 2011 - 09:20 PM UTC
Hi Mark,

Great progress on that engine, your extra attention to the details does make it come alive – and the exhaust looks the business too!

Best Regards

Mikael
Mgunns
_VISITCOMMUNITY
Arizona, United States
Joined: December 12, 2008
KitMaker: 1,423 posts
AeroScale: 1,319 posts
Posted: Tuesday, March 22, 2011 - 12:17 AM UTC
Hi Mikael:

Thanks for the kind words. I still need to do a little dry brushing and a dull cote, but as Bobby "The Brain" Fiskne would say, it has the look. For the most part the engine is finished and on to the interior.
lalanagas
_VISITCOMMUNITY
Tabasco, Mexico
Joined: November 26, 2007
KitMaker: 31 posts
AeroScale: 26 posts
Posted: Tuesday, March 22, 2011 - 02:35 AM UTC
Hi Mark


looks interesting this project, as I would like to have one of these models, I'm in the group that you mentioned. and I hope to get all the juice to my camel of Smer.


I'll be aware of the updates.


Greetings Luis Antonio.
Mgunns
_VISITCOMMUNITY
Arizona, United States
Joined: December 12, 2008
KitMaker: 1,423 posts
AeroScale: 1,319 posts
Posted: Tuesday, March 22, 2011 - 06:07 AM UTC
Hi Luis:

Thanks for stopping by and taking a look. More updates coming.

Best

Mark
Mgunns
_VISITCOMMUNITY
Arizona, United States
Joined: December 12, 2008
KitMaker: 1,423 posts
AeroScale: 1,319 posts
Posted: Friday, March 25, 2011 - 12:50 AM UTC
Greetings All:

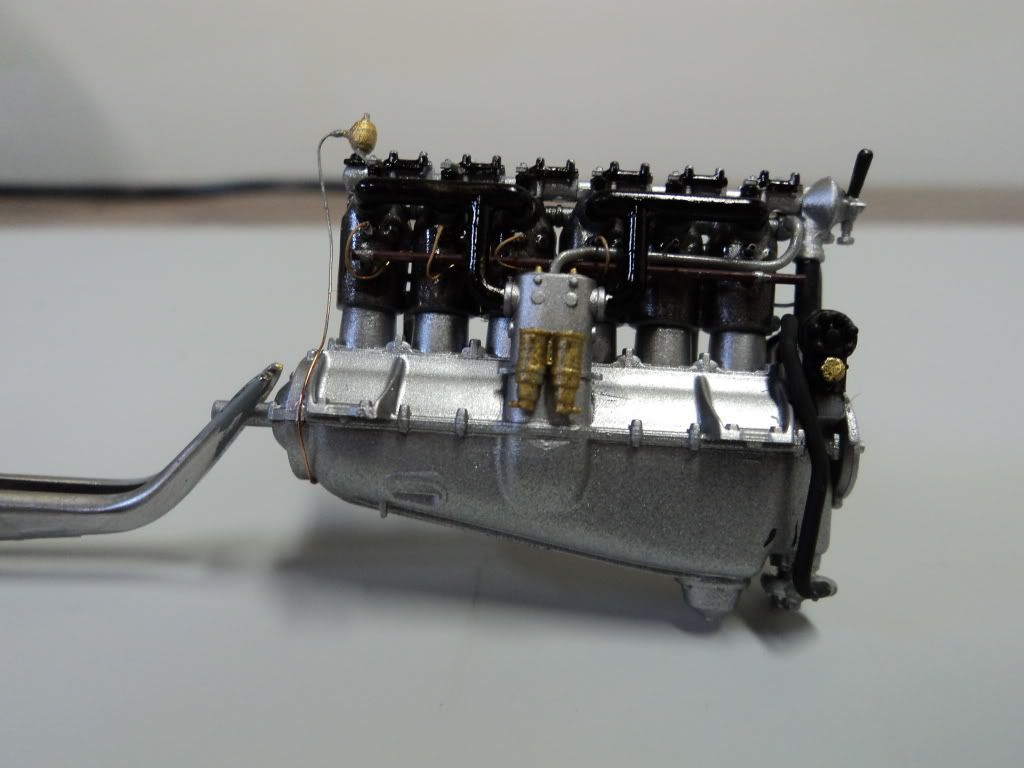
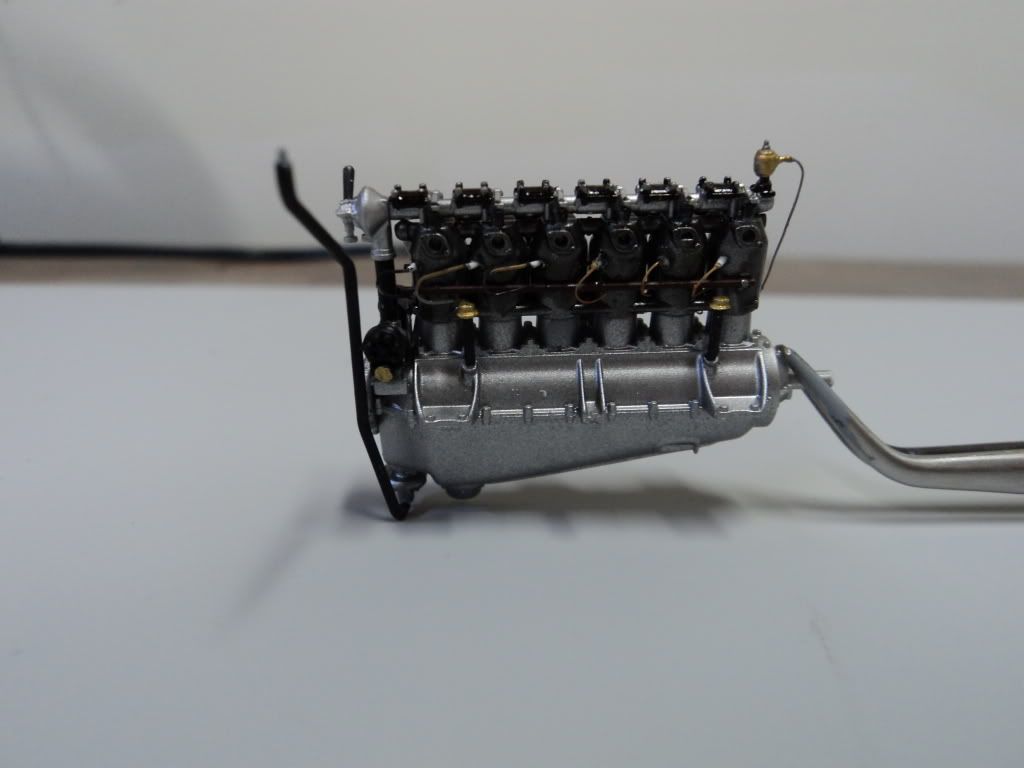
I have made a little progress on the Albatros. I have been experimenting with different effects for wood. I am not real happy with what I have done, but as it is all in inconspicuous places, I think it will achieve the desired effect. Anyway, here are some pics of what I was doing.. I tried some white wood grain on the inside, and brown on some of the panel sections and the props. When it all dries assembly in earnest will commence.
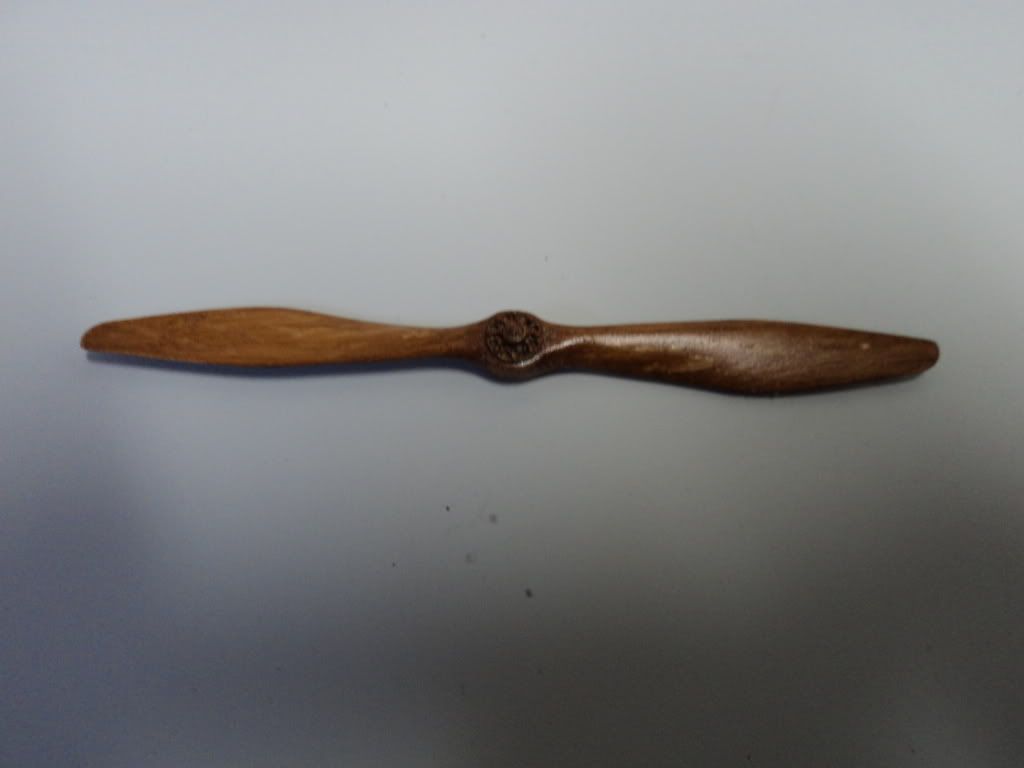
Here is one of the props I tried using brown striations, I think the brown is too harsh.

Here is one of the props I used white striations, again I think it is too harsh, maybe a yellow or a lighter wood like testors wood.

Here is the interior, I painted the base color Tamiya Flat Flesh, painted some white wood grain, then went over it with Sienna and Umber. I am somewhat satisfied with it, just need to get the white down real faint.

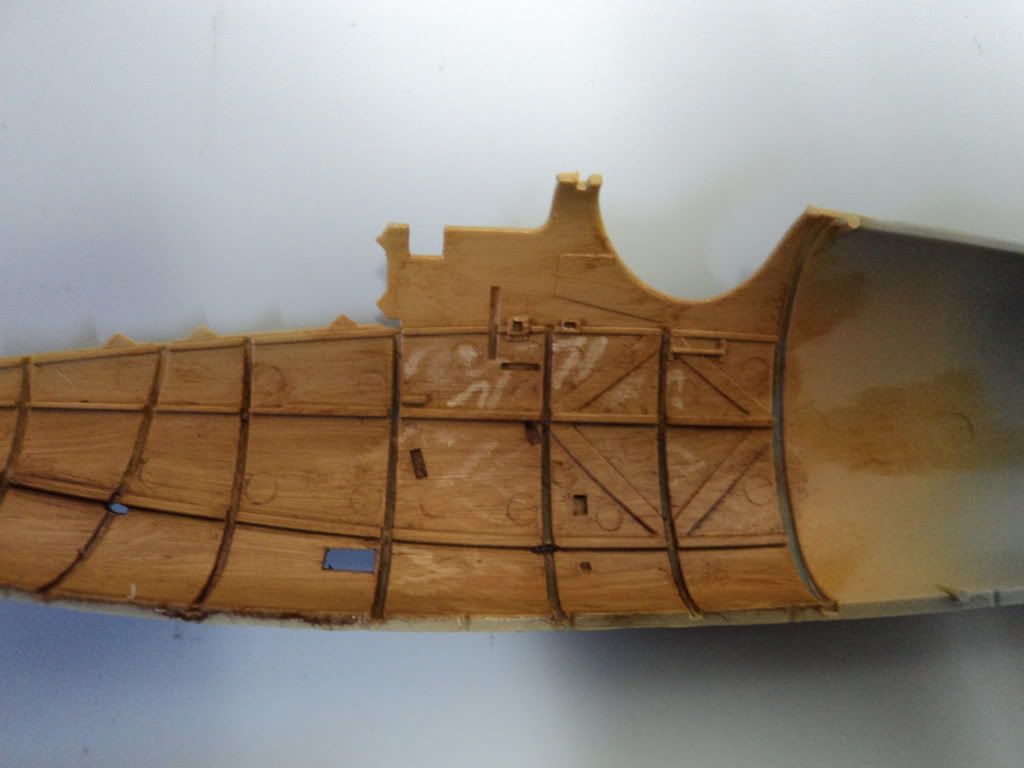
And here is the floor, again I think the brown is too harsh, and I am just not happy with the wood effect. I think that is why I want to paint the Albatros rather than do a wood scheme.

Thanks for scoping it out.

Best

Mark

Here is
thegirl
_VISITCOMMUNITY
Alberta, Canada
Joined: January 19, 2008
KitMaker: 6,743 posts
AeroScale: 6,151 posts
Posted: Friday, March 25, 2011 - 02:08 PM UTC
Hi Mark

I see what you mean on the brown , but over all you did do a nice job at her . The second prop would be my choice for the effect that you are after.

Maybe once you get your choice of clear yellow or orange it will tone done the effect some blending it in better .

Looking forward to your next up-date
 _GOTOTOP