

Welcome to the Vac Attack campaign!
Please post your progress and campaign fellowship here
If you haven't already joined, you can Enlist Here
Please post the photos of you completed build in the Official Campaign Gallery
Air Campaigns
Want to start or join a group build? This is where to start.
Want to start or join a group build? This is where to start.
Hosted by Frederick Boucher, Michael Satin
OFFICIAL: Vac Attack Campaign Thread

camogirl

Joined: October 20, 2005
KitMaker: 1,045 posts
AeroScale: 622 posts

Posted: Saturday, April 30, 2011 - 11:20 AM UTC

ludwig113

Joined: February 05, 2008
KitMaker: 1,381 posts
AeroScale: 1,110 posts

Posted: Monday, May 02, 2011 - 07:50 PM UTC
hi all,
well here is what i'm building...

1/48 polikarpov with etch cockpit,resin wheels and a vac canopy.
paul
well here is what i'm building...
1/48 polikarpov with etch cockpit,resin wheels and a vac canopy.
paul
ludwig113
Joined: February 05, 2008
KitMaker: 1,381 posts
AeroScale: 1,110 posts
Posted: Tuesday, May 03, 2011 - 03:00 AM UTC
well this took me about half an hour,dead easy.

paul
paul
ludwig113
Joined: February 05, 2008
KitMaker: 1,381 posts
AeroScale: 1,110 posts
Posted: Wednesday, May 04, 2011 - 03:31 AM UTC
and heres the next stage.
a small glass shelf with wet and dry paper,i'll wet it when sanding.

paul
a small glass shelf with wet and dry paper,i'll wet it when sanding.
paul

Jessie_C


Joined: September 03, 2009
KitMaker: 6,965 posts
AeroScale: 6,247 posts

Posted: Wednesday, May 04, 2011 - 10:50 AM UTC
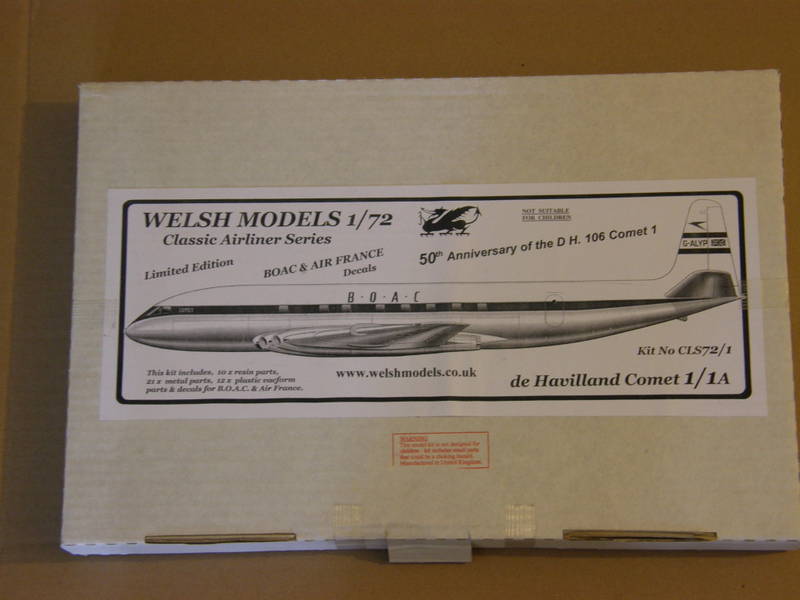
My entry will be Welsh Models' 1/72 Comet 1. This is the sleekest, prettiest looking jetliner there ever was.
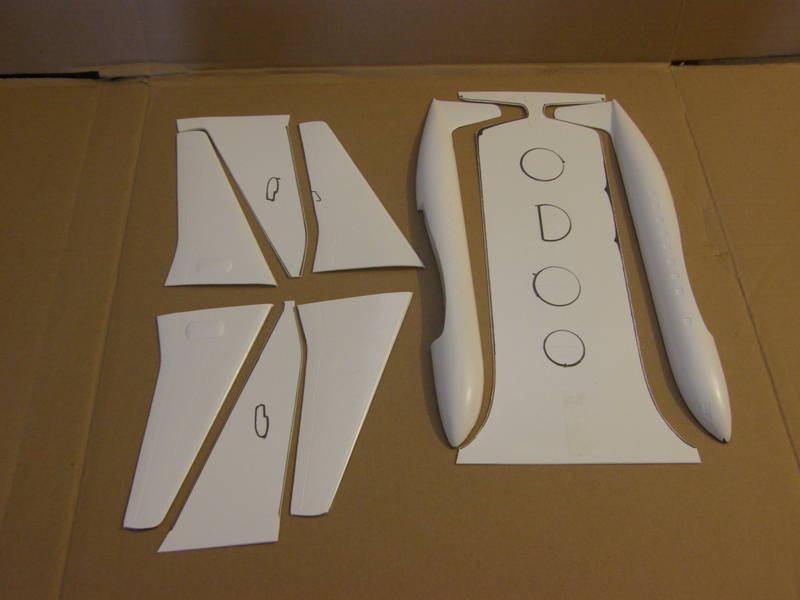
Vac parts already mostly cut out. It went so quickly I forgot to take a starting picture.
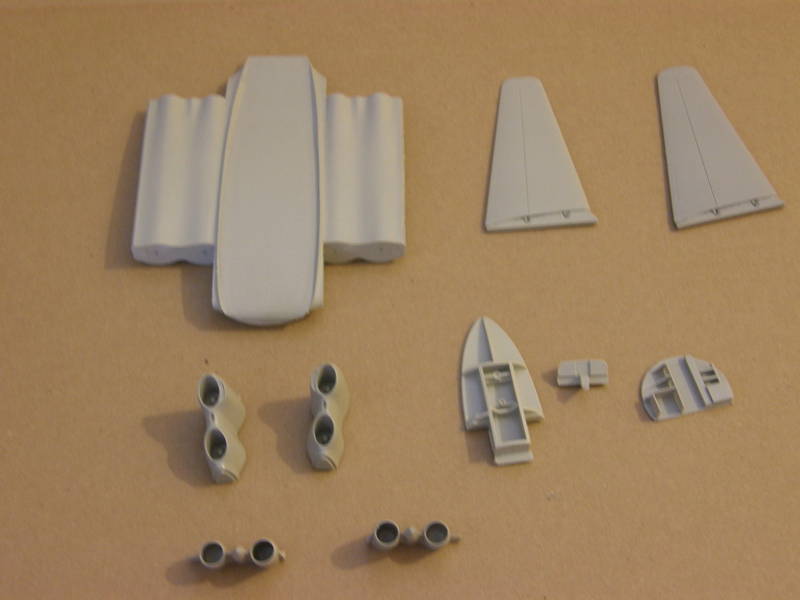
Resin parts. You get a monstrous centre section, tailplanes, intakes, exhausts and cockpit/nose gear well. The rear bulkhead shelves suffered a little in shipping. I'll have to replace them with plastic card.
Metal parts. I notice that a main wheel has gone astray. Oh well, I'll have to make a copy...

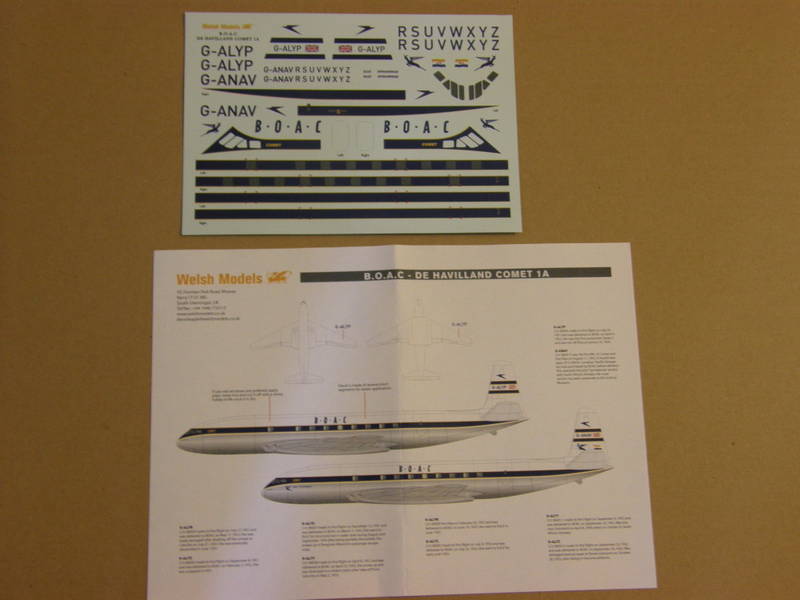
BOAC decals. The kit also offers an Air France option.
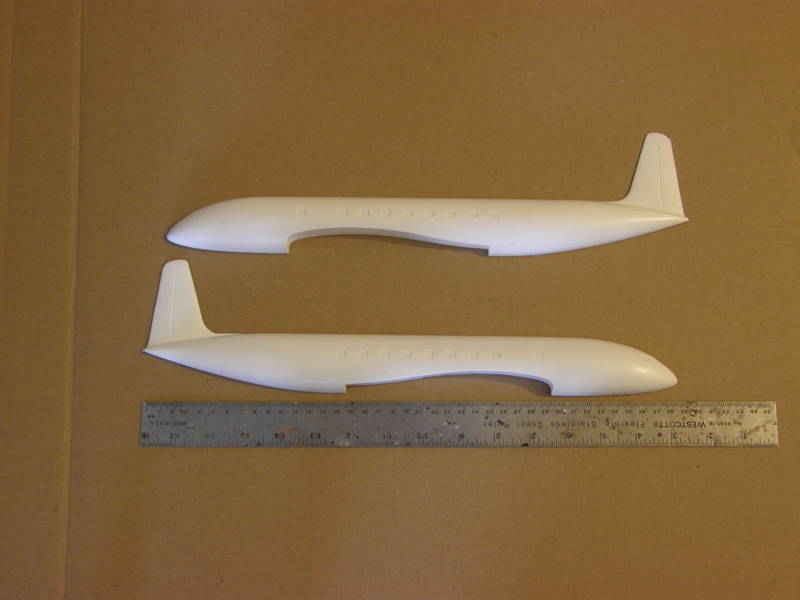
Here are the fuselage halves next to a 45cm (18") ruler. Comets are smaller than one might think. Today's 737-600 is about the same size and carries more than twice the passengers. Oh for the days of luxury and spacious seats in air travel...
Vac parts already mostly cut out. It went so quickly I forgot to take a starting picture.
Resin parts. You get a monstrous centre section, tailplanes, intakes, exhausts and cockpit/nose gear well. The rear bulkhead shelves suffered a little in shipping. I'll have to replace them with plastic card.
Metal parts. I notice that a main wheel has gone astray. Oh well, I'll have to make a copy...
BOAC decals. The kit also offers an Air France option.
Here are the fuselage halves next to a 45cm (18") ruler. Comets are smaller than one might think. Today's 737-600 is about the same size and carries more than twice the passengers. Oh for the days of luxury and spacious seats in air travel...
Removed by original poster on 05/05/11 - 05:46:13 (GMT).
Removed by original poster on 05/05/11 - 05:47:42 (GMT).

magnusf

Joined: May 02, 2006
KitMaker: 1,953 posts
AeroScale: 1,902 posts
Posted: Wednesday, May 04, 2011 - 07:19 PM UTC
I'm joining with this year's second Bücker Bestmann, the first can be found here. Beware, that one is not a vacforum though  ! It is however the very reason for starting this build since there were some essential spare parts coming with that kit AND a generous sheet of decals, the only parts I miss for this build now is a set of seats and a pair of wheels. Seats can be scratch-built and I would be astonished if I don't find a pair of suitable wheels in the spare parts box!
There is also a story that goes with this old Airmodel kit. I got it from a childhood friend when he quit building fifteen or so years ago, he had bought it for his (now late) father who was an Sk 25 (SWAF designation for the Bestmann) mechanic during WWII who never got around to build it. So, after dwelling in a plastic bag for probably nearly 30 years the time has finally come to build it! It will be a bit different from the original intentions since I will go for the Egyptian decal option from the AZ models kit.
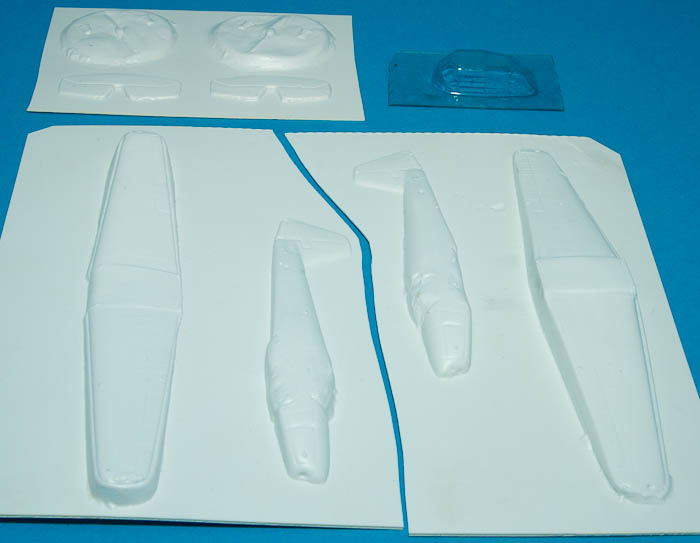
At some point in history I cut the sheet in two to fit it into a box. This is all that comes with the kit, I wonder why they did a prop and a set of landing gear legs that are sure to be useless while a set of wheels and seats actually can be used, even if they are vacformed!
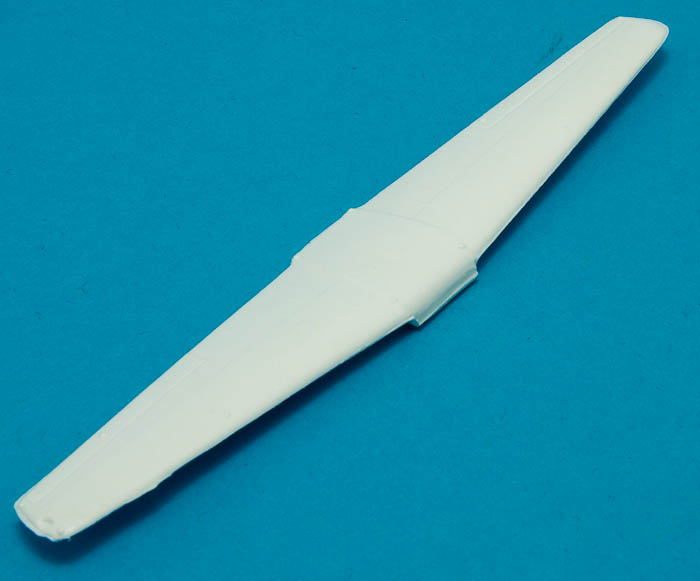
The wing glued together, two rather flimsy halves glued together form a quite sturdy (and lightweight!) wing!
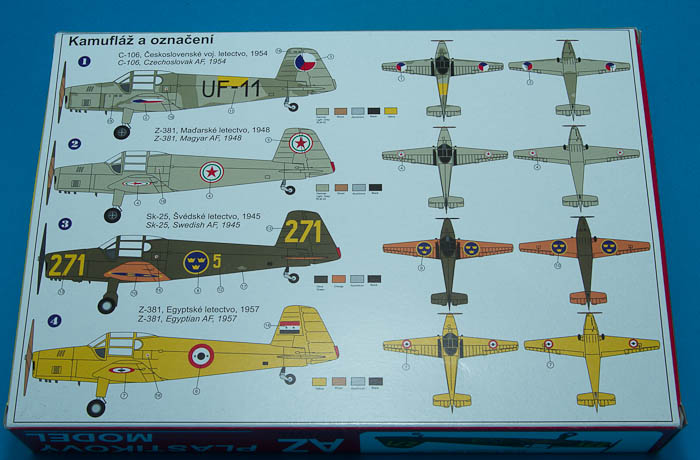
Decal options from the AZ models kit, I'll go for the all-yellow Egyptian one!
Paul! Clever choice of model, it doesn't have a full canopy (my main worry with this kit)
Jessica! Beautiful choice of model. I have several Welsh Models kits (a SAAB 340 was one of the candidates for this campaign, an Avro Vulcan was another) and they all look very nice. The Comet is something really special!

Magnus
! It is however the very reason for starting this build since there were some essential spare parts coming with that kit AND a generous sheet of decals, the only parts I miss for this build now is a set of seats and a pair of wheels. Seats can be scratch-built and I would be astonished if I don't find a pair of suitable wheels in the spare parts box!There is also a story that goes with this old Airmodel kit. I got it from a childhood friend when he quit building fifteen or so years ago, he had bought it for his (now late) father who was an Sk 25 (SWAF designation for the Bestmann) mechanic during WWII who never got around to build it. So, after dwelling in a plastic bag for probably nearly 30 years the time has finally come to build it! It will be a bit different from the original intentions since I will go for the Egyptian decal option from the AZ models kit.
At some point in history I cut the sheet in two to fit it into a box. This is all that comes with the kit, I wonder why they did a prop and a set of landing gear legs that are sure to be useless while a set of wheels and seats actually can be used, even if they are vacformed!
The wing glued together, two rather flimsy halves glued together form a quite sturdy (and lightweight!) wing!
Decal options from the AZ models kit, I'll go for the all-yellow Egyptian one!
Paul! Clever choice of model, it doesn't have a full canopy (my main worry with this kit)
Jessica! Beautiful choice of model. I have several Welsh Models kits (a SAAB 340 was one of the candidates for this campaign, an Avro Vulcan was another) and they all look very nice. The Comet is something really special!
Magnus
ludwig113
Joined: February 05, 2008
KitMaker: 1,381 posts
AeroScale: 1,110 posts
Posted: Thursday, May 05, 2011 - 02:00 AM UTC
great to see some more people starting
that comet should look great jessica and magnus, i'm starting with a small vac form model as i need to learn the basics before tackling some larger ones in the stash.
all the best paul
that comet should look great jessica and magnus, i'm starting with a small vac form model as i need to learn the basics before tackling some larger ones in the stash.
all the best paul
magnusf
Joined: May 02, 2006
KitMaker: 1,953 posts
AeroScale: 1,902 posts
Posted: Thursday, May 05, 2011 - 09:45 AM UTC

I have glued the fuselage halves as well. I'll do as much as possible of the filling and sanding before opening the wing and canopy cutouts.
I am betting heavily on that it will be possible to build much of the interior on the wing centre section and then insert it all from below...
Magnus

Dunners01

Joined: April 05, 2011
KitMaker: 15 posts
AeroScale: 14 posts
Posted: Thursday, May 05, 2011 - 01:55 PM UTC
Huh - success at last - It has just taken me 5 days to work out how to post images here. What an effort. Thank goodness its not my day job. (this also explains the mysterious deleted posts of a couple of days ago.)
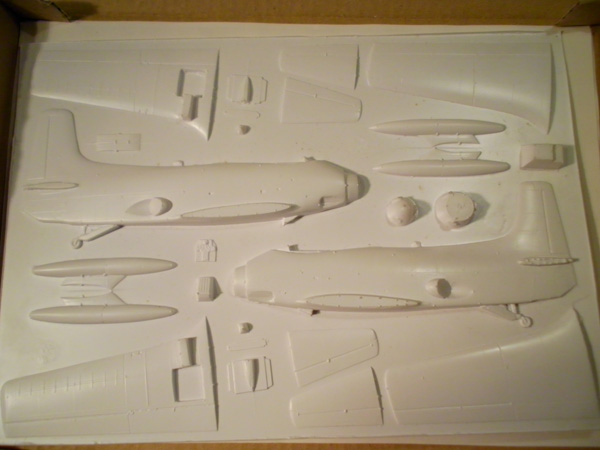
Anyway - this is my project - the Rareplanes A2D-1. This is the Hannants produced product rather than the original rareplanes, the good news about this is that the canopy has withstood the ravages of time and not turned yellow, unlike some of my other Rareplanes offerings. The kit also has a more refined surface detail without the multitude of rivet detail that early Rareplane releases had. Not that that matters as the first task is to strip it back and rescribe.
The box top - as you may be able to tell this has been around for a while. I picked the kit up second hand some time ago. There looks be be some sort of mould growing on the box.

The plastic - Not too bad, plenty of mold pips especially on the mating surfaces for the wings and tail planes. The spinner and u/carriage end caps are overdrawn and will need to be filled. Lots of stuff to keep me entertained here.
Now that I seem to have worked things out I should be able to post a couple of other photos later.
Cheers Brent
Anyway - this is my project - the Rareplanes A2D-1. This is the Hannants produced product rather than the original rareplanes, the good news about this is that the canopy has withstood the ravages of time and not turned yellow, unlike some of my other Rareplanes offerings. The kit also has a more refined surface detail without the multitude of rivet detail that early Rareplane releases had. Not that that matters as the first task is to strip it back and rescribe.
The box top - as you may be able to tell this has been around for a while. I picked the kit up second hand some time ago. There looks be be some sort of mould growing on the box.
The plastic - Not too bad, plenty of mold pips especially on the mating surfaces for the wings and tail planes. The spinner and u/carriage end caps are overdrawn and will need to be filled. Lots of stuff to keep me entertained here.
Now that I seem to have worked things out I should be able to post a couple of other photos later.
Cheers Brent

GaryKato

Joined: December 06, 2004
KitMaker: 3,694 posts
AeroScale: 163 posts

Posted: Sunday, May 08, 2011 - 04:38 PM UTC
I must have been insane to enlist in this one. Took a picture today of the kit contents.

ludwig113
Joined: February 05, 2008
KitMaker: 1,381 posts
AeroScale: 1,110 posts
Posted: Monday, May 09, 2011 - 01:33 AM UTC
welcome brent and gary.
cant wait to see that venom gary.
paul
cant wait to see that venom gary.
paul
Dunners01
Joined: April 05, 2011
KitMaker: 15 posts
AeroScale: 14 posts
Posted: Friday, May 13, 2011 - 12:28 AM UTC
I have used construction foam to provide ridigity for the fuselage. Not really required for this kit but handy for larger models.
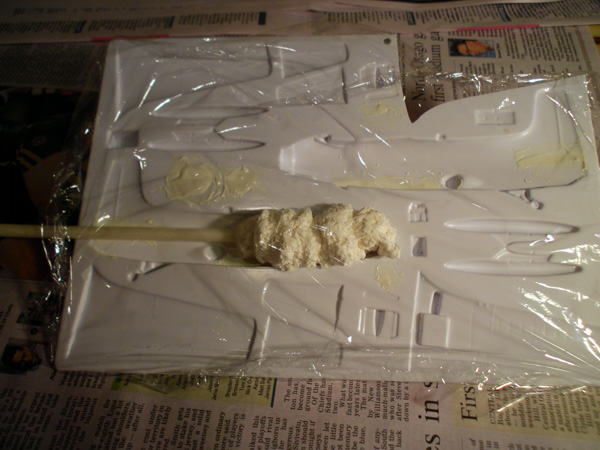
Cling flim gives me the opportunity to push the foam into place as it comes out of the nozzle. The disadvantage is that it delays the setting of the foam considerably. You may be able to just spot some epoxy filler used to provide a backing to the sections that have been overdrawn. This is a great product to use as it has the consistancy of margarine which make application easy, sands easily but best of all does not give off heat as it sets, nor contain solvents, thus protecting an already sensitive part from further damage.
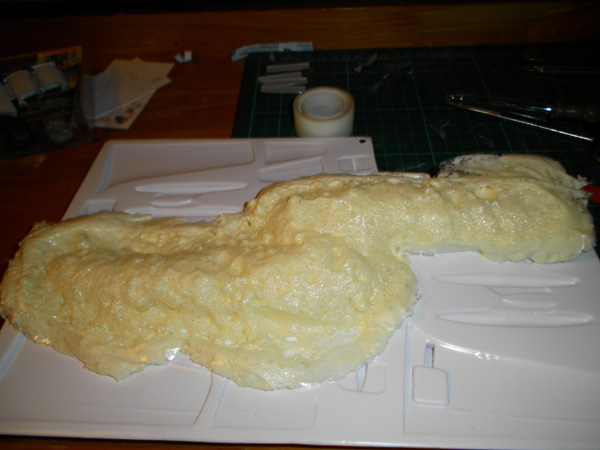
Oops, too much product.
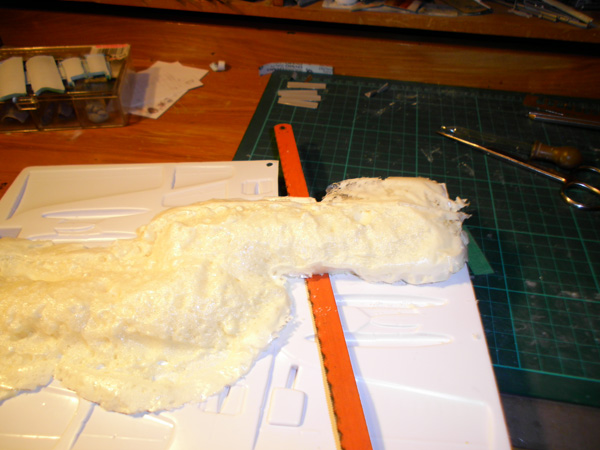
The excess is simple to remove by running a hacksaw blade across the back of the model.
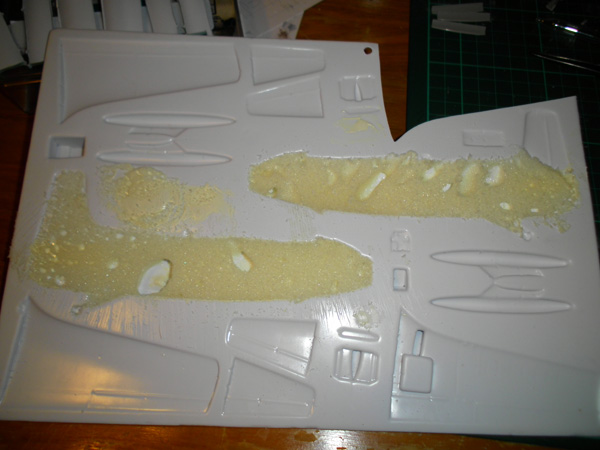
The end result. As you can see there are a few holes evident but these won't affect anything. The parts are now sanded out as per normal with the foam in place. The foam offers no resistance to the sanding process. Sections can be easily cut out for cockpits etc while still providing a good solid support for the fuselage halves.
Cling flim gives me the opportunity to push the foam into place as it comes out of the nozzle. The disadvantage is that it delays the setting of the foam considerably. You may be able to just spot some epoxy filler used to provide a backing to the sections that have been overdrawn. This is a great product to use as it has the consistancy of margarine which make application easy, sands easily but best of all does not give off heat as it sets, nor contain solvents, thus protecting an already sensitive part from further damage.
Oops, too much product.
The excess is simple to remove by running a hacksaw blade across the back of the model.
The end result. As you can see there are a few holes evident but these won't affect anything. The parts are now sanded out as per normal with the foam in place. The foam offers no resistance to the sanding process. Sections can be easily cut out for cockpits etc while still providing a good solid support for the fuselage halves.
magnusf
Joined: May 02, 2006
KitMaker: 1,953 posts
AeroScale: 1,902 posts
Posted: Friday, May 13, 2011 - 09:43 AM UTC
Brent! Good trick, I'll keep that in mind for future use!
The Bücker has taken a few steps forward, I'll have to go looking for some suitable seats and interior pieces in the eternal mess of my spares box...
Engine front from my AZ models Bücker and wing fitted into the fuselage recess.
I have started a build blog for this project that can be found here!
Magnus

Bigrip74
Joined: February 22, 2008
KitMaker: 5,026 posts
AeroScale: 2,811 posts

Posted: Friday, May 13, 2011 - 06:02 PM UTC
@ Paul: I will be mirroring your build since we are building the same kit. Hey nice A/M goodies.
@ Jessica: I would like to have gotten that kit, nice clean job on seperating the parts.
@ Magnus: cute little a/c which scheme will you use to paint her in?
@ Brent: I almost picked that kit up for $2.00 USD but just could not make up my mind.
@ Gary: OUCH, that looks intimidating with those booms.
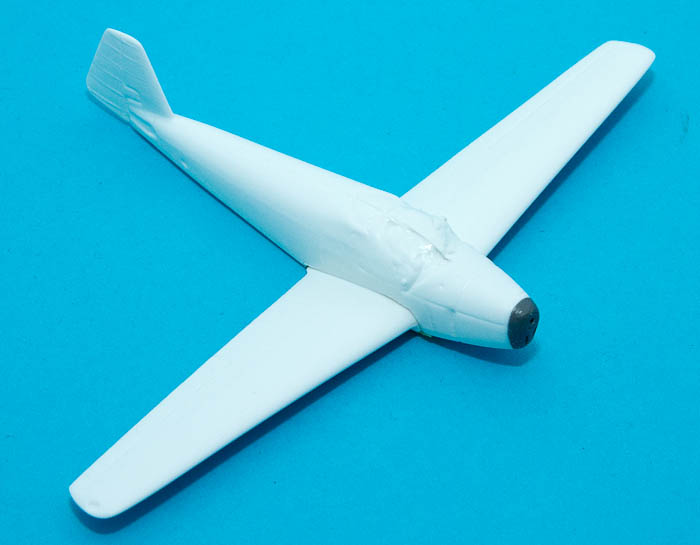
Here is my build. MPM's 1/48 I16 I picked this kit since it looked the easiest to me.


Next to cut out the parts and do that thing that I hate the most "SANDING".
Bob
@ Jessica: I would like to have gotten that kit, nice clean job on seperating the parts.
@ Magnus: cute little a/c which scheme will you use to paint her in?
@ Brent: I almost picked that kit up for $2.00 USD but just could not make up my mind.
@ Gary: OUCH, that looks intimidating with those booms.
Here is my build. MPM's 1/48 I16 I picked this kit since it looked the easiest to me.


Next to cut out the parts and do that thing that I hate the most "SANDING".
Bob
magnusf
Joined: May 02, 2006
KitMaker: 1,953 posts
AeroScale: 1,902 posts
Posted: Friday, May 13, 2011 - 07:18 PM UTC
Bob! That's a nice kit you have found. I once had both the Avia 534 and the Avia B.35 vacforms from MPM but I never got around to building them, a friend got both of them from me. A bit of extra fun is that this kit is how MPM started, now twenty years later they are making some of the finest and most interesting plastic models there is.
Paint scheme for my Bücker will be canary yellow in Egyptian markings!
Magnus
Paint scheme for my Bücker will be canary yellow in Egyptian markings!
Magnus
Jessie_C
Joined: September 03, 2009
KitMaker: 6,965 posts
AeroScale: 6,247 posts
Posted: Friday, May 13, 2011 - 07:45 PM UTC
Hi Bob,
The Comet is currently available from AHS or direct from Welsh Models (there it is in all its Air France glory) .
It'$ not exa¢t£¥ ¢heap though
Cutting out vac parts is dead easy. Outline them with a marker pen, Then score around the part outline with a new Exacto blade (You don't have to cut all the way through). Then snap off the excess plastic. The pen line shows where you have to sand to, and you only have a little triangular bit of waste plastic to sand away. It'll take me about 5 minutes to sand down both fuselage halves although I'll need to spend a little extra time with the trailing edge of the vertical stabiliser and the wings. Call it half an hour on the outside until I'll be ready to begin assembly.
J
GaryKato
Joined: December 06, 2004
KitMaker: 3,694 posts
AeroScale: 163 posts
Posted: Friday, May 13, 2011 - 11:05 PM UTC
This is my first time doing this. Hands sweaty, vision blurred.

Success! I am the Vacform Master!!

Success! I am the Vacform Master!!
ludwig113
Joined: February 05, 2008
KitMaker: 1,381 posts
AeroScale: 1,110 posts
Posted: Saturday, May 14, 2011 - 02:25 AM UTC
a little update...
all the sanding done on the major parts,to be honest its no worse than having a kit with loads of flash on it.

now time for a bit of washing up.
good to see the other builds coming along.
cheers paul
all the sanding done on the major parts,to be honest its no worse than having a kit with loads of flash on it.
now time for a bit of washing up.
good to see the other builds coming along.
cheers paul
Removed by original poster on 05/15/11 - 01:50:12 (GMT).

Tomcat31

#042
Joined: November 18, 2006
KitMaker: 2,828 posts
AeroScale: 1,720 posts

Posted: Sunday, May 15, 2011 - 03:01 AM UTC
I have spoken to the leader and taken the plunge to join this campaign (At the risk of joining too many campaigns) with the Welsh Models 1/144 Nimrod that I started a few years ago. I say started as it only ever got as far as removing the fuselage and scribing some panel lines. I've brought it on holiday with me as there isn't much to do so I'll take some photos over the week and post them when we return (as I don't think the mobile connection I'm using will cope )
)
GaryKato
Joined: December 06, 2004
KitMaker: 3,694 posts
AeroScale: 163 posts
Posted: Sunday, May 15, 2011 - 08:58 AM UTC
All major pieces have been snapped away from the sheet. I feel like I have made a big step forward here. I was tempted to haul out some more Rareplane kits but I think it would be better to stick to just the Venom. Even if I don't finish, this campaign has already paid off for me!
GaryKato
Joined: December 06, 2004
KitMaker: 3,694 posts
AeroScale: 163 posts
Posted: Thursday, May 19, 2011 - 10:21 AM UTC
Ah, I can see why tail booms can be intimidating. It's like having more fuselages! I decided to start sanding the pieces starting with the tail boom halves. The first half went OK because I was cautious. I went overboard on the next and wound up taking too much off.

You can see where the top one has had too much taken off where it necks down. I will just have to use some scrap plastic and putty to fill it up again. I will be more careful on the other pair of tail booms.
You can see where the top one has had too much taken off where it necks down. I will just have to use some scrap plastic and putty to fill it up again. I will be more careful on the other pair of tail booms.
Dunners01
Joined: April 05, 2011
KitMaker: 15 posts
AeroScale: 14 posts
Posted: Sunday, May 22, 2011 - 05:15 PM UTC
Nice work on the Vemon Gary, one of my favourite aircraft. Heres a tip that may help you to avoid oversanding. Having done this in the past I can appreciate what a pain it is.
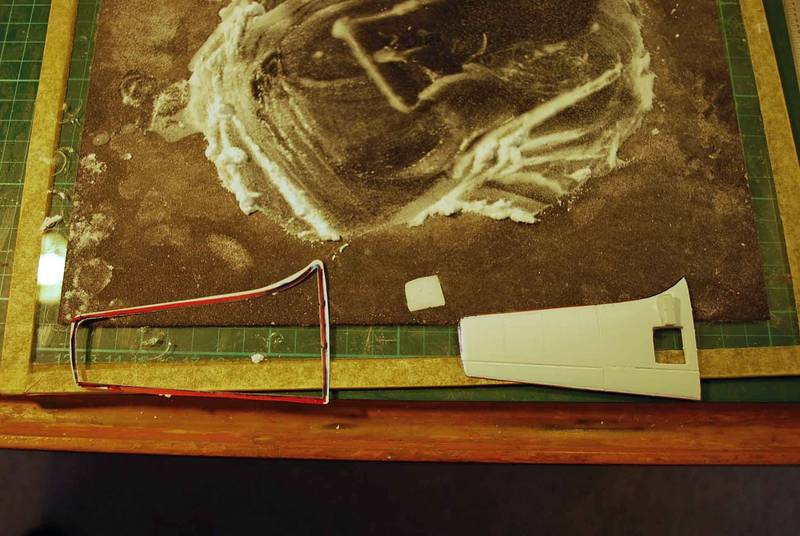
First up I mark the outline of the part in a thick marker pen. The type I use has ink that is soluable in methylated spirit. This way the ink can be removed when we're done.
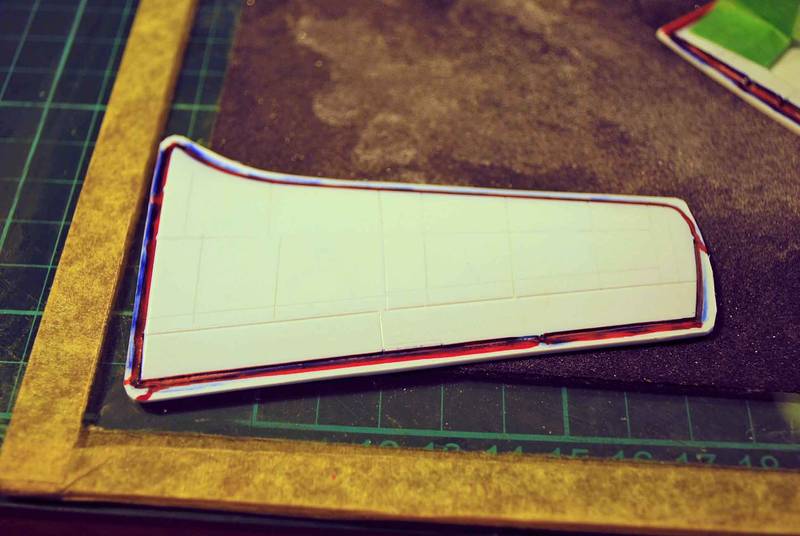
Being a wing I have added masking tape handles. These flat parts are almost impossible to hold onto without them. The handles allow me to adjust the pressure applied to various spots. The tape does have a tendancy to loose interest in its job when it gets wet however.
As the part is sanded keep moving the application of pressure around the top surface (this is where the handles really help). Flip the part over and keep a regular check on the side that is getting sanded. In this photo we can see the marker pen just starting to show through the plastic.
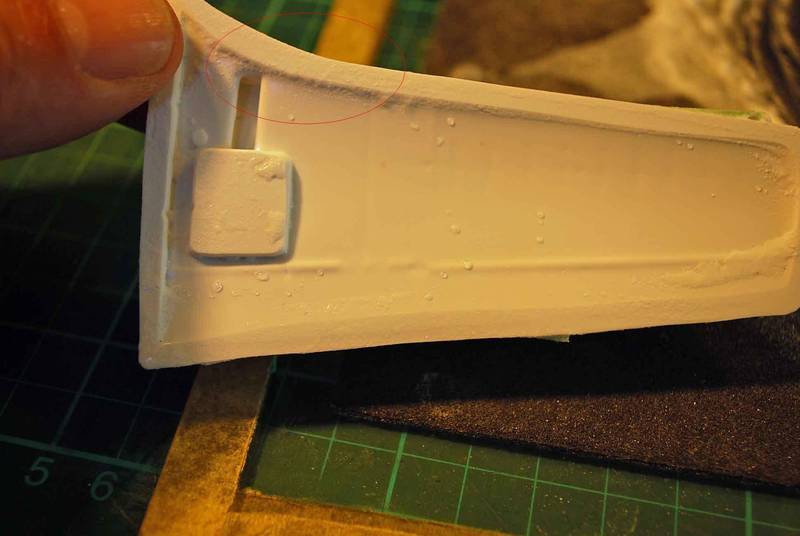
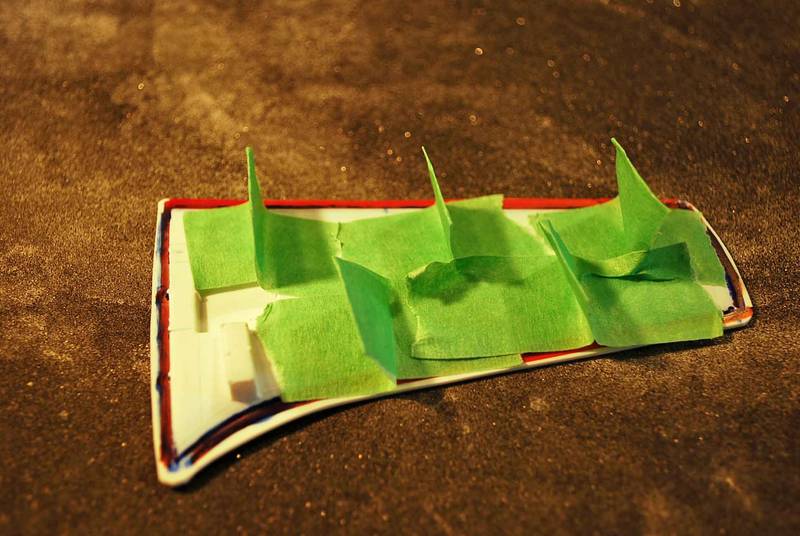
In this next photo you can see that some areas are thinning out much quicker than others. Pressure to these areas will be avoided now until we have a consist line around the outside of the part. Without checking like this I would have blown through these areas and had a hell of a mess to try and fix.

Getting through it now, we are just about done. A check underneath shows a couple of areas that still need attention. Incidentally, at this stage 5 rotations on the sand paper will take a region from being underdone to overdone. It doesn't take much. Constant checking is the name of the game.
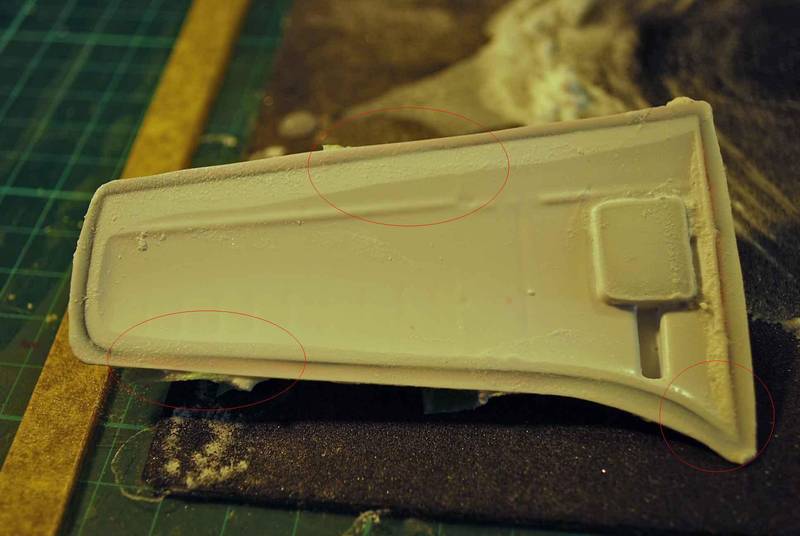
All done. The outer ring of surplus plastic is hanging on by a coulpe of threads here and there. Running you thumb across the part generally sees it removed. Trailing edges and tail fins usually take a bit more grunt because of the broard surafec area of plastic in contact with the sandpaper. I'm sure you will have noticed this with the tail booms. A prime example where the forward end will sand so much quicker than the fin. For me it was the wheelwells which made it tricky to get the wing roots sanded evenly.
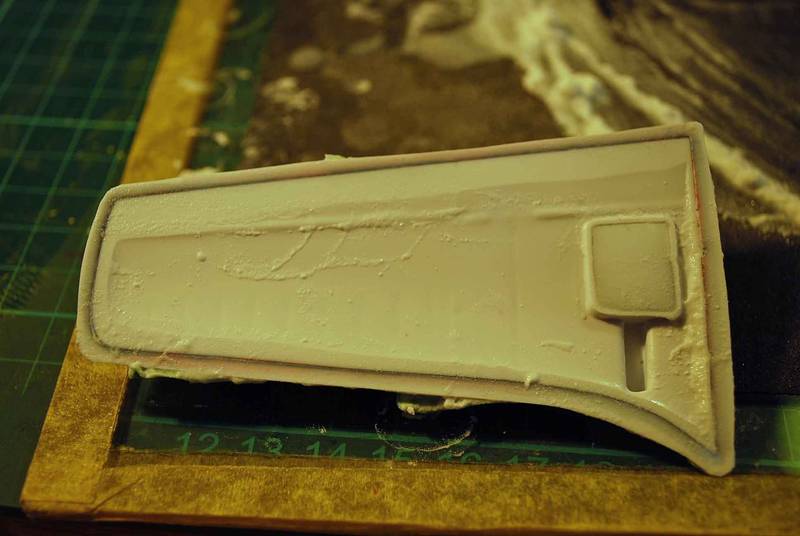
The end result. Note that the wheelwell excess sanded out at the same time.
Hope your don't think I'm telling you how to suck eggs Gary but I could never understand all the magazine articles over the years stating to use the pencil line as a guide to sanding parts out, cause it never worked for me until one day I flipped the part over and could see the line shining through the plastic. I'm sure there are many other ways to skinning this cat but this one works for me.
Regards
Brent
First up I mark the outline of the part in a thick marker pen. The type I use has ink that is soluable in methylated spirit. This way the ink can be removed when we're done.
Being a wing I have added masking tape handles. These flat parts are almost impossible to hold onto without them. The handles allow me to adjust the pressure applied to various spots. The tape does have a tendancy to loose interest in its job when it gets wet however.
As the part is sanded keep moving the application of pressure around the top surface (this is where the handles really help). Flip the part over and keep a regular check on the side that is getting sanded. In this photo we can see the marker pen just starting to show through the plastic.
In this next photo you can see that some areas are thinning out much quicker than others. Pressure to these areas will be avoided now until we have a consist line around the outside of the part. Without checking like this I would have blown through these areas and had a hell of a mess to try and fix.
Getting through it now, we are just about done. A check underneath shows a couple of areas that still need attention. Incidentally, at this stage 5 rotations on the sand paper will take a region from being underdone to overdone. It doesn't take much. Constant checking is the name of the game.
All done. The outer ring of surplus plastic is hanging on by a coulpe of threads here and there. Running you thumb across the part generally sees it removed. Trailing edges and tail fins usually take a bit more grunt because of the broard surafec area of plastic in contact with the sandpaper. I'm sure you will have noticed this with the tail booms. A prime example where the forward end will sand so much quicker than the fin. For me it was the wheelwells which made it tricky to get the wing roots sanded evenly.
The end result. Note that the wheelwell excess sanded out at the same time.
Hope your don't think I'm telling you how to suck eggs Gary but I could never understand all the magazine articles over the years stating to use the pencil line as a guide to sanding parts out, cause it never worked for me until one day I flipped the part over and could see the line shining through the plastic. I'm sure there are many other ways to skinning this cat but this one works for me.
Regards
Brent
 |

WEB HOSTING BY


Copyright ©2021 AeroScale and Kitmaker Network, a subsidiary of Silver Star Enterprises
All Rights Reserved. Please read our Conditions of Use and Privacy Policy.
All Rights Reserved. Please read our Conditions of Use and Privacy Policy.