

Early Aviation
Discuss World War I and the early years of aviation thru 1934.
Discuss World War I and the early years of aviation thru 1934.
Hosted by Jim Starkweather
KoTS GB 2011 WNW Sop.Pup RNAS lcarrol

wing_nut

Joined: June 02, 2006
KitMaker: 1,212 posts
AeroScale: 468 posts
Posted: Wednesday, August 10, 2011 - 01:49 AM UTC
Doing some catching up. Love that pre-shade.

Mgunns
Joined: December 12, 2008
KitMaker: 1,423 posts
AeroScale: 1,319 posts

Posted: Wednesday, August 10, 2011 - 07:39 AM UTC
 Hi Lance:
I have been catching up on your build in your absence. It is really coming along nicely, and am looking forward to see how your pre-shading ends up on the fuselage rear deck.
Best
Mark

warreni

Joined: August 14, 2007
KitMaker: 5,926 posts
AeroScale: 2,201 posts

Posted: Wednesday, August 10, 2011 - 11:10 AM UTC
You need to be very careful with pre-shading. I don't do it as 999 times out of a thousand you can't see anything that resembles the effect this technique gives. What I am trying to say is that unless you have the sun directly behind a subject, you can't see through the fabric.
I am not saying not to do it Lance, it is your model and your interpretation of the subject, but for me it is an unnecessary step in most WW1 machines, especially if they have PC10 applied to the fabric.
It will be interesting to see the finished product my friend. I will be giving the method a try with early un-PC10ed aircraft..

lcarroll

Joined: July 26, 2010
KitMaker: 1,032 posts
AeroScale: 1,025 posts

Posted: Monday, August 15, 2011 - 10:34 AM UTC
Managed a few hours on the build yesterday and this morning; thought I'd post a brief update and some photos.
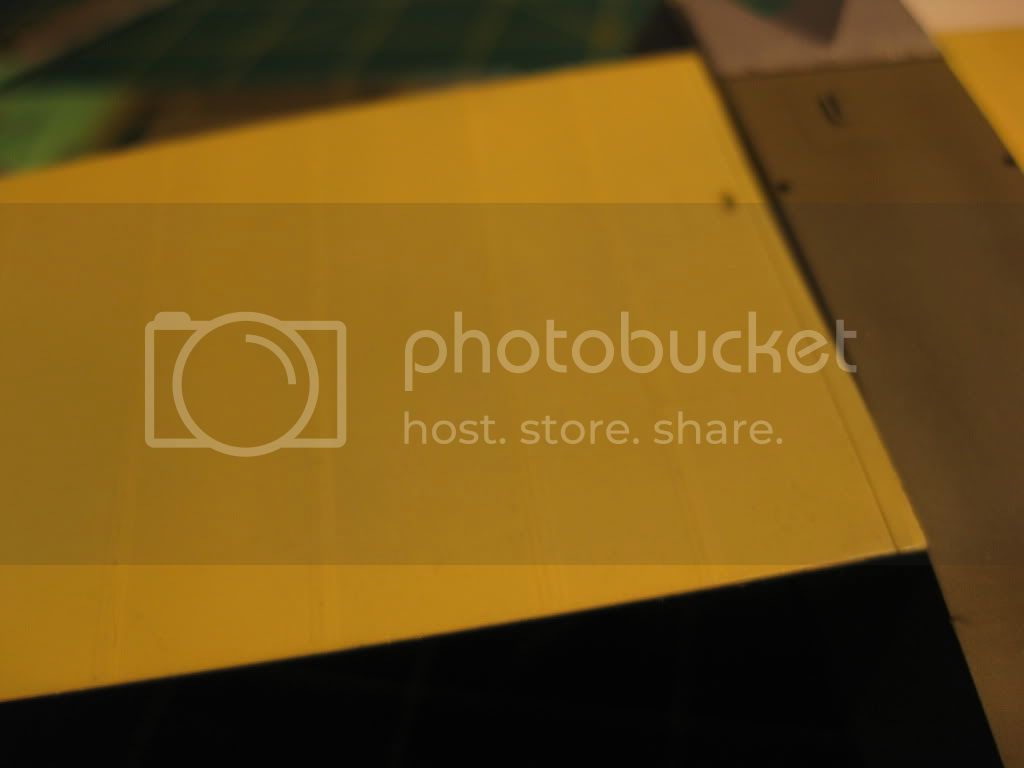
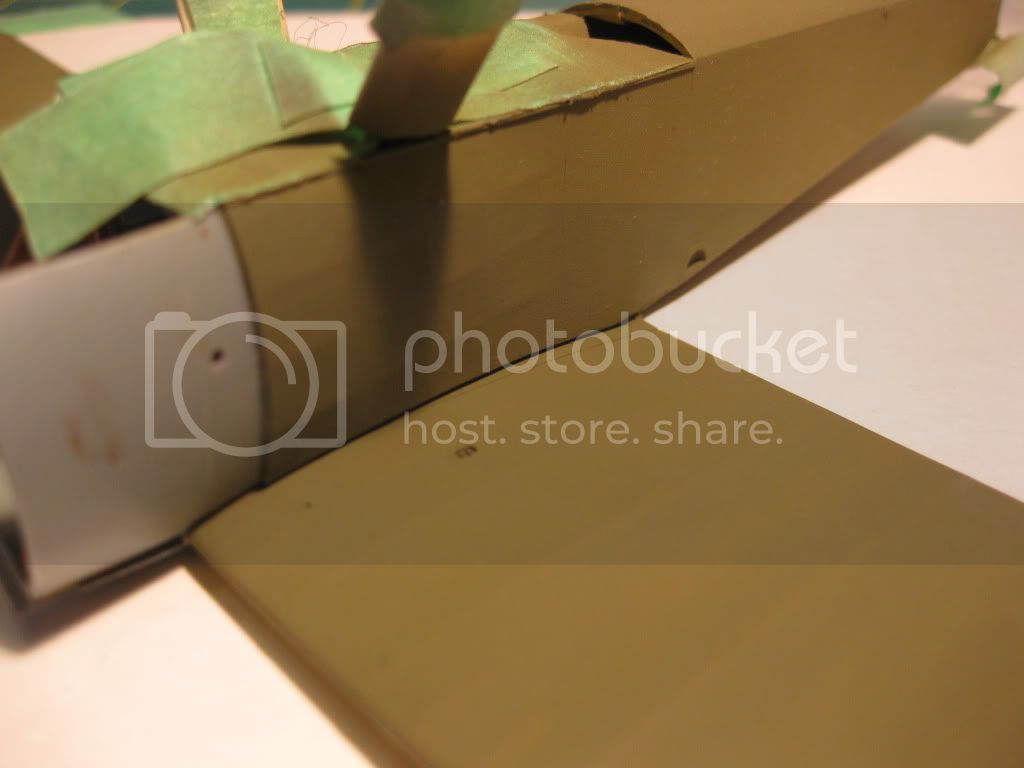
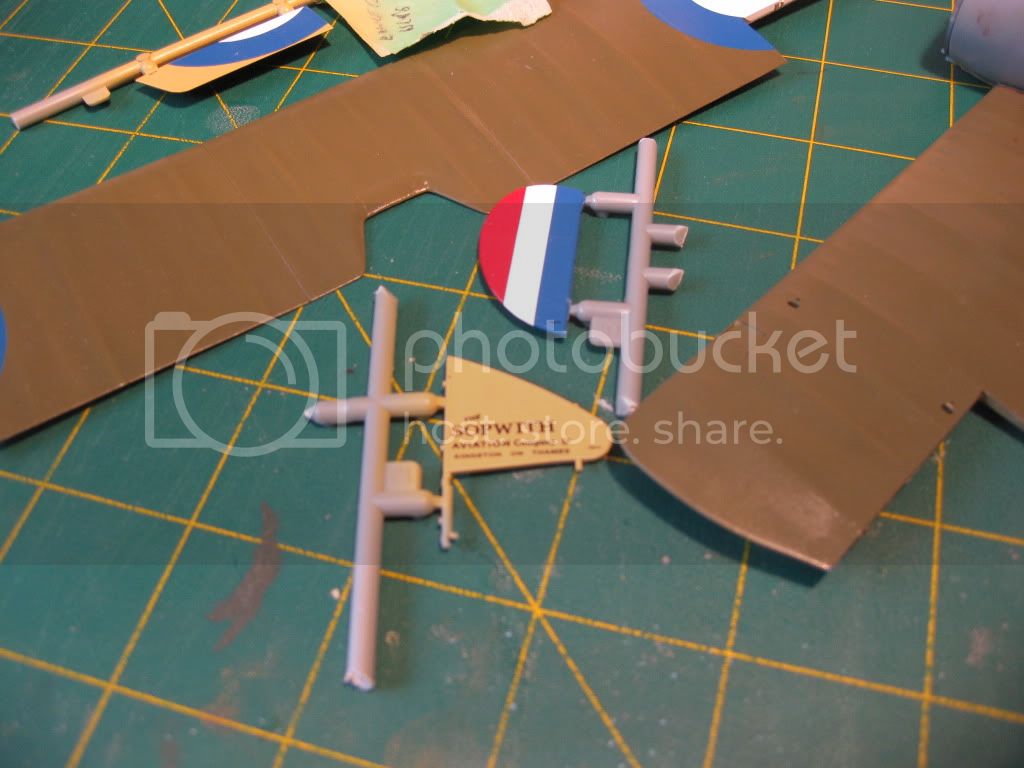
The base coat of PC10 and Linen went on well. The PC10 is a 50/50 mix of Model Master O.D. and faded O.D. and the Linen is Humbrol. The big item I was concerned about was how the preshading would show thru the PC10; especially on the spine and below the cockpit. I'm happy with the subtle outlines I got and hoping the clear sealing coat will enhance the effect. I chose the red vs. black nose colors for Carter's Baby Mine when he was with B Flight of 3 Naval. The Black is also correct however for the period after Carters use when 6179 was transfered to C Flight and the nose/cowling painted in their black color.
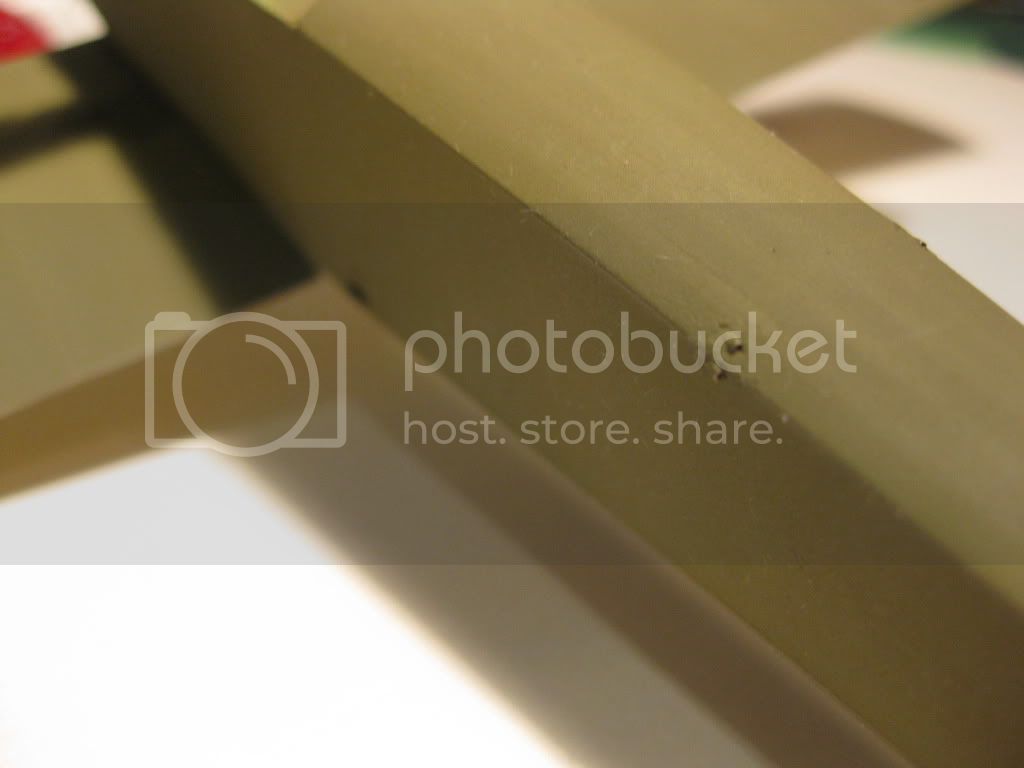
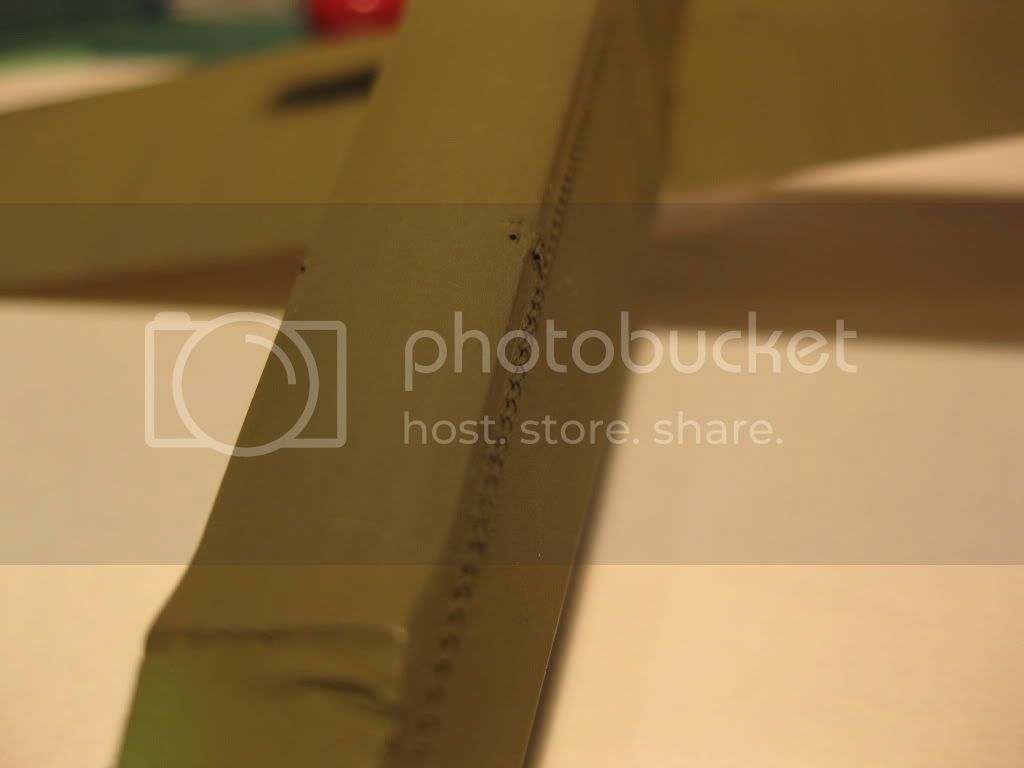
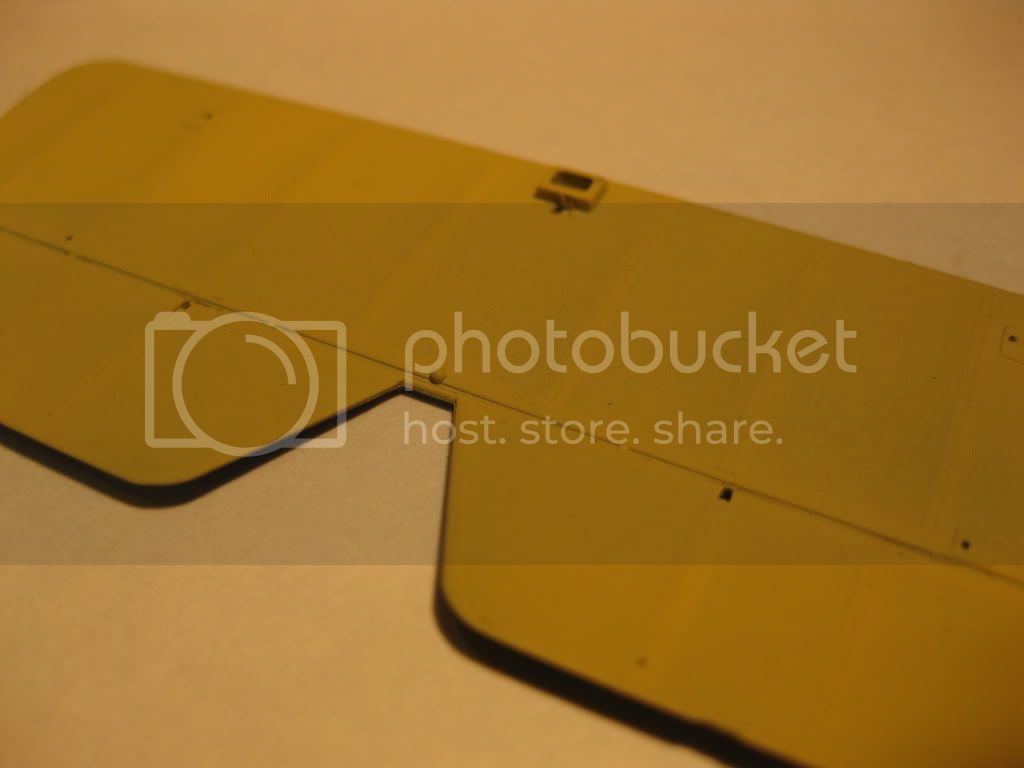
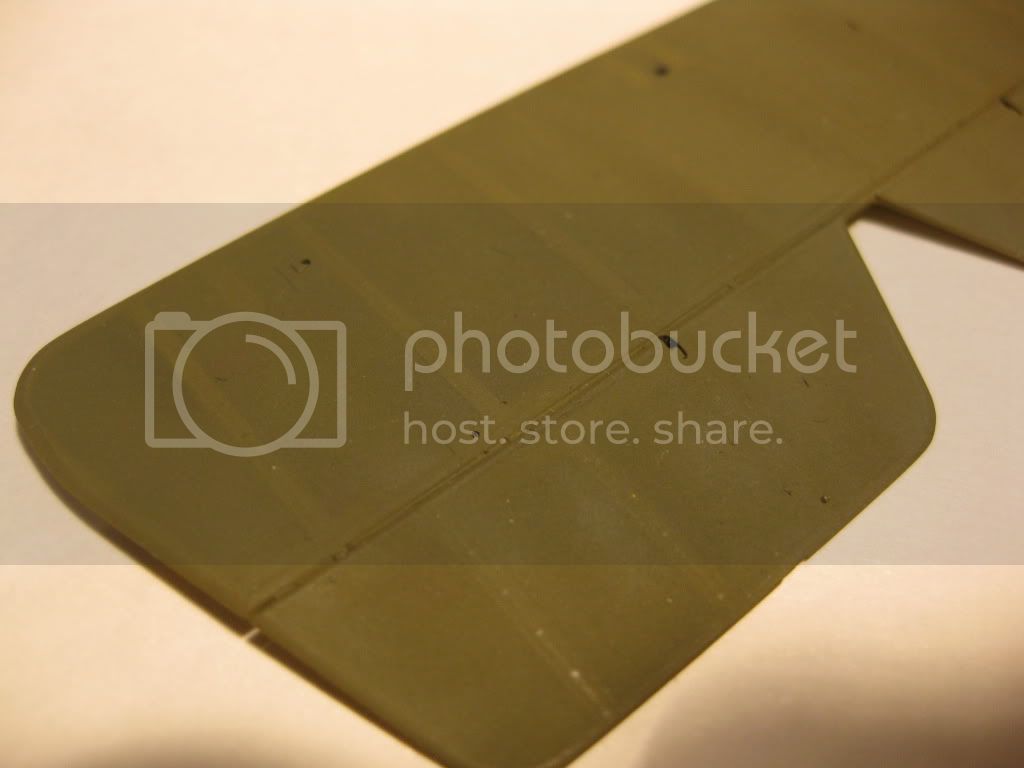
The Pre-shading on the uppers of the wings and Tail/elevators is a little more pronounced, the lowers worked fine as did the forward fuselage sides.
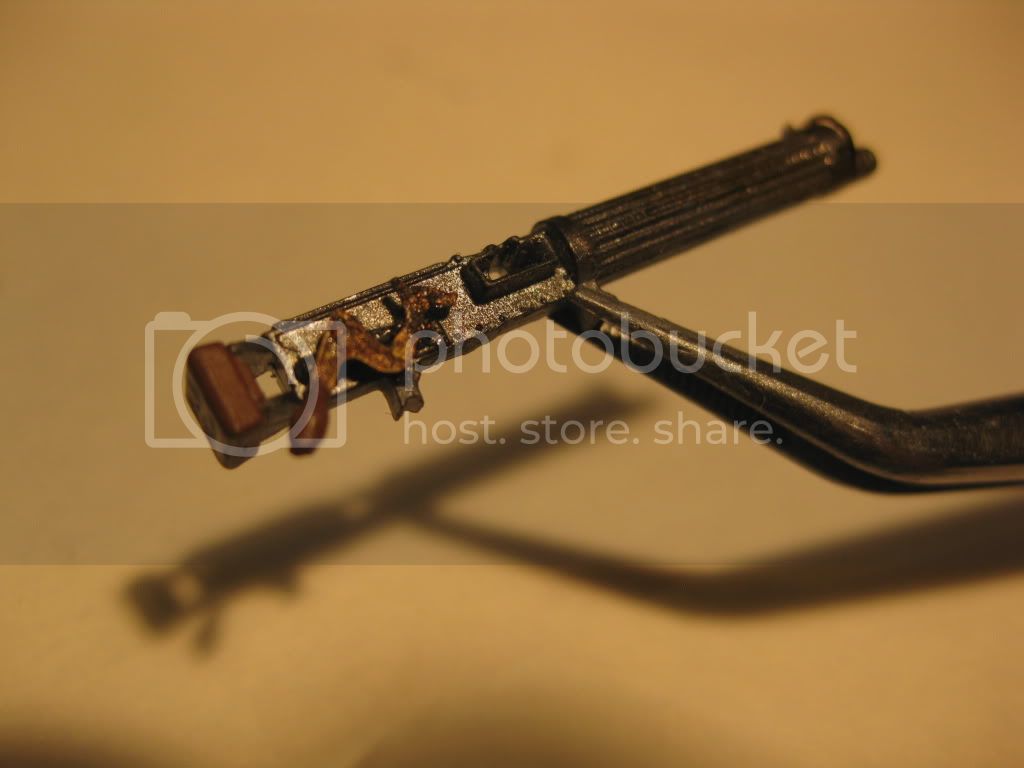
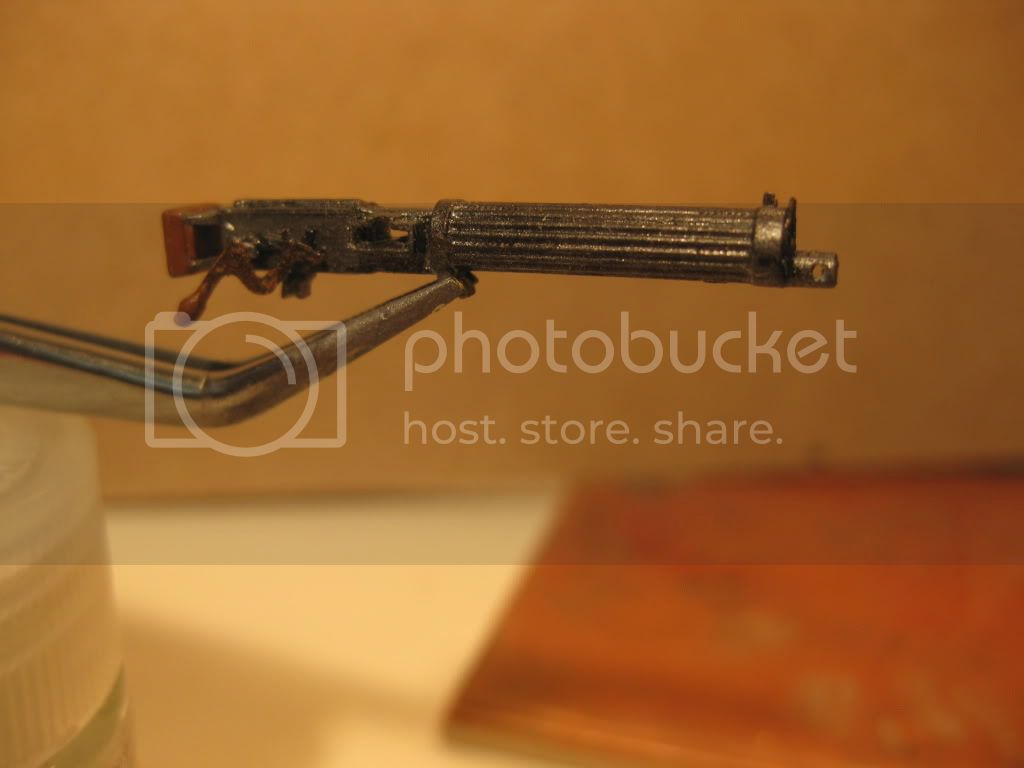
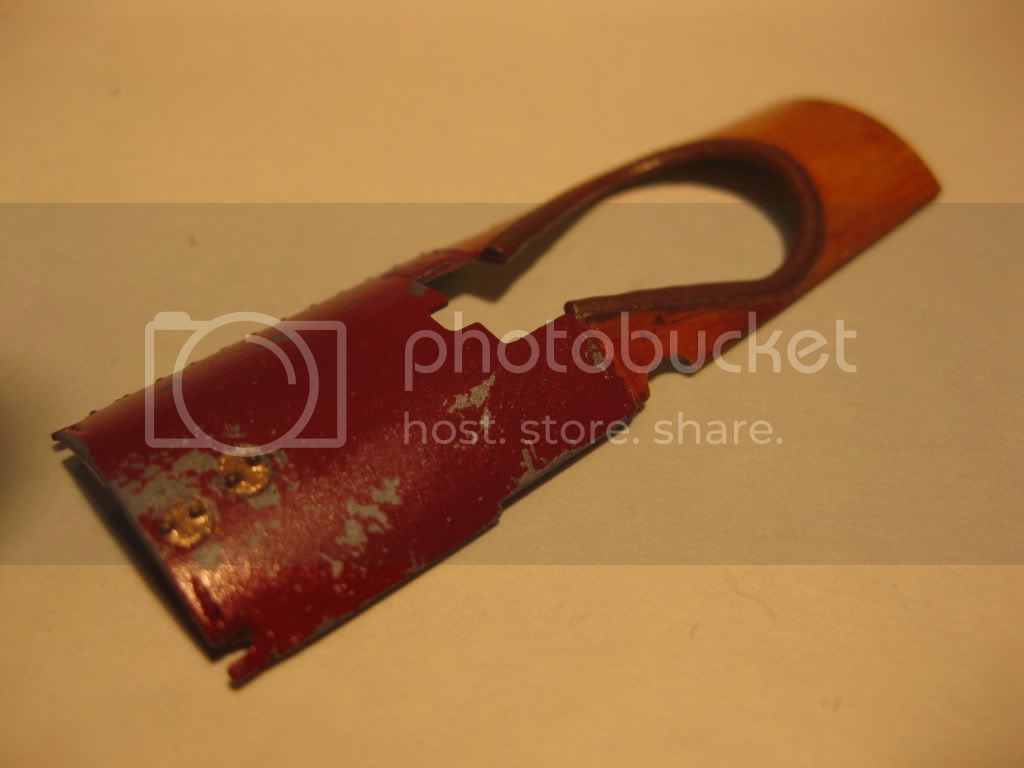
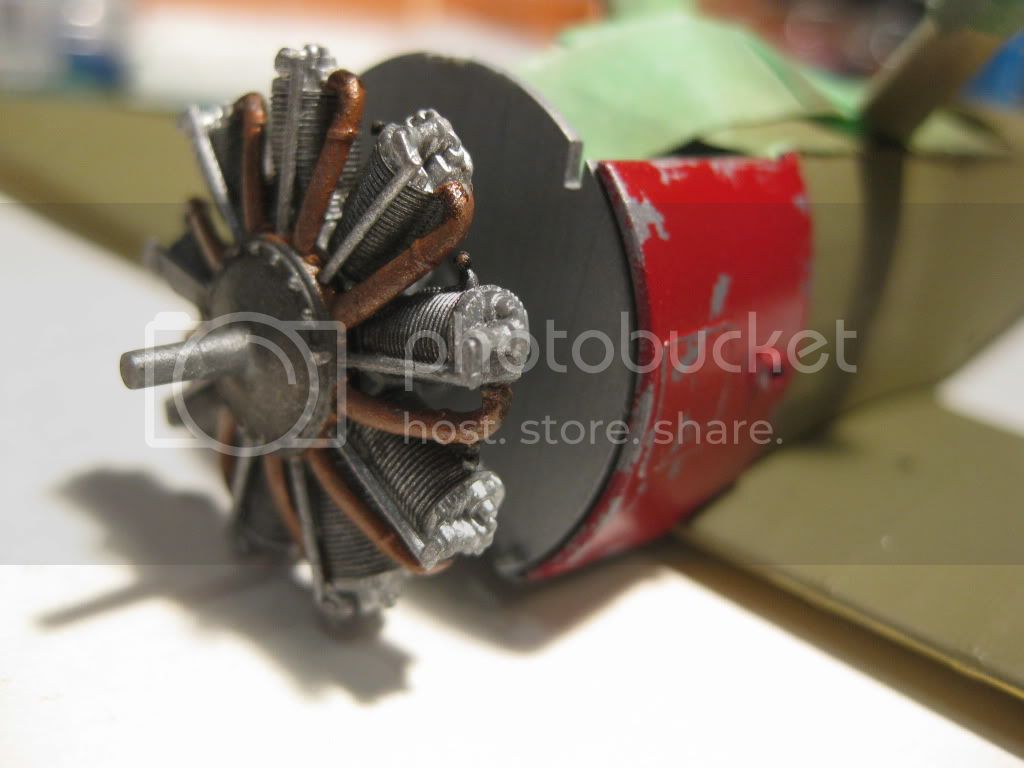
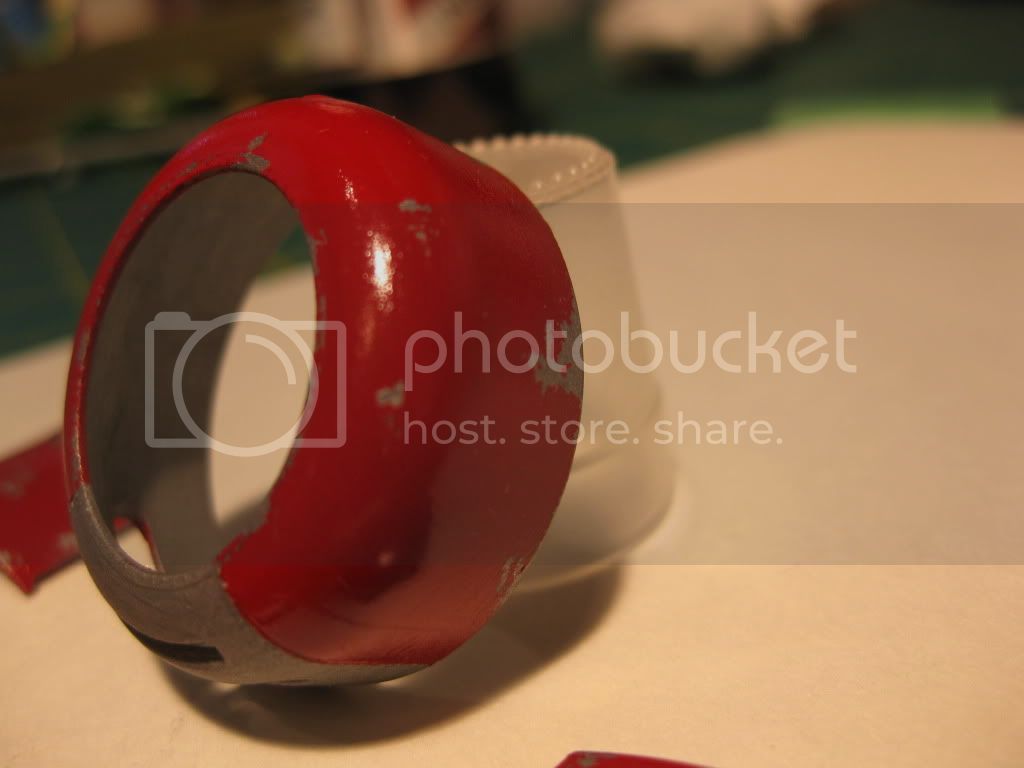
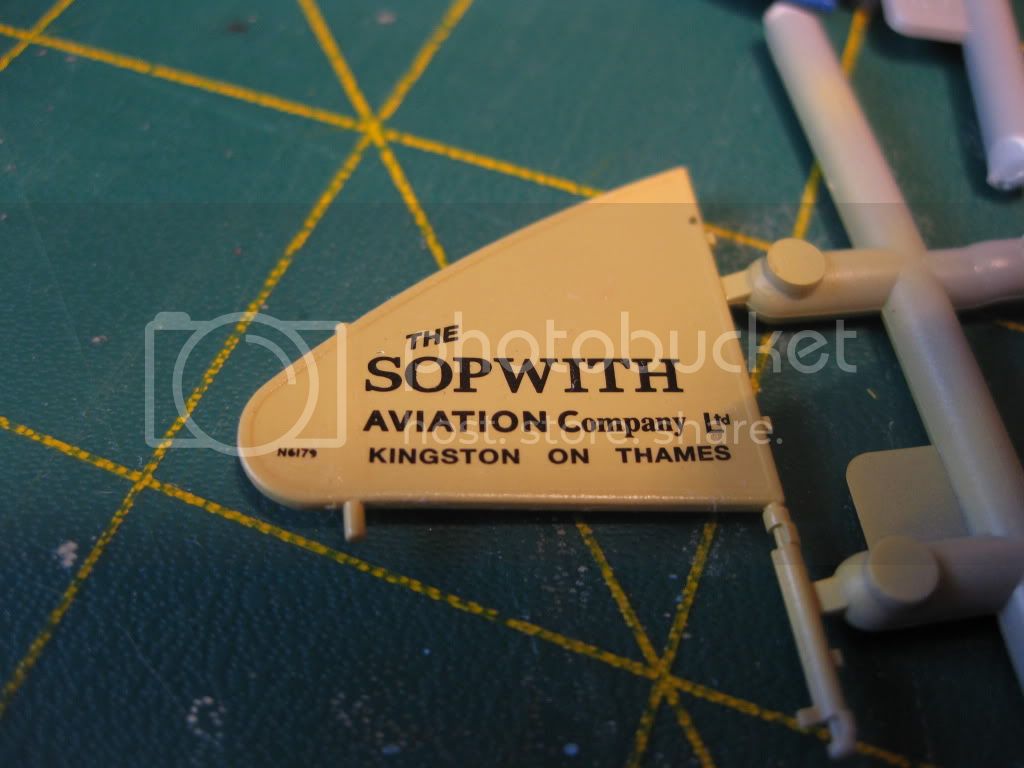
Last, I've completed the gun, cowling parts, and top deck for installation once the gloss coat and decalling is completed.
Next step is an overall dose of clear gloss enamel or future, some decalling, and then final assembly. So far I'm happy with the results, ecstatic with the quality of the kit, and looking forward to the next stage.
As always, thanks for looking in, comments, suggestions, and points I may have missed welcome as always.
Cheers,
Lance

The base coat of PC10 and Linen went on well. The PC10 is a 50/50 mix of Model Master O.D. and faded O.D. and the Linen is Humbrol. The big item I was concerned about was how the preshading would show thru the PC10; especially on the spine and below the cockpit. I'm happy with the subtle outlines I got and hoping the clear sealing coat will enhance the effect. I chose the red vs. black nose colors for Carter's Baby Mine when he was with B Flight of 3 Naval. The Black is also correct however for the period after Carters use when 6179 was transfered to C Flight and the nose/cowling painted in their black color.
The Pre-shading on the uppers of the wings and Tail/elevators is a little more pronounced, the lowers worked fine as did the forward fuselage sides.
Last, I've completed the gun, cowling parts, and top deck for installation once the gloss coat and decalling is completed.
Next step is an overall dose of clear gloss enamel or future, some decalling, and then final assembly. So far I'm happy with the results, ecstatic with the quality of the kit, and looking forward to the next stage.
As always, thanks for looking in, comments, suggestions, and points I may have missed welcome as always.
Cheers,
Lance

Kornbeef

Joined: November 06, 2005
KitMaker: 1,667 posts
AeroScale: 1,551 posts

Posted: Monday, August 15, 2011 - 11:45 AM UTC
Looking Very nice Lance, you really are bringing something out in this build, making it your own.
I won't enter the preshading debate but to say I do like the way it brings out the rib details, correct or not, like woodgraining and adding texture decals, they may not be scale correcct but give a lovely impression and feel to the subject.
Lovely work.
Keith
I won't enter the preshading debate but to say I do like the way it brings out the rib details, correct or not, like woodgraining and adding texture decals, they may not be scale correcct but give a lovely impression and feel to the subject.
Lovely work.
Keith

thegirl
Joined: January 19, 2008
KitMaker: 6,743 posts
AeroScale: 6,151 posts
Posted: Monday, August 15, 2011 - 02:55 PM UTC
Been following your build for some time now and I must say Lance , wonderful job so far ! Very impressive
The pre-shading does take time to get used to when it comes to applying the top coat of colour , yours is well done . It has a nice effect showing .
Also like the chipping on the cowl
The pre-shading does take time to get used to when it comes to applying the top coat of colour , yours is well done . It has a nice effect showing .
Also like the chipping on the cowl

OEFFAG_153

Joined: February 19, 2010
KitMaker: 1,473 posts
AeroScale: 1,450 posts
Posted: Monday, August 15, 2011 - 09:24 PM UTC
Very nice build Lance, I've been watching it from afar for a while I think this is going to be a great looking model once finished.
All the Best
Mikael
All the Best
Mikael

gajouette
Joined: February 01, 2007
KitMaker: 365 posts
AeroScale: 356 posts

Posted: Monday, August 15, 2011 - 09:55 PM UTC
Lance,
Well I guess that three in roll that have been watching this thread for a while.Great looking Pup my friend.Your pre-shading is impressive and really sets the weathered up well.I'm looking forward to seeing your next update.
Highest Regards,
Gregory Jouette
Well I guess that three in roll that have been watching this thread for a while.Great looking Pup my friend.Your pre-shading is impressive and really sets the weathered up well.I'm looking forward to seeing your next update.
Highest Regards,
Gregory Jouette
wing_nut
Joined: June 02, 2006
KitMaker: 1,212 posts
AeroScale: 468 posts
Posted: Tuesday, August 16, 2011 - 03:32 AM UTC
OK Lance sorry to have to do this but I must bring to light the problems that I see. First one the...er..OK so that looks good. But what about the.. hmmm? Gee, that looks good too. But surely everyone saw the... wait! What?
OK forget it. This is nothing to not like. (yeah, yeah I know...a double negative)
I like it all. The wear on the cowl and the deck looks great. And I am a BIG fan of the way the pre-shade looks. You really pulled that off nicely. The more subtle it looks the better. And that is subtle.
OK forget it. This is nothing to not like. (yeah, yeah I know...a double negative)
I like it all. The wear on the cowl and the deck looks great. And I am a BIG fan of the way the pre-shade looks. You really pulled that off nicely. The more subtle it looks the better. And that is subtle.
lcarroll
Joined: July 26, 2010
KitMaker: 1,032 posts
AeroScale: 1,025 posts
Posted: Tuesday, August 16, 2011 - 08:03 AM UTC
Keith, Terri, Mikael, Gregory and Marc,
Compliments from folks like yourselves who produce such outstanding work is a wonderful compliment to say the very least. Also, it certainly has a great affect on confidence and motivation. So much of this build involves techniques and advice that I have gleaned from members here including all of you. That is what I truly enjoy about participating in our Forum. (think I've mentioned that several times in the past!)
Warren,
To go back to your advice on Pre-Shading I agree; too much is not good however a bit fits nicely in my view. I've spent hours poring over the examples provided on others builds here and am quite taken by how they use it very succesfully to enhance the lighting effects and contrasts produced on the real items different planes/cavities/projections, especially on the tops of wing and empanage surfaces. As for the all CDL subject, it will be a long while before I feel confident enough to take on that challenge!
I hope to get that clear gloss topcoat on later today and then let it cure for a couple of days before the decal application. Think I'll try Future (the new version) on this one. Thanks all for not mentioning (I know you all saw it!) the blob on the woodgrain on the top deck and the same result on the fuel/oil filler caps. I will be re-visiting those and doing a little damage repair. (damned cameras)
As earlier, thanks for the encouragement, I should be providing another update in 3-4 days.
Cheers,
Lance
lcarroll
Joined: July 26, 2010
KitMaker: 1,032 posts
AeroScale: 1,025 posts
Posted: Friday, August 19, 2011 - 04:16 AM UTC
I got the pre-decal top coat on using the "new" Future product (Pledge with Future) that is available here, airbrushed at full strength. It took 3 coats with 24 hours between them to get a glossy finish; I seem to recall that years ago the original product produced a glossy finish with one application. Anyone else had any experience with this?
I'll hold off on photos/updates until the decals are on; have to work a bit for the next several days which is delaying progress (and enjoyment) far too much; need to get better at real retirement!
Cheers,
Lance
I'll hold off on photos/updates until the decals are on; have to work a bit for the next several days which is delaying progress (and enjoyment) far too much; need to get better at real retirement!
Cheers,
Lance
Mgunns
Joined: December 12, 2008
KitMaker: 1,423 posts
AeroScale: 1,319 posts
Posted: Friday, August 19, 2011 - 08:35 AM UTC
Hi Lance I concur with the others assessment of your work. It is looking quite good. Your weathering is good, and I like the pre-shading as well. Sometimes preshading can be over done, or it may not be authentic, but it gives the model interest rather than a solid coat of paint, and I like it, as long as it isn't over done. That is the neat thing about this aspect of the hobby, is it is always a learning experience and we build on each successive kit and learn from others. I am looking forward to seeing your next batch of photos as you progress through this kit.Best
Mark
lcarroll
Joined: July 26, 2010
KitMaker: 1,032 posts
AeroScale: 1,025 posts
Posted: Monday, August 22, 2011 - 03:41 PM UTC
Thanks Mark, really appreciate positive comments and support.
So far, so good. I'm not really sold on the Future thing, was still a tiny bit tacky after 3 days. I believe I'll try enamal clear gloss on the next build and then decide which works best for me.
I thought I'd throw in a very brief update since I reached the next significant stage of the build today; got all the decals done with the exception of the landing gear, tires, and wing struts.
Four quick photos of the results, and kudos to both WNW (Cartograph) and Pheon for their outstanding products. I did use some Microset and Sol however, as some of the curves were a little tough (but still got 100% of the rudder covered, the WNWs fit like a "glove" !!) and also some of the fuselage decals indicated some silvering early on..the Microsol cured that in a heartbeat!
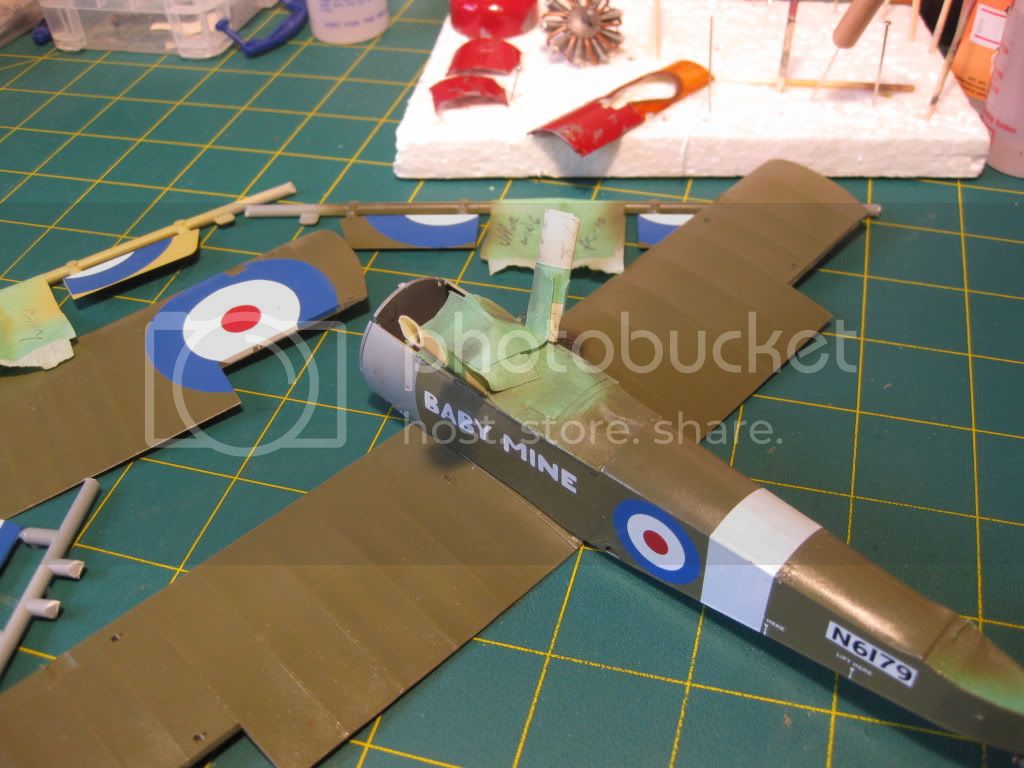
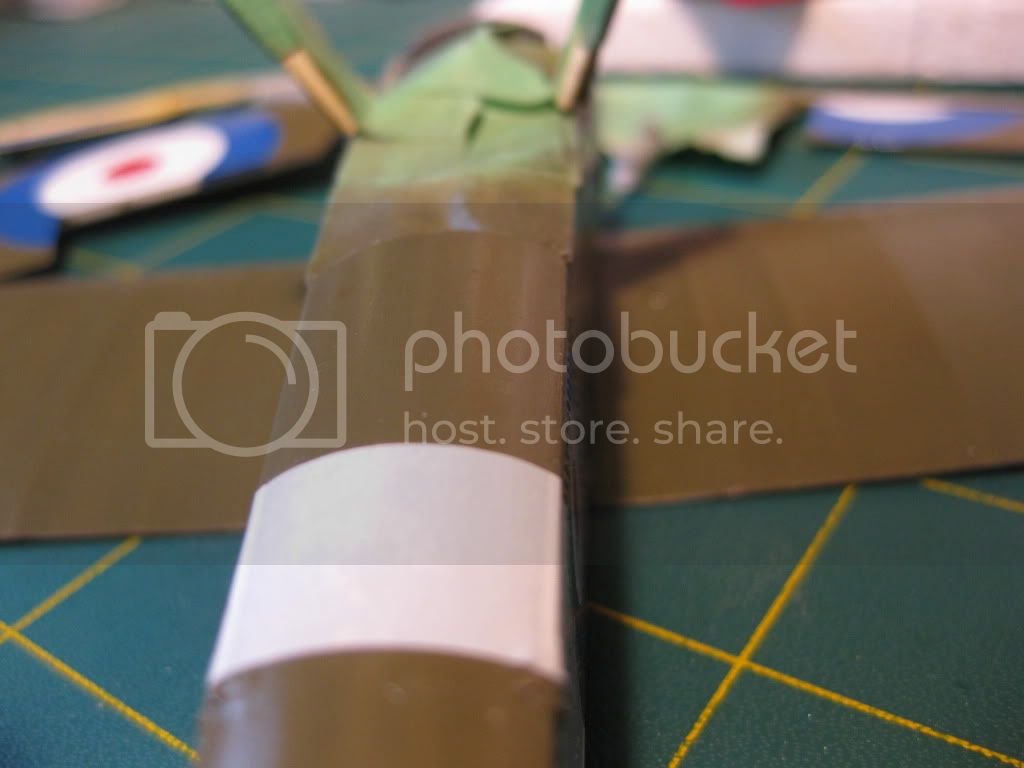
Just had to throw in the last one, incredible quality and register in this one (from the WNW Cartograph Sheet)
Last, a shot that captures the Pre-shading ribbing on the spine still there after the gloss coat.
Next step, the entire beast gets the semi-gloss overcoat/sealant and then it's time to do up all the turn buckles and pre-attachment of wires prior to rigging................still the nicest kit I've ever worked on, but then it's my first WNW, no surprise to anyone I'm certain!!
Any and all comments most welcome; I'll update again once the sealant and rigging is complete.
Without wishing to sound like a "stuck record" I have to say, "what a great kit!"
Cheers,
Lance
So far, so good. I'm not really sold on the Future thing, was still a tiny bit tacky after 3 days. I believe I'll try enamal clear gloss on the next build and then decide which works best for me.
I thought I'd throw in a very brief update since I reached the next significant stage of the build today; got all the decals done with the exception of the landing gear, tires, and wing struts.
Four quick photos of the results, and kudos to both WNW (Cartograph) and Pheon for their outstanding products. I did use some Microset and Sol however, as some of the curves were a little tough (but still got 100% of the rudder covered, the WNWs fit like a "glove" !!) and also some of the fuselage decals indicated some silvering early on..the Microsol cured that in a heartbeat!
Just had to throw in the last one, incredible quality and register in this one (from the WNW Cartograph Sheet)
Last, a shot that captures the Pre-shading ribbing on the spine still there after the gloss coat.
Next step, the entire beast gets the semi-gloss overcoat/sealant and then it's time to do up all the turn buckles and pre-attachment of wires prior to rigging................still the nicest kit I've ever worked on, but then it's my first WNW, no surprise to anyone I'm certain!!
Any and all comments most welcome; I'll update again once the sealant and rigging is complete.
Without wishing to sound like a "stuck record" I have to say, "what a great kit!"
Cheers,
Lance
wing_nut
Joined: June 02, 2006
KitMaker: 1,212 posts
AeroScale: 468 posts
Posted: Monday, August 22, 2011 - 05:15 PM UTC
Lance it is really coming together nicely.
I gave up on Future a long time ago. I must be "Future challenged" because I never could get it lay down nicely no matter what I did. I have better results when I use it as the setting solution or placing the decals. The excess Future can be wiped away with some alcohol when it is used over enamels.
As far as the tacky after 3 days... dunno. That stuff should dry in a few hours.
OEFFAG_153
Joined: February 19, 2010
KitMaker: 1,473 posts
AeroScale: 1,450 posts
Posted: Monday, August 22, 2011 - 07:08 PM UTC
Very nice proegress Lance this will be a handsome baby bird when its done.
As for the Future well, like Marc says, it should be dry almost instantly. Did you dilute it any? I use a good measure of "Isopropyl" in my mix. Not sure if it helps the drying, but it does make it more manageble.
Best Regards
Mikael
As for the Future well, like Marc says, it should be dry almost instantly. Did you dilute it any? I use a good measure of "Isopropyl" in my mix. Not sure if it helps the drying, but it does make it more manageble.
Best Regards
Mikael
lcarroll
Joined: July 26, 2010
KitMaker: 1,032 posts
AeroScale: 1,025 posts
Posted: Tuesday, August 23, 2011 - 03:11 AM UTC
Quoted Text
Very nice proegress Lance this will be a handsome baby bird when its done.
As for the Future well, like Marc says, it should be dry almost instantly. Did you dilute it any? I use a good measure of "Isopropyl" in my mix. Not sure if it helps the drying, but it does make it more manageble.
Best Regards
Mikael
Mikael & Marc,
It's been really humid and rainy here for the past week, that may partially explain the slow drying. I used the Pledge/Future full strength which may also play into the results. Years ago when I last used it (the original product) I recall thinning it with distilled water, if I use it again I'll try the isopropyl as a thinning agent. Thanks for the hints and, as before, the encouraging comments.
Cheers,
Lance
lcarroll
Joined: July 26, 2010
KitMaker: 1,032 posts
AeroScale: 1,025 posts
Posted: Monday, August 29, 2011 - 04:00 AM UTC
A question ........... After spending some time thumbing through all my available references I can't seem to determine details on the prop for this little darling. From all the photos I've seen the prop doesn't seem to be laminated; rather it appears solid or, if laminated, very subtle in color contrast between layers.
My build has been at a standstill for a week, work called and I've been on the road; got to get on with the concept of full retirement!
So, any advice or info out there to help with this question, did Sopwith use solid wood or laminated props on the early Pups? My AMS is running rampant and I want to get this part of the build right.
Hopefully I can get going this week and get this to the next milestone; will provide an update once it's further along.
Cheers,
Lance 
My build has been at a standstill for a week, work called and I've been on the road; got to get on with the concept of full retirement!
So, any advice or info out there to help with this question, did Sopwith use solid wood or laminated props on the early Pups? My AMS is running rampant and I want to get this part of the build right.
Hopefully I can get going this week and get this to the next milestone; will provide an update once it's further along.
Cheers,
Lance
OEFFAG_153
Joined: February 19, 2010
KitMaker: 1,473 posts
AeroScale: 1,450 posts
Posted: Monday, August 29, 2011 - 04:24 AM UTC
Lance,
I'm in no way an autothority on Sopwith props but I recall reading somewhere that british props were indeed in general? laminated but the heavy laquer reduced the effetc from the laminations...
I could be wrong, and no doubt someone else here will know more on the subject.
Best Regards
Mikael
I'm in no way an autothority on Sopwith props but I recall reading somewhere that british props were indeed in general? laminated but the heavy laquer reduced the effetc from the laminations...
I could be wrong, and no doubt someone else here will know more on the subject.
Best Regards
Mikael
lcarroll
Joined: July 26, 2010
KitMaker: 1,032 posts
AeroScale: 1,025 posts
Posted: Thursday, September 08, 2011 - 04:46 AM UTC
Time for a brief update; progress has been delayed by some everyday life "things" and several extra work tasks.
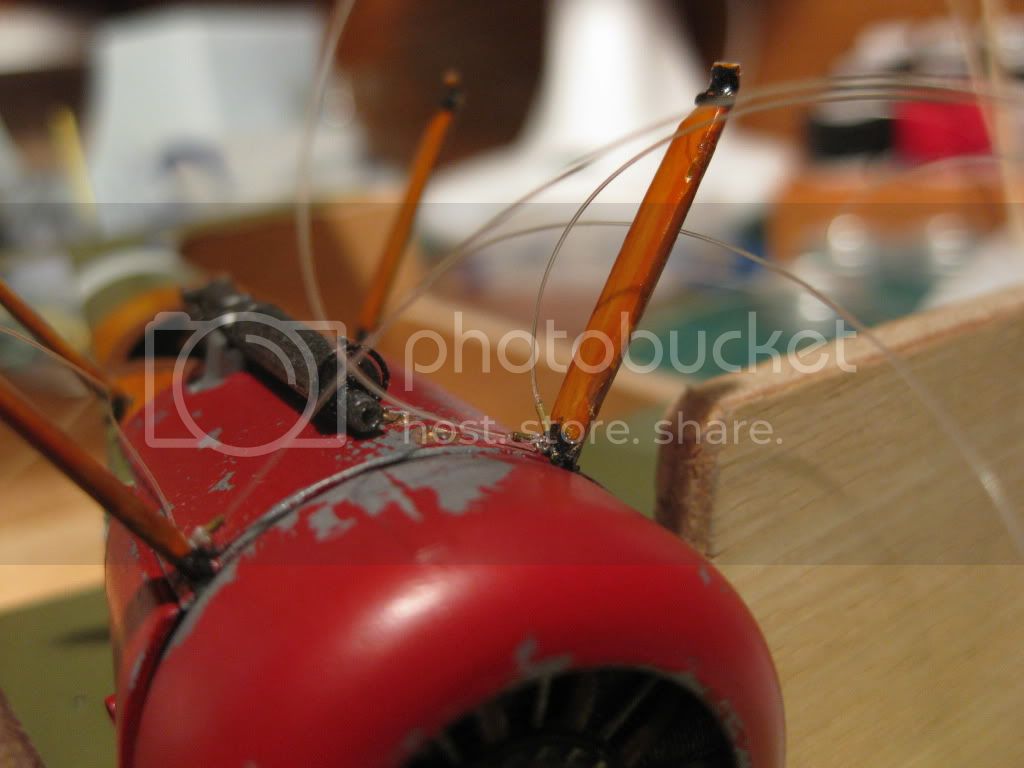
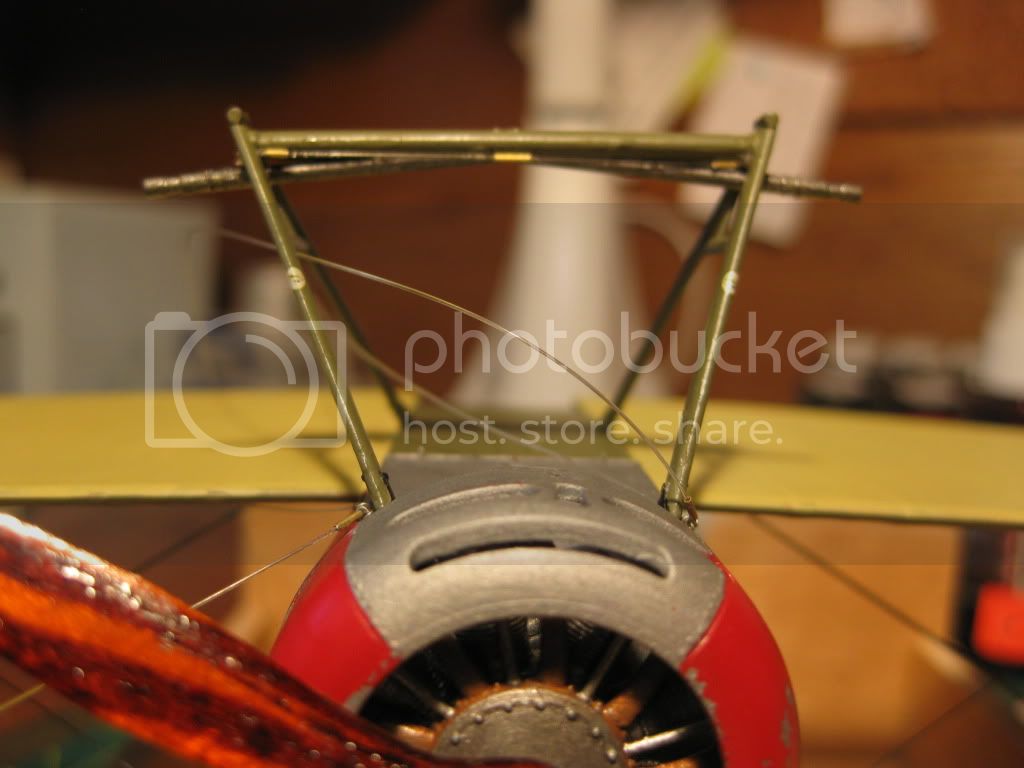
Since the last report I have almost reached the final rigging stage. The front cabanes got installed with perfect alignment with the use of a jig/template once the eyelets (a mix of Bob's and my own built versions) were all put in place.
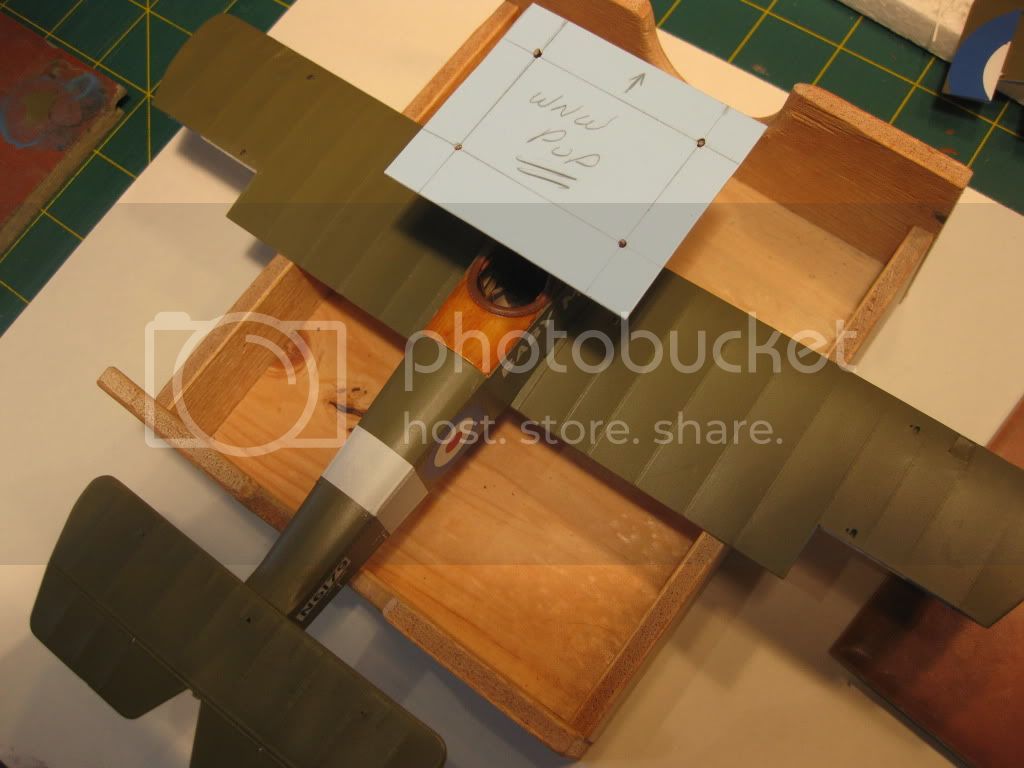
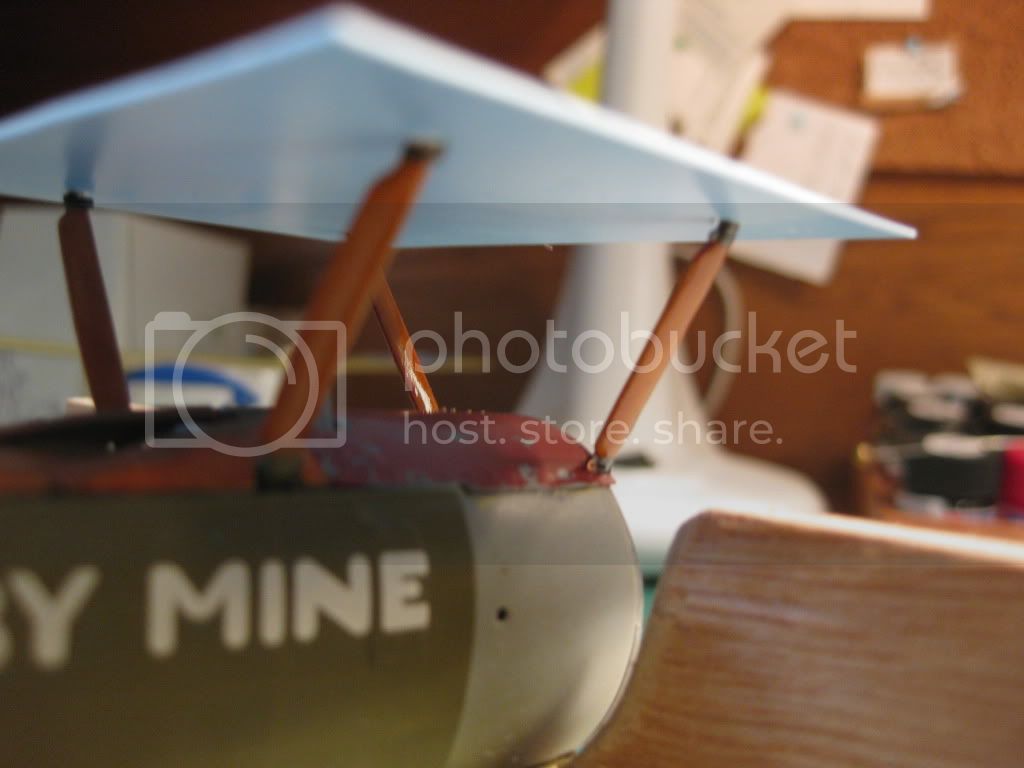
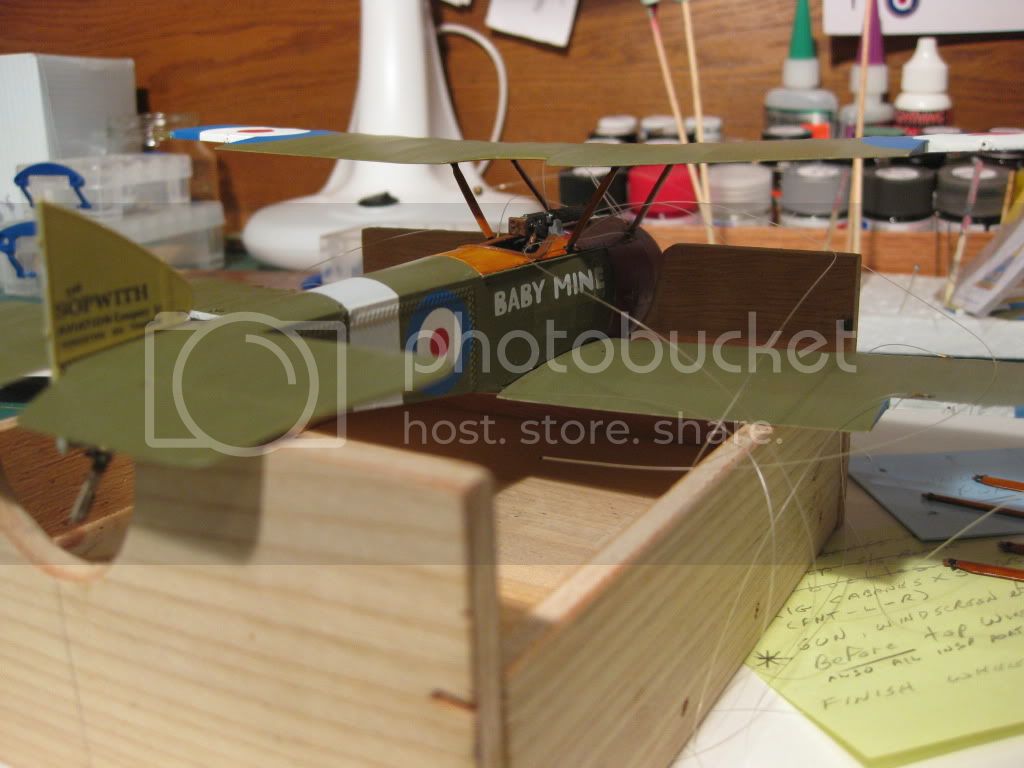
Next I added the cowling components which made her appear much more complete. (Upper Wing and ring cowling "posed".)
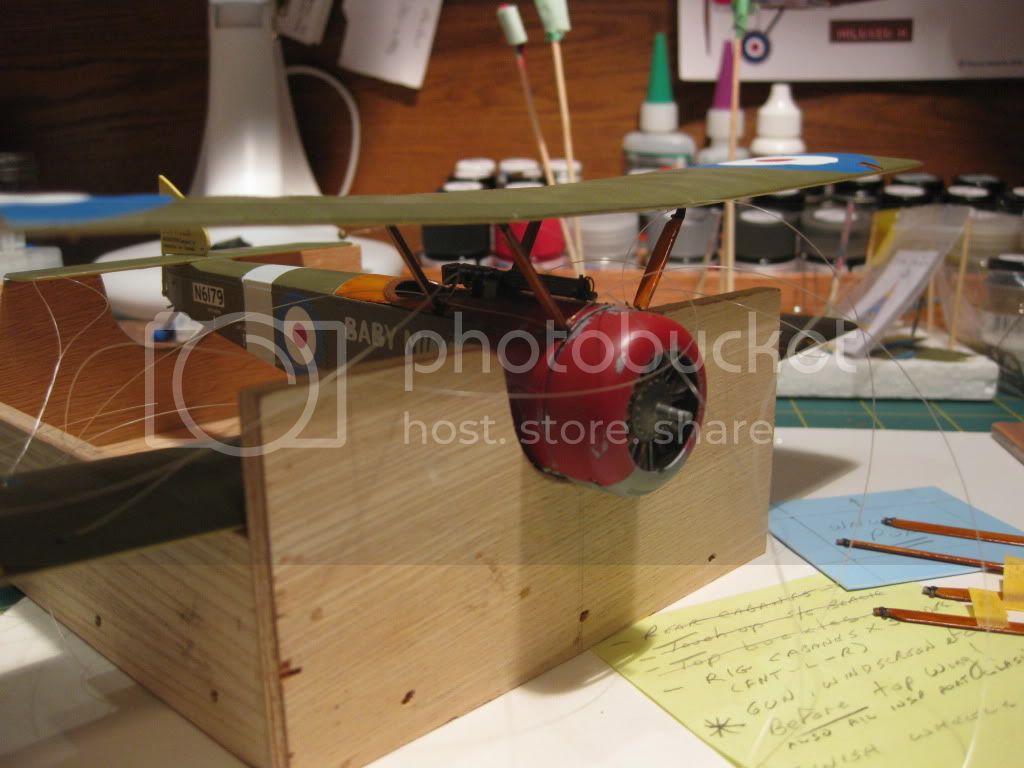
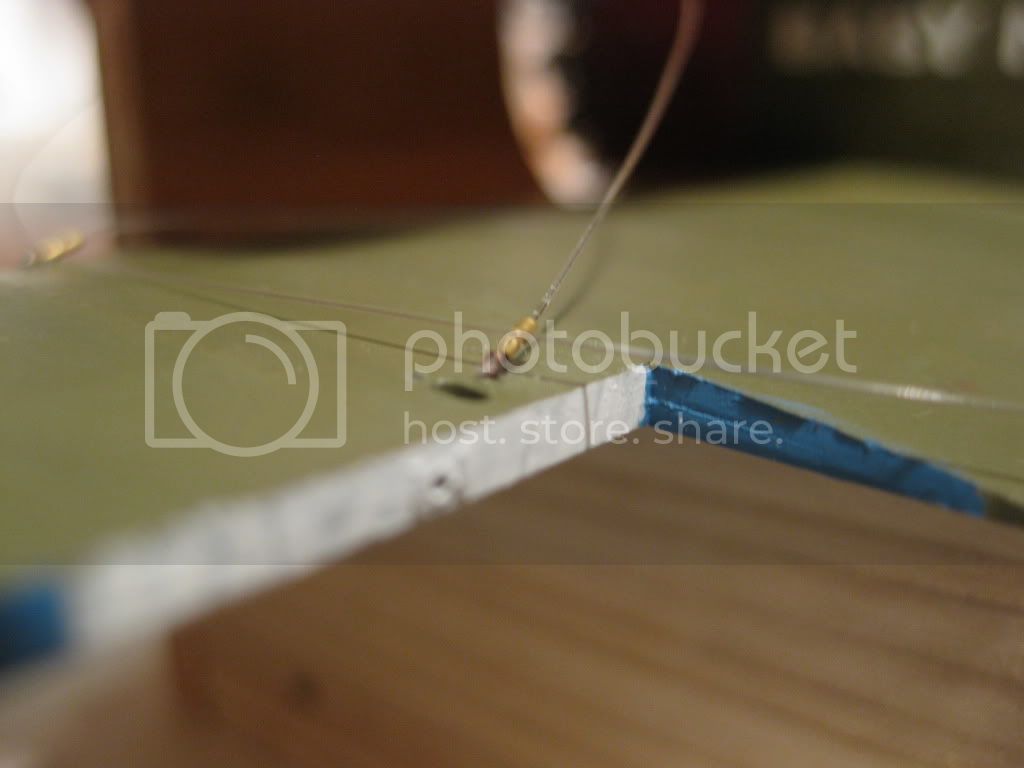
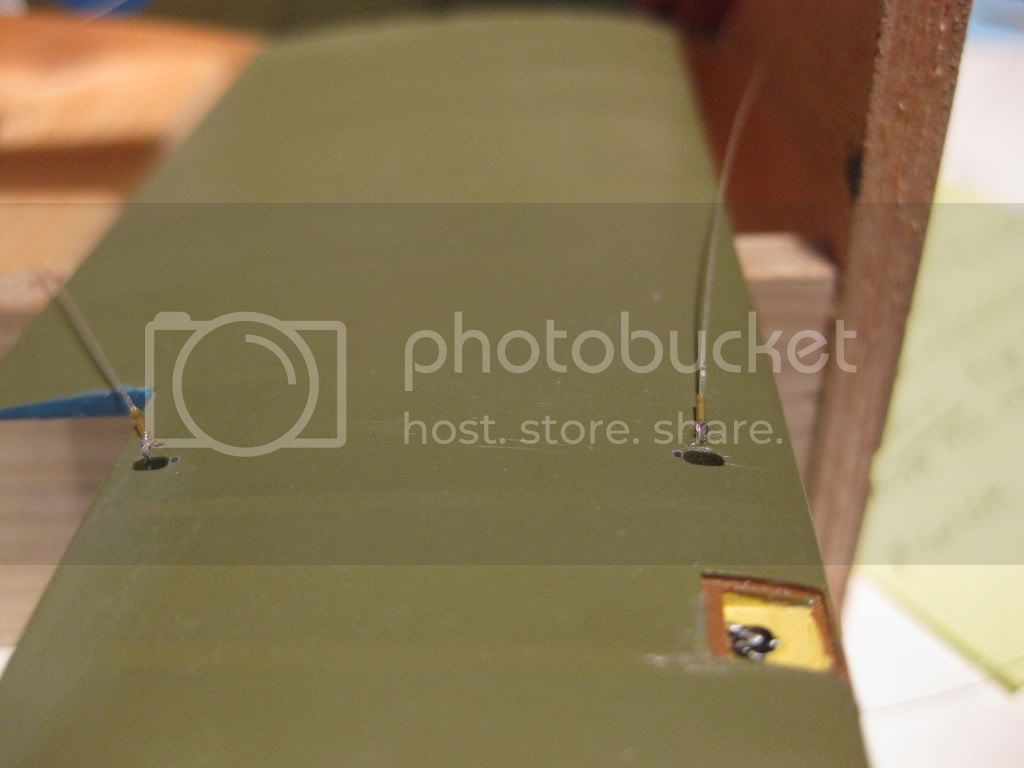
Next came finishing up the aileron inspection ports, glass to follow, and eyelets/Bob's Buckles at the pre-drilled locations. I've elected to attach all the lower rigging points to follow with attachment of the upper wing, then roll her over on her back and do all the uppers. The cabanes will be rigged prior to this step. Note the "notes to self" on the yellow sticky lower right; a sure give-away of my advanced age! (Trust me good people, the memory is the second thing to fail !!!)
Just love the candid camera; some adjustment of the front Vickers gun PE bit required to get rid of the tiny gap I hadn't noticed before.
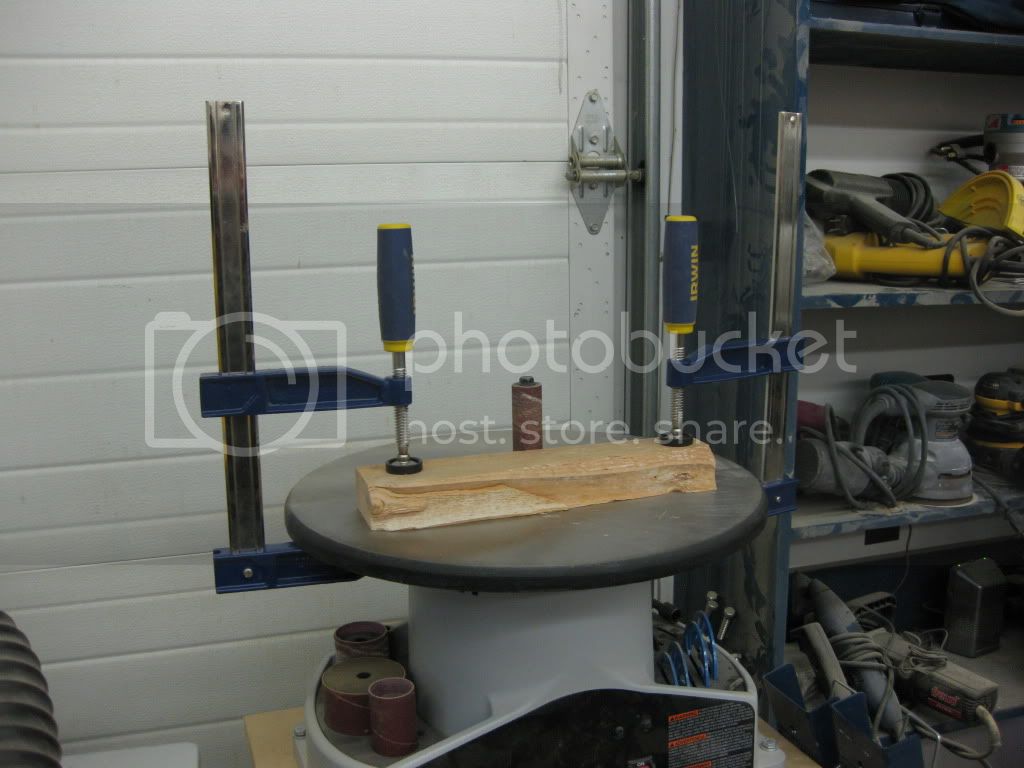
In between rigging sessions I hit the workshop to get the prop started. Although a crude set up the sander serves the rough shaping stage very well and I'm fortunate to have a solid work table and good lighting for this sub-component stage. The wires on the side of the shelf on the right are guitar strings stretched with lag bolts for weights; I use these for a lot of the flight control rigging requirements.
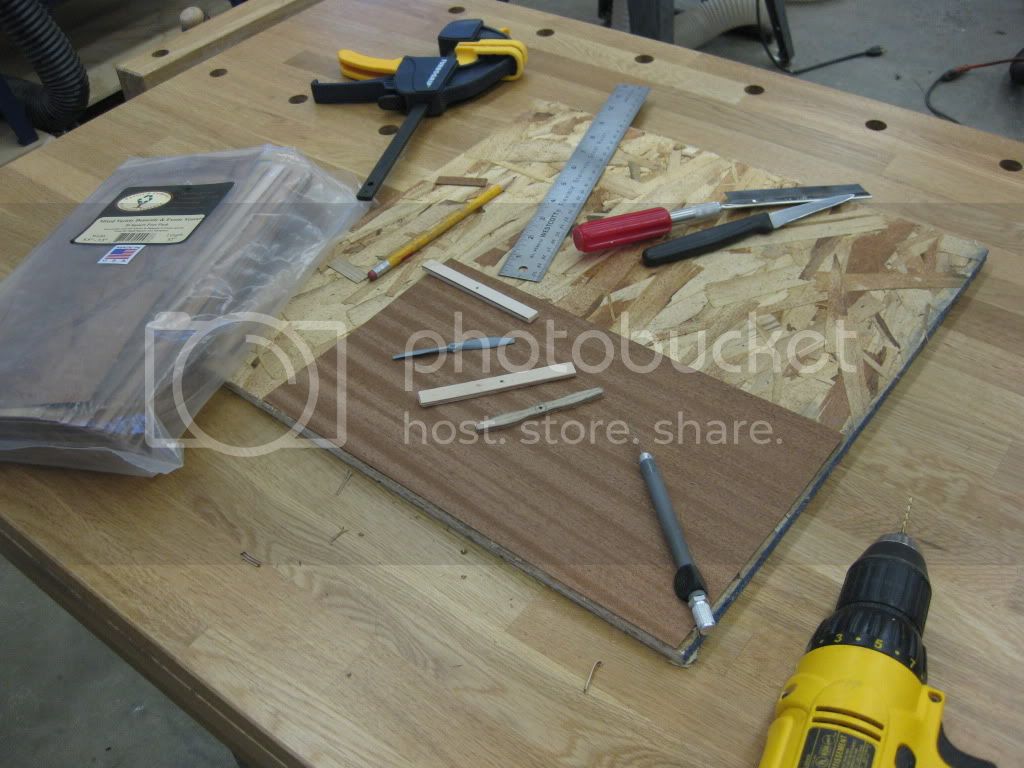
I purchased the "grab bag" of veneers mentioned in an earlier thread, made up some laminated "blanks" and am working from there. As usual several will be done to ensure minimum delays should one fail.
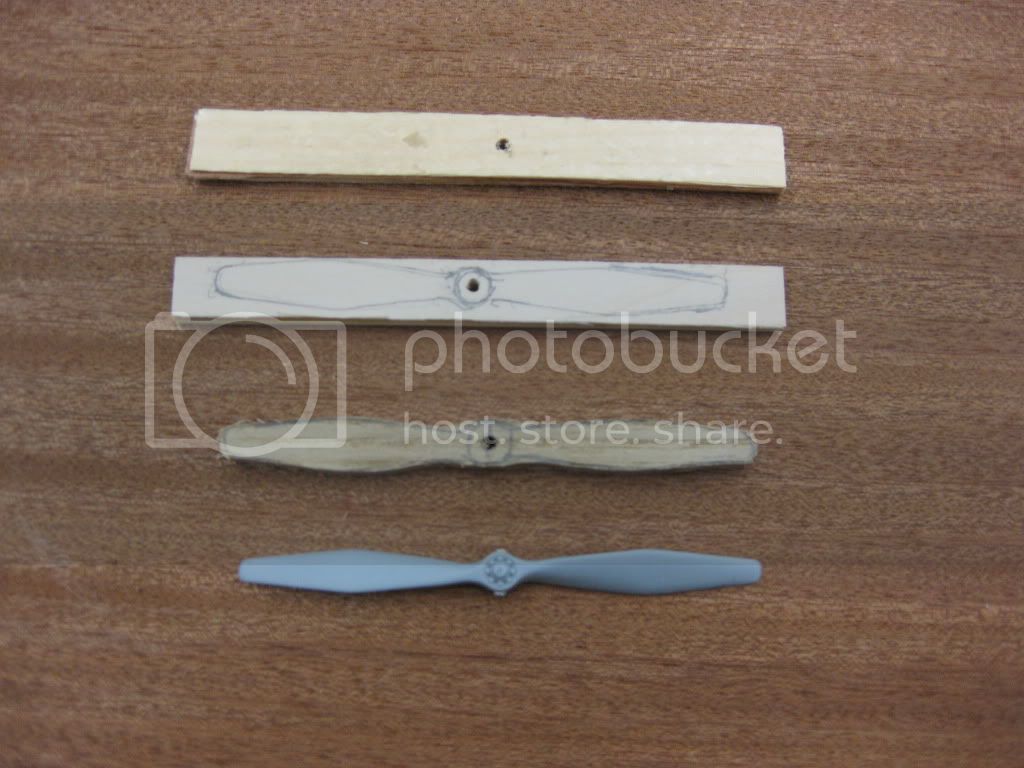
For this one I chose a light pine and dark walnut types of veneer.
At this point I am going to "down tools" for a few days until I can get a full day to wrap up this stage. I find things get out of sequence too easily if a few minutes here and there approach is taken.
Again, so far, so good. This kit is a joy to work on and find myself resenting the periods of enforced delay. I also have to force myself to slow down at times as I really look forward to the next WNW build. Got to get a few done before the landslide of their announced releases. The next update should show her rigged and ready for the final stage of gear, a bit of weathering, flight control rigging and she's a "wrap".
Thanks for looking and don't be shy to contribute suggestions and point out things I may have missed.
Cheers,
Lance
Since the last report I have almost reached the final rigging stage. The front cabanes got installed with perfect alignment with the use of a jig/template once the eyelets (a mix of Bob's and my own built versions) were all put in place.
Next I added the cowling components which made her appear much more complete. (Upper Wing and ring cowling "posed".)
Next came finishing up the aileron inspection ports, glass to follow, and eyelets/Bob's Buckles at the pre-drilled locations. I've elected to attach all the lower rigging points to follow with attachment of the upper wing, then roll her over on her back and do all the uppers. The cabanes will be rigged prior to this step. Note the "notes to self" on the yellow sticky lower right; a sure give-away of my advanced age! (Trust me good people, the memory is the second thing to fail !!!)
Just love the candid camera; some adjustment of the front Vickers gun PE bit required to get rid of the tiny gap I hadn't noticed before.
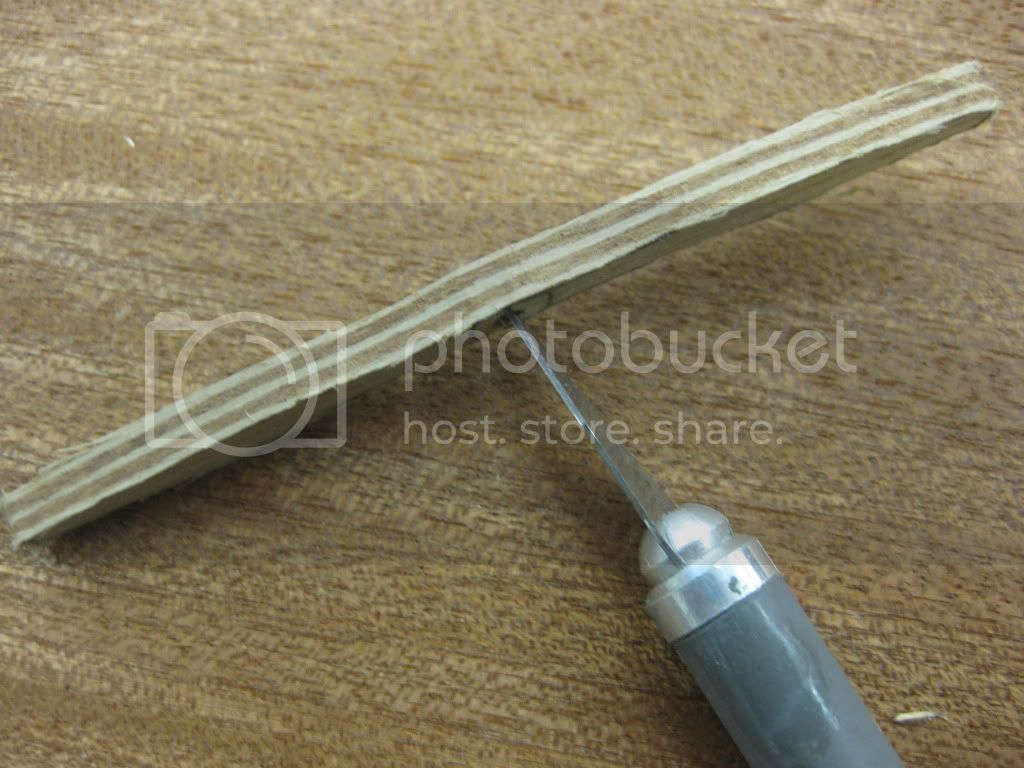
In between rigging sessions I hit the workshop to get the prop started. Although a crude set up the sander serves the rough shaping stage very well and I'm fortunate to have a solid work table and good lighting for this sub-component stage. The wires on the side of the shelf on the right are guitar strings stretched with lag bolts for weights; I use these for a lot of the flight control rigging requirements.
I purchased the "grab bag" of veneers mentioned in an earlier thread, made up some laminated "blanks" and am working from there. As usual several will be done to ensure minimum delays should one fail.
For this one I chose a light pine and dark walnut types of veneer.
At this point I am going to "down tools" for a few days until I can get a full day to wrap up this stage. I find things get out of sequence too easily if a few minutes here and there approach is taken.
Again, so far, so good. This kit is a joy to work on and find myself resenting the periods of enforced delay. I also have to force myself to slow down at times as I really look forward to the next WNW build. Got to get a few done before the landslide of their announced releases. The next update should show her rigged and ready for the final stage of gear, a bit of weathering, flight control rigging and she's a "wrap".
Thanks for looking and don't be shy to contribute suggestions and point out things I may have missed.
Cheers,
Lance
wing_nut
Joined: June 02, 2006
KitMaker: 1,212 posts
AeroScale: 468 posts
Posted: Thursday, September 08, 2011 - 09:59 AM UTC
Really coming together nicely Lance. The rigging/buckles looks great. A drum sander sure does make that initial shaping easy. I did mine with a drum on my Dremel but it would be nice to have a table to keep it all square.
lcarroll
Joined: July 26, 2010
KitMaker: 1,032 posts
AeroScale: 1,025 posts
Posted: Thursday, September 08, 2011 - 10:57 AM UTC
Thanks Marc,
I use the mini drums on the Dremel as well for the finishing phase and also around the hubs for the smaller radius curves. A vice as you probably know is invaluable at that stage.
As for the rigging / turnbuckles, no news to most, Bob's Bucklles are a wonderful product. Makes the job quicker and definitely produces great looking results.
Cheers,
Lance
warreni
Joined: August 14, 2007
KitMaker: 5,926 posts
AeroScale: 2,201 posts
Posted: Thursday, September 08, 2011 - 11:09 AM UTC
After seeing many props on WW1 aircraft over my years you will find that most use laminated wood, but often the wood for each of the laminations is exactly the same colour. So all you see are the narrow bands of glue used to hold the laminations together.
I have also seen solid wooden props made from one piece of timber, but that is the not as common in WW1 as laminated props. Also, the pices of wood used for the laminations are normally pretty thin, no more than half an inch to an inch. 12.5mm to 25mm for those smart metric people out there.
But, it is your model Lance and you build however you want.
lcarroll
Joined: July 26, 2010
KitMaker: 1,032 posts
AeroScale: 1,025 posts
Posted: Thursday, September 08, 2011 - 11:25 AM UTC
Warren,
Agree, the "lams" are normally pretty narrow. Per my earlier discourse this one will be heavily stained and overcoated and I used the highly contrasting colors in the hope that the laminated "look" will still show through. Mikael pointed out earlier that the Brits usually used a very dark and heavy shellac overcoat which makes the laminations almost invisible and gives the appearance of a solid prop in the majority of photos. If this doesn't work out I'll convince myself that some props were solid and this is one of them!
Last, I'm thinking back to the numerous photos I studied on this; you may have convinced me to try a laminated but one wood type/color sample as well, I suspect that may be a better representation of what I want.
Cheers,
Lance
lcarroll
Joined: July 26, 2010
KitMaker: 1,032 posts
AeroScale: 1,025 posts
Posted: Tuesday, September 27, 2011 - 04:01 PM UTC
Folks,
Like Warreni I'm off on a 10-12 day break; in my case it's the annual moose hunt up north.
Some progress since my last report of three weeks ago; again like Warreni I find it shocking how slow things go at this stage. From 90% complete to finished literally seems to take 80% of the total time. The wing rigging is complete, 75% completed on gear and bracing, and I have a choice of 2 completed props, one hand carved and the other the kit original. I am leaning very heavily towards the kit version at this point.
I'll drop in some photos once back and firmly seated at the work bench; best to all and will update again soon.
Cheers,
Lance
lcarroll
Joined: July 26, 2010
KitMaker: 1,032 posts
AeroScale: 1,025 posts
Posted: Wednesday, September 28, 2011 - 03:57 AM UTC
A couple of very quick photos before I run off into the wilderness.
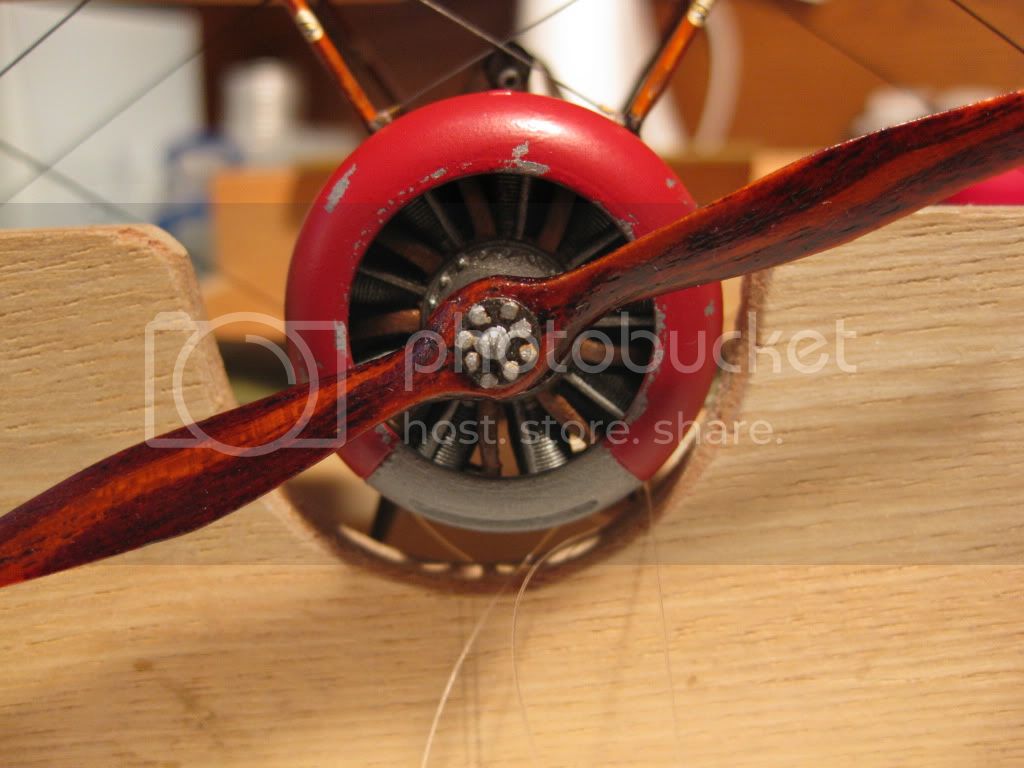
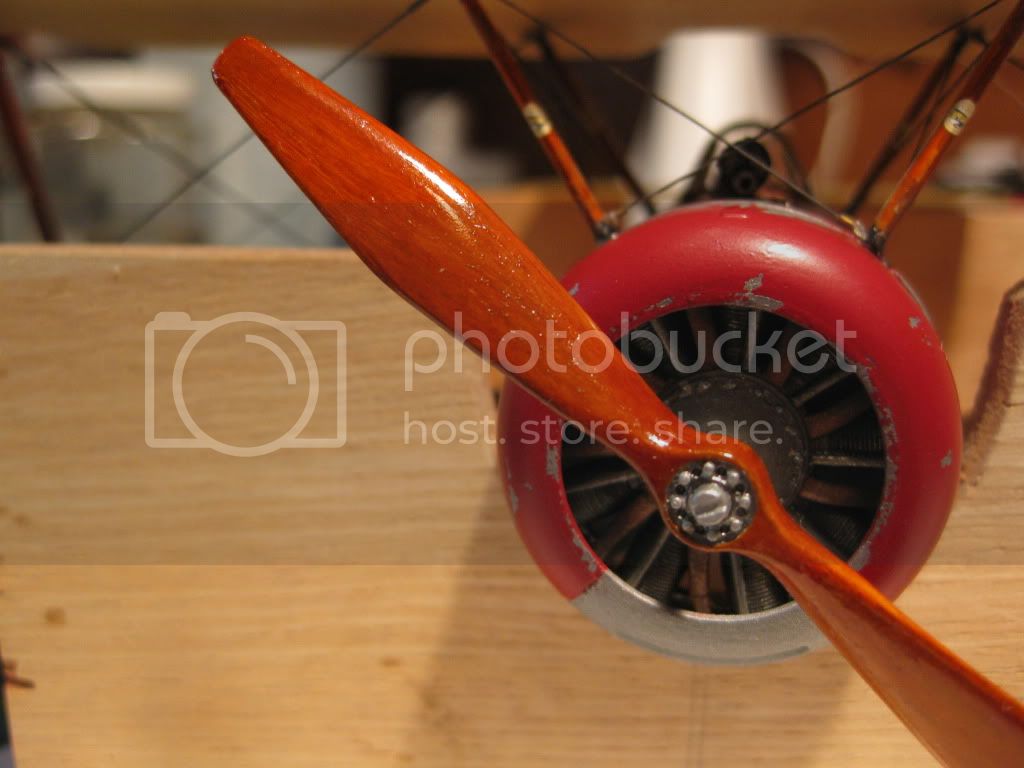
One each of the two props, as I said earlier the kit version with some acrylic grain and some clear orange appeals a lot more to me. The carved version's grain is a little wide and graphic for scale effect in my view. The hub is Copper State, the bolts are Vectornut.
The rigging, still a few buckles to touch up and I'm leaving the front pair of flying wires until last.
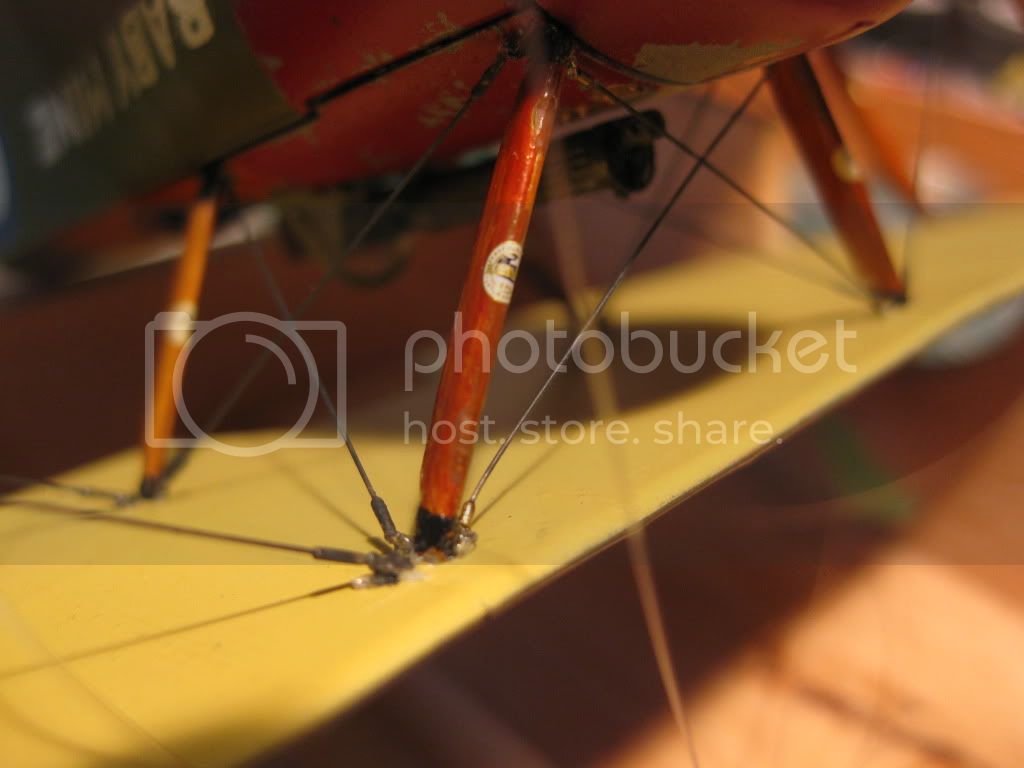
Last, the beginning of the landing gear installation; forward supports were pinned, this shot has it "posed", and the rigging at the initial stage.
That's it for now, slow progress but so far a very smooth progression and no major obstacles. Once again, great kit in the WNW style!
Cheers,
Lance
 (as he drives north tomorrow!
One each of the two props, as I said earlier the kit version with some acrylic grain and some clear orange appeals a lot more to me. The carved version's grain is a little wide and graphic for scale effect in my view. The hub is Copper State, the bolts are Vectornut.
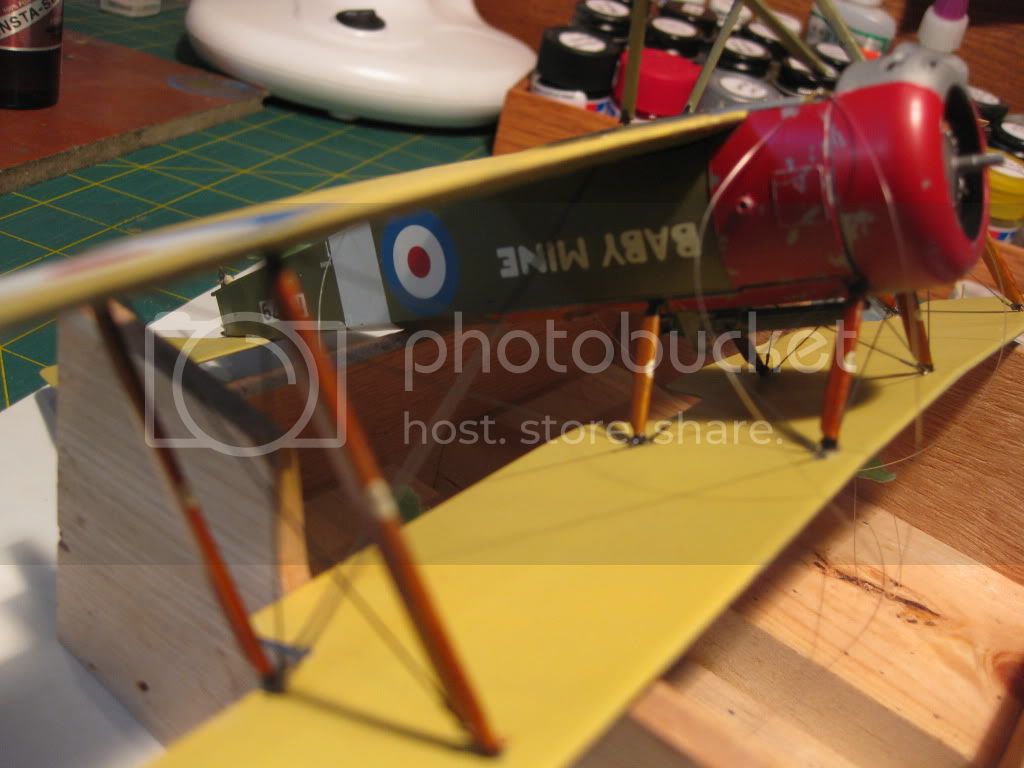
The rigging, still a few buckles to touch up and I'm leaving the front pair of flying wires until last.
Last, the beginning of the landing gear installation; forward supports were pinned, this shot has it "posed", and the rigging at the initial stage.
That's it for now, slow progress but so far a very smooth progression and no major obstacles. Once again, great kit in the WNW style!
Cheers,
Lance
(as he drives north tomorrow! |

WEB HOSTING BY


Copyright ©2021 AeroScale and Kitmaker Network, a subsidiary of Silver Star Enterprises
All Rights Reserved. Please read our Conditions of Use and Privacy Policy.
All Rights Reserved. Please read our Conditions of Use and Privacy Policy.