

Early Aviation
Discuss World War I and the early years of aviation thru 1934.
Discuss World War I and the early years of aviation thru 1934.
Hosted by Jim Starkweather
KoTS GB 2011 WNW Sop.Pup RNAS lcarrol

wing_nut

Joined: June 02, 2006
KitMaker: 1,212 posts
AeroScale: 468 posts
Posted: Sunday, October 02, 2011 - 01:57 AM UTC
If you shoot as well as you build... the moose are screwed.

JackFlash
Joined: January 25, 2004
KitMaker: 11,669 posts
AeroScale: 11,011 posts
Posted: Sunday, October 02, 2011 - 03:31 PM UTC
A news report from the Great White North News Channel! Flash!
". . .A large number of Moose trails (187 at last count) that have been tracked recently were found to end abruptly! The mystery was solved when Air Rescue units started to notice an equal number of Moose antlers were seen in the tree tops. Something has the moose population nervous enough to hide in the trees. . . "
". . .A large number of Moose trails (187 at last count) that have been tracked recently were found to end abruptly! The mystery was solved when Air Rescue units started to notice an equal number of Moose antlers were seen in the tree tops. Something has the moose population nervous enough to hide in the trees. . . "
wing_nut
Joined: June 02, 2006
KitMaker: 1,212 posts
AeroScale: 468 posts
Posted: Friday, October 07, 2011 - 12:07 PM UTC
Just off the wire...
Rocket J. Squirrel died on Monday while gather nuts for this winter. The aging Mr. Squirrel fell from a wire passing over a local road and was hit by a car. The funeral was attending by dignitaires from the entertainment world. Among those notably missing was his long friend and colleage, Bullwinkle.
LANCE!!! What have you done?

lcarroll

Joined: July 26, 2010
KitMaker: 1,032 posts
AeroScale: 1,025 posts

Posted: Monday, October 10, 2011 - 11:07 AM UTC
I'm back safe and sound; the Great Boreal Forest was a wonderful break and is minus one bull moose.
Will hopefully find a little time early next week to get back to this build. Thanks for the levity and comments Mark and Stephen. I'm looking forward to completing this one and to the next in the line. BTW one of my three hunting buddies met Nick Carter, the subject of this build, on numerous occasions and I may have an absolutely incredible find to share with you shortly. Looks like I may have be recieving what my buddy claims is Nick's Leather helmet from his Pup and Tripe days! If this works out I'll share some photos.
Cheers,
Lance
JackFlash
Joined: January 25, 2004
KitMaker: 11,669 posts
AeroScale: 11,011 posts
Posted: Monday, October 10, 2011 - 02:23 PM UTC
Excellent Lance! Kudos to your friend for the offer!

OEFFAG_153

Joined: February 19, 2010
KitMaker: 1,473 posts
AeroScale: 1,450 posts
Posted: Tuesday, October 11, 2011 - 12:37 AM UTC
Hello Lance,
Excellent news on the moose and leather helmet. Our hunting season is about to start I won't be shooting any moose but I do hope to eat some moose steak, with the mushrooms I've picked in the forests (while ducking the bullets).
Best Regards
Mikael
Excellent news on the moose and leather helmet. Our hunting season is about to start I won't be shooting any moose but I do hope to eat some moose steak, with the mushrooms I've picked in the forests (while ducking the bullets).
Best Regards
Mikael
lcarroll
Joined: July 26, 2010
KitMaker: 1,032 posts
AeroScale: 1,025 posts
Posted: Wednesday, October 19, 2011 - 04:30 AM UTC
An update on the flying helmet, the build will re-commence in the next day or three.
I just recieved an Email from my friend Jack who made the offer; he will deliver the item to me personally next June on his next visit here. (doesn't want to trust the Postal or other delivery agents with this artifact) He has provided me with some of the info and background as follows:
- He recieved it from his Father's estate years ago;
- Remembers his Dad telling him it was given to him by his friend, Nick Carter and it being in his collection of momentos as he grew up;
- His Dad was a Senior Officer (I believe Air Commodore) in the RCAF post WWII, he had joined the RCAF in the late 30s and flown through WWII;
- His Dad had an incredible group of buddies who would often gather for Social Visits in his home; Jack recalls on one occasion Nick Carter, Billy Bishop, Raymond Collishaw, and a few other Canadian WWI aces sitting in their home, trading war stories and reliving the "good old days" over Scotch and Cuban cigars. (that's 149 confirmed kills just counting the three names, in one room) He says he was thrilled, Mom less so as visibility sank to "zero-zero" in cigar smoke and the odd colorful words as the evening progressed. He also remembers Donald MacLaren (54 kills) visiting on several occasions. He still feels tremendously privileged to have met these men albeit it was in the late 40s, early 50s when he was 8-10 years old.
- Jack went on to become a Fighter Pilot in the RCAF and we flew together for years. We were and still are close friends, this year was our 28th year of going on an Annual Moose Hunt together.
- I have promised Jack that, when I go to the great "Flyer's Reunion in the Sky", this artifact will be suitably donated to a good museum, I'm thinking the Canadian War Museum (which display's Bishop's Neuport 17 windscreen complete with Spandau bullet hole) or the Canadian Aviation Museum, both in the National Capital Ottawa Ontario. The Calgary Museum comes to mind as well; they have a replica Pup on display, last time I saw it it was in Nick Carters color scheme.
I feel privileged and fortunate beyond words to recieve this item. Jack has kept it all these years with a vague notion to offer it to some museum but recognises my passion for early Canadian Aviation and feels I can better choose an appropriate spot for it. He says he can't prove it is indeed authentic however the foregoing, and his Father's ststements that Nick had given it to him as a gesture of friendship years ago work for me!
Coincidently I met and spoke to Donald MacLaren in 1980 or 81 when he was a Guest Speaker at a 419 Squadron Mess Dinner. He was 87 years old and still sharp as a tack. His speech was centered on his Great War exploits and you can't imagine the silence in a room full of Fighter Pilots as he modestly described the emotions, physical stresses, and mental strain of Air Combat he had experienced. He was very keen on meeting as many of us "youngsters" as possible and I was thrilled when he asked me what my callsign was; when I replied "Bishop" he smiled and said "if they call you Bishop you must be good at what you do". I walked on air for weeks! Forgive the old man excursion down the bunny trail of reminiscences................
Thought I'd share this with you folks; it's a big event in my tiny little world for sure! I plan to display the helmet beside this build of "Baby Mine", Nick Carters Pup on Naval 3 Sqn. I figure that beats the replica Blue Max I have beside my Roden DIII.
Cheers,
Lance

warreni

Joined: August 14, 2007
KitMaker: 5,926 posts
AeroScale: 2,201 posts

Posted: Wednesday, October 19, 2011 - 10:47 AM UTC
Hope the Canadian Greenies don't hear about your moose hunting adventures Lance... 
My comments on all things are just from my experiences over the years and I am not trying to influence anyone in the build of THEIR model. I mightn't agree with all finishes and techniques people use, but I defend the right of anyone to finish a model however they want.
I have found that I was losing the enjoyment in building models a few years ago as I was slipping into the AMS abyss, but after a few OOB WNW kits I have found myself enjoying building again.
lcarroll
Joined: July 26, 2010
KitMaker: 1,032 posts
AeroScale: 1,025 posts
Posted: Saturday, October 22, 2011 - 04:14 PM UTC
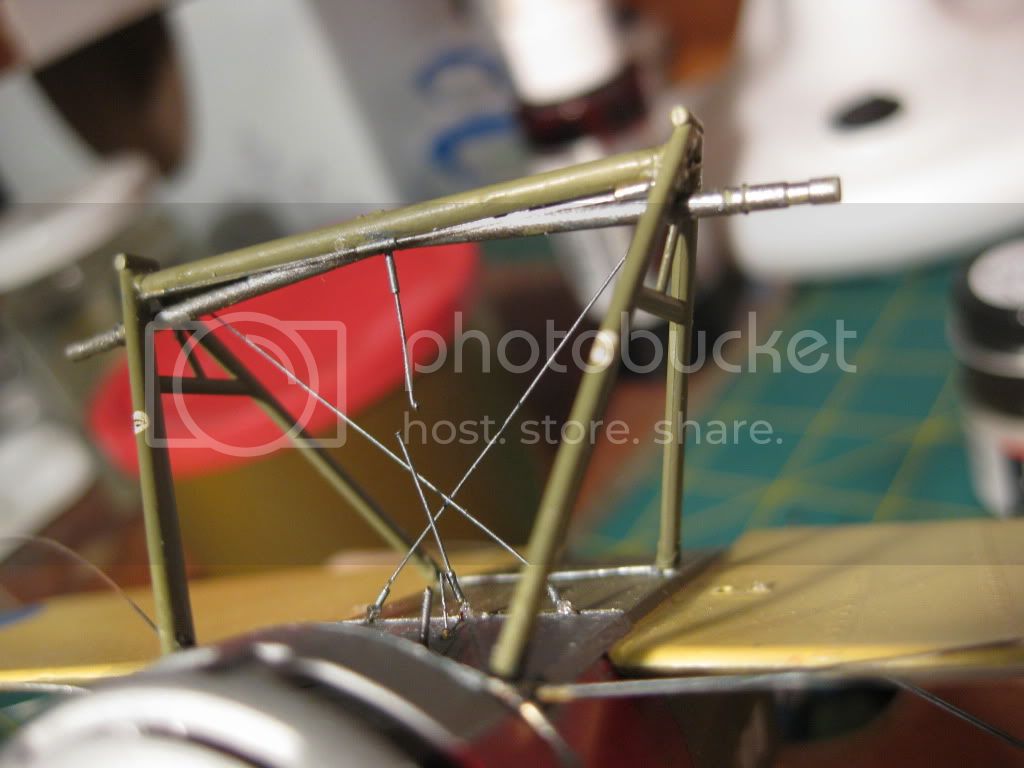
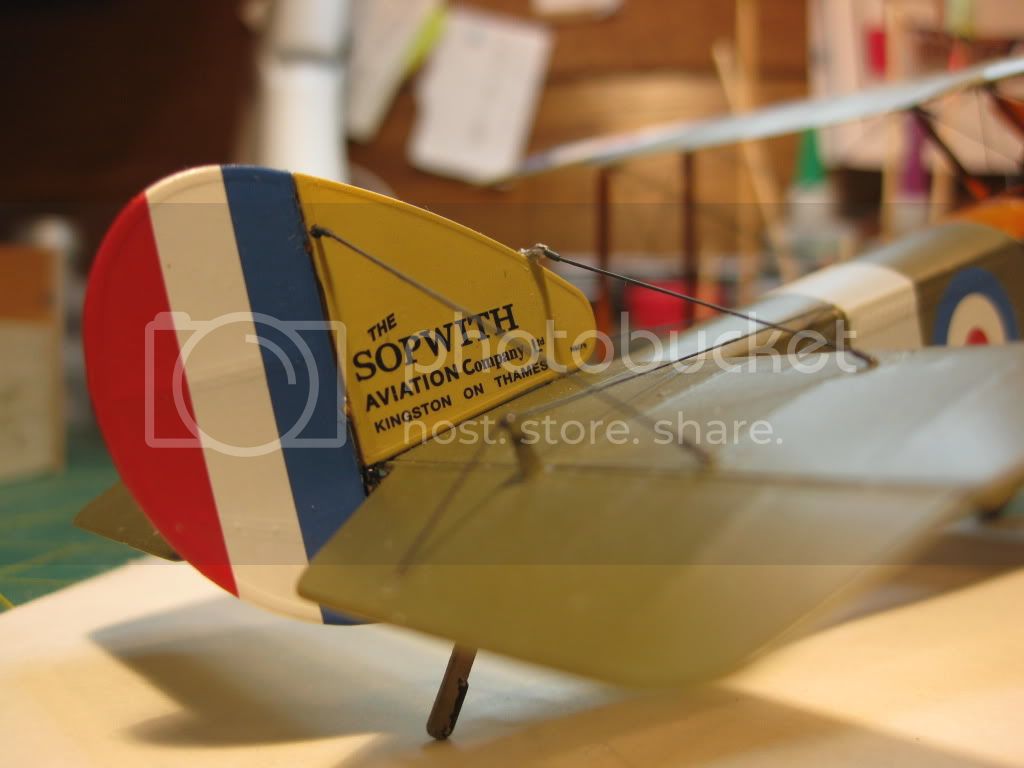
Neil Diamond once sang, "Some days are diamonds, some days are gold"! Today ended as neither. Getting back into the flow of the build went well all day however in the last 5 minutes of workbench activity things definitely fell flat on their collective posteriors! Mere seconds after completing the landing gear and rigging (very nice results I might add and an all day affair what with hours on the web regarding Cowling Straps/cables and cross braces) I caught my sleeve in an errant rigging line, dragged the entire Pup out of her "cradle" over the edge of the desk and dropped her flat at my feet.
The good news, I didn't step on her and no damage beyond today's work; the bad news, the gear rigging all went very slack.
No problem says Mr. Master Modeller, heat will fix that!! It did for the two cross braces; not so well when the hot knife contacted the monofil center gear support! As you can see, something obvious is wrong with the first picture at the end of this update
Tomorrow is another day; I'll drill it out and re-do it with stainless steel wire and more Bob's Buckles tubing.
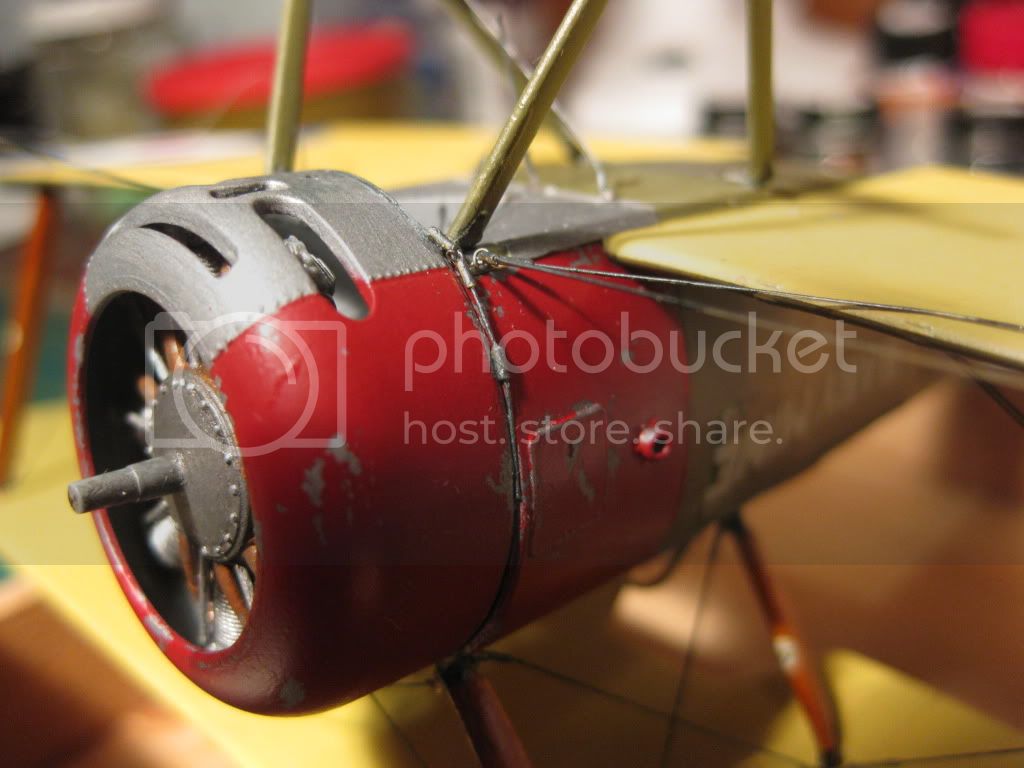
Two comments; the cross brace between the rear Gear Support Legs and the Cowling Strap(s).
Both are a result of varying illustrations in the available References and a considerable amount of info available on-line. Although the preceeding is an incredible mish-mash of re-builds, period photos and References, and Replicas, I chose the best combination I thought logical. I suspect the real Pups had a variance of fittings and hopefully I haven't gone too far astray. I tended to lean towards the configurations on the Canadian Warplane Heritage Museum Pup, as far as I know a rebuild and to flying standard at that.
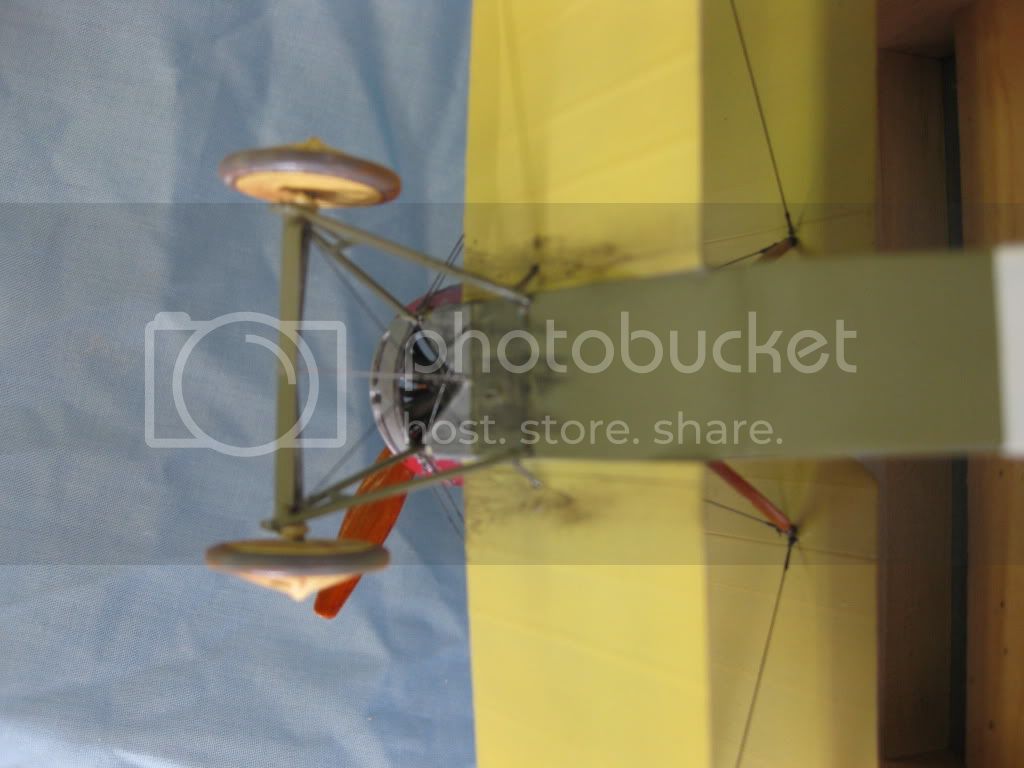
Other then the impulsive "spin trial" onto the hard floor the rest is progressing nicely. Three quick photos follow............................
The broken center gear suspension cable.
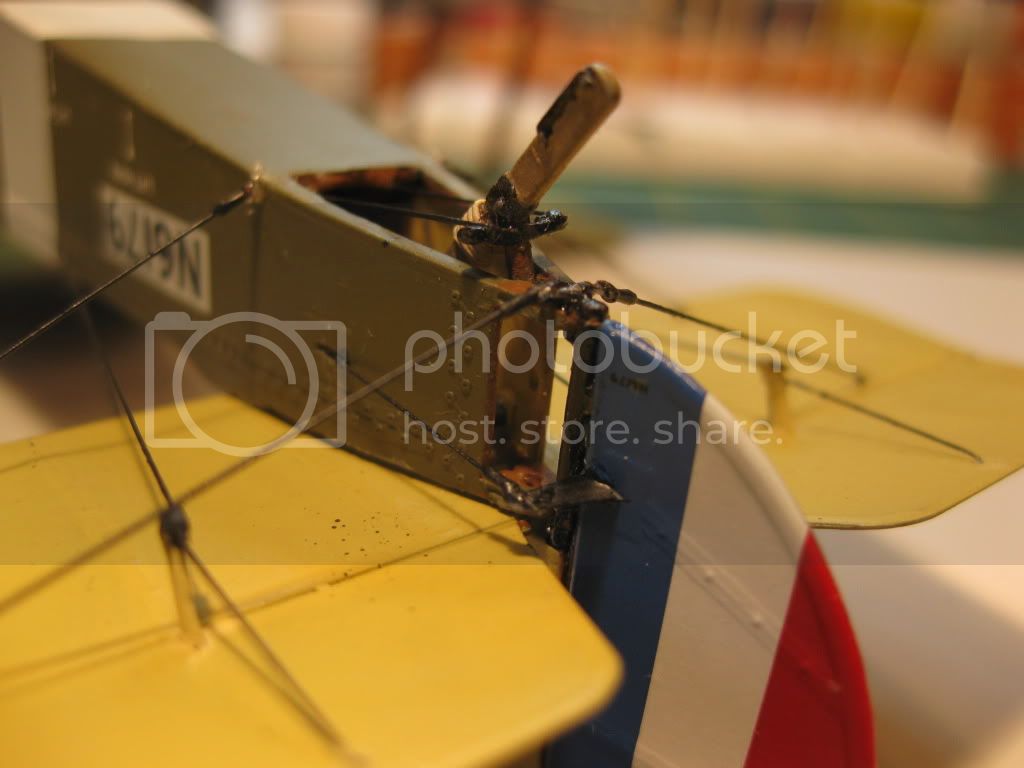
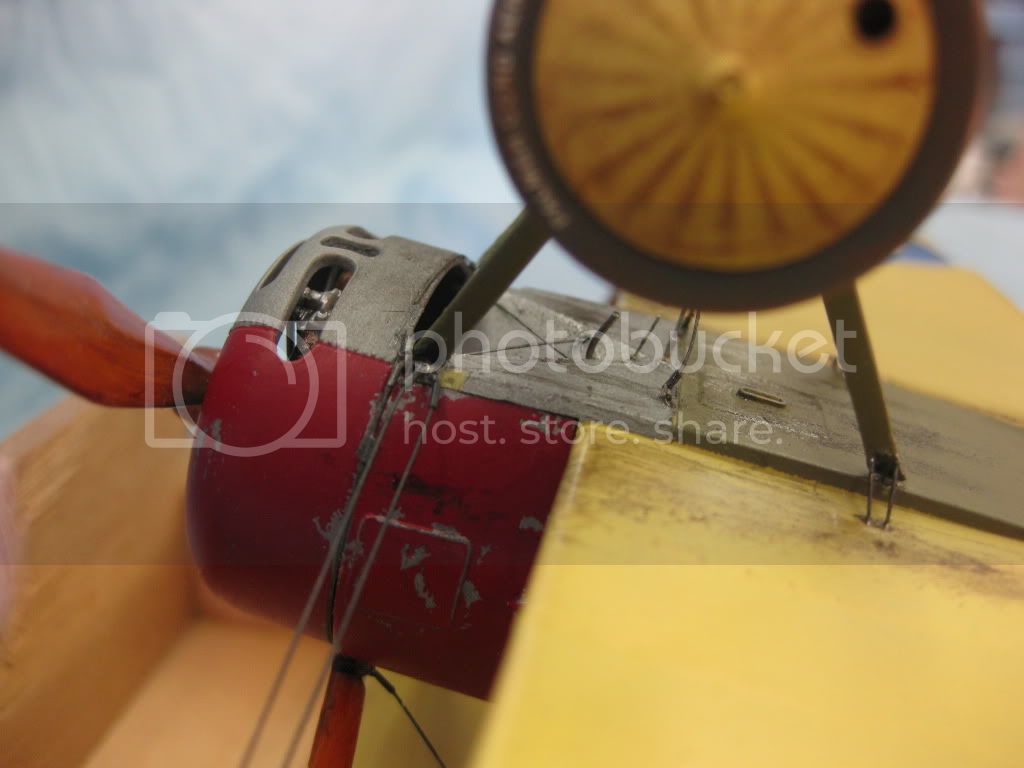
The cowling fastening cable, (found this only on some references but decided to add it for interest's sake....)
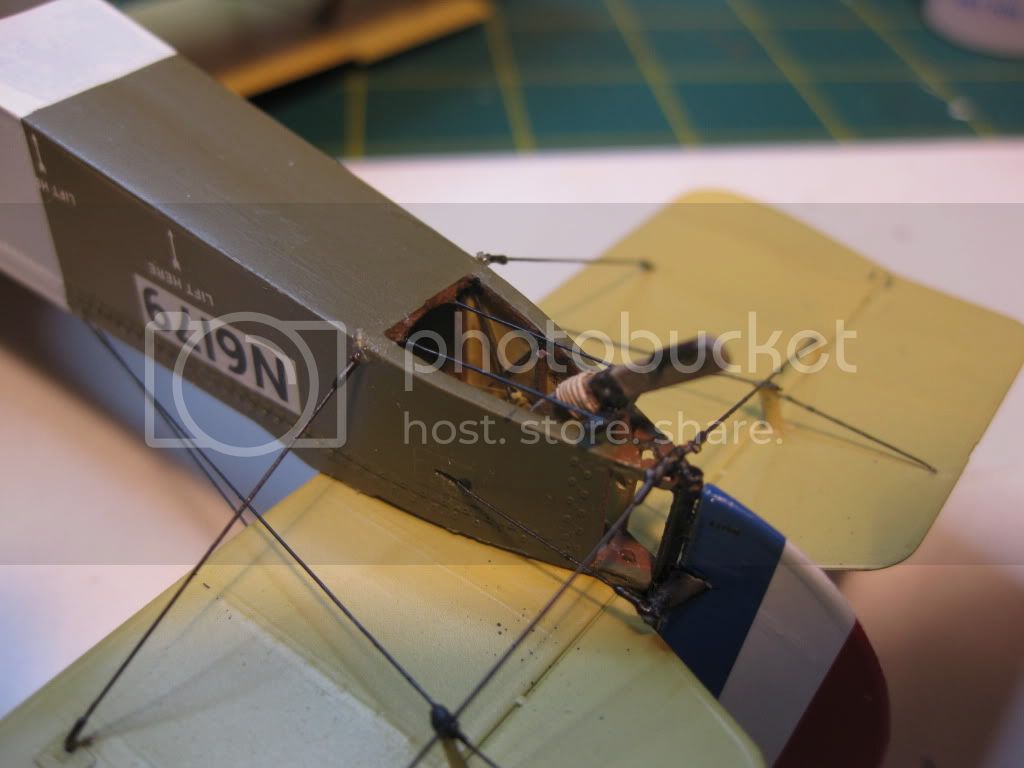
And last, an overall view.......
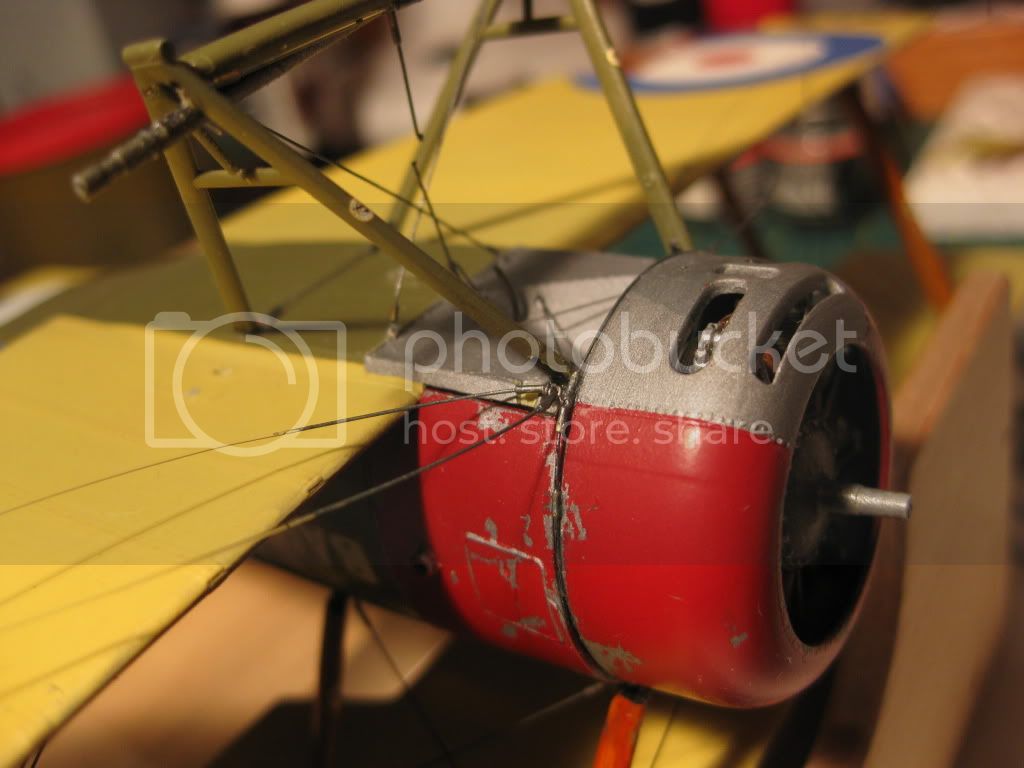
Hopefully tomorrow will end better! Still think this is a wonderful kit; only problems encountered are definitely "self induced"!
Cheers,
Lance
The good news, I didn't step on her and no damage beyond today's work; the bad news, the gear rigging all went very slack.
No problem says Mr. Master Modeller, heat will fix that!! It did for the two cross braces; not so well when the hot knife contacted the monofil center gear support! As you can see, something obvious is wrong with the first picture at the end of this update
Tomorrow is another day; I'll drill it out and re-do it with stainless steel wire and more Bob's Buckles tubing.
Two comments; the cross brace between the rear Gear Support Legs and the Cowling Strap(s).
Both are a result of varying illustrations in the available References and a considerable amount of info available on-line. Although the preceeding is an incredible mish-mash of re-builds, period photos and References, and Replicas, I chose the best combination I thought logical. I suspect the real Pups had a variance of fittings and hopefully I haven't gone too far astray. I tended to lean towards the configurations on the Canadian Warplane Heritage Museum Pup, as far as I know a rebuild and to flying standard at that.
Other then the impulsive "spin trial" onto the hard floor the rest is progressing nicely. Three quick photos follow............................
The broken center gear suspension cable.
The cowling fastening cable, (found this only on some references but decided to add it for interest's sake....)
And last, an overall view.......
Hopefully tomorrow will end better! Still think this is a wonderful kit; only problems encountered are definitely "self induced"!
Cheers,
Lance
JackFlash
Joined: January 25, 2004
KitMaker: 11,669 posts
AeroScale: 11,011 posts
Posted: Saturday, October 22, 2011 - 04:23 PM UTC
Self induced. . . yep been there done that.
lcarroll
Joined: July 26, 2010
KitMaker: 1,032 posts
AeroScale: 1,025 posts
Posted: Tuesday, October 25, 2011 - 06:49 AM UTC
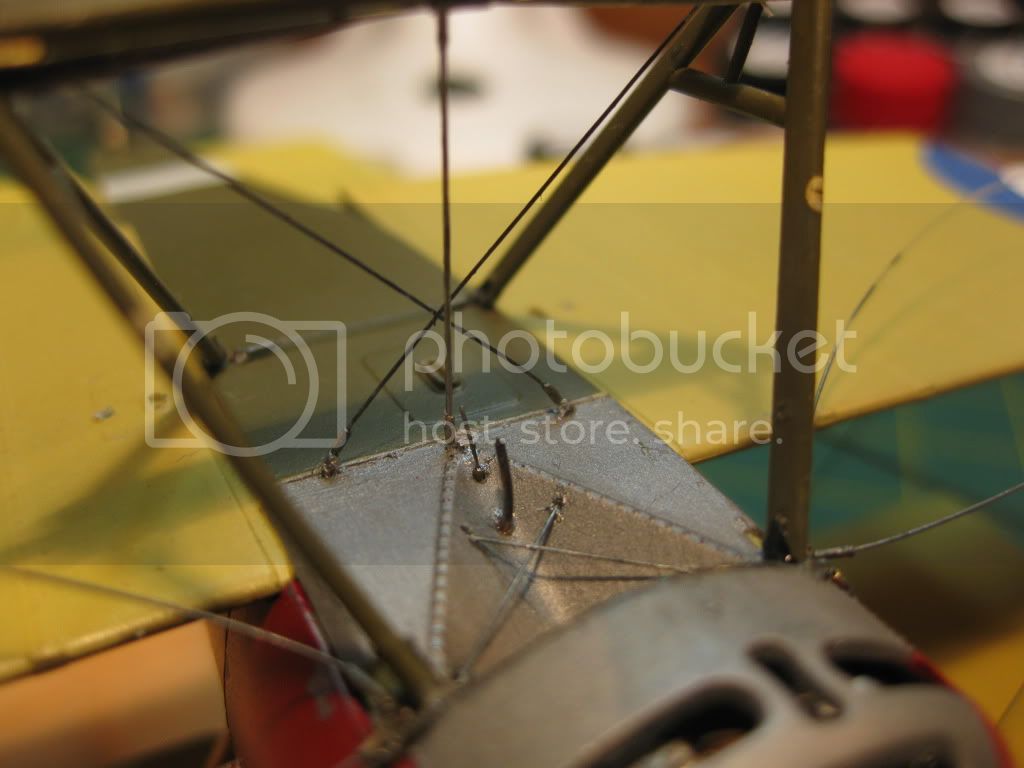
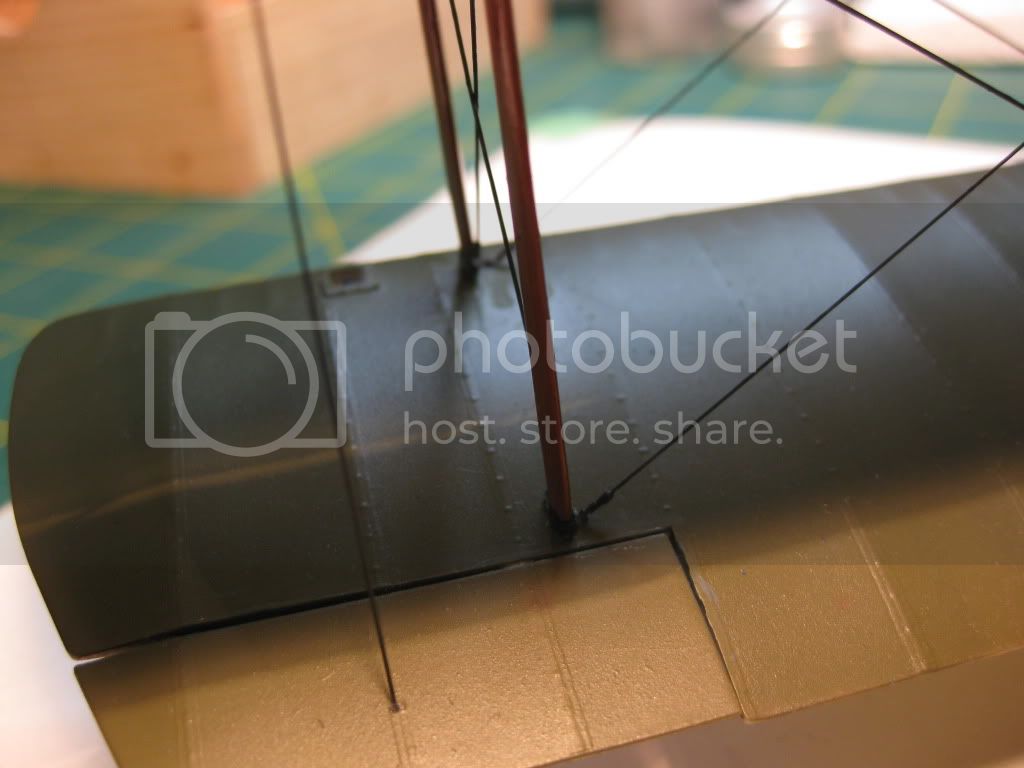
Repairs are done! I completed the replacement of the severed rod/cable undercarriage center support (used stainless steel wire) several days back and have since started on the wing/aileron and tail section control horns and supports. Progress in that department is slow at best; a very busy phase of the build for sure as always.
I plan to rig the entire aft section, then do the wing control cables, and then finish with the double flying wires forward that are still attached only to the upper wing.
Photos of the repaired undercarriage rigging:

I should be able to complete the aft section by the weekend, too many "things" to attend to in my real life at present. I'll try for photos as soon as it's done. Getting close but the build really drags at this near complete stage.
Cheers,
Lance
I plan to rig the entire aft section, then do the wing control cables, and then finish with the double flying wires forward that are still attached only to the upper wing.
Photos of the repaired undercarriage rigging:
I should be able to complete the aft section by the weekend, too many "things" to attend to in my real life at present. I'll try for photos as soon as it's done. Getting close but the build really drags at this near complete stage.
Cheers,
Lance
lcarroll
Joined: July 26, 2010
KitMaker: 1,032 posts
AeroScale: 1,025 posts
Posted: Saturday, October 29, 2011 - 01:11 PM UTC
Great progress and time for an almost final update.
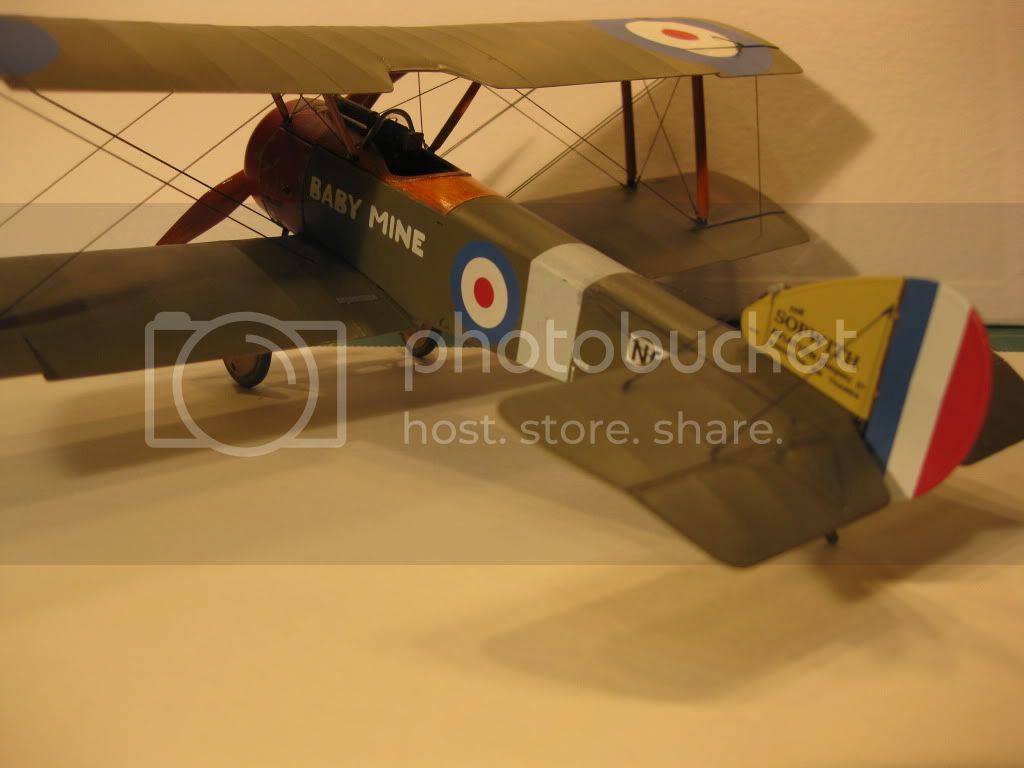
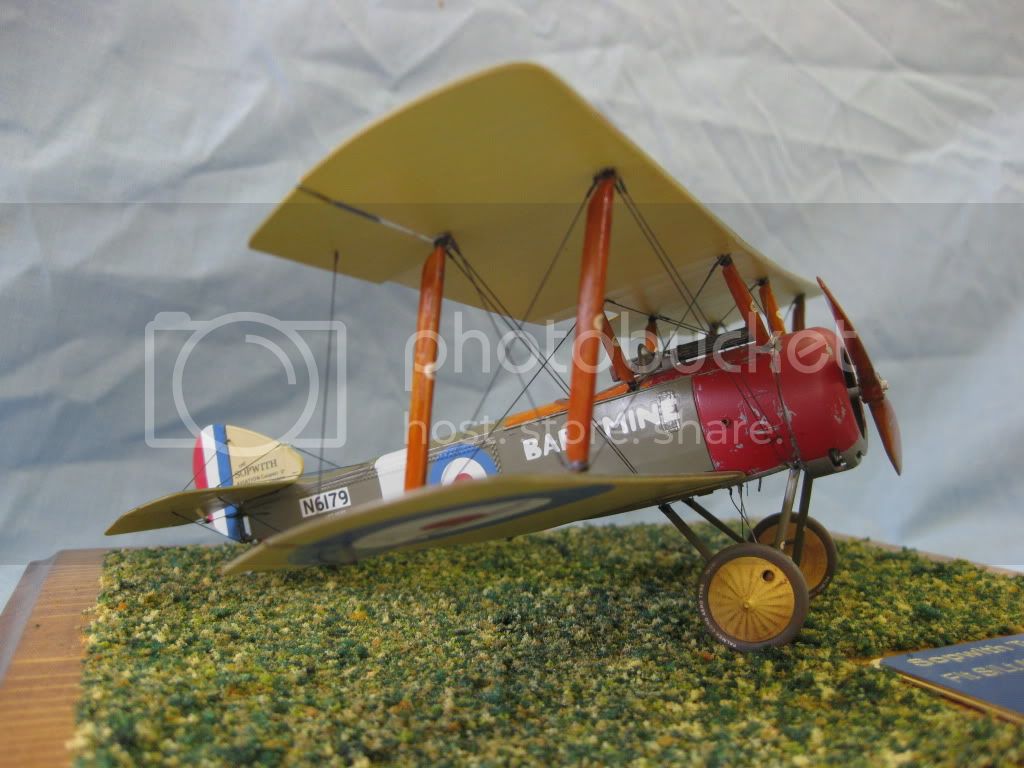
I completed the aft section rigging; very busy what with control and a number of bracing wires. I elected to install a "scratched" bracing attachment for the forward fin to connect the two pairs of forward bracing wires, design and photo compliments of the Data File Special color photos of the Hendon Pup on Page 34.
Once the bracing was done the rudder and elevator control lines were installed from control horns to pre-drilled (and for the elevators conduit / tubes pre-installed) along with the lines running from the rear fuselage to the tail skid. I've included a shot to show the rear fuselage interior bracing and detail in the rudder kingpost area as well. The oil "splatters "on the underside view of the horizontal Stab/elevator were inadvertantly applied while painting the bracing wires.they will remain as part of the weathering!
Next came the aileron rigging; top wing upper, upper and lower aileron interconnects, and lower aileron to wing (to the pulley mechanisms). Like the aft section a mix of monofil (4 and 6 pound test or .20 and .23mm respectively) and the same sizes of guitar wire were used. Ailerons were installed just prior and all were pinned with stainless steel wire.
Next the two sets of forward double "flying wires" were finally attached to their locations on the upper struts; these had been the bain of my existence for the past month catching up in any and all things on the bench and my body and causing the "dump it on the floor" trick a few weeks back that led to re-rigging the gear. Nice to have them tied up and out of the way!
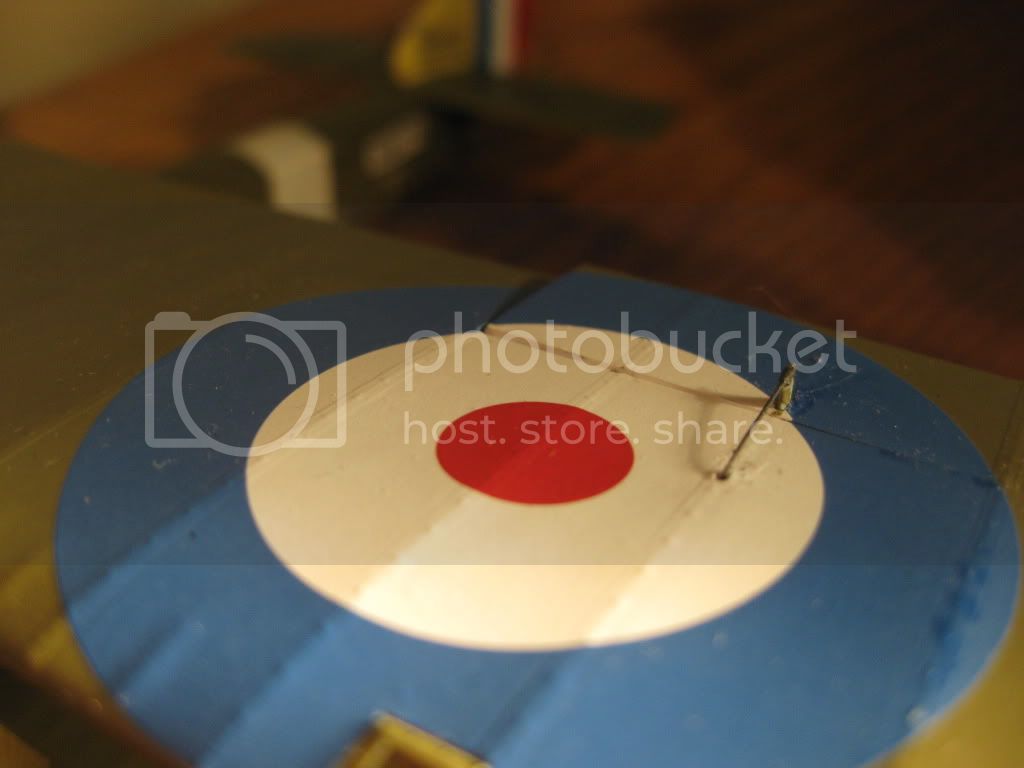
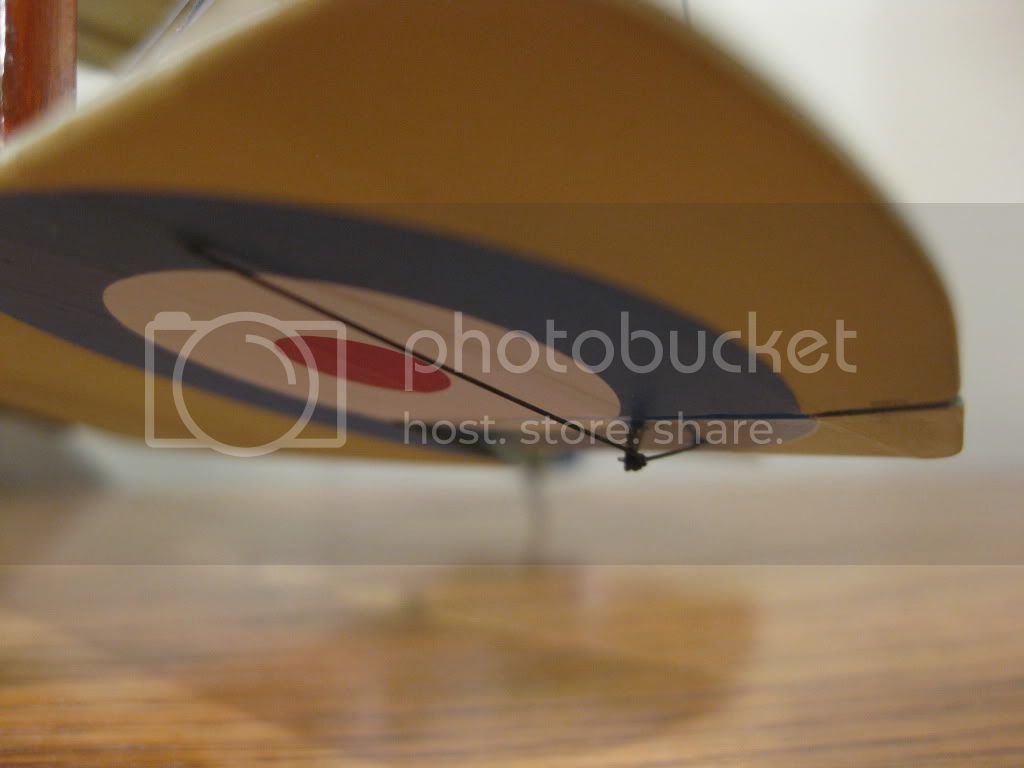
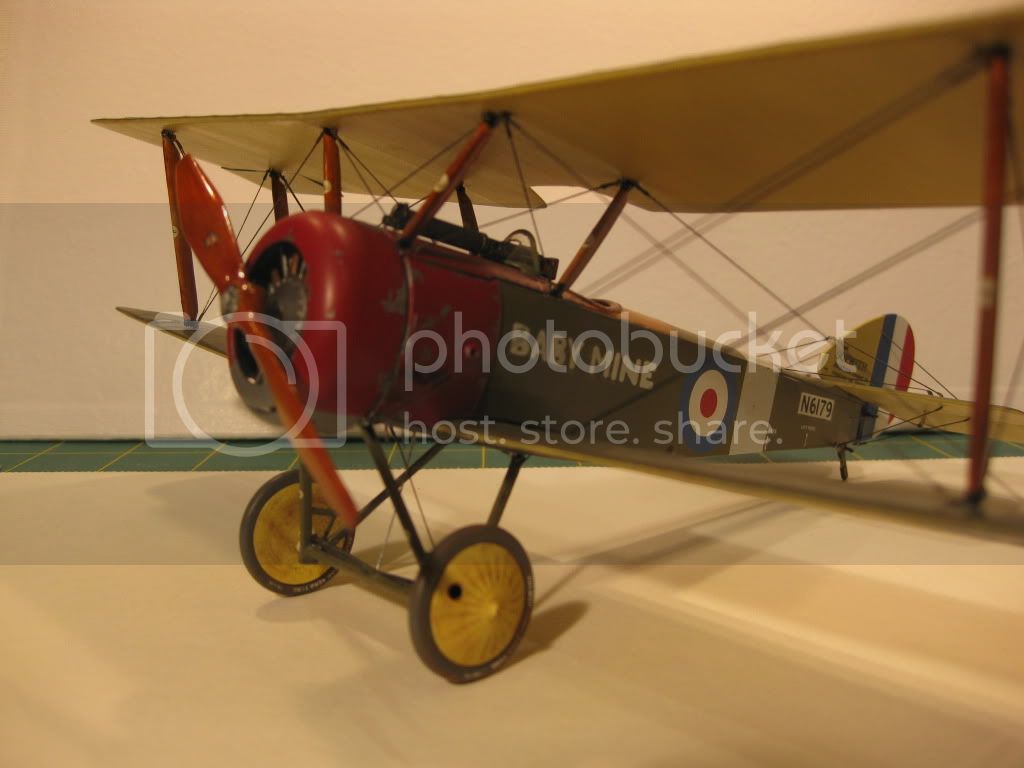
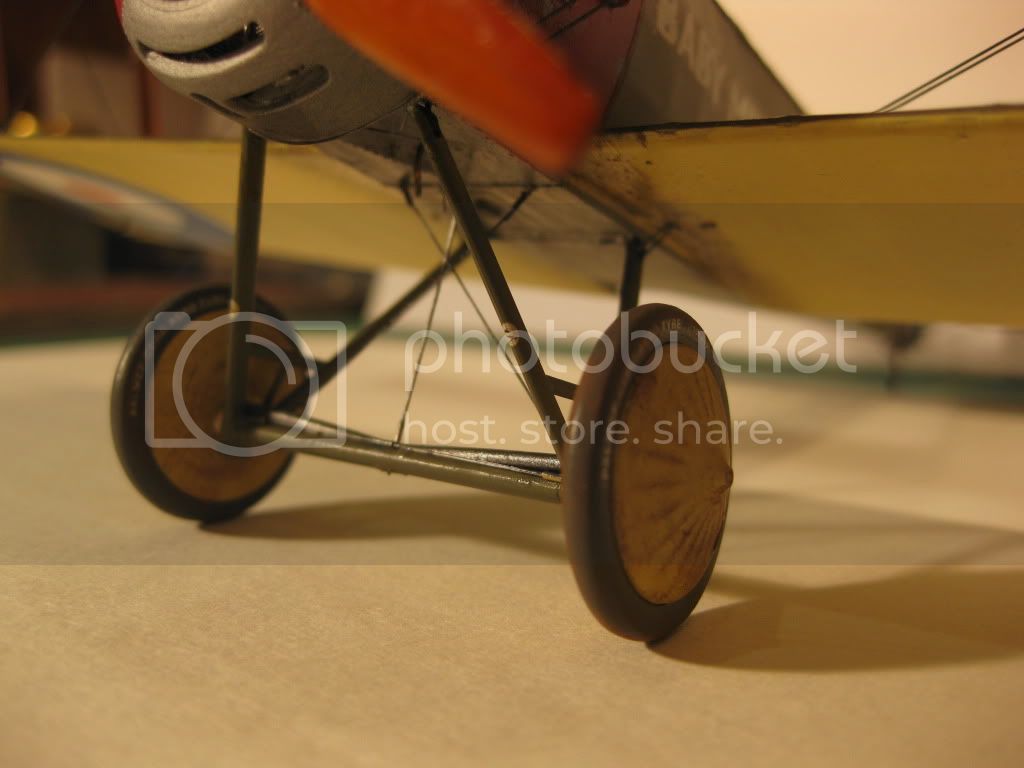
Next a little weathering was applied; some such as the wheels having been done as the work progressed earlier. The previous photo shows the wheels to best advantage. In this case I decided to keep the weathering/dirt to a small amount. Oil staining on the lower fuselage and inner lower wings and some dirt on the wheels being deemed sufficient. The oil stains are a mix of Tamiya Smoke and black pigment, the wheels done with a mix of black and "europe dirt"pigments.
At this point I realised that she was all but finished. A little touching up, a good dusting (Can't say enuff about these little cameras, missed the dirt til now!) followed by some overall pics and she'll be a wrap! I'll do my best to get that all done tomorrow.
Thanks for looking and any and all comments welcome.
Cheers,
Lance
I completed the aft section rigging; very busy what with control and a number of bracing wires. I elected to install a "scratched" bracing attachment for the forward fin to connect the two pairs of forward bracing wires, design and photo compliments of the Data File Special color photos of the Hendon Pup on Page 34.
Once the bracing was done the rudder and elevator control lines were installed from control horns to pre-drilled (and for the elevators conduit / tubes pre-installed) along with the lines running from the rear fuselage to the tail skid. I've included a shot to show the rear fuselage interior bracing and detail in the rudder kingpost area as well. The oil "splatters "on the underside view of the horizontal Stab/elevator were inadvertantly applied while painting the bracing wires.they will remain as part of the weathering!
Next came the aileron rigging; top wing upper, upper and lower aileron interconnects, and lower aileron to wing (to the pulley mechanisms). Like the aft section a mix of monofil (4 and 6 pound test or .20 and .23mm respectively) and the same sizes of guitar wire were used. Ailerons were installed just prior and all were pinned with stainless steel wire.
Next the two sets of forward double "flying wires" were finally attached to their locations on the upper struts; these had been the bain of my existence for the past month catching up in any and all things on the bench and my body and causing the "dump it on the floor" trick a few weeks back that led to re-rigging the gear. Nice to have them tied up and out of the way!
Next a little weathering was applied; some such as the wheels having been done as the work progressed earlier. The previous photo shows the wheels to best advantage. In this case I decided to keep the weathering/dirt to a small amount. Oil staining on the lower fuselage and inner lower wings and some dirt on the wheels being deemed sufficient. The oil stains are a mix of Tamiya Smoke and black pigment, the wheels done with a mix of black and "europe dirt"pigments.
At this point I realised that she was all but finished. A little touching up, a good dusting (Can't say enuff about these little cameras, missed the dirt til now!) followed by some overall pics and she'll be a wrap! I'll do my best to get that all done tomorrow.
Thanks for looking and any and all comments welcome.
Cheers,
Lance
JackFlash
Joined: January 25, 2004
KitMaker: 11,669 posts
AeroScale: 11,011 posts
Posted: Saturday, October 29, 2011 - 01:57 PM UTC
Lance it has been an enjoyable thread watching your progress. Decent build!
Please don't stop with this one, Model On!
Please don't stop with this one, Model On!

vulkanizer

Joined: December 26, 2009
KitMaker: 144 posts
AeroScale: 109 posts

Posted: Saturday, October 29, 2011 - 09:26 PM UTC
Beautifully done plane. Pleasure watch the details on her .
lcarroll
Joined: July 26, 2010
KitMaker: 1,032 posts
AeroScale: 1,025 posts
Posted: Sunday, October 30, 2011 - 07:42 AM UTC
Last entry on this one; finished her up this morning! I'm not at all expert at the photographing part however have taken some in different locations and light sources, a few follow.
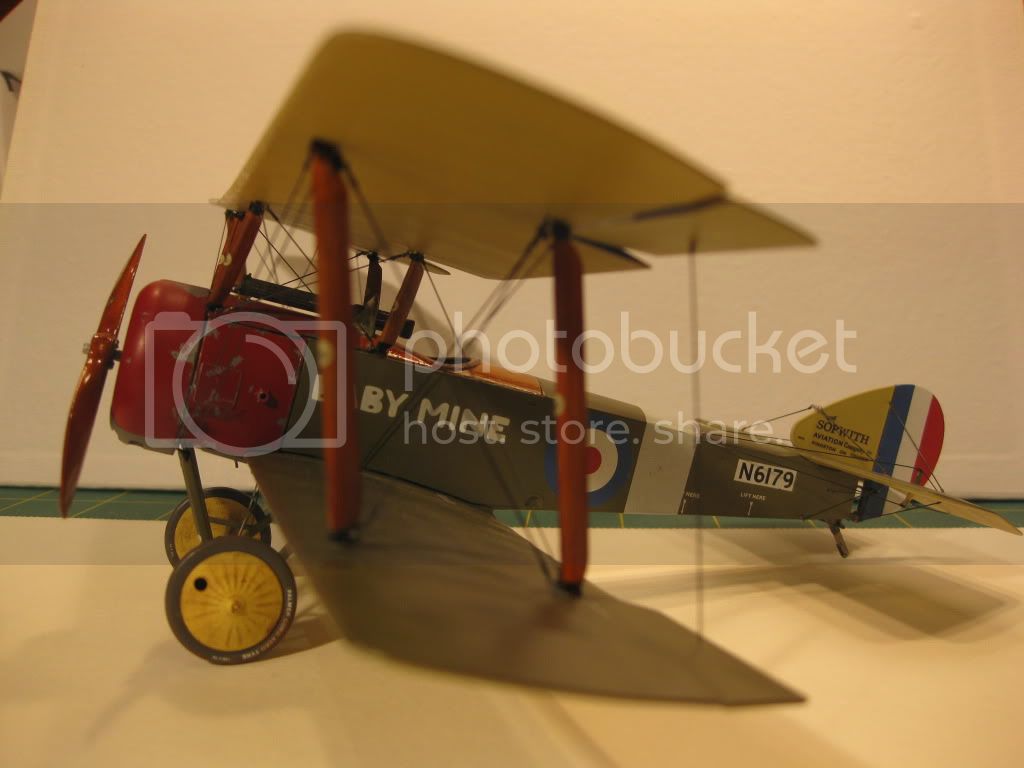
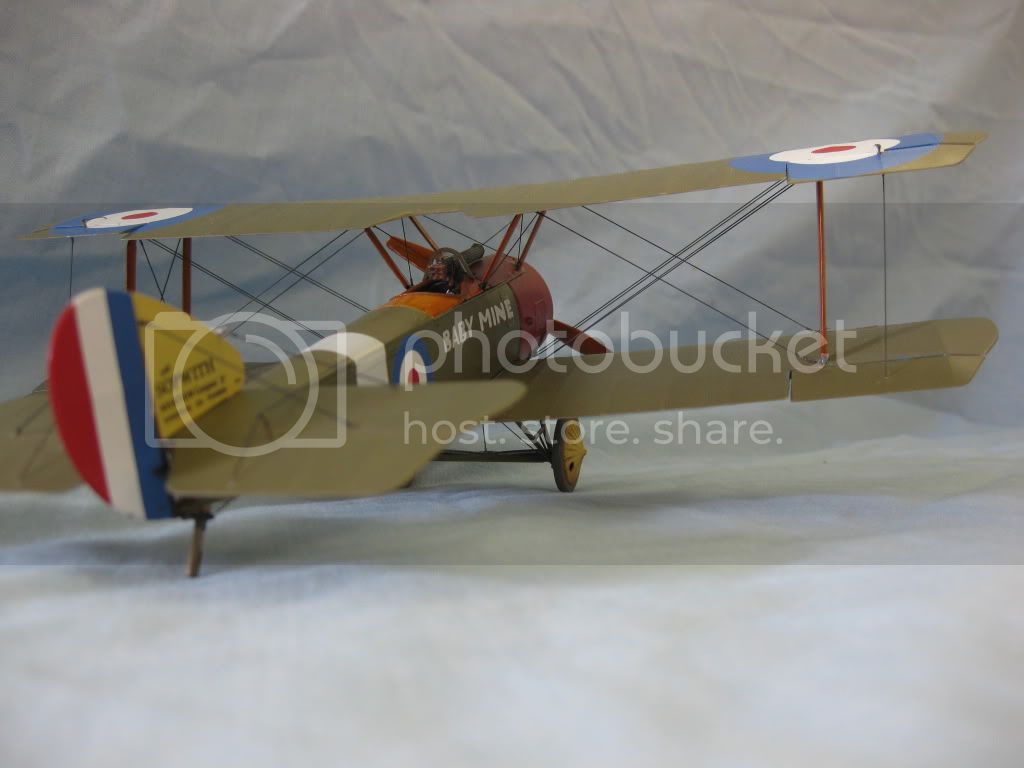
Took these three to capture her overall against a white background with lots of light but mostly from above, set up on my bench:
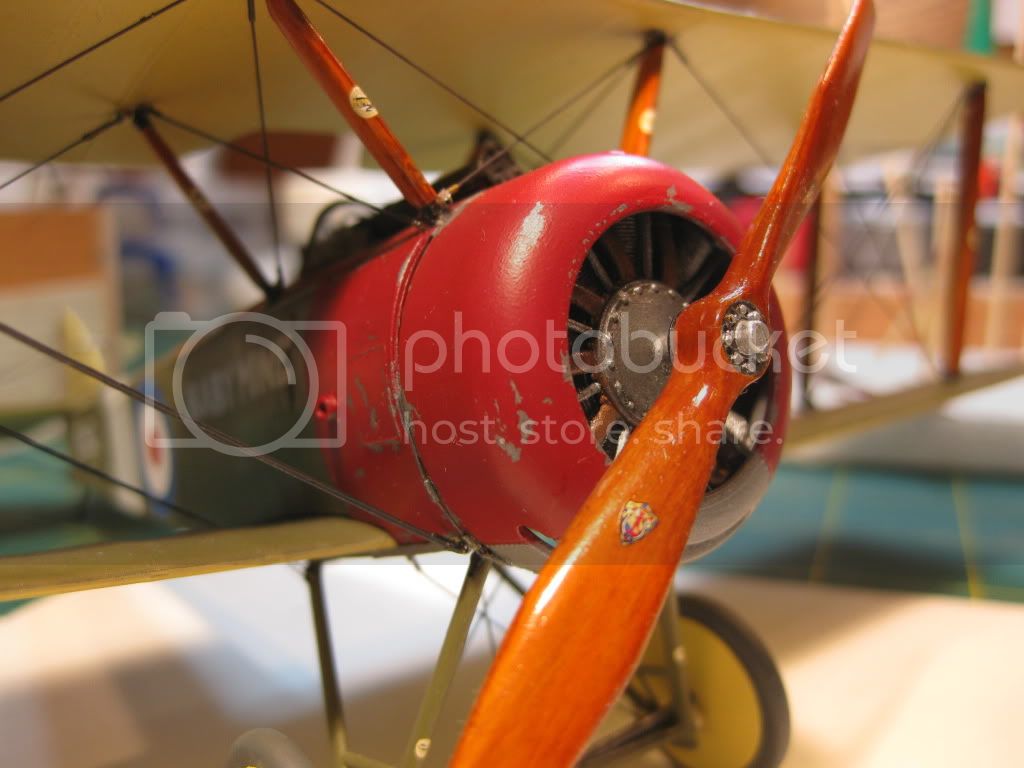
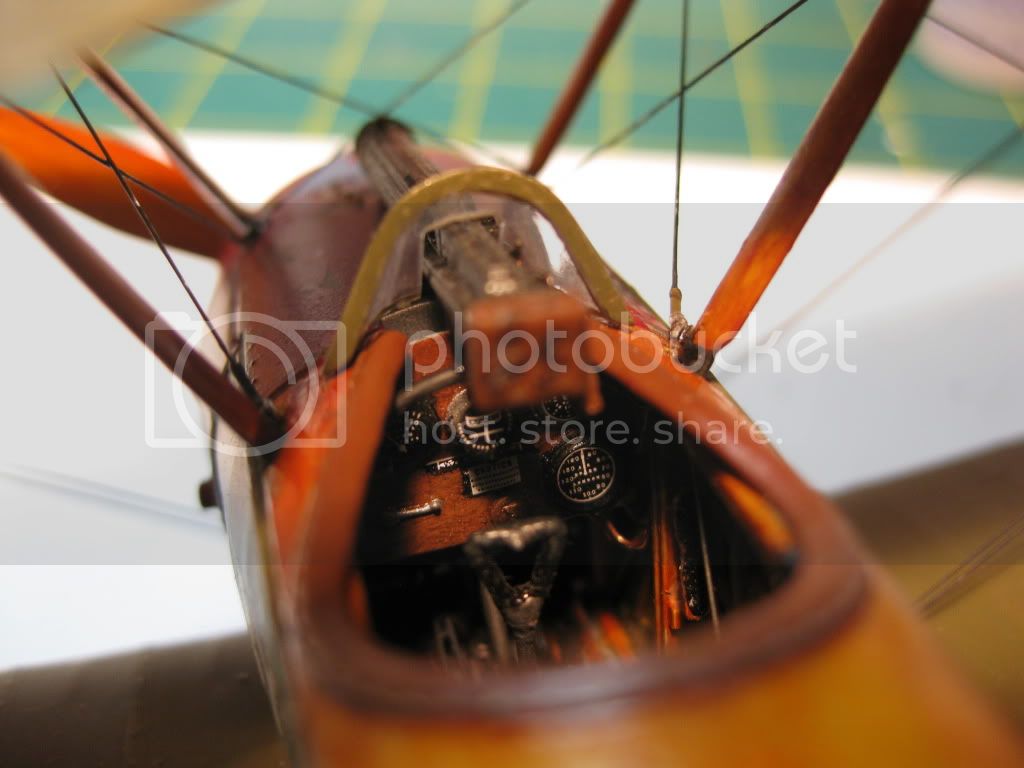
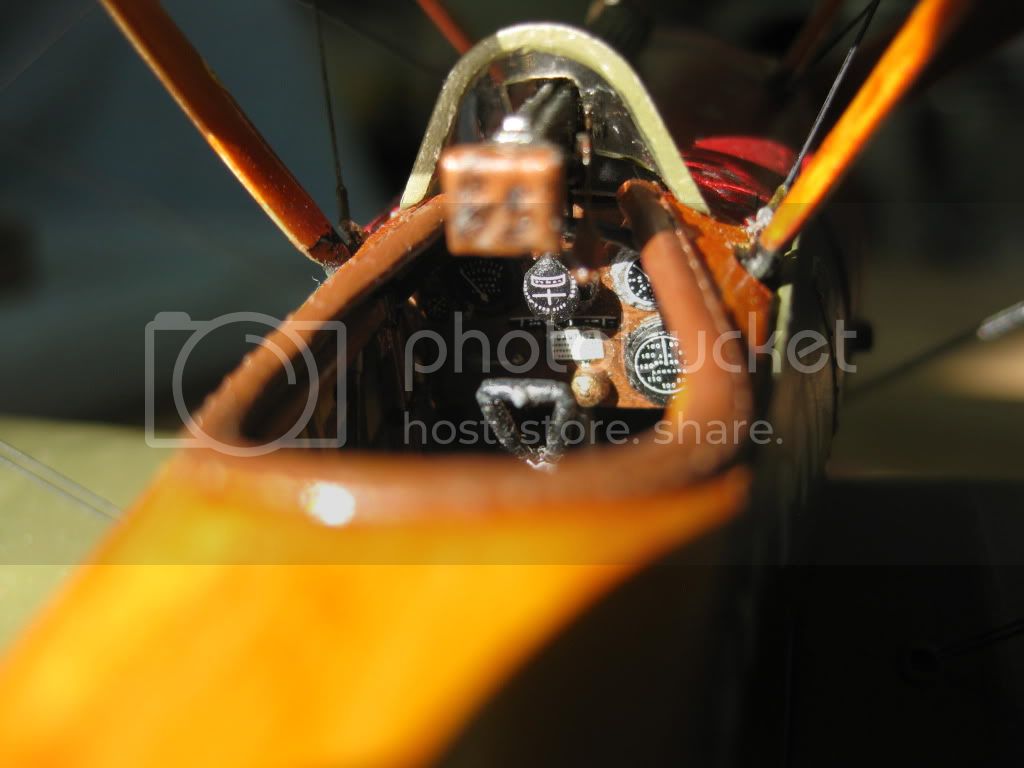
Next, a couple of close-ups, first the cockpit that is still visible. These photos well illustrate a change I'll have to incorporate in future builds; the windshield frame needs to be thinned considerably to achieve "scale" as is it is far to thick at the rear as faces the camera. Big "note to self" on this and I may try to modify this one yet.
Last, a quick study of the weathering around the gear and underwing area.
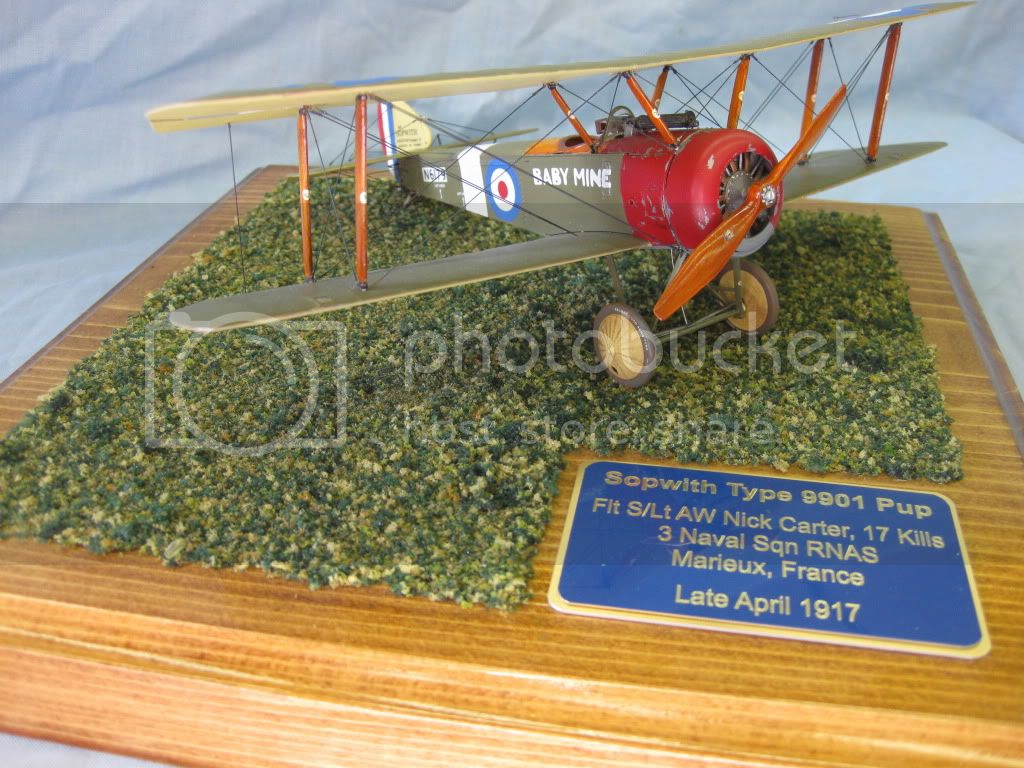
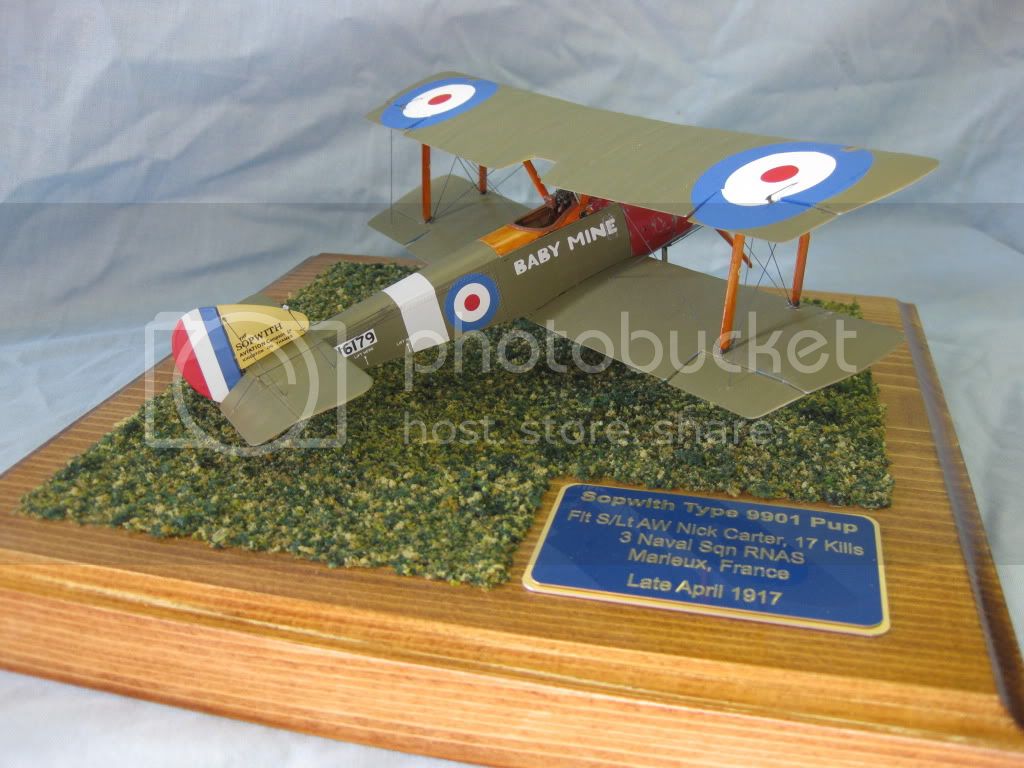
Following are four shots I did in my Workshop with a blue drop cloth as a background. Also posed her on the display base with the plaque included. I get the plaques made up at a Trophy Store locally; be lost without the guy!
So that raps this one up. Should I return to the windscreen I'll add to the Post.
Final comments as follows:
My first WNW Kit and the nicest I've had the pleasure to build! With the (minor) exception of the upper cowling/cockpit deck panel every thing fell together perfectly. I noted, as have others, that when something didn't fit perfectly I had only to remove a bit of stray paint from the mating surfaces and the problem was gone, that's how good the fit was!
On the less then perfect (personal/professional development challenges) I need to get better at the glue thing. Although I have cobbled together a few "tools" (suggested by others on this site) for the application of CA I still tend to overdo it and it shows here and there much to my frustration. On the other side of the coin my pre-shading and "chipped paint" technique improved from my first experiences thus there is hope!
Last, as mentioned earlier on, I have one of Nick Carter's helmets coming here in June to be displayed with this build of his Pup; doesn't get much better then that!
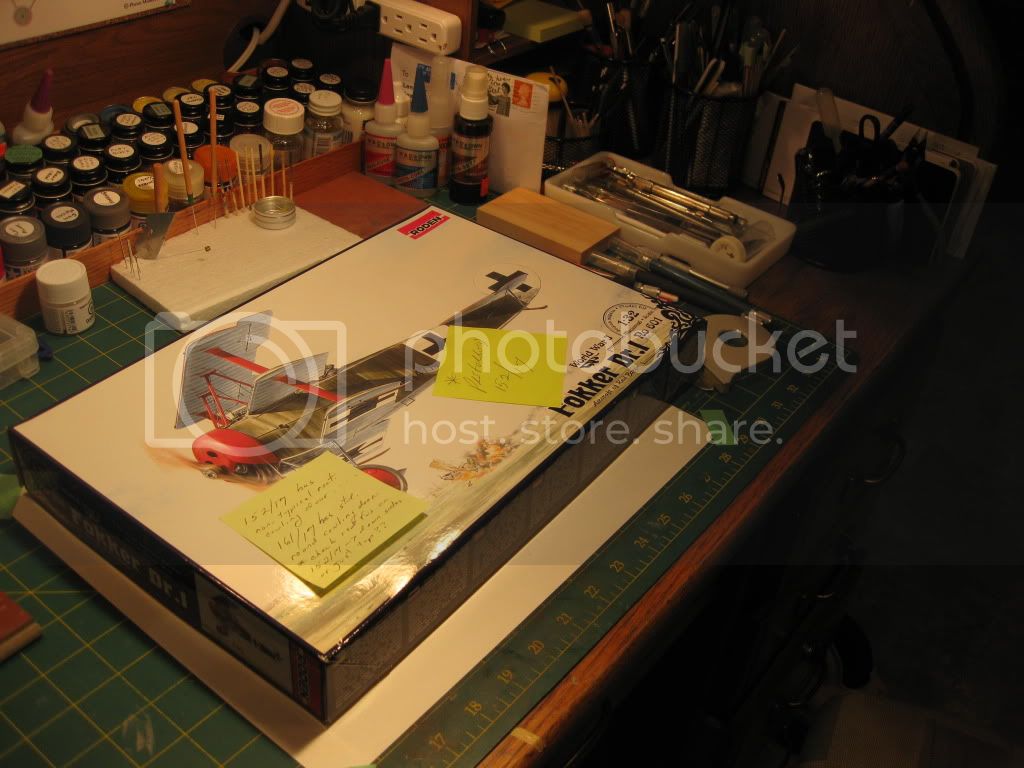
So, this morning when I finished I cleaned up the bench and, just in case I have a few spare moments in the next several days, tossed a box on the bench. Either this or the Encore SE5a unless someone convenes a Campaign before I finish the research and planning. The motivation factor goes way up for me when a Campaign's involved.
Thanks for viewing, thanks for the specific help along the way, and again, all comments welcome!
Cheers,
Lance
Took these three to capture her overall against a white background with lots of light but mostly from above, set up on my bench:
Next, a couple of close-ups, first the cockpit that is still visible. These photos well illustrate a change I'll have to incorporate in future builds; the windshield frame needs to be thinned considerably to achieve "scale" as is it is far to thick at the rear as faces the camera. Big "note to self" on this and I may try to modify this one yet.
Last, a quick study of the weathering around the gear and underwing area.
Following are four shots I did in my Workshop with a blue drop cloth as a background. Also posed her on the display base with the plaque included. I get the plaques made up at a Trophy Store locally; be lost without the guy!
So that raps this one up. Should I return to the windscreen I'll add to the Post.
Final comments as follows:
My first WNW Kit and the nicest I've had the pleasure to build! With the (minor) exception of the upper cowling/cockpit deck panel every thing fell together perfectly. I noted, as have others, that when something didn't fit perfectly I had only to remove a bit of stray paint from the mating surfaces and the problem was gone, that's how good the fit was!
On the less then perfect (personal/professional development challenges) I need to get better at the glue thing. Although I have cobbled together a few "tools" (suggested by others on this site) for the application of CA I still tend to overdo it and it shows here and there much to my frustration. On the other side of the coin my pre-shading and "chipped paint" technique improved from my first experiences thus there is hope!
Last, as mentioned earlier on, I have one of Nick Carter's helmets coming here in June to be displayed with this build of his Pup; doesn't get much better then that!
So, this morning when I finished I cleaned up the bench and, just in case I have a few spare moments in the next several days, tossed a box on the bench. Either this or the Encore SE5a unless someone convenes a Campaign before I finish the research and planning. The motivation factor goes way up for me when a Campaign's involved.
Thanks for viewing, thanks for the specific help along the way, and again, all comments welcome!
Cheers,
Lance
lcarroll
Joined: July 26, 2010
KitMaker: 1,032 posts
AeroScale: 1,025 posts
Posted: Monday, October 31, 2011 - 12:17 AM UTC
Stephen & Dani,
Missed your kind comments earlier in the excitement of getting the final update submitted. Thanks for the compliments!
Cheers,
Lance
Missed your kind comments earlier in the excitement of getting the final update submitted. Thanks for the compliments!
Cheers,
Lance
OEFFAG_153
Joined: February 19, 2010
KitMaker: 1,473 posts
AeroScale: 1,450 posts
Posted: Monday, October 31, 2011 - 12:20 AM UTC
Hello Lance,
Very nice finish to the pup I do like your rigging on this one looks very convoncing.
Congrats on finishing
Regards Mikael
Very nice finish to the pup I do like your rigging on this one looks very convoncing.
Congrats on finishing
Regards Mikael
lcarroll
Joined: July 26, 2010
KitMaker: 1,032 posts
AeroScale: 1,025 posts
Posted: Monday, October 31, 2011 - 07:02 AM UTC
Quoted Text
Hello Lance,
Very nice finish to the pup I do like your rigging on this one looks very convoncing.
Congrats on finishing
Regards Mikael
Mikael,
Thanks for the compliments, coming from a Master such as yourself it's very encouraging!
BTW, rigging comprised mainly of Bob's Buckles, a great product recommended by you when I first joined the site. I owe you a big "thank you" for that...........
Cheers,
Lance

wing_nut
Joined: June 02, 2006
KitMaker: 1,212 posts
AeroScale: 468 posts
Posted: Tuesday, November 01, 2011 - 12:49 AM UTC
As soon as I saw this was no longer pinned I knew there was a completion to behold. And it was a sight to behold too. Very well done. Good idea with that wrap up too. When I picked the hobby up again in '05 I would write down the good and bad points of the build. Make you think the next time.
Congrats on a great build,
Congrats on a great build,
lcarroll
Joined: July 26, 2010
KitMaker: 1,032 posts
AeroScale: 1,025 posts
Posted: Tuesday, November 01, 2011 - 03:48 AM UTC
Quoted Text
As soon as I saw this was no longer pinned I knew there was a completion to behold. And it was a sight to behold too. Very well done. Good idea with that wrap up too. When I picked the hobby up again in '05 I would write down the good and bad points of the build. Make you think the next time.
Congrats on a great build,
Marc,
Thanks for the positive comments!
She is growing on me, like most I spend a lot of time gazing into the display case at the latest addition. As I've switched to 1/32 from 1/48 my two products thus far are crammed in with little if no room to spare thus I'm about to spend some quality time in the workshop building a "deeper" case .......... "SWMBO" will be so pleased at another piece of purpose built furniture in the already crowded Den.
As for the wrap up, you are so right. I keep a hard cover notebook just for that purpose and it pays great dividends given the dramatic contrast between increase in age and the inverse decrease in memory!
Cheers,
Lance
 |

WEB HOSTING BY


Copyright ©2021 AeroScale and Kitmaker Network, a subsidiary of Silver Star Enterprises
All Rights Reserved. Please read our Conditions of Use and Privacy Policy.
All Rights Reserved. Please read our Conditions of Use and Privacy Policy.