Wood Grain Decals and Methods 101
Colorado, United States
Joined: January 25, 2004
KitMaker: 11,669 posts
AeroScale: 11,011 posts
Posted: Saturday, August 27, 2011 - 07:37 AM UTC

This thread will be about modeling wood grain and the decals and methods that have been available for our hobby. Note this will be early aviation subject specific in its content, but can apply to other genres as well. As you will note from the Spruce and Linen thread I have been working on this subject for a tutorial for over a year and have been gleaning research on it from my own stash of kits and aftermarket decal sheets.
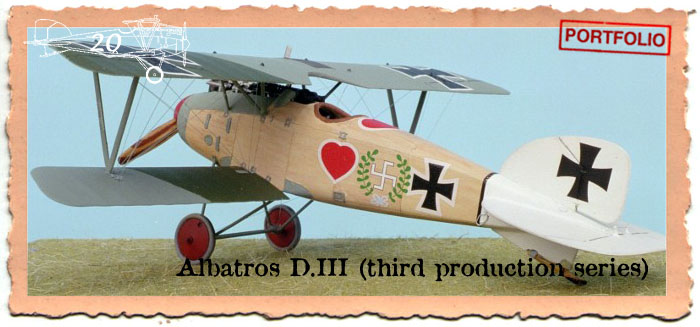
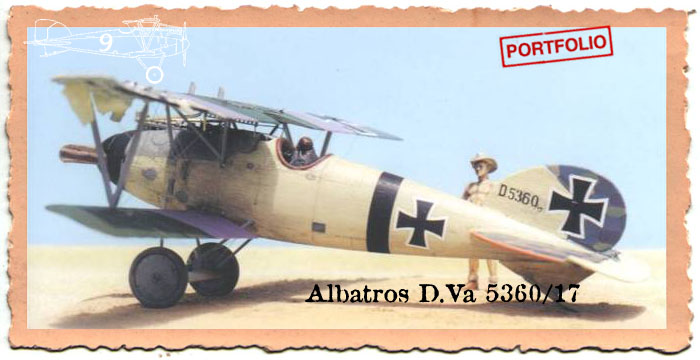
Generally speaking the grain on the original airframes ran fore to aft. (nose to tail) on the whole airframe. There were some angled cuts seen on the flat sided fuselages but where there is a curve in the skeletal formers the grain always ran fore to aft. This would include the spine and the belly areas on the Alb. D.I - II & III types. On the D.V & Va the whole wood skinned paneling was fore to aft.
For best results mix the type, but I don't recommend altering the lay of the grain direction too much. I would go as far as to mix the various similar grain decals one panel to the next.
Some decal applications can be tricky if most of it is just carrier film. It can fold over on itself with the slightest provocation. So as the instructions note work carefully, deliberately and it will have some fine results. With the amount of pattern repeats on a sheet you have to be cautious to make the panels appear as individual cuts.
Applications
Most WWI aircraft had some major wooden components. German, British, French and etc. But the decals themselves have other appications where ever you want to see a wood grain.

The above photo still is from the 2008 movie release "The Red Baron". ( Note the Hollernzoren ribbon on his tunic was dubbed in after the shot was taken. )
". . .The most important thing is to know why you build and then get the most that you can out of building." via D.D.
Colorado, United States
Joined: January 25, 2004
KitMaker: 11,669 posts
AeroScale: 11,011 posts
Posted: Saturday, August 27, 2011 - 08:07 AM UTC

This is an example of the MicroScale sheet #TF 28. I used it with a yellow - brown translucent over coat in the Eduard 1:48 #8001 kit that I modified to a SSW D.IV. Build circa 1992

". . .The most important thing is to know why you build and then get the most that you can out of building." via D.D.
Colorado, United States
Joined: January 25, 2004
KitMaker: 11,669 posts
AeroScale: 11,011 posts
Posted: Saturday, August 27, 2011 - 08:22 AM UTC

Here is the Microscale Wood grain sheet #TF 29. These were little more than a pattern on a dot matrix format. They really needed the over coating. Dark or red brown would work.
". . .The most important thing is to know why you build and then get the most that you can out of building." via D.D.
Colorado, United States
Joined: January 25, 2004
KitMaker: 11,669 posts
AeroScale: 11,011 posts
Posted: Saturday, August 27, 2011 - 08:30 AM UTC

These are my copies of the old Koster propeller laminations from their SSW D.III. Laser safe decals sheets and Kinkos. Note one blade shows my attempt of adding a red breown stain / over coat on the original sheet as as an experiment.
". . .The most important thing is to know why you build and then get the most that you can out of building." via D.D.
Colorado, United States
Joined: January 25, 2004
KitMaker: 11,669 posts
AeroScale: 11,011 posts
Posted: Saturday, August 27, 2011 - 08:49 AM UTC
". . .The most important thing is to know why you build and then get the most that you can out of building." via D.D.
Colorado, United States
Joined: January 25, 2004
KitMaker: 11,669 posts
AeroScale: 11,011 posts
Posted: Saturday, August 27, 2011 - 08:55 AM UTC

Here is the Aeromaster sheets that were often included in their aftermarket 1:48 Albatros D. fighter profile series.
". . .The most important thing is to know why you build and then get the most that you can out of building." via D.D.
Colorado, United States
Joined: January 25, 2004
KitMaker: 11,669 posts
AeroScale: 11,011 posts
Posted: Saturday, August 27, 2011 - 08:59 AM UTC

Here is the Aeromaster sheets that were often included in their aftermarket 1:48 SSW D. fighter profile series.
". . .The most important thing is to know why you build and then get the most that you can out of building." via D.D.
Colorado, United States
Joined: January 25, 2004
KitMaker: 11,669 posts
AeroScale: 11,011 posts
Posted: Saturday, August 27, 2011 - 09:07 AM UTC

One of our generous modelers gave this pattern up for free and general use.
". . .The most important thing is to know why you build and then get the most that you can out of building." via D.D.
Colorado, United States
Joined: January 25, 2004
KitMaker: 11,669 posts
AeroScale: 11,011 posts
Posted: Saturday, August 27, 2011 - 09:14 AM UTC
". . .The most important thing is to know why you build and then get the most that you can out of building." via D.D.
Colorado, United States
Joined: January 25, 2004
KitMaker: 11,669 posts
AeroScale: 11,011 posts
Posted: Saturday, August 27, 2011 - 09:20 AM UTC
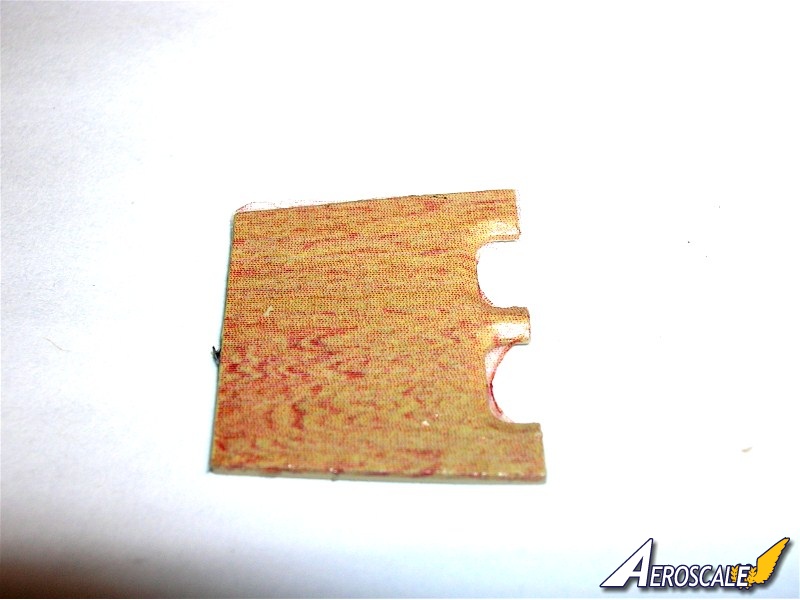
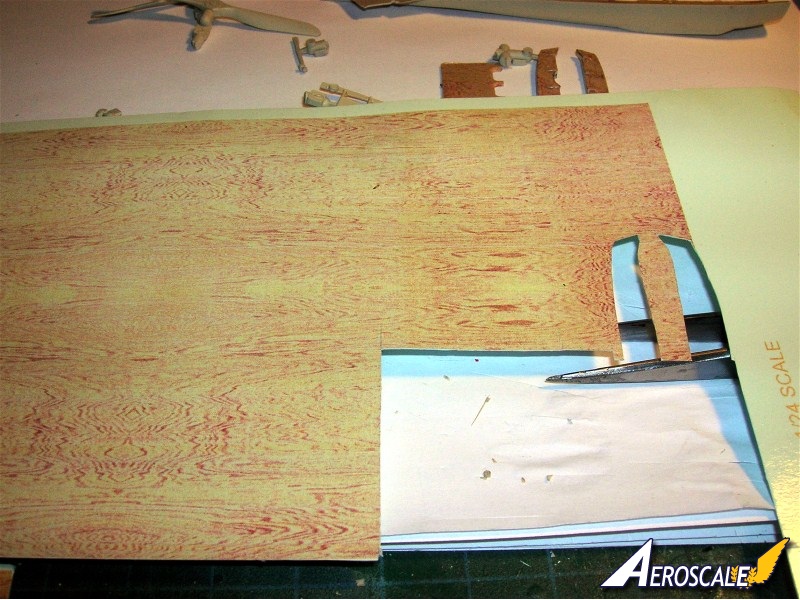
Here recently reviewed on Aeroscale is the "Uschi van Rosten" products.


We have been told that the fold-over problem inherent in many wood grain decals with a clear carrier has been reliably fixed with their recent modifications.

From their website examples of fine and coarse grain.
". . .The most important thing is to know why you build and then get the most that you can out of building." via D.D.
Colorado, United States
Joined: January 25, 2004
KitMaker: 11,669 posts
AeroScale: 11,011 posts
Posted: Saturday, August 27, 2011 - 09:45 AM UTC
The next subjects will include paint and surprise surprise real wood applications. If you are aware of any other decal products for wood grain feel free to briefly post. So far we are just showing examples of what is or has been available.
". . .The most important thing is to know why you build and then get the most that you can out of building." via D.D.
Colorado, United States
Joined: January 25, 2004
KitMaker: 11,669 posts
AeroScale: 11,011 posts
Posted: Sunday, August 28, 2011 - 12:11 AM UTC
Most of the time before wood grain decals modelers began to try to paint their wooden skins on various subjects.
Next we will discuss
painting a real look to the plywood veneer fuselages that were typical of the WWI aircraft manufacturing works. The process is very simple. To begin with it works better with the early Eduard kits as there is less detail to rid yourself of. Once you have closed up the fuselage and have erased the central union seam its time to sand off all raised details. During this procedure, you will work down from using the heavy grit to about a fine 1200 grit sanding film. Do not try to polish the bare plastic as the small grooves simulating panels edges helps in either process you are about to choose. When sanding seams or union gaps, protect the details you want to save with masking tape. During this process you may fine that you have to re-drill strut locator holes Keep it straight and plumb using a temporary jig made from children's plastic Lego blocks.
In doing either of the procedures that I am about to describe, there are a few rules that you should remember. First the grain in the panels whether they be heavy or light always go from front to rear or in a word from nose to tail. They did not use barn wood so be aware of the tight grained look your going for. As you work apply the panels in pairs, that is left side- right side top and bottom. I find that the more work I do to simulate the wood paneling the less area that I will want to commit to personal marking applications. If you choose to paint your panels use several different colours of a basic cream, sail or off white.
Polly-S paints had a series of warm buff colours that I like and are just barely different enough, that when you place them side by side the effect is striking. Antique white, Dirty white, French Beige, Doped Linen and Sand. Apply them in pairs as I mentioned of earlier. They should oppose one another one on the left side and the match panel on the right side. Or the top panel then the matching panel on the bottom. Using this method and 5-6 different paints will cause the fuselage to look like a patch work quilt, but using subtle shades. Next spray a dull coat over the base colours you have just applied and let the piece dry thoroughly. This creates a barrier that will keep your base coat intact when applying the next step. When ready apply a wash of brown to each individual panel. This can be a orange brown like Testors #1166. Work lightly one panel at a time and flip your brush over as you go to the next panel. This wash adds some direction to the grain so always work from nose to tail. The finish your trying to reach keeps the slight variation on the base colours but mutes them under the grain wash. This must be accomplished with a subtle approach. Practice on scrap plastic if you need to.
". . .The most important thing is to know why you build and then get the most that you can out of building." via D.D.
Colorado, United States
Joined: January 25, 2004
KitMaker: 11,669 posts
AeroScale: 11,011 posts
Posted: Sunday, August 28, 2011 - 12:18 AM UTC
When dry apply another clear dull coat and when it is dry take a dark grey, rust or leather toned brown and apply sparingly over all with an dry brush method. Ths will accentuate the panel borders and give depth to the overall scheme. It really works great in smaller scales. Another way to do a simulated wood grain is to apply a clear decal film that has been streaked or a wash applied in cut sections over the existing painted panels. Remember to be subtle. If your successful you can use these pieces to cockpit interiors.


Next after having described the painting method I'll provide some inprogress images for your study. The natural sunlight I like to shoot my images in tends to wash the grain out (like original aircraft when photographed at a distance). So we will move on to sonme studio shots.
Also there is a beginner's guide to painting wood grain by several people here at Aeroscale. These can be found
here.". . .The most important thing is to know why you build and then get the most that you can out of building." via D.D.
Colorado, United States
Joined: January 25, 2004
KitMaker: 11,669 posts
AeroScale: 11,011 posts
Posted: Sunday, August 28, 2011 - 12:24 AM UTC
Keep in mind the image from the first post.
". . .The most important thing is to know why you build and then get the most that you can out of building." via D.D.
Texas, United States
Joined: February 01, 2007
KitMaker: 365 posts
AeroScale: 356 posts
Posted: Sunday, August 28, 2011 - 06:42 AM UTC
Stephen,
Thank you for the excellent wood grain decal comparative my friend. It's always great to be able to look at all the options available to the modeler.To date I haven't yet tried the wood grain decals myself so reading through this thread is of the greatest importance in help me choose which to try and which not.
Highest Regards,
Gregory Jouette
Colorado, United States
Joined: January 25, 2004
KitMaker: 11,669 posts
AeroScale: 11,011 posts
Posted: Sunday, August 28, 2011 - 11:01 AM UTC
Thanks for your support Gregory,
Here is an example of the
wood grain painting method I described.


". . .The most important thing is to know why you build and then get the most that you can out of building." via D.D.
Västra Götaland, Sweden
Joined: February 19, 2010
KitMaker: 1,473 posts
AeroScale: 1,450 posts
Posted: Sunday, August 28, 2011 - 11:16 PM UTC
Hello Stephen,
Thank You for starting this thread up some very interesting info so far also some great looking Albarosses

Mikael
_________________________________________________________
Just finished the Wingnut Wings Taube. On to the Junkers D.1
Colorado, United States
Joined: January 25, 2004
KitMaker: 11,669 posts
AeroScale: 11,011 posts
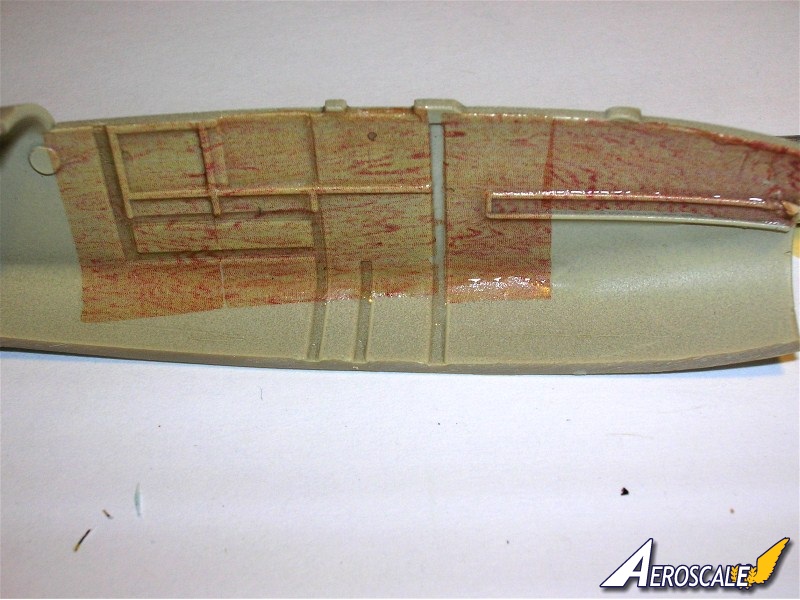
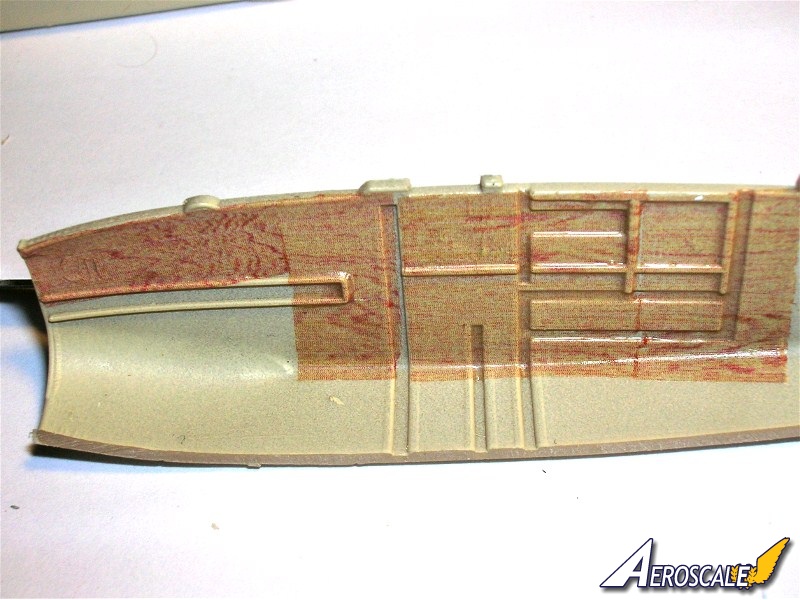
Posted: Tuesday, August 30, 2011 - 05:00 AM UTC
After an over coat of "sand" on the Uschi decals the build continues.

". . .The most important thing is to know why you build and then get the most that you can out of building." via D.D.
Colorado, United States
Joined: January 25, 2004
KitMaker: 11,669 posts
AeroScale: 11,011 posts
Posted: Tuesday, August 30, 2011 - 08:17 AM UTC
". . .The most important thing is to know why you build and then get the most that you can out of building." via D.D.
Colorado, United States
Joined: January 25, 2004
KitMaker: 11,669 posts
AeroScale: 11,011 posts
Posted: Tuesday, August 30, 2011 - 10:54 AM UTC
Now I haven't seen these and cannot tell you how they look but HGW has a set of wood grain decals for 1:48 & 1:32.
 See here.
 ". . .The most important thing is to know why you build and then get the most that you can out of building." via D.D.
Colorado, United States
Joined: January 25, 2004
KitMaker: 11,669 posts
AeroScale: 11,011 posts
Posted: Thursday, September 01, 2011 - 09:40 PM UTC
Here is another painted wood grain finish on an 1:48 Eduard Albatros D.V kit in the markings of a pilot from Jasta 17.


Are there any questions about the painting method?
". . .The most important thing is to know why you build and then get the most that you can out of building." via D.D.
Colorado, United States
Joined: January 25, 2004
KitMaker: 11,669 posts
AeroScale: 11,011 posts
Posted: Sunday, September 04, 2011 - 07:51 PM UTC

Next we move on to wood veneers.
". . .The most important thing is to know why you build and then get the most that you can out of building." via D.D.
Colorado, United States
Joined: January 25, 2004
KitMaker: 11,669 posts
AeroScale: 11,011 posts
Posted: Monday, September 05, 2011 - 06:09 AM UTC
The idea is to replicate real wood by using real wood. One fellow who did believe in this was John Meikranz of the old Meikraft Models. You could purchase thin cuts of wood from him for just this purpose.
Here are two types that I used on one 1:48 Albatros D.III kit.


First you paint the kit fuselage a base coat and them you lay down the cuts of wood and apply drops of thin cynoacrylate -super glue to secure.


Here is a an Alb. D.III diorama called "Home from the Front." The mechanic figure offering up a cup-o-java is a CMK figure. The figure posing as Jasta 5 pilot Ltn Strobel is unfortunately Out of production from Van's Scale Models. The Albatros D.III was built before the Eduard kit was available from a heavily modified Glencoe Alb. D.III fuselage and resin poured wings of the Eduard Alb.D.V kit.. It took three attempts to get it right. The lozenge was from the Eduard D.V kit and helps represent a replacement wing.


". . .The most important thing is to know why you build and then get the most that you can out of building." via D.D.
Colorado, United States
Joined: January 25, 2004
KitMaker: 11,669 posts
AeroScale: 11,011 posts
Posted: Monday, September 05, 2011 - 06:40 AM UTC
". . .The most important thing is to know why you build and then get the most that you can out of building." via D.D.
Västra Götaland, Sweden
Joined: February 19, 2010
KitMaker: 1,473 posts
AeroScale: 1,450 posts
Posted: Monday, September 05, 2011 - 07:46 AM UTC
Very nice Stephen Would the thickness of the veneer be affecting the scale in any way. I.e. thickening the fuselage up in a noticable way?
Mikael
_________________________________________________________
Just finished the Wingnut Wings Taube. On to the Junkers D.1