_GOTOBOTTOM
Early Aviation
Discuss World War I and the early years of aviation thru 1934.
KotS GB 2012 Polikarpov I-15 - Amegan
amegan
#243
_VISITCOMMUNITY
England - North East, United Kingdom
Joined: March 21, 2008
KitMaker: 996 posts
AeroScale: 915 posts
Posted: Tuesday, January 31, 2012 - 12:26 PM UTC
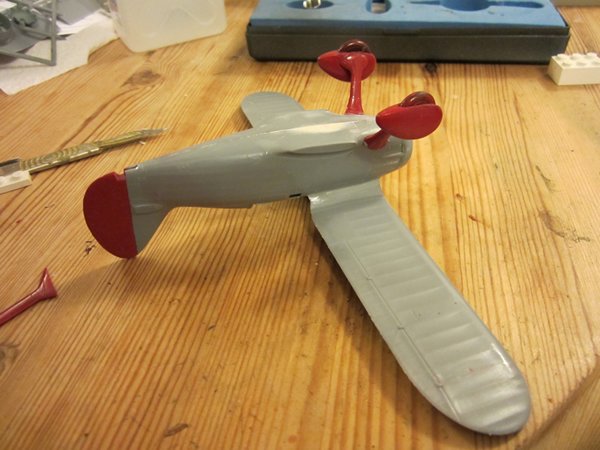
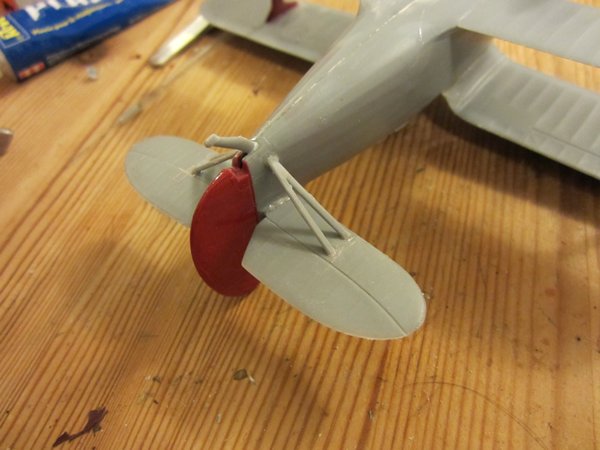
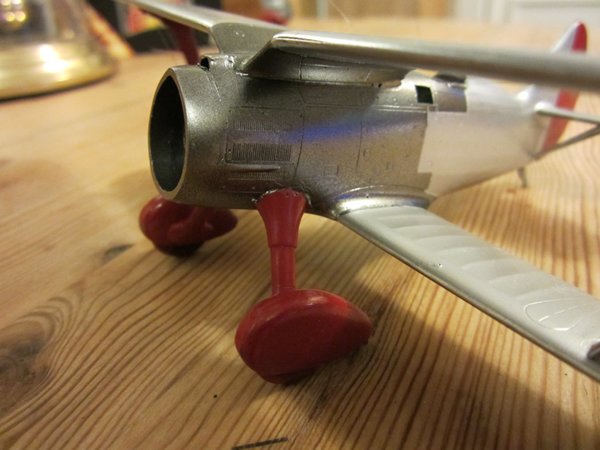
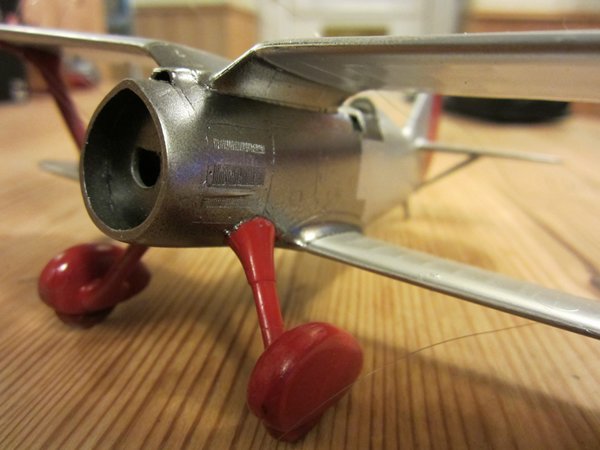
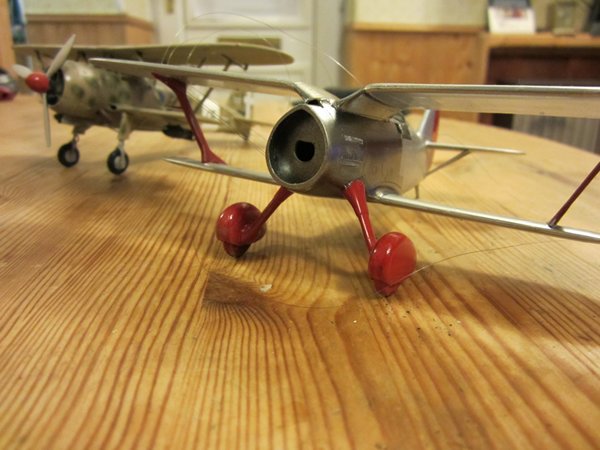
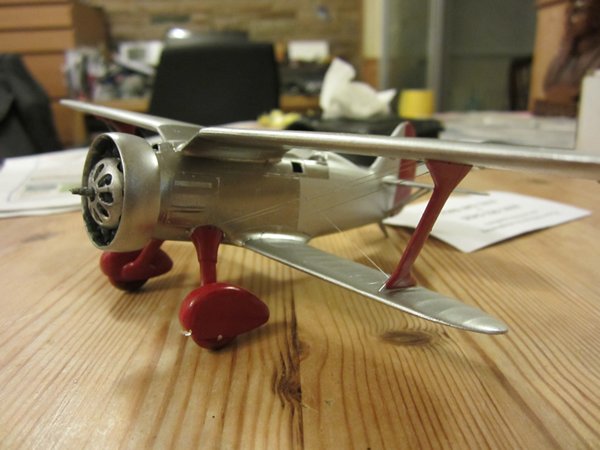
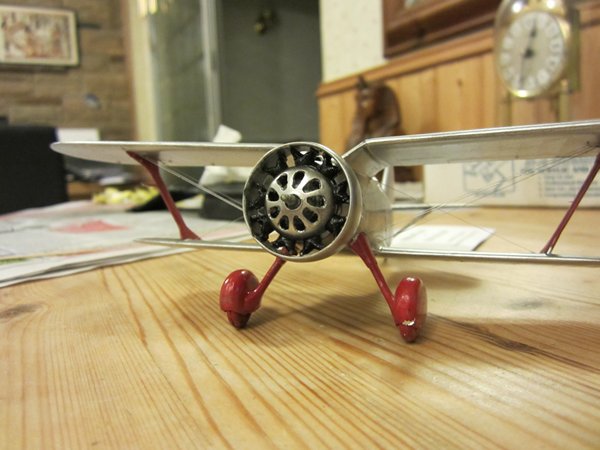
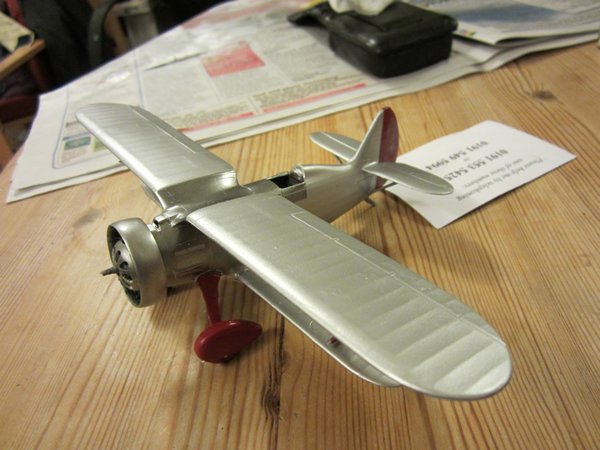
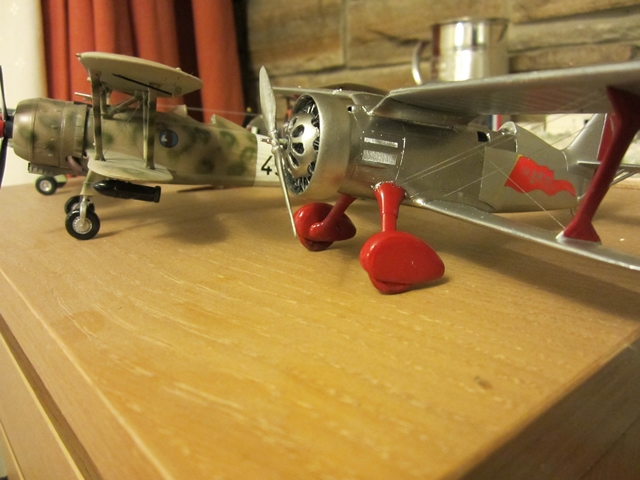
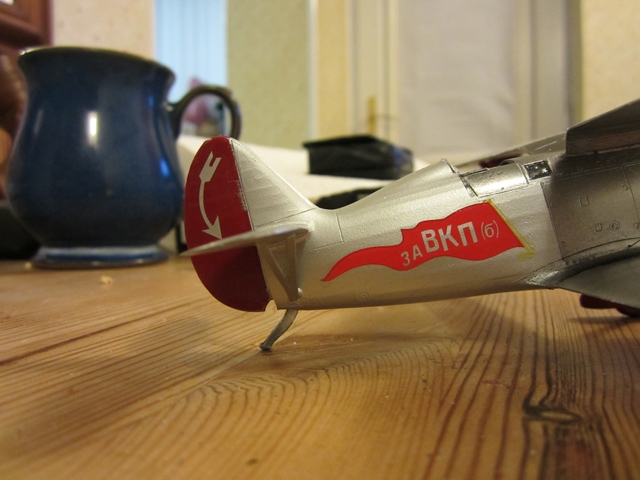
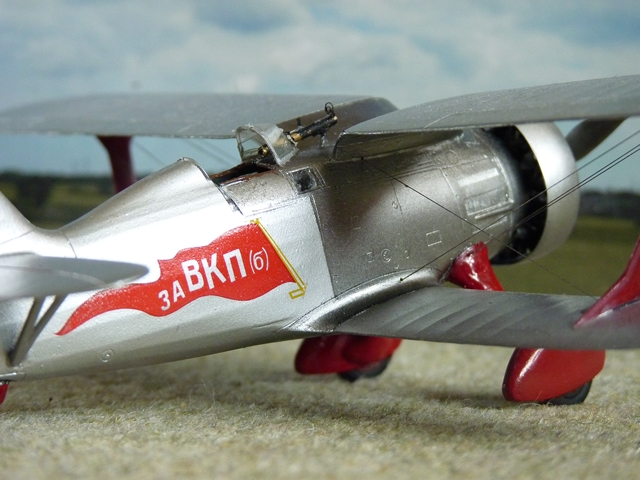
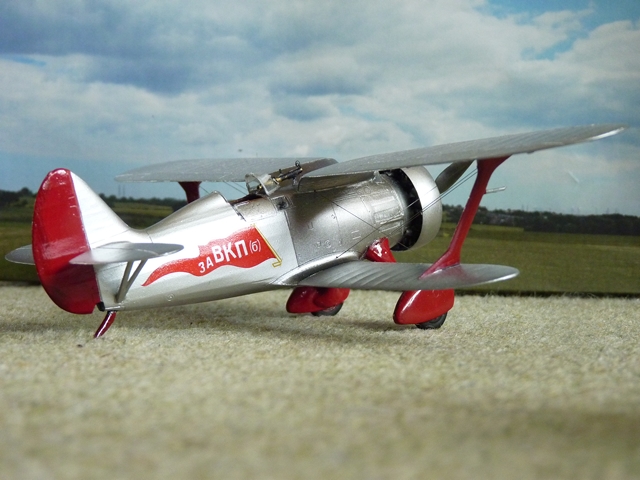
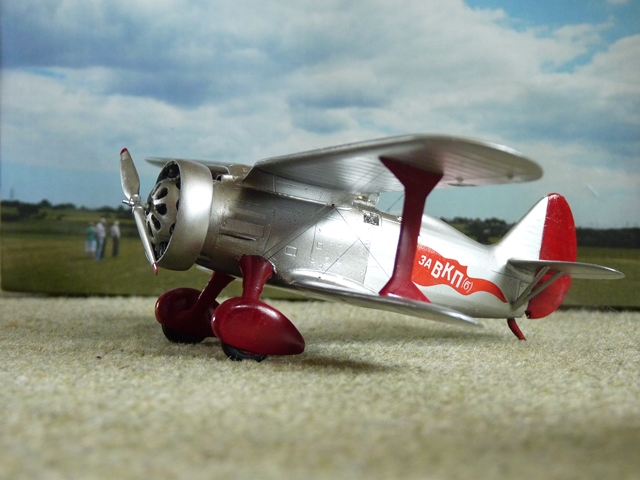
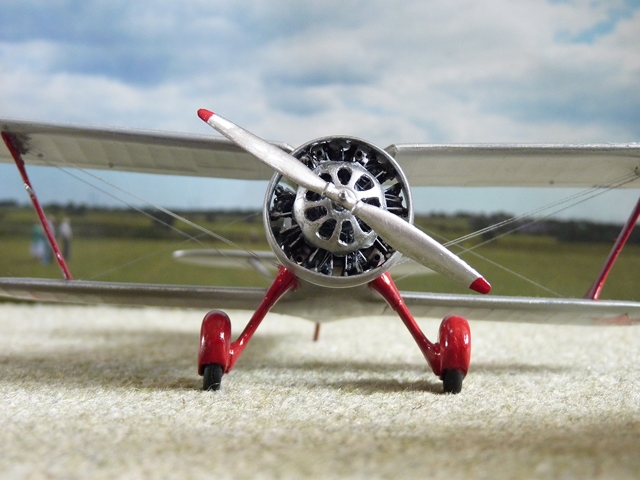
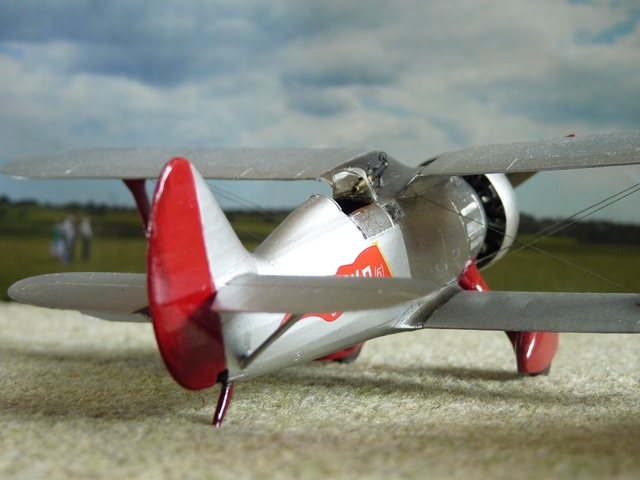
Having recently admired the Mitsubishi Claude build log published recently I started keeping some basic pics and note on the Special Hobbies Polikarpov I-15 "Chaika" (or in Spain "Chato"). Designed slightly after the I-16 monoplane and flown in 1934 it was produced concurrently with the I-16 and used in the front line until 1941. Highly maneuverable and fairly fast for a biplane the aircraft was effective until it encountered modern monoplanes. The kit is attractively boxed and is a multi-media kit with injected, resin and pe parts. These first pics cover the fuselage assembly and kit parts. I intend to finish the model in Alclad Polished Aluminium and Vallejo metallic Silver and rigging will be using nylon monofilament thread. The undercarriage, interplane struts and rudder will be red. This is one of the colour schemes on the kit.

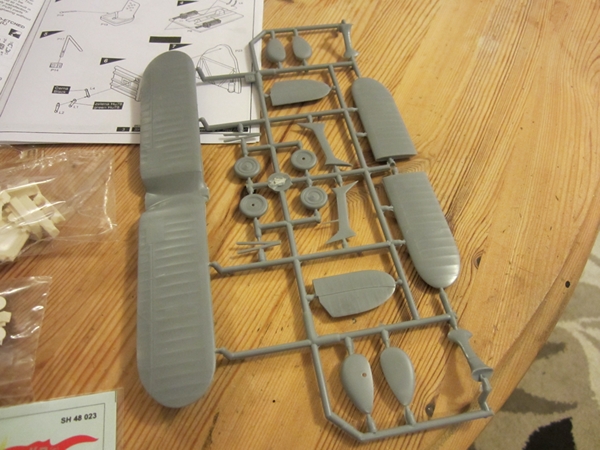
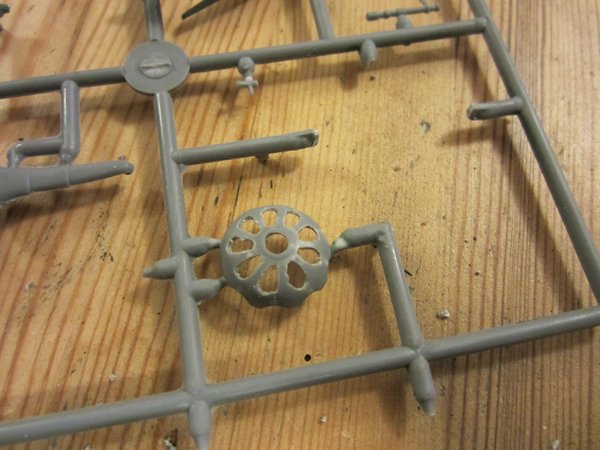
Pretty nice injected parts with no pin marks and reasonable detail
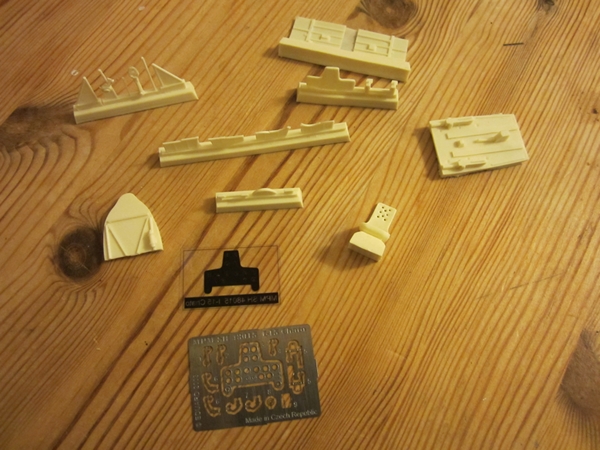
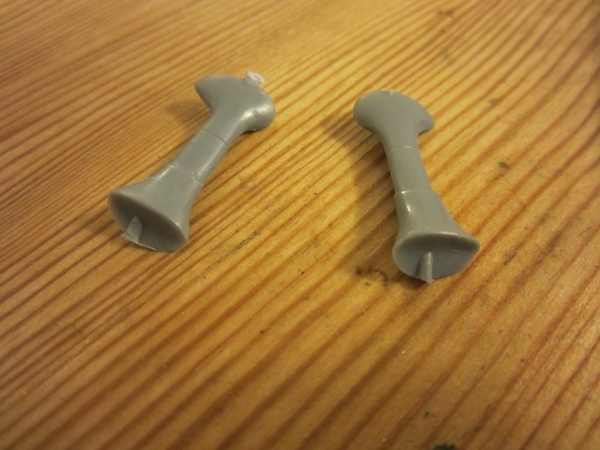
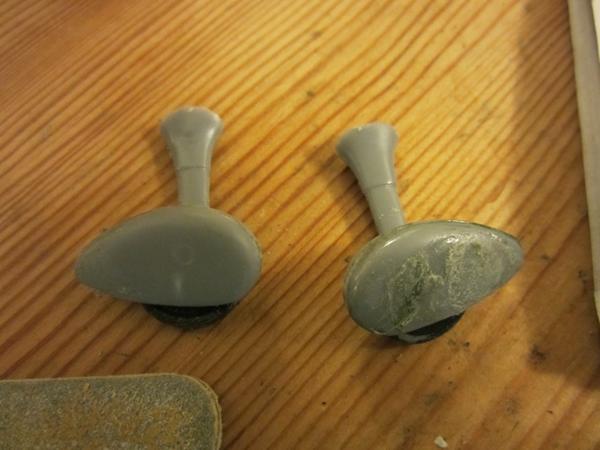
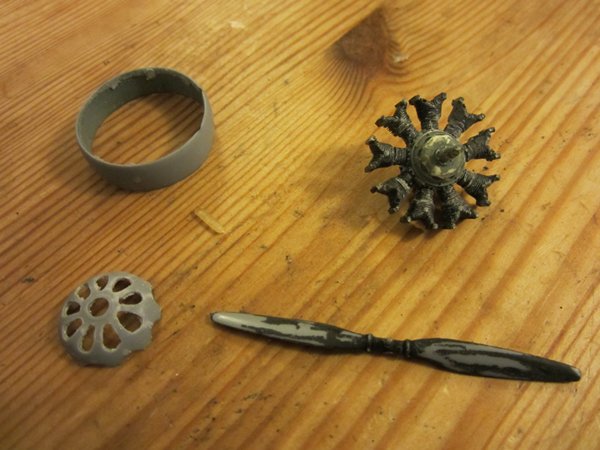
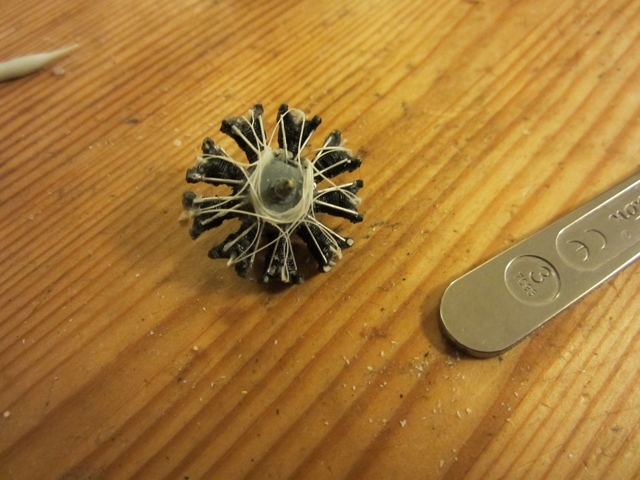
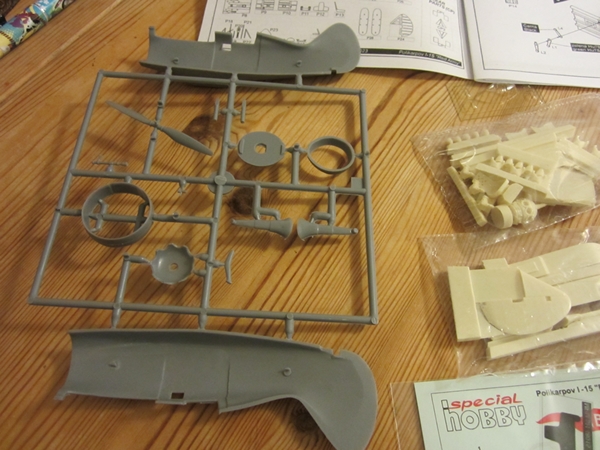
Resin parts

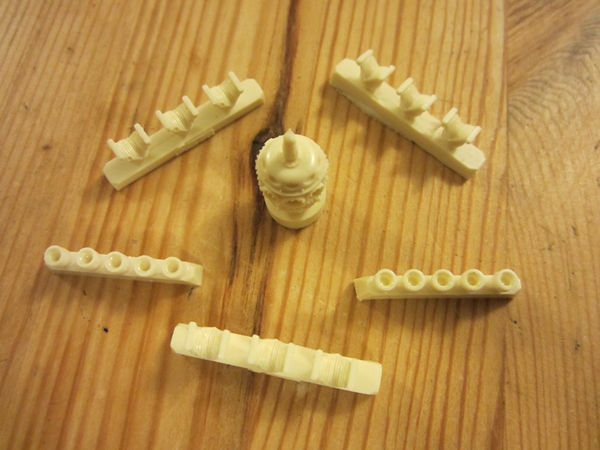
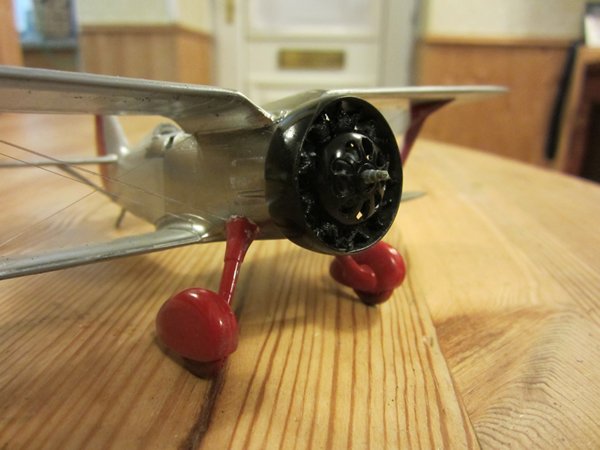
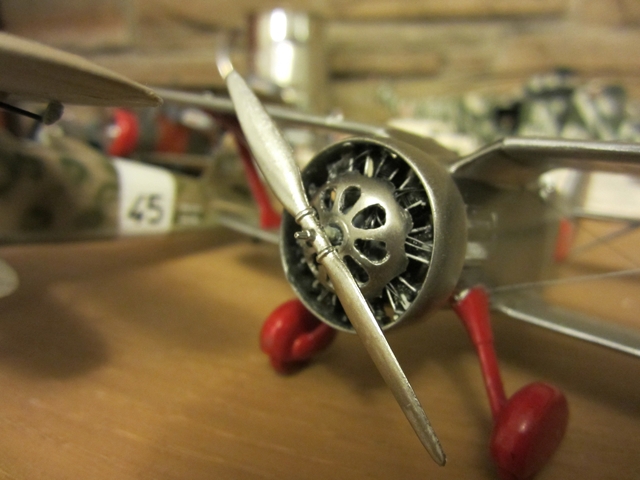
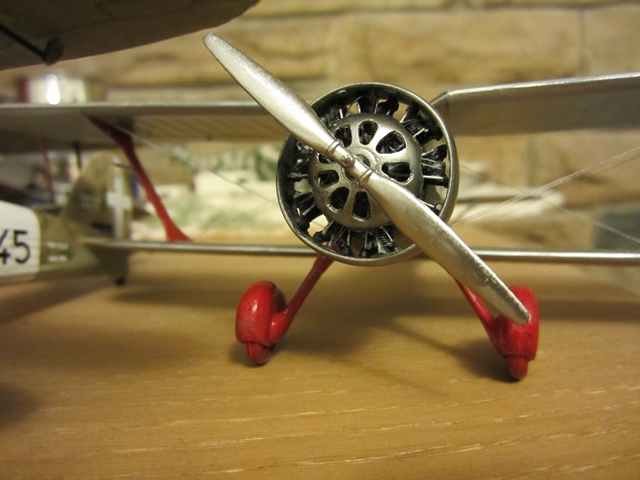
Resin engine parts look good

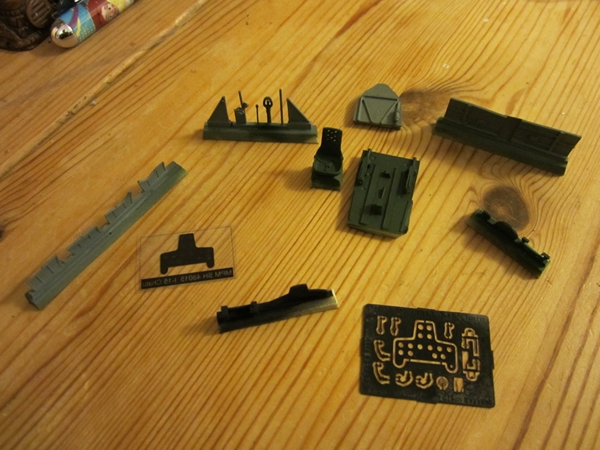
Base coat of paint on cockpit resin and pe parts

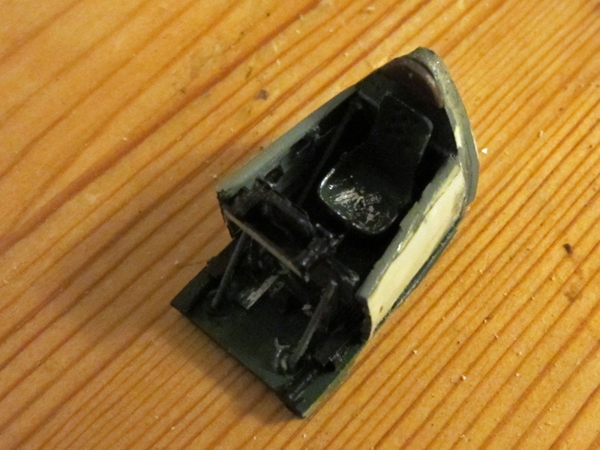
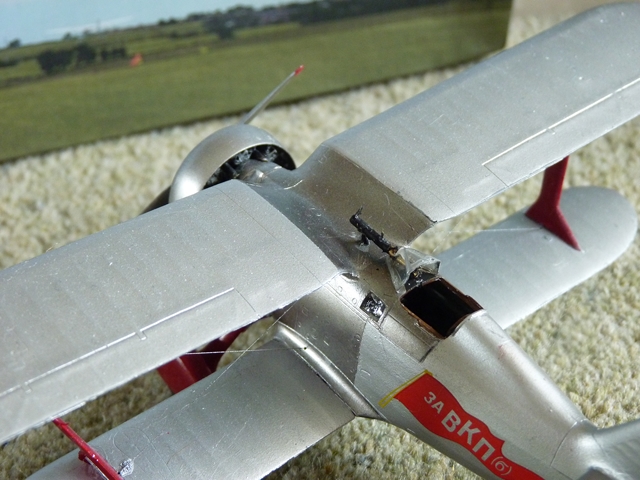
Assembled cockpit, instrument panel is nicely done, resin base, acetate instruments and pe panel sandwiched together.

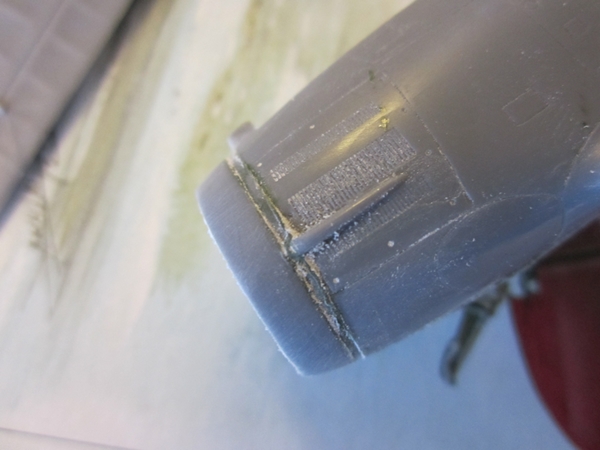
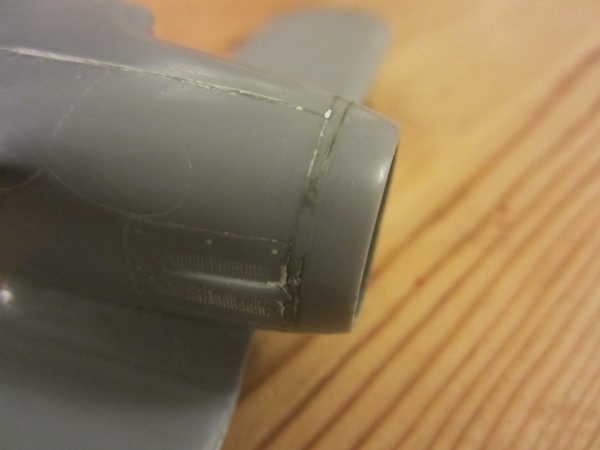
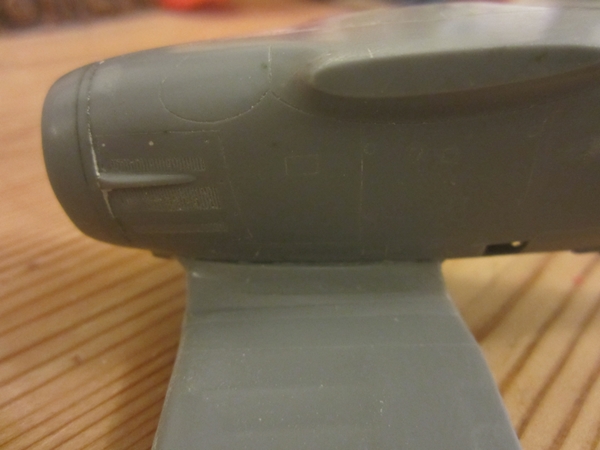
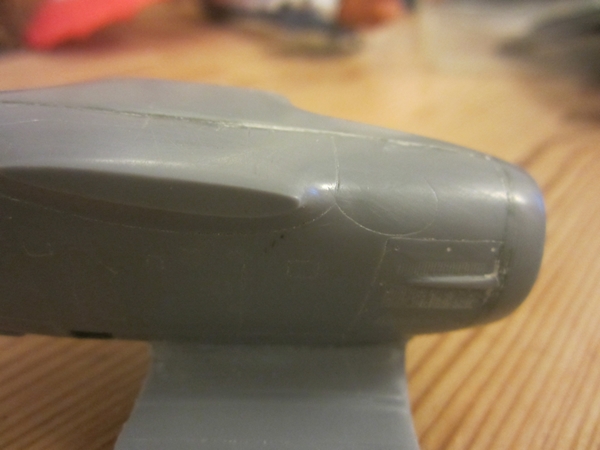
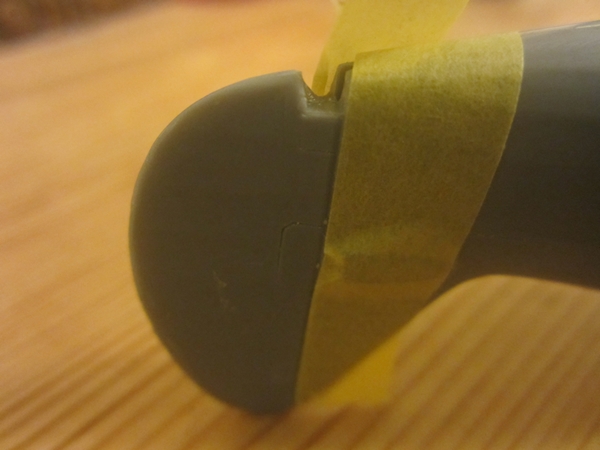
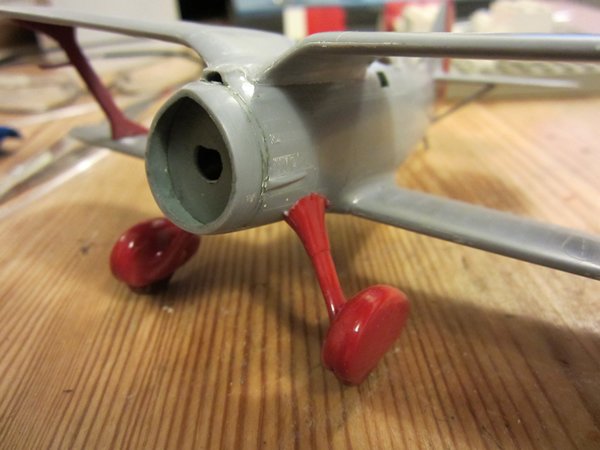
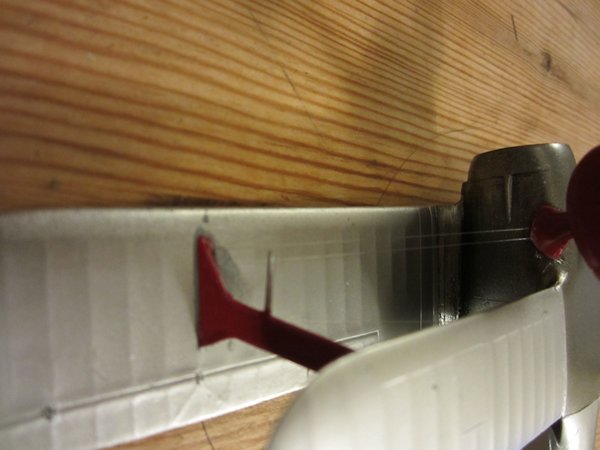
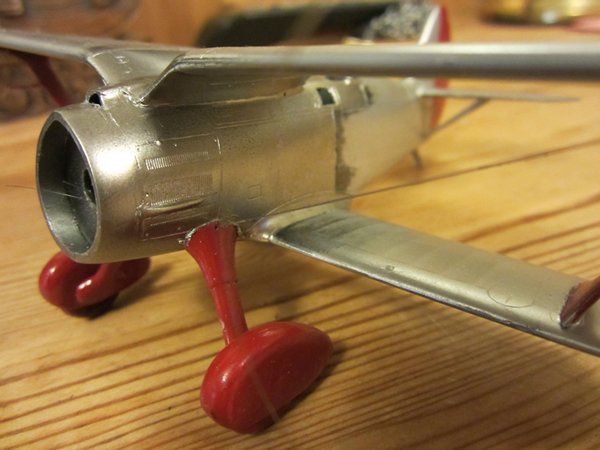
Firewall and nose does not fit well, sand and fill ing required here, especially as this part will be alclad covered

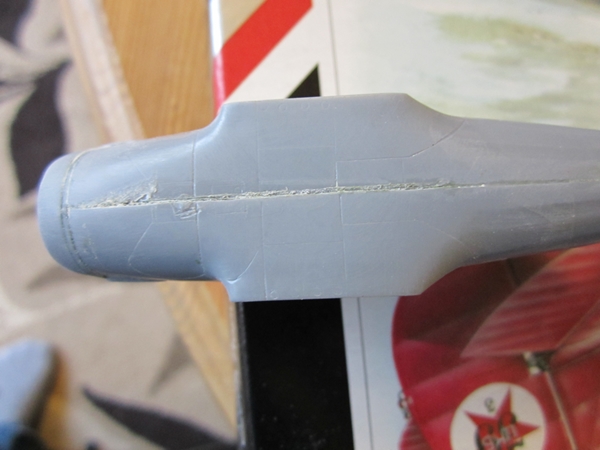
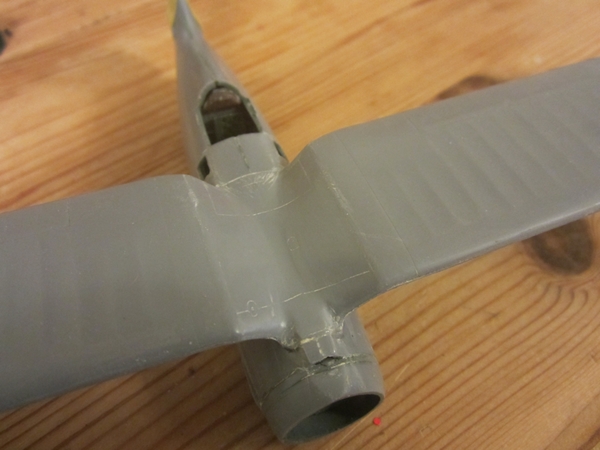
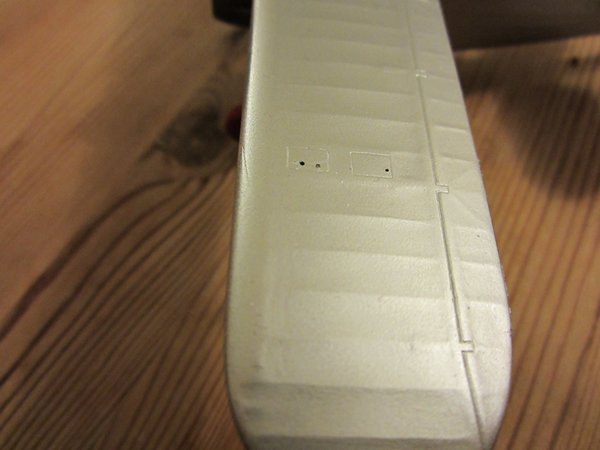
Bottom seam, the only one that did not fit well.
More when I get the photos uploaded
mike_espo
_VISITCOMMUNITY
Illinois, United States
Joined: September 26, 2011
KitMaker: 125 posts
AeroScale: 115 posts
Posted: Tuesday, January 31, 2012 - 12:31 PM UTC
Where are the pics?
amegan
#243
_VISITCOMMUNITY
England - North East, United Kingdom
Joined: March 21, 2008
KitMaker: 996 posts
AeroScale: 915 posts
Posted: Tuesday, January 31, 2012 - 12:42 PM UTC
Sorry, couldn't remember code for adding pics, had to RTFM
mike_espo
_VISITCOMMUNITY
Illinois, United States
Joined: September 26, 2011
KitMaker: 125 posts
AeroScale: 115 posts
Posted: Tuesday, January 31, 2012 - 01:22 PM UTC
lots of resin! Looks like a rudder and tail...

is that a standard kit?
amegan
#243
_VISITCOMMUNITY
England - North East, United Kingdom
Joined: March 21, 2008
KitMaker: 996 posts
AeroScale: 915 posts
Posted: Tuesday, January 31, 2012 - 08:47 PM UTC
There is a fair amount of resin, and yes, this is a standard kit. the resin components are beautifully moulded and fit together very well. I use thin cyano and the stuff sold by Warcraft in this country with a brush included in the lid has proved the neatest one I have found. The fin and rudder is included because one of the aircraft included in the kit instructions is an early prototype with a different tail. I decided not to carry out this surgery. I have not shown the cockpit build and the photos aren't marvellous, new camera, but they are getting better.
Mgunns
_VISITCOMMUNITY
Arizona, United States
Joined: December 12, 2008
KitMaker: 1,423 posts
AeroScale: 1,319 posts
Posted: Wednesday, February 01, 2012 - 02:37 AM UTC
Hello Andrew:

This will be interesting to watch as it is not a WWI subject nor one that I am familiar with but significant none the less. Lots of resin castings that look sharp.

Best of luck

Mark
amegan
#243
_VISITCOMMUNITY
England - North East, United Kingdom
Joined: March 21, 2008
KitMaker: 996 posts
AeroScale: 915 posts
Posted: Wednesday, February 01, 2012 - 08:08 AM UTC
Pushing on a bit further,after several hours (well it felt like it) of sanding and filling the nose looks ok

and on to the wings

Upper wing is a gull wing assembly attached directly to the top of the fuselage, a minor amount of sanding was needed to get a good fit

Undersides of the wings also fits pretty well

....and the other side

Undercarriage legs have this blemish, fairly easy to remove with a scalpel and fit is good after

Wheels don't fit well inside spats, trying to close the gap led to this solvent damage to the spat. More sanding, fortunately there is very little detail on the spats.
lcarroll
_VISITCOMMUNITY
Alberta, Canada
Joined: July 26, 2010
KitMaker: 1,032 posts
AeroScale: 1,025 posts
Posted: Wednesday, February 01, 2012 - 02:44 PM UTC
Andrew,
There's very often a big conflict between the subject and the quality of the actual kit; you've got a truly unique and interesting subject here represented by a fairly mediochre kit as is so often the case. Looking great so far, the fun is taking it into the next level of quality which you are already doing. Keep at it, it's looking great so far and I'll be very interested in the final result.
Cheers,
Lance
amegan
#243
_VISITCOMMUNITY
England - North East, United Kingdom
Joined: March 21, 2008
KitMaker: 996 posts
AeroScale: 915 posts
Posted: Thursday, February 02, 2012 - 10:47 AM UTC
Thanks Lance, and I agree the kit is mediocre, especially compared to the WNW examples in other builds. However there is a challenge in trying to produce a good looking model from such a kit. The colour scheme becomes important here. The planned model is of the aircraftflown by Col Tupolev and was obviously painted as a display aircraft. The airframe is all silver with red rudder, interplane struts and undercarriage. These I masked as required and painted together Paint is Tamiya Red.

Painted undercarriage legs fitted

Lower wings are butt joined to the stubs, a very weak configuration for a monoplane but ok in this case. Needs care to get the alignment right.

Tailplane also joined by butt joint and stabilised with the struts. the alignment was set using a Lego jig.

Starting to look like an aircraft now, tailskid is a tight fit. Serious painting next, The aluminium panel round the nose will be Alclad, the rest being fabric covered will be Metallic Silver.
OEFFAG_153
_VISITCOMMUNITY
Västra Götaland, Sweden
Joined: February 19, 2010
KitMaker: 1,473 posts
AeroScale: 1,450 posts
Posted: Thursday, February 02, 2012 - 08:01 PM UTC
Hello Andrew,

Nice to see something a bit different. Looks like a tough kit to tackle.

Looking forward your progress

Mikael
Mgunns
_VISITCOMMUNITY
Arizona, United States
Joined: December 12, 2008
KitMaker: 1,423 posts
AeroScale: 1,319 posts
Posted: Friday, February 03, 2012 - 12:56 AM UTC
Hello Andrew:

You are making good progress on this kit. I always viewed low injection molding limited run kits, slightly better than doing a vacuform. You are making a silk purse out of this sows ear.

Best

Mark
amegan
#243
_VISITCOMMUNITY
England - North East, United Kingdom
Joined: March 21, 2008
KitMaker: 996 posts
AeroScale: 915 posts
Posted: Sunday, February 05, 2012 - 05:43 AM UTC
Here is were this build starts to go wrong.
The aforward fuselage was masked round and the black Alclad coat blown on. A day later the metal coat was sprayed. The nose was masked off and the rest of the aircraft sprayed Vallejo Model Air Metallic Silver

Yes you're right that Alclad doesn't look right. More later.
Decided to start rigging. Although I have tried Terri's method using small hooks and thin stretched Q-tips this aircraft has streamline wires and fairings covering the wire ends. In this Stearman photo (aircraft built 1941) you can see how the two front flying wires are anchored under the Undercarriage fairing


Rigging Holes drilled at the top of the Undercarriage fairings

and in the wings

Monofilament thread is passed through the holes into the fuselage then fished for through the hole where the engine will mount, pulled out, knotted, glue (cyano) applied and then pulled back so it locks in place. The other end is passed through the wing holes and with glue applied and pulled taut and a clothes peg attached to the end then left to set thoroughly.

I-15 and friend (enemy?)
amegan
#243
_VISITCOMMUNITY
England - North East, United Kingdom
Joined: March 21, 2008
KitMaker: 996 posts
AeroScale: 915 posts
Posted: Monday, February 13, 2012 - 09:12 PM UTC
Rework on the aliuminium sheeting round the nose has dramtically improved the look of that area I am now pretty happy with it.

Just for a change decided to assemble the engine, 19 pieces to get a basic engine shape! Airfix would have done it in 2:-) The resin moulded engine went together very well and surprised me by fitting snugly into the cowl. the cowl had a huge moulding line round it and 3 sprue entry points that had to be removed before it could be finished.

there is an aluminium cover over the crankcase that is perforated with elongated holes, unfortunately the kit one is not perforated nor are the perforations marked well. I drilled and cut them with a scalpel finishing with a file but I am not happy with the result. Unfortunatly I am going to have to live with it.

Dry fitted the engine and cowling, loks like a Chato now.


Disassembled and painted engine parts in black lacquer, then dry fitted together again.


Mgunns
_VISITCOMMUNITY
Arizona, United States
Joined: December 12, 2008
KitMaker: 1,423 posts
AeroScale: 1,319 posts
Posted: Tuesday, February 14, 2012 - 01:24 AM UTC
Hello Andrew: This is coming along quite nicely. As you painted the whole engine area black, the vent holes won't be as noticeable as if you had done them in a contrasting color. I got some after market engines and am not sure I will use them due to the multi cylinder issue, but seeing as you had good luck with yours, I will have to try my luck with mine.
Looking forward to more

Best
Mark
lcarroll
_VISITCOMMUNITY
Alberta, Canada
Joined: July 26, 2010
KitMaker: 1,032 posts
AeroScale: 1,025 posts
Posted: Tuesday, February 14, 2012 - 03:46 AM UTC
Andrew,
Nice work on the engine, as Mark pointed out the effect makes up for the short comings of the basic kit. Promises to be an impressive build. Looking forward to still more.
Cheers,
Lance
amegan
#243
_VISITCOMMUNITY
England - North East, United Kingdom
Joined: March 21, 2008
KitMaker: 996 posts
AeroScale: 915 posts
Posted: Tuesday, February 14, 2012 - 07:13 AM UTC
Thanks guys, but I'm afraid that the black is the undercoat for Alclad, it should be Polished Aluminium. Engine is not finished yet, will try to do pushrods and plug leads but need to check arrangement.
mike_espo
_VISITCOMMUNITY
Illinois, United States
Joined: September 26, 2011
KitMaker: 125 posts
AeroScale: 115 posts
Posted: Tuesday, February 14, 2012 - 07:15 AM UTC
Nice Work on taming the beast!

Is that a Italeri or CA 1/48 Fiat CR.42 in the backdrop?
amegan
#243
_VISITCOMMUNITY
England - North East, United Kingdom
Joined: March 21, 2008
KitMaker: 996 posts
AeroScale: 915 posts
Posted: Tuesday, February 14, 2012 - 08:09 AM UTC
Sure is, I want a -32 now It is the Italieri CR42AS and I loved building it.
amegan
#243
_VISITCOMMUNITY
England - North East, United Kingdom
Joined: March 21, 2008
KitMaker: 996 posts
AeroScale: 915 posts
Posted: Thursday, February 16, 2012 - 03:28 AM UTC
Alclad paint added to cowling parts, now you can see the problems with the crankcase fairing. Unfortunately I don't know how to get it any better

thegirl
_VISITCOMMUNITY
Alberta, Canada
Joined: January 19, 2008
KitMaker: 6,743 posts
AeroScale: 6,151 posts
Posted: Saturday, February 25, 2012 - 11:27 AM UTC
Your making some pretty quick work with this build , coming along nicely 1

Terri
mike_espo
_VISITCOMMUNITY
Illinois, United States
Joined: September 26, 2011
KitMaker: 125 posts
AeroScale: 115 posts
Posted: Sunday, February 26, 2012 - 06:27 AM UTC
What material did you use for the rigging wires?
amegan
#243
_VISITCOMMUNITY
England - North East, United Kingdom
Joined: March 21, 2008
KitMaker: 996 posts
AeroScale: 915 posts
Posted: Thursday, March 01, 2012 - 09:08 AM UTC
Hi Mike. Rigging wire is invisible mending thread, used for hemming clothes. Made from Nylon monofilament. Knots well but needs securing with cyano. I have used it for a number of biplanes now and it works well.
amegan
#243
_VISITCOMMUNITY
England - North East, United Kingdom
Joined: March 21, 2008
KitMaker: 996 posts
AeroScale: 915 posts
Posted: Sunday, March 18, 2012 - 11:38 AM UTC
A bit more done and a small disaster

Ignition leads and valve pushrods fitted ready for painting, I needs to look for a better method but 18 leads are quite obtrusive

Engine finally assembled into airframe, still some paint to touch in.


Finally the disaster, put the decals on and the paint on the struts and tail is a totally different colour. After this tried a different colour on the tail but not right, and I lost the tail decals, pondering what to do next, leave it and repaint the tail decals, repaint everything (if I can find a matching paint).
amegan
#243
_VISITCOMMUNITY
England - North East, United Kingdom
Joined: March 21, 2008
KitMaker: 996 posts
AeroScale: 915 posts
Posted: Sunday, April 08, 2012 - 11:52 PM UTC
Calling this one finished. Lost the rudder decals when I tried to match the Fuselage decal to the rudder colour. Interesting kit


Mgunns
_VISITCOMMUNITY
Arizona, United States
Joined: December 12, 2008
KitMaker: 1,423 posts
AeroScale: 1,319 posts
Posted: Monday, April 09, 2012 - 01:01 AM UTC
Hello Andrew:

Nicely done. Were you able to contact the manufacturer and get a replacement decal? It looks quite good, and knowing the trials you had, a noteworthy effort.

Are you planning on doing another one for the GB?

Best

Mark
 _GOTOTOP