_GOTOBOTTOM
Early Aviation
Discuss World War I and the early years of aviation thru 1934.
KotS GB 2012 Nieuport 17 Russian - Mark
Mgunns
_VISITCOMMUNITY
Arizona, United States
Joined: December 12, 2008
KitMaker: 1,423 posts
AeroScale: 1,319 posts
Posted: Friday, April 06, 2012 - 04:53 AM UTC
Okay, I am going to do this one OOB! I like the markings. Don't know much about it other than what the directions say about it and that isn't much. I will post more as I work through it, but for now this is all I have.

The Obligatory Box art:


and the contents:


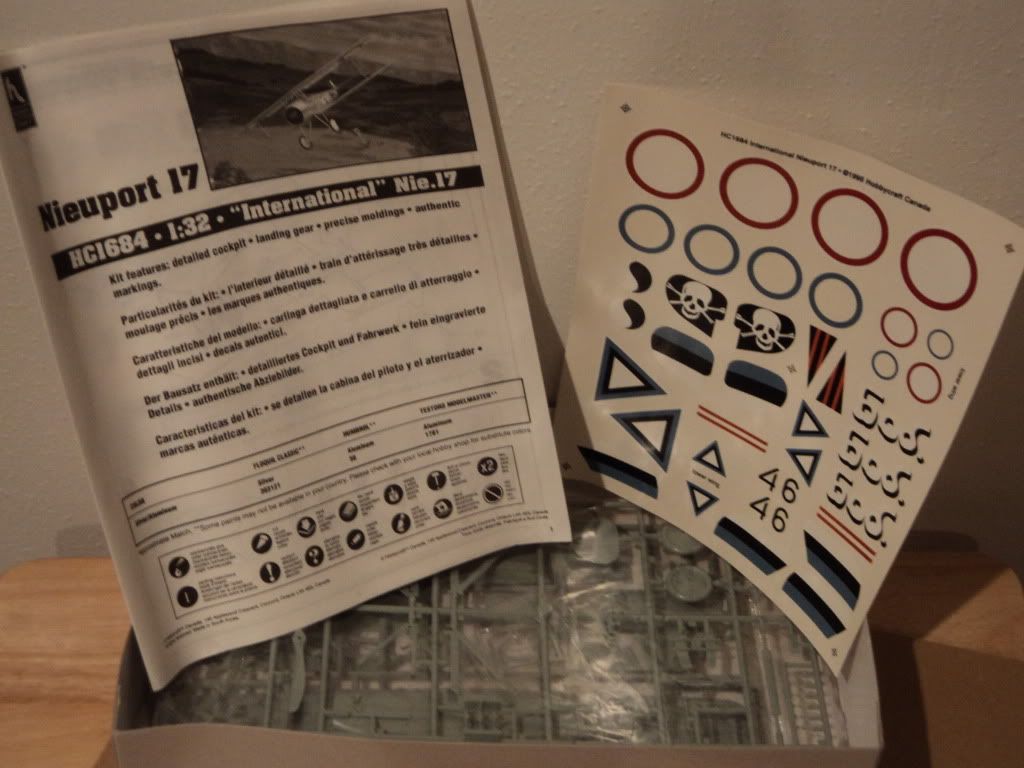
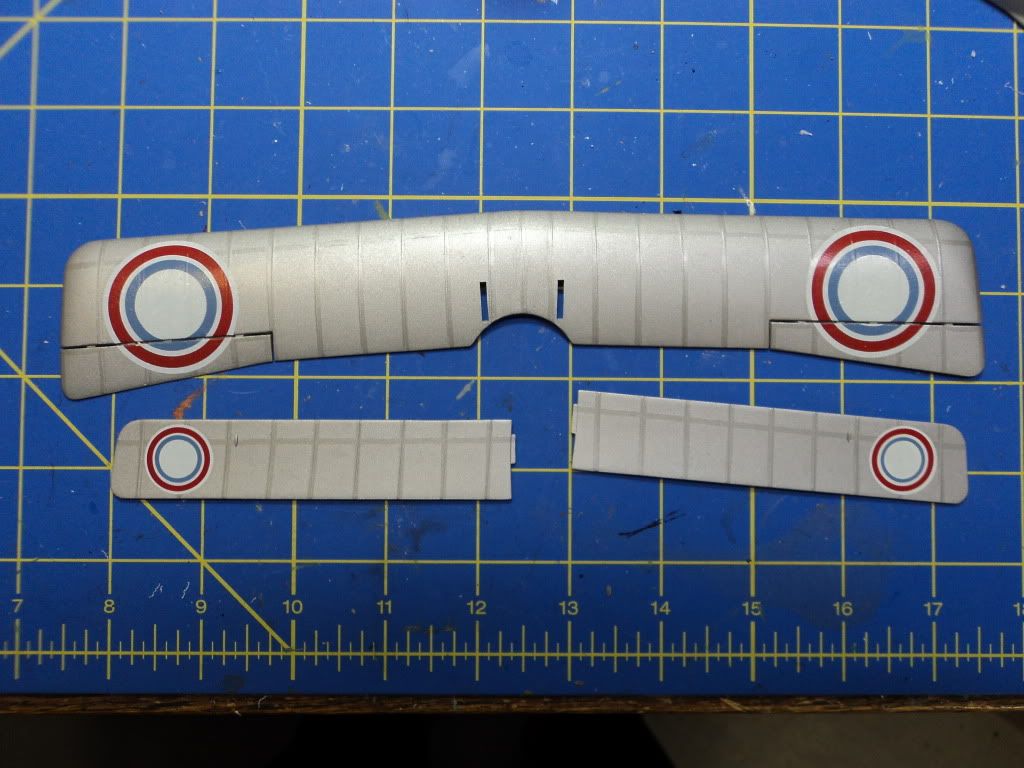
It also comes with Estonian markings for an a/c in 1919, but I like the Russian markings with the Skull and crossbones on the tail and the Cyrillic markings.

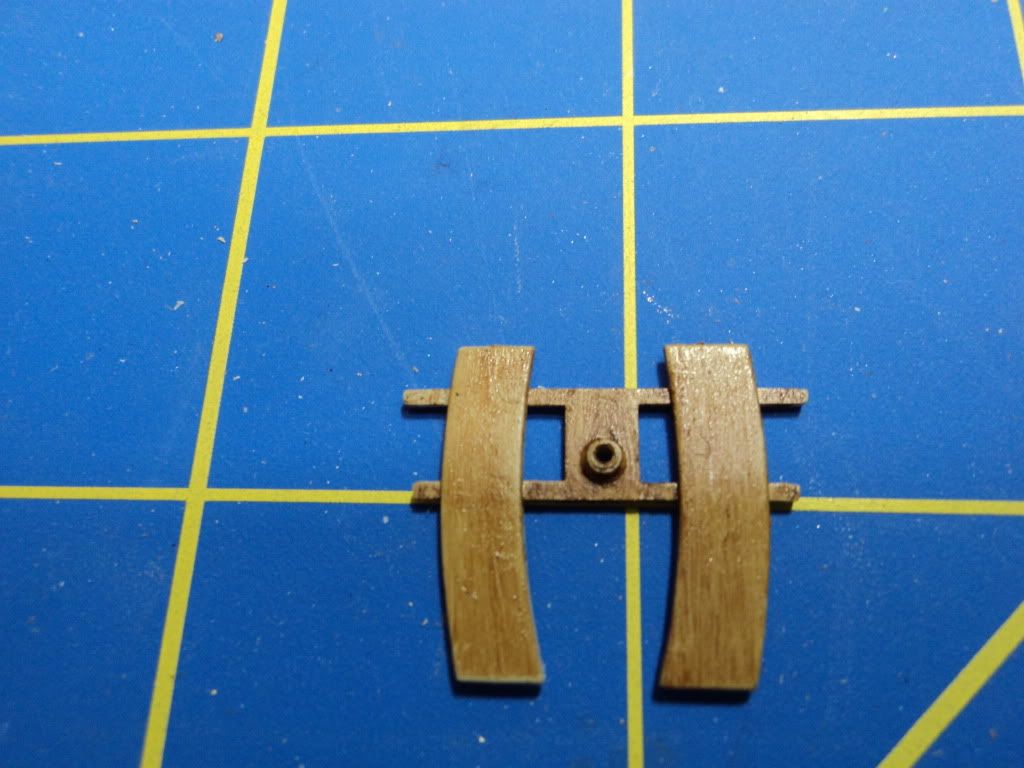
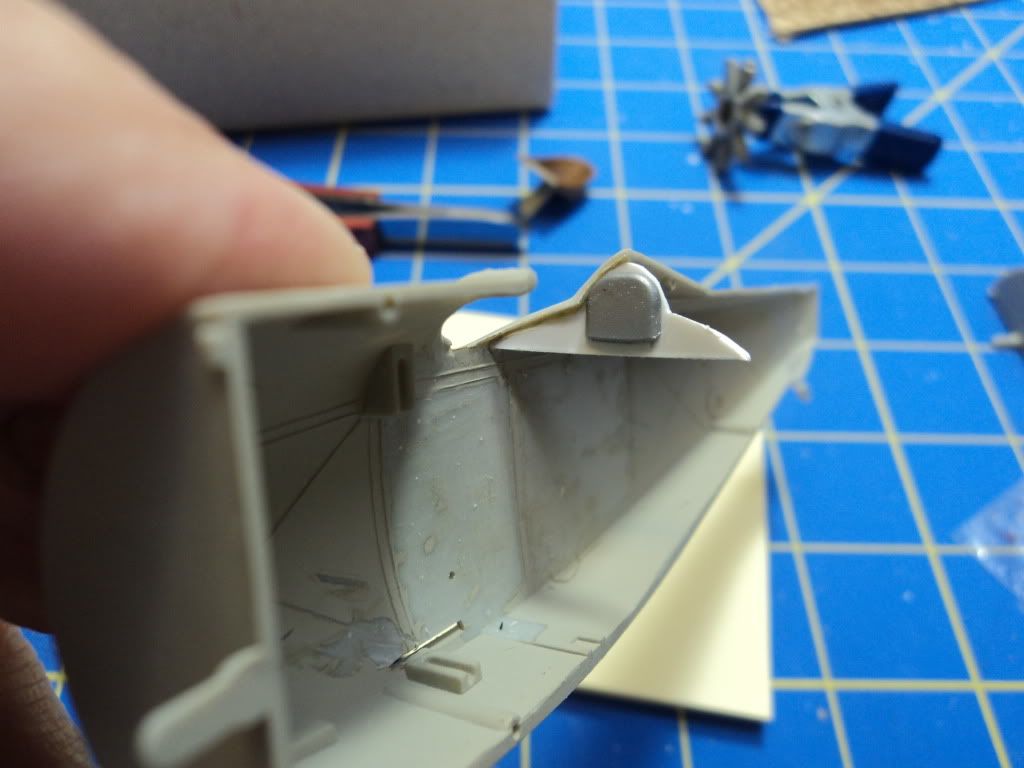
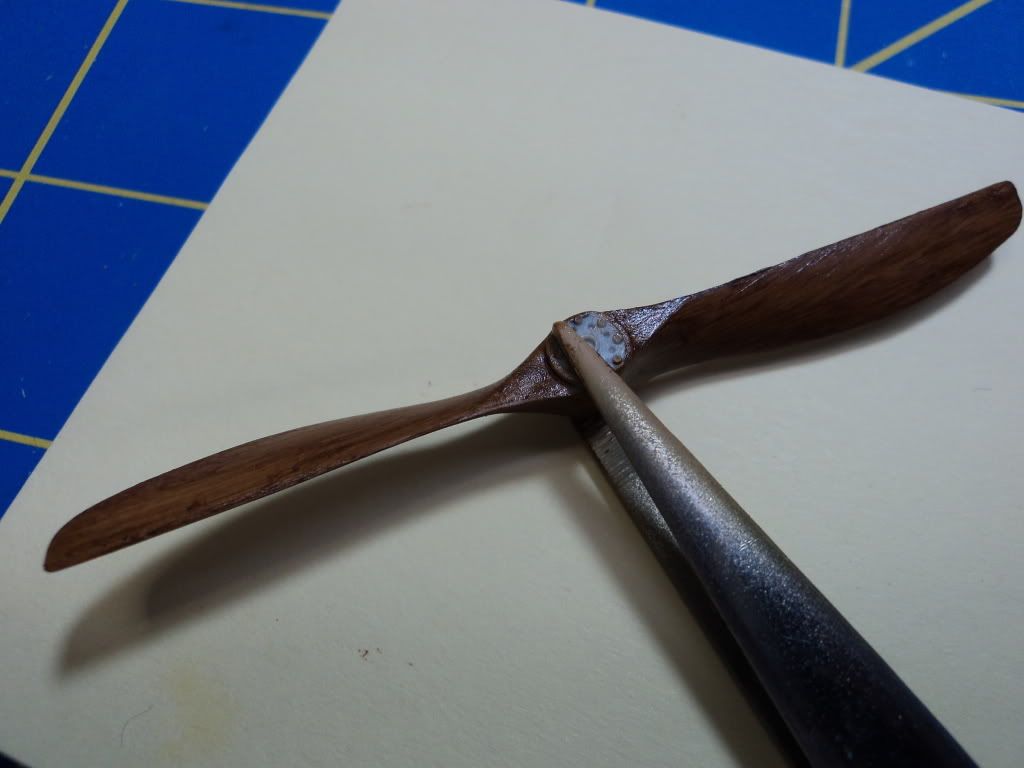
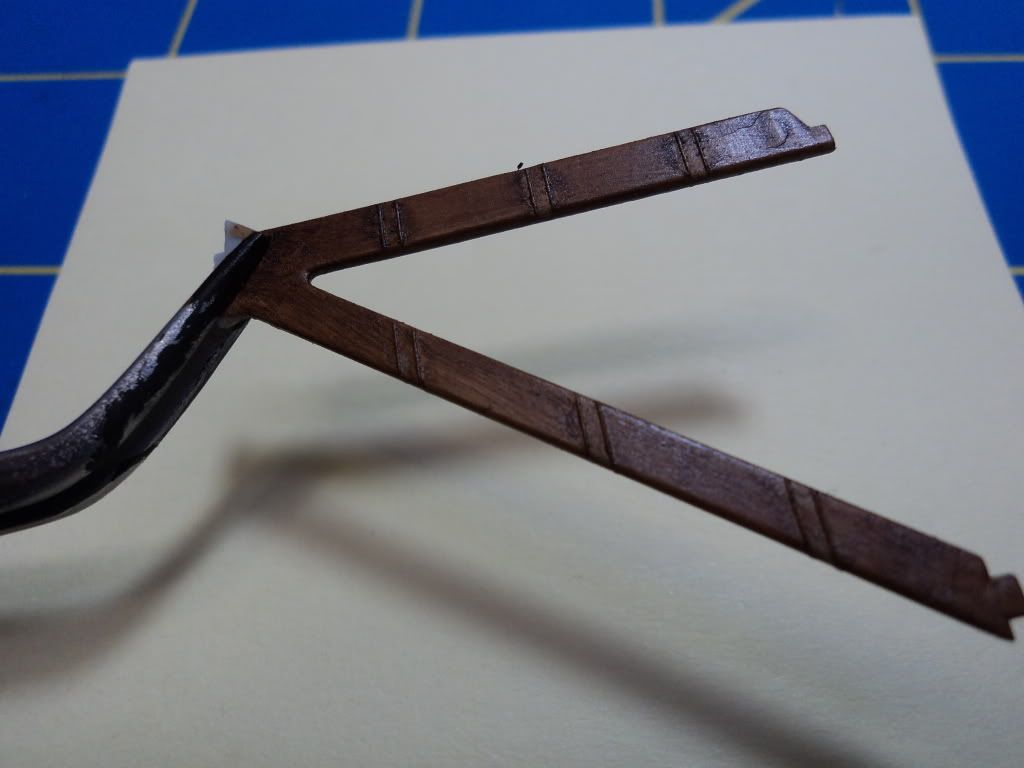
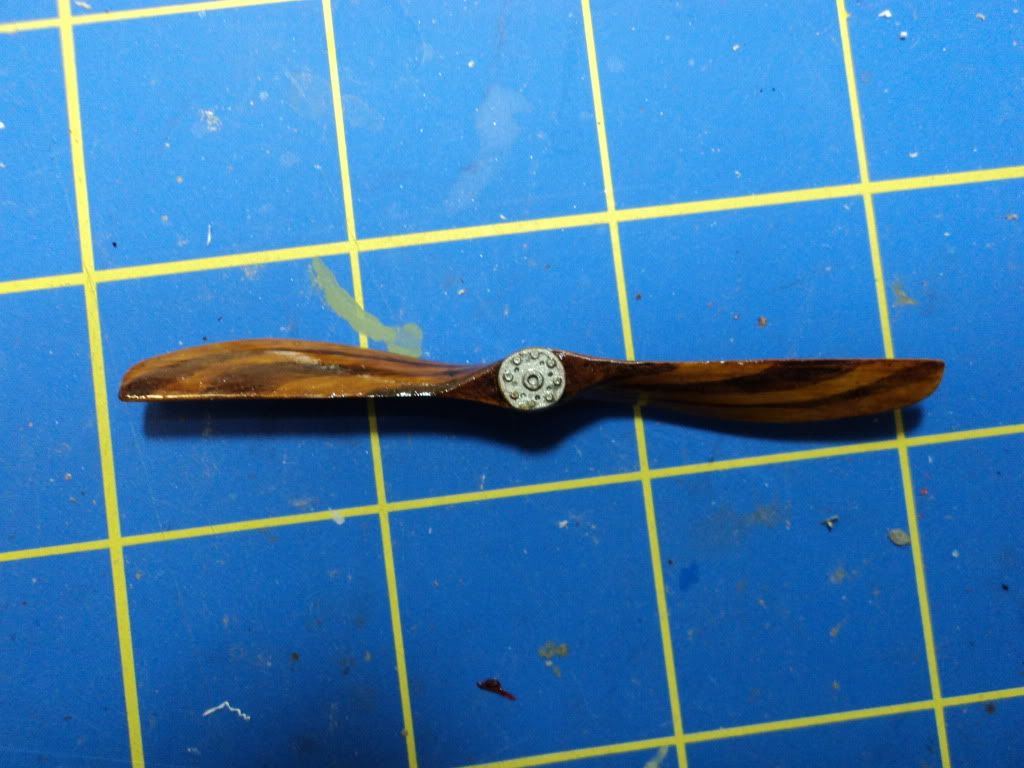
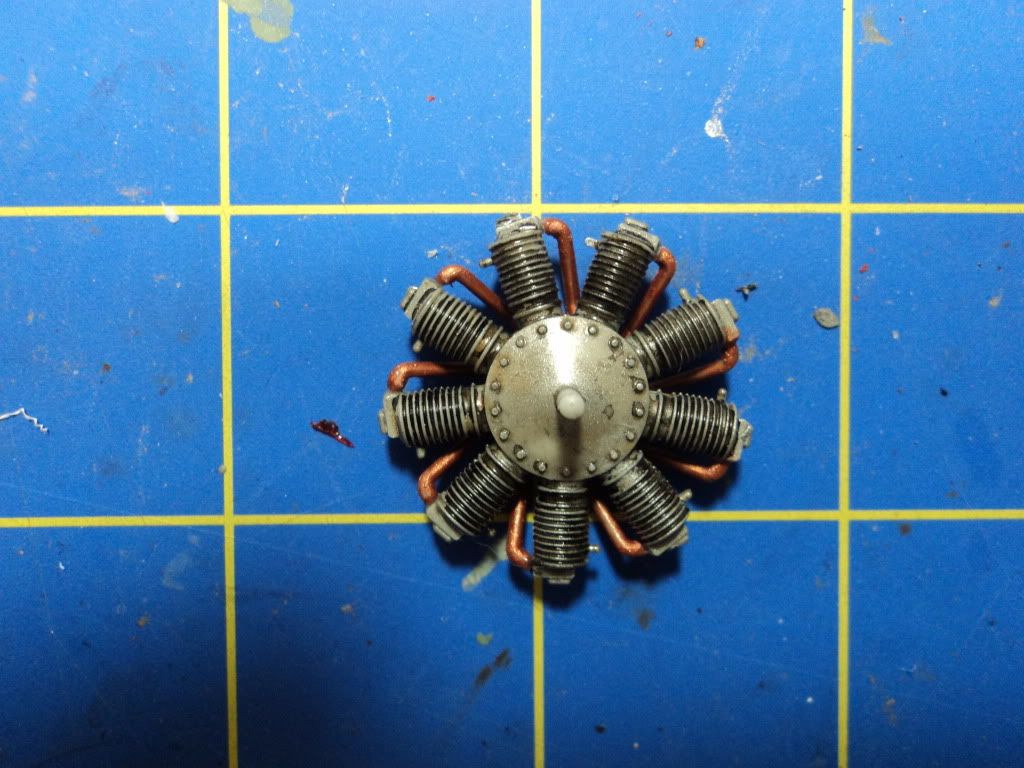
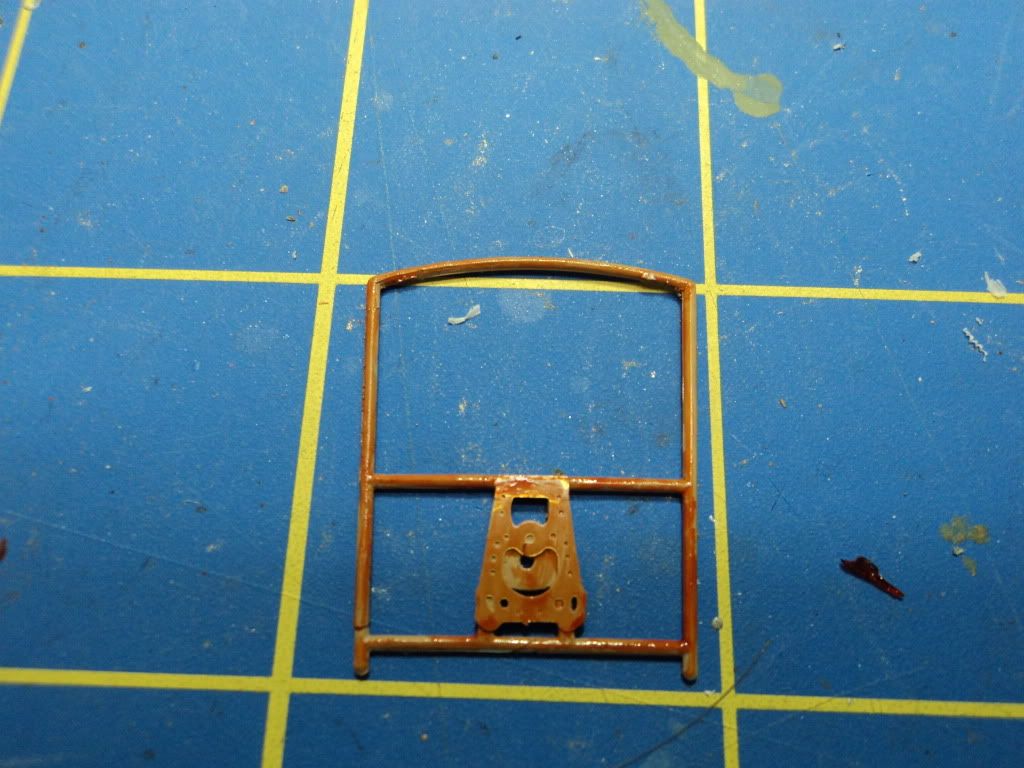
The kit itself is extremely bare bones, and those with AMS could have a field day. I debated adding interior details, but with a warm spring, an early riding season and my frustration with the past couple of kits, I would like to just model this one with no extra detailing. I have two other of these on the shelf as well that I can perk up as I see fit when I tackle those, for now, I just want to "play" with this one. I did see an aftermarket resin cockpit for this and may at some point pop for that and use it on the other ones.

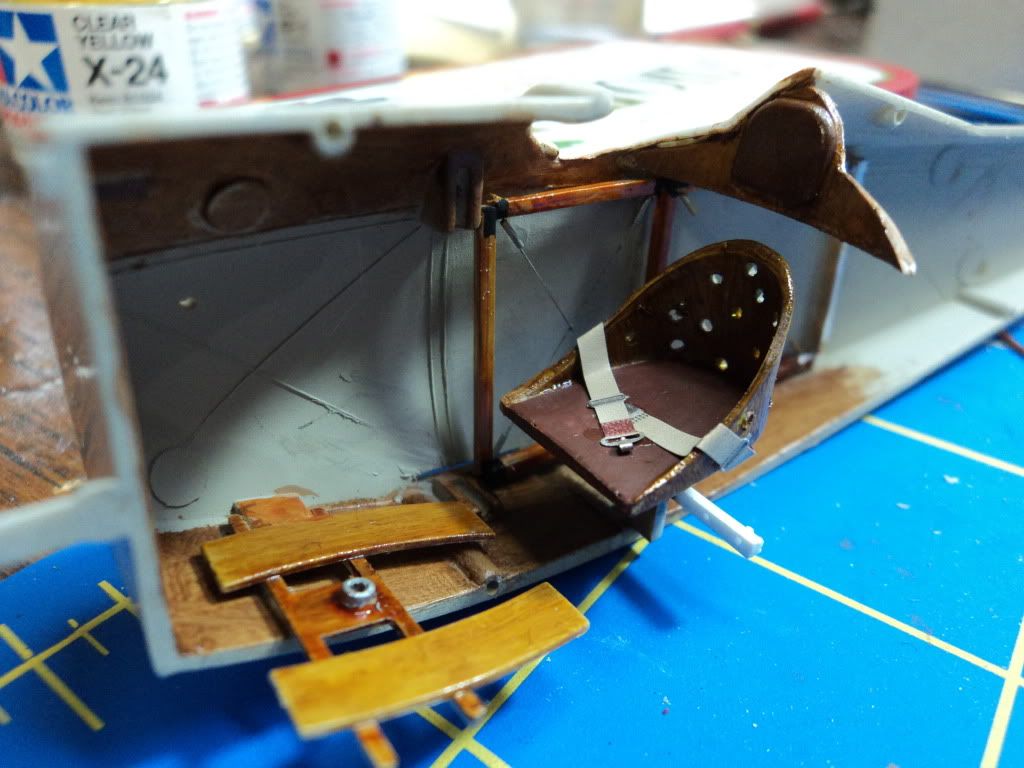
I did drill holes in the seat, will add seat belts but that is about it. I have to come up with silver paint that won't peel when masked, a rarity I am sure.

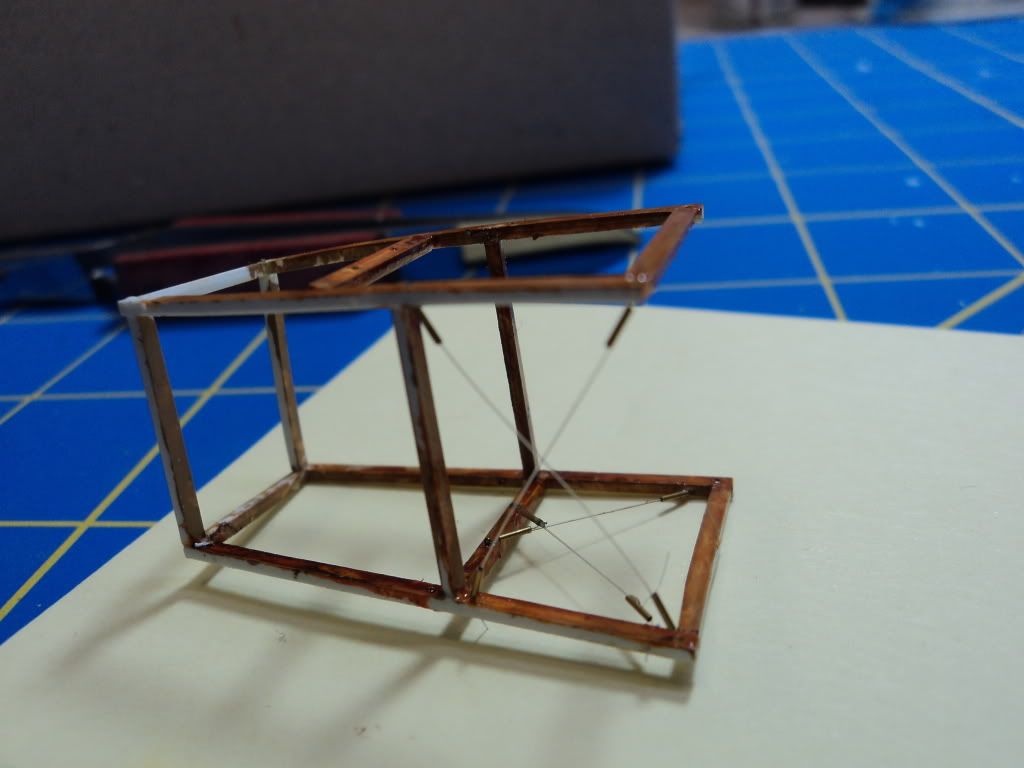
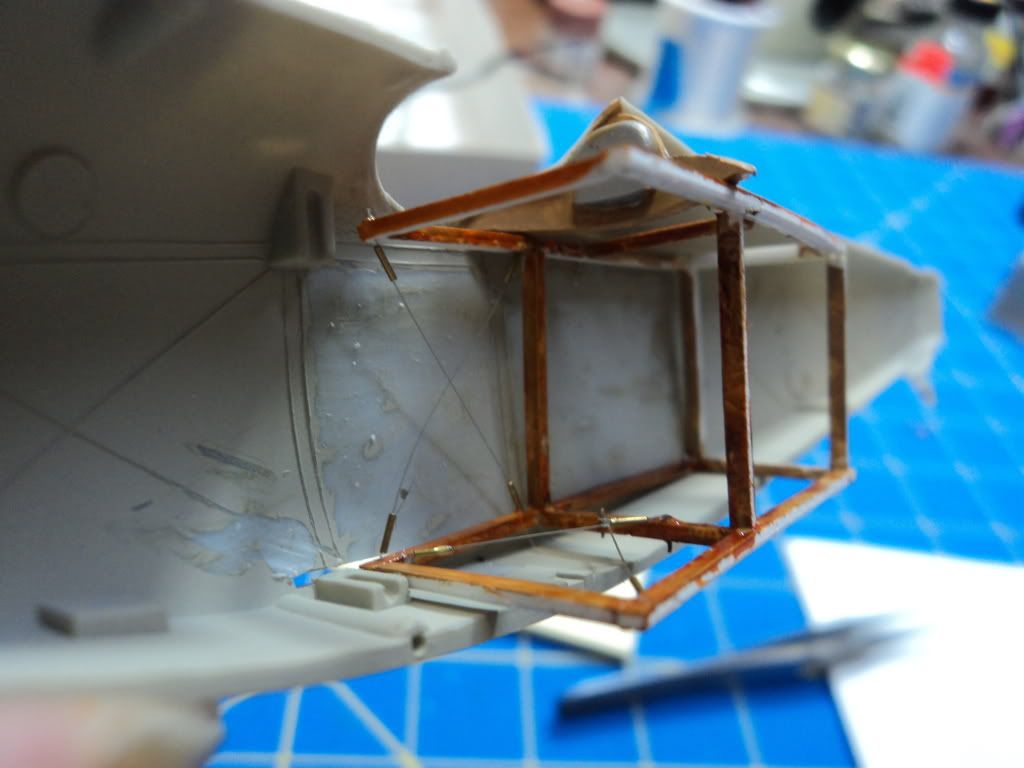
Anyway, more pics as I progress through this. There aren't that many parts so I am hoping to move right along on this one.

Stay tuned for more exciting, dismemebered news as it happens right here.

Mark
Kornbeef
_VISITCOMMUNITY
England - South East, United Kingdom
Joined: November 06, 2005
KitMaker: 1,667 posts
AeroScale: 1,551 posts
Posted: Friday, April 06, 2012 - 05:15 AM UTC
Mark.

I have one of these, but the standard markings in the stash from eons ago, I recently dug her out, bought that aforementioned resin cockpit set and a revised cowling and wheels from the same supplier,

Its one of those I intend to finish but... always seem to buy something else instead. The cockpit detail sets quite nice.


K
Mgunns
_VISITCOMMUNITY
Arizona, United States
Joined: December 12, 2008
KitMaker: 1,423 posts
AeroScale: 1,319 posts
Posted: Friday, April 06, 2012 - 05:50 AM UTC
Hi Keith:

Thanks for stopping by. I have the Billy Bishop and the One in the Academy release with the French ace's marking. The resin set looks nice.


thegirl
_VISITCOMMUNITY
Alberta, Canada
Joined: January 19, 2008
KitMaker: 6,743 posts
AeroScale: 6,151 posts
Posted: Saturday, April 07, 2012 - 03:34 AM UTC
Looking forward to seeing you put this one together Mark .
Mgunns
_VISITCOMMUNITY
Arizona, United States
Joined: December 12, 2008
KitMaker: 1,423 posts
AeroScale: 1,319 posts
Posted: Sunday, April 08, 2012 - 08:46 AM UTC
Hello Terri:

Thanks for stopping by and taking a peek. I have spent the afternoon working on an interior framework. I wasn't going to do it, but it is too baren in there and a lot can be seen, besides, it was good practice. No pictures right now, but when painted and rigged I will post some pics. I am at least making progress on something.
Best

Mark
Mgunns
_VISITCOMMUNITY
Arizona, United States
Joined: December 12, 2008
KitMaker: 1,423 posts
AeroScale: 1,319 posts
Posted: Sunday, April 08, 2012 - 02:27 PM UTC
Okay folks:

I made some progress today and here it is, I got the foot control board wood grained:

I fashioned a head rest out of sheet styrend and a number tab off the sprue of a Monogram 1/48 C-47 and fitted in place as it was lacking in the kit:

I fashioned a modest frame to dress up the interior; I have started to rig it.


And of course the prop and V-Strut all kit supplied.


For the base coat I used Tamiya Desert Yellow XF59 and then a mixture of WINTON Raw Umber and Burnt Sienna. So far so good.
That's it for now. More as it happens.

Thanks for stopping by

Mark
mike_espo
_VISITCOMMUNITY
Illinois, United States
Joined: September 26, 2011
KitMaker: 125 posts
AeroScale: 115 posts
Posted: Tuesday, April 10, 2012 - 10:50 AM UTC
Excellent cockpit detail! Love the wire bracing in the interior!
thegirl
_VISITCOMMUNITY
Alberta, Canada
Joined: January 19, 2008
KitMaker: 6,743 posts
AeroScale: 6,151 posts
Posted: Tuesday, April 10, 2012 - 12:44 PM UTC
Nice to see you get into the scratching a bit more , careful it is addictive ....hehehe


Thumbs up Mark
amegan
#243
_VISITCOMMUNITY
England - North East, United Kingdom
Joined: March 21, 2008
KitMaker: 996 posts
AeroScale: 915 posts
Posted: Thursday, April 12, 2012 - 11:15 AM UTC
Not OOB, your resolution didn't last long, looks good tho
gajouette
_VISITCOMMUNITY
Texas, United States
Joined: February 01, 2007
KitMaker: 365 posts
AeroScale: 356 posts
Posted: Thursday, April 12, 2012 - 07:52 PM UTC
Mark,
Great first progress my friend. The frame came out well,love the bracing too.Looking forward to following along.
Highest Regards,
Gregory Jouette
Mgunns
_VISITCOMMUNITY
Arizona, United States
Joined: December 12, 2008
KitMaker: 1,423 posts
AeroScale: 1,319 posts
Posted: Friday, April 13, 2012 - 03:23 AM UTC
Greetings all:

Thanks for the encouragement. I had to make some mods to the frame. Got some painting done last night will be posting pics of progress.
Thanks all for stopping by.

Best
Mark
lcarroll
_VISITCOMMUNITY
Alberta, Canada
Joined: July 26, 2010
KitMaker: 1,032 posts
AeroScale: 1,025 posts
Posted: Friday, April 13, 2012 - 06:10 AM UTC
Mark,
I too add my compliments to your framework. A really nice start to making a mediochre kit into a great model. The darker wood approach looks good and the rampant AMS (it's a good thing!!) in the wire bracing looks very real.
Looking forward to the photos you mentioned.
Cheers,
Lance
OEFFAG_153
_VISITCOMMUNITY
Västra Götaland, Sweden
Joined: February 19, 2010
KitMaker: 1,473 posts
AeroScale: 1,450 posts
Posted: Saturday, April 14, 2012 - 03:02 AM UTC
Hi Mark, excellent progress with your mods, I like what I see. I too have a couple of these in my stash. Like Keith I bought some AM bits for them to spice things up a bit, but somehow they don't lure me. Nice to see what you'll do with it, also nice with a Russian subject.

Best Regards

Mikael
guitarlute101
_VISITCOMMUNITY
West Virginia, United States
Joined: December 18, 2006
KitMaker: 1,121 posts
AeroScale: 1,063 posts
Posted: Saturday, April 14, 2012 - 03:13 AM UTC


Great work mark. I really like those Estonian and Russian Skull markings. Have you decided on a specific profile yet?

Mark
Mgunns
_VISITCOMMUNITY
Arizona, United States
Joined: December 12, 2008
KitMaker: 1,423 posts
AeroScale: 1,319 posts
Posted: Monday, April 16, 2012 - 12:40 AM UTC
Hi Mark:

I chose to do the Russian one as it was a participant of the great war, but; the Estonian Markings are kind of cool too. I may do another one in those markings at some time.
Thanks for stopping by

Best
Mark
Mgunns
_VISITCOMMUNITY
Arizona, United States
Joined: December 12, 2008
KitMaker: 1,423 posts
AeroScale: 1,319 posts
Posted: Tuesday, April 17, 2012 - 03:24 PM UTC
Greetings all:

Here is where I am at this point. I sanded the wings to soften the ribbing and then painted them Tamiya deck tan, masked the ribs, painted them Model Master silver, then took the masking off and painted Model Master Metalizer Steel non buffing. I tried to lightly spray over the Tamiya deck tan, but with silver it is pretty hard not to cover it. I was surprised by the effect as you can see. I applied the Russian Roundels and when dry, I took a sharp exacto #11 blade and cut at the elevator line; soaked with solvaset and viola.

I painted the prop per usual and using an artists pen drew the lamination. Painted over it all with Tamiya orange.

I used the kit engine, painted it Testors Model Master Steel and Tamiya Copper. I then "weathered" it using India ink. Not quite finished yet. I need to add the plub wires and do a little dirtying on the pipes.


Due to the way the kit goes together and my first attempt at scratching an interior frame, I had to rethink it, so I just used the side braces and cemented them to the fuselage side. I think when it is finished it will be fine. I also cemented a piece of strut with holes drilled to fix the rudder bar rigging.

I painted this deal Tamiya wood and then over painted it with Tamiya orange. I used a piece off of Tom's Model works Nieuport set for the part where the control rod goes through.

Next time it will be buttoned up with paint.

Thanks for stopping by

Best

Mark
tinbanger
_VISITCOMMUNITY
Ontario, Canada
Joined: February 04, 2008
KitMaker: 2,507 posts
AeroScale: 1,814 posts
Posted: Wednesday, April 18, 2012 - 12:37 AM UTC
Nice work Mark
JackFlash
_VISITCOMMUNITY
Colorado, United States
Joined: January 25, 2004
KitMaker: 11,669 posts
AeroScale: 11,011 posts
Posted: Wednesday, April 18, 2012 - 01:16 AM UTC
Interesting approach to the wings in this scheme.
lcarroll
_VISITCOMMUNITY
Alberta, Canada
Joined: July 26, 2010
KitMaker: 1,032 posts
AeroScale: 1,025 posts
Posted: Wednesday, April 18, 2012 - 03:17 AM UTC

Quoted Text

Interesting approach to the wings in this scheme.


Mark,
I really like the effect you got on the wings; will be keeping your little trick in my "tickle trunk" for the WNW Pfalz DIIIa kit when I get to it if a mainly silbergrau scheme gets used.
Nice work and coming on strong.
Cheers,
Lance
mike_espo
_VISITCOMMUNITY
Illinois, United States
Joined: September 26, 2011
KitMaker: 125 posts
AeroScale: 115 posts
Posted: Wednesday, April 18, 2012 - 02:14 PM UTC
The prop is awesome. Love it!
Mgunns
_VISITCOMMUNITY
Arizona, United States
Joined: December 12, 2008
KitMaker: 1,423 posts
AeroScale: 1,319 posts
Posted: Thursday, April 19, 2012 - 12:22 AM UTC
Greetings all:

Thanks Richard it is coming along.
@ Stephen: Not the effect I was looking for but....it is an effect

@ Lance: Thanks for looking and motivation. I will be working on it tonight, hope to button up the fuselage and proceed from there.

@ Thanks Mike for the words about the prop. Props are still a work in progress for me.

Thanks all for stopping by.

Best

Mark
thegirl
_VISITCOMMUNITY
Alberta, Canada
Joined: January 19, 2008
KitMaker: 6,743 posts
AeroScale: 6,151 posts
Posted: Tuesday, April 24, 2012 - 11:19 AM UTC
I like Mark , your doing a great job . The different tones in the wood is a nice effect Looking forward to your next up-date .


Terri


guitarlute101
_VISITCOMMUNITY
West Virginia, United States
Joined: December 18, 2006
KitMaker: 1,121 posts
AeroScale: 1,063 posts
Posted: Sunday, April 29, 2012 - 06:09 PM UTC


Coming along nicely, Mark! That prop looks great!

Mark
OEFFAG_153
_VISITCOMMUNITY
Västra Götaland, Sweden
Joined: February 19, 2010
KitMaker: 1,473 posts
AeroScale: 1,450 posts
Posted: Sunday, April 29, 2012 - 09:03 PM UTC
Nice progress Mark, agree with what everybody says on the prop – looks superb!

Mikael
Mgunns
_VISITCOMMUNITY
Arizona, United States
Joined: December 12, 2008
KitMaker: 1,423 posts
AeroScale: 1,319 posts
Posted: Tuesday, May 01, 2012 - 04:21 AM UTC

Thanks Terri, Mark and Mikael. I have the thing buttoned up, and will be posting some pics this evening.
Thanks for stopping by.

Best

Mark
 _GOTOTOP