OFFICIAL: British Aerospace Campaign Thread
British Columbia, Canada
Joined: September 03, 2009
KitMaker: 6,965 posts
AeroScale: 6,247 posts
Posted: Tuesday, June 19, 2012 - 05:25 PM UTC
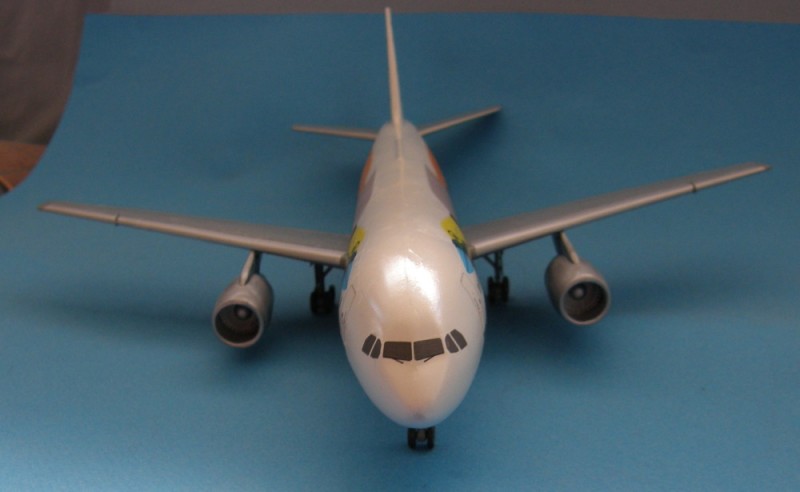
It's time for a test fit. The basic colours are on the airframe
The fit's a bit sloppy, but nothing that proper gluing won't overcome when it's time.
When once you have tasted flight you will walk the Earth with your eyes turned skyward.
For there you have been, and there you will always long to return.
-Leonardo Da Vinci
Western Australia, Australia
Joined: May 04, 2012
KitMaker: 60 posts
AeroScale: 43 posts
Posted: Wednesday, June 20, 2012 - 02:52 PM UTC
Victoria, Australia
Joined: September 19, 2003
KitMaker: 708 posts
AeroScale: 674 posts
Posted: Thursday, June 21, 2012 - 10:25 AM UTC
Hi All,
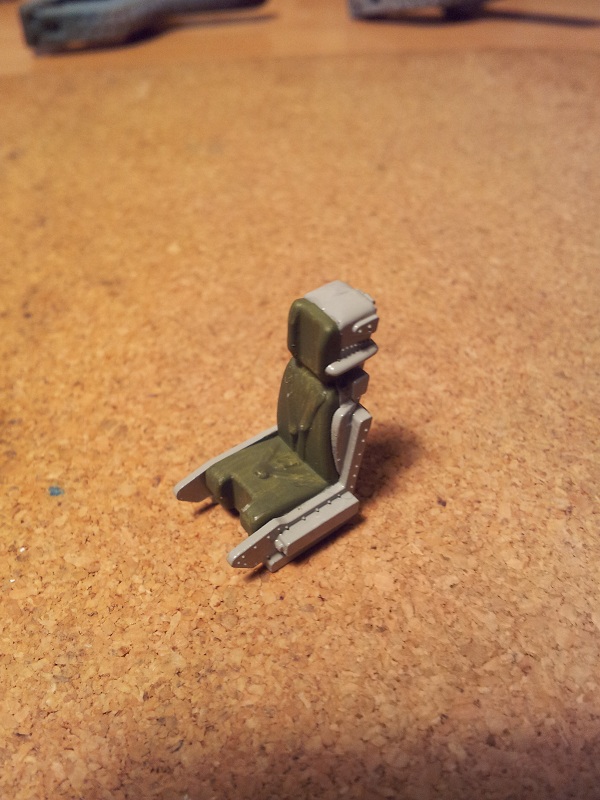
I've done a little bit on the 'Wolfpack' AM seats for my Airfix Hawk 127 have some cleaning up on the filler used on the assembly but it's getting there.
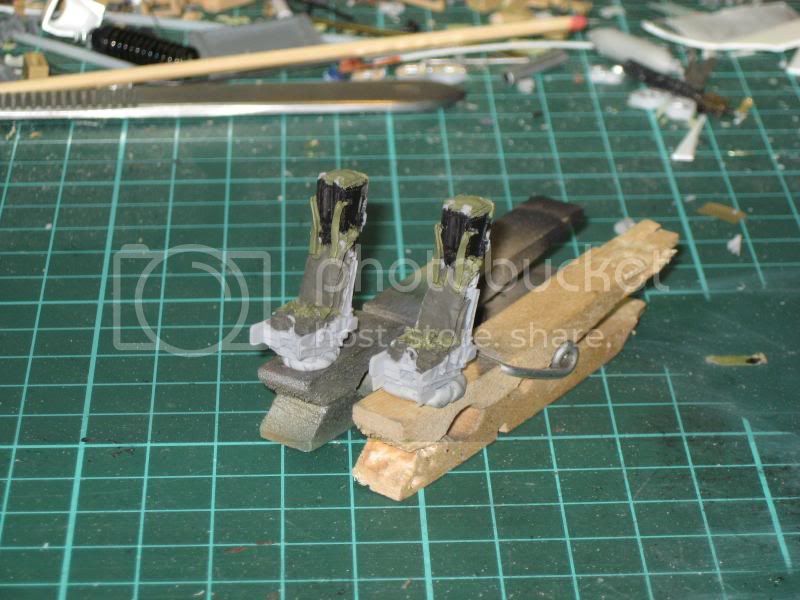
Progress on the resin seats.
More later.
President:- Southern Model Club.
Those who never learn from history will always repeat it.
"When you go home tell them of us and say.
For your tomorrow we gave our today."
Victoria, Australia
Joined: September 19, 2003
KitMaker: 708 posts
AeroScale: 674 posts
Posted: Friday, June 22, 2012 - 10:52 AM UTC
Hi All,
Progress pic of my RAAF Hawk 127.
I added a Wolfpack pitot tube to the nose.
President:- Southern Model Club.
Those who never learn from history will always repeat it.
"When you go home tell them of us and say.
For your tomorrow we gave our today."
Removed by original poster on 06/23/12 - 07:57:30 (GMT).
Western Australia, Australia
Joined: May 04, 2012
KitMaker: 60 posts
AeroScale: 43 posts
Posted: Friday, June 22, 2012 - 07:56 PM UTC
coming together nicely Rob.
Western Australia, Australia
Joined: May 04, 2012
KitMaker: 60 posts
AeroScale: 43 posts
Posted: Friday, June 22, 2012 - 08:00 PM UTC
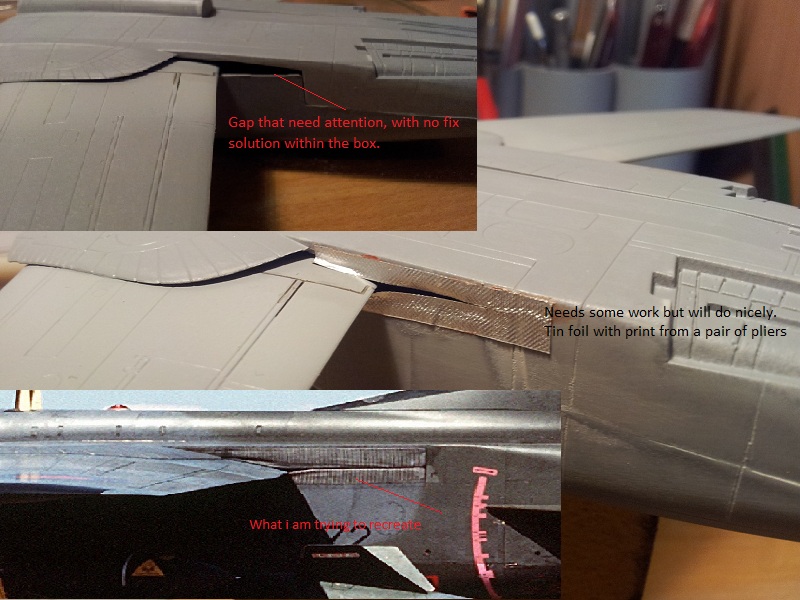
I decided to fix the wings in an open position however this leaving a big cap to fill behind the wing, this is my fix
Ontario, Canada
Joined: February 04, 2008
KitMaker: 2,507 posts
AeroScale: 1,814 posts
Posted: Saturday, June 23, 2012 - 02:25 AM UTC
Hi All
I was going to build a Hawk but with so many entered i have changed to a Airfix 1/72 BAC 167 Strikemaster Mk88.

AC will be modeled as #74 of 14 SQ RNZAF

" The Die Hards"
43rd MIDDLESEX REGIMENT
MACHINE GUN CORPS
XXX CORP
The most effective way to do it, is to do it.
- Amelia Earhart
Western Australia, Australia
Joined: May 04, 2012
KitMaker: 60 posts
AeroScale: 43 posts
Posted: Sunday, June 24, 2012 - 12:42 AM UTC
I remember them well.. when i was in the ATC back in NZ meany a year ago... but we wont go into that.
Nice choice

Western Australia, Australia
Joined: February 11, 2012
KitMaker: 56 posts
AeroScale: 50 posts
Posted: Sunday, June 24, 2012 - 01:34 AM UTC
Started the Harrier build with the cockpit. With the seat moulded to the cockpit tub it meant a fun time hand-painting. Looked OK once I got the decals on.
Also started weapon assembly. I haven't decided on a final loadout yet, but stole the GP bombs from the Sea Harrier kit as well as GBU-16s from the Hasegawa Smart Bombs kit. Lots of options.

And some inspiration.

Western Australia, Australia
Joined: February 11, 2012
KitMaker: 56 posts
AeroScale: 50 posts
Posted: Sunday, June 24, 2012 - 08:28 PM UTC
So once the glue was dry I started sanding down the seams on the Harrier's weapons, but I wasn't making much headway. I decided to treat myself to a new piece of 600-grit wet-and-dry and lo-and-behold, it worked so much better. Using the other piece had become like sanding with a piece of blank paper. Doh!

I have got to change sanding sheets more often...
British Columbia, Canada
Joined: September 03, 2009
KitMaker: 6,965 posts
AeroScale: 6,247 posts
Posted: Wednesday, June 27, 2012 - 11:20 AM UTC
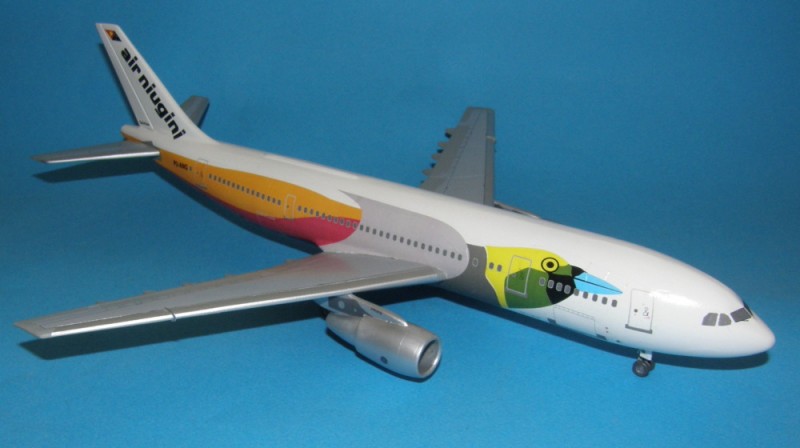
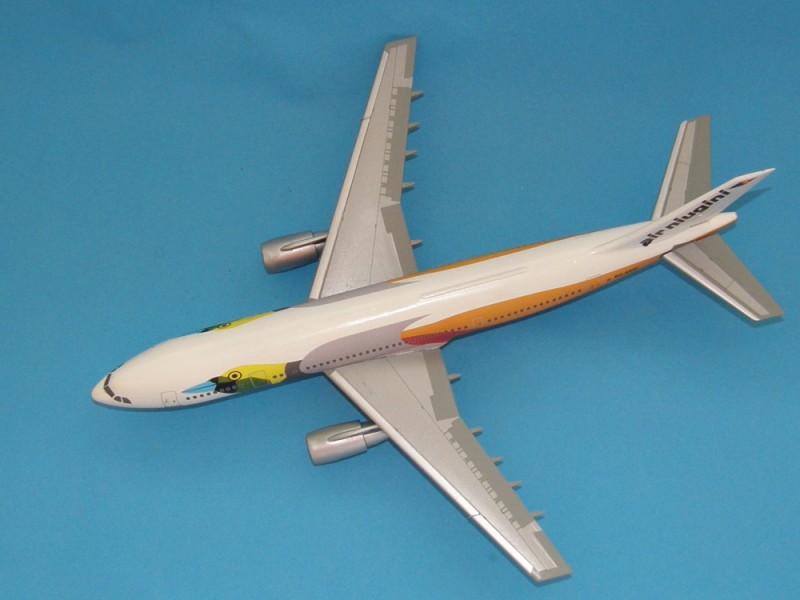
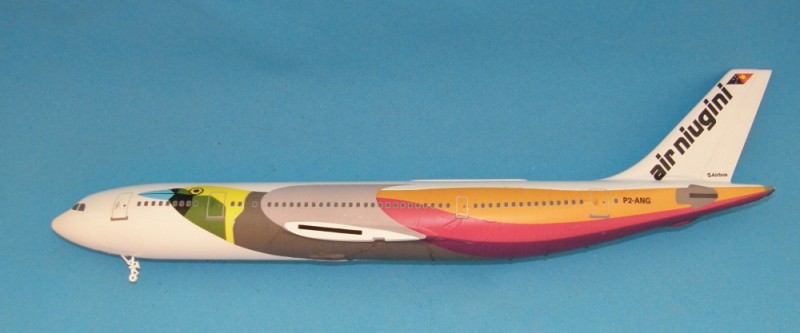
The Bird of Paradise has some plumage now
The decal is huuuuuge, and loves to wrinkle. It's going to take a lot of coaxing to make it settle down and behave itself.
When once you have tasted flight you will walk the Earth with your eyes turned skyward.
For there you have been, and there you will always long to return.
-Leonardo Da Vinci
Western Australia, Australia
Joined: February 11, 2012
KitMaker: 56 posts
AeroScale: 50 posts
Posted: Friday, June 29, 2012 - 05:11 PM UTC
Harrier GR.3 build: The major sub-assemblies came together last night. The fit of the fuselage was HORRIBLE! The fuselage halves were warped, one side had a different cross-sectional profile by about 3mm! Lots of holding and stretching until the glue dried, then lots of sanding. I hope the finish comes up OK.

United States
Joined: December 26, 2008
KitMaker: 288 posts
AeroScale: 195 posts
Posted: Saturday, June 30, 2012 - 03:25 AM UTC
My Hawk is now officially started! Yay! I found the Airwaves PE set for the Italeri kit in my stash and started work on the cockpit. First step is to dress up the cockpit with the PE bits.

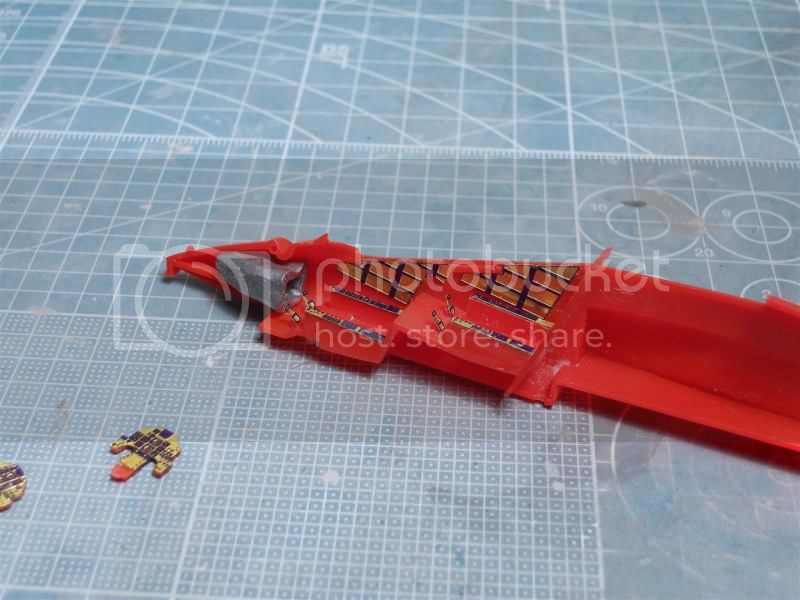
I definitely have taken a dislike to kits with red plastic!
I also squashed a small lead weight and added it in front to keep the kit balanced. I suspect that the Hawk might be a tail sitter otherwise!
This will definitely look a lot better with a few coats of paint.
Have fun modeling!
Mike
United States
Joined: February 01, 2009
KitMaker: 1,233 posts
AeroScale: 663 posts
Posted: Saturday, June 30, 2012 - 03:27 AM UTC
It is a fact that under equal conditions, large-scale battles and whole wars are won by troops which have a strong will for victory, clear goals before them, high moral standards, and devotion to the banner under which they go into battle.
-Georgy Zhukov
Western Australia, Australia
Joined: February 11, 2012
KitMaker: 56 posts
AeroScale: 50 posts
Posted: Saturday, June 30, 2012 - 04:39 AM UTC
Hi Ian,
I'm looking forward to seeing your build. I just finished a 1/72 Airfix Sea Harrier for the Falklands 30th anniversary. I am looking forward to seeing yours coming together.
United States
Joined: February 01, 2009
KitMaker: 1,233 posts
AeroScale: 663 posts
Posted: Saturday, June 30, 2012 - 05:25 AM UTC
Thanks Harry.............looking forward to this one. BAE and Boeing MDD are my all time favorite aviation giants. I have always liked the Airfix 1/48th Harrier too. A little tricky to assemble but a very accurate model, shape-wise. I have decided I will be building "Black 77" in overall Medium Sea Gray from the Falklands.
Regards, Ian

It is a fact that under equal conditions, large-scale battles and whole wars are won by troops which have a strong will for victory, clear goals before them, high moral standards, and devotion to the banner under which they go into battle.
-Georgy Zhukov
Western Australia, Australia
Joined: February 11, 2012
KitMaker: 56 posts
AeroScale: 50 posts
Posted: Sunday, July 01, 2012 - 05:52 PM UTC
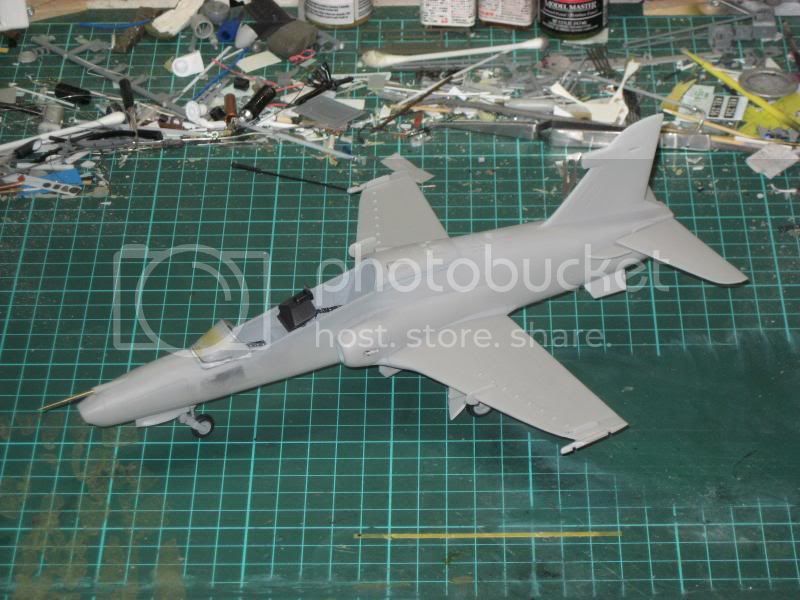
Harrier on a stick! My Harrier GR.3 got an overall coat of Dark Sea Grey last night. The colour was just a shade too dark, so I mixed some white (15-20%) in and gave it a quick overspray to lighten it up a touch.
You can see the join between the port wing and fuselage which has been giving me so much trouble. The wing tab on the kit made the wing sit down about 1 to 1-and-a-half mm. I tried to sand it, but I also tried to preserve the surface detail. I should have just left it - at least it would have been a straight edge, not the glaring problem it is now...

Western Australia, Australia
Joined: February 11, 2012
KitMaker: 56 posts
AeroScale: 50 posts
Posted: Sunday, July 01, 2012 - 08:54 PM UTC
Blue Tack is the masking medium I am using. This is the first camouflage scheme I have attempted with my airbrush. Wish me luck!

Harrier on a stick Mk2: Camouflage applied. Some areas are a bit soft on the edge, but blue-tack masking worked well.

Western Australia, Australia
Joined: May 04, 2012
KitMaker: 60 posts
AeroScale: 43 posts
Posted: Monday, July 02, 2012 - 12:51 AM UTC
Great work for your first attempt. looks realy good. i hate bad fits, i sometimes use pva glue and wipe the excess of with a wet cotton budd or my finger it may take a few goes to fill.i find it works as an alternative to filler that has to be sanded and could remove some of the detail.
United States
Joined: February 01, 2009
KitMaker: 1,233 posts
AeroScale: 663 posts
Posted: Monday, July 02, 2012 - 10:49 AM UTC
Harry, nice camo pattern on the Harrier. The demarcation lines are nice and fine.
Regards, Ian
It is a fact that under equal conditions, large-scale battles and whole wars are won by troops which have a strong will for victory, clear goals before them, high moral standards, and devotion to the banner under which they go into battle.
-Georgy Zhukov
British Columbia, Canada
Joined: September 03, 2009
KitMaker: 6,965 posts
AeroScale: 6,247 posts
Posted: Wednesday, July 04, 2012 - 05:34 AM UTC
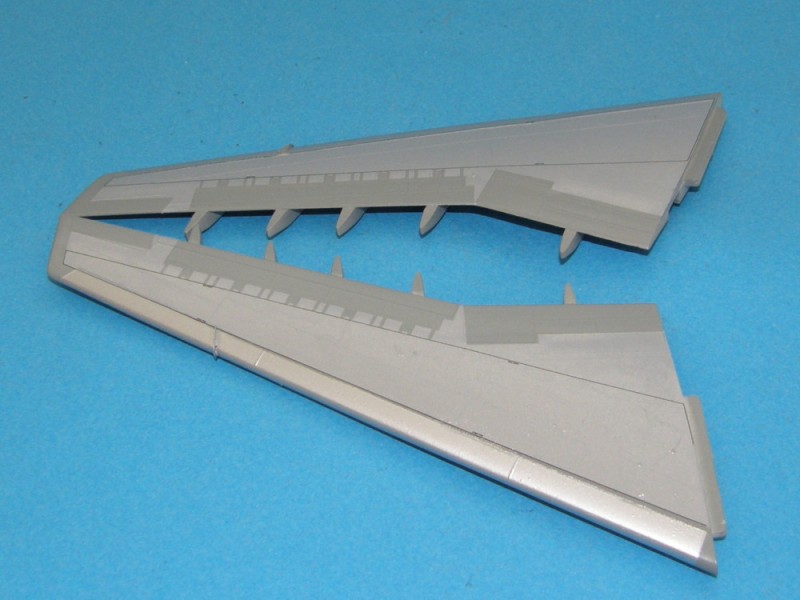
More progress on the Bird of Paradise.
Airfix forgot the A-300B4's wing fences. 30 seconds' work with a razor saw and plastic card:
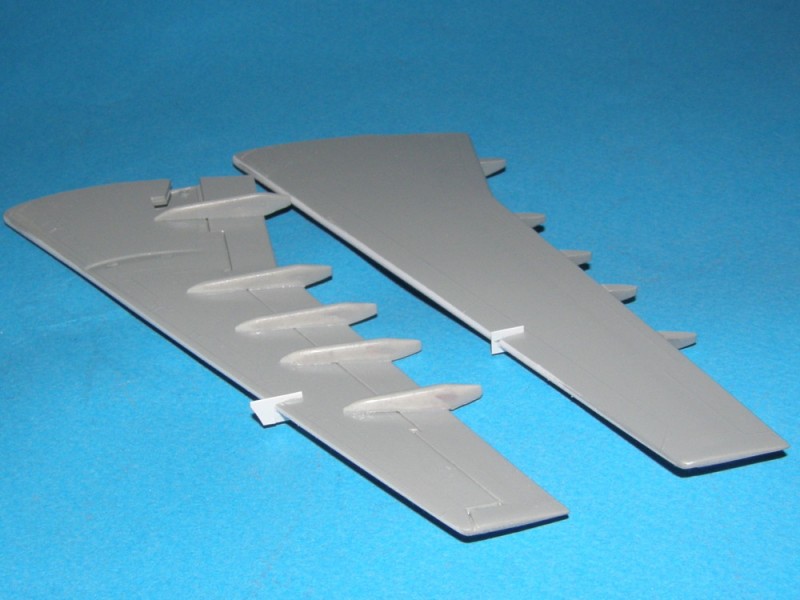
After the glue set I trimed and sanded them to their final shape, then painted the leading edge and applied the Corogard decals. It makes the wings look really professional.
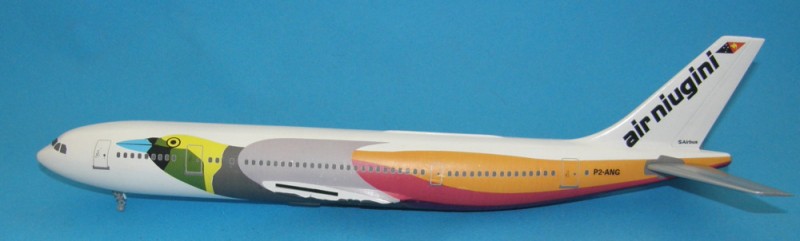
The fuselage and tailplanes
Engines
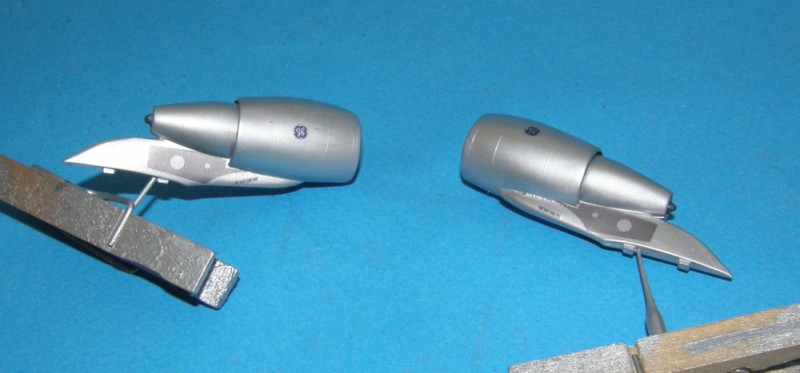
All that remains is the landing gear and final assembly.
When once you have tasted flight you will walk the Earth with your eyes turned skyward.
For there you have been, and there you will always long to return.
-Leonardo Da Vinci
British Columbia, Canada
Joined: September 03, 2009
KitMaker: 6,965 posts
AeroScale: 6,247 posts
Posted: Wednesday, July 04, 2012 - 12:20 PM UTC
When once you have tasted flight you will walk the Earth with your eyes turned skyward.
For there you have been, and there you will always long to return.
-Leonardo Da Vinci
Western Australia, Australia
Joined: February 11, 2012
KitMaker: 56 posts
AeroScale: 50 posts
Posted: Wednesday, July 04, 2012 - 09:57 PM UTC
Nice work @Jessie_C! That's one beautiful piece of work. Hope my final effort is one-tenth as good.
Ontario, Canada
Joined: February 04, 2008
KitMaker: 2,507 posts
AeroScale: 1,814 posts
Posted: Wednesday, July 04, 2012 - 10:33 PM UTC
Good job!
" The Die Hards"
43rd MIDDLESEX REGIMENT
MACHINE GUN CORPS
XXX CORP
The most effective way to do it, is to do it.
- Amelia Earhart