

Air Campaigns
Want to start or join a group build? This is where to start.
Want to start or join a group build? This is where to start.
Hosted by Frederick Boucher, Michael Satin
OFFICIAL: Porco Rosso Campaign

Emeritus

Joined: March 30, 2004
KitMaker: 2,845 posts
AeroScale: 1,564 posts

Posted: Tuesday, February 05, 2013 - 08:48 AM UTC
I'm planning to paint the wing and rudder stripes as well. Could be just me, but the shade of green used on the sheet looks a bit off to me as well.
Emeritus
Joined: March 30, 2004
KitMaker: 2,845 posts
AeroScale: 1,564 posts
Posted: Wednesday, February 06, 2013 - 08:13 AM UTC
Fuselage primed.
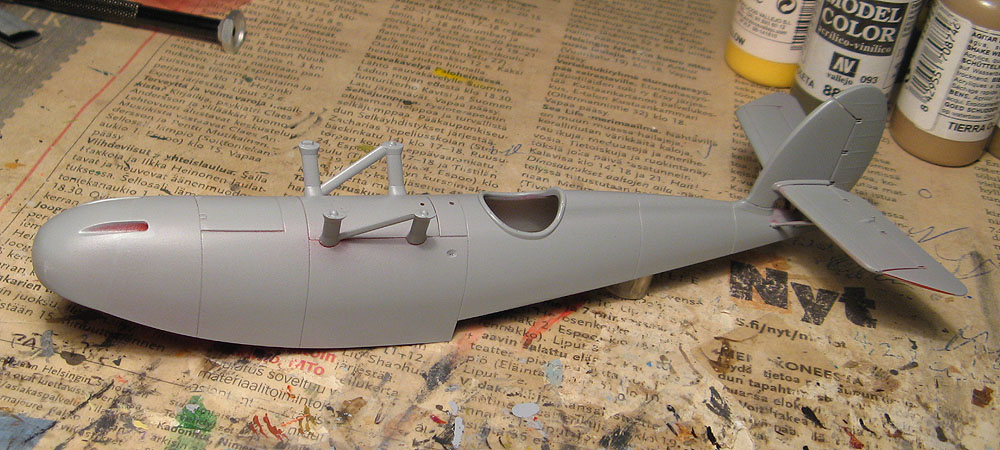
I'll have to get the inside and the white and green fields on the fin painted right away so I can get the red exterior paint on - the spray paint I'm using takes a while to dry completely. The wing is at the same stage, primed and ready for paint.

I'll have to get the inside and the white and green fields on the fin painted right away so I can get the red exterior paint on - the spray paint I'm using takes a while to dry completely. The wing is at the same stage, primed and ready for paint.
raypalmer

Joined: March 29, 2010
KitMaker: 1,151 posts
AeroScale: 985 posts

Posted: Wednesday, February 06, 2013 - 10:44 AM UTC
Quoted Text
I'm planning to paint the wing and rudder stripes as well. Could be just me, but the shade of green used on the sheet
looks a bit off to me as well.
Yes, quite a more garish green in the film i think. I used X-15 "Light Green"

I think "Light Green" is a typo. It's seriously Bright Green.
Emeritus
Joined: March 30, 2004
KitMaker: 2,845 posts
AeroScale: 1,564 posts
Posted: Wednesday, February 06, 2013 - 12:22 PM UTC
Quoted Text
Yes, quite a more garish green in the film i think. I used X-15 "Light Green"
I think "Light Green" is a typo. It's seriously Bright Green.
Thanks for the paint tip!
 Indeed, the color in the film is quite bright, quite close to the one in the Italian flag.
Guess I have to go paint shopping, as I think I don't have a green close to that shade in my collection yet.
Emeritus
Joined: March 30, 2004
KitMaker: 2,845 posts
AeroScale: 1,564 posts
Posted: Saturday, February 09, 2013 - 05:31 AM UTC
Red paint is on. Used some red alkyd spray paint. Worked quite nice, except for some unexplained spots which I'll have to look at when dry. Despite it says it's quick-drying on the can, I've noticed it takes a some time to dry fully.
So, everything went pretty well. Except for the windscreen. Even though I primed everything, I had tested the spray paint beforehand on a piece of styrene sheet, both to check the shade and make sure it doesn't affect the plastic. Turns out the clear plastic used in the kit was different, and the framing took on a coarse texture, like it was hit with Mr. Surfacer or something.
Should have sticked to acrylics and airbrush with this one...
Needless to say, that would be almost impossible to repair Even if it was possible to sand and polish, there's not much material to work with, the part is thin.
I've already sent an email to Finemolds asking if they could help with replacement parts.

North4003

Joined: August 01, 2012
KitMaker: 960 posts
AeroScale: 391 posts
Posted: Sunday, February 10, 2013 - 05:24 PM UTC
My Testors Supermarine S6B is in the sanding stage now. I need to drill holes and add the rigging next.


JClapp

#259

Joined: October 23, 2011
KitMaker: 2,265 posts
AeroScale: 1,715 posts

Posted: Tuesday, February 12, 2013 - 08:20 PM UTC
Ive painted the Pirates plane,
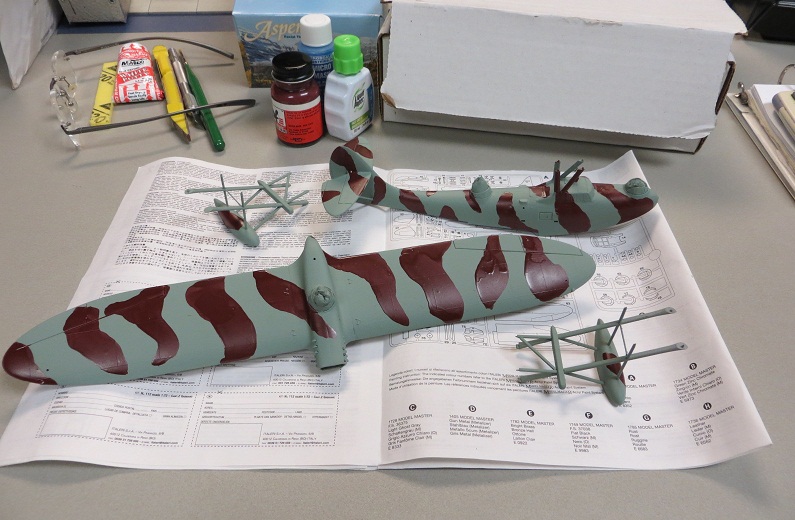
for good or ill. I chose some rather amusing colors, pale green and Tuscan Red. The brush painted red looks pretty brush painted, not my forte'.
for good or ill. I chose some rather amusing colors, pale green and Tuscan Red. The brush painted red looks pretty brush painted, not my forte'.

Bink123
Joined: June 23, 2008
KitMaker: 414 posts
AeroScale: 364 posts
Posted: Wednesday, February 13, 2013 - 01:16 AM UTC
Looking good.
Progress on my craft is coming along slowly - my workshop is in the basement where it is inhospitably cool some days. I willbe able to finish in time.
Progress on my craft is coming along slowly - my workshop is in the basement where it is inhospitably cool some days. I willbe able to finish in time.
JClapp
#259
Joined: October 23, 2011
KitMaker: 2,265 posts
AeroScale: 1,715 posts
Posted: Wednesday, February 13, 2013 - 07:33 PM UTC
a few layers of clear varnish improves matters, and I made up some skull decals.


that's all Ill be able to do for this week. A number of detail parts to mount, and final assembly remaining.
One last thing -Pulled the masks off, looks pretty good.

that's all Ill be able to do for this week. A number of detail parts to mount, and final assembly remaining.
One last thing -Pulled the masks off, looks pretty good.
raypalmer
Joined: March 29, 2010
KitMaker: 1,151 posts
AeroScale: 985 posts
Posted: Wednesday, February 13, 2013 - 11:37 PM UTC
Jonathan that looks great. You really tackled a hard one. Once the requisite layer of pirate grime is weathered on there it'll be the coolest build of the year!
Emeritus
Joined: March 30, 2004
KitMaker: 2,845 posts
AeroScale: 1,564 posts
Posted: Thursday, February 14, 2013 - 10:15 AM UTC
Looking nice. Good job on those skull decals! Did you draw the on a computer and print them?
My build's coming along pretty well. Got the windscreen saved! I brushed a few coats of Mr. Surfacer on the framing, sanded it as carefully as I could in order not to disturb the masking, then applied the spray can red again. Not adverse reactions this time.
Got the fuselage bottom and cockpit components primed. I'm just a bit worried over the campaign deadline looming ahead. It's only two weeks away. And it's not painting or assembly, it's the drying time of the red spray paint I'm using...
My build's coming along pretty well. Got the windscreen saved!
I brushed a few coats of Mr. Surfacer on the framing, sanded it as carefully as I could in order not to disturb the masking, then applied the spray can red again. Not adverse reactions this time.Got the fuselage bottom and cockpit components primed. I'm just a bit worried over the campaign deadline looming ahead. It's only two weeks away. And it's not painting or assembly, it's the drying time of the red spray paint I'm using...
JClapp
#259
Joined: October 23, 2011
KitMaker: 2,265 posts
AeroScale: 1,715 posts
Posted: Thursday, February 14, 2013 - 11:21 AM UTC
Quoted Text
Looking nice. Good job on those skull decals! Did you draw the on a computer and print them?
That's right. I made the design in MSPaint, using just circles and lines. Printed on white decal paper, sealed down with Krylon clear gloss enamel. From concept to applying the finished decals, maybe 1 hour.
Quoted Text
... I'm just a bit worried over the campaign deadline looming ahead. It's only two weeks away. And it's not painting or assembly, it's the drying time of the red spray paint I'm using...
Dont tell us that, you must finish! What type of paint is it! I dont like it when paint is not dry by 24 hours..

Emeritus
Joined: March 30, 2004
KitMaker: 2,845 posts
AeroScale: 1,564 posts
Posted: Thursday, February 14, 2013 - 12:35 PM UTC
Quoted Text
Dont tell us that, you must finish! What type of paint is it! I dont like it when paint is not dry by 24 hours..
It's an alkyd paint from Maston.

The can says a new coat should be sprayed within 15 minutes, or after 7 days. My guess is that 7 days is to ensure the first coat is completely cured to prevent any funny stuff happening if a still-a-bit-fresh coat is trapped under a new one.
Seems pretty similar to regular hobby enamels, starting from the smell. Also in that their flat paints dry quicker than gloss ones. Not that I sprayed too heavily (I hope), but rather to have a an even wet coat.
yeah, I think I should have sticked to airbrushing some acrylic red, then brushing Future for the gloss coat. There I was again, trying to save time, only ending up spending more waiting...
A kind of same thing happened with the white for the rudder and wing markings: I thought I could save time by hand-brushing the white. There I was, brushing the third coat of white and cussing at the brush marks, increasing coat thickness, and the paint never wanting to cover properly. I stripped the white and sat down to airbrush it on. --> Even coverage and smooth coat in one sitting. Even though that airbrushing session took longer than hand brushing one coat, it's much quicker than trying to get a good coverage by hand brushing.
Note to self: no hand brushing white, it doesn't work (except for the occasional little detail).
raypalmer
Joined: March 29, 2010
KitMaker: 1,151 posts
AeroScale: 985 posts
Posted: Saturday, February 16, 2013 - 06:39 PM UTC
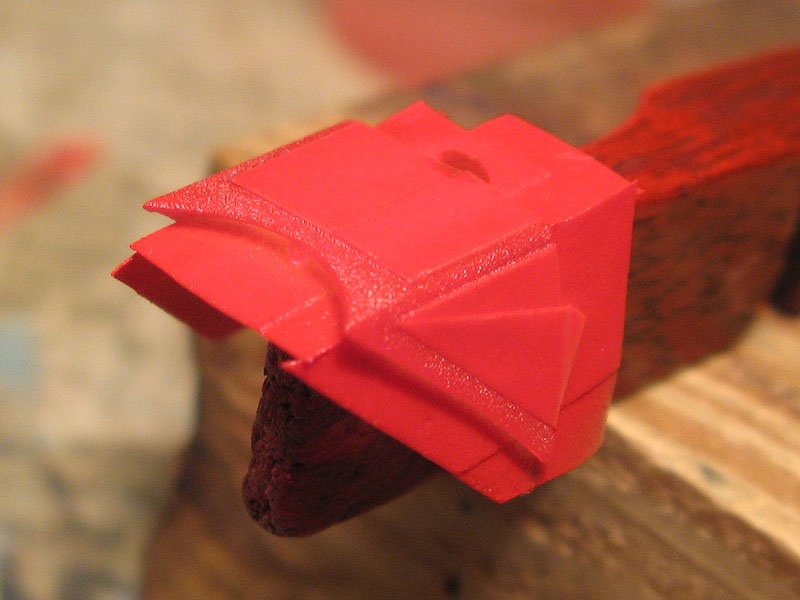
Eetu, my luck is better, but not much. I just primed the prop and spinner and accidentally dusted the almost finished dolly with Tamiya Surface Primer. Hopefully it'll budge or blend in...
On the airframe itself I'm basically through what weathering is to be done, I was touching some spots of red with a pinpoint brush when I realized I had gunmetal paint on my thumb and had smeared the belly... I had to put it down and walk away at that point. Would've had the glosscote on tonight ready for decals tomorrow otherwise!
On the airframe itself I'm basically through what weathering is to be done, I was touching some spots of red with a pinpoint brush when I realized I had gunmetal paint on my thumb and had smeared the belly... I had to put it down and walk away at that point. Would've had the glosscote on tonight ready for decals tomorrow otherwise!

Jessie_C

Joined: September 03, 2009
KitMaker: 6,965 posts
AeroScale: 6,247 posts

Posted: Sunday, February 17, 2013 - 04:32 AM UTC
Quoted Text
Eetu, my luck is better, but not much. I just primed the prop and spinner and accidentally dusted the almost finished dolly with Tamiya Surface Primer. Hopefully it'll budge or blend in...
That's alright, it's just rust. Nobody expects a beaching dolly to be showroom clean, do they?
JClapp
#259
Joined: October 23, 2011
KitMaker: 2,265 posts
AeroScale: 1,715 posts
Posted: Sunday, February 17, 2013 - 07:48 AM UTC
I gave mine a thick coat of oxide red

There is something odd and wonderful about a parasol wing

There is something odd and wonderful about a parasol wing
Emeritus
Joined: March 30, 2004
KitMaker: 2,845 posts
AeroScale: 1,564 posts
Posted: Sunday, February 17, 2013 - 09:17 AM UTC
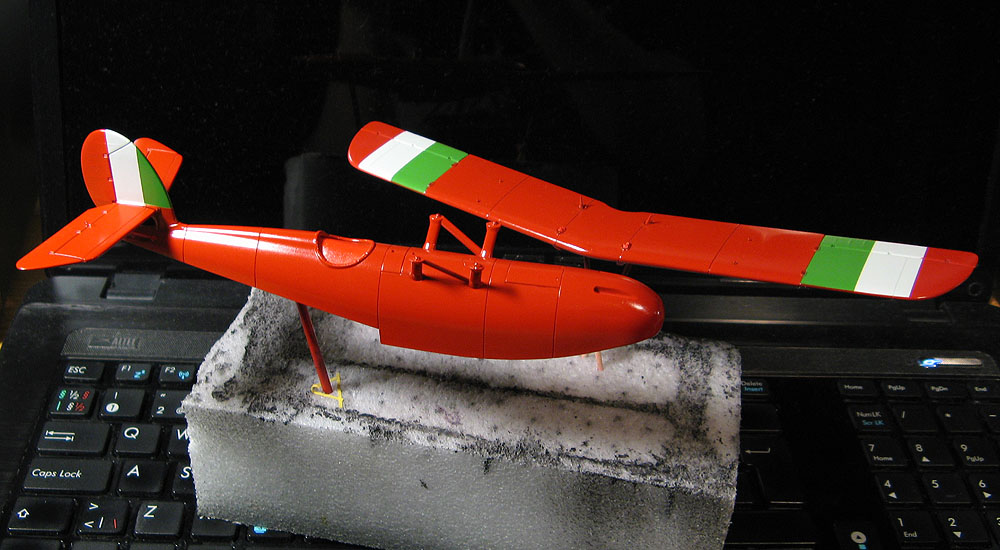
I think the red should about dry by now. Looking like this at the moment.
JClapp
#259
Joined: October 23, 2011
KitMaker: 2,265 posts
AeroScale: 1,715 posts
Posted: Sunday, February 17, 2013 - 09:35 AM UTC
stunning! 
raypalmer
Joined: March 29, 2010
KitMaker: 1,151 posts
AeroScale: 985 posts
Posted: Sunday, February 17, 2013 - 06:16 PM UTC
Eetu's method is superior to mine. He was wise enough to leave the windscreen off, attaching mine has caused severe headaches, almost impossible to unmask it in place...
Anyway, I'm not going to apply any further decals now that the crests are on the tails. The aircraft generally appears bereft of fine print markings in the film and I want to stick to that.
Nearly done, touchups required around the windscreen, one or two more glosscotes, one dullcote for the dolly. And Robert's your mother's brother.


The cellular takes god awful photos. I'll take proper ones when I'm done, I promise it doesn't look that grim in person.
Anyway, I'm not going to apply any further decals now that the crests are on the tails. The aircraft generally appears bereft of fine print markings in the film and I want to stick to that.
Nearly done, touchups required around the windscreen, one or two more glosscotes, one dullcote for the dolly. And Robert's your mother's brother.
The cellular takes god awful photos. I'll take proper ones when I'm done, I promise it doesn't look that grim in person.
JClapp
#259
Joined: October 23, 2011
KitMaker: 2,265 posts
AeroScale: 1,715 posts
Posted: Monday, February 18, 2013 - 02:05 AM UTC
Richard that looks great !

I mounted the floats on Gabbiano. That could have been a show stopper, but I have to say this kit went together very well.
look at all that drag.

Close to finished. still have to mount the guns in the turrets, and maybe locates some figures to man them.
I mounted the floats on Gabbiano. That could have been a show stopper, but I have to say this kit went together very well.
look at all that drag.
Close to finished. still have to mount the guns in the turrets, and maybe locates some figures to man them.
raypalmer
Joined: March 29, 2010
KitMaker: 1,151 posts
AeroScale: 985 posts
Posted: Monday, February 18, 2013 - 04:14 PM UTC
Well. All that remains is a gloss Cote on the underside, the gun sight and the exhausts. Finished tomorrow maybe. 
raypalmer
Joined: March 29, 2010
KitMaker: 1,151 posts
AeroScale: 985 posts
Posted: Tuesday, February 19, 2013 - 05:12 AM UTC
Done! Can't figure out how to work the gallery though.


JClapp
#259
Joined: October 23, 2011
KitMaker: 2,265 posts
AeroScale: 1,715 posts
Posted: Tuesday, February 19, 2013 - 05:39 AM UTC
Bellissima !
regarding the gallery, you probobly have to log in again when the gallery page loads, something to do with cookies or whatever. then you'll get the upload photos menu item in the upper right. find your way to the aeroscale > campaigns > 2012 campaigns > porco rosso . then click on upload photos and youll get the browse your hard drive page.
regarding the gallery, you probobly have to log in again when the gallery page loads, something to do with cookies or whatever. then you'll get the upload photos menu item in the upper right. find your way to the aeroscale > campaigns > 2012 campaigns > porco rosso . then click on upload photos and youll get the browse your hard drive page.
Removed by original poster on 02/22/13 - 14:10:06 (GMT).
Removed by original poster on 02/22/13 - 14:11:30 (GMT).
 |

WEB HOSTING BY


Copyright ©2021 AeroScale and Kitmaker Network, a subsidiary of Silver Star Enterprises
All Rights Reserved. Please read our Conditions of Use and Privacy Policy.
All Rights Reserved. Please read our Conditions of Use and Privacy Policy.