

The seat is looking real good. I concur that a lot of those details won't be visible to the viewer once the cockpit is enclosed within the fuselage. Still, as long as you know you added it, it's worth the time & effort.
Joel
Hosted by Rowan Baylis
1:32 Revell P-51B "BIG MAC Junior"
Joel_W

Joined: December 04, 2010
KitMaker: 11,666 posts
AeroScale: 7,410 posts
Posted: Tuesday, June 25, 2013 - 01:51 AM UTC


FlorinM

Joined: August 01, 2011
KitMaker: 385 posts
AeroScale: 173 posts
Posted: Tuesday, October 22, 2013 - 09:20 PM UTC
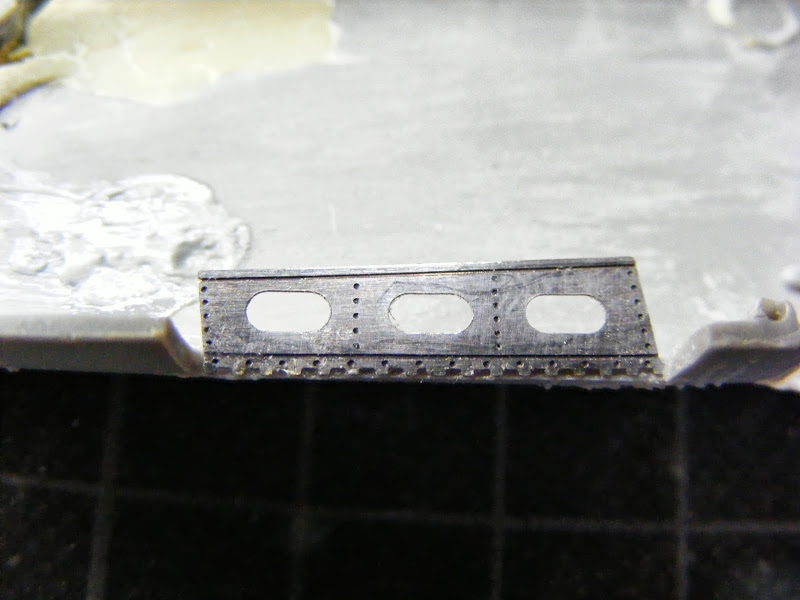
Moving one step closer to gluing the fuselage halves together and starting the scribing work: the tail wheel well has received its PE walls, and after painting chromate yellow these will receive the olive drab rectangular felt covers:
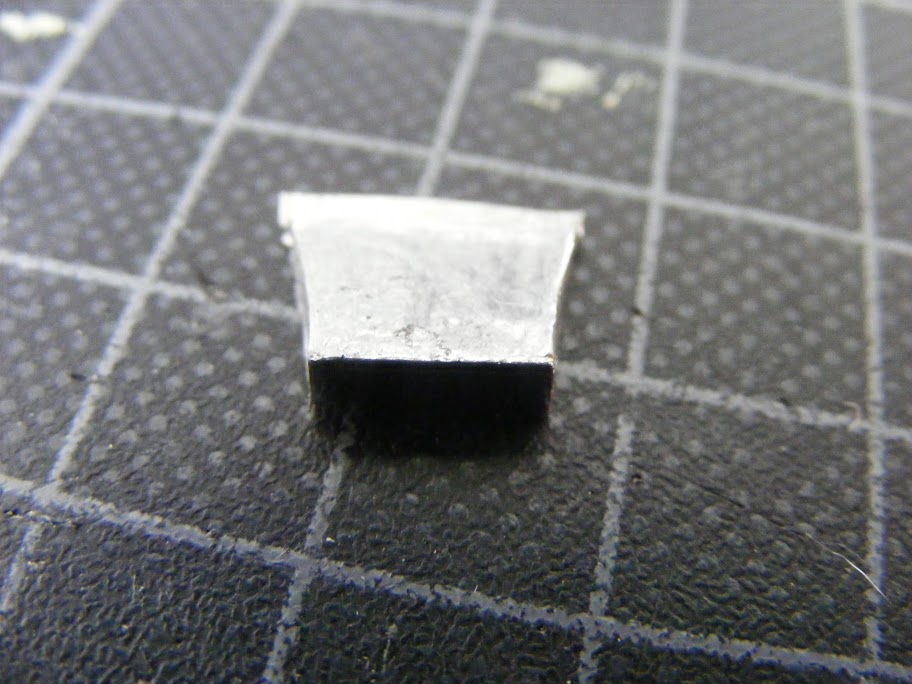
And the gear itself now has its boot, made from thick aluminum foil:
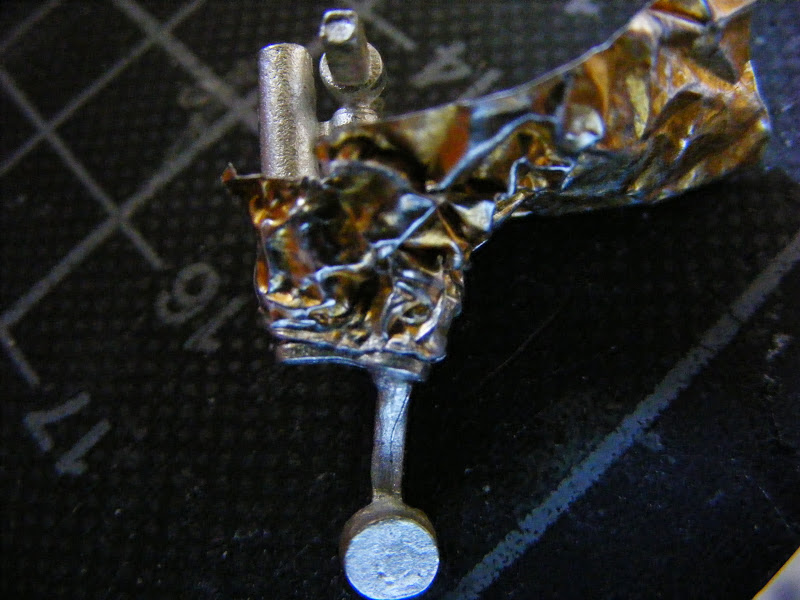

And the gear itself now has its boot, made from thick aluminum foil:
FlorinM
Joined: August 01, 2011
KitMaker: 385 posts
AeroScale: 173 posts
Posted: Thursday, October 24, 2013 - 11:57 PM UTC
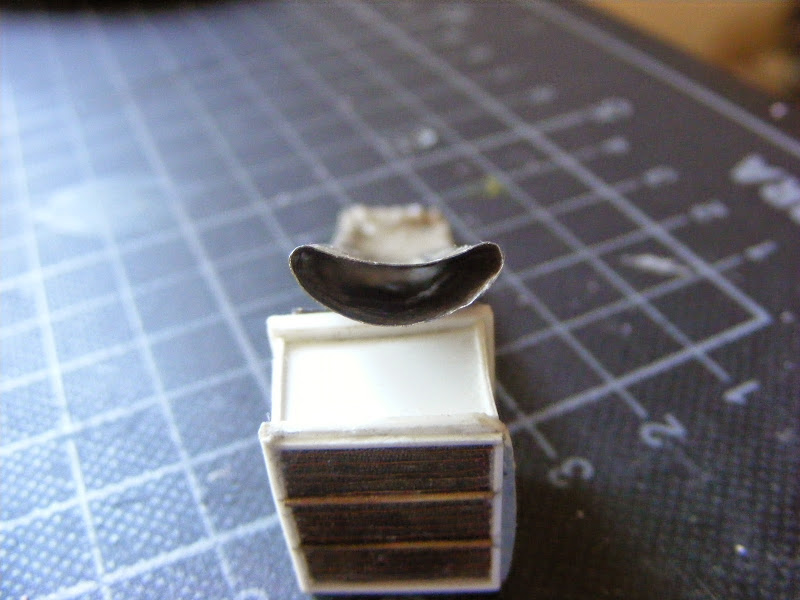
Update on the canvas boot: the material looked too stiff and the wrinkles were too jagged, so I used it as an armature for a paper-mache version:

Joel_W
Joined: December 04, 2010
KitMaker: 11,666 posts
AeroScale: 7,410 posts
Posted: Saturday, October 26, 2013 - 02:04 AM UTC
Florin, A really a good choice. the paper Mache version looks a lot more natural. Should really look good with some paint and a little weathering.
Joel
Joel
FlorinM
Joined: August 01, 2011
KitMaker: 385 posts
AeroScale: 173 posts
Posted: Saturday, October 26, 2013 - 03:03 AM UTC
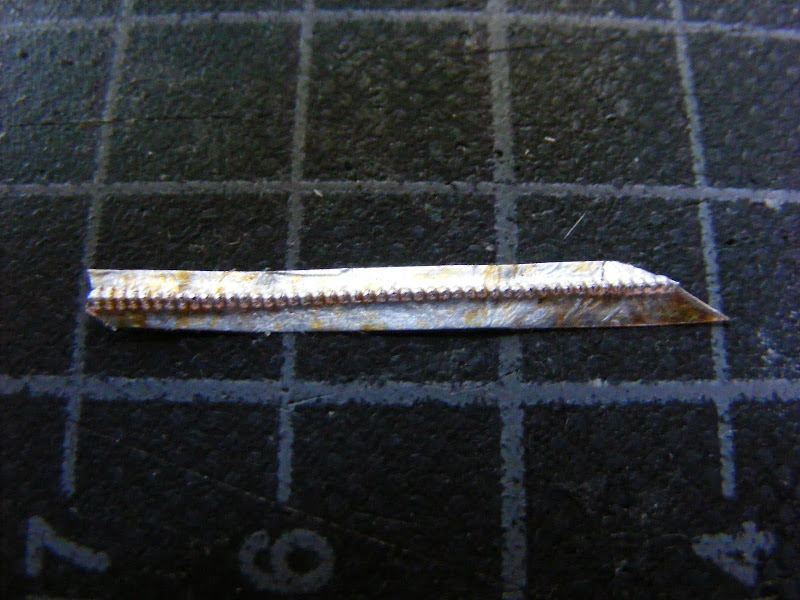
Glad you like it! Now to add the zipper running down the middle.
FlorinM
Joined: August 01, 2011
KitMaker: 385 posts
AeroScale: 173 posts
Posted: Tuesday, October 29, 2013 - 01:00 AM UTC
Canvas boot, version number three, somewhere between too many wrinkles and almost none:

...and the zipper would look like this:
...and the zipper would look like this:

JPTRR

#051

Joined: December 21, 2002
KitMaker: 7,772 posts
AeroScale: 3,175 posts
Posted: Tuesday, October 29, 2013 - 02:18 AM UTC
Quoted Text
Can anybody please tell me if the floor was painted black just like that of the D version or was it lacquered
The B/C cockpits (sides, bulkheads and firewall, anti-glare and seat) were Dull Dark Green, a dark green color. The cockpit floor was left natural metal although I don't know if it was laquered. Dana Bell wrote that some of the seats were painted Bronze Green. I don't recall the date or tech order yet sometime in mid-1944 maintenance manuals specified that the cockpit of all models be painted USAAF "Interior Green", a color less yellow than my beloved zinc chromate green. That color was to extend from the instrument panel to the rear of the canopy.

I love finding new documentation and information on this subject! It has been established that Curtiss had a local paint shop mix up their idea of the official Interior Green that has widely been shown to be a bit browner than DoW's specs; Northrop's P-61 had some color referred to as 'Northrop Cockpit Green'. Most USAAC/USAAF crew areas were 'bronze green, dull dark green', and 'interior green'. I read an article that lists the manufacturers and their variances in practice. It's a lot of fun.
Model Master had a set of six colors: US WWII Cockpit colors with many of the above. I used it on my P-51B: https://aeroscale.kitmaker.net/forums/52188&page=1&ord=0


JPTRR
#051
Joined: December 21, 2002
KitMaker: 7,772 posts
AeroScale: 3,175 posts
Posted: Tuesday, October 29, 2013 - 02:21 AM UTC
Uh-oh, I just noticed that I am months late posting about the colors! 

FlorinM
Joined: August 01, 2011
KitMaker: 385 posts
AeroScale: 173 posts
Posted: Tuesday, October 29, 2013 - 03:07 AM UTC
No problem, haven't reached the paint stage yet. Any information is more than welcome, even more so since my area of expertise is the Luftwaffe!
FlorinM
Joined: August 01, 2011
KitMaker: 385 posts
AeroScale: 173 posts
Posted: Thursday, January 23, 2014 - 04:11 AM UTC
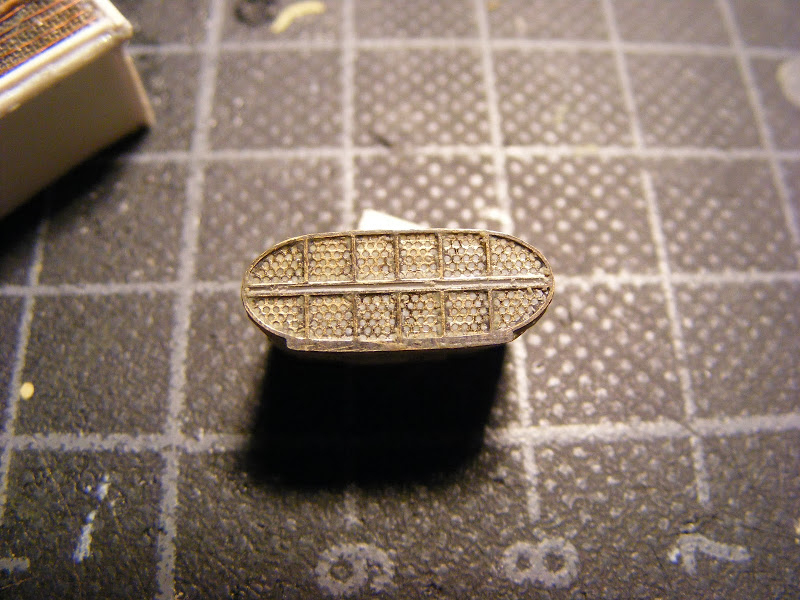
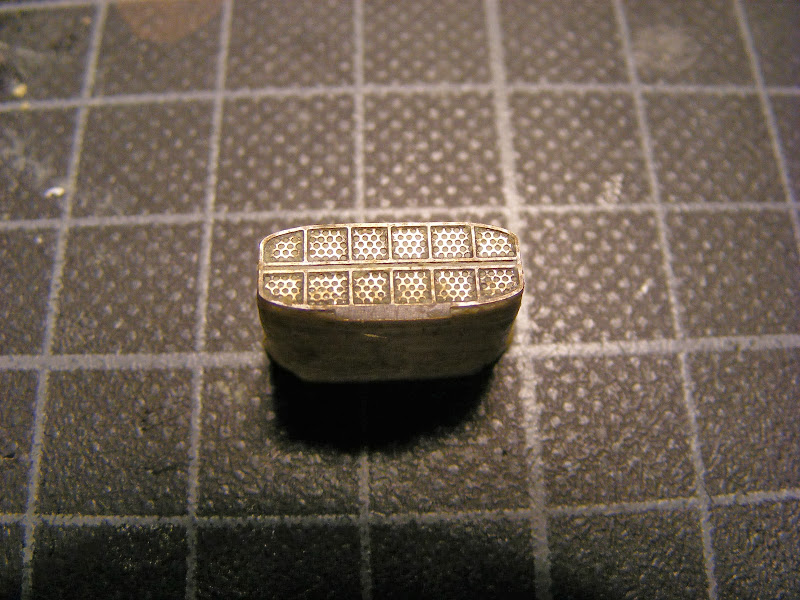
The kit lacks any internal detail inside the air scoop, so an oil cooling unit was built from PE, styrene and Milliput.
The ovoid in front...
... transitions to a more rectangular face
The ovoid in front...
... transitions to a more rectangular face
Joel_W
Joined: December 04, 2010
KitMaker: 11,666 posts
AeroScale: 7,410 posts
Posted: Thursday, January 23, 2014 - 06:28 AM UTC
Florin, Impressive PE work on that cooler. Looks like it was easy, but from personal experience I know it was in fact far from that.
Joel
Joel
FlorinM
Joined: August 01, 2011
KitMaker: 385 posts
AeroScale: 173 posts
Posted: Friday, April 25, 2014 - 09:20 PM UTC
The kit, being very old, does not provide the under chin duct for the carburetor, so one was replicated using thin aluminum sheet. The shape of the smile (slightly off in the kit) looks better now:
FlorinM
Joined: August 01, 2011
KitMaker: 385 posts
AeroScale: 173 posts
Posted: Wednesday, May 07, 2014 - 11:35 PM UTC
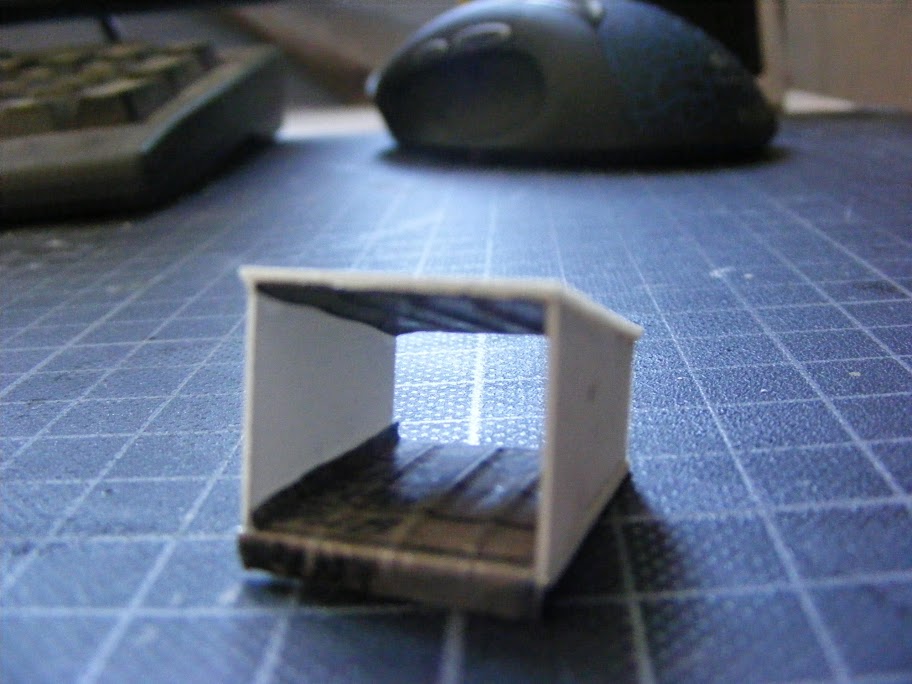
One more step towards closing up the fuselage: the tunnel for the air cooler (seen from the rear) is now completed:
Joel_W
Joined: December 04, 2010
KitMaker: 11,666 posts
AeroScale: 7,410 posts
Posted: Thursday, May 08, 2014 - 02:28 AM UTC
Florin,
I really like your air duct. If the kit doesn't have one that you could use as a former, did you have to make a former 1st?
Joel
I really like your air duct. If the kit doesn't have one that you could use as a former, did you have to make a former 1st?
Joel
FlorinM
Joined: August 01, 2011
KitMaker: 385 posts
AeroScale: 173 posts
Posted: Thursday, May 08, 2014 - 03:30 AM UTC
As interior components the kit only has seven parts: four that comprise the engine and three for the cockpit. All were thrown away, engine not needed and cockpit replaced by the Aires set. So no template, nothing to use as a guide, just scale drawings and photographic references. The kit is ancient, being first released 45 years ago, don't judge it too hard.
Did a dry fit test of the fuselage halves with all the parts in their places to see how everything goes together. Fit is perfect, but not much can be seen by looking through the air scoop. Maybe this is why they did not bother with this area...
Did a dry fit test of the fuselage halves with all the parts in their places to see how everything goes together. Fit is perfect, but not much can be seen by looking through the air scoop. Maybe this is why they did not bother with this area...
FlorinM
Joined: August 01, 2011
KitMaker: 385 posts
AeroScale: 173 posts
Posted: Friday, June 06, 2014 - 12:42 AM UTC
Thin aluminum sheet was used to replicate the flap for the oil cooler:
FlorinM
Joined: August 01, 2011
KitMaker: 385 posts
AeroScale: 173 posts
Posted: Sunday, June 08, 2014 - 01:13 AM UTC
The bump in the cooling flap indicates the presence of the actuating rod:

FlorinM
Joined: August 01, 2011
KitMaker: 385 posts
AeroScale: 173 posts
Posted: Friday, October 17, 2014 - 04:51 AM UTC
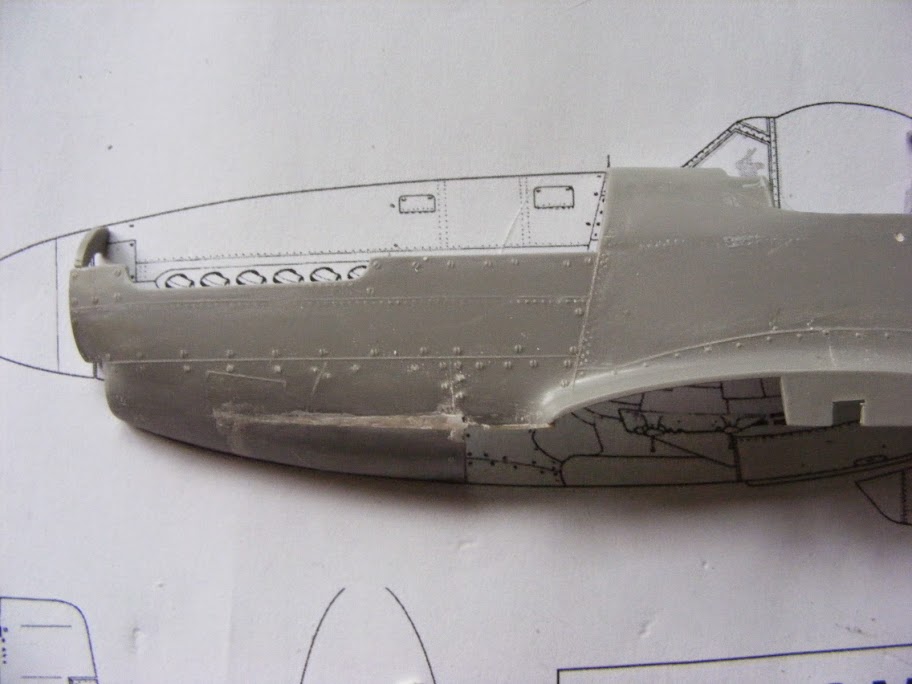
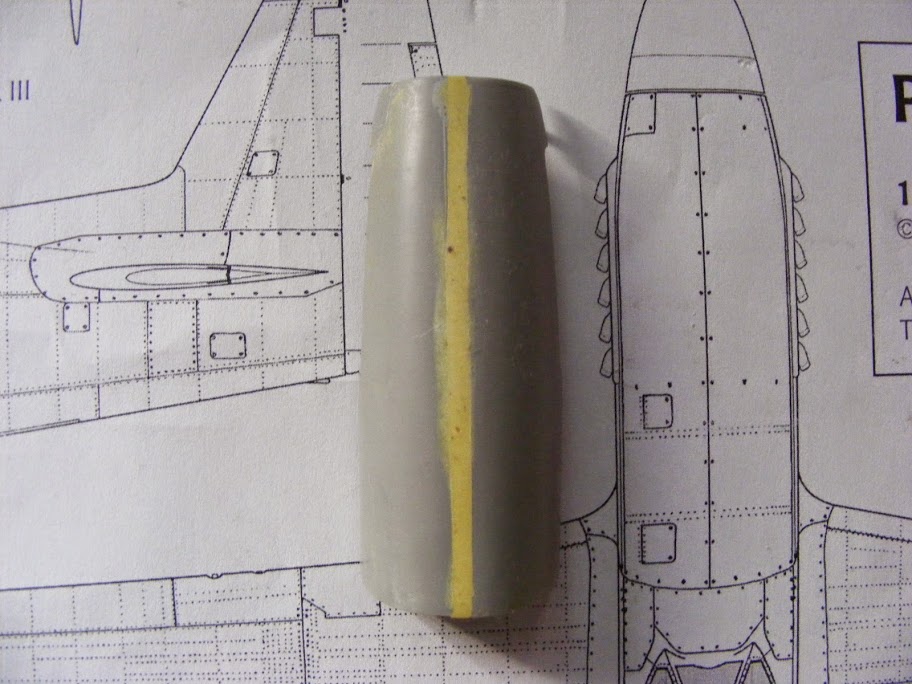
All reviews of this kit claim that the nose is hopelessly wrong and suggest cutting it off and replacing it with the one from a Hasegawa P-51D, ignoring the fact that in real life the profile of the upper cowling on the B & D are different and the firewall on the B is approximately 2.5 cm taller than the D.
The nose can actually be corrected, and it's not that complicated. First cut 1.5 millimeters upward following the edge of the cowling, then do another cut, 3 centimeters long at a right angle, and finally a smaller one.
Insert a 1.5 millimeter spacer at the rear and fill in the resulted triangle.
An overlap on scale drawings looks like this:
FlorinM
Joined: August 01, 2011
KitMaker: 385 posts
AeroScale: 173 posts
Posted: Saturday, October 25, 2014 - 07:37 PM UTC
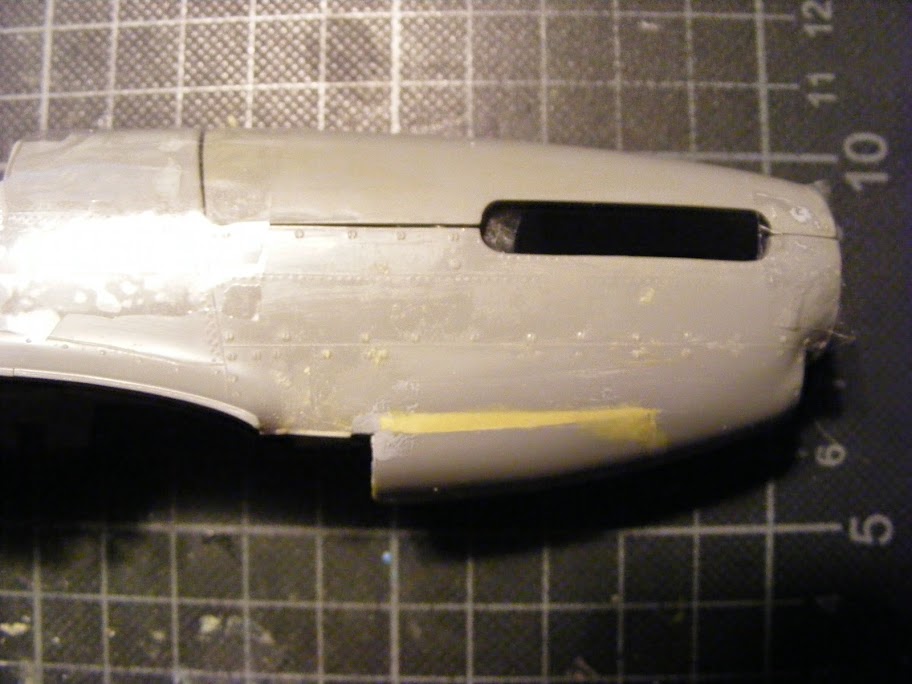
The cowling that was corrected at the very beginning, also compares favorably to the line drawings:

Joel_W
Joined: December 04, 2010
KitMaker: 11,666 posts
AeroScale: 7,410 posts
Posted: Sunday, October 26, 2014 - 02:36 AM UTC
Florin,
A most impressive correction. Looks fantastic.
Joel
A most impressive correction. Looks fantastic.
Joel
FlorinM
Joined: August 01, 2011
KitMaker: 385 posts
AeroScale: 173 posts
Posted: Saturday, November 01, 2014 - 06:10 AM UTC
Cleaning up all the raised details from the fuselage halves has revealed that the plastic is of excellent quality, actually one of the best the author of this build blog has worked on.
It was a good opportunity for a dry fit test:
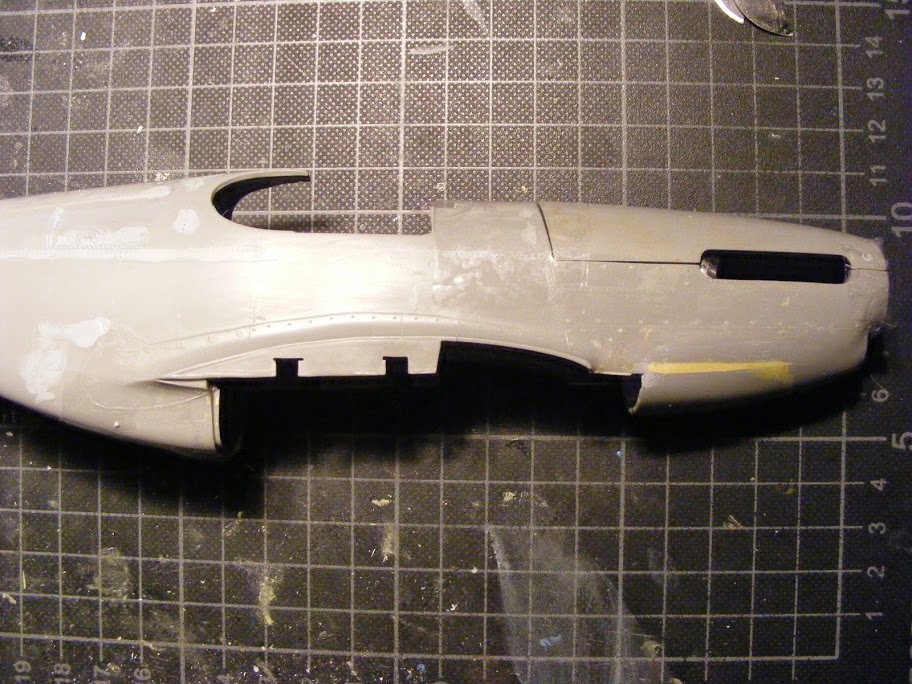
The nose in its corrected form:
It was a good opportunity for a dry fit test:
The nose in its corrected form:
Joel_W
Joined: December 04, 2010
KitMaker: 11,666 posts
AeroScale: 7,410 posts
Posted: Saturday, November 01, 2014 - 09:40 AM UTC
The fit of the nose section is just about perfect. Most impressive to say the least. You make it look so easy, and I know it's just the opposite.
Joel
Joel
FlorinM
Joined: August 01, 2011
KitMaker: 385 posts
AeroScale: 173 posts
Posted: Saturday, November 01, 2014 - 08:24 PM UTC
Just taming this Mustang, that's all...
FlorinM
Joined: August 01, 2011
KitMaker: 385 posts
AeroScale: 173 posts
Posted: Monday, November 03, 2014 - 08:49 PM UTC
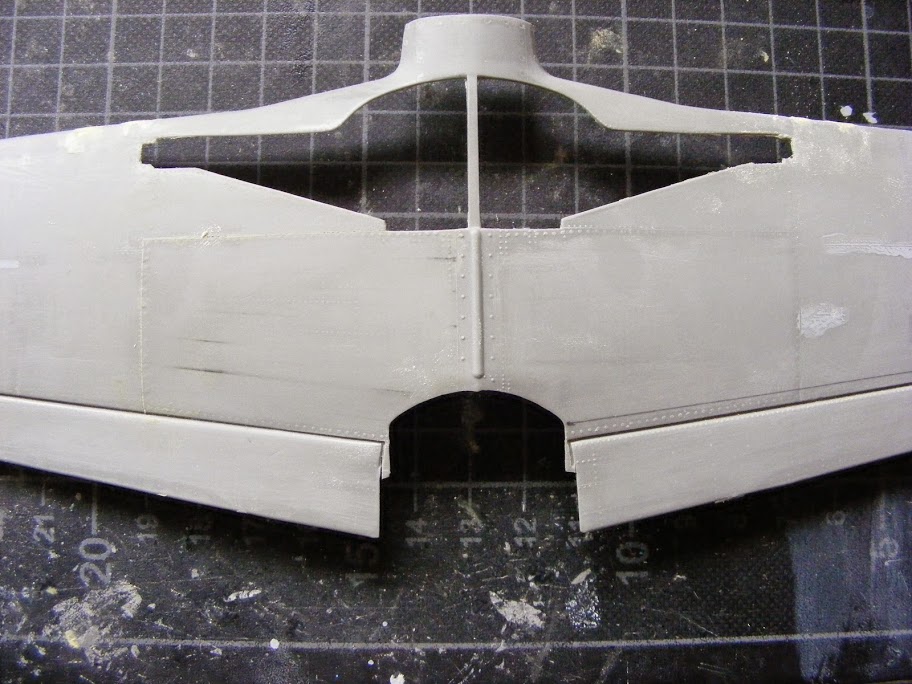
The landing gear bay, integral to the bottom of the wing, was removed as it was too shallow.Fitting the Aires bay won't be easy, because it has been designed for the wrong wing profile of the Trumpeter kit. The wing was cleaned up and the gun ports (wrong size and position) were filled in with some Milliput, in preparation for the rescribing of the details.
Joel_W
Joined: December 04, 2010
KitMaker: 11,666 posts
AeroScale: 7,410 posts
Posted: Tuesday, November 04, 2014 - 02:30 AM UTC
Florin,
Take plenty of pictures of the process to get the wheels wells to correctly fit. The prep work looks perfect, which is a big plus.
Joel
Take plenty of pictures of the process to get the wheels wells to correctly fit. The prep work looks perfect, which is a big plus.
Joel
 |

WEB HOSTING BY


Copyright ©2021 AeroScale and Kitmaker Network, a subsidiary of Silver Star Enterprises
All Rights Reserved. Please read our Conditions of Use and Privacy Policy.
All Rights Reserved. Please read our Conditions of Use and Privacy Policy.