

Early Aviation
Discuss World War I and the early years of aviation thru 1934.
Discuss World War I and the early years of aviation thru 1934.
Hosted by Jim Starkweather
1:32 Roden Siemens Schuckert D.III - early

russamotto

Joined: December 14, 2007
KitMaker: 3,389 posts
AeroScale: 375 posts

Posted: Saturday, March 14, 2015 - 06:57 PM UTC
I've been tracking this also. Amazing work and very well described for those who wish to follow.

JackFlash
Joined: January 25, 2004
KitMaker: 11,669 posts
AeroScale: 11,011 posts
Posted: Saturday, March 14, 2015 - 11:35 PM UTC
Thanks Terri & Russ.
JackFlash
Joined: January 25, 2004
KitMaker: 11,669 posts
AeroScale: 11,011 posts
Posted: Tuesday, March 17, 2015 - 11:49 AM UTC
Working here on kit motor mods. The kit motor fits under the kit cowling. But if you use the Loon cowling you will have to take 1/16" off the top of the tappets. Also I "twist" the push rod stems so they are slightly off set. Unless you cut them free and reposition them entirely this is the best choice.

JackFlash
Joined: January 25, 2004
KitMaker: 11,669 posts
AeroScale: 11,011 posts
Posted: Sunday, March 22, 2015 - 05:53 PM UTC
Early production build needing some gauges, and the cockpit coaming. Maybe a facade for the fuel tank behind the firewall. There should be tubes for the spent shells as well.


Removed by original poster on 03/28/15 - 04:59:19 (GMT).
JackFlash
Joined: January 25, 2004
KitMaker: 11,669 posts
AeroScale: 11,011 posts
Posted: Friday, March 27, 2015 - 10:35 PM UTC
The actual firewall could be noted as coming in 2 parts.
1. the wall behind the motor.
2. The tray below the center of the main wall that kept the rotary exhaust out of the interior of the cockpit.
The cooling holes in the main wall were designed for air flow cooling the cylinders. Since the exhaust was set at the 4,5, & 6 O'clock positions the vented chin cowl was of course to spill the exhaust under the belly of the fuselage. The oil / main fuel & reserve tanks were kept from the build up of heat off the motor by the circulating air. The image below will illustrate this.

I have seen one reserve tank for sure and am suspicious there was another. One for fuel, one for oil. The main tank was internally divided for fuel & oil.
1. the wall behind the motor.
2. The tray below the center of the main wall that kept the rotary exhaust out of the interior of the cockpit.
The cooling holes in the main wall were designed for air flow cooling the cylinders. Since the exhaust was set at the 4,5, & 6 O'clock positions the vented chin cowl was of course to spill the exhaust under the belly of the fuselage. The oil / main fuel & reserve tanks were kept from the build up of heat off the motor by the circulating air. The image below will illustrate this.
I have seen one reserve tank for sure and am suspicious there was another. One for fuel, one for oil. The main tank was internally divided for fuel & oil.
JackFlash
Joined: January 25, 2004
KitMaker: 11,669 posts
AeroScale: 11,011 posts
Posted: Sunday, April 12, 2015 - 04:09 AM UTC
Interiors almost complete. Starting to add HGW dark wood decal over basic grey. It gets pretty dark almost like the "piano" finish described in the Swiss reports of the interned birds. I have to check all surfaces of the early production build to make sure its ready for white paint on the fuselage.

JackFlash
Joined: January 25, 2004
KitMaker: 11,669 posts
AeroScale: 11,011 posts
Posted: Saturday, May 16, 2015 - 10:15 PM UTC
Kit engine with minor mods. Basic clean up and paint of kit engine. Push rod stems twisted to get the angle needed and the shafts replacing the plastic items are cut metal wire.

JackFlash
Joined: January 25, 2004
KitMaker: 11,669 posts
AeroScale: 11,011 posts
Posted: Wednesday, May 20, 2015 - 01:05 PM UTC
Here is a bit of fun with the Roden kit backdated with the Loon resin parts kit #32006 to an "early" production 8346/17. More to come.


Merlin

#017


Joined: June 11, 2003
KitMaker: 17,582 posts
AeroScale: 12,795 posts

Posted: Thursday, May 21, 2015 - 01:10 AM UTC
Hi Stephen
Looking good. There's a bit of anhedral to sort out, but I'm sure you're aware of that. I'm guessing the wings are only tacked in place so far - otherwise, a bit of brute force while no-one's looking (who hasn't resorted to that on occasion?
  )
)
All the best
Rowan
Looking good.
There's a bit of anhedral to sort out, but I'm sure you're aware of that. I'm guessing the wings are only tacked in place so far - otherwise, a bit of brute force while no-one's looking (who hasn't resorted to that on occasion? )All the best
Rowan

JackFlash
Joined: January 25, 2004
KitMaker: 11,669 posts
AeroScale: 11,011 posts
Posted: Saturday, May 23, 2015 - 12:17 PM UTC
Rowan, I always get a kick out of your assumptions.
With the exception of some minor touch ups I'll call this build done. More build images are in the Roden 1/32 SSW D.III 2 builds album on FB.
This Roden kit was backdated to one of the early production machines (8346/17 to be exact) One of 2 such machines delivered to Jasta 19 by 6 April 1918. It was assigned to Ltn. Walter Goettsch the unit commander. He fell in action on 10 April 1918 flying his usual Fokker Dr.I triplane 419/17 The white was his personal color. It is likely he had only a few familiarization flights but no combats in this machine. Its ultimate fate is unknown but like other SSW D.III types assigned to JG.II was probably returned to the factory for refitting new wings, engines and modifications recommended by the front line pilots.
Lozenge wing camouflage decals from HGW.
Natural linen ribtapes laid under the lozenge to add rib detail from HGW.
Backdating resin set from Loon Models a Roll Models subsidiary. (Cowling, wing tips, ailerons, horizontal stabilizer, elevator). #LO32006.
Brass PE detail set from Brengun. An excellent product. #BRL32014
Instrument Gauge faces from Airscale.
Instrument Bezels from HGW.
National markings from the spares folder or modified items.
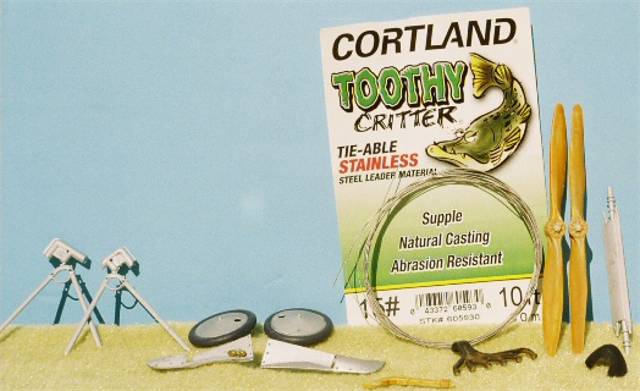
Rigging is "Toothy Critter" leader material. Set #15.


This brings an end to this build.
With the exception of some minor touch ups I'll call this build done. More build images are in the Roden 1/32 SSW D.III 2 builds album on FB.
This Roden kit was backdated to one of the early production machines (8346/17 to be exact) One of 2 such machines delivered to Jasta 19 by 6 April 1918. It was assigned to Ltn. Walter Goettsch the unit commander. He fell in action on 10 April 1918 flying his usual Fokker Dr.I triplane 419/17 The white was his personal color. It is likely he had only a few familiarization flights but no combats in this machine. Its ultimate fate is unknown but like other SSW D.III types assigned to JG.II was probably returned to the factory for refitting new wings, engines and modifications recommended by the front line pilots.
Lozenge wing camouflage decals from HGW.
Natural linen ribtapes laid under the lozenge to add rib detail from HGW.
Backdating resin set from Loon Models a Roll Models subsidiary. (Cowling, wing tips, ailerons, horizontal stabilizer, elevator). #LO32006.
Brass PE detail set from Brengun. An excellent product. #BRL32014
Instrument Gauge faces from Airscale.
Instrument Bezels from HGW.
National markings from the spares folder or modified items.
Rigging is "Toothy Critter" leader material. Set #15.
This brings an end to this build.
Merlin
#017
Joined: June 11, 2003
KitMaker: 17,582 posts
AeroScale: 12,795 posts
Posted: Saturday, May 23, 2015 - 08:35 PM UTC
Quoted Text
Rowan, I always get a kick out of your assumptions.
Cheers Stephen
 So it was Plan B then. It certainly does look a lot healthier. I'm casting a wary eye ahead on the AEG, with those big heavy wings looming ever closer...
All the best
Rowan
JackFlash
Joined: January 25, 2004
KitMaker: 11,669 posts
AeroScale: 11,011 posts
Posted: Sunday, May 24, 2015 - 03:29 AM UTC
Thinner & Heavy wings means the rigging has to be functional to some degree. Hence the stainless steel leader line like I used on this and the Roden 1/32 Pfalz D.III (back in 2007). Forcing is a bad choice. Gently cradling the wings with functional rigging is the ticket. Of course the wing attachment has to be plumb and square.
Pfalz build here.
Pfalz build here.
russamotto
Joined: December 14, 2007
KitMaker: 3,389 posts
AeroScale: 375 posts
Posted: Sunday, May 24, 2015 - 03:57 AM UTC
It looks beautiful. Thank you for the history on the build as well. It is nice to learn the history behind a particular subject.
Merlin
#017
Joined: June 11, 2003
KitMaker: 17,582 posts
AeroScale: 12,795 posts
Posted: Tuesday, May 26, 2015 - 12:39 AM UTC
Quoted Text
Thinner & Heavy wings means the rigging has to be functional to some degree...
Cheers Stephen
Yep - while the AEG's wings aren't thin, they are certainly heavy. So I'm psyching myself up for my most major rigging project to-date. I've been reading up on how to make functional turn buckles etc. - Des Delatorre's tutorials over on WW1 Aircraft Models are excellent, and the section in Dani Zamarbide's new FAQ book that arrived today also gives an essential grounding for newcomers to the black art like myself.

All the best
Rowan
JackFlash
Joined: January 25, 2004
KitMaker: 11,669 posts
AeroScale: 11,011 posts
Posted: Tuesday, May 26, 2015 - 04:36 AM UTC
For functional turnbuckles try GasPatch products like the ones announced here. As to the Wombat method I found it lacking.
Merlin
#017
Joined: June 11, 2003
KitMaker: 17,582 posts
AeroScale: 12,795 posts
Posted: Tuesday, May 26, 2015 - 11:35 AM UTC
Hi Stephen
I've got a little stash of GasPatch ones. I used a couple for the interior. Wonderful little gems.
But, equally, I'm keen to have a try at making some by hand.
All the best
Rowan
I've got a little stash of GasPatch ones. I used a couple for the interior. Wonderful little gems.
But, equally, I'm keen to have a try at making some by hand.
All the best
Rowan

thegirl

Joined: January 19, 2008
KitMaker: 6,743 posts
AeroScale: 6,151 posts
Posted: Wednesday, May 27, 2015 - 06:01 AM UTC
Another enjoyable project Stephen 
Terri
Terri
JackFlash
Joined: January 25, 2004
KitMaker: 11,669 posts
AeroScale: 11,011 posts
Posted: Saturday, June 06, 2015 - 01:04 AM UTC
Thanks Teri.
JackFlash
Joined: January 25, 2004
KitMaker: 11,669 posts
AeroScale: 11,011 posts
Posted: Tuesday, June 09, 2015 - 05:13 PM UTC
Done!


 |

WEB HOSTING BY


Copyright ©2021 AeroScale and Kitmaker Network, a subsidiary of Silver Star Enterprises
All Rights Reserved. Please read our Conditions of Use and Privacy Policy.
All Rights Reserved. Please read our Conditions of Use and Privacy Policy.