Air Campaigns
Want to start or join a group build? This is where to start.
Want to start or join a group build? This is where to start.
Hosted by Frederick Boucher, Michael Satin
Official: FROG Modellers Campaign

Berwickboy

Joined: April 27, 2013
KitMaker: 450 posts
AeroScale: 387 posts

Posted: Sunday, February 16, 2014 - 04:36 AM UTC
That's a real shame Lee after all your good work. Have you thought of trying a coat of Mr Surfacer all over to seal the cracks?
Posted: Sunday, February 16, 2014 - 08:35 AM UTC
Lee, sorry to hear that, I once had a similar problem when I used cellulose primer on plastic, but I didn't think cellulose was widely available now.
Posted: Sunday, February 16, 2014 - 10:13 AM UTC
Well Lee you have out sympathies. Taking a write off just sucks. 
Still 3 months left, any chance you might start over with another kit...?

Still 3 months left, any chance you might start over with another kit...?
ljames0874

Joined: August 15, 2012
KitMaker: 408 posts
AeroScale: 365 posts

Posted: Sunday, February 16, 2014 - 07:45 PM UTC
Quoted Text
Still 3 months left, any chance you might start over with another kit...?
Not with the number of other builds I've got going on. I haven't binned the Sea Vixen yet, it's still soaking in window cleaner. I'm going to try to skim the cracks with model filler. If I can get it back to a reasonably primer worthy condition, I may yet finish this after all.
Regarding the comment about using Mr Surfacer, I looked that stuff up on Hannants website. They have it at £7 a 100ml can, but they won't send it though the post, they actually expect you to go to their main shop to pick it up! As for ordering it from Amazon - get this - they want £37.00 for the same can!!!

Posted: Sunday, February 16, 2014 - 10:48 PM UTC
Quoted Text
Quoted TextStill 3 months left, any chance you might start over with another kit...?
Not with the number of other builds I've got going on. I haven't binned the Sea Vixen yet, it's still soaking in window cleaner. I'm going to try to skim the cracks with model filler. If I can get it back to a reasonably primer worthy condition, I may yet finish this after all.
Regarding the comment about using Mr Surfacer, I looked that stuff up on Hannants website. They have it at £7 a 100ml can, but they won't send it though the post, they actually expect you to go to their main shop to pick it up! As for ordering it from Amazon - get this - they want £37.00 for the same can!!!
ok man, completely understand. see you around!

Posted: Monday, February 17, 2014 - 12:37 AM UTC
Quoted Text
Regarding the comment about using Mr Surfacer, I looked that stuff up on Hannants website. They have it at £7 a 100ml can, but they won't send it though the post, they actually expect you to go to their main shop to pick it up! As for ordering it from Amazon - get this - they want £37.00 for the same can!!!
Don't feel bad - good luck trying to find Humbrol Acrylic thinner in the US. Even the Humbrol website says it ships UK only
 I have to order through ebay. The seller shows Australia but ships out of London UK. 125ml bottle can be had for a mere $16.29AUD
Cheers
C[ ]


Posted: Monday, February 17, 2014 - 04:40 AM UTC
Hannant do have a shop near the RAF museum in Hendon (2 birds, 1 stone) and if you ring that shop and tell them what you want and when they will get it from the main shop. I know that might be a bit of a hike but it is probably better than trying to get to the main shop. Good luck with it whatever you decide, and if you do go to Hannants beware of the pre-owned section, costs me money every time.
Posted: Monday, February 17, 2014 - 06:52 AM UTC
Quoted Text
find Humbrol Acrylic thinner in the US.
Dim recollection of two glass bottles (2-3 oz?) of Humbrol thinner in a hobby shop here in Portland area. Don't know if it was acrylic or enamel. I can check one shop tomorrow, can't get to the other one til the weekend.

Berwickboy

Joined: April 27, 2013
KitMaker: 450 posts
AeroScale: 387 posts

Posted: Monday, February 17, 2014 - 08:57 AM UTC
You an blame the Post office for Hannant's reluctance to ship liquid through the post. Even parcels with a couple of paints in have been ripped apart by the PO as they claim it breaks their rules. How can tins of paint constitute a hazard? they ought to think of how much 'harmful' material we have on our modelling benches alone 

ljames0874

Joined: August 15, 2012
KitMaker: 408 posts
AeroScale: 365 posts

Posted: Friday, February 21, 2014 - 04:29 AM UTC
Quoted Text
Lee James, some nice modifications!
yes the raised panel lines are part of the 'retro' aspect of this campaign, the tools were made before most of us were born after all.
re-scribing is way above my level of expertize,
There are months to go before this is ended, Id like to see how you go about it..
Jonothan, looks like you will get your wish. I have withdrawn my withdrawal (see previous posts!) as I have filled the scars left by my primer disaster, and sanded it all back. The upshot is, all the raised panel lines have gone, so now I will have to bite the bullet and re-scribe them. I have done a little scribing before, but not in such a small scale. The straight panel lines shouldn't present much of a challenge. I have bought myself a 1/72 scribing template for the smaller, rounder panels. The template is photo-etched, and to my eye looks a little flimsy, so we'll see how it performs.
Here is what the Sea Vixen looked like this morning, prior to priming:
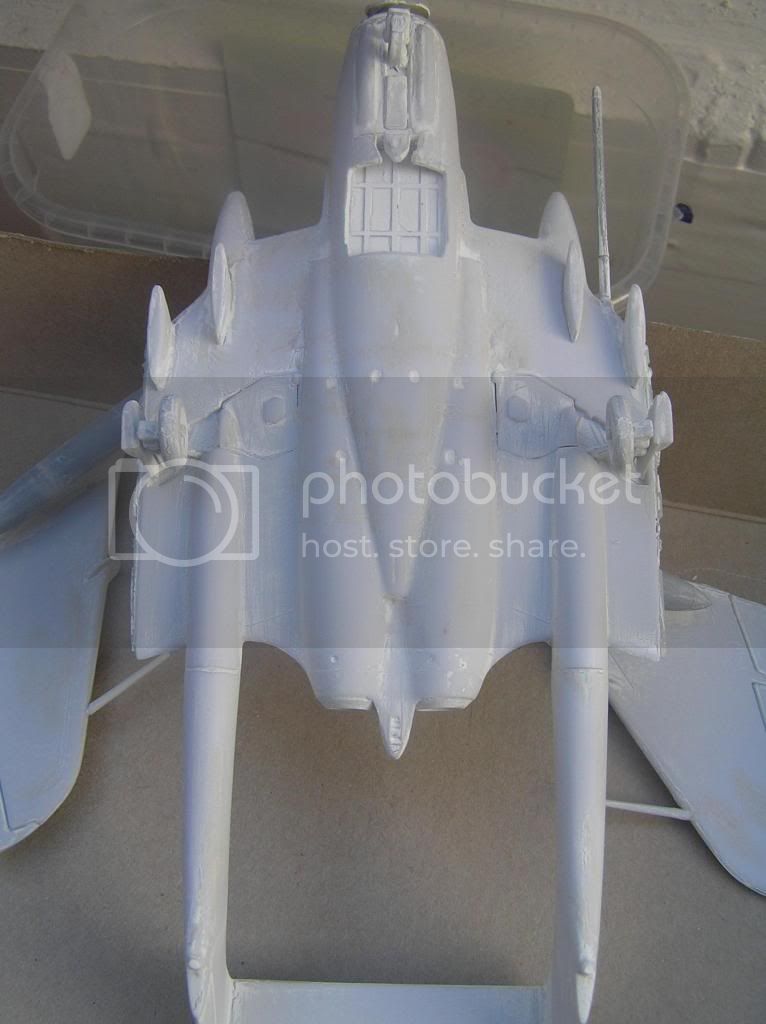
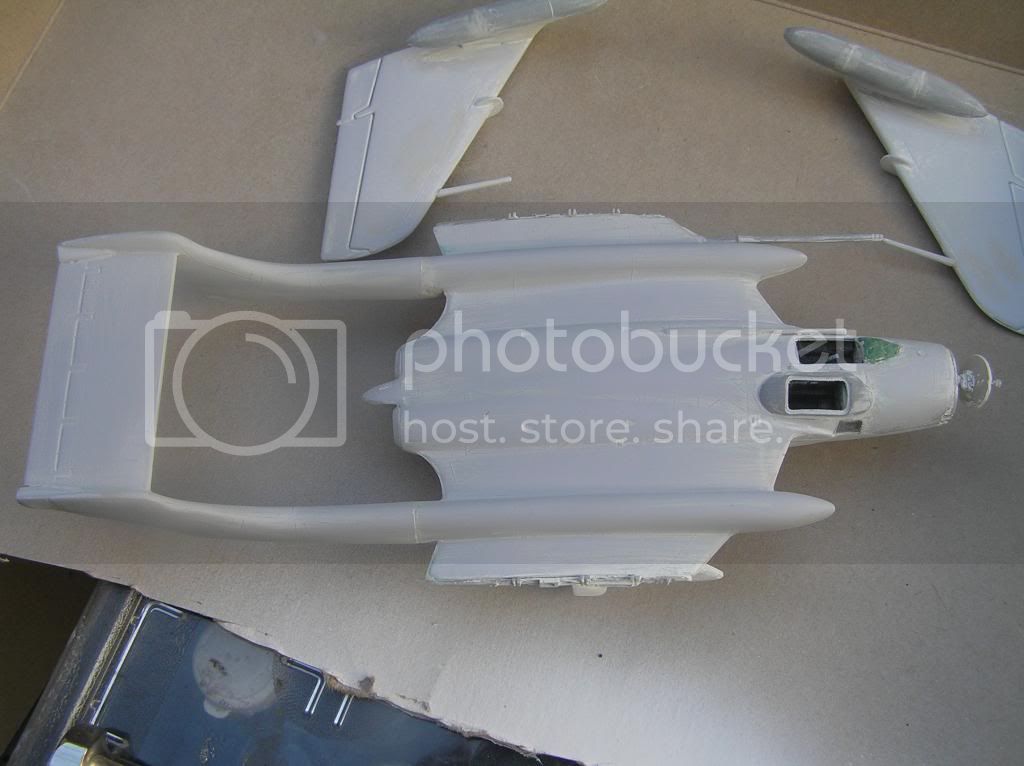
....and after:
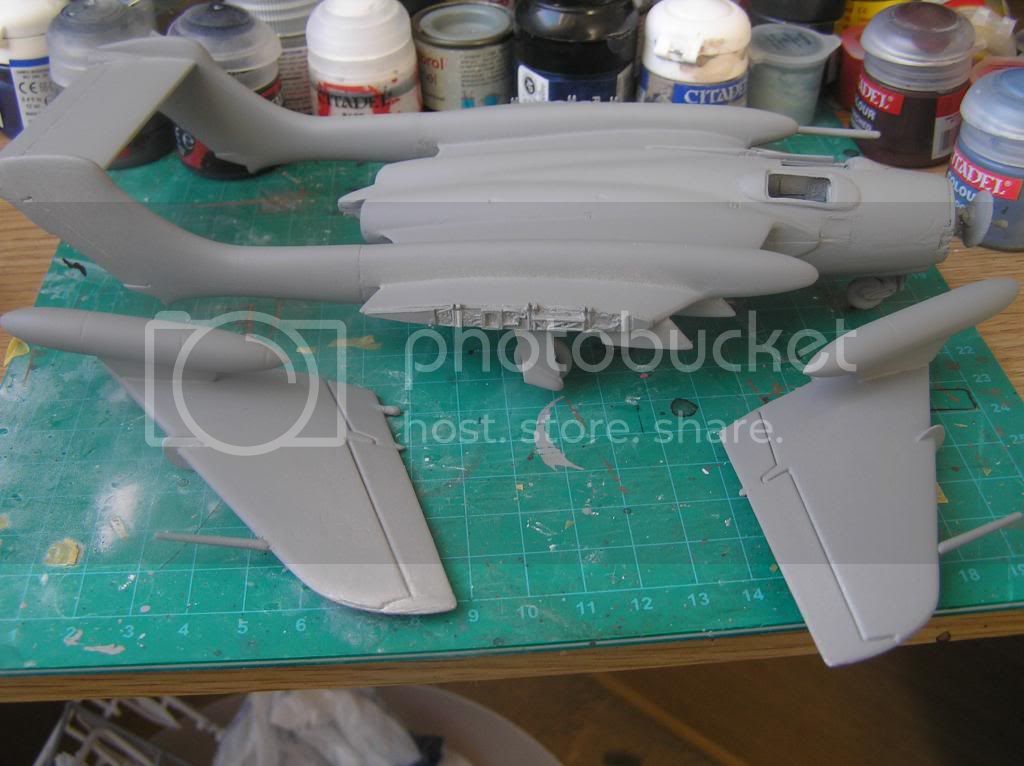
Now I'm off to read up on scribing techniques - cheers everyone!

Posted: Friday, February 21, 2014 - 05:11 AM UTC
Saved from the bin!! 


Posted: Thursday, February 27, 2014 - 06:35 AM UTC
Go Lee, I've got a decision to make about the Victor, all panel lines are raised
Posted: Thursday, February 27, 2014 - 09:34 AM UTC
As I've said before, Id like to encourage panel line scribing, as its a skill I would like to learn myself.
One of the values of building these old kits is we can use them for trying new stuff and not be too nervous about the outcome vs the invested cost.
Ive been working away this week, but expect to be home and back to model building this weekend.
One of the values of building these old kits is we can use them for trying new stuff and not be too nervous about the outcome vs the invested cost.
Ive been working away this week, but expect to be home and back to model building this weekend.
ljames0874

Joined: August 15, 2012
KitMaker: 408 posts
AeroScale: 365 posts

Posted: Thursday, February 27, 2014 - 07:18 PM UTC
Quoted Text
Go Lee, I've got a decision to make about the Victor, all panel lines are raised
I think it depends on how good your reference materials are. Having just finished Xtrakit's Sea Vixen, I'm using that as my reference for the Frog kit. I'll be doing a Gloster Javelin for Russell's memorial campaign, and I'm guessing I'll need to re-scribe it. Happily, with the Airfix 1/48 Javelin now released, a lot of magazines have been putting out detailed plans, so scribing it accurately shouldn't be a problem.
ljames0874

Joined: August 15, 2012
KitMaker: 408 posts
AeroScale: 365 posts

Posted: Friday, February 28, 2014 - 02:21 AM UTC
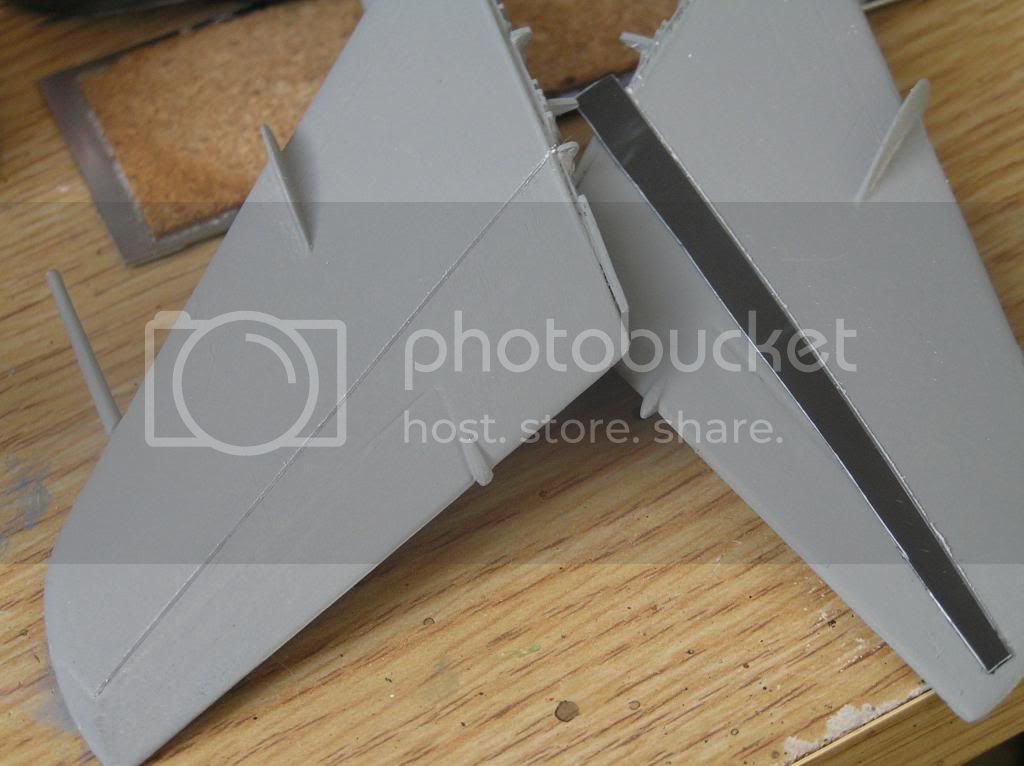
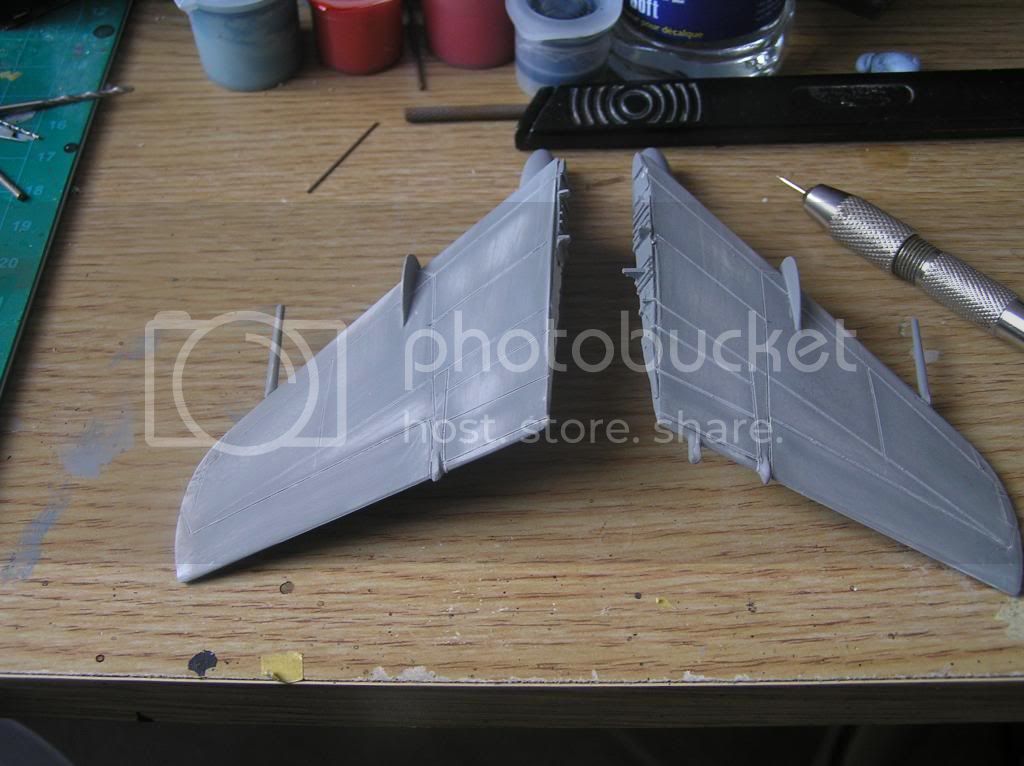
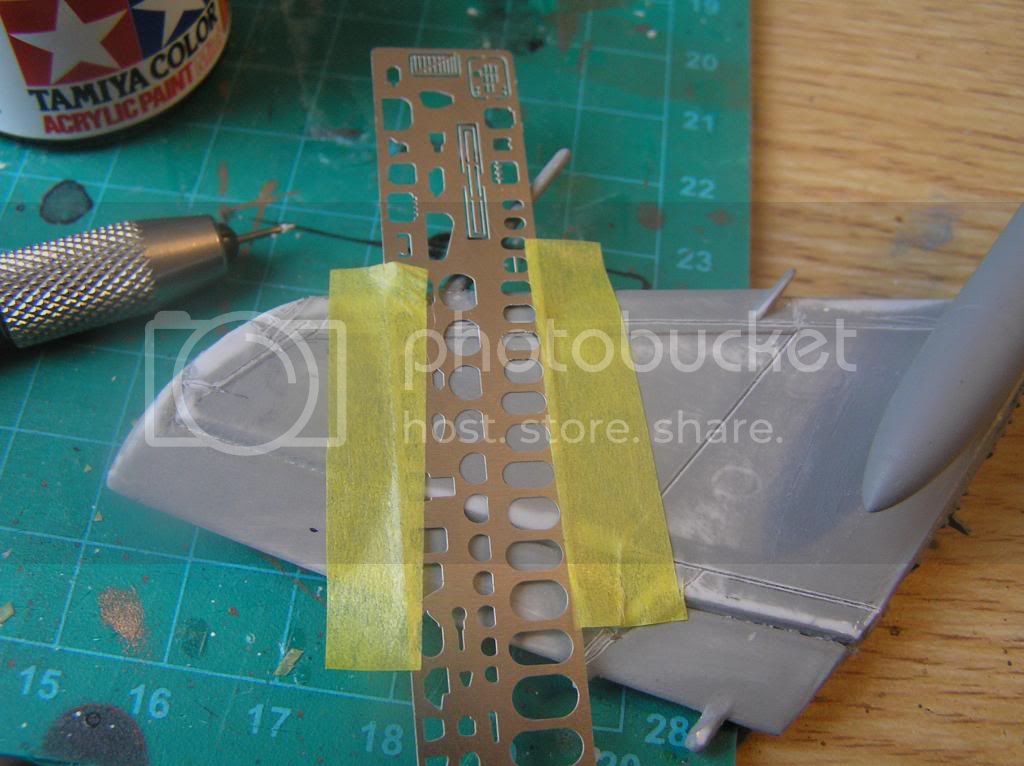
Ok, some progress on re-scribing the Sea Vixen. I started on the outer wing sections. In an ideal world, you would re-scribe the parts before starting to assemble the kit, as you can hold the parts flat on a cutting mat. With this model being assembled, things are a little trickier. I am using Dymo tape as a guide for scribing straight panel lines. I split each section of tape down the middle, to save on waste. Each piece of tape can be used 2 or 3 times, depending on how quickly you work. After scribing the area you are working on, you need to sand the raised burrs that kick up on both sides of the scribed lines. After this is done I do the small panels and hatches using photo etched templates (Verlinden).


Posted: Friday, February 28, 2014 - 10:10 AM UTC
that looks pretty dam good for a first attempt!
I wonder if the Dymo company knows their product has been re-purposed by the model airplane building community...
I wonder if the Dymo company knows their product has been re-purposed by the model airplane building community...

North4003

Joined: August 01, 2012
KitMaker: 960 posts
AeroScale: 391 posts

Posted: Monday, March 03, 2014 - 03:48 PM UTC
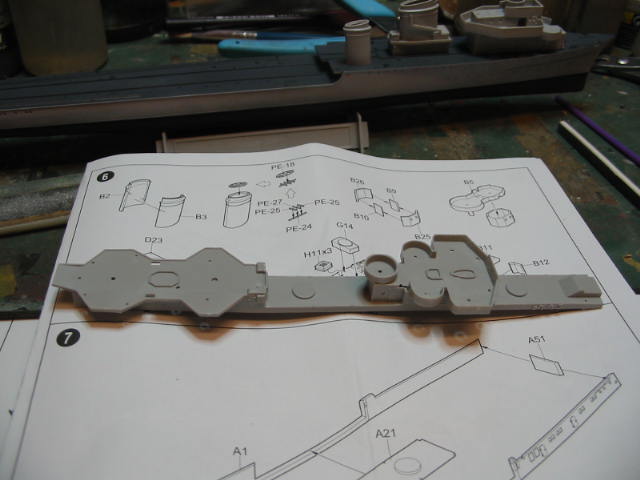
It's about time I posted my start photo for this campaign.
Posted: Monday, March 03, 2014 - 09:46 PM UTC
Hey Brent, youve got alot of irons in the fire, thats good 
Ive got progress to show on the 707.
painting complete except for minor touch ups, engines on
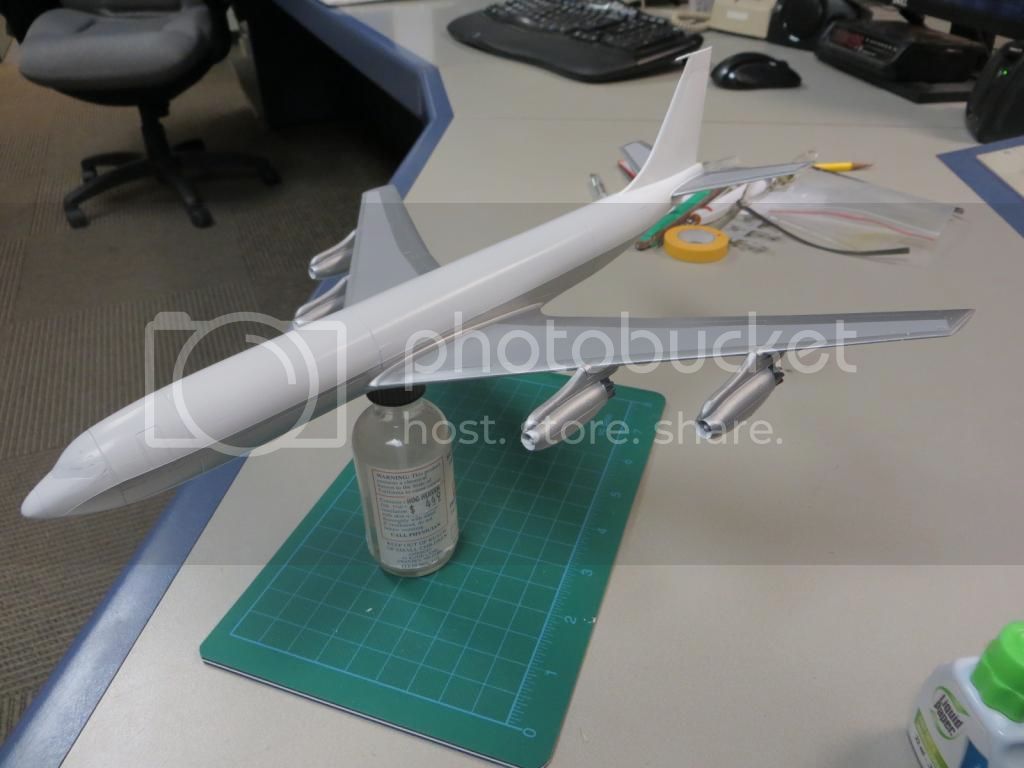
Not my best work on filling and fairing, but its pleasing none the less.
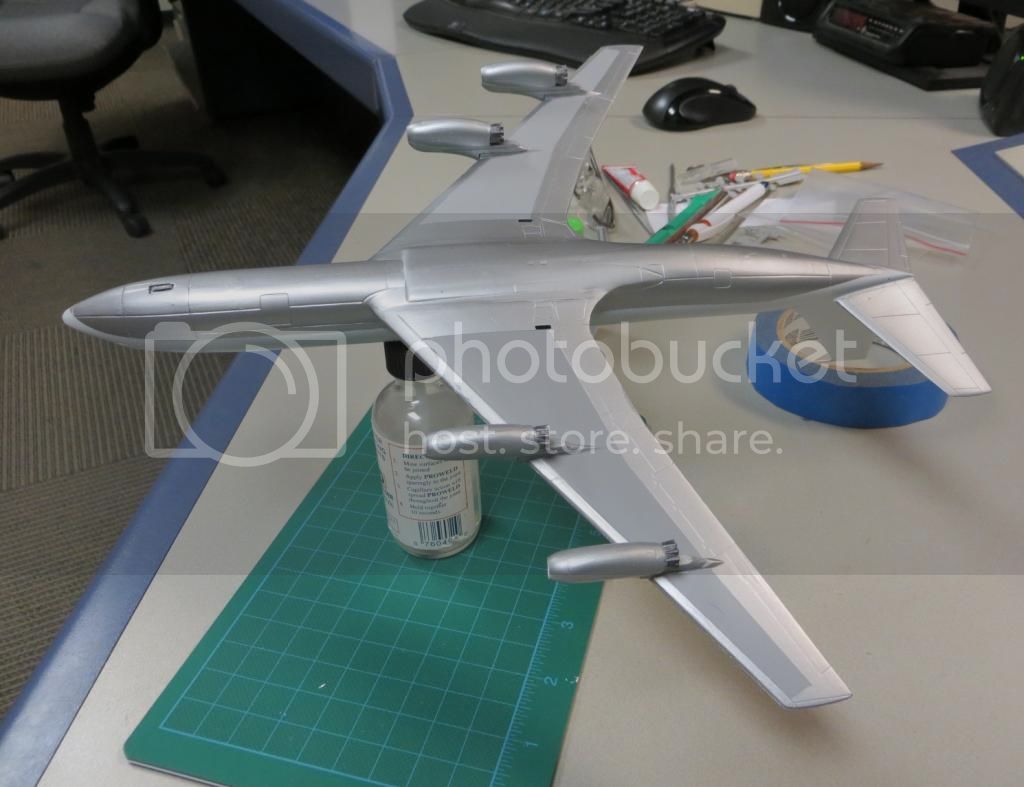

Ive got progress to show on the 707.
painting complete except for minor touch ups, engines on

Not my best work on filling and fairing, but its pleasing none the less.


SmashedGlass

Joined: October 26, 2006
KitMaker: 105 posts
AeroScale: 62 posts

Posted: Tuesday, March 04, 2014 - 05:52 AM UTC
Well, this has been going for a bit of time already and I'm embarrassed to say that I haven't posted a single thing! The usual story, been too busy with other projects.....which is really no excuse.
The following build kept me busy for quite a while (for a group build on another site--hopefully there is no problem with me posting this? It IS a Frog kit....). Could not enter the Jav here, as it was begun two months prior to this GB's start date.: Javelin FAW.9R
So now I'm ready to move along and get hoppin' on something for this GB. I'm in with the FROG Spitfire XIV & Buzzbomb that JClapp so graciously supplied to me.

It will be built OOB, on the stand as intended, and definitely not going "whole hog" like I did on that Javelin....This is intended as a fun build for me, and a chance to play with some paint and weathering. IF I have enough time what with everything else I've managed to get myself tangled up in, I'll be adding in the Fiat G.55bis too.
More soon!!!
The following build kept me busy for quite a while (for a group build on another site--hopefully there is no problem with me posting this? It IS a Frog kit....). Could not enter the Jav here, as it was begun two months prior to this GB's start date.: Javelin FAW.9R
So now I'm ready to move along and get hoppin' on something for this GB. I'm in with the FROG Spitfire XIV & Buzzbomb that JClapp so graciously supplied to me.

It will be built OOB, on the stand as intended, and definitely not going "whole hog" like I did on that Javelin....This is intended as a fun build for me, and a chance to play with some paint and weathering. IF I have enough time what with everything else I've managed to get myself tangled up in, I'll be adding in the Fiat G.55bis too.
More soon!!!
Posted: Tuesday, March 04, 2014 - 06:23 AM UTC
Hi Erik, good to see another kit started. Plenty of time left, and a very cool Frog kit!
I had never seen that 72nd scale board before, thanks for the link, I just spent an hour over there. by the way,
You do good work !!
....................................

 ................................
I had never seen that 72nd scale board before, thanks for the link, I just spent an hour over there. by the way,
You do good work !!
....................................


 ................................
Posted: Tuesday, March 04, 2014 - 07:41 PM UTC

Jessie_C


Joined: September 03, 2009
KitMaker: 6,965 posts
AeroScale: 6,247 posts

Posted: Tuesday, March 18, 2014 - 03:17 PM UTC
Something seems to be going very wrong here.
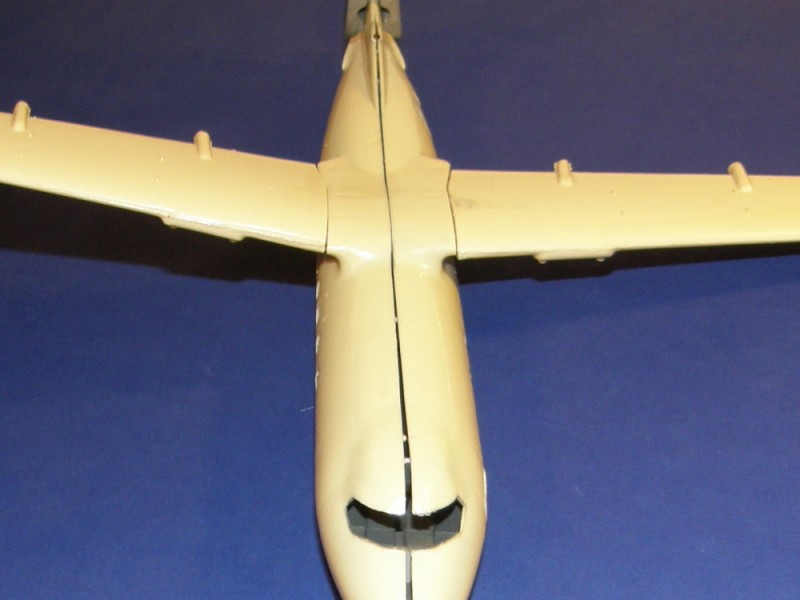
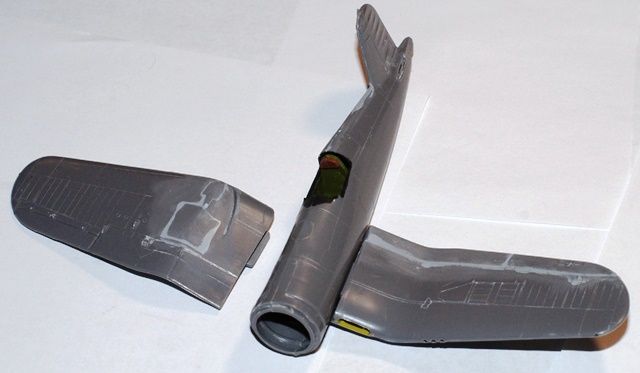
Both wings are thicker than their respective roots, and the wing tabs don't interlock at all. I had to file the tabs down to nearly nothing and still this is what I get. Much work will need to happen here before I'll be happy with the situation.

Both wings are thicker than their respective roots, and the wing tabs don't interlock at all. I had to file the tabs down to nearly nothing and still this is what I get. Much work will need to happen here before I'll be happy with the situation.
Posted: Saturday, March 22, 2014 - 07:02 AM UTC
ayup, that's gonna need some bondo, as well as some force fitting.
The Soviet era issues of this stuff certainly are challenging. its a question if we should be glad to have them, or just as well have kept our fond memories.
I ruined the Pan Am decal that came with the 707 by peeling off the wax paper.
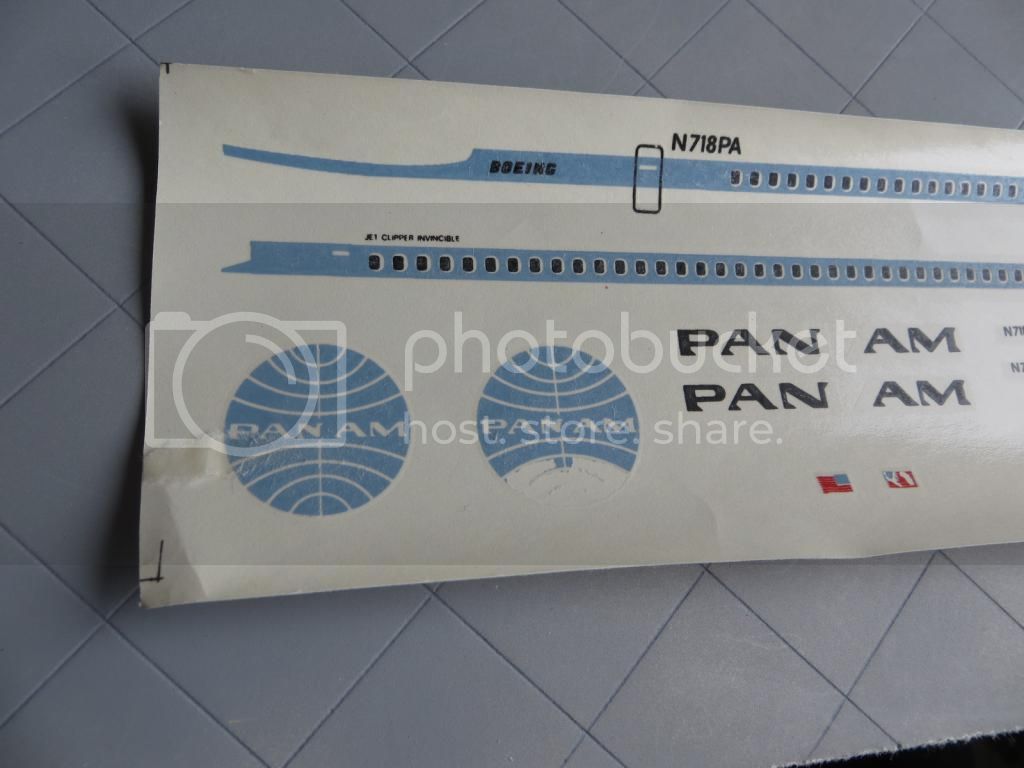
It was obviously crap anyway. there are several really nice 707 decals available in the aftermarket. I have ordered a replacement from TwoSix (fingers crossed it arrives before end of April).
The Soviet era issues of this stuff certainly are challenging. its a question if we should be glad to have them, or just as well have kept our fond memories.
I ruined the Pan Am decal that came with the 707 by peeling off the wax paper.

It was obviously crap anyway. there are several really nice 707 decals available in the aftermarket. I have ordered a replacement from TwoSix (fingers crossed it arrives before end of April).
Posted: Saturday, March 22, 2014 - 07:53 AM UTC
I've got an original issue P-51A, with the wax paper over the decals. They've fused together, I dipped one in water with the wax paper still in place, the decal eventually lifted off of the backing paper, but the wax paper remained resolutely in place.

Jessie_C


Joined: September 03, 2009
KitMaker: 6,965 posts
AeroScale: 6,247 posts

Posted: Saturday, March 22, 2014 - 09:11 AM UTC
Quoted Text
ayup, that's gonna need some bondo, as well as some force fitting.
I'm going to saw the tabs right off and replace them with metal spars made from coat hangar wire. I'll still need to blend the roots in with filler, but I'll at least be able to play with the fit until it's least bad.
 |


