OFFICIAL: National Pride Campaign
Arizona, United States
Joined: October 03, 2012
KitMaker: 89 posts
AeroScale: 33 posts
Posted: Thursday, December 18, 2014 - 12:43 PM UTC
I will be building this almost totally out of the box. With the kit decals. And I will be starting this, not tonight, but right NOW

.
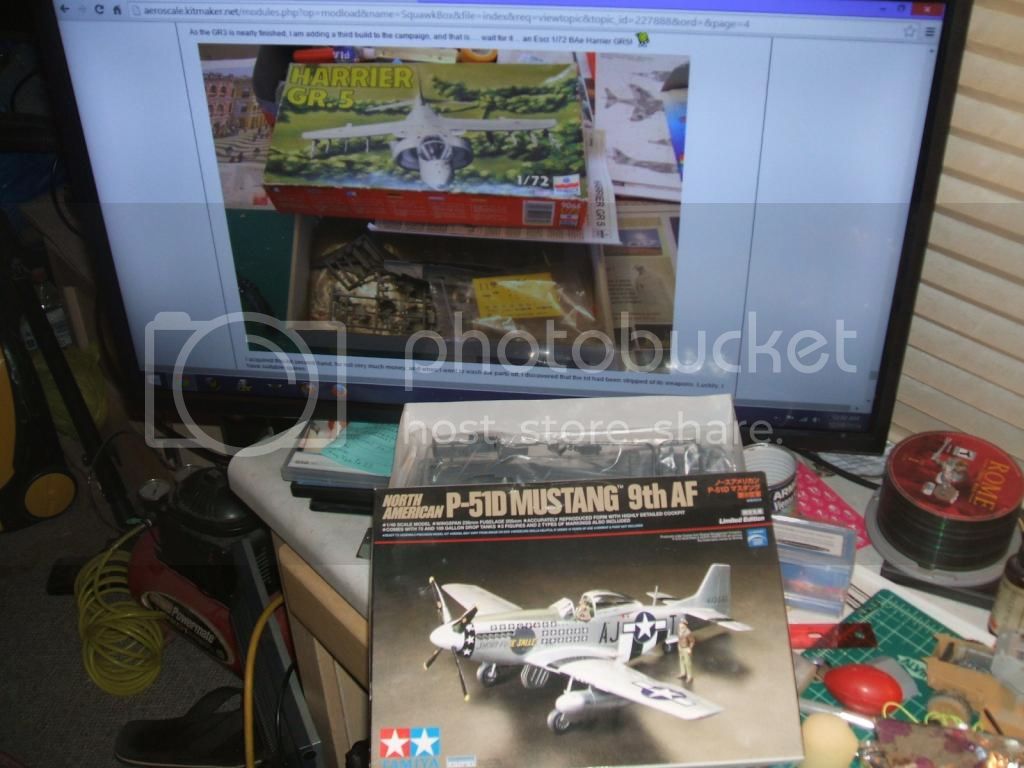
It will be Short Fuse Sally.
Gary

If it can't be fixed with duct tape, or a hammer, it aint worth fixin !

#041
Kobenhavn, Denmark
Joined: July 20, 2006
KitMaker: 10,069 posts
AeroScale: 3,788 posts
Posted: Thursday, December 18, 2014 - 03:10 PM UTC
Great progress, Lee James. I guess there is no other British aircraft more iconic to Britain than Harrier - other than the Spitfire, Hurricane, lancaster, halifax and.......

I are almost making enough models to have a campaign by yourselves.
Jonanthan, I missed the fact that you were making two planes that is why I though they would not fit. I guess it would be difficult to fit two left fuselage halves anyway with or without bolts in them.
I will look more closely at the pictures in the future

Nice choice, Gary. A great kit. Looking forward to see more.
Campaign'oholic - 252+ campaigns completed
Alberta, Canada
Joined: April 07, 2010
KitMaker: 1,028 posts
AeroScale: 939 posts
Posted: Thursday, December 18, 2014 - 07:50 PM UTC
Welcome to the campaign, Gary. The Tamiya P-51 is a wonderful kit.

To prevent being called an 'expert', screw something up good every now and again.
Arizona, United States
Joined: October 03, 2012
KitMaker: 89 posts
AeroScale: 33 posts
Posted: Friday, December 19, 2014 - 02:21 PM UTC
Hi Yall:
I Got the front office banged out last night. Not much to it really. Just put in a few scratches to sort of simulate the wood floor, and drilled a few holes for the little bit of wiring I am going to do to it.
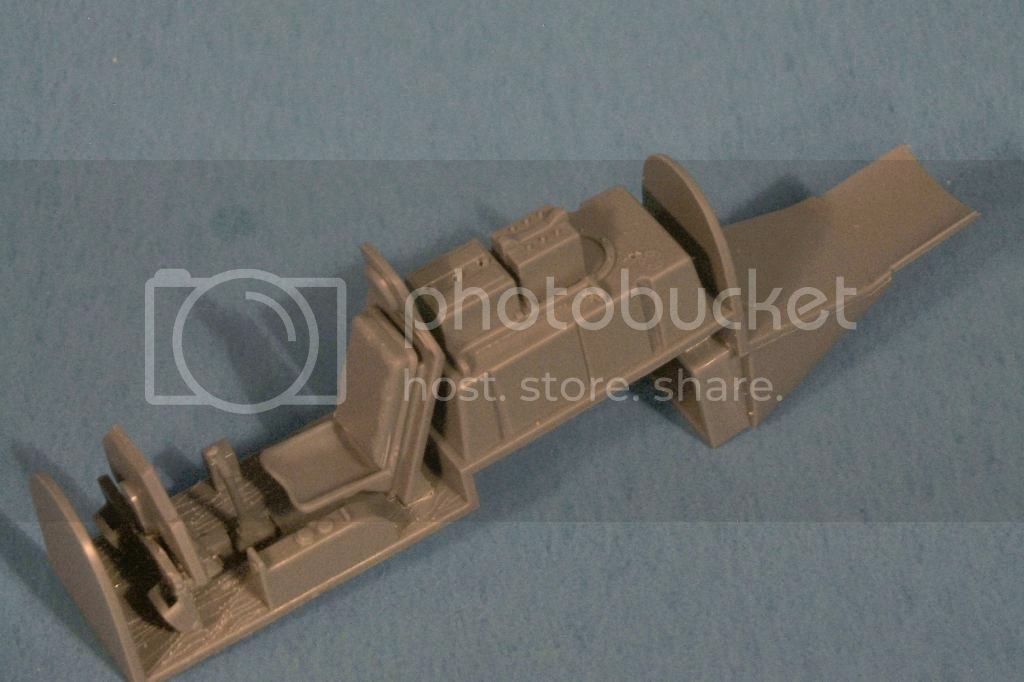
I will be doing the wiring and just a tiny bit of improvement in the cockpit, then slapping on some color tonight.
Gary
If it can't be fixed with duct tape, or a hammer, it aint worth fixin !
#305
Christchurch, New Zealand
Joined: February 01, 2006
KitMaker: 1,673 posts
AeroScale: 1,517 posts
Posted: Tuesday, December 23, 2014 - 02:01 PM UTC
#257
Ontario, Canada
Joined: October 11, 2011
KitMaker: 812 posts
AeroScale: 458 posts
Posted: Thursday, December 25, 2014 - 01:33 AM UTC
Does the aircraft need to be in Military colours or can it be in civilian markings? There seem to be a lot of civilian Otters out there.
Modelling is something we never perfect. We should never quit learning new tricks and be willing to share what we have learned on our own.
Alberta, Canada
Joined: April 07, 2010
KitMaker: 1,028 posts
AeroScale: 939 posts
Posted: Thursday, December 25, 2014 - 03:02 AM UTC
Quoted Text
Does the aircraft need to be in Military colours or can it be in civilian markings?
Hi, Darrell. The answer to your question is in
rule #1 To prevent being called an 'expert', screw something up good every now and again.
Ontario, Canada
Joined: March 29, 2010
KitMaker: 1,151 posts
AeroScale: 985 posts
Posted: Thursday, December 25, 2014 - 04:37 AM UTC
Quoted Text
Does the aircraft need to be in Military colours or can it be in civilian markings? There seem to be a lot of civilian Otters out there.
I've been secretly hoping someone would do a goose livery CA...
Joel_W
 Associate Editor
New York, United States
Joined: December 04, 2010
KitMaker: 11,666 posts
AeroScale: 7,410 posts
Posted: Thursday, December 25, 2014 - 05:51 AM UTC
I've just posted another update in my ongoing build blog in the Modern forum. I've finished the cockpit fuselage and main fuselage sections, and finally glued them up. It's really starting to look like a F-15C now.
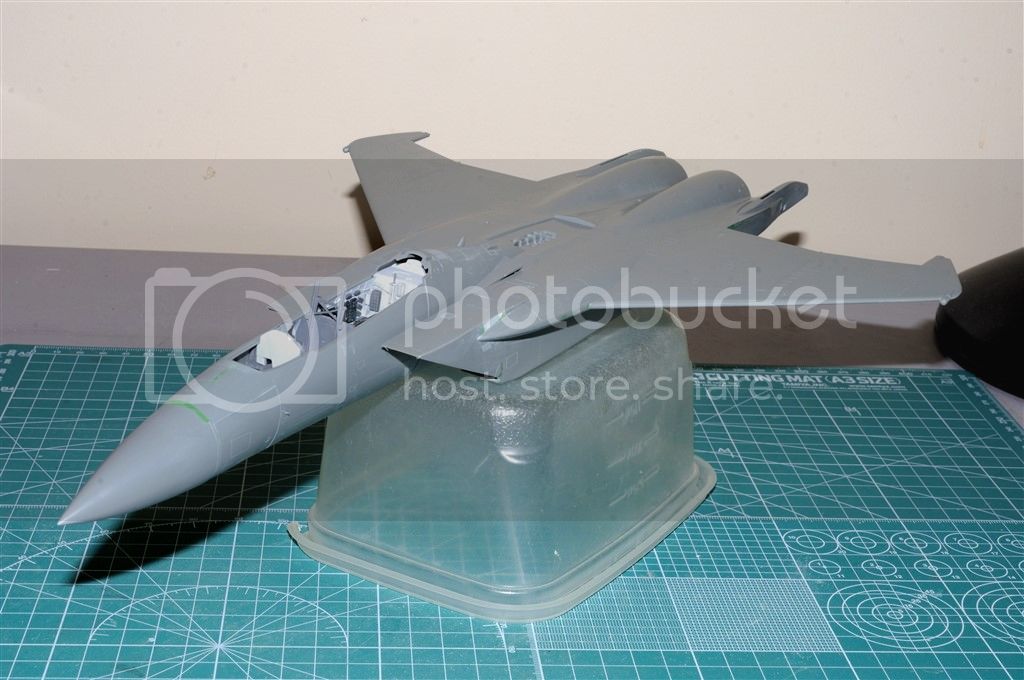
Here's the link:
F-15CJoel
On my Workbench:
Monogram 1/24 scale 427 Shelby Cobra
Just Completed:
Beemax 1/24 scale BMW M3 E30 1992 Evolution II
Alberta, Canada
Joined: April 07, 2010
KitMaker: 1,028 posts
AeroScale: 939 posts
Posted: Thursday, December 25, 2014 - 11:31 AM UTC
Quoted Text
Progress has been at my usual snails pace, but some progress has been made none the less.
That quote from Joel's excellent F-15C blog is so fitting here, for myself.
Even with life's debilitating hick-ups, the hobby goes on. Some small progress on the Twin Otter.
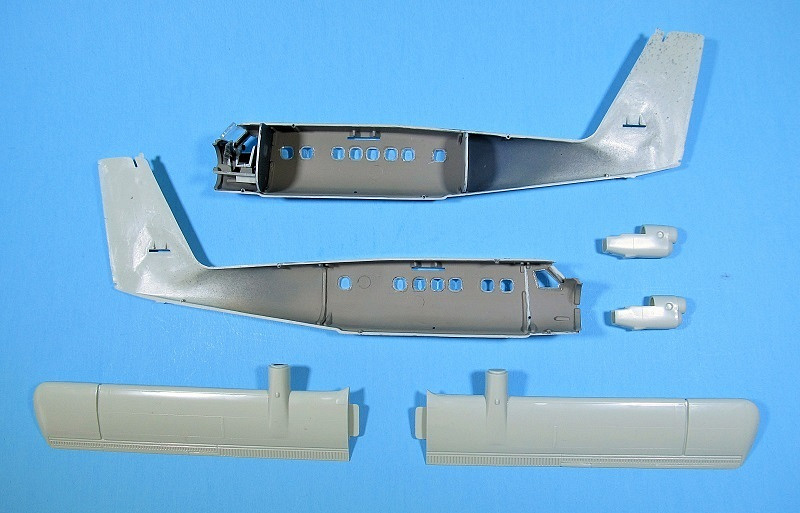
Cabin windows and front windscreen are in, and wings are nearly ready to play. I'm going to attach the wings before the fuselage halves are joined so I can better secure them from the inside.
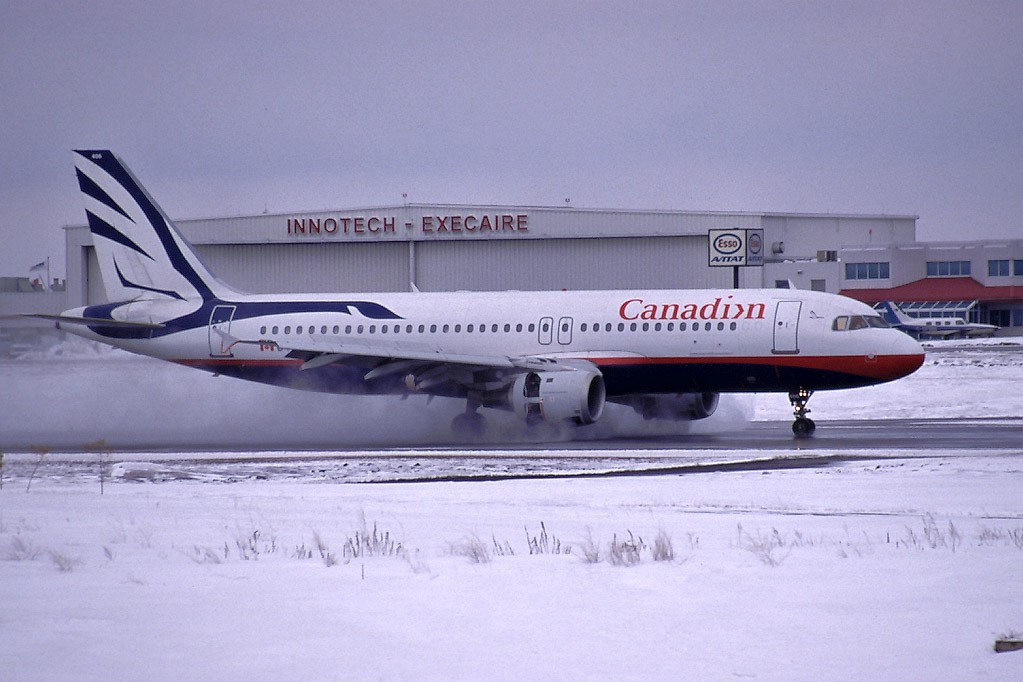
@Richard - nice looking A320. I have not seen those markings made available. Do you know if they are done in 1/144?
To prevent being called an 'expert', screw something up good every now and again.
Joel_W
Associate Editor New York, United States
Joined: December 04, 2010
KitMaker: 11,666 posts
AeroScale: 7,410 posts
Posted: Thursday, December 25, 2014 - 07:13 PM UTC
Ben,
You're making excellent progress. For me, progress certainly isn't measured in amount of work divided by time, but rather the amount of work accomplished for the entire build. I hope that makes some sense because I never measure my builds by time taken to accomplish it.
Sure looks like you're making steady progress. Attaching the wings separately, is a good concept as long as you have the fuselage secured to a perfectly flat base, and means to keep the wing at 90 degrees to the centerline. Would really like to see the jig you devise for this task.
Joel
On my Workbench:
Monogram 1/24 scale 427 Shelby Cobra
Just Completed:
Beemax 1/24 scale BMW M3 E30 1992 Evolution II
Alberta, Canada
Joined: April 07, 2010
KitMaker: 1,028 posts
AeroScale: 939 posts
Posted: Thursday, December 25, 2014 - 08:48 PM UTC
Quoted Text
Attaching the wings separately, is a good concept as long as you have the fuselage secured to a perfectly flat base, and means to keep the wing at 90 degrees to the centerline. Would really like to see the jig you devise for this task.
Thankyou for your comments, Joel. I'm formulating a quick jig design in my mind, and will come up with something to solve the problem. I prefer making jigs with balsa wood over Lego, because its so easy to work with. I've got boxes of it left over from my R/C days.
To prevent being called an 'expert', screw something up good every now and again.
Joel_W
Associate Editor New York, United States
Joined: December 04, 2010
KitMaker: 11,666 posts
AeroScale: 7,410 posts
Posted: Thursday, December 25, 2014 - 09:22 PM UTC
[quote
Thank you for your comments, Joel. I'm formulating a quick jig design in my mind, and will come up with something to solve the problem. I prefer making jigs with balsa wood over Lego, because its so easy to work with. I've got boxes of it left over from my R/C days.
[/quote]
Ben,
I've seen a lot of guys use Legos, but I've never tried them. All my jigs are Rub Goldberg deals that I fashion out of wood, metal straight edges, etc. Some work, and some don't. Looking forward to seeing what you come up with.
Joel
On my Workbench:
Monogram 1/24 scale 427 Shelby Cobra
Just Completed:
Beemax 1/24 scale BMW M3 E30 1992 Evolution II
United Kingdom
Joined: May 25, 2013
KitMaker: 137 posts
AeroScale: 103 posts
Posted: Friday, December 26, 2014 - 04:38 AM UTC
Quoted Text
I've seen a lot of guys use Legos, but I've never tried them. All my jigs are Rub Goldberg deals that I fashion out of wood, metal straight edges, etc. Some work, and some don't. Looking forward to seeing what you come up with.
Joel
the only kind of jigs I have ever used were made from a couple of paint pots, some sticky tape. a bit of rolled up paper and old elastic bands

works well enough, but anyone who takes time to make a proper jig would have a fit if they saw one of my disaster areas!

Ontario, Canada
Joined: February 04, 2008
KitMaker: 2,507 posts
AeroScale: 1,814 posts
Posted: Monday, December 29, 2014 - 01:58 AM UTC
I have started to blend casting blocks to make the model come out to the correct length.
First up the tail area before:-

Then a quick copy and paste onto the trimed photo:-

Next the fuselarge is layed onto the top wing and the rough outline is marked for trimming:-

And now we have a line to cut to and then fit and sand:-

" The Die Hards"
43rd MIDDLESEX REGIMENT
MACHINE GUN CORPS
XXX CORP
The most effective way to do it, is to do it.
- Amelia Earhart
Alberta, Canada
Joined: April 07, 2010
KitMaker: 1,028 posts
AeroScale: 939 posts
Posted: Monday, December 29, 2014 - 04:41 AM UTC
Looks good, Richard. Just remember the main rule of resin: sand/test fit, sand/test fit, sand/test fit; not sand,sand,sand/test fit.
To prevent being called an 'expert', screw something up good every now and again.
Ontario, Canada
Joined: February 04, 2008
KitMaker: 2,507 posts
AeroScale: 1,814 posts
Posted: Monday, December 29, 2014 - 06:11 AM UTC
Quoted Text
Looks good, Richard. Just remember the main rule of resin: sand/test fit, sand/test fit, sand/test fit; not sand,sand,sand/test fit.
To true Ben!
" The Die Hards"
43rd MIDDLESEX REGIMENT
MACHINE GUN CORPS
XXX CORP
The most effective way to do it, is to do it.
- Amelia Earhart
Joel_W
Associate Editor New York, United States
Joined: December 04, 2010
KitMaker: 11,666 posts
AeroScale: 7,410 posts
Posted: Monday, December 29, 2014 - 07:35 PM UTC
Richard,
Looking good. Just remember to wear a mask once you start sanding the resin. I was really surprised when I did the turbos on the P-38. The resin dust went everywhere. Ended up doing all the cutting and sanding in the garage.
Joel
On my Workbench:
Monogram 1/24 scale 427 Shelby Cobra
Just Completed:
Beemax 1/24 scale BMW M3 E30 1992 Evolution II
Ontario, Canada
Joined: February 04, 2008
KitMaker: 2,507 posts
AeroScale: 1,814 posts
Posted: Monday, December 29, 2014 - 10:03 PM UTC
Hi Joel.
I do my sanding in my workshop, I use a large air cleaner with good filtering.
" The Die Hards"
43rd MIDDLESEX REGIMENT
MACHINE GUN CORPS
XXX CORP
The most effective way to do it, is to do it.
- Amelia Earhart
#305
Christchurch, New Zealand
Joined: February 01, 2006
KitMaker: 1,673 posts
AeroScale: 1,517 posts
Posted: Tuesday, December 30, 2014 - 07:02 AM UTC
Alberta, Canada
Joined: April 07, 2010
KitMaker: 1,028 posts
AeroScale: 939 posts
Posted: Tuesday, December 30, 2014 - 07:23 AM UTC
Chris, your Mosquito looks really nice, and is welcomed in the gallery when you are able to get the photos.
Admittedly, at first I thought the navigation lights were way over sized. Then I checked my references out of curiosity. They look about right. it's just the full lens clear paint that make them appear excessive. The real ones are a colored bulb inside a clear lens.
As a whole your model is brilliant; well done.
To prevent being called an 'expert', screw something up good every now and again.
#305
Christchurch, New Zealand
Joined: February 01, 2006
KitMaker: 1,673 posts
AeroScale: 1,517 posts
Posted: Tuesday, December 30, 2014 - 07:41 AM UTC
Hi Ben a coloured bulb? Well that's what I get for following instructions as Airfix would have you paint them! It's strange though as I've seen mosquito's with coloured plastic covers. I guess it depends on what was installed at the factory or as a repair?? The mossies we had here at the end of WW2 were coloured plastic but they were FB MkVI and quite possibly changed as per RNZAF policies.
Alberta, Canada
Joined: April 07, 2010
KitMaker: 1,028 posts
AeroScale: 939 posts
Posted: Tuesday, December 30, 2014 - 08:25 AM UTC
Quoted Text
Hi Ben a coloured bulb? Well that's what I get for following instructions as Airfix would have you paint them! It's strange though as I've seen mosquito's with coloured plastic covers. I guess it depends on what was installed at the factory or as a repair?? The mossies we had here at the end of WW2 were coloured plastic but they were FB MkVI and quite possibly changed as per RNZAF policies.
Now I'm sorry I even mentioned it, Chris, because you certainly have built a wonderful Mosquito NF30. Like I've said, very well done.

To prevent being called an 'expert', screw something up good every now and again.
#305
Christchurch, New Zealand
Joined: February 01, 2006
KitMaker: 1,673 posts
AeroScale: 1,517 posts
Posted: Tuesday, December 30, 2014 - 01:31 PM UTC
Don't worry about it Ben! I'm not, I should have checked my references! Thanks for the kind comments Ben, the Tamiya panel line wash did a fantastic job and the kit while old still makes a great model with the new additions. Now to photograph the beastie against a neutral back ground and get ti up in the gallery.
Joel_W
Associate Editor New York, United States
Joined: December 04, 2010
KitMaker: 11,666 posts
AeroScale: 7,410 posts
Posted: Tuesday, December 30, 2014 - 08:24 PM UTC
Chris,
That's one very nice Mosquito. Sure looks like a rock solid build, outstanding paint scheme, and perfect decaling. Can't ask for more.
As for a man cave, it's my favorite room in the house.
Joel
On my Workbench:
Monogram 1/24 scale 427 Shelby Cobra
Just Completed:
Beemax 1/24 scale BMW M3 E30 1992 Evolution II