Revell Dornier Do 217-5 1/48 Build
Overijssel, Netherlands
Joined: September 13, 2003
KitMaker: 339 posts
AeroScale: 244 posts
Posted: Tuesday, November 17, 2015 - 01:58 AM UTC
Hi guys,
I started my first plane project in 20 years. Also this my first 1/48 plane.
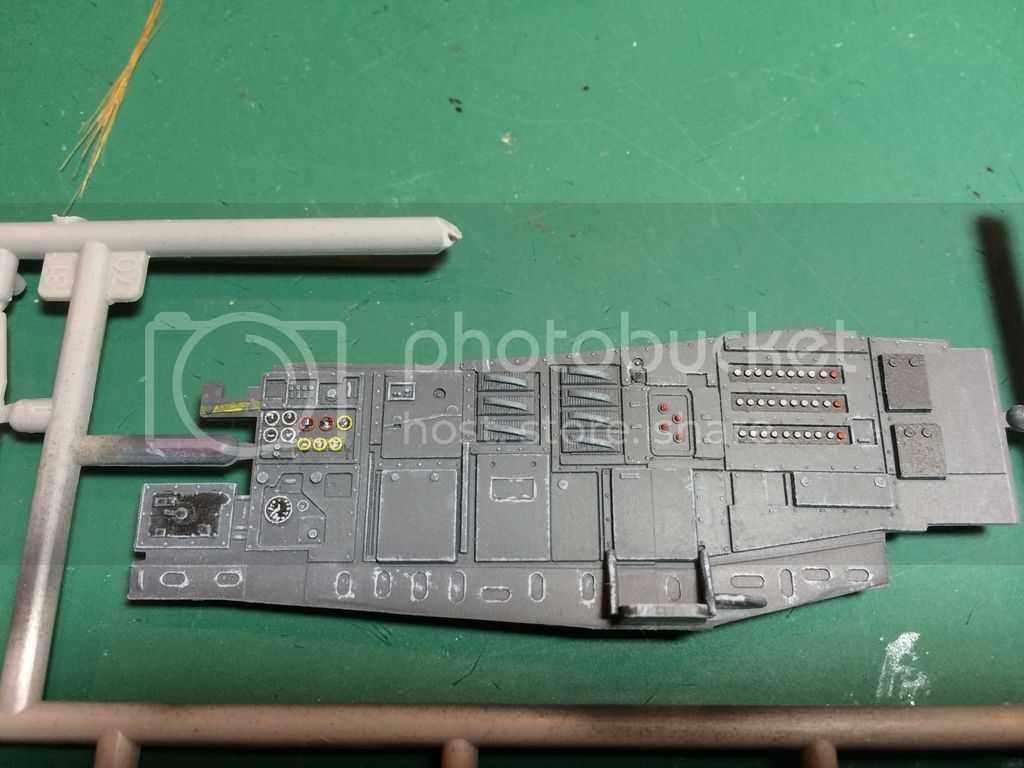
I started with the cockpit. I have almost finished one sidewall (except washes). This is the first time I really lined raised details. You can see on the quality of the lines I still not really used to it. It took me 2 session of an hour to paint the high lights. I am really wondering if dry brushing isnt much easier and quicker... What do you guys think?

litespeed
 News Reporter
England - North West, United Kingdom
Joined: October 15, 2009
KitMaker: 1,976 posts
AeroScale: 1,789 posts
Posted: Tuesday, November 17, 2015 - 02:16 AM UTC
Welcome back to aircraft modeling Lars. I like the way you have done the edges of the boxes, they look worn with use. Weathering is subtle and the black boxes are not too black. The detail on the instruments looks excellent. So a very good start Lars. I look forward to more progress.
tim

JPTRR
 Managing Editor
#051
Tennessee, United States
Joined: December 21, 2002
KitMaker: 7,772 posts
AeroScale: 3,175 posts
Posted: Tuesday, November 17, 2015 - 02:37 AM UTC
Welcome to the Wingy-Thingie world, Lars!

Yes, picking out each detail can be a challenge. Personally, I drybrush all I can, especially in cockpits where visibility is limited. (Even under the Do 217's big greenhouse.)
I agree with Tim about the way you have done the edges of the boxes, and he detail on the instruments looks excellent.

If they demand your loyalty, give them integrity; if they demand integrity, give them your loyalty.--Col John Boyd, USAF
“Any plan where you lose your hat is a bad plan.”
JPTRR
 Managing Editor
#051
Tennessee, United States
Joined: December 21, 2002
KitMaker: 7,772 posts
AeroScale: 3,175 posts
Posted: Tuesday, November 17, 2015 - 02:41 AM UTC
Lars,
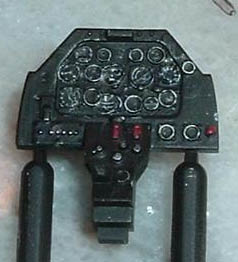
Here is an example of my detailing a panel with drybrushing and Prismacolor color pencil:

It is not razor-sharp but in my eyes, it makes the details "pop" and demonstrates the dials and bezels. I just can't achieve the fine brush work like I used to.

If they demand your loyalty, give them integrity; if they demand integrity, give them your loyalty.--Col John Boyd, USAF
“Any plan where you lose your hat is a bad plan.”
Overijssel, Netherlands
Joined: September 13, 2003
KitMaker: 339 posts
AeroScale: 244 posts
Posted: Tuesday, November 17, 2015 - 02:51 AM UTC
Hi guys,
thank you on the comments. I read an article claiming the cockpit gets so dark that it is good to "exaggerate" with the weathering a bit just to make sure the weathering pops up. As said my last plane is 20 years ago and in that period I dindt weather at all. Also I dont have any models left so I will have to find out how it looks. I am quite satisfied, in my armor models I was quite defensively with weather, it was all quite suttle and I noticed I didnt bring out the details as much as it maybe could... that was another reason for this move.
I guess with the other panel I will go with a combo of dry brush and painting. I think the stark raised object like boxes and knobs are well possible to drybrush leaving the more difficult to reach raised objects with the brush. I will post asap.
gr TC

#424
Queensland, Australia
Joined: April 23, 2015
KitMaker: 4,648 posts
AeroScale: 1,938 posts
Posted: Tuesday, November 17, 2015 - 03:44 AM UTC
Hi Lars,
Your panel looks great! I look forward to seeing more.
Gary
"Artillery adds dignity, to what would otherwise be an ugly brawl."
Frederick The Great
Overijssel, Netherlands
Joined: September 13, 2003
KitMaker: 339 posts
AeroScale: 244 posts
Posted: Wednesday, November 18, 2015 - 02:00 AM UTC
Ok guys,
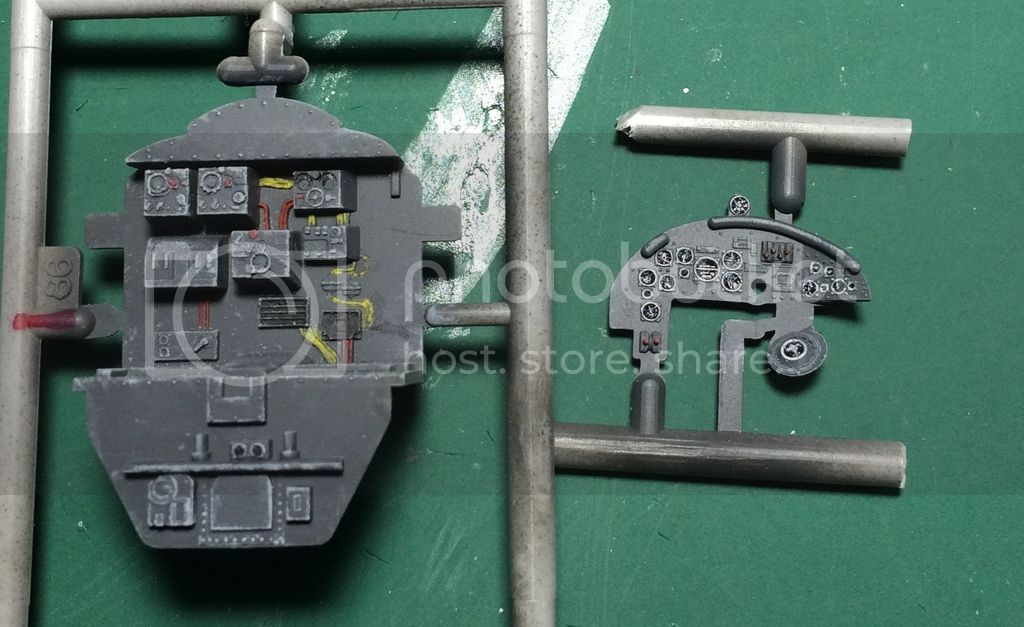
tonight I changed my approach. This time I drybrushed the panel. It was more semi drybrush to get a stronger effect. As thought the harder to reach sections had to be done by brush. Also the nobs and dials were done with a brush. I am not sure wich looks I like more.. the drybrushed panel or the brushed panel (previous post). Dry brushing is sure a heck faster... I guess I will wait and see how things play out when the model is finished and the copula is placed.


#424
Queensland, Australia
Joined: April 23, 2015
KitMaker: 4,648 posts
AeroScale: 1,938 posts
Posted: Wednesday, November 18, 2015 - 12:22 PM UTC
Lars,
This panel looks great, too!
Gary
"Artillery adds dignity, to what would otherwise be an ugly brawl."
Frederick The Great

#041
Kobenhavn, Denmark
Joined: July 20, 2006
KitMaker: 10,069 posts
AeroScale: 3,788 posts
Posted: Wednesday, November 18, 2015 - 08:07 PM UTC
Looks good, Lars. I actually think the drybrushing came out best.
Looking forward to see more.

Campaign'oholic - 252+ campaigns completed
Overijssel, Netherlands
Joined: September 13, 2003
KitMaker: 339 posts
AeroScale: 244 posts
Posted: Thursday, November 19, 2015 - 02:48 AM UTC
Hi guys, thx for liking the panel. I personnally tend to like the drybrushed version more. Although I think with a bit of practice the brush technique gives more possibilities.
One question though: what would you take for the wash? A more brownish colour or a black grey colour?
gr TC
Overijssel, Netherlands
Joined: September 13, 2003
KitMaker: 339 posts
AeroScale: 244 posts
Posted: Friday, November 20, 2015 - 04:14 PM UTC
Well,
here are the last panels. The details like chairs, wheels are ready also. I put some gloss varnish on the dials.
Now I get to the wash stage. Maybe someone can help with the question dark grey wash or brown wash.

gr TC
Oregon, United States
Joined: February 07, 2004
KitMaker: 869 posts
AeroScale: 862 posts
Posted: Tuesday, November 24, 2015 - 04:03 AM UTC
That looks great Lars!
As for your question about the wash...try a black/brown pin wash, this will provide just enough contrast to be seen on the finished model without it looking too cartoonish.
A gray wash would not be that visible after other weathering effects and flat clear coat.
Matrixone
Overijssel, Netherlands
Joined: September 13, 2003
KitMaker: 339 posts
AeroScale: 244 posts
Posted: Wednesday, November 25, 2015 - 02:28 AM UTC
Hi Max,
thanks! I used a black/grey wash. Only on some bigger area's where I would suspect some shadows. I wanted to put together the tub today but I had some problems with the armored shield of the pilot and the chair struts of the co-pilot. The struts broke, on 1 piece two struts broke of. I managed to put it all together and want to believe it will be less then visible when the canopy is but we will see...
Tommorow I will post some pics.
gr TC
Overijssel, Netherlands
Joined: September 13, 2003
KitMaker: 339 posts
AeroScale: 244 posts
Posted: Thursday, November 26, 2015 - 02:24 AM UTC
Well I tried to put together the cockpit today in wich I finally succeeded, I guess.
Lots of mistakes here, issues with fitting the parts, paint where no paint should be and no paint where paint should be. I will put together the fuselage tommorow (I had hoped to finish that tonight to le it dry overnight). I will send some pics then...
gr TC
Overijssel, Netherlands
Joined: September 13, 2003
KitMaker: 339 posts
AeroScale: 244 posts
Posted: Thursday, November 26, 2015 - 05:39 PM UTC
Ok, another update with pictures.
Here we see the inside of the pilots armour plate. I Hadn't dry fit it so I dint notice the big ugly sink mark that was visible. I filled it up and repainted the area:

The cockpit tub is ready. I like the inside paint job. I must be honest now everything is build up it is already difficult to see the differnce between the two panels. I wonder how much detail will be visible after putting on the canopy...
Side view for the pilot:

View the co pilot/bomber. I used some pigments to get some dust effects:

The pilots view on the dashboard.

gr TC
Joel_W
 Associate Editor
New York, United States
Joined: December 04, 2010
KitMaker: 11,666 posts
AeroScale: 7,410 posts
Posted: Friday, November 27, 2015 - 05:42 AM UTC
Lars,
Welcome back to the dark side. 20 years isn't such a long time,as I was on "break' for 30 years or so till I got the bug again.
Your outlining to high light raised details by painting is a technique that I've never really considered but it does offer an alternate and some what different look to running a paint brush held 45 degrees to the edge, and dragged along for a similar effect. The major difference I see is that your highlights are bolder and more pronounced. Both certainly have their preferred applications.
The various cockpit panels really came out quite well, so that each one offers enough pop to add interest to the cockpit as a whole.
As for what color wash for the cockpit, I prefer a brownish dirt tone like Raw or Burnt Sienna, rather then the more traditional Black. The over all effect not only tones and blends, but offers a hint of dirt and dust, which black just can't achieve.
I'll certainly be following your build blog to its conclusion.
Joel
On my Workbench:
Monogram 1/24 scale 427 Shelby Cobra
Just Completed:
Beemax 1/24 scale BMW M3 E30 1992 Evolution II
Overijssel, Netherlands
Joined: September 13, 2003
KitMaker: 339 posts
AeroScale: 244 posts
Posted: Saturday, November 28, 2015 - 12:18 AM UTC
Hi Joel,
thanks for the comments. The painted panel was looking quite thick (and the lines werne't perfect) but even without the canopy it gets so dark in the cockpit that the lines are barely visible.. The effect looks quite nice then.
Next time I will try the brown wash :-).
gr TC
Overijssel, Netherlands
Joined: September 13, 2003
KitMaker: 339 posts
AeroScale: 244 posts
Posted: Saturday, November 28, 2015 - 12:21 AM UTC
Cab someone help me here?
I joined the fusalage parts and had som gaps and overlap. I read in reviews that is standard with this kit.
Now I wonder does this join line have to be completely smooth or should there still be a panel line be visible??
In the picture I filled the seams and did some filing:

gr TC
Joel_W
 Associate Editor
New York, United States
Joined: December 04, 2010
KitMaker: 11,666 posts
AeroScale: 7,410 posts
Posted: Saturday, November 28, 2015 - 12:54 AM UTC
Lars,
the only way to know if indeed the real aircraft had panel lines there is to look at as many photographs of the real aircraft as you can.
As for filling in that seam line, it does look like you missed a few spots under the trailing edge of the wing, and that some of the filled in areas are now below the surface nor smooth enough. The easiest way to ck seams is to hand brush on some primer, let dry, then see what you have.
Joel
On my Workbench:
Monogram 1/24 scale 427 Shelby Cobra
Just Completed:
Beemax 1/24 scale BMW M3 E30 1992 Evolution II
Overijssel, Netherlands
Joined: September 13, 2003
KitMaker: 339 posts
AeroScale: 244 posts
Posted: Saturday, November 28, 2015 - 02:25 AM UTC
Hi Joel,
I quit as soon as I realized I couldnt make up my mind what to do: smooth or panel line...
So this is half baked work to say at least. I will check out the reference but my feeling say going for a panel line will be easier when I see what I got now.
gr TC
PS Thx for the sharp eye on the wing detail I missed :-)
Overijssel, Netherlands
Joined: September 13, 2003
KitMaker: 339 posts
AeroScale: 244 posts
Posted: Saturday, November 28, 2015 - 02:28 AM UTC
Ok looking at some reference there should be a panel line half the way... Well I know what do lets see if I succeed.
I took this picture of a E-2 because it colours make it easier to determine if there is a line or not...

on the E-5 its the same

gr TC

#424
Queensland, Australia
Joined: April 23, 2015
KitMaker: 4,648 posts
AeroScale: 1,938 posts
Posted: Saturday, November 28, 2015 - 02:56 AM UTC
Also, looking at pictures taken by other modellers can prove useful since modellers often darken their panel lines.
Personally, I hate ut when a panel line and a seam coincide. So hard to make pretty.
"Artillery adds dignity, to what would otherwise be an ugly brawl."
Frederick The Great
Overijssel, Netherlands
Joined: September 13, 2003
KitMaker: 339 posts
AeroScale: 244 posts
Posted: Saturday, November 28, 2015 - 08:27 PM UTC
Gary thx,
to bad there arent thtat much clear pictures of this model on the net.
I decided I will try to smooth it all up.
gr TC
Joel_W
 Associate Editor
New York, United States
Joined: December 04, 2010
KitMaker: 11,666 posts
AeroScale: 7,410 posts
Posted: Saturday, November 28, 2015 - 08:51 PM UTC
Lars,
The drawing only has that panel line going for one panel, then it stops. It's a drawing, so I would question it to start with, especially since it's purpose is to show a particular paint scheme and set of markings.
Do some google searches to find as many photos as you can.
Joel
On my Workbench:
Monogram 1/24 scale 427 Shelby Cobra
Just Completed:
Beemax 1/24 scale BMW M3 E30 1992 Evolution II
Overijssel, Netherlands
Joined: September 13, 2003
KitMaker: 339 posts
AeroScale: 244 posts
Posted: Monday, November 30, 2015 - 11:23 PM UTC
Ok,
the weekend brought less progress then hoped. But still a bit. I decided to even out the overlap on the fuselages.. I finished it tonight. What do you guys think?

gr TC


