

Lars,
The seam looks a lot better, but only a coat of primer will tell you if it's perfect or not. The eye test, at least for me, isn't always accurate nor the best way.
Joel
World War II
Discuss WWII and the era directly before and after the war from 1935-1949.
Discuss WWII and the era directly before and after the war from 1935-1949.
Hosted by Rowan Baylis
Revell Dornier Do 217-5 1/48 Build
Joel_W

Joined: December 04, 2010
KitMaker: 11,666 posts
AeroScale: 7,410 posts
Posted: Tuesday, December 01, 2015 - 12:28 AM UTC


c4willy

#305

Joined: February 01, 2006
KitMaker: 1,673 posts
AeroScale: 1,517 posts

Posted: Wednesday, December 02, 2015 - 12:40 PM UTC
The seam looks great! But I agree with Joel's assessment that only a spray with primer will tell you whether it's good enough.

Twentecable

Joined: September 13, 2003
KitMaker: 339 posts
AeroScale: 244 posts
Posted: Sunday, December 06, 2015 - 01:22 AM UTC
Hi
Joel was right. I sprayed some primer on the seam and there are 2 spots to work over...
progress picutres will follow soon..
gr TC
Joel was right. I sprayed some primer on the seam and there are 2 spots to work over...
progress picutres will follow soon..
gr TC
Twentecable
Joined: September 13, 2003
KitMaker: 339 posts
AeroScale: 244 posts
Posted: Wednesday, December 09, 2015 - 02:27 AM UTC
So time for an update.
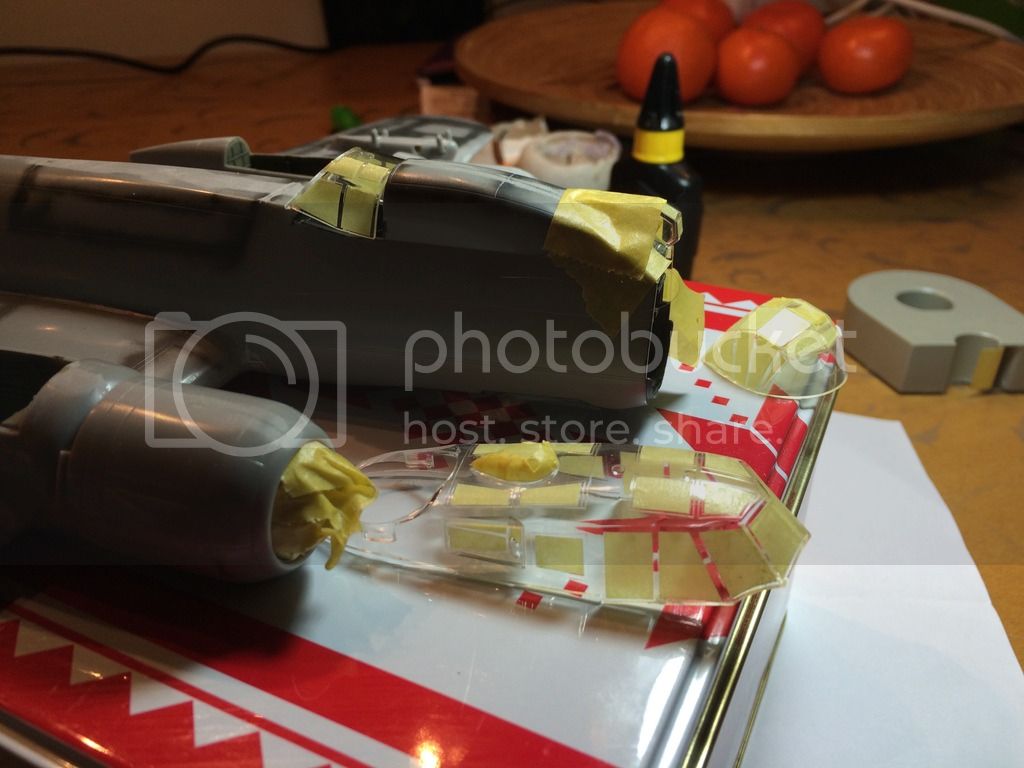
I did quite some things. I reworked the fuselage. Also I painted the interior parts like the narcelles. Here I learned that Vallejo air is cool but it schould Always be mixed with Vallejo air and not regular Vallejo paint thinnend in water, especially when you mix in the airbrush. So Everything when out too light. I applied a green/grey filter and a heavy wash.
I tried Vallejo wahs wich is based on accryl and I really dont like it. The part on the right is worked with the Vallejo wash. After that I stepped to the good old oil wash.
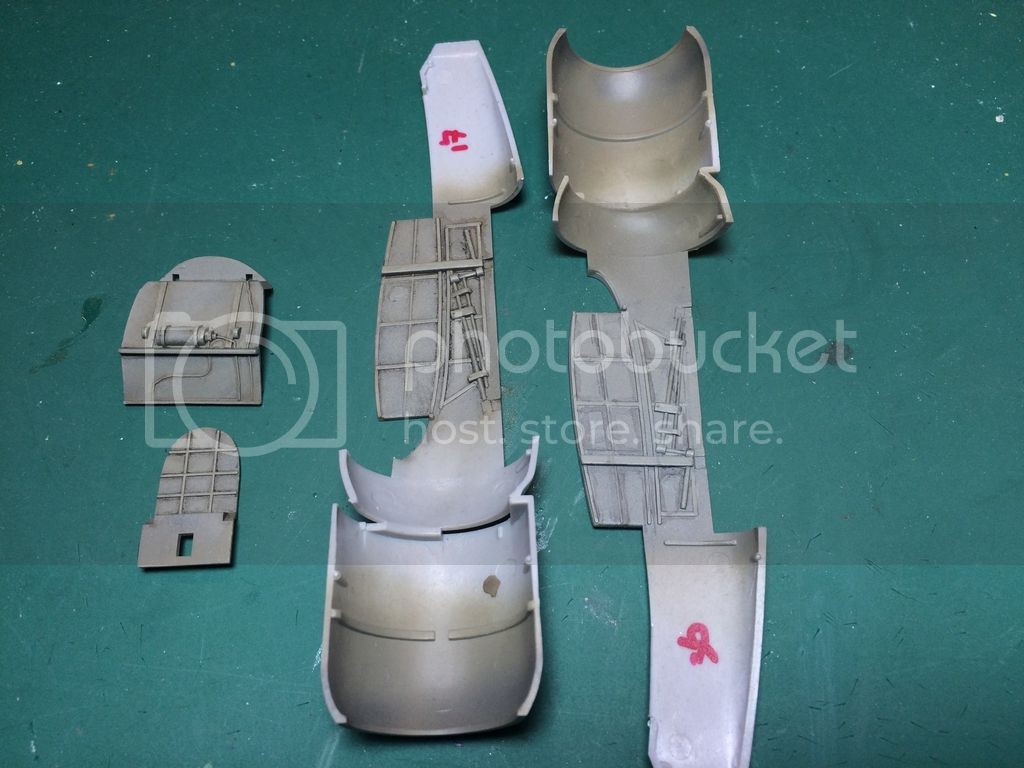
So now I got the upper and underwing glued, almost all internal pieces painted. Tommorow I want to finish painting them and glue the wings to the plane. Then I will have to do some canopy masking and I hope to get some camo on the plane in the weekend.
gr TC
I did quite some things. I reworked the fuselage. Also I painted the interior parts like the narcelles. Here I learned that Vallejo air is cool but it schould Always be mixed with Vallejo air and not regular Vallejo paint thinnend in water, especially when you mix in the airbrush. So Everything when out too light. I applied a green/grey filter and a heavy wash.
I tried Vallejo wahs wich is based on accryl and I really dont like it. The part on the right is worked with the Vallejo wash. After that I stepped to the good old oil wash.
So now I got the upper and underwing glued, almost all internal pieces painted. Tommorow I want to finish painting them and glue the wings to the plane. Then I will have to do some canopy masking and I hope to get some camo on the plane in the weekend.
gr TC
Twentecable
Joined: September 13, 2003
KitMaker: 339 posts
AeroScale: 244 posts
Posted: Thursday, December 10, 2015 - 09:15 PM UTC
Okay another update:
She finally starts looking like a plane:
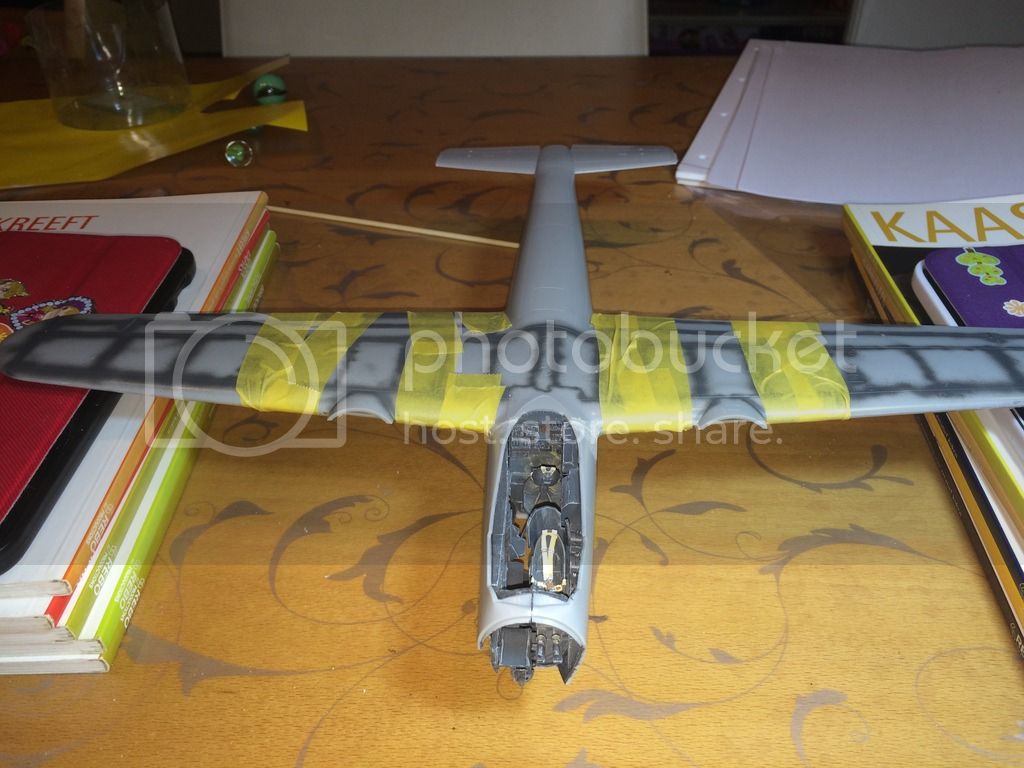
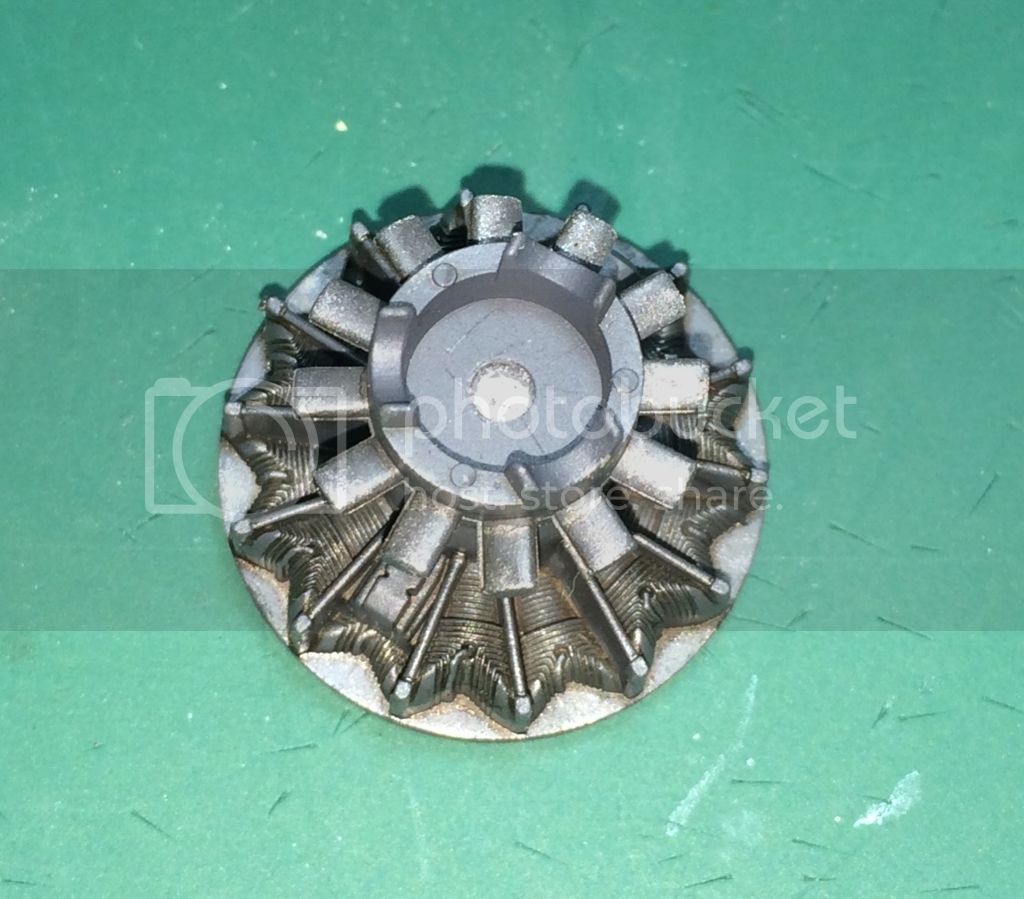
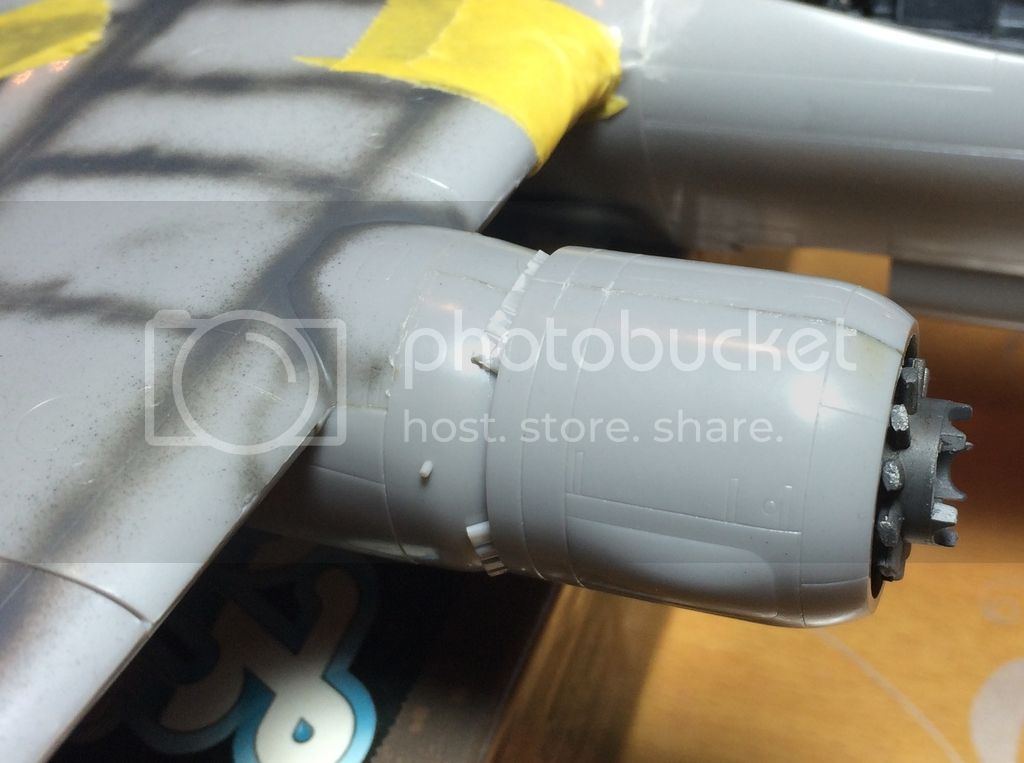
here is the motor. It is not much, most of it wont be seen on the finished model so I kept it basic. RLM66 and some steel drybrush, finished with a heavy brown wash.
gr TC
She finally starts looking like a plane:

here is the motor. It is not much, most of it wont be seen on the finished model so I kept it basic. RLM66 and some steel drybrush, finished with a heavy brown wash.

gr TC
Joel_W
Joined: December 04, 2010
KitMaker: 11,666 posts
AeroScale: 7,410 posts
Posted: Saturday, December 12, 2015 - 09:36 PM UTC
Lars,
You're making excellent progress. While the engines might not be that easy to view, they're still visible, so doing the basics plus was the right way to go.
Joel
You're making excellent progress. While the engines might not be that easy to view, they're still visible, so doing the basics plus was the right way to go.
Joel

litespeed


Joined: October 15, 2009
KitMaker: 1,976 posts
AeroScale: 1,789 posts
Posted: Sunday, December 13, 2015 - 12:52 AM UTC
Lars your build is looking excellent, it's great seeing the 217 taking shape.
tim
tim

GazzaS
#424

Joined: April 23, 2015
KitMaker: 4,648 posts
AeroScale: 1,938 posts

Posted: Sunday, December 13, 2015 - 01:56 AM UTC
Great to see it coming together Lars. Your cockpit looks great!

mrockhill
Joined: June 17, 2009
KitMaker: 566 posts
AeroScale: 507 posts

Posted: Sunday, December 13, 2015 - 09:27 AM UTC
Lars,
Looks like a great time for me to learn about Dorniers! Your cockpit work looks excellent!
Looks like a great time for me to learn about Dorniers! Your cockpit work looks excellent!
Twentecable
Joined: September 13, 2003
KitMaker: 339 posts
AeroScale: 244 posts
Posted: Saturday, December 19, 2015 - 08:13 PM UTC
Hi guys thanks for the nice comments!
I had a very busy week at work and didnt have much time or spirit on moddeling. This weekend I picked it up again and well I noticed that I am on a steep learning curve with this one.
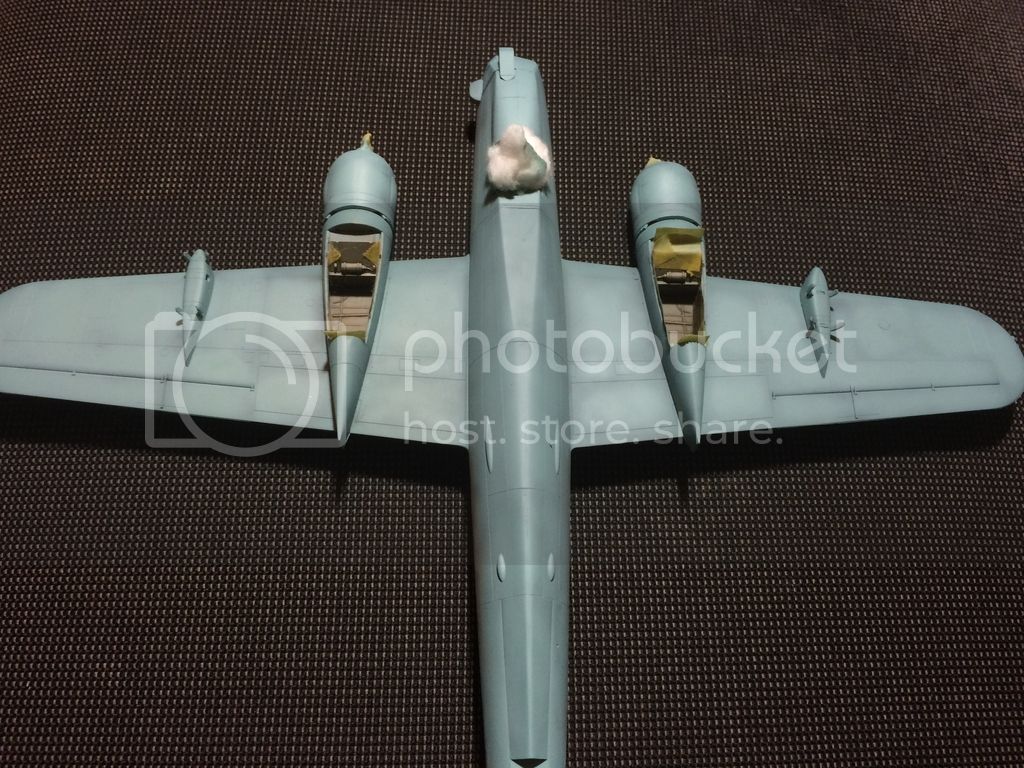
It seems I haven't joined the fuselage cleanly... it is like a few millimeters off to the left side. Enough that I had to sand down the left rudder to get it fit.
The engeine narcelles are a pain now.
I tried to pull them into position by using masking tape. I will have to see if it worked but I don't have a great feeling about it.
Anyway there will be alot of filling and sanding to be done to get this right and it surely wont be a price winner (lol as I ever expected it to be).
In the next update I will show some pictures of the gaps I hope you can help tell me wich to fill and wich not...
gr TC
I had a very busy week at work and didnt have much time or spirit on moddeling. This weekend I picked it up again and well I noticed that I am on a steep learning curve with this one.
It seems I haven't joined the fuselage cleanly... it is like a few millimeters off to the left side. Enough that I had to sand down the left rudder to get it fit.
The engeine narcelles are a pain now.
I tried to pull them into position by using masking tape. I will have to see if it worked but I don't have a great feeling about it.
Anyway there will be alot of filling and sanding to be done to get this right and it surely wont be a price winner (lol as I ever expected it to be).
In the next update I will show some pictures of the gaps I hope you can help tell me wich to fill and wich not...
gr TC
Twentecable
Joined: September 13, 2003
KitMaker: 339 posts
AeroScale: 244 posts
Posted: Saturday, December 19, 2015 - 11:09 PM UTC
So everything went better than thought. Now I hope the parts arent on to much stress. I will have to work away the seams but I guess this will do :

gr TC
gr TC
GazzaS
#424
Joined: April 23, 2015
KitMaker: 4,648 posts
AeroScale: 1,938 posts
Posted: Saturday, December 19, 2015 - 11:13 PM UTC
Hi Lars,
These twin engined planes always seem to present some difficulties in joining with the wings. For mine, I kept filing and sanding until the engines were where I wanted. Fortunately then the rest of the nacelle was where I wanted it to be. I'd rather the part sat in place instead of being forced. I always fear that they might spring later if put under tension.
Bw, Gs
Twentecable
Joined: September 13, 2003
KitMaker: 339 posts
AeroScale: 244 posts
Posted: Monday, January 18, 2016 - 01:50 AM UTC
Hi guys,
just a sign of life.
Last weeks were quite busy and I didnt make the proogress I would have washed. Also because alot of sanding, filling and masking activity. Really not much to see here but I am imn good spirit next weekend the first layer of paint will be on the plane... wish me luck
gr TC
just a sign of life.
Last weeks were quite busy and I didnt make the proogress I would have washed. Also because alot of sanding, filling and masking activity. Really not much to see here but I am imn good spirit next weekend the first layer of paint will be on the plane... wish me luck
gr TC
SGTJKJ

#041

Joined: July 20, 2006
KitMaker: 10,069 posts
AeroScale: 3,788 posts

Posted: Monday, January 18, 2016 - 07:36 PM UTC
Lars, looks good. I am sure this will be an excellent build when finished. I am
Looking forward to see more.
Good luck with the painting
Looking forward to see more.
Good luck with the painting

heavyjagdpanzer
Joined: February 17, 2013
KitMaker: 173 posts
AeroScale: 108 posts
Posted: Monday, January 18, 2016 - 08:07 PM UTC
Lars, it does not look like you have lost your modeling skills after 20 years. What you have done looks good. It is never too late to come back; I just finished my first model airplane in over 30 years.
Twentecable
Joined: September 13, 2003
KitMaker: 339 posts
AeroScale: 244 posts
Posted: Tuesday, January 19, 2016 - 12:05 AM UTC
@ Jesper and Bill
thank you very much for the kind comments.
gr TC
thank you very much for the kind comments.
gr TC

greif8

Joined: January 17, 2006
KitMaker: 673 posts
AeroScale: 492 posts
Posted: Tuesday, January 19, 2016 - 11:40 AM UTC
Hi Lars, very, very nice work, the build is shaping up nicely. I agree with the other posters that you have not "lost it" during your break from modeling.
Twentecable
Joined: September 13, 2003
KitMaker: 339 posts
AeroScale: 244 posts
Posted: Wednesday, January 20, 2016 - 01:46 AM UTC
Hi Ernest many thanks.
Lets see what happens when the paint gets on the model. I have finally reached the point (after some more filling and taping) that I can paint the bird. I hope to start tommorrow!!
gr TC
Lets see what happens when the paint gets on the model. I have finally reached the point (after some more filling and taping) that I can paint the bird. I hope to start tommorrow!!
gr TC
Joel_W
Joined: December 04, 2010
KitMaker: 11,666 posts
AeroScale: 7,410 posts
Posted: Wednesday, January 20, 2016 - 02:39 AM UTC
Lars,
When you said you had to pull them into position with masking tape, did they seem to then pop into the right position? Further dry fitting would have helped as you just tweak them a little at a time till they fit. One benefit of using liquid glue is that it will melt enough of the plastic so that it can start to conform to the allotted space as needed. Keep pressure on the glue joint for a few days, and you should be good to go.
Joel
Twentecable
Joined: September 13, 2003
KitMaker: 339 posts
AeroScale: 244 posts
Posted: Thursday, January 21, 2016 - 01:42 AM UTC
Hi Joel,
well several things went wrong there. First I have messed up the whole gluing of the fuselage parts, they are a few mm of. Because of that I thought this bad fit of the narcelle is "normal".
After that I installed the other narcelle and it went in like butter.Would I have chosen to do the other first I surely would have tried more dry fitting first. Like in math making an eroor in the first sum resolves in errors after that.
gr TC
c4willy
#305
Joined: February 01, 2006
KitMaker: 1,673 posts
AeroScale: 1,517 posts
Posted: Friday, January 22, 2016 - 02:33 AM UTC
Lars it sometimes happens that we make mistakes and the test of our skills lies in how we remedy those errors. It's also true that your fellow modellers will be unlikely to see the mistakes that are glaringly obvious to us only because we know they are there. I'm sure after filling, sanding, painting and weathering the errors will be less than noticeable. It's been a great build I'm enjoying watching your progress and look forward to seeing her painted and weathered.
Twentecable
Joined: September 13, 2003
KitMaker: 339 posts
AeroScale: 244 posts
Posted: Friday, January 22, 2016 - 10:42 PM UTC
Hi Willy, thanks for the kind words >-)
gr TC
gr TC
Twentecable
Joined: September 13, 2003
KitMaker: 339 posts
AeroScale: 244 posts
Posted: Friday, January 22, 2016 - 10:47 PM UTC
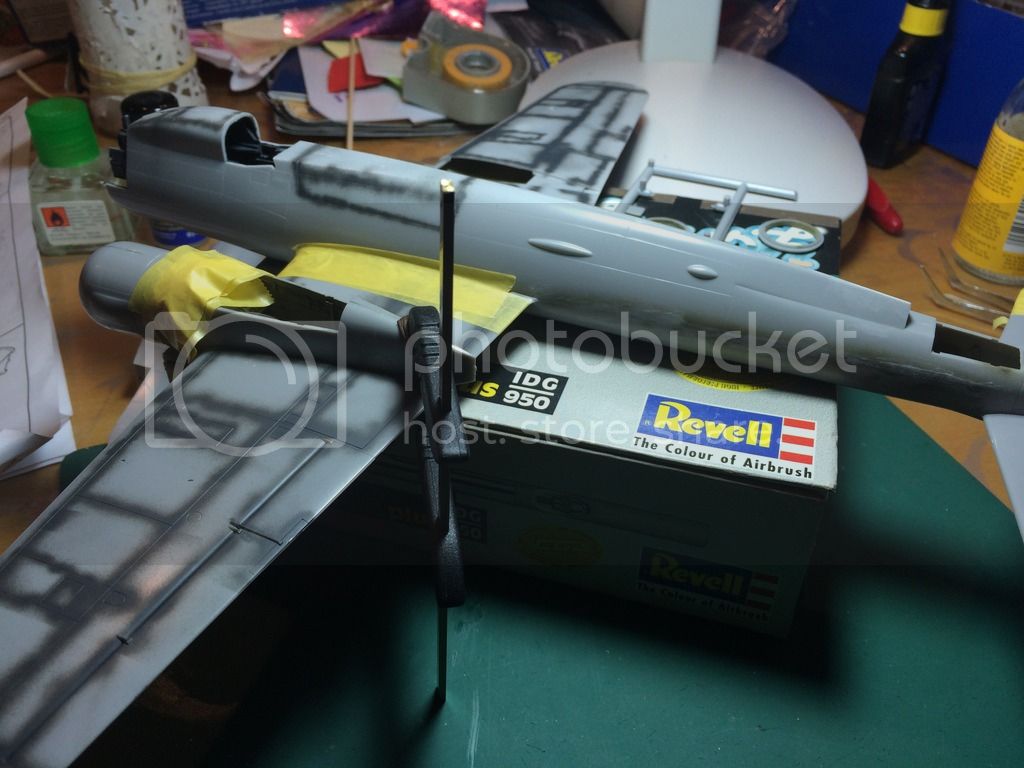
Well here we are the first dash of paint is on her. I airbrushed the under fuselage light blue.
Afther the forst layer of paint I tried to post shade the thing. That was a total fiasco. I mixed my Vallejo in a 1 to 5 rato with water and tried to spray it. I used 0,9 bar, 1,5 bar and 2 bar. Nothing worked. The paint bubbled in the cup and came out in irragular quantities. Can someone tell me what went wrong?
Finally I post shaded with undilluted paint and oversprayed that again with the blue followed by a blue mixed with white for the highlights.
In the end I can be satisfied with result but I really would have liked to do it with the right technique.
here it is
gr TC
Joel_W
Joined: December 04, 2010
KitMaker: 11,666 posts
AeroScale: 7,410 posts
Posted: Saturday, January 23, 2016 - 02:51 AM UTC
Bubbling in the cup is the result of a air leak usually from around the main cup. The front cup is for protection only.
For weathering/shading, when I use Lifecolor paints, I dilute them 1:1, and air brush around a flow rate of 12 psi or so, not the static psi which is a useless figure. I'm as close as I can get, while I slowly increase the amount of paint till I just get it to flow.
1st things 1st. Find and fix your air leak.
Joel
GazzaS
#424
Joined: April 23, 2015
KitMaker: 4,648 posts
AeroScale: 1,938 posts
Posted: Saturday, January 23, 2016 - 07:13 AM UTC
Glad to see some paint on, Lars. I've had weird airbrush happenstances when changing mediums.
 |

WEB HOSTING BY


Copyright ©2021 AeroScale and Kitmaker Network, a subsidiary of Silver Star Enterprises
All Rights Reserved. Please read our Conditions of Use and Privacy Policy.
All Rights Reserved. Please read our Conditions of Use and Privacy Policy.