I think we're going to need a bigger display cabinet . . . . . , ,
Cheers, D
Air Campaigns
Want to start or join a group build? This is where to start.
Hosted by Frederick Boucher, Michael Satin
Edgar Brooks Memorial Spitfire Campaign
Posted: Sunday, February 21, 2016 - 04:22 PM UTC
BlackWidow
European Union
Joined: August 09, 2009
KitMaker: 1,732 posts
AeroScale: 1,336 posts
Joined: August 09, 2009
KitMaker: 1,732 posts
AeroScale: 1,336 posts
Posted: Tuesday, March 01, 2016 - 12:52 AM UTC
Ooops! That pilot took the words "Flying Home" literally ....
Just want to let you guys all know that I've started my campaign build last week and hópe to show some WIP photos soon.
Torsten
Just want to let you guys all know that I've started my campaign build last week and hópe to show some WIP photos soon.
Torsten
Posted: Friday, March 04, 2016 - 05:46 PM UTC
HAPPY BIRTHDAY SPITFIRE
http://www.airfix.com/uk-en/shop/themes/spitfire-80th-anniversary.html?utm_campaign=1122375_Airfix%20-%20Spitfire%20Anniversary%20-%20week%2049%202016&utm_medium=email&utm_source=Hornby%20PLC&utm_content=Spitfire&_%24ja=tsid%3A71284&dm_i=2DJZ
What is your favorite Mark ?
Me, it is the Ia
Cheers
http://www.airfix.com/uk-en/shop/themes/spitfire-80th-anniversary.html?utm_campaign=1122375_Airfix%20-%20Spitfire%20Anniversary%20-%20week%2049%202016&utm_medium=email&utm_source=Hornby%20PLC&utm_content=Spitfire&_%24ja=tsid%3A71284&dm_i=2DJZ
What is your favorite Mark ?
Me, it is the Ia
Cheers
BlackWidow
European Union
Joined: August 09, 2009
KitMaker: 1,732 posts
AeroScale: 1,336 posts
Joined: August 09, 2009
KitMaker: 1,732 posts
AeroScale: 1,336 posts
Posted: Friday, March 11, 2016 - 02:17 AM UTC
SunburntPenguin
Australian Capital Territory, Australia
Joined: March 15, 2011
KitMaker: 121 posts
AeroScale: 112 posts
Joined: March 15, 2011
KitMaker: 121 posts
AeroScale: 112 posts
Posted: Friday, March 11, 2016 - 03:03 AM UTC
Looking good so far there Torsten.
I have been busy with work and other projects recently but will be dragging my Airfix Spitfire Mk XII on to the workbench very soon.
BlackWidow
European Union
Joined: August 09, 2009
KitMaker: 1,732 posts
AeroScale: 1,336 posts
Joined: August 09, 2009
KitMaker: 1,732 posts
AeroScale: 1,336 posts
Posted: Monday, March 14, 2016 - 01:23 AM UTC
Posted: Monday, March 14, 2016 - 03:43 AM UTC
Posted: Wednesday, March 16, 2016 - 03:48 AM UTC
Hi there
I realised this build was slipping away from me - and I really do want to add something as a thank-you to all the help Edgar gave me over the years. As lovely as the Alley Cat Spitfire Prototype is, I've hit some major fit issues - something I'll need to step back from and do a re-assessment as to how to proceed.
It was tempting to turn to Trumpeter's ghastly Spiteful - something Edgar and I corresponded on - and a kit that I know irked him deeply, but that's a major undertaking and something I don't want to rush.
So, in the interests of getting something built, I've started the Airfix PR.XIX and I'll use some Xtradecals for a wartime scheme.
All the best
Rowan
greif8
Bayern, Germany
Joined: January 17, 2006
KitMaker: 673 posts
AeroScale: 492 posts
Joined: January 17, 2006
KitMaker: 673 posts
AeroScale: 492 posts
Posted: Wednesday, March 16, 2016 - 12:16 PM UTC
I have started my build. I did not know Edgar personally, but I have benefited from his knowledge over the years; hopefully my build will do justice to his memory.
First up is a photo of the kit box that I forgot to post when I took it early this week. My next post will explain where I am heading with this build.
greif8
Bayern, Germany
Joined: January 17, 2006
KitMaker: 673 posts
AeroScale: 492 posts
Joined: January 17, 2006
KitMaker: 673 posts
AeroScale: 492 posts
Posted: Wednesday, March 16, 2016 - 12:58 PM UTC
Using Revell of Germany's 1/32 scale Spitfire MkII as base, I plan to build a BoB Spitfire MkIa. There were very few external differences between the aircraft as far as I know, so the Revell kit should suffice for exterior viewing. I will likely make a few minor corrections as needed, but I don't plan to do any major make overs. I realize that the kit has a few minor, in my view at least, dimensional errors, but I am not much of a rivet counter, and I don't plan to spend the time required to bend and sand the fuselage and wings to correct a millimeter or less here and there. What I do plan to do is a bit of super detailing of the cockpit, to include either scratch building some of the important, and seeable, equipment that would have been in a MkIa Spitfire; or use some of the excellent Barracuda AM parts to correct kit errors. I will also use a couple of the Barracuda AM packs to fix a few of the exterior issues on the kit, as well as, Eagle Parts excellent prop.
I won't be correcting every single thing; some because I lack the skill or ambition to do so and a couple because you won't be able to see them anyway. For those interested, following is a list, not comprehensive as I am definitely not an expert here, of cockpit related items that can be corrected to make the MkII pit a MkIa pit:
The lower right of the IP should have two fuel gauges. (I won't be correcting this.)
Rudder Pedals should have cloth retainers at the top.
The Landing Lights device should be on the lower left of the IP just to the below right of the Brake Pressure Gauge.
The kit instructions are wrong when they say to paint the gun firing button all red. It should be brass, with the ring around it in red.
I am replacing the seat with the Barracuda one. It has the correct seat back cushion and the armor plate. Also I will not be installing the Very pistol cartridge holder to the front of the seat.
I will make a radiator flap lever. This goes on the floor just to the left of left rudder operating rod.
I won't install part 36, the IFF destructor panel; they were not installed until after BoB.
I won't install parts 37 and 38, VHF radios were very uncommon during BoB.
I will be installing all the Barracuda AM cockpit stuff, as that is all accurate for a BoB period Spit.
There is very likely a few other things that I have missed as I am not an in depth expert on the Spitfire, but I think I will be able to construct a pretty accurate pit with what I do know. Of course I am all ears if any of you have better or more accurate knowledge then I do.
On to the photos of what I have done thus far.
Overall shot showing most of the pit parts. The resin parts are all Barracuda, the white, beige or darker grey parts are what I have scratched as is the wire of course.

IP cabling and the Landing Lights switch.

Pit side walls with resin and scratched parts.

Rudder Pedal Assembly, the beige colored pieces are extensions I made. The very nice Barracuda Control Stick.

The seat bulkhead with the insulated cable I made using a piece of plastic rod drilled out with small pieces of copper wire that are installed in the voltage regulator.


ludwig113
England - South East, United Kingdom
Joined: February 05, 2008
KitMaker: 1,381 posts
AeroScale: 1,110 posts
Joined: February 05, 2008
KitMaker: 1,381 posts
AeroScale: 1,110 posts
Posted: Wednesday, March 16, 2016 - 10:51 PM UTC
hi all,
well my build is going well(eduard 1/48 mk1Xe) but my photobucket isn't !... really need to sort another photo host.
i've finished the cockpit and will be closing it all up soon.
all the best
paul
well my build is going well(eduard 1/48 mk1Xe) but my photobucket isn't !... really need to sort another photo host.
i've finished the cockpit and will be closing it all up soon.
all the best
paul
Posted: Saturday, March 19, 2016 - 01:14 AM UTC
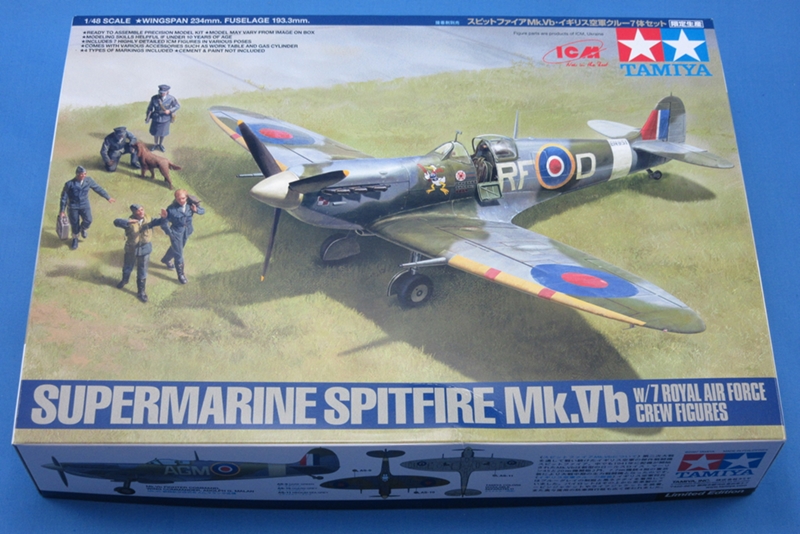
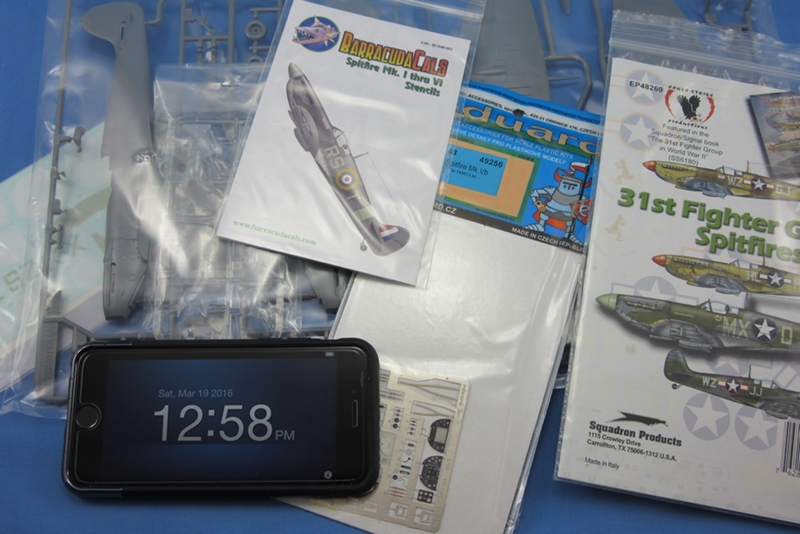
Tamiya 1:48 Spitfire Mk.Vb
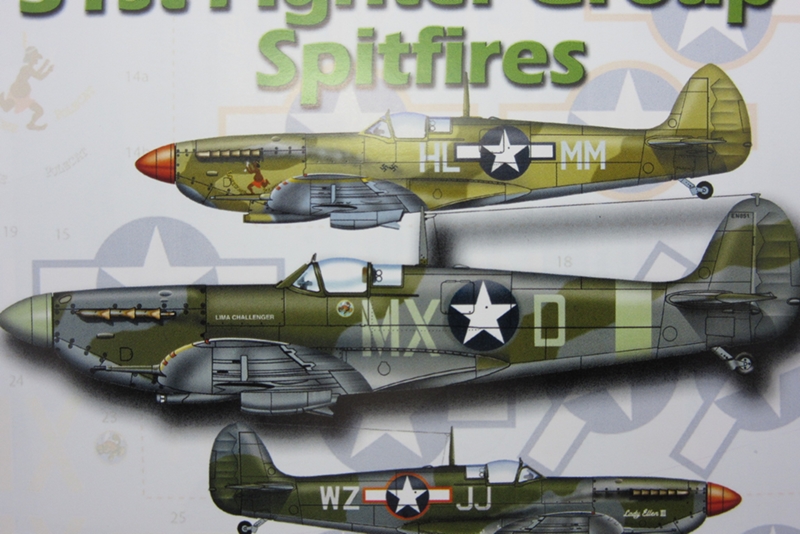
Thought I would build something for this since it has such a long window to finish. I need something simple to work on when the Ho 229 is drying/setting whatever, and haven't built Tamiya's Spitfire yet. I'll be doing "Lima Challenger" flown by LT Wooten from the 307th FS, 31st FG out of West Sussex in August 1942.
BlackWidow
European Union
Joined: August 09, 2009
KitMaker: 1,732 posts
AeroScale: 1,336 posts
Joined: August 09, 2009
KitMaker: 1,732 posts
AeroScale: 1,336 posts
Posted: Saturday, March 19, 2016 - 06:02 PM UTC
Nice choices, Cam and Paul. Good luck for your builds. That cockpit is looking really fine, Ernest. Hope you can still see that work when it's finished (and not only know that it's there ....)
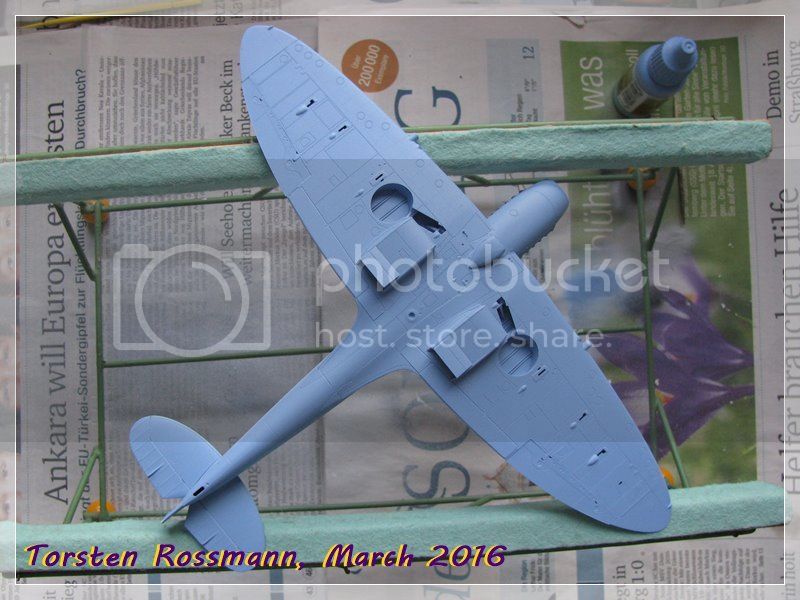
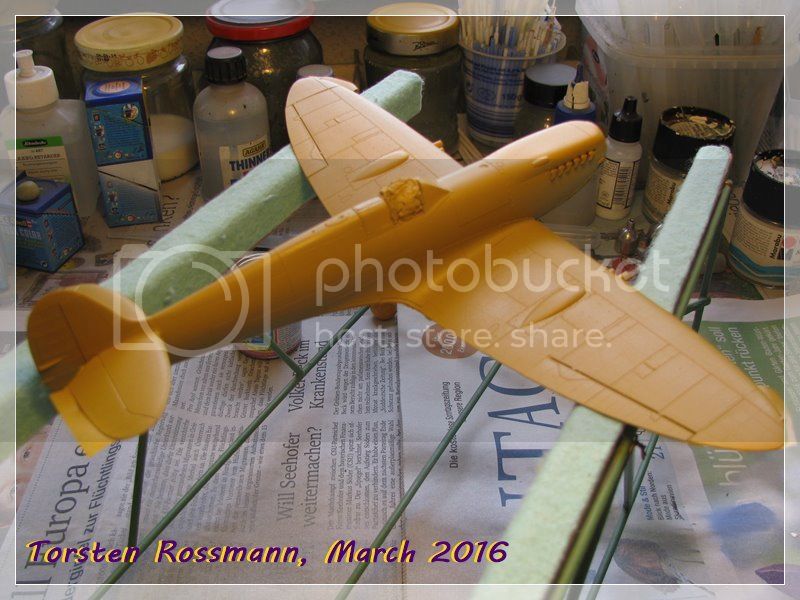
Well folks, here's another small update of my Spit 9. First white primer is on ....
.... next step was Azure Blue No. 71108 from Vallejo. First it looked like "Baby Boy Blue" but now that it's dry it looks nice ....
.... after masking the underside on 2 evenings, this morning it was airbrush time again with Middle Stone H 71 from Gunze. Looks like a big yummy toffee candy now ....
Next step is airbrushing Dark Earth from Gunze. The main painting work should be done right before Easter.
Have a nice Sunday everyone!
Torsten
Posted: Sunday, March 20, 2016 - 01:54 AM UTC
Impressive progress on lots of fronts here guys!
Torsten, my first thought was caramel sauce, but your toffee description fits better. Either way, please don't bite into it, it is looking great!
Do you have any issues with the different paint brands not agreeing with each other? I have a couple of builds where my base colour was Tamiya acrylic, and once it was fully cured I used Gunze acrylic for the second camo colour. After a while the top colour developed a lot of very fine cracks. This hasn't happened every time, but often enough for me to avoid mixing brands at all any more.
Ernest, super detail work! As Torsten said, I hope some of it is still visible once you get it buttoned up.
Cheers, D
BlackWidow
European Union
Joined: August 09, 2009
KitMaker: 1,732 posts
AeroScale: 1,336 posts
Joined: August 09, 2009
KitMaker: 1,732 posts
AeroScale: 1,336 posts
Posted: Monday, March 21, 2016 - 12:31 AM UTC
Thanks Damian!
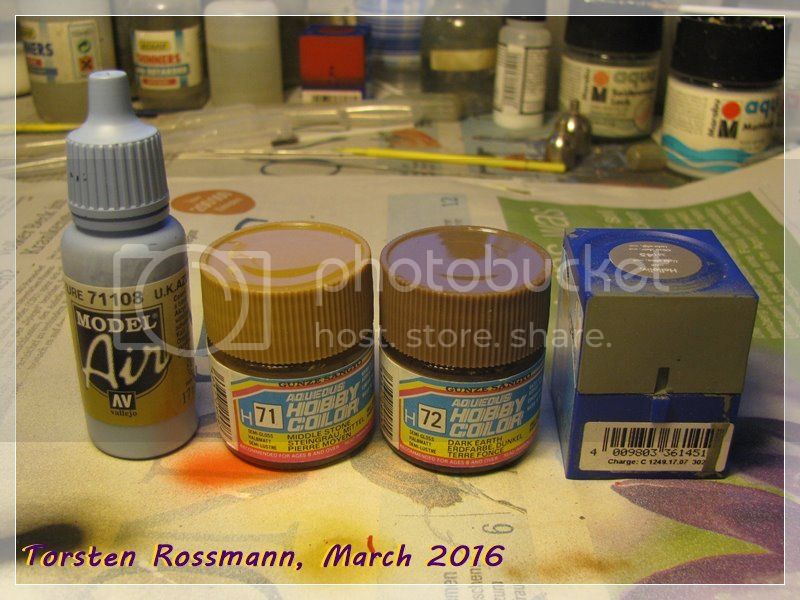
I always use different brands on my kits, because I don't like mixing paints. You know, 5 parts paint A, 3 parts paint B, 2 parts paint C and so on. Revell is the best negative example for that. I look what colour comes closest to the desired one and that's my choice. I have 5 brands of paints in my easel and they work perfect with each other. On my Finnish Air Force Saab Draken I have painted Gunze Midnight Blue over Vallejo Olive Drab on the upperside. No cracks at all. First paint is alcohol based and the second is water based. Here you can see the main paints I use on my Spitfire now. Vallejo, Gunze and Revell ....
Torsten
greif8
Bayern, Germany
Joined: January 17, 2006
KitMaker: 673 posts
AeroScale: 492 posts
Joined: January 17, 2006
KitMaker: 673 posts
AeroScale: 492 posts
Posted: Thursday, March 24, 2016 - 05:27 PM UTC
Following are some photos of the progress I have made on the Spitfire. Thus far things have gone fairly smoothly. The Barracuda AM parts have all fit well, and the minor surgery I did to the lower wing to fit the radiator and oil cooler AM parts went off without a hitch. After measuring the correct dimensions, I used the UMM scriber to score the plastic until it was thin enough to snap away cleanly.
The IP turned out very well, though a few of the instrument decals that I used do not show the correct gauge in every case. The photo makes the black look "clunky" but that is the reflection caused by the gloss coat. The rest of the pit also turned out fairly well. The Sutton Harness is the most complex, and fiddly, cloth seatbelt that I have built to date. It does look the part however. It will be very hard to see, but I made two wires leading back from the end buckle of the seatbelt toward the rear of the fuselage. I think this was part of the retracting system on the real thing. I like how the Barracuda AM door turned out, it looks MUCH better then the kit part.
You can't very much of the scratch built wiring I made for the cockpit now that it is closed up. But that is pretty common for scale model pits. Anyway, on to the photos.
The IP
The Barracuda AM radiator and oil cooler installed.
The very nice Barracuda access door.
The HGW Sutton Harness.
You can just make out the wires I made at the right of the photo. (I noticed that I needed to paint the seat braces green. Doh!)
Cockpit tub installed in left fuselage half.
All closed up.
BlackWidow
European Union
Joined: August 09, 2009
KitMaker: 1,732 posts
AeroScale: 1,336 posts
Joined: August 09, 2009
KitMaker: 1,732 posts
AeroScale: 1,336 posts
Posted: Sunday, March 27, 2016 - 02:34 PM UTC
That cockpit looks great, Ernest. Too bad, that most of the work dissapears in the fuselage without ever seen again ....
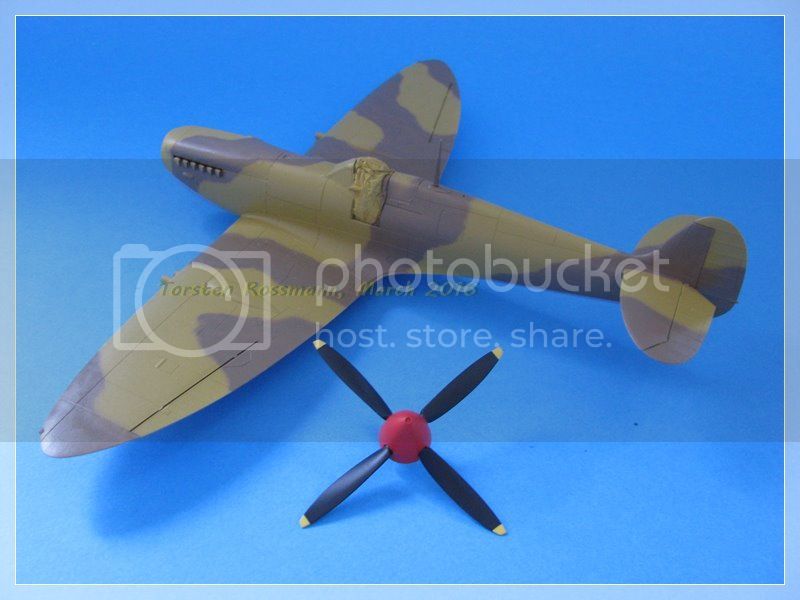
From me it's just a small update today. My spitfire-shaped toffee candy has got some chocolate on it and the prop is done. Landing gear work is in progress.
Happy Easter everyone!
Torsten
From me it's just a small update today. My spitfire-shaped toffee candy has got some chocolate on it and the prop is done. Landing gear work is in progress.
Happy Easter everyone!
Torsten
greif8
Bayern, Germany
Joined: January 17, 2006
KitMaker: 673 posts
AeroScale: 492 posts
Joined: January 17, 2006
KitMaker: 673 posts
AeroScale: 492 posts
Posted: Sunday, March 27, 2016 - 09:32 PM UTC
Danke Torsten! You are right that it is a bit too bad most of the work disappears when the pit is closed up. At least we know it is there!
Your Spitfire is looking very good. I take it you are doing a North Africa Spitfire with those colors.
BlackWidow
European Union
Joined: August 09, 2009
KitMaker: 1,732 posts
AeroScale: 1,336 posts
Joined: August 09, 2009
KitMaker: 1,732 posts
AeroScale: 1,336 posts
Posted: Monday, March 28, 2016 - 11:11 PM UTC
Thanks Ernest! Yes, it will be a reverse land-lease US-Spit, based in Tunesia in summer 1943. Decals are from the kit.
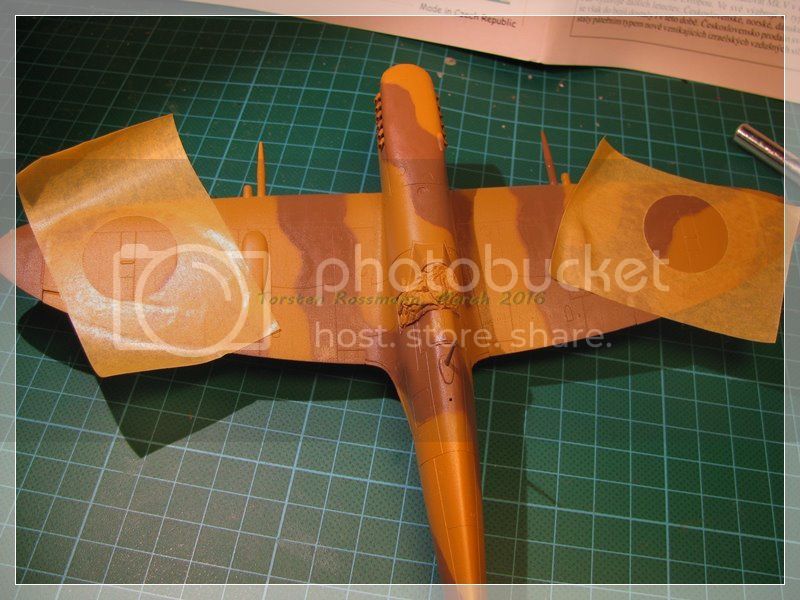
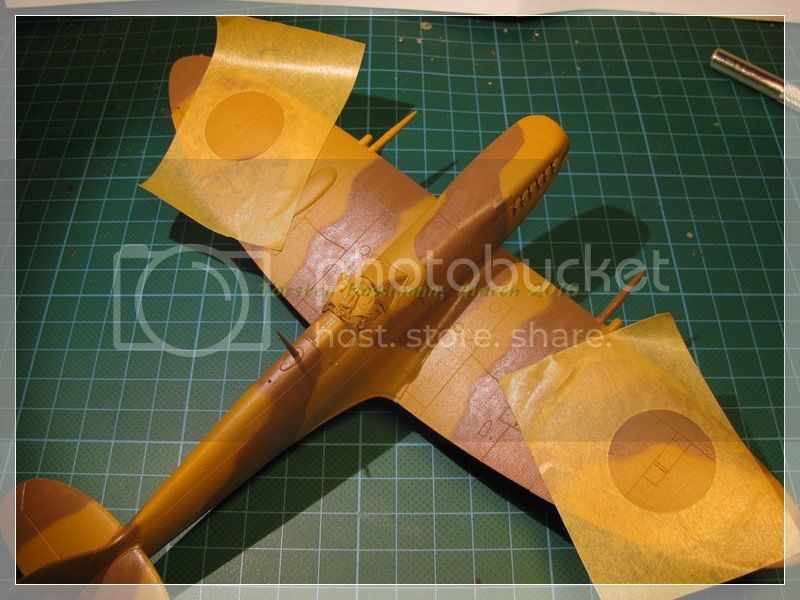
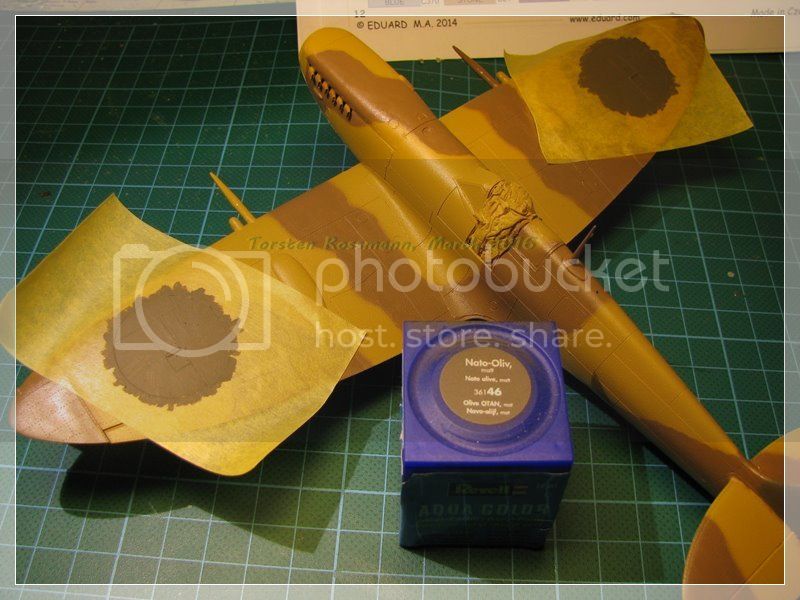
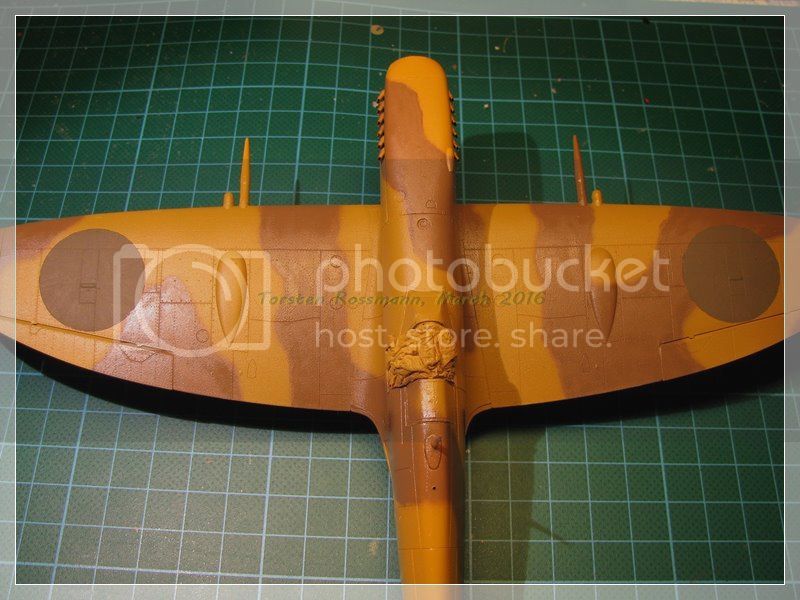
Here is another small update of what I did yesterday evening. The RAF markings were painted over with a different brownish paint and I used Revell 46 Olive Drab for that. It's painted with a brush like I guess it was done also on the real thing. It came out better than I expected. The diameter of the circles is 26 mm, slightly bigger than the US markings. Here are the steps:
Hm, Photobucket is pretty slow these days ....
Anyway, all RAF markings were overpainted, including those on the fuselage and the fin. That I'll show you in my next update.
Torsten
Posted: Thursday, March 31, 2016 - 05:00 AM UTC
Tamiya 1:48 Spitfire Vb "Lima Challenger"
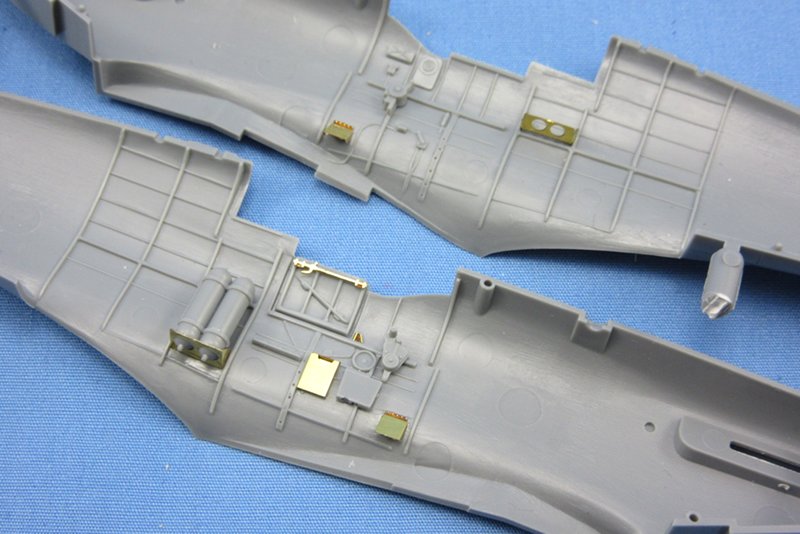
Started adding some Eduard PE bits from their detail set, but will likely not use much of it. I tried sticking to adding details rather than replacing Tamiya's, too much of it ends up looking flat compared to the original molded stuff. I need to add wire details next, then prime and paint everything so I can add the color PE bits. It's a start though.
BlackWidow
European Union
Joined: August 09, 2009
KitMaker: 1,732 posts
AeroScale: 1,336 posts
Joined: August 09, 2009
KitMaker: 1,732 posts
AeroScale: 1,336 posts
Posted: Monday, April 04, 2016 - 12:01 AM UTC
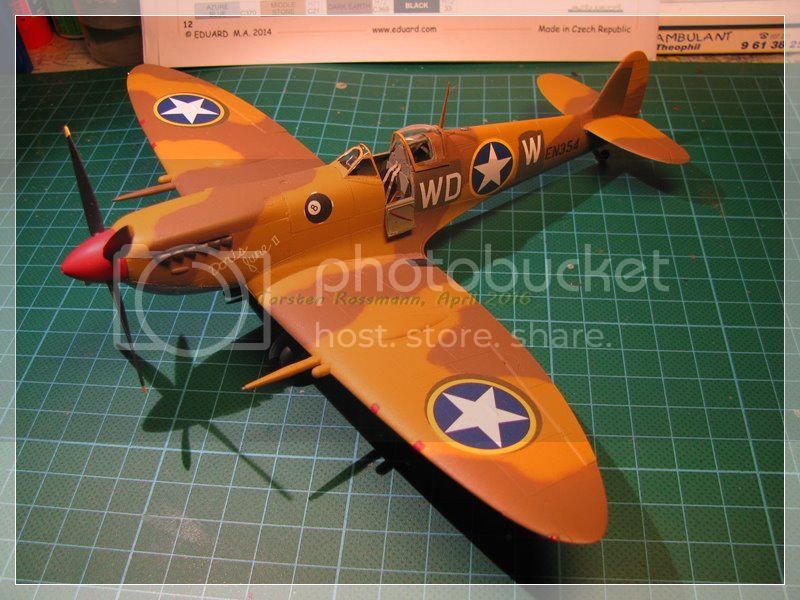
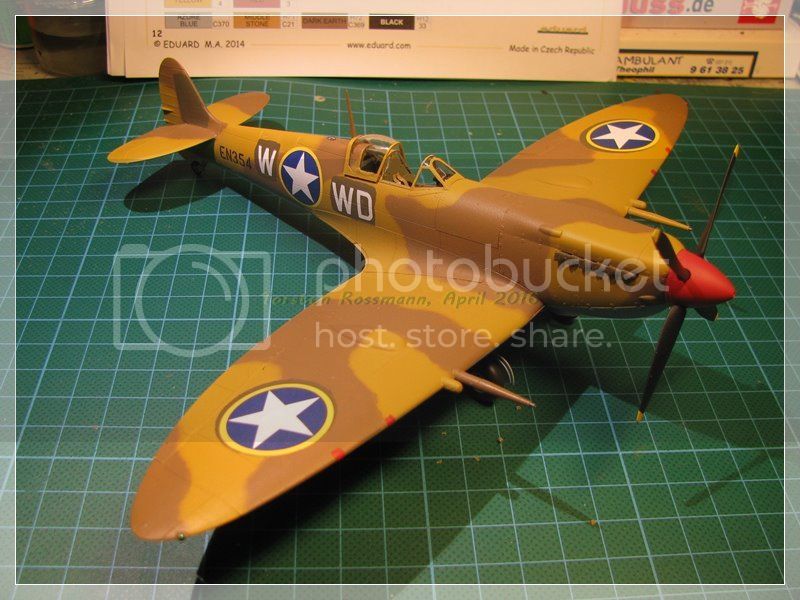
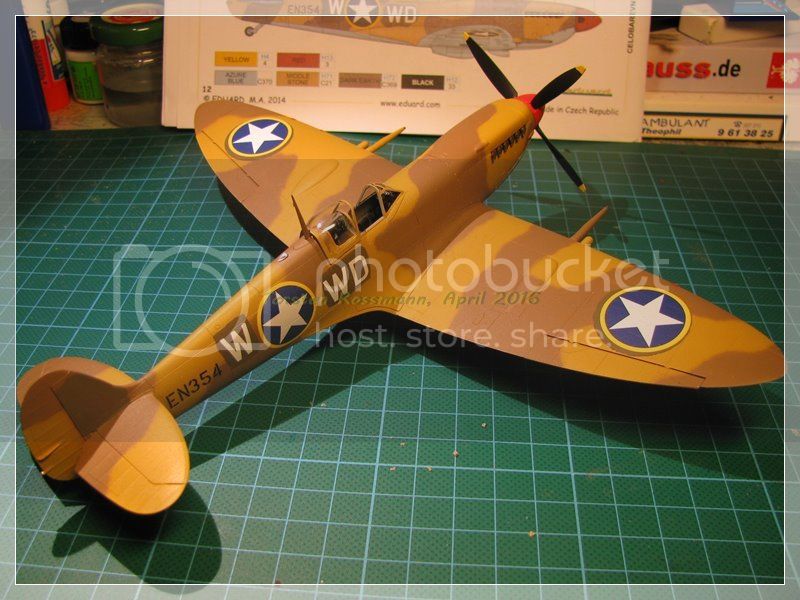
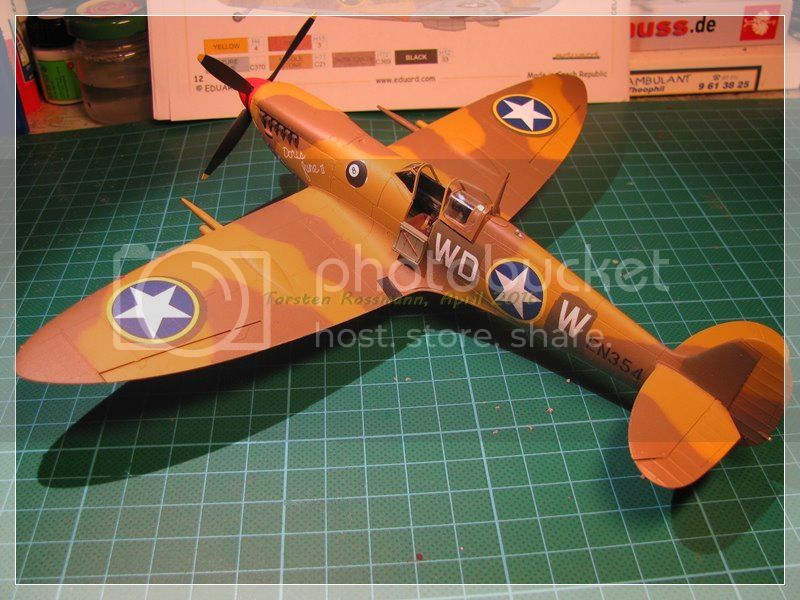
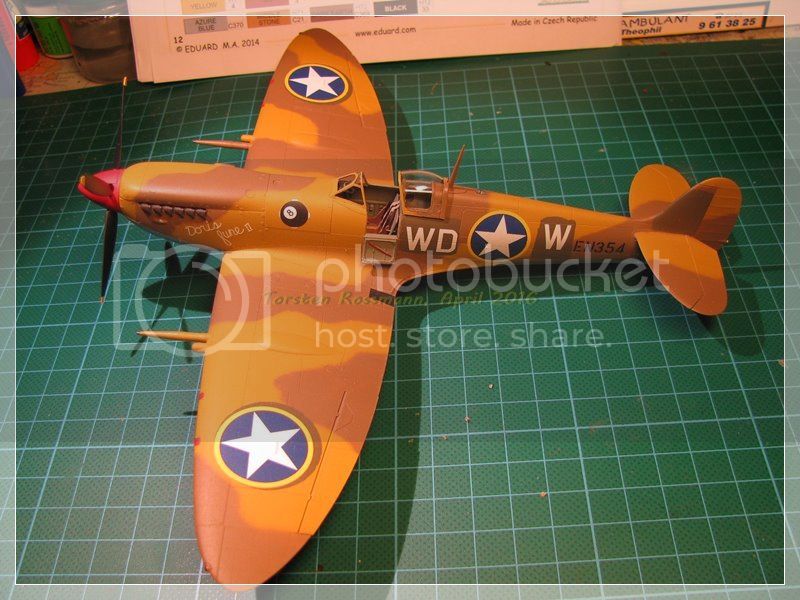
Okay guys, I call this baby finished!
With some clear matt varnish from Marabu spraying Sunday morning, I demasked the canopy in the evening and painted the last few bits. Only one mishap occured right at the end. When I tried to put the landing light glass into its place, it decided to jump on the carpet and was never seen again .... It didn't even wave
But that was the only negative point about this kit. No problems at all. It was really fun to build it. About 3 weeks for building it speaks for itself, doesn't it?
Edgar, I hope you sit on a spitfire-shaped cloud up there and smile when seeing this. Hope you have not too much to critizise about my build.
Here are some quick shots from my workbench yesterday evening. More and better will follow soon in my assembly line thread and of course in the gallery.
Oh, before I forget: It's the Spitfire Mk. IX (early) in 1/48 from Eduard (Weekend Edition), built oob.
Happy modelling and good luck for your builds!
Torsten
greif8
Bayern, Germany
Joined: January 17, 2006
KitMaker: 673 posts
AeroScale: 492 posts
Joined: January 17, 2006
KitMaker: 673 posts
AeroScale: 492 posts
Posted: Monday, April 04, 2016 - 02:25 PM UTC
Very nice build Torsten. I like the colors very much.
Ernest
Ernest
MichaelSatin
Campaigns Administrator
Colorado, United States
Joined: January 19, 2008
KitMaker: 3,909 posts
AeroScale: 2,904 posts
Joined: January 19, 2008
KitMaker: 3,909 posts
AeroScale: 2,904 posts
Posted: Monday, April 04, 2016 - 05:24 PM UTC
Nice work Torsten, Edgar would be proud!
Michael
Michael
MichaelSatin
Campaigns Administrator
Colorado, United States
Joined: January 19, 2008
KitMaker: 3,909 posts
AeroScale: 2,904 posts
Joined: January 19, 2008
KitMaker: 3,909 posts
AeroScale: 2,904 posts
Posted: Sunday, April 10, 2016 - 12:46 AM UTC
Posted: Sunday, April 10, 2016 - 12:20 PM UTC
Colin Gray ..... but then I would say that as he's a Kiwi! lol