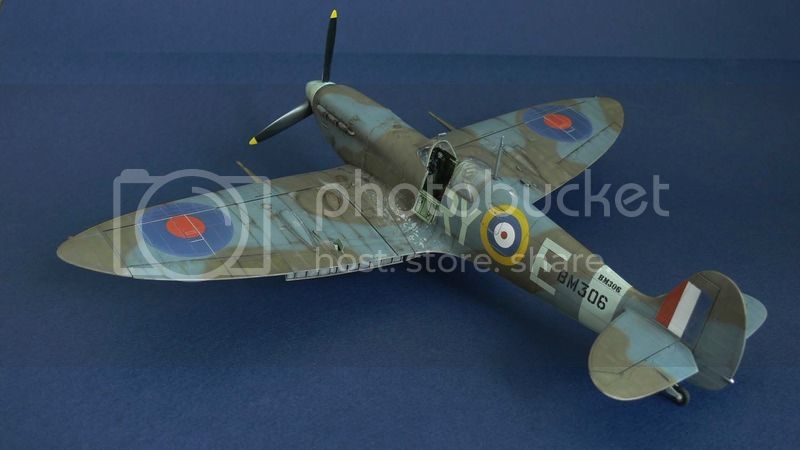
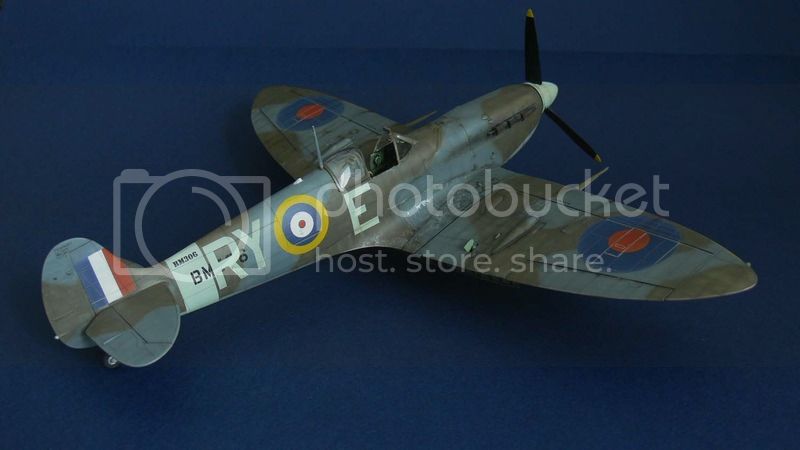
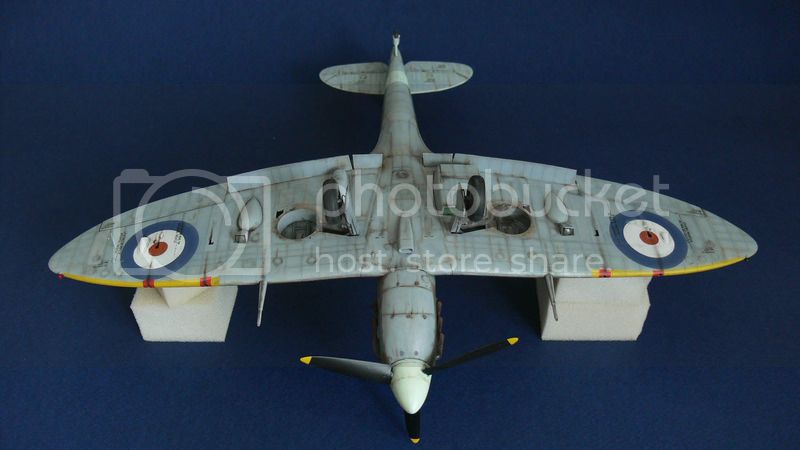
Edgar Brooks Memorial Spitfire Campaign
MichaelSatin
 Campaigns Administrator
Colorado, United States
Joined: January 19, 2008
KitMaker: 3,909 posts
AeroScale: 2,904 posts
Posted: Saturday, October 08, 2016 - 07:11 PM UTC
Oliver, I think you're pretty close there, perhaps a bit more red in the Dark Earth. You're right about Tamiya's mixes being off, especially the Dk Earth. They have their own Dark Green now.
Darrin, Nice work on the Mk.XVI!
Finally a couple of pics of my 1/32 Mk.XIV:
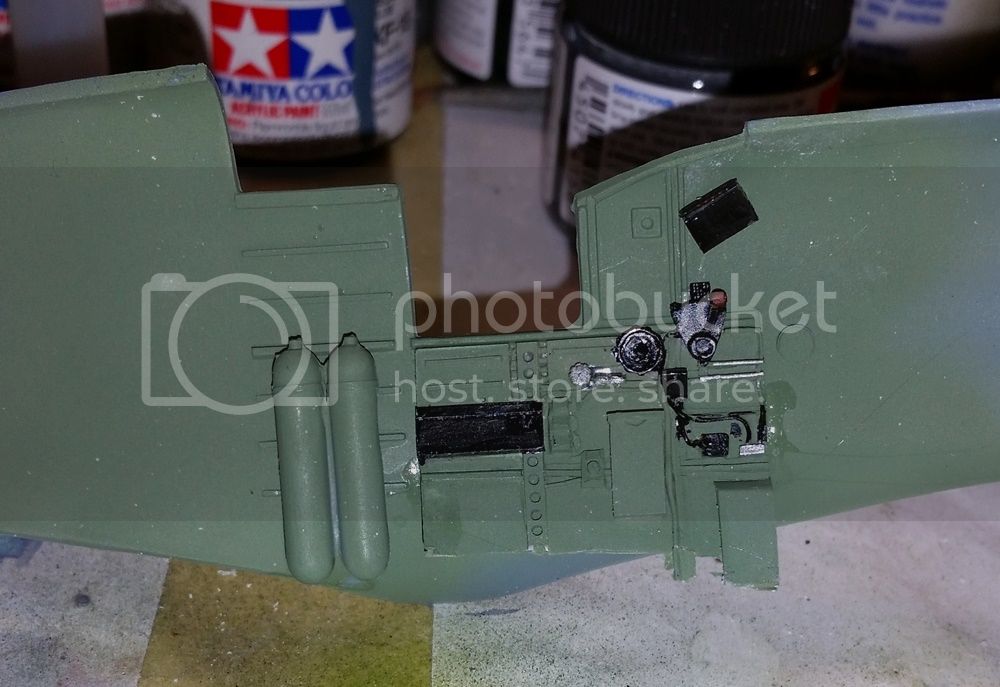
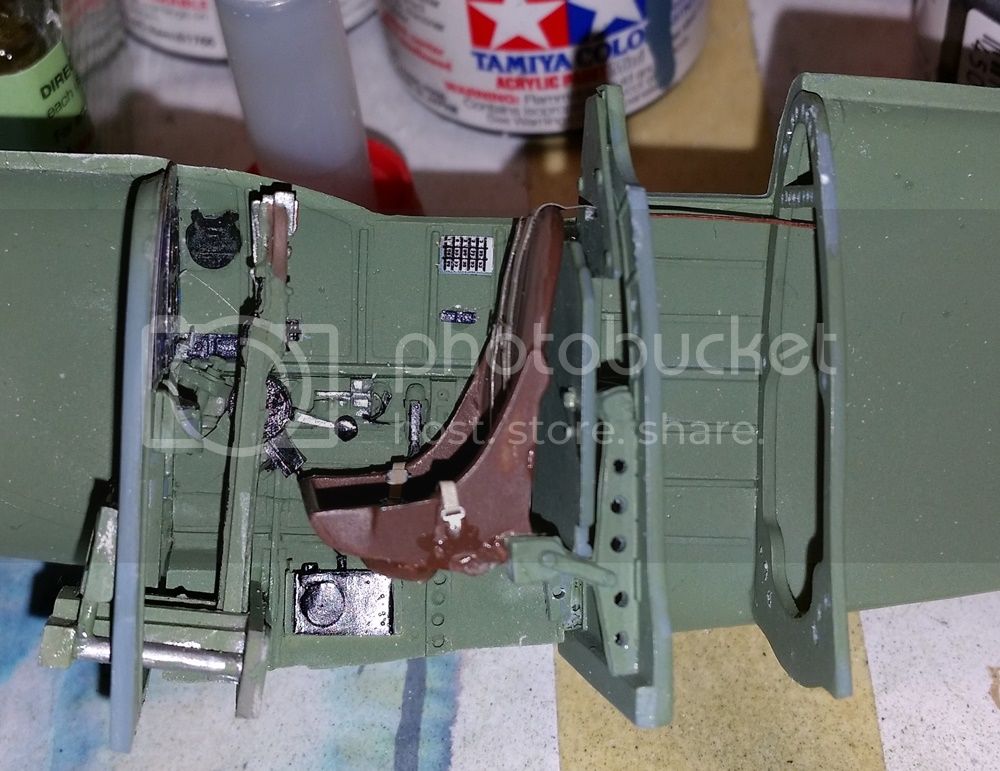
Pretty typical Pac Front Spit. I think the seat is too wide and it throws off the width of the fuselage as it interferes with the side panels (especially on the starboard side) as I'm discovering now I'm putting the wings on. Hopefully more pictures later today.
Michael

On the bench:
Sorta depends on your definition of "on the bench"...
Nordrhein-Westfalen, Germany
Joined: March 22, 2015
KitMaker: 671 posts
AeroScale: 614 posts
Posted: Monday, October 10, 2016 - 07:39 PM UTC
Michael,
thank´s for the tip with dark earth. I think, I will lay an orange filter on it after doing the camo.
Nice office Job on Your Spit!
Darren,
congratulation to Your last Spit!
Oliver

On the desk: Probably a Panzer III.
Merlin
 Senior Editor
#017
United Kingdom
Joined: June 11, 2003
KitMaker: 17,582 posts
AeroScale: 12,795 posts
Posted: Monday, October 10, 2016 - 08:34 PM UTC
Hi again
Well, it's all change again!

I did battle with Tamiya's bullet-proof decals on the Spit and thought I had them on the ropes. Then I couldn't resist a knock-out punch with one final coat of Mr. Mark... and it was a classic case of pride before the fall - I messed up big time! The solution attacked the decals, creating shallow pits, with indelible white marks on the roundels and brown(!?) ones on the fuselage codes! It just goes to show you can never take anything for granted in our hobby.
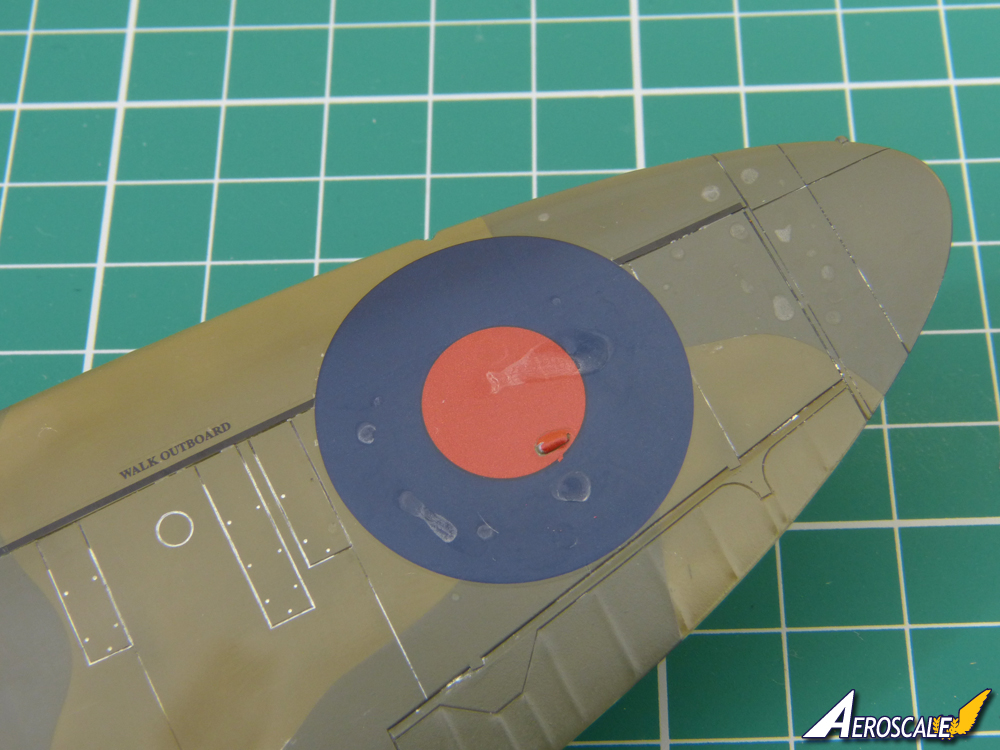
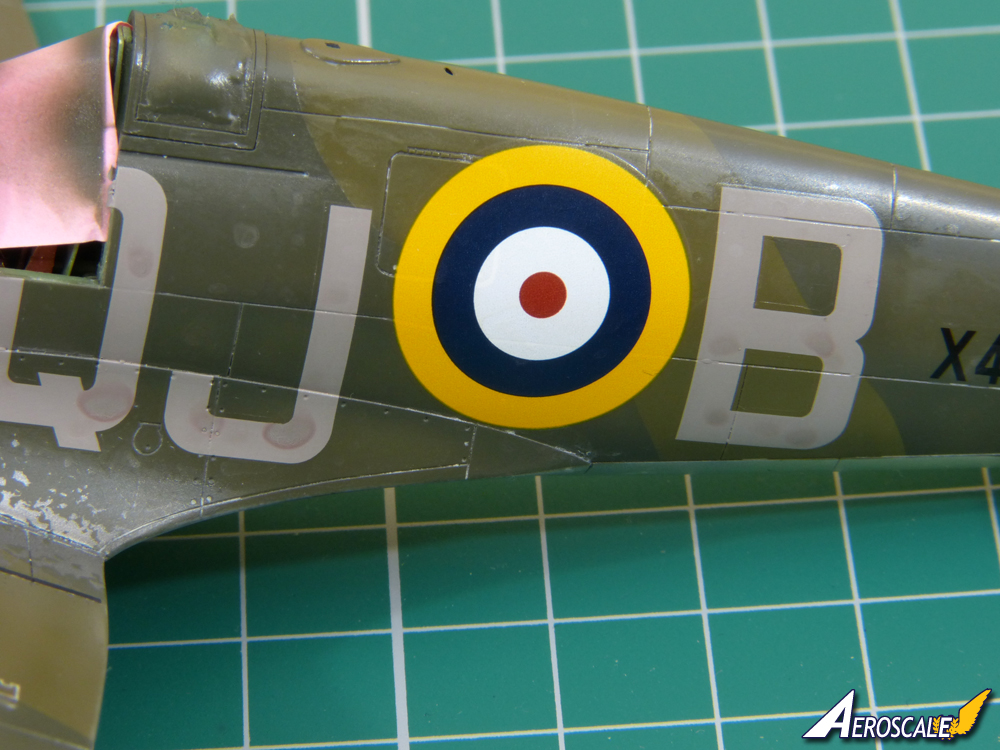
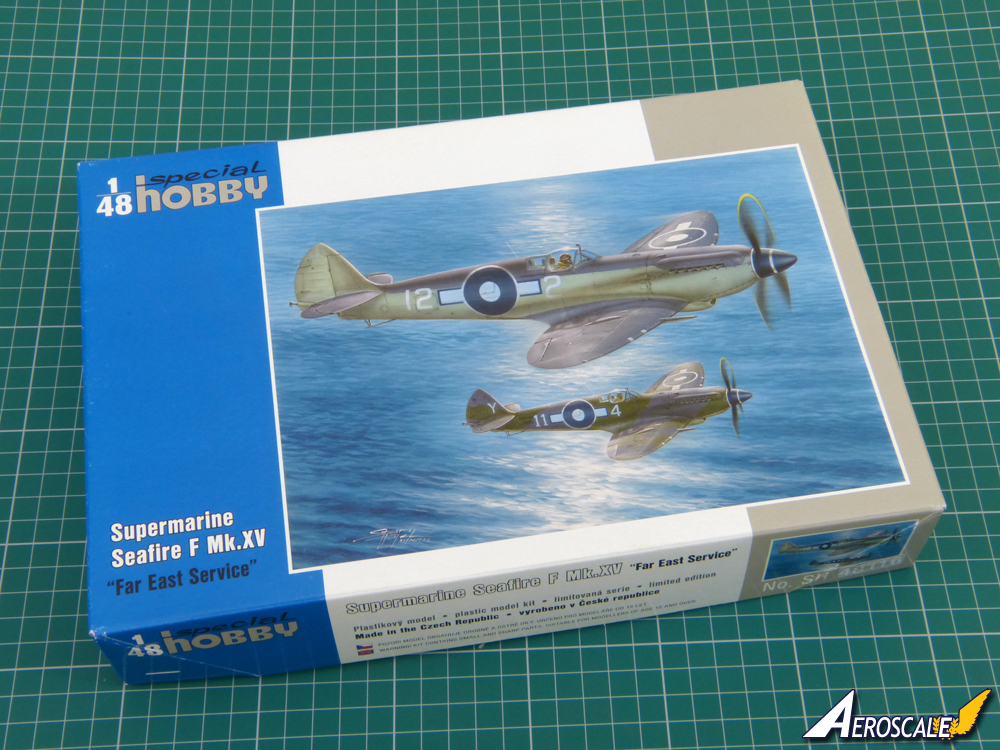
Add to that some really stubborn white residue from wet-polishing prior to applying the darned decals - and I think there's no option but to strip the lot off sometime. I can't face that just at the moment, so I've grabbed the nearest Spit-type thingy to make one last attempt to finish this campaign - and it's actually turned out to be a Seafire:
It'll be a real race to meet the deadline, but if everything goes smoothly for a change, I might just manage it...
All the best
Rowan

BEWARE OF THE FEW...
As I grow older, I regret to say that a detestable habit of thinking seems to be getting a hold of me. - H. Rider Haggard
Merlin
 Senior Editor
#017
United Kingdom
Joined: June 11, 2003
KitMaker: 17,582 posts
AeroScale: 12,795 posts
Posted: Tuesday, October 11, 2016 - 12:24 AM UTC
Hi Michael
I'd better check before I get too stuck in - is a Seafire eligible for the campaign? If not, I'll have to try to find where I stashed the Airfix P.R.XIX. I'm determined to get something finished as a way of thanking Edgar for all the help he gave us over the years.
All the best
Rowan

BEWARE OF THE FEW...
As I grow older, I regret to say that a detestable habit of thinking seems to be getting a hold of me. - H. Rider Haggard
MichaelSatin
 Campaigns Administrator
Colorado, United States
Joined: January 19, 2008
KitMaker: 3,909 posts
AeroScale: 2,904 posts
Posted: Tuesday, October 11, 2016 - 12:36 AM UTC
Quoted Text
Hi Michael
I'd better check before I get too stuck in - is a Seafire eligible for the campaign?
All the best
Rowan 
Seafires are just fine Rowan, go for it! I have faith.
Michael

On the bench:
Sorta depends on your definition of "on the bench"...
Merlin
 Senior Editor
#017
United Kingdom
Joined: June 11, 2003
KitMaker: 17,582 posts
AeroScale: 12,795 posts
Posted: Tuesday, October 11, 2016 - 01:54 AM UTC
Quoted Text
I have faith.
Michael 
Cheers Michael
But, with my reputation - you fool, you!


I might dig out the PR Spit anyway for a belt and braces attack on the deadline. I can probably double-up a bunch of the painting stages so, hopefully, one or other might have half a chance of being finished in time...
Alternatively, I can screw up two kits just as easily as one - which would be par for the course after my Mk. I disaster.

All the best
Rowan

BEWARE OF THE FEW...
As I grow older, I regret to say that a detestable habit of thinking seems to be getting a hold of me. - H. Rider Haggard
Nordrhein-Westfalen, Germany
Joined: March 22, 2015
KitMaker: 671 posts
AeroScale: 614 posts
Posted: Wednesday, October 12, 2016 - 01:31 AM UTC
Hi Rowan,
sorry for the decals on Your Spit! You make me frighten to use the decals of my Tamiya Spit. What about micro sol. Will it work? Good luck with Your next Spit!
Oliver

On the desk: Probably a Panzer III.
Merlin
 Senior Editor
#017
United Kingdom
Joined: June 11, 2003
KitMaker: 17,582 posts
AeroScale: 12,795 posts
Posted: Wednesday, October 12, 2016 - 01:48 AM UTC
Hi Oliver
I'd read about the problems with the Tamiya decals, but thought I'd be able to overcome them. I used very hot water (straight from the kettle!), as recommended, which certainly helped - but somewhere I read a post stating that Mr. Mark worked well, despite the decals not responding to other solutions. It did work - to an extent. They didn't snuggle down with a true "painted on" look like the best decals, but they were usable... until I pushed my luck too far with a last very liberal coat of Mr Mark.
The decals in my kit actually fall into two distinct categories, depending which sheet they're printed on. I didn't bother with the white backings for the national markings, and found the white of the roundels etc. perfectly opaque - but those decals are very tough and don't really respond much even to Mr. Mark. Conversely, the fuselage codes from the other sheet actually went on beautifully until I ruined them!
Overall, if you're still at a stage where you can consider alternative schemes, I'd seriously recommend getting some aftermarket decals that you can rely on to work (or, of course, there are plenty of masks available if you're up for a different challenge). I'll do that once I have the heart to strip back what I've done and try again.
All the best
Rowan

BEWARE OF THE FEW...
As I grow older, I regret to say that a detestable habit of thinking seems to be getting a hold of me. - H. Rider Haggard
Nordrhein-Westfalen, Germany
Joined: March 22, 2015
KitMaker: 671 posts
AeroScale: 614 posts
Posted: Friday, October 14, 2016 - 04:54 PM UTC
Hi Rowan,
thank´s a lot for Your answer. Following Your advice, I checked my rest decal box and found some roundels that I can exchange with the Tamiya ones. By the way. My Spitfire has no roundels on the lower side. Was this typical?
For the fuselage code, I will give a try with the original Tamiya decals and some decal softener.
Meanwhile, the second colour has been painted and now the first fading with pigments has to be done.

Oliver

On the desk: Probably a Panzer III.
Nordrhein-Westfalen, Germany
Joined: March 22, 2015
KitMaker: 671 posts
AeroScale: 614 posts
Posted: Friday, October 21, 2016 - 05:16 AM UTC
Hello fellow modelers,
I could not resist and just gave Tamiya decals and micro sol a try.

I hate, when it looks like this

,
but most of the decals went out quite well.

Now, the Spit is panel washed and awaits some weathering with pigments.

More to come!
Oliver

On the desk: Probably a Panzer III.
Berlin, Germany
Joined: October 12, 2008
KitMaker: 709 posts
AeroScale: 651 posts
Posted: Friday, October 21, 2016 - 10:40 AM UTC
Oliver, very nice paint 'n decal job. Details coming out nicely now.
Great work shown up in this campaign.
I wonder why there are obvious differences in decal quality comparing it to Rowan's build. Or is it a matter of production line/year?
Thomas

Sometimes you need to distance yourself to see things clearly - Lao Tzu -
... in scale and in real life -T.
MichaelSatin
 Campaigns Administrator
Colorado, United States
Joined: January 19, 2008
KitMaker: 3,909 posts
AeroScale: 2,904 posts
Posted: Sunday, October 23, 2016 - 03:42 AM UTC
The great work continues here!
My 1/32 PacCoast Spit XIV is starting to look like a Spitfire now:
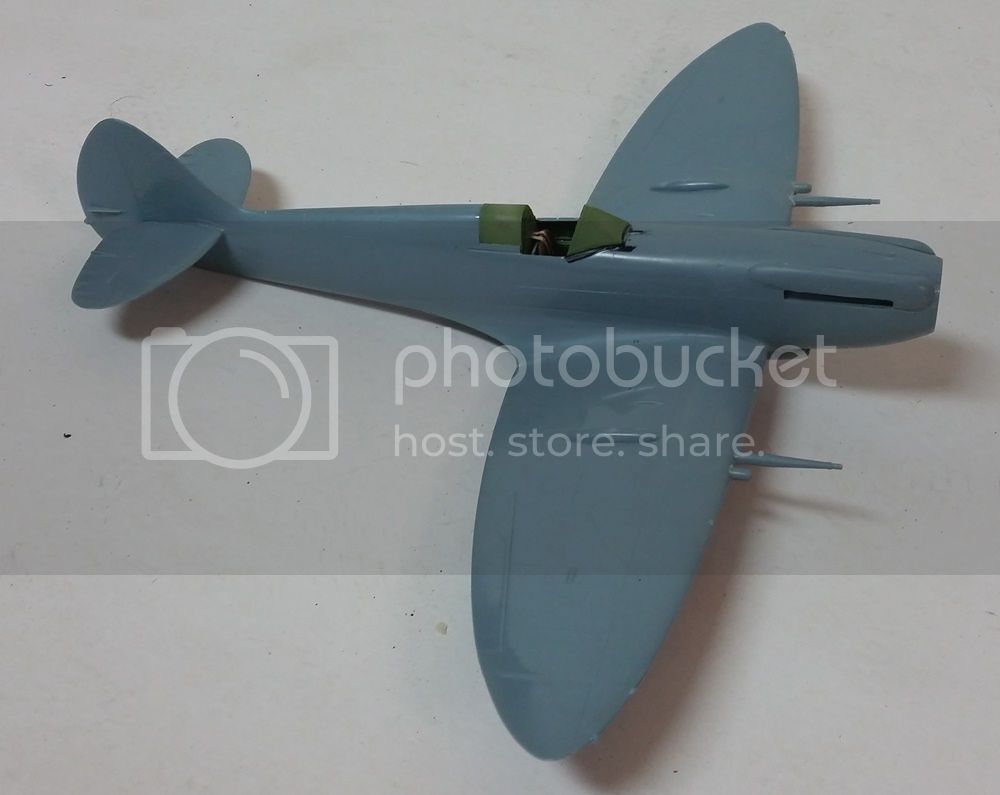
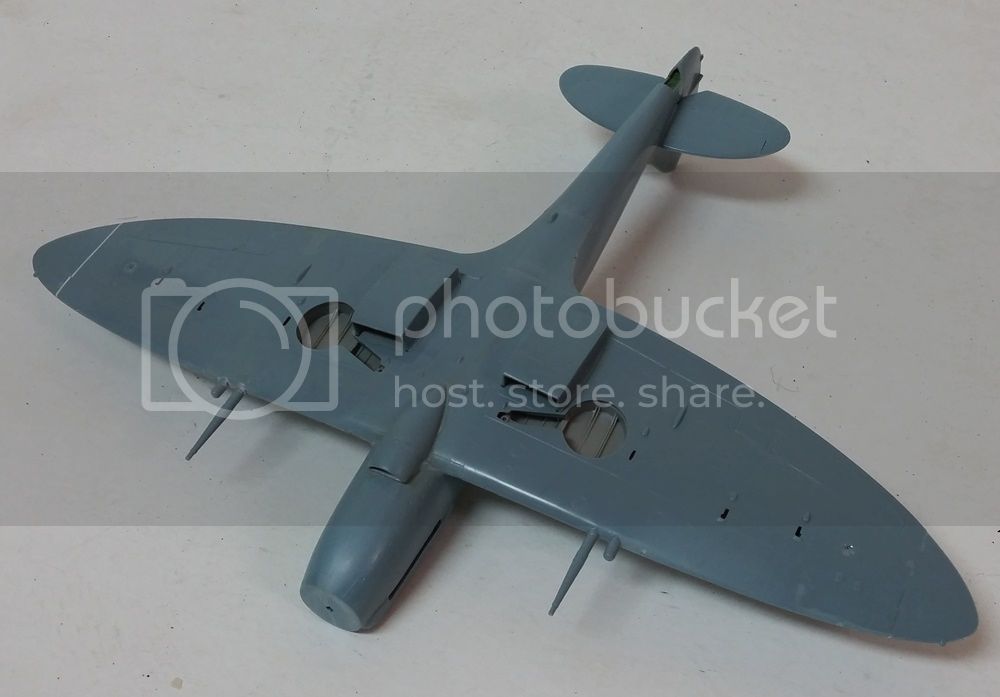
Maybe paint by next week?
Michael

On the bench:
Sorta depends on your definition of "on the bench"...
Praha, Czech Republic
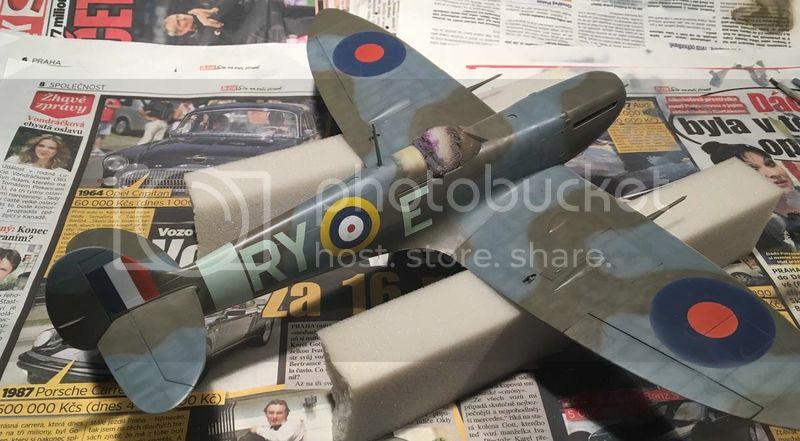
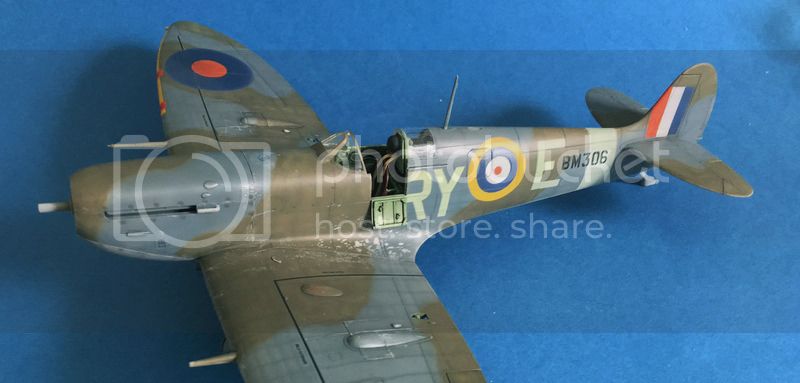
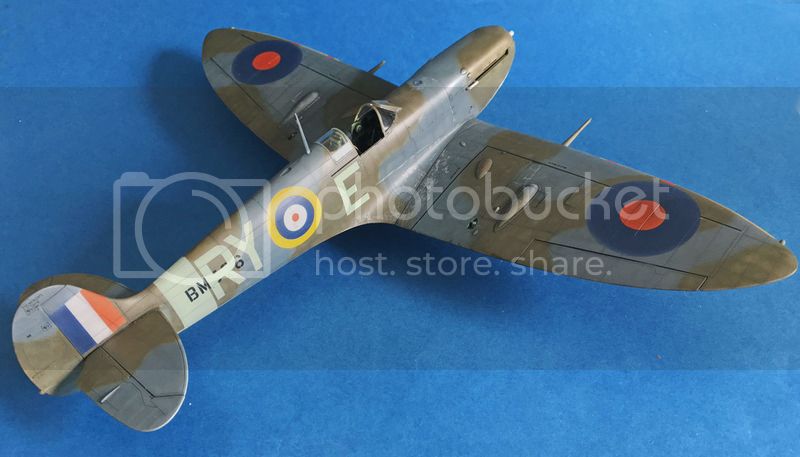
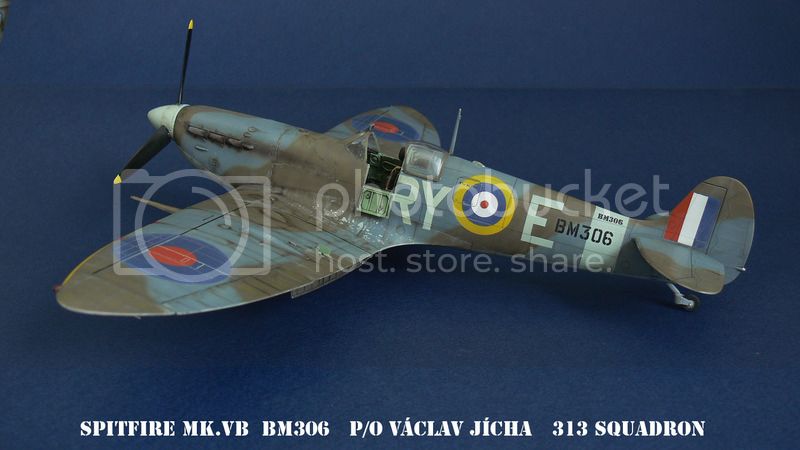
Joined: April 03, 2006
KitMaker: 2,450 posts
AeroScale: 30 posts
Posted: Sunday, October 23, 2016 - 06:37 PM UTC
Hope you like it and "watch those negative waves"
Nordrhein-Westfalen, Germany
Joined: March 22, 2015
KitMaker: 671 posts
AeroScale: 614 posts
Posted: Monday, October 24, 2016 - 12:27 AM UTC
Hi Thomas,
concerning different productions of tamiya decals, I am sorry to have no answer about this. But, I am curious if anyone else has the solution.
Michael,
very nice update. Looking forward to see some paint onto your spitfire.
Miloslav,
just outstanding. Modelling and painting of the model are great. But excellent is the weathering! Congratulation

Oliver

On the desk: Probably a Panzer III.
European Union
Joined: August 09, 2009
KitMaker: 1,732 posts
AeroScale: 1,336 posts
Posted: Monday, October 24, 2016 - 12:33 AM UTC
Quoted Text
Hi again
Well, it's all change again!  I did battle with Tamiya's bullet-proof decals on the Spit and thought I had them on the ropes. Then I couldn't resist a knock-out punch with one final coat of Mr. Mark... and it was a classic case of pride before the fall - I messed up big time! The solution attacked the decals, creating shallow pits, with indelible white marks on the roundels and brown(!?) ones on the fuselage codes! It just goes to show you can never take anything for granted in our hobby ....
What a shame, Rowan! I'm really sorry for that result of your work. Has it changed to the better in the meantime? I believe you've used the wrong softener, maybe too much and too aggresive for the decals. I have here something like that, it's called "Hypersol Strong Decal Stretching Solution" made by the czech company Agama. I use it very rarely only on very curved surfaces and in tiny doses because it makes no jokes with decals. My major softener for all decals, no matter what brand, is surprisingly Revell Decal Soft. You should also get it over at your place. I never had any problems with any decals when using it, also those "thick" Tamiya or Hasegawa ones. They all lay smooth and comfotrable to the surface. Give it a try!
Miloslav, great result of that beauty. A bit too dirty and war weary for my taste, but that's only my subjective apperception.
Torsten

My campaigns for 2020:
MiGs - Done !
The Big Three - Done !
65 years Bundeswehr - Done !
40 years Leopard 2 - Done !
Land Lease - Done !
Nordrhein-Westfalen, Germany
Joined: March 22, 2015
KitMaker: 671 posts
AeroScale: 614 posts
Posted: Thursday, October 27, 2016 - 03:56 PM UTC
Hello fellow modelers,
here is the next update of my little Spit. She is now on her feet. And most things are completed.

But, does anybody know, if the Mk.I and Mk.II in 1940 already had the IFF antenna?
Oliver

On the desk: Probably a Panzer III.
Nordrhein-Westfalen, Germany
Joined: March 22, 2015
KitMaker: 671 posts
AeroScale: 614 posts
Posted: Sunday, October 30, 2016 - 01:32 AM UTC
Hello everybody,
the Spitfire is now complete. I added just a little bit fading and some dirt. Hope You like it:
Tamiya Spitfire Mk.I, scale 1:72


Could not resist to make a little dio:

Blue skies Edgar!
Oliver

On the desk: Probably a Panzer III.
Merlin
 Senior Editor
#017
United Kingdom
Joined: June 11, 2003
KitMaker: 17,582 posts
AeroScale: 12,795 posts
Posted: Tuesday, November 01, 2016 - 01:30 AM UTC
Hi again
Some great builds!

@ Oliver - That's interesting. I didn't try Micro Sol with my Tamiya decals because I'd read somewhere that it didn't work.

I wish I'd given it a go...
Anyway, I'm make progress with the Seafire. The interior's basically finished and the wings are ready to fit once the fuselage is closed up. I don't know if I'll make the deadline, because I'm hitting the busiest time of year at work and I've also got reviews to write, but I'll do my best.

All the best
Rowan

BEWARE OF THE FEW...
As I grow older, I regret to say that a detestable habit of thinking seems to be getting a hold of me. - H. Rider Haggard
Merlin
 Senior Editor
#017
United Kingdom
Joined: June 11, 2003
KitMaker: 17,582 posts
AeroScale: 12,795 posts
Posted: Tuesday, November 01, 2016 - 11:45 PM UTC
Hi again
Just a few pictures to go with the update. I need to do a couple of tweaks, but the fuselage is about ready to close up:
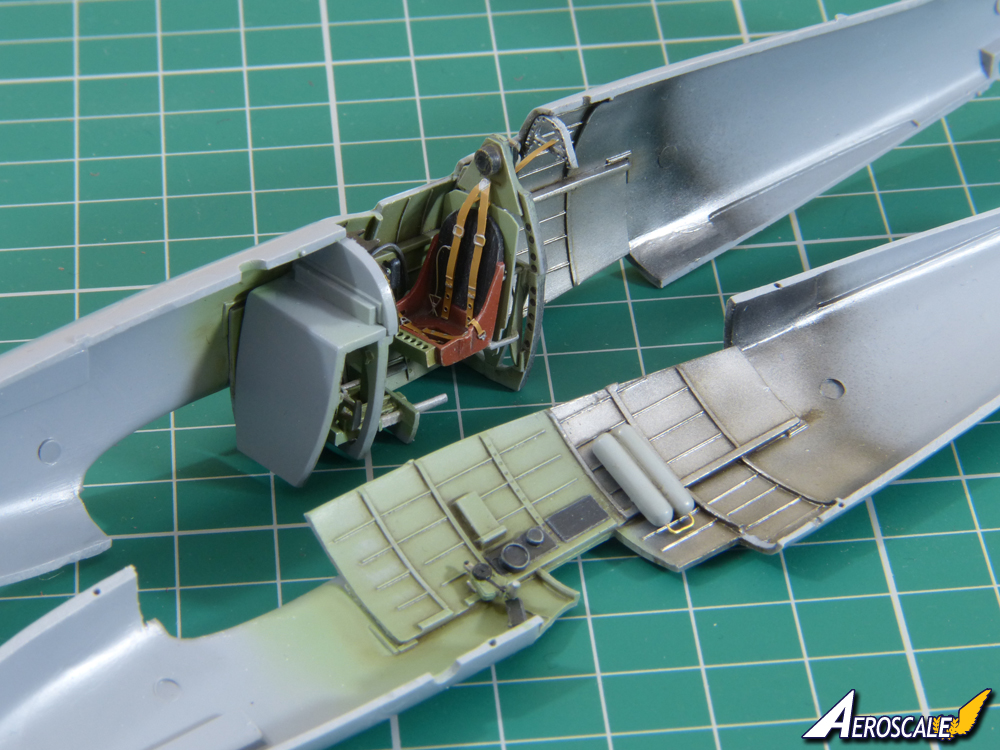
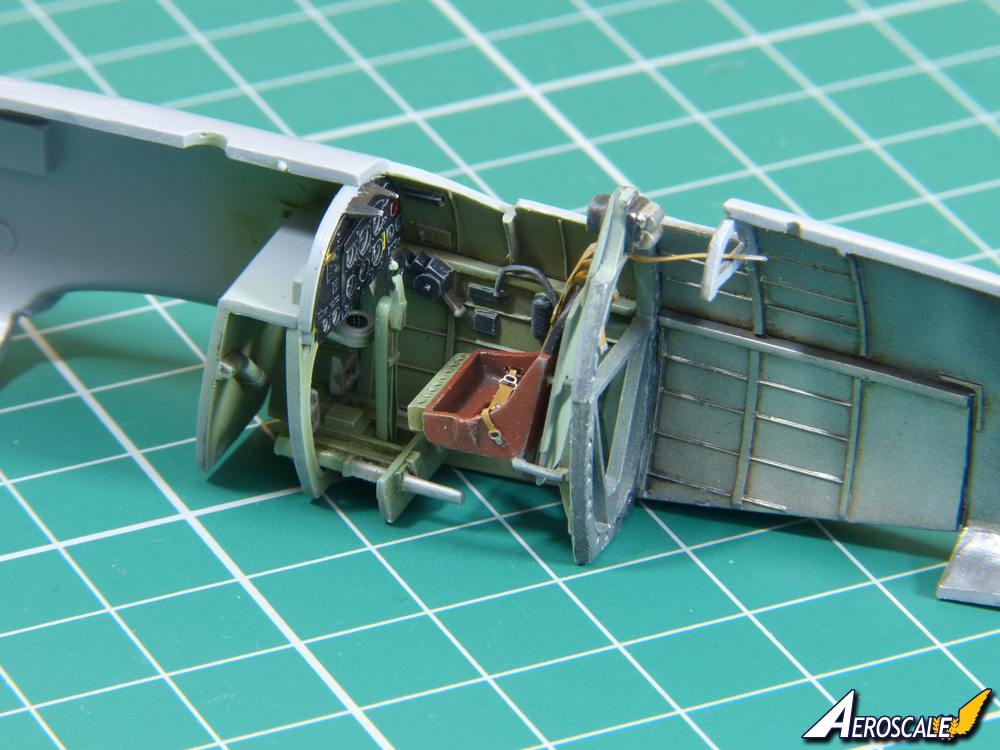
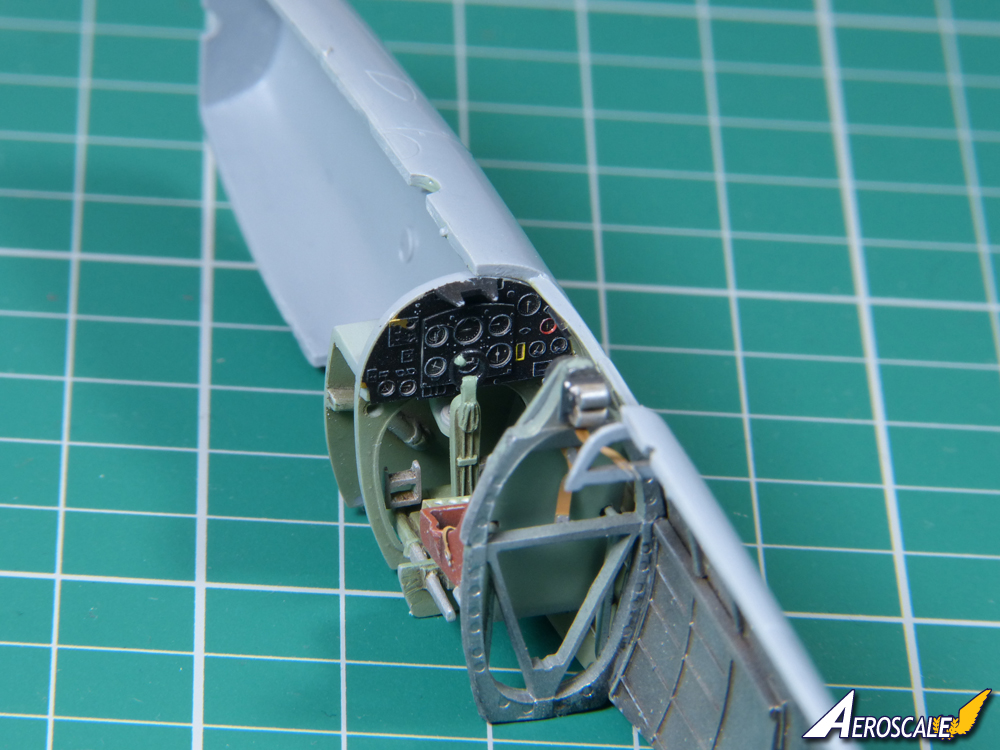
Touch wood, it all fits in and the wing roots seem a good fit...
All the best
Rowan

BEWARE OF THE FEW...
As I grow older, I regret to say that a detestable habit of thinking seems to be getting a hold of me. - H. Rider Haggard
Nordrhein-Westfalen, Germany
Joined: March 22, 2015
KitMaker: 671 posts
AeroScale: 614 posts
Posted: Wednesday, November 02, 2016 - 07:16 PM UTC
Rowan,
the cockpit-area of Your Seafire looks good!
Nice update!
Oliver

On the desk: Probably a Panzer III.
Berlin, Germany
Joined: October 12, 2008
KitMaker: 709 posts
AeroScale: 651 posts
Posted: Wednesday, November 02, 2016 - 08:42 PM UTC
Beautiful work Rowan, you really get the details.
Oliver, the Spit is looking extremely nice! Paint, panel wash & weathering are very well done and the dio's cool with a relaxed pilot!

Thomas

Sometimes you need to distance yourself to see things clearly - Lao Tzu -
... in scale and in real life -T.
Merlin
 Senior Editor
#017
United Kingdom
Joined: June 11, 2003
KitMaker: 17,582 posts
AeroScale: 12,795 posts
Posted: Thursday, November 03, 2016 - 01:34 AM UTC
Cheers Oliver and Thomas
I really appreciate you kind comments. The Special Hobby kit has a nicely detailed cockpit. The plastic parts need a little bit of extra clean-up (it's "semi-limited run"), but the effort is worth it. The "old school" etched instrument panel with a film backing is very effective in my opinion, and rivals the more recent trend to pre-painted ones. The only addition I made was to scratchbuild the flare rack for the seat, which Special Hobby missed despite showing in the instructions.
I'll try to get the basic airframe together over the next couple of days to give myself half a hope of finishing by the deadline.
All the best
Rowan

BEWARE OF THE FEW...
As I grow older, I regret to say that a detestable habit of thinking seems to be getting a hold of me. - H. Rider Haggard
TimReynaga
 Associate Editor
California, United States
Joined: May 03, 2006
KitMaker: 2,500 posts
AeroScale: 318 posts
Posted: Saturday, November 05, 2016 - 12:33 AM UTC
I’m in! Veeeeeeery late, but I’ll build this one with no frills!
Here’s the start pic of my 1/72 Airfix Spitfire PRXIX with a copy of “The Week” dated November 11. I actually started the model when the mag came in the mail yesterday, November 4.
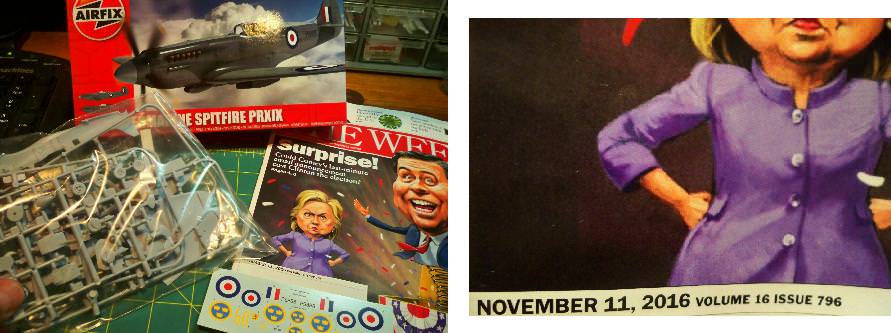
We’ll see if I can knock this thing out in two weeks!

Merlin
 Senior Editor
#017
United Kingdom
Joined: June 11, 2003
KitMaker: 17,582 posts
AeroScale: 12,795 posts
Posted: Saturday, November 05, 2016 - 01:29 AM UTC
Hi Tim
Go for it!

All the best
Rowan

BEWARE OF THE FEW...
As I grow older, I regret to say that a detestable habit of thinking seems to be getting a hold of me. - H. Rider Haggard
Merlin
 Senior Editor
#017
United Kingdom
Joined: June 11, 2003
KitMaker: 17,582 posts
AeroScale: 12,795 posts
Posted: Saturday, November 05, 2016 - 07:47 PM UTC
Hi again
The Seafire is starting to look aeroplane-shaped:
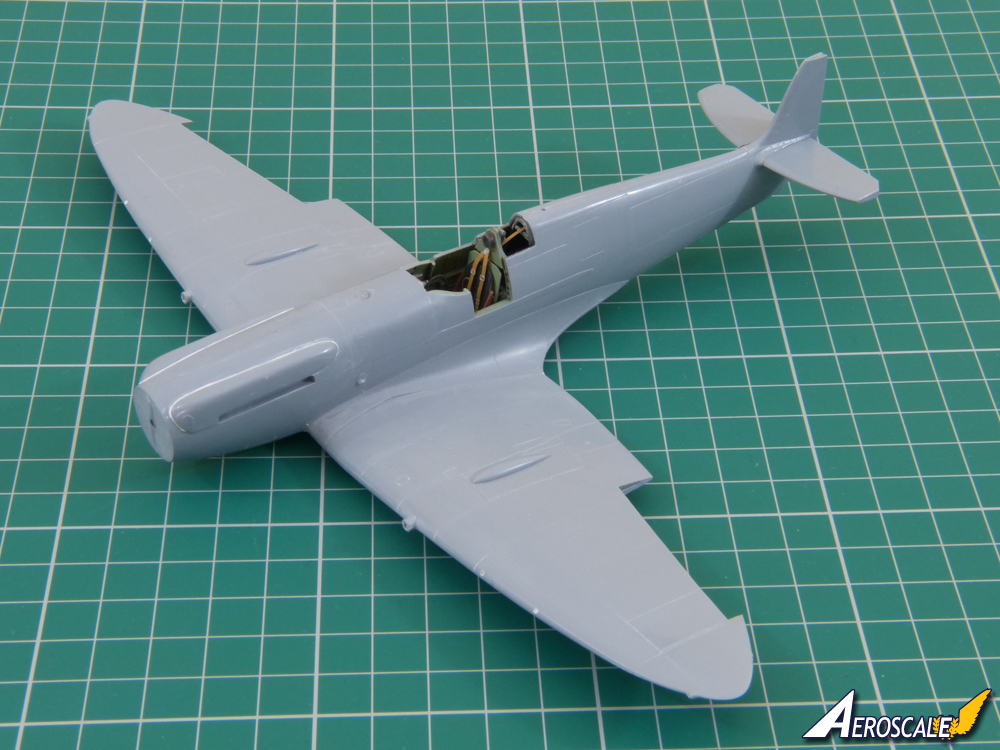
I've sliced off the elevators to droop them. There are a few seams still needing attention and then I'll probably give an overall basecoat with Alclad's filler-primer to make sure everything's looking reasonable.
All the best
Rowan

BEWARE OF THE FEW...
As I grow older, I regret to say that a detestable habit of thinking seems to be getting a hold of me. - H. Rider Haggard


