Paul, I am Impressed! You made the maple planks yourself to get the tracks right?
Looking good!!
Air Campaigns
Want to start or join a group build? This is where to start.
Want to start or join a group build? This is where to start.
Hosted by Frederick Boucher, Michael Satin
OFFICIAL: Hot Out Of The Molds II Campaign
Posted: Tuesday, July 19, 2016 - 12:11 PM UTC
Posted: Tuesday, July 19, 2016 - 11:38 PM UTC
Quoted Text
Paul, I am Impressed! You made the maple planks yourself to get the tracks right?
Looking good!!
I bought the raw planks on Ebay then cut to shape on my laser.
I started with a digital photo of the model, brought that into a Mac with Photoshop then into Illustrator where the vector file was designed.
Then the file went over to a PC into Correl Draw and the Epilog laser software. The shape was refined by trial & error. Once the shape was spot on, the text & holes were added and the tool was cut.
It takes a while to do all this but the tracks assembled easily and I was able to make a second tool for a pal who is building the same kit.
These aren't working tracks but al least the kit can be completed.
Posted: Wednesday, July 20, 2016 - 01:02 AM UTC
Thanks for sharing your procedure, Paul. Now I am even more impressed 

Posted: Friday, July 22, 2016 - 12:24 AM UTC
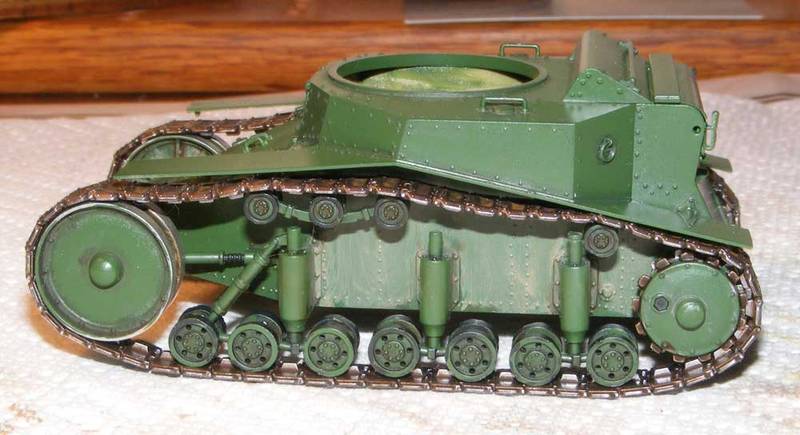
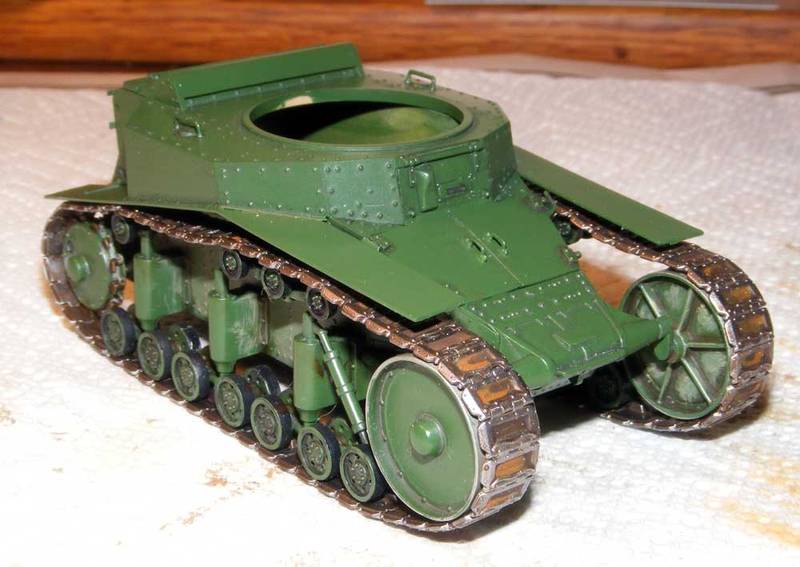
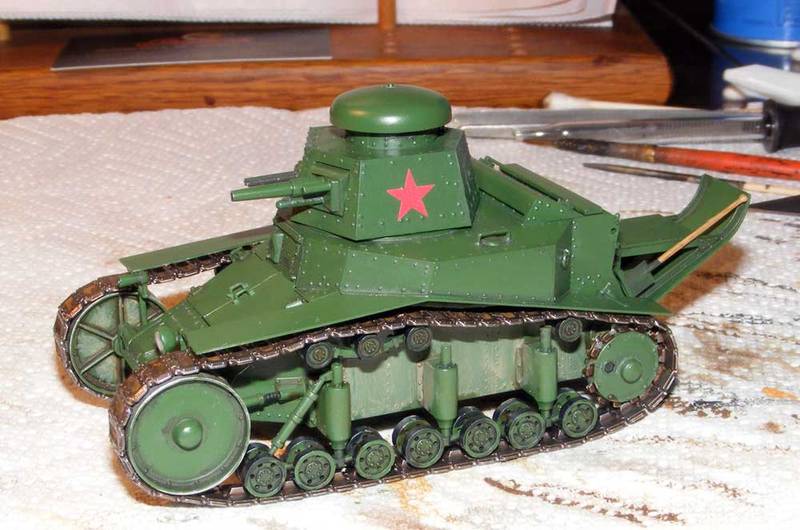
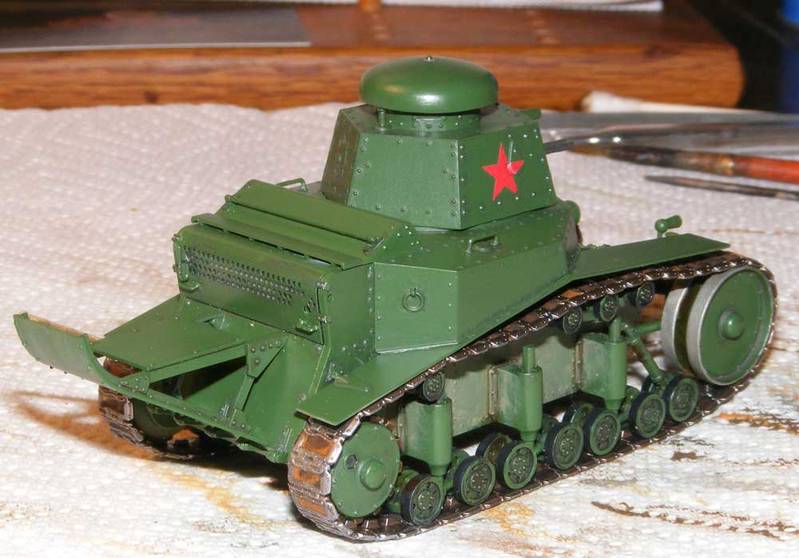
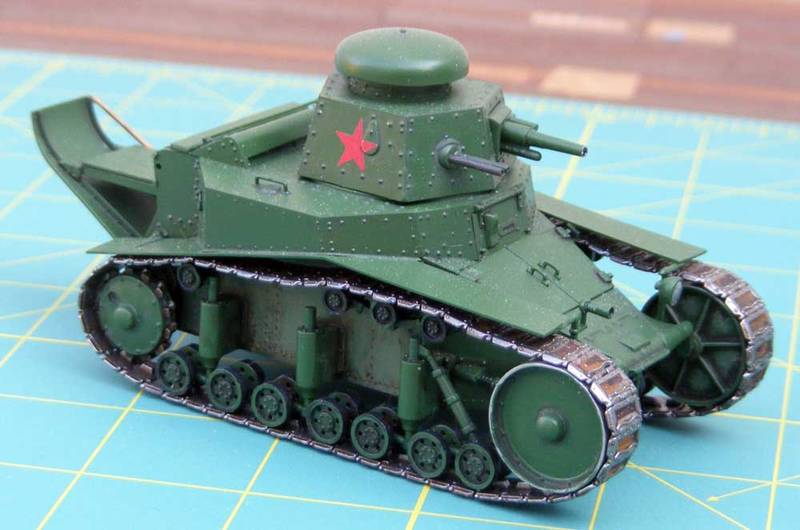
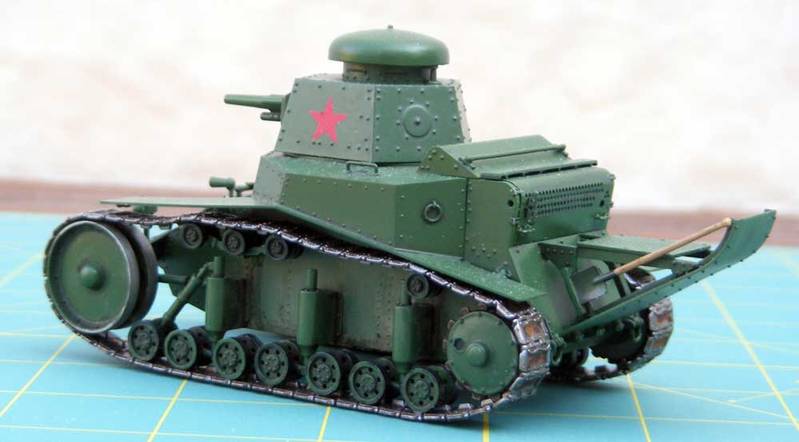
I have very little reference material on this tank so I used a small illustration found online for inspiration. It showed a T-18 in 1929 that participated in one of the big Red Square parades before Uncle Joe. I thought this sounded interesting and with no details, I made up my own "legend."
It seems reasonable to assume that no one in the Red Army from the highest general to the lowest boot would want to draw Uncle Joe's malevolent eye – so they gussied up the ole bus with a wash job, fresh paint and red star. The tracks would have been cleaned up but gathered dirt & mud from being in the staging area before running over the hard surfaces of the parade route.
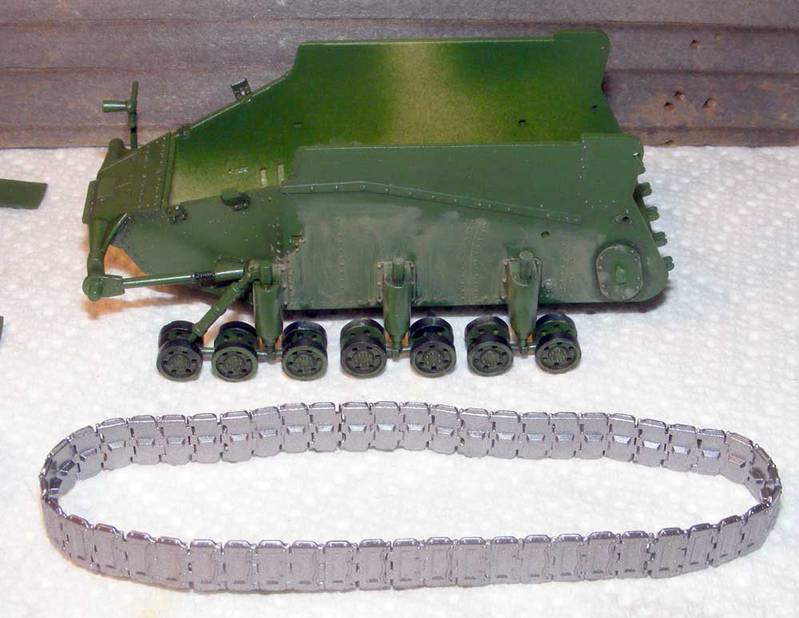
I was darned curious to see how the tracks formed by my home made tool would fit on the model. I painted them using a new technique for me. I painted them with a Tamiya color, Light Gun Metal then dirtied them up with washes. My assembly job on the track links themselves was less than perfect and the tracks broke in a couple of places. No huge problem but it did cause extra fumbling trying to wrap them around the wheels & sprockets. I got them on after digging out some of Pop's old Marine Corp words that mother told me never to repeat . . .
So - here it is basically done. I forgot the three tow rings and will paint them and add them tomorrow. The total time from Hobby Shop to completion just under three weeks, light speed for me.
Working tracks are still the A option for me but when they are not available the individual links can be made to work even by a modeler with my modest skills.


Posted: Saturday, July 30, 2016 - 01:29 PM UTC
Posted: Sunday, July 31, 2016 - 01:03 PM UTC
Just started to build my entry, Hasegawa 1/35 Hitachi double arm working machine Astaco Neo. 


Kilo_Uniform

Joined: July 03, 2015
KitMaker: 280 posts
AeroScale: 141 posts

Posted: Sunday, July 31, 2016 - 02:33 PM UTC
Hi Jesper,
Your Celestial Prime is an absolute masterwork!!
AWESOME!!
Regards,
Kobus
Your Celestial Prime is an absolute masterwork!!
AWESOME!!
Regards,
Kobus

PantherF

Joined: June 10, 2005
KitMaker: 6,188 posts
AeroScale: 25 posts

Posted: Monday, August 01, 2016 - 01:04 AM UTC
Quoted Text
"paralysis by analysis"
Oh my... this describes me to a 'T' and my whole problem building now too.
Lots of neat stuff going on here, the T-18 (gotta get that one) and the Celestial Prime just to name just a few.
Kinda wished I had seen this Campaign earlier!

Jeff
Klaus-Adler

Joined: June 08, 2015
KitMaker: 1,505 posts
AeroScale: 193 posts

Posted: Monday, August 08, 2016 - 03:17 PM UTC
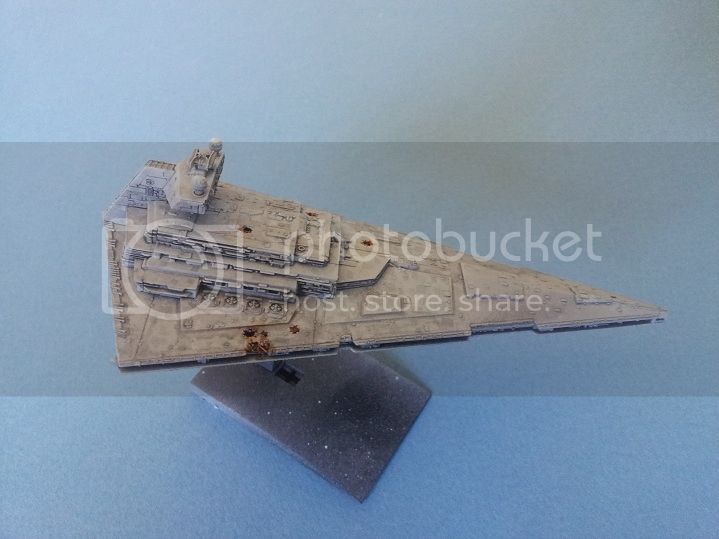
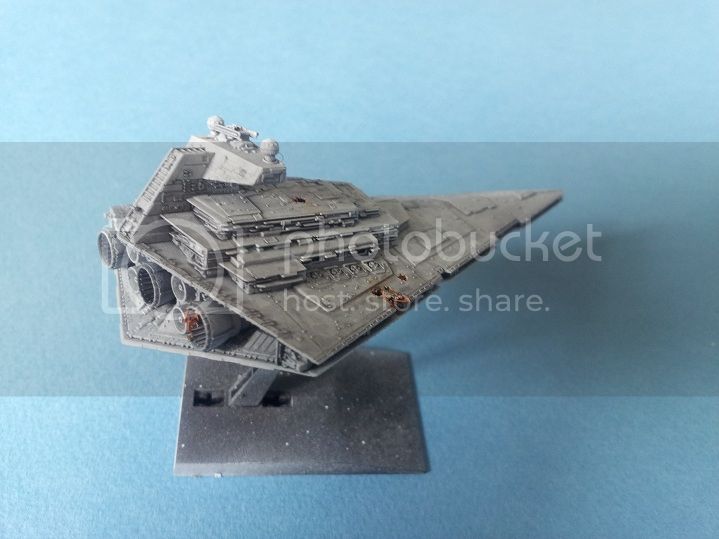
a bit of a late entry with this the Bandai Imperial Star Destroyer which was released at the end of June. you can see some shots of the box and it's contents here at this link: Bandai Star Destroyer.
well it being a quiet weekend, my partner was at work i decided to open this little kit up and get to work. my plan was to recreate the crashed star destroyer seen in the new star wars film "The Force Awakens" and it has taken me some time to get all the items gathered to complete this plan.
as you can see in this opening photo i have already started to drill some holes in the hull and i added PE 1/350 ship railings to simulate internal structure:
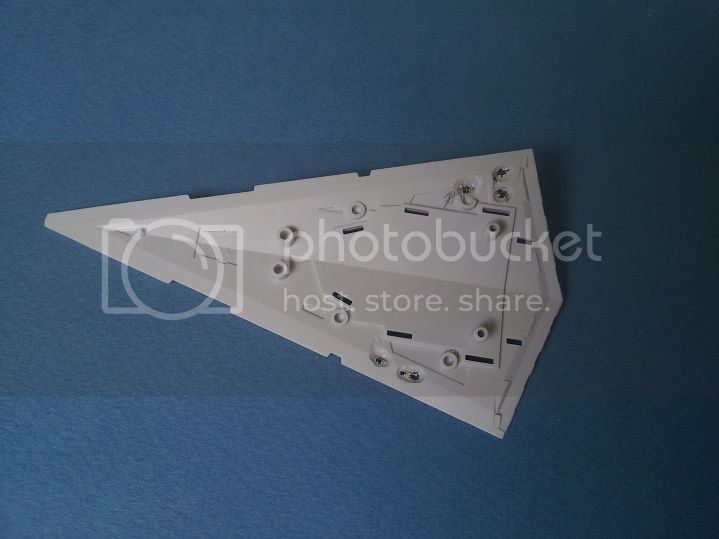
in this next shot you can see that the same process has been applied to the upper hull section now.
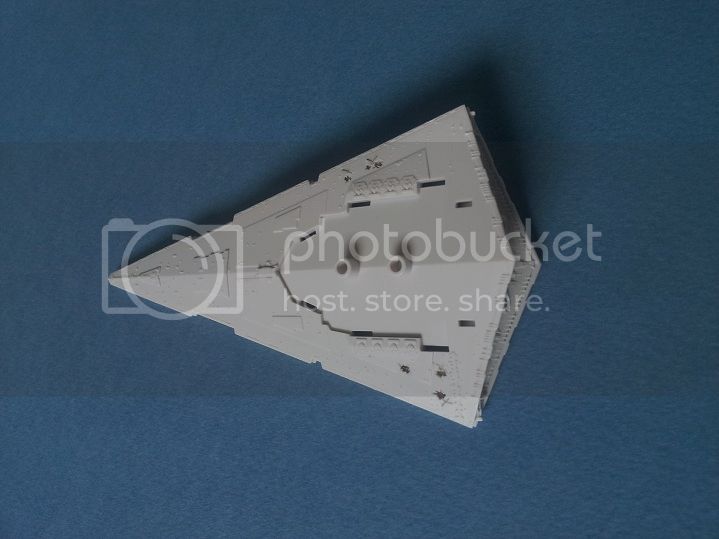
well it being a quiet weekend, my partner was at work i decided to open this little kit up and get to work. my plan was to recreate the crashed star destroyer seen in the new star wars film "The Force Awakens" and it has taken me some time to get all the items gathered to complete this plan.
as you can see in this opening photo i have already started to drill some holes in the hull and i added PE 1/350 ship railings to simulate internal structure:

in this next shot you can see that the same process has been applied to the upper hull section now.

Klaus-Adler

Joined: June 08, 2015
KitMaker: 1,505 posts
AeroScale: 193 posts

Posted: Monday, August 08, 2016 - 03:21 PM UTC
an update: a few hours later and the upper sections have also received the same treatment, with holes being drilled into them and ship railings being used to replicate internal bulkheads etc.
the construction phase has now been completed it's case of finding the time to begin painting and detailing the ship as well as organising a diorama base for it.
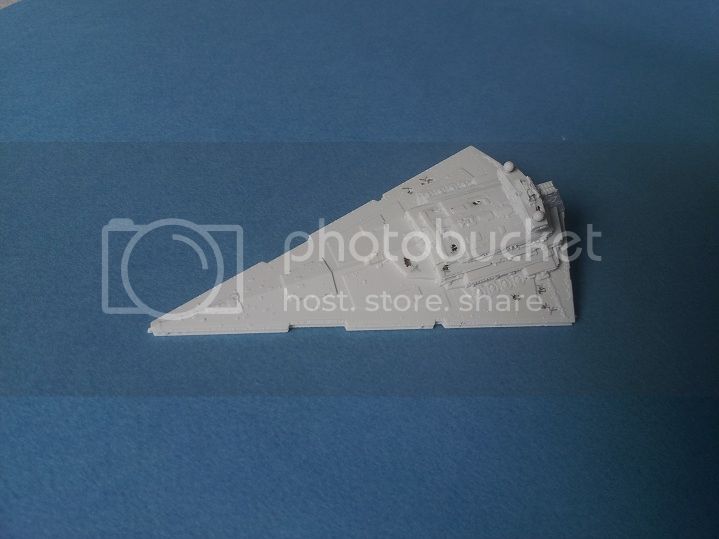
To be continued.....
the construction phase has now been completed it's case of finding the time to begin painting and detailing the ship as well as organising a diorama base for it.

To be continued.....
Posted: Monday, August 08, 2016 - 06:55 PM UTC
Awesome plan, David. It is very ambitious, but could also look extremely well.
Posted: Thursday, August 11, 2016 - 04:46 AM UTC
Quoted Text
Quoted Text"paralysis by analysis"
Oh my... this describes me to a 'T' and my whole problem building now too.
Lots of neat stuff going on here, the T-18 (gotta get that one) and the Celestial Prime just to name just a few.
Kinda wished I had seen this Campaign earlier!
My father was a perfectionist. He always had stacks & heaps of half completed projects, things would go along well for a while but he'd get stalled for lack of something, parts, info or time. The project would get set aside and sometimes resumed at a later date, sometimes not.
My mother had a rather different standard. "Good enough" was good enough. She almost always completed her projects. Her efforts were not perfection but she got a lot done and many times took Pop's stalled projects and finished them.
I naturally take after Pop. I too have stacks and heaps of partially completed projects including models. Lately I have been reviewing my standards and deciding to try to get more done and have less stuff sitting on the shelf waiting for something sometime in the future.
A side benefit is that I have been liberated from the rule of the perfect and have been enjoying the builds a lot more. In the end, this is a hobby and it is all about enjoying ourselves.
There is still plenty of time to build something for this campaign, it doesn't end until January.
David - I look forward to seeing more of your Star Wars ship. Is the ship going to be damaged? That will be fun to mess it up some.
Posted: Thursday, August 11, 2016 - 04:50 AM UTC
I have never actually COMPLETED a campaign before. Now the little T-18 is done and I will shoot some photos of it to post here. As I understand it, I also need to post pics to a gallery someplace to get the ribbon. Where is this gallery?
rochaped

Joined: August 27, 2010
KitMaker: 679 posts
AeroScale: 669 posts

Posted: Thursday, August 11, 2016 - 03:41 PM UTC
Paul you can find the link to access the campaign gallery right at the beginning of this campaign thread, in Michael's oppening post.
Cheers and congrats for that great T-18
Cheers and congrats for that great T-18
Posted: Thursday, August 11, 2016 - 08:56 PM UTC
Thanks, I found that link. Now I just have to shoot some pics.
Klaus-Adler

Joined: June 08, 2015
KitMaker: 1,505 posts
AeroScale: 193 posts

Posted: Sunday, August 14, 2016 - 06:12 PM UTC
Hi all,
just a brief update: most of the painting has now been completed and as you can see the star destroyer has an attack of blue measles lol. actually its for the "aztec" style to create some different coloured panels rather than having a rather boring mono-chromatic appearance.
i have also today purchased some foam blocks from a local florist which i will use to create the desert diorama for the kit.
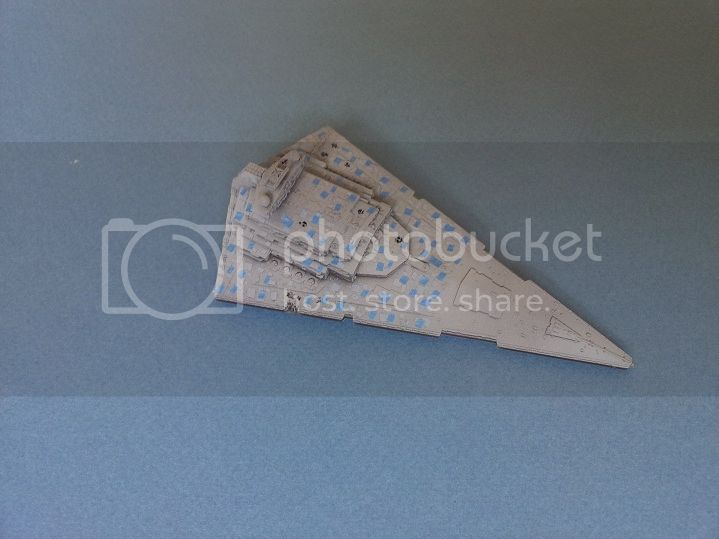

rochaped

Joined: August 27, 2010
KitMaker: 679 posts
AeroScale: 669 posts

Posted: Monday, August 22, 2016 - 08:38 PM UTC
Hi everyone,
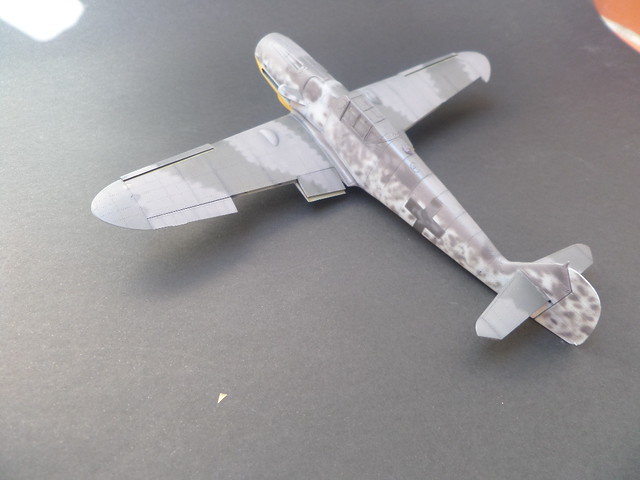
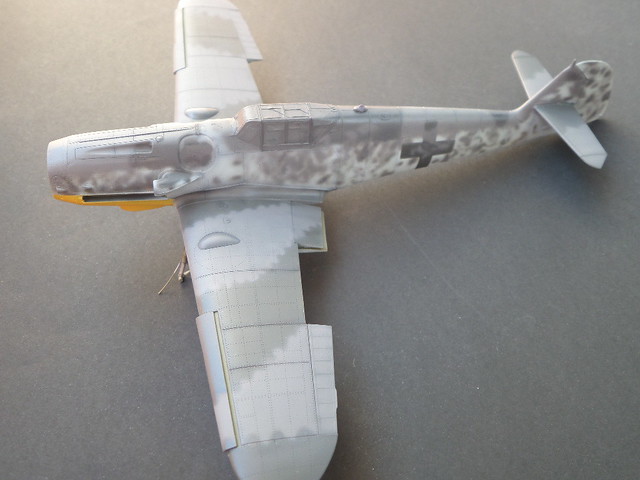
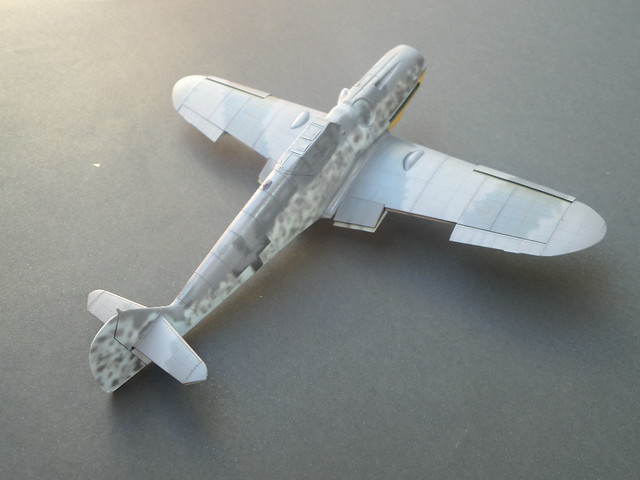
some work done today on my Eduard bf 109 G
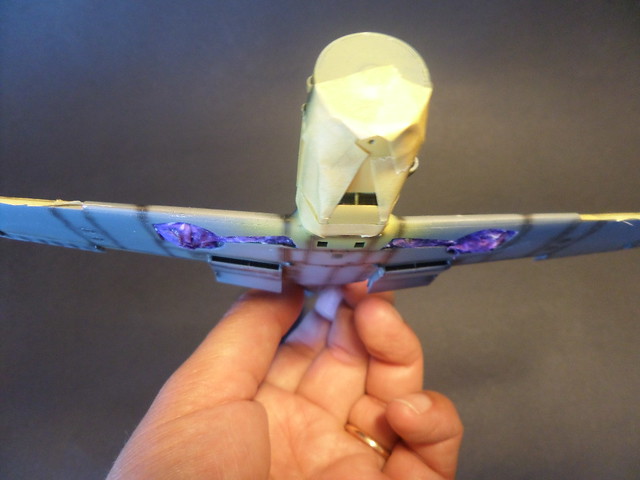
a bit of extras added to the radiators
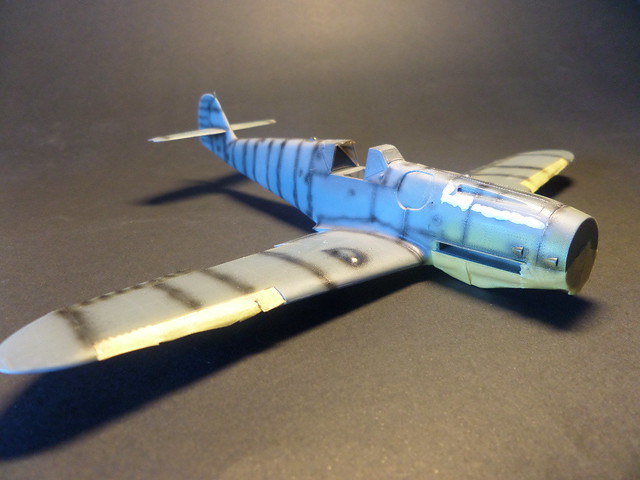
After pre shading found that the joint line made by the insertion of the gun breeches above the engine did't exist on the real thing so off came the putty...
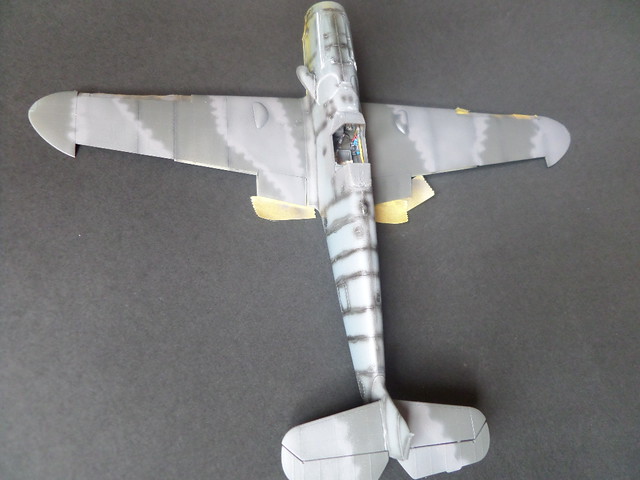
My first attempt at the jigsaw pattern splinter camo some Gustavs had around 1943. Made freehand and using a lot thinned gunze 75 than the initial layer, that explains the different hues. Hopefully the color will be uniform latter on.
Cheers
Pedro
some work done today on my Eduard bf 109 G

a bit of extras added to the radiators

After pre shading found that the joint line made by the insertion of the gun breeches above the engine did't exist on the real thing so off came the putty...

My first attempt at the jigsaw pattern splinter camo some Gustavs had around 1943. Made freehand and using a lot thinned gunze 75 than the initial layer, that explains the different hues. Hopefully the color will be uniform latter on.
Cheers
Pedro
Posted: Tuesday, August 23, 2016 - 12:31 AM UTC
David, nice progress on the star destroyer. Looking forward to see the diorama take shape.
Pedro, nice job on the camouflage. I hope you will be able to blend everything together.
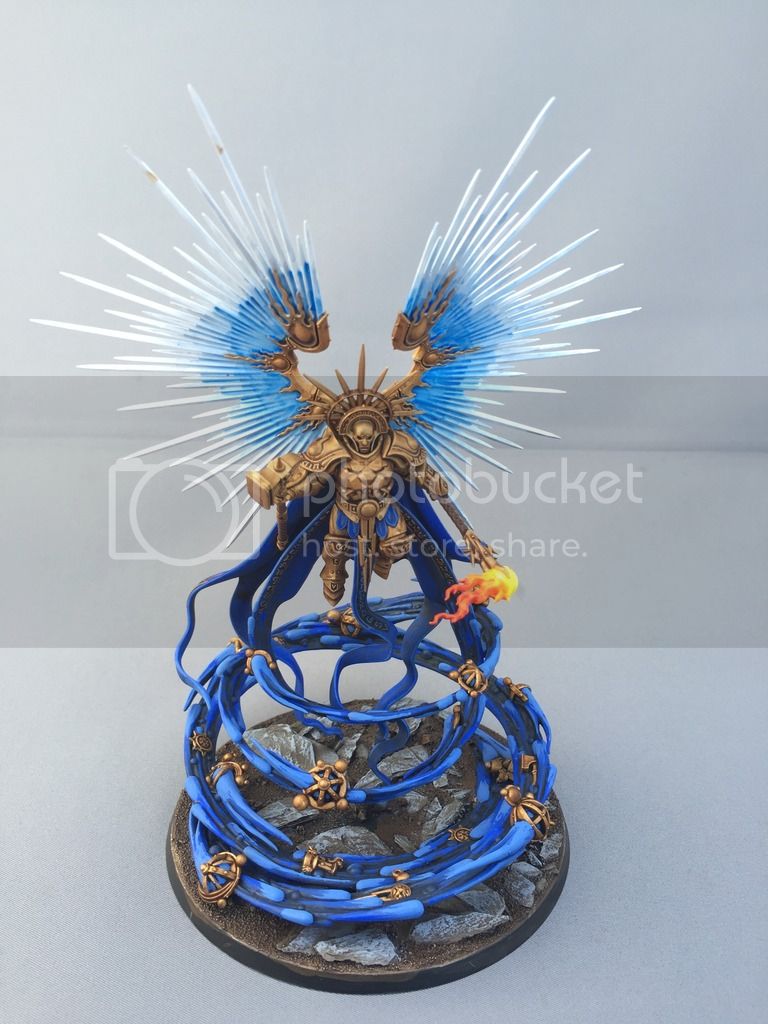
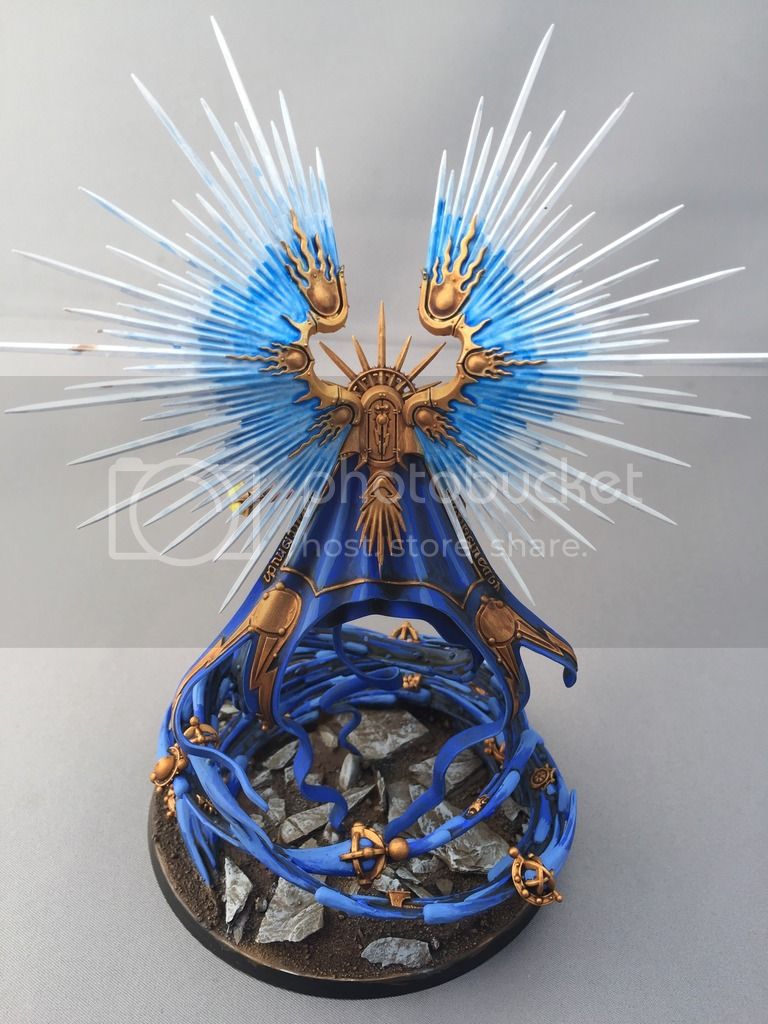
I have finished my Celestial Prime. An awesome model. Took forever to paint that vortex around the figure, but I am very satisfied with the end result.
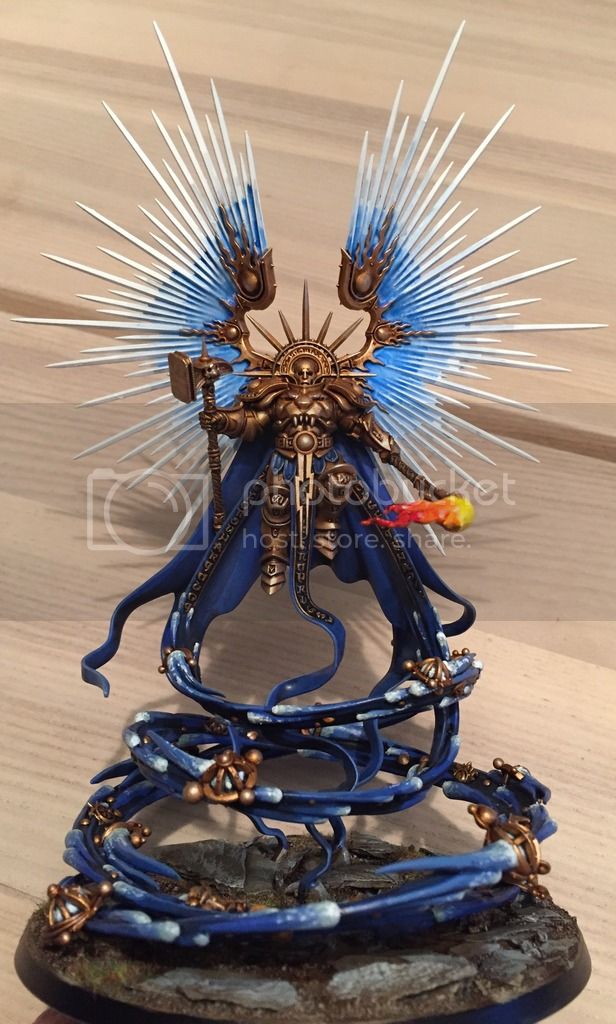


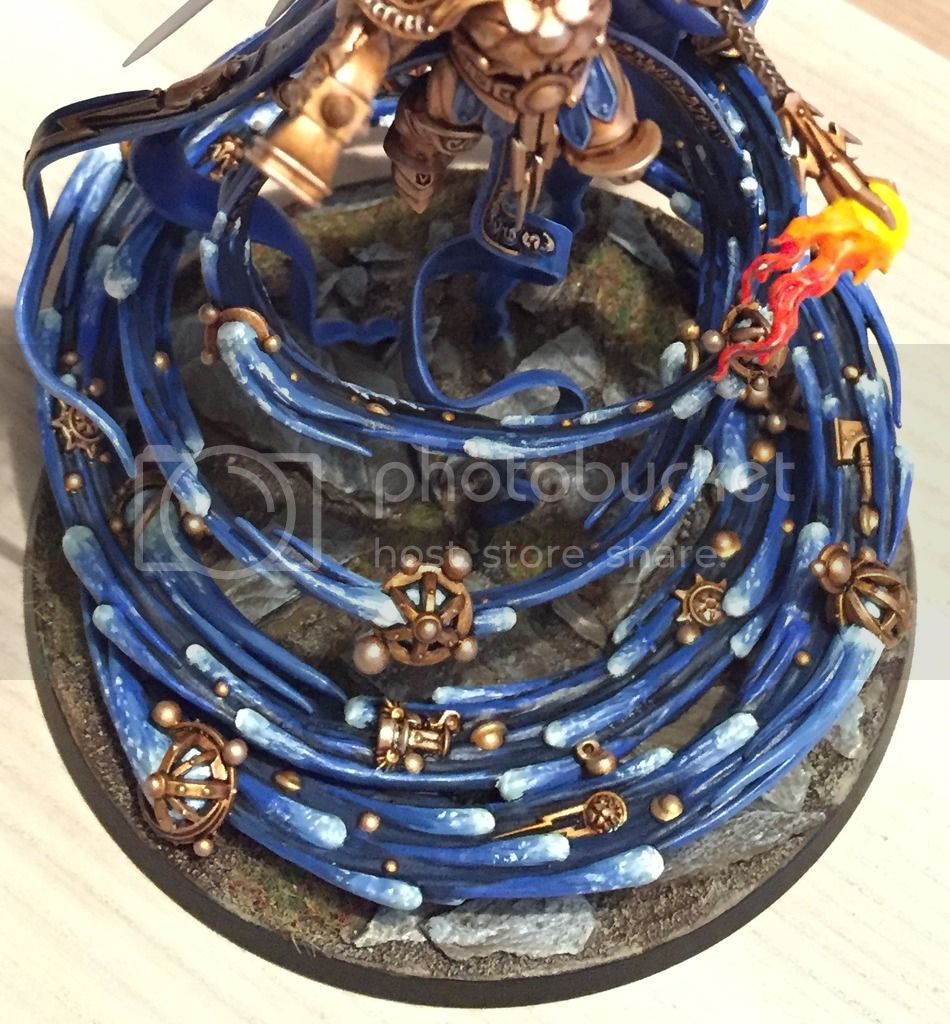
Pedro, nice job on the camouflage. I hope you will be able to blend everything together.
I have finished my Celestial Prime. An awesome model. Took forever to paint that vortex around the figure, but I am very satisfied with the end result.


BlackWidow

Joined: August 09, 2009
KitMaker: 1,732 posts
AeroScale: 1,336 posts

Posted: Tuesday, August 23, 2016 - 12:44 AM UTC
Great paint work on it, Jesper! What's the story behind the figure? Haven't heared of it before.
Torsten
Torsten

Posted: Wednesday, August 24, 2016 - 12:04 AM UTC
Thanks for the comment, Torsten. The figure is a general for a Stormcast Eternal army. Stormcasts is a faction in Games Workshops Age Of Sigmar game. A really nice figure.
You can read more about the game here
Age of Sigmar
You can read more about the game here
Age of Sigmar
Posted: Wednesday, August 24, 2016 - 01:46 AM UTC
Congrats Jesper on your striking figure. I thinks the blues are "out of this world."
I have put the finishing touches on the Soviet T-18 tankette. Here it is in all its freshened up glory ready for its big show in front of Uncle Joe in 1929:
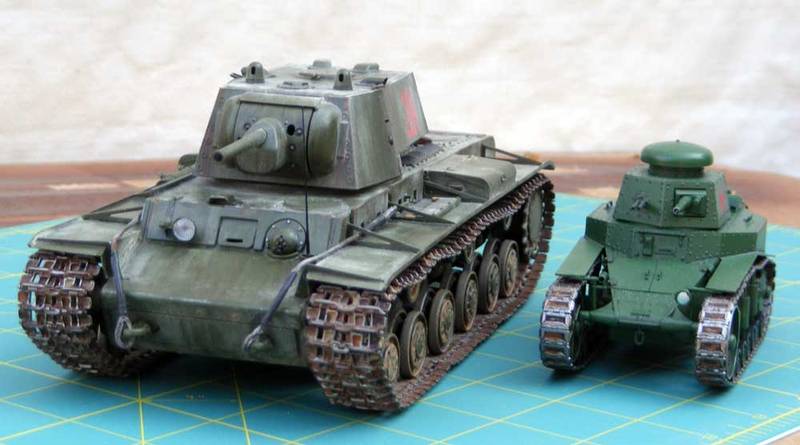
Just for fun, here is a shot of the T-18 sitting next to the just completed KV-1 Model 1941:
I have uploaded a couple of pics to the gallery and will call this campaign done!
I have put the finishing touches on the Soviet T-18 tankette. Here it is in all its freshened up glory ready for its big show in front of Uncle Joe in 1929:


Just for fun, here is a shot of the T-18 sitting next to the just completed KV-1 Model 1941:

I have uploaded a couple of pics to the gallery and will call this campaign done!
Klaus-Adler

Joined: June 08, 2015
KitMaker: 1,505 posts
AeroScale: 193 posts

Posted: Wednesday, August 24, 2016 - 03:44 PM UTC
the star destroyer has been completed and you can see here in the first picture some of the PE i used as a internal super-structure and on the last picture you can just about make out the damaged engine housing, again this was made using fuse wire and PE.
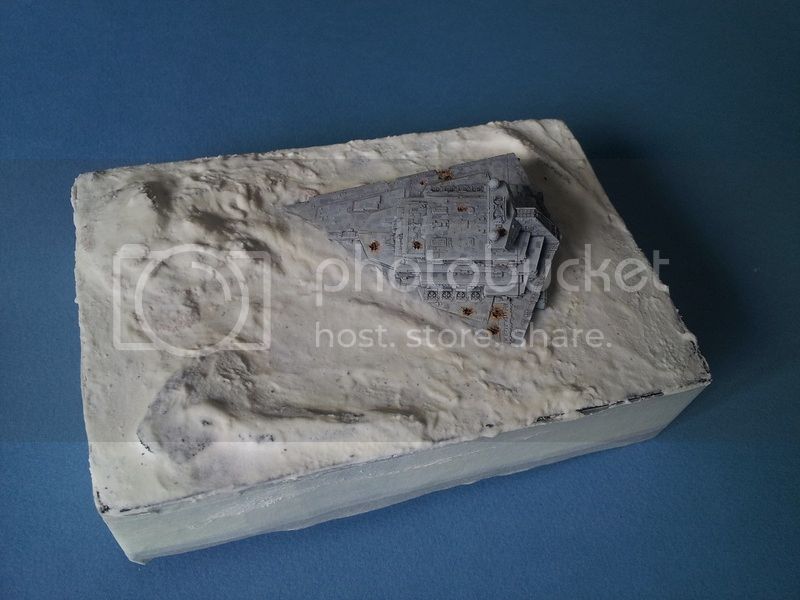
it's simply a case now of building the diorama and crashing the ship on to the planet of Jakku.
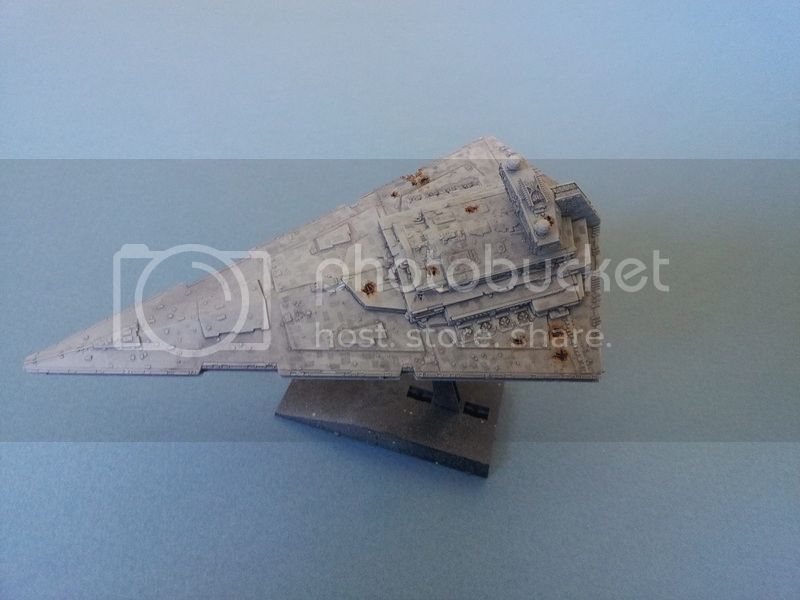
it's simply a case now of building the diorama and crashing the ship on to the planet of Jakku.


Klaus-Adler

Joined: June 08, 2015
KitMaker: 1,505 posts
AeroScale: 193 posts

Posted: Thursday, September 01, 2016 - 03:40 PM UTC
looking more like the planet hoth than jakku at the moment but as you can see the dio is well on it's way to being completed, i hope to have it done before i go on holiday next weekend.

Posted: Thursday, September 01, 2016 - 06:29 PM UTC
It is taking shape, David. Looking forward to see more 

rochaped

Joined: August 27, 2010
KitMaker: 679 posts
AeroScale: 669 posts

Posted: Friday, September 02, 2016 - 07:53 PM UTC
 |




 [/url]