Rowan, everything is fair in VAC kits.
Bob
Air Campaigns
Want to start or join a group build? This is where to start.
Want to start or join a group build? This is where to start.
Hosted by Frederick Boucher, Michael Satin
OFFICIAL: The Lost Art Campaign

Bigrip74

Joined: February 22, 2008
KitMaker: 5,026 posts
AeroScale: 2,811 posts

Posted: Monday, November 06, 2017 - 03:06 AM UTC
Posted: Monday, November 06, 2017 - 03:34 AM UTC
Quoted Text
Rowan, everything is fair in VAC kits.
Bob
 It's certainly tempting! But, nahh - I'll start again - if only to get some shots in the can for a follow-up How-To article. I always hated the "here's one we built earlier" examples we had on TV hobby shows in the UK when I was a kid, so this is a good excuse to start from scratch.
All the best
Rowan


Bigrip74

Joined: February 22, 2008
KitMaker: 5,026 posts
AeroScale: 2,811 posts

Posted: Monday, November 06, 2017 - 03:45 AM UTC
Quoted Text
Quoted TextRowan, everything is fair in VAC kits.
Bob
It's certainly tempting! But, nahh - I'll start again - if only to get some shots in the can for a follow-up How-To article. I always hated the "here's one we built earlier" examples we had on TV hobby shows in the UK when I was a kid, so this is a good excuse to start from scratch.
All the best
Rowan
Fair enough Rowan. I cannot wait to see your build and review.
Bob
Posted: Tuesday, November 07, 2017 - 10:25 PM UTC
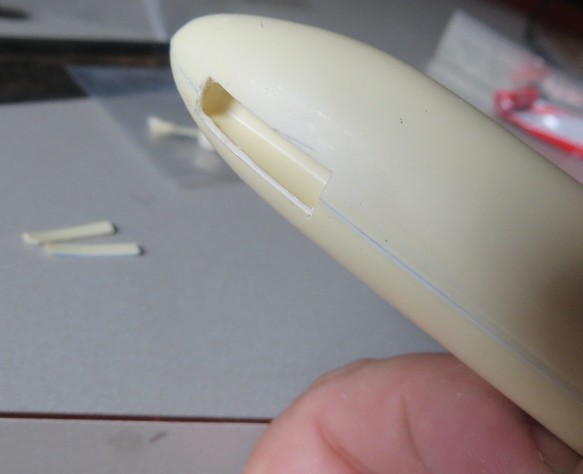
One usually has to cut open landing gear door openings, and build something in there to stick the strut to. This kit came with a box of the right dimensions. looks ok roughed in.
1/144 scale models don't get interiors, but they do get some internals. stiffeners cut from scraps, and a goodly nose weight.
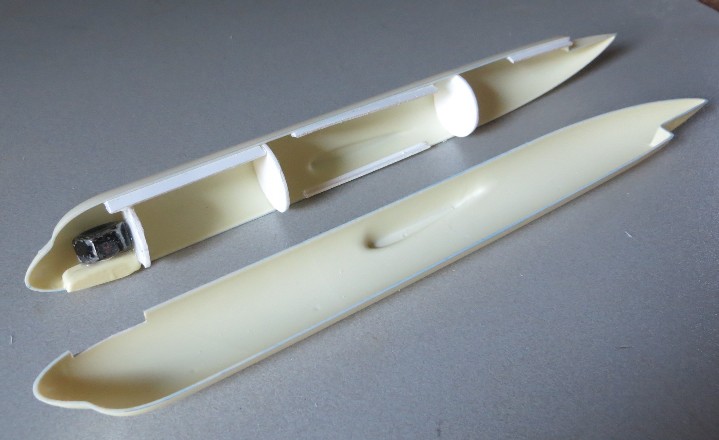

1/144 scale models don't get interiors, but they do get some internals. stiffeners cut from scraps, and a goodly nose weight.


goodn8

Joined: October 12, 2008
KitMaker: 709 posts
AeroScale: 651 posts

Posted: Tuesday, November 07, 2017 - 11:36 PM UTC
Fantastic work here, gentlemen!
Never managed to get a vacuform kit together. Last time I handled vacuforms were sails from my Revell Cutty Sark in the late 70s ...
... ended up as a hangar beauty and gave away.
Keep on that great work!
Thomas
Never managed to get a vacuform kit together. Last time I handled vacuforms were sails from my Revell Cutty Sark in the late 70s ...

... ended up as a hangar beauty and gave away.
Keep on that great work!
Thomas

Posted: Wednesday, November 08, 2017 - 07:44 PM UTC
It is good to see that we have 13 people enlisted in the campaign. I hope some more kits get started soon! 

Posted: Saturday, November 11, 2017 - 01:48 AM UTC
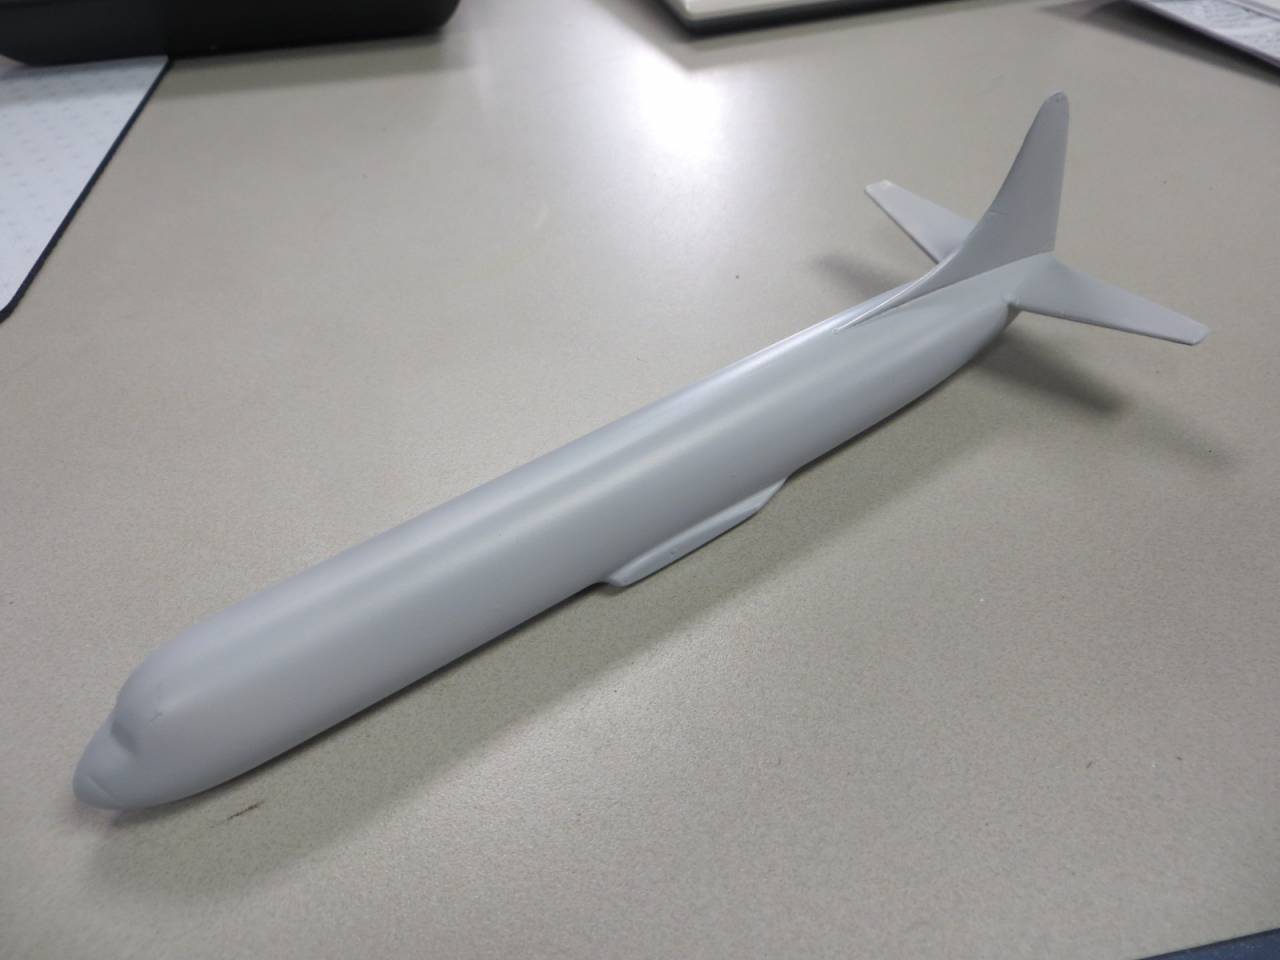
tail group complete, first coat of primer on. looks pretty smooth. 

Posted: Saturday, November 11, 2017 - 03:37 AM UTC
Count me among the impressed. No hint that there isn't injection molded plastic under that paint. 


Bigrip74

Joined: February 22, 2008
KitMaker: 5,026 posts
AeroScale: 2,811 posts

Posted: Monday, November 13, 2017 - 07:41 AM UTC

Scrodes

Joined: July 22, 2012
KitMaker: 771 posts
AeroScale: 763 posts

Posted: Monday, November 13, 2017 - 11:45 PM UTC
I see recognizable airplane parts Bob, that's always a good start.
Cutting and sanding will become second nature. You'll likely wake up to discover that you've prepped a dozen parts while you slept.
Cutting and sanding will become second nature. You'll likely wake up to discover that you've prepped a dozen parts while you slept.

Bigrip74

Joined: February 22, 2008
KitMaker: 5,026 posts
AeroScale: 2,811 posts

Posted: Tuesday, November 14, 2017 - 12:04 AM UTC
Matt, this Yak 3 is not going together as well as my last vacs, the fuselage is misbehaving a little.
(edit @ 2:10pm) this Yak 3's top section of the wing will not align with the bottom. I may need to cut the top in sections to align with the bottom. OR! go to another kit like:
Wings 48 Mig 3
or
Wings 48 Shtormovick
Bob
(edit @ 2:10pm) this Yak 3's top section of the wing will not align with the bottom. I may need to cut the top in sections to align with the bottom. OR! go to another kit like:
Wings 48 Mig 3
or
Wings 48 Shtormovick
Bob
Kevlar06

Joined: March 15, 2009
KitMaker: 3,670 posts
AeroScale: 833 posts

Posted: Tuesday, November 14, 2017 - 02:47 AM UTC
Quoted Text
Matt, this Yak 3 is not going together as well as my last vacs, the fuselage is misbehaving a little.
(edit @ 2:10pm) this Yak 3's top section of the wing will not align with the bottom. I may need to cut the top in sections to align with the bottom. OR! go to another kit like:
Wings 48 Mig 3
or
Wings 48 Shtormovick
Bob
Bob--for the Yak-3-- did you sand both wing halves down enough? Sometimes with Vacs I find the parts mismatch is because I either took too much material off, or not enough. If I've taken off too much, I just add a little strip styrene to the plastic. sometimes the plastic can be a little "finicky" on Vacforms as the heating and cooling process can distort the sheet enough so the plastic shrinks at different rates. This is especially true if wing or fuselage halves are on different sheets.
VR, Russ

Bigrip74

Joined: February 22, 2008
KitMaker: 5,026 posts
AeroScale: 2,811 posts

Posted: Tuesday, November 14, 2017 - 04:03 AM UTC
Russ, this wing does not match up. It was sanded good, I think its the maker of the kit. Ill give it a try (I have extra plastic sheets) then decide if to continue or go to another kit.
Bob
Bob
Posted: Tuesday, November 14, 2017 - 05:26 AM UTC
the JLM Electra went together flawlessly.
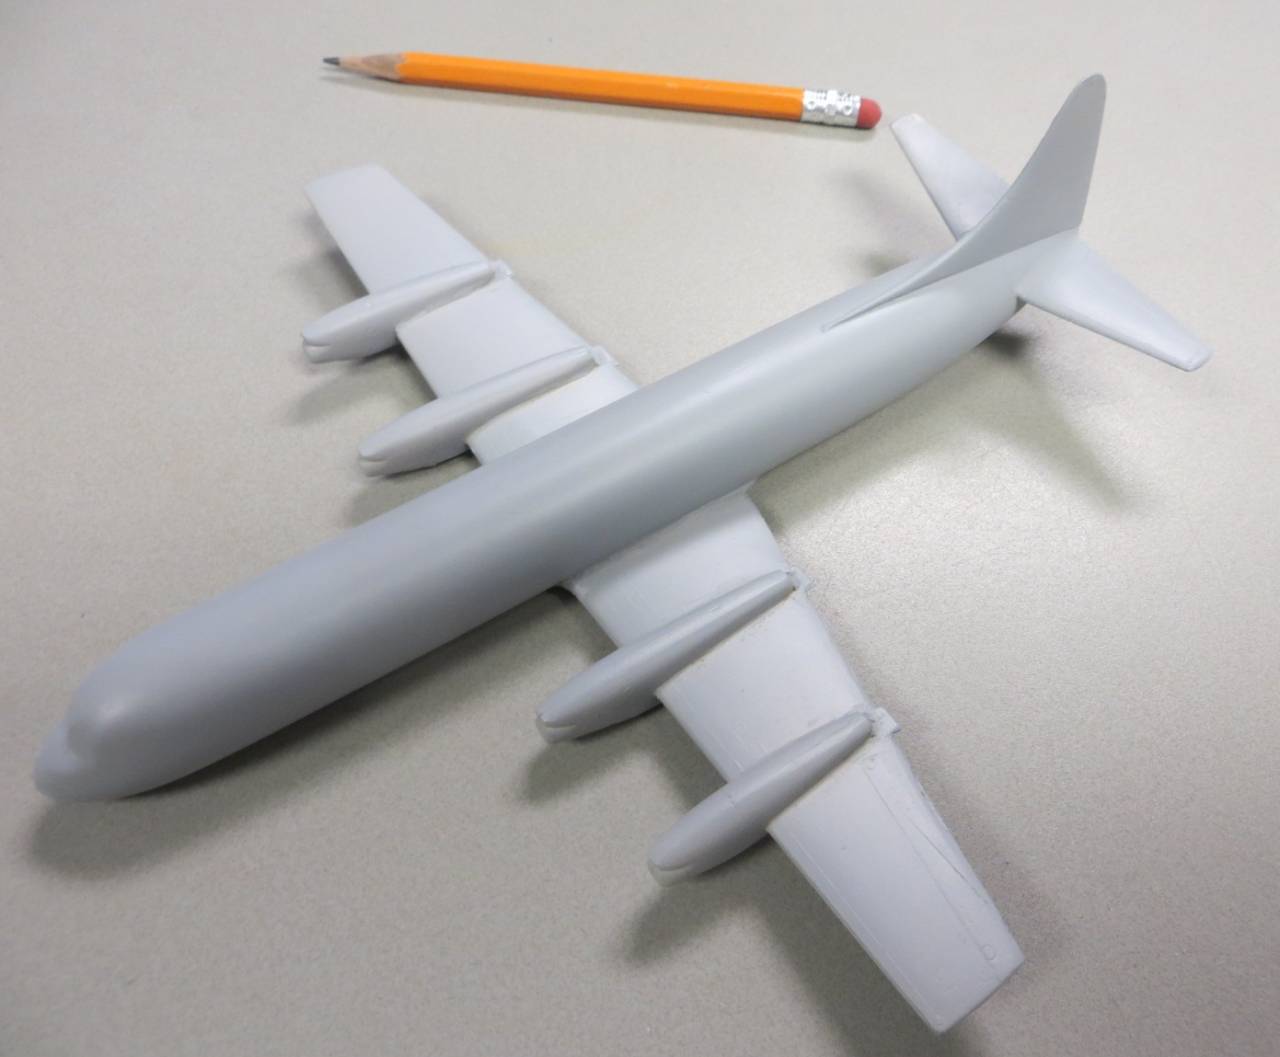
some work to do on the wing root fairings, nothing unusual.
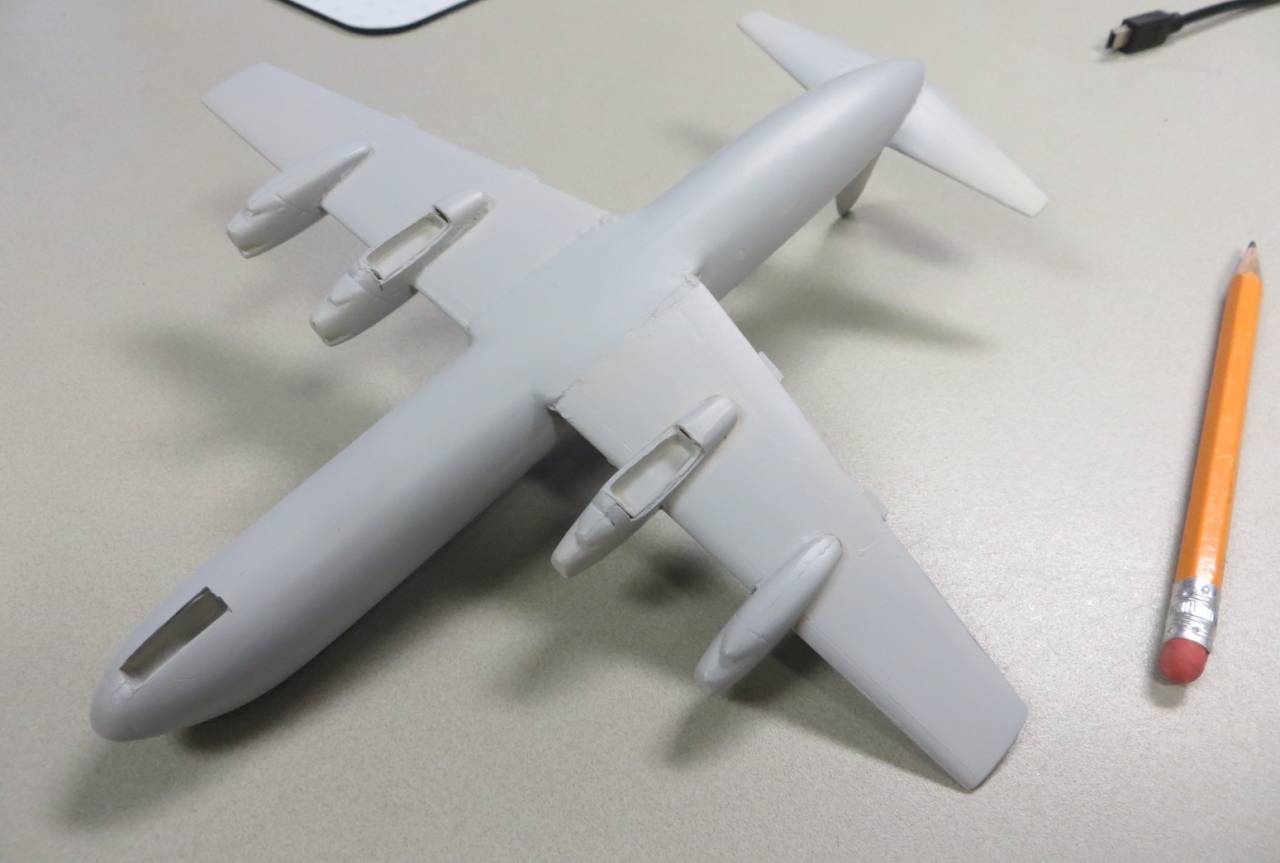
Wing dihedral came out ok.
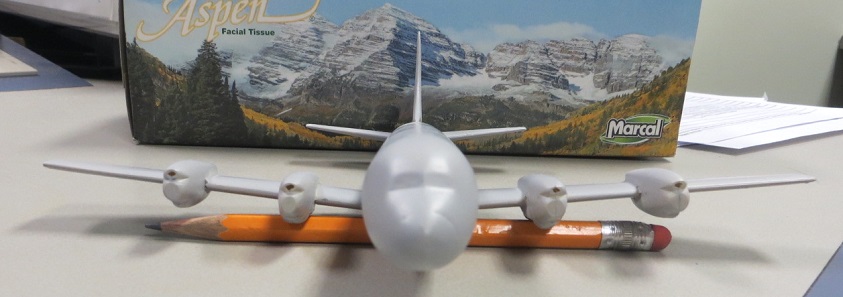
Ive just drilled opened up the engine air intakes, some work to do there with jewelers files.
some work to do on the wing root fairings, nothing unusual.
Wing dihedral came out ok.
Ive just drilled opened up the engine air intakes, some work to do there with jewelers files.

Bigrip74

Joined: February 22, 2008
KitMaker: 5,026 posts
AeroScale: 2,811 posts

Posted: Tuesday, November 14, 2017 - 06:02 AM UTC
Jonathan, I enjoy watching your work,it gives me ideas/tips and encouragement for my builds.
Bob
Bob

Scrodes

Joined: July 22, 2012
KitMaker: 771 posts
AeroScale: 763 posts

Posted: Tuesday, November 14, 2017 - 06:24 AM UTC
I can't even put Lego together at the pace you guys are moving *crosseyed*

Bigrip74

Joined: February 22, 2008
KitMaker: 5,026 posts
AeroScale: 2,811 posts

Posted: Tuesday, November 14, 2017 - 06:42 AM UTC
Matt, my excuses is I'm bored not fast.
The first two photos show how the top and bottom of the wing aligns.
Photo #3 I cut out a center section of the top wing.
Photo #4 shows how the left two pieces line up.
Photo #5 both top pieces are added to see how the wing will look.
Not bad, I still need to figure out how to cut the wheel wells out before I glue the wing pieces together.


Posted: Wednesday, November 15, 2017 - 03:58 AM UTC
Did cutting out the center of the upper half fix the problem?
It will be interesting to see how the fuselage fits on to the top of the wing now.
I've added a bunch of Milliput to the wing roots of my Electra. It's on a shelf curing. I'm not going to look at it again until tomorrow.
It will be interesting to see how the fuselage fits on to the top of the wing now.
I've added a bunch of Milliput to the wing roots of my Electra. It's on a shelf curing. I'm not going to look at it again until tomorrow.

Bigrip74

Joined: February 22, 2008
KitMaker: 5,026 posts
AeroScale: 2,811 posts

Posted: Wednesday, November 15, 2017 - 06:47 AM UTC

Scrodes

Joined: July 22, 2012
KitMaker: 771 posts
AeroScale: 763 posts

Posted: Thursday, November 16, 2017 - 03:13 AM UTC
Wow, nice slick fix!
You make it look easy
You make it look easy

Bigrip74

Joined: February 22, 2008
KitMaker: 5,026 posts
AeroScale: 2,811 posts

Posted: Thursday, November 16, 2017 - 03:30 AM UTC
Quoted Text
Wow, nice slick fix!
You make it look easy
Not so fast! It has not been attached to the fuselage yet and I do not know how much putty will be involved. But thanks for the comment. I want to see how Jonathan progresses with his Electra and when you start with your build.
I feel so lonely here in the Midwest.


Bob
Posted: Thursday, November 16, 2017 - 08:51 AM UTC
By gum, bob, that looks like its going to get built!
I'm done with filling and fairing.
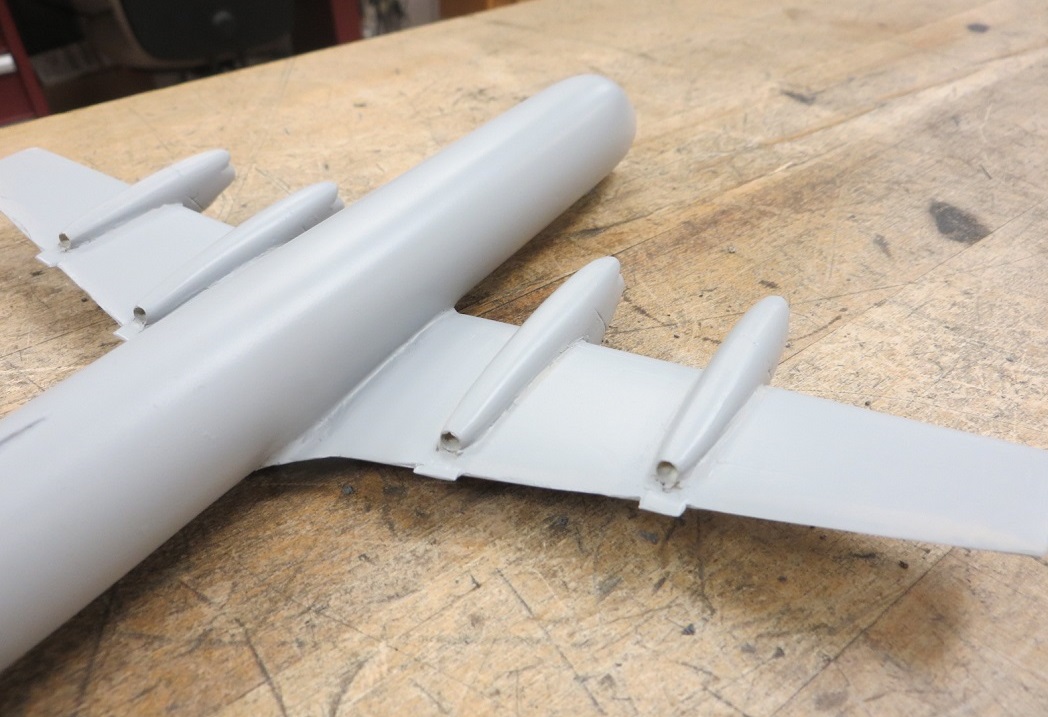
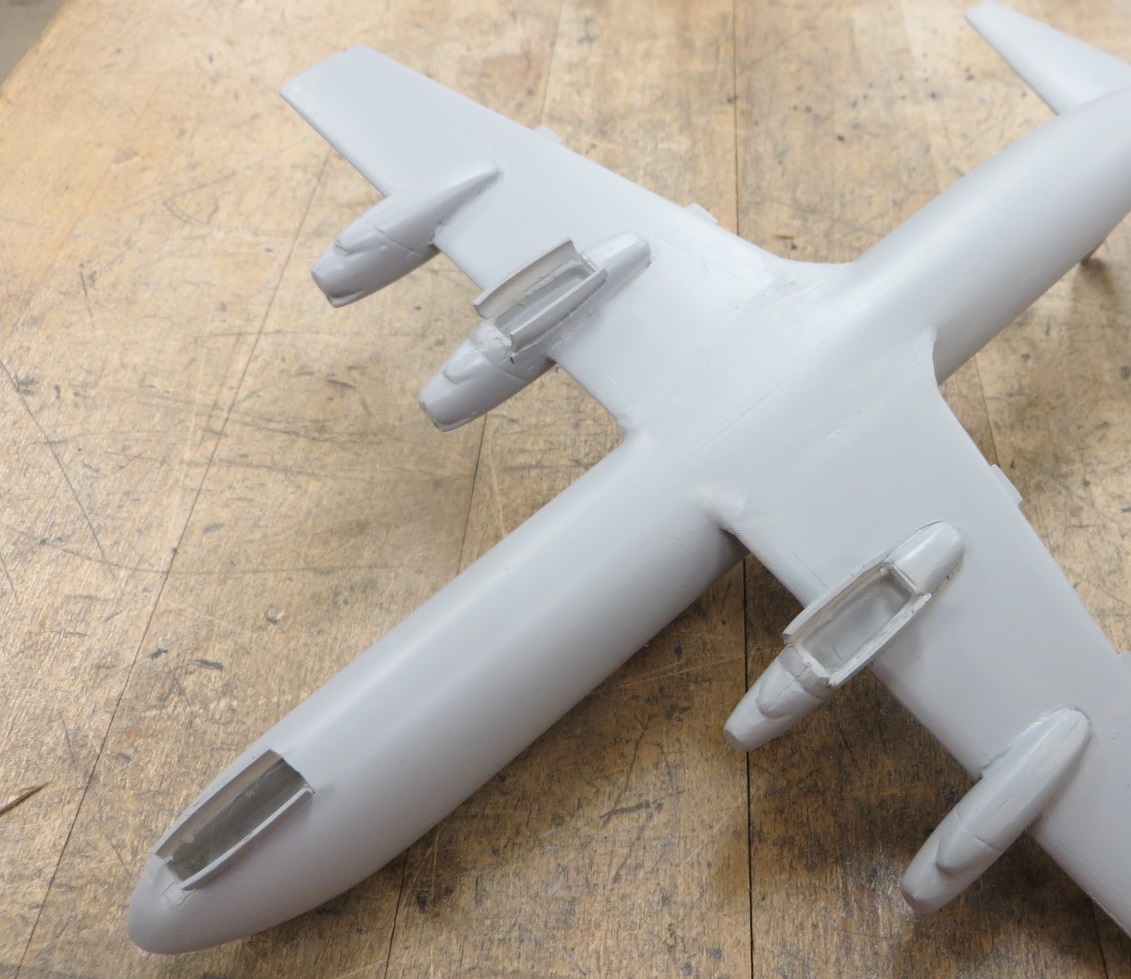
I'm not a super-detailer either. this is an OOB build, there will be no fidgity details in the wheel wells.
I'm done with filling and fairing.

I'm not a super-detailer either. this is an OOB build, there will be no fidgity details in the wheel wells.

Bigrip74

Joined: February 22, 2008
KitMaker: 5,026 posts
AeroScale: 2,811 posts

Posted: Thursday, November 16, 2017 - 08:57 AM UTC
Nice job Jonathan. "What putty/filler are you using?
Bob
Bob
Posted: Thursday, November 16, 2017 - 09:03 AM UTC
Milliput.
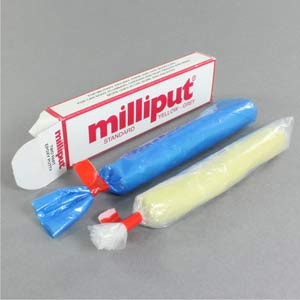
no toxic fumes, water clean up.

no toxic fumes, water clean up.
drabslab

Joined: September 28, 2004
KitMaker: 2,186 posts
AeroScale: 1,587 posts

Posted: Thursday, November 16, 2017 - 01:41 PM UTC
Quoted Text
Milliput.
no toxic fumes, water clean up.
Is that 2 components that you have to mix? Or two types of putty?
I usually use Tamiya putty, it works, is easy to apply but shrinks quite a bit.

 |


