World War II: Germany
Aircraft of Germany in WWII.
Hosted by Rowan Baylis
1/72 Eduard Bf 110G-4
spaarndammer
_VISITCOMMUNITY
Noord-Holland, Netherlands
Joined: January 28, 2007
KitMaker: 1,945 posts
AeroScale: 388 posts
Posted: Saturday, February 03, 2018 - 11:36 AM UTC
Excellent work as always Magnus, beautiful cockpit. Those Quickboost gunsights must be very small, especially those mirrorplates, a job well done!


Jelger
RussellE
#306
_VISITCOMMUNITY
Victoria, Australia
Joined: June 27, 2010
KitMaker: 3,959 posts
AeroScale: 598 posts
Posted: Sunday, February 04, 2018 - 02:41 PM UTC
I like the way you rack them up for painting Magnus
magnusf
_VISITCOMMUNITY
Stockholm, Sweden
Joined: May 02, 2006
KitMaker: 1,953 posts
AeroScale: 1,902 posts
Posted: Tuesday, February 06, 2018 - 01:33 AM UTC
Jelger! Thanks! Not as difficult as it appears actually!

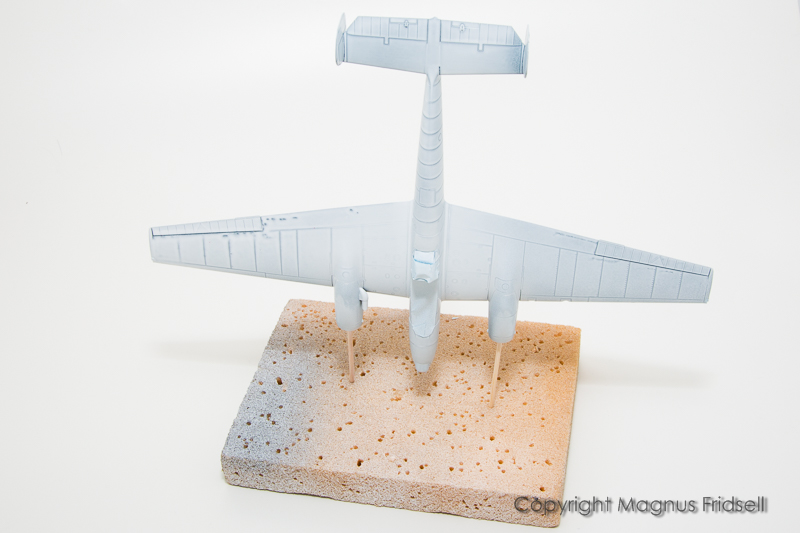
Russell! Good practice for learning how to spray tight, going slalom with the airbrush around the parts !


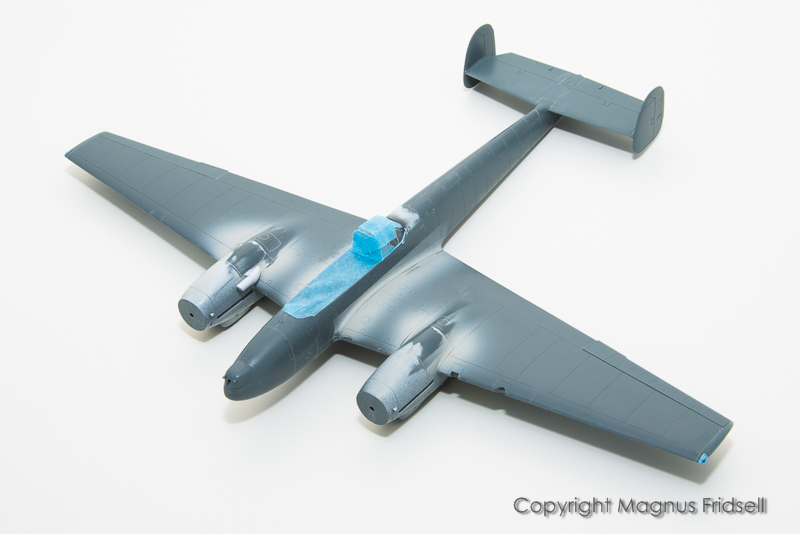
Another one of those not-so-interesting updates but there is no way of avoiding the masking...


...one great advantage of having build a 110 before (and kept the spares!) is the extra canopy available for covering the oblique cannon that otherwise would be a bit sprawling and troublesome...


And a coat of primer! It was well below freezing when I painted (outside, it is far too easy to paint yourself to a divorce if using the spray cans indoors...) and I think it affected the finish a bit. Nothing that a quick swipe with a fine sanding pad will fix though!


Magnus
Joel_W
Staff MemberAssociate Editor
AUTOMODELER
_VISITCOMMUNITY
New York, United States
Joined: December 04, 2010
KitMaker: 11,666 posts
AeroScale: 7,410 posts
Posted: Tuesday, February 06, 2018 - 03:17 AM UTC
Magnus
I haven't used a spray can of primer in many years. Like you said, a quick rub with a Micro Mesh pad should take care of any issues. Lately I've been using Tamiya sponge sanding pads, and they work great for concave and convex surfaces. Much easier to use then the Micro Mesh pads.

Joel
magnusf
_VISITCOMMUNITY
Stockholm, Sweden
Joined: May 02, 2006
KitMaker: 1,953 posts
AeroScale: 1,902 posts
Posted: Friday, February 09, 2018 - 06:28 PM UTC
Joel! I'll order some! Thanks!


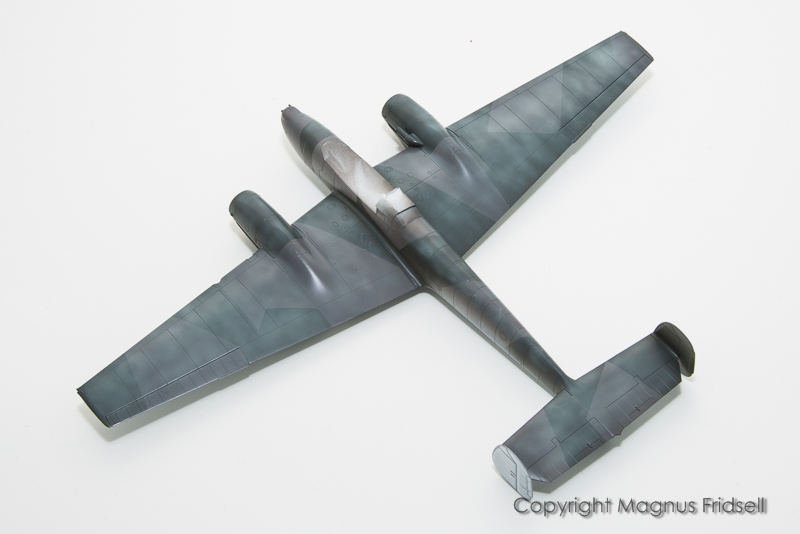
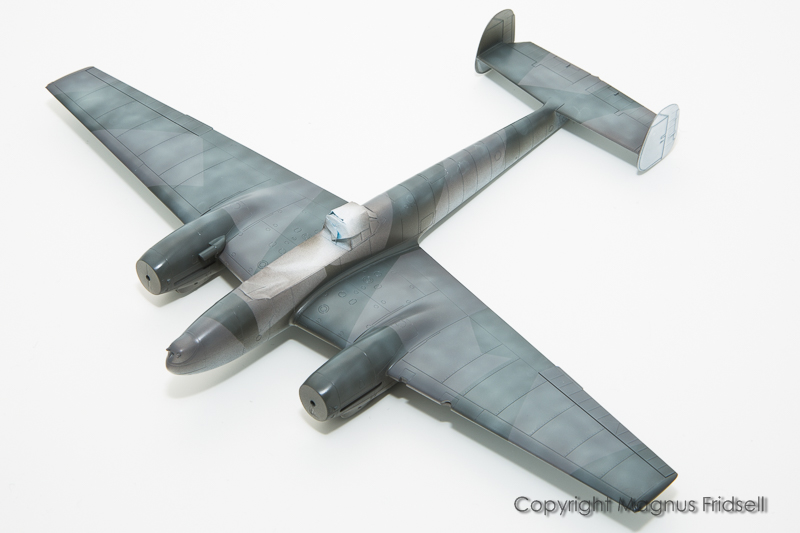
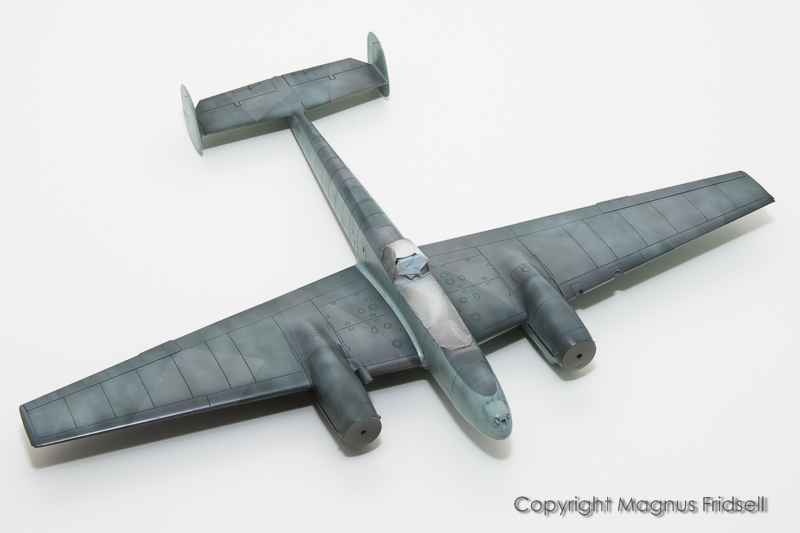
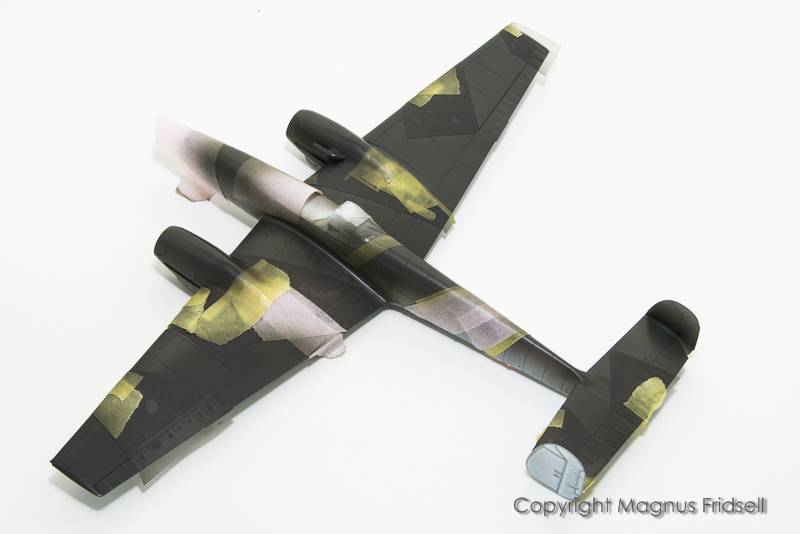
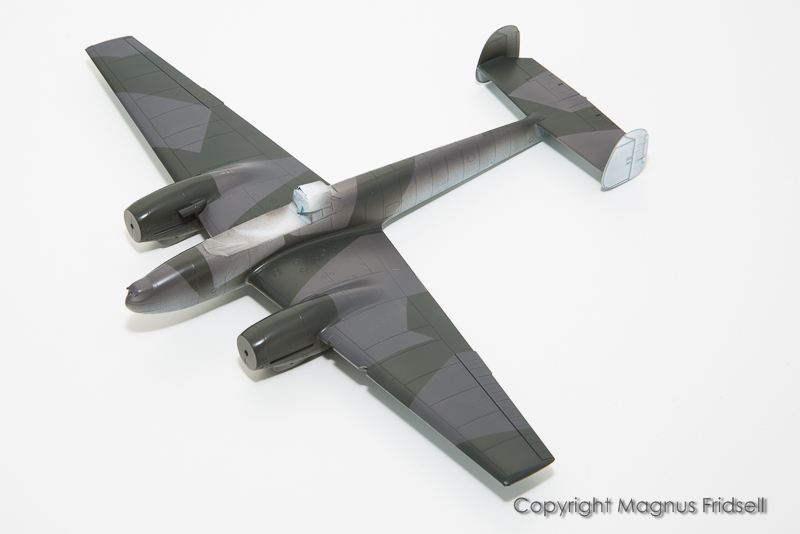
Masking for the top surfaces camo, this time using a perfectly manual process: a sharp scalpel and a ruler and some extra tape to cover the tricky areas!


And just about finished, some places will need a bit of touch-up!


Magnus
AussieReg
Staff MemberAssociate Editor
AUTOMODELER
#007
_VISITCOMMUNITY
Victoria, Australia
Joined: June 09, 2009
KitMaker: 8,156 posts
AeroScale: 3,756 posts
Posted: Friday, February 09, 2018 - 06:40 PM UTC
Very nice work on the splinter scheme Magnus, looking good.

Cheers, D

BTW - Whole airframe on sticks,
Joel_W
Staff MemberAssociate Editor
AUTOMODELER
_VISITCOMMUNITY
New York, United States
Joined: December 04, 2010
KitMaker: 11,666 posts
AeroScale: 7,410 posts
Posted: Friday, February 09, 2018 - 09:59 PM UTC
Magnus,
The Camo Splinter pattern came out absolutely perfect.

Joel
greif8
_VISITCOMMUNITY
Bayern, Germany
Joined: January 17, 2006
KitMaker: 673 posts
AeroScale: 492 posts
Posted: Saturday, February 10, 2018 - 01:33 AM UTC
Excellent job blending the nacelles into the wings Magnus. I think you paint job is also very well executed. The camo pattern looks bang on.

Ernest
RussellE
#306
_VISITCOMMUNITY
Victoria, Australia
Joined: June 27, 2010
KitMaker: 3,959 posts
AeroScale: 598 posts
Posted: Monday, February 12, 2018 - 03:42 PM UTC
very sharp paint work there, Magnus
spaarndammer
_VISITCOMMUNITY
Noord-Holland, Netherlands
Joined: January 28, 2007
KitMaker: 1,945 posts
AeroScale: 388 posts
Posted: Monday, February 12, 2018 - 10:43 PM UTC
Great work on the camo Magnus.

Interesting to see what you will do with the outer faces of the vertical stabilizers.


Jelger
magnusf
_VISITCOMMUNITY
Stockholm, Sweden
Joined: May 02, 2006
KitMaker: 1,953 posts
AeroScale: 1,902 posts
Posted: Thursday, February 15, 2018 - 01:48 AM UTC
Friends! Thanks! I have to warn you though that I didn't leave that splinter camo well alone ! More on that below...

Damian! As usual, "especially for you" !

Jelger! The outsides of the fins? Lots of victory marks of course !

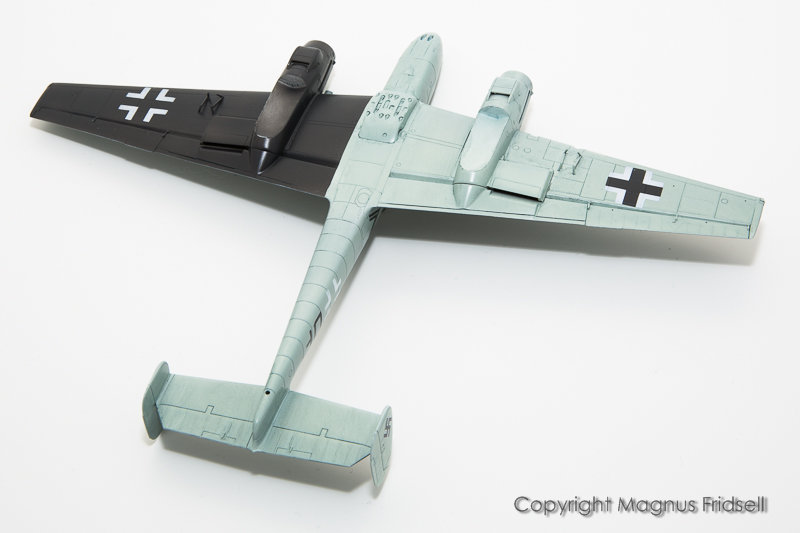
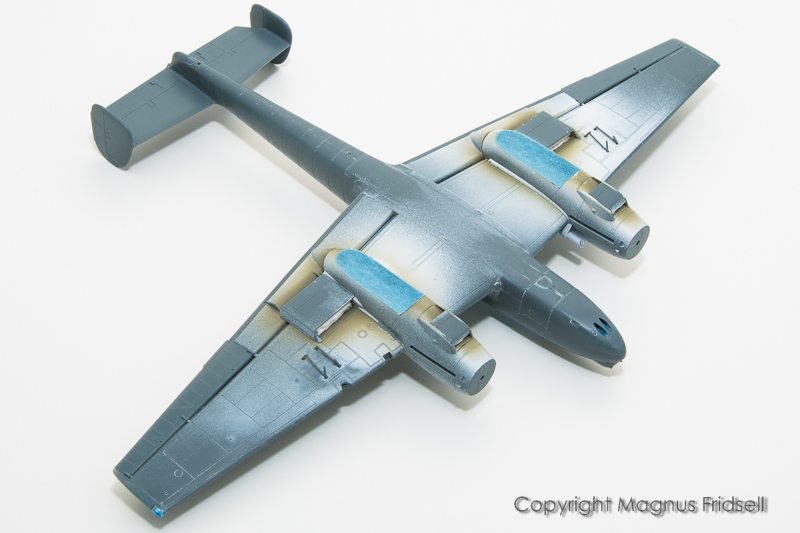
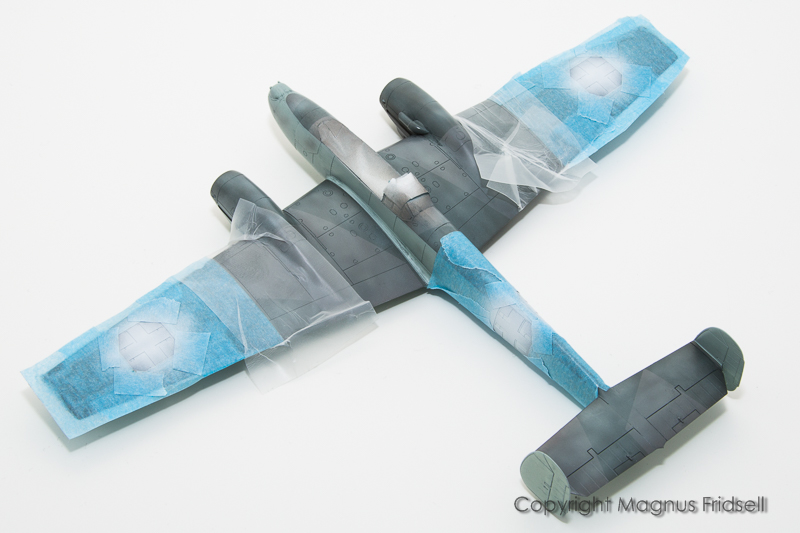
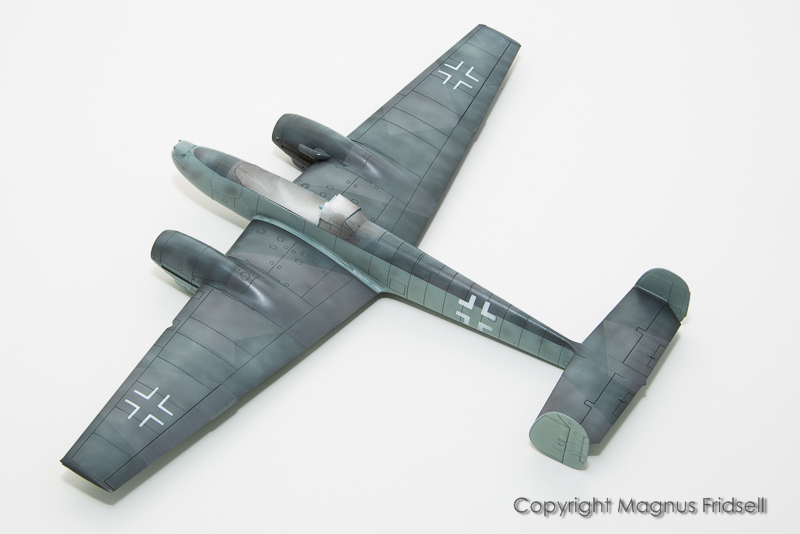
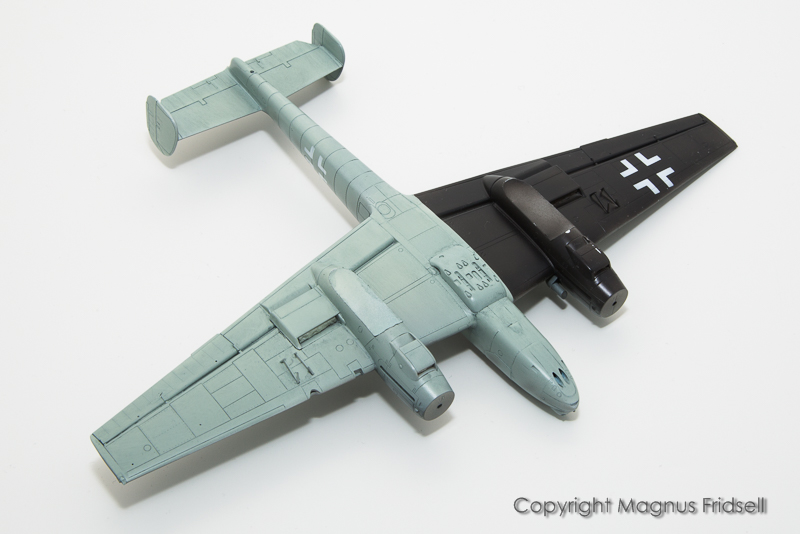
According to Eduard's instructions (and photos of many 110:s) they seem to have had their factory camo overpainted with RLM 76, the lower surface colour. In many cases, the camo below showed through and that was an effect I tried to emulate.


So after carefully painting the splinter camo, I mixed Mr Paint RLM 76 and clear in 30/70 proportions and started spraying. I did give some thought to how it could have been done in reality (probably starting at the wingtips, crawling on all fours back in towards the fuselage while spraying, and realising that it would probably not be possible to reach over the wing chord-wise in one sweep with the spray gun). I am not sure how much of all this thinking is showing through in the actual result but you'll have to take my word for it !


I was quite careful not to get too carried away, I can always add to the effect later on while going the other way will be a bit more difficult!


I have also gone over the model with Mig's enamel Dark Sea Blue panel line wash that popped the details in a nice way without too much contrast.


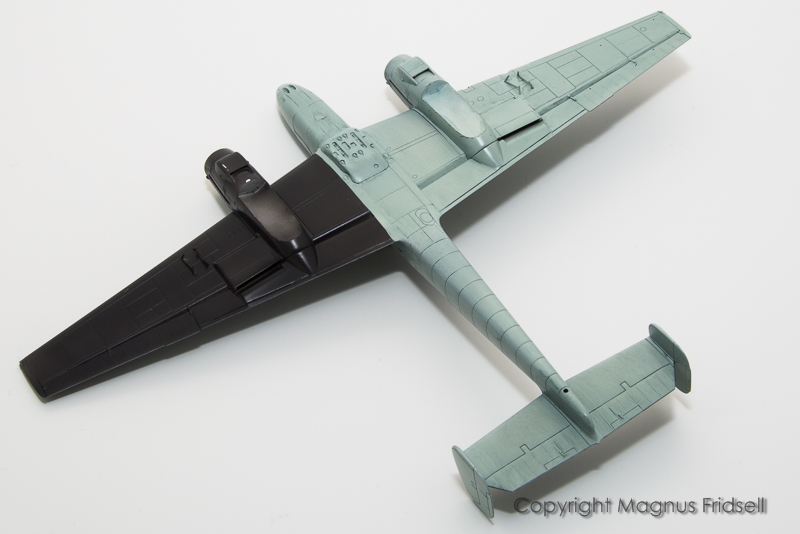
And finally the black lower right wing has been painted an "off-black" colour!

Next time there will hopefully be some markings done, with a bit of luck I'll be able to finish the cutting files for the masks tonight!


Magnus
goodn8
_VISITCOMMUNITY
Berlin, Germany
Joined: October 12, 2008
KitMaker: 709 posts
AeroScale: 651 posts
Posted: Friday, February 16, 2018 - 01:26 AM UTC
Lovely work on that rarely seen paint scheme !
Your paint job is fantastic, you really achieved the effect you wanted to go.
It`s already looking great, can't wait the next steps.

Thomas
Joel_W
Staff MemberAssociate Editor
AUTOMODELER
_VISITCOMMUNITY
New York, United States
Joined: December 04, 2010
KitMaker: 11,666 posts
AeroScale: 7,410 posts
Posted: Friday, February 16, 2018 - 10:36 PM UTC
Magnus
I've never built an Axis aircraft, but the camo paint scheme from a technical point of view is simply outstanding. The color modulation comes through all the colors, so the variation in tones is most realistic.

I'm still using decals over masks as I've yet taken the plunge into buying the craft cutting machine.

Joel
greif8
_VISITCOMMUNITY
Bayern, Germany
Joined: January 17, 2006
KitMaker: 673 posts
AeroScale: 492 posts
Posted: Saturday, February 17, 2018 - 01:30 AM UTC
Excellent color modulation with the RLM76 Magnus.

Ernest
magnusf
_VISITCOMMUNITY
Stockholm, Sweden
Joined: May 02, 2006
KitMaker: 1,953 posts
AeroScale: 1,902 posts
Posted: Saturday, March 03, 2018 - 11:26 AM UTC
Thomas! Thanks! I think though that they were a lot more "monochrome" in reality with a lot denser overspray but I'll leave it as it is!

Joel! You ought to tread the Luftwaffe-path at least once ! The camo (and variations thereof) is great fun and makes for a never-ending catalogue of subjects to build. Regarding the colour modulation, what really brought the model to life was the wash. I know this is not everyone's cup of tea but I think it is a great way of bringing a bit of life into the paint work and much of the criticism of this technique has been centered around too much contrast: choosing a base colour of the wash that is closer to the base paintwork and avoiding pure black does the trick.
Ernest! Thanks!

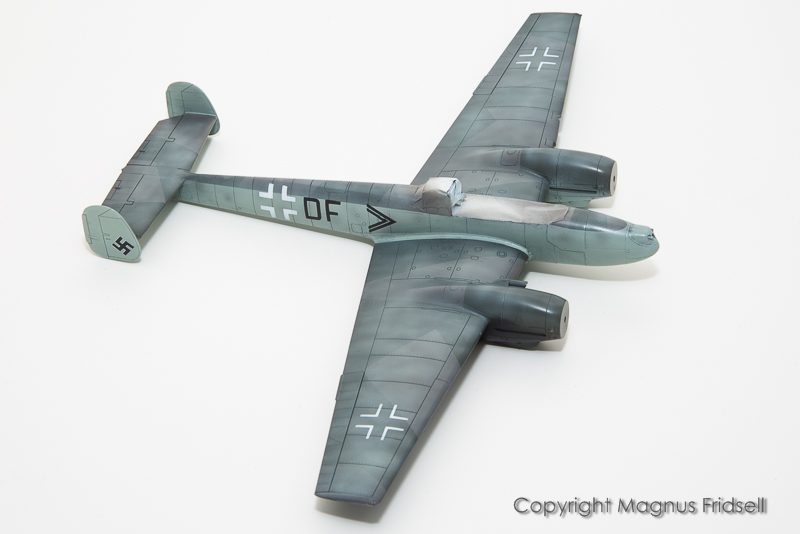
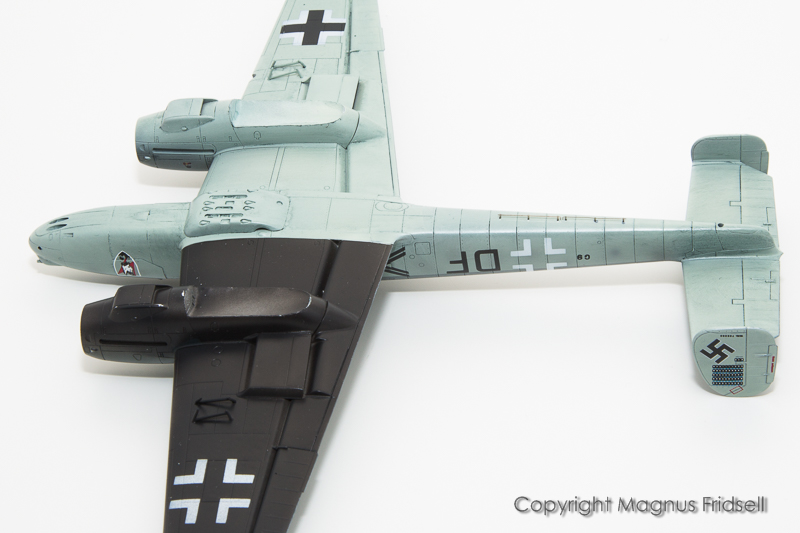
So, I've been away skiing for a week and before that there were other commitments to attend to but now I'm up and running again. Yesterday night was markings-night!


Masking and painting the white crosses...


...and this is what it looks like when masks are removed!


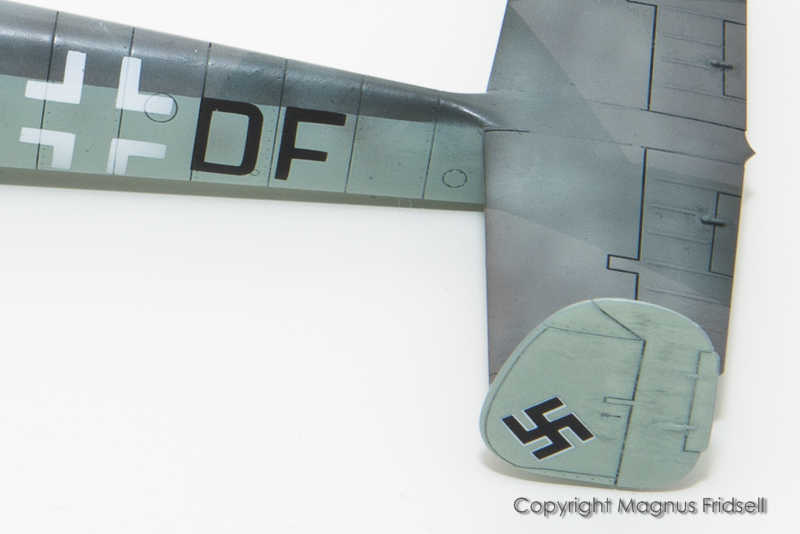
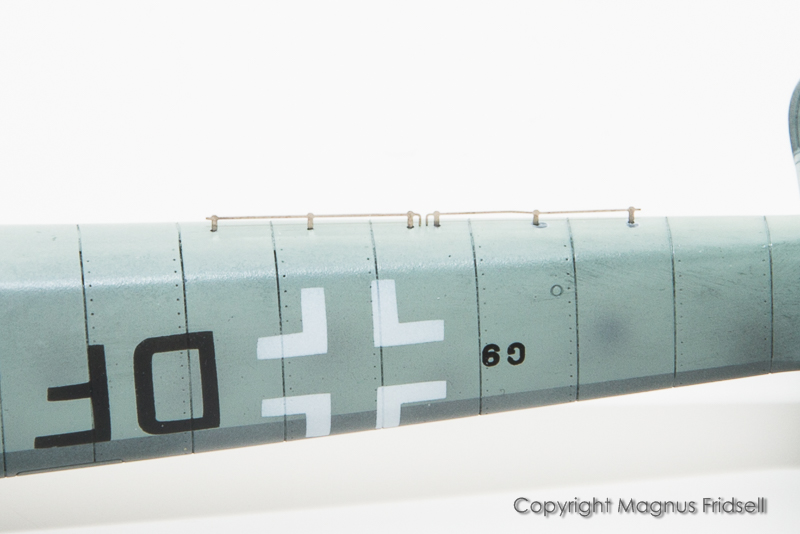
And then lettering, chevrons and swastikas...


...seen here in close-up. White around the edges of the swastika is very thin and the mask was difficult to center (painting them "backwards", black first) but it isn't really noticeable for the naked eye. I might make a bit of a touch-up later though...


Magnus
thegirl
_VISITCOMMUNITY
Alberta, Canada
Joined: January 19, 2008
KitMaker: 6,743 posts
AeroScale: 6,151 posts
Posted: Saturday, March 03, 2018 - 08:04 PM UTC
Really nice job on the camo Magnus and the markings .


Terri
Joel_W
Staff MemberAssociate Editor
AUTOMODELER
_VISITCOMMUNITY
New York, United States
Joined: December 04, 2010
KitMaker: 11,666 posts
AeroScale: 7,410 posts
Posted: Saturday, March 03, 2018 - 10:23 PM UTC
Magnus,
I'm really getting tempted to try a few German aircraft with all the quality kits now out on the market.

As for the color modulation, yours really came out perfect. On the other hand my black basing didn't turn out on my Hurricane MkI with enough modulation to really show up, so I'm going to have to go with post shading before oil washes.

You masks for the markings are dead on perfect. I just gotta bite the bullet and buy one of those craft cutters, and learn the basics.

Joel
BlackWidow
_VISITCOMMUNITY
European Union
Joined: August 09, 2009
KitMaker: 1,732 posts
AeroScale: 1,336 posts
Posted: Sunday, March 04, 2018 - 12:23 AM UTC
Magnus, you did a great job with painting the markings, That looks awesome! And don't worry about the swastikas. Don't forget: Macro kills always. And you are always the hardest critic of you own build because you see it with different eyes than we do.

Torsten
BlackWidow
_VISITCOMMUNITY
European Union
Joined: August 09, 2009
KitMaker: 1,732 posts
AeroScale: 1,336 posts
Posted: Sunday, March 04, 2018 - 12:27 AM UTC

Quoted Text

Magnus,
I'm really getting tempted to try a few German aircraft with all the quality kits now out on the market ....

Joel


Good idea, Joel! With your Spitfire and Hurricane you have arrived on the "Old Continent". So why not jump over the Channel and have a look what "the other guys" had ....
Joel_W
Staff MemberAssociate Editor
AUTOMODELER
_VISITCOMMUNITY
New York, United States
Joined: December 04, 2010
KitMaker: 11,666 posts
AeroScale: 7,410 posts
Posted: Sunday, March 04, 2018 - 12:53 AM UTC

Quoted Text


Quoted Text

Magnus,
I'm really getting tempted to try a few German aircraft with all the quality kits now out on the market ....

Joel


Good idea, Joel! With your Spitfire and Hurricane you have arrived on the "Old Continent". So why not jump over the Channel and have a look what "the other guys" had ....


Torsten
Just might take a look

Joel
RussellE
#306
_VISITCOMMUNITY
Victoria, Australia
Joined: June 27, 2010
KitMaker: 3,959 posts
AeroScale: 598 posts
Posted: Sunday, March 04, 2018 - 01:31 AM UTC
Magnus, your masking efforts on the markings are just superb!

I would never even dream of painting on the markings in this scale! Invasion stripes are my limit I'm afraid

Exceptional work so far! Glad you are back from skiing so you can share this with us
magnusf
_VISITCOMMUNITY
Stockholm, Sweden
Joined: May 02, 2006
KitMaker: 1,953 posts
AeroScale: 1,902 posts
Posted: Friday, March 23, 2018 - 03:21 PM UTC
Terri and Torsten! Thanks a lot! I know all too well how easy it is to stare at ones own mistakes but being away from the model a few days usually helps me appreciate what has actually gone well better!

Joel! Be careful so you don't get bogged down in things Luftwaffe !

Russell! Invasion stripes is a good start! I graduated to basic crosses, they are easy like anything else that was is a single colour and can be cut out of tape using a scalpel and a straightedge !


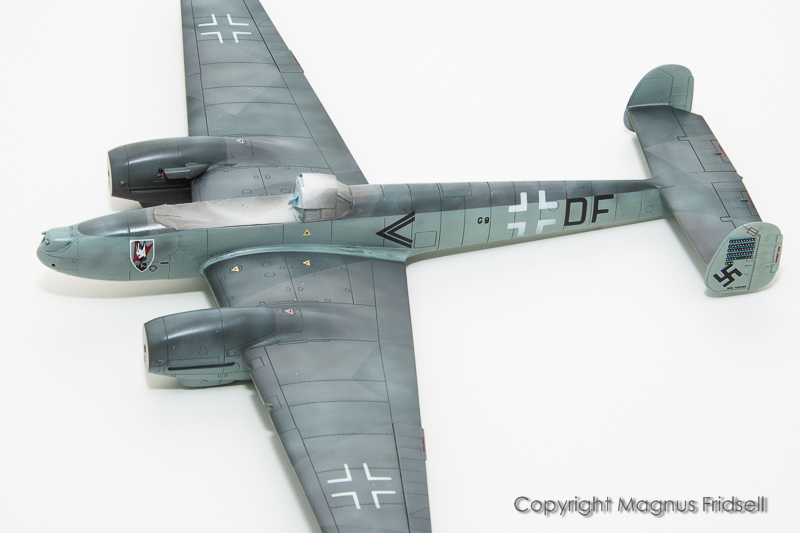
Whatever Mal says I find it difficult to avoid decals altogether, that squadron shield was a bit over the top for me...


...not to mention that score board on the fin! Decals are Eduard original and as usual they perform flawlessly over a gloss coat.


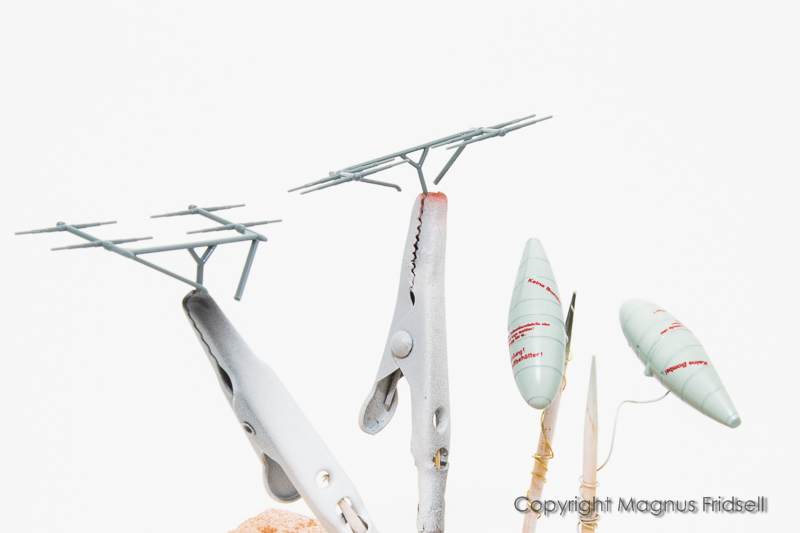
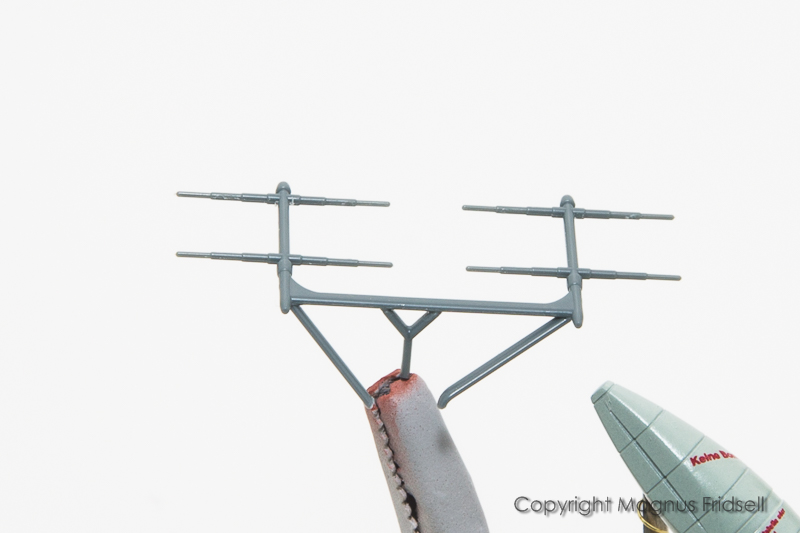
A late addition clothes-hanger antenna. It'll get a coat of paint later today!


Drop tanks were the most decal-dense part of the airframe, telling suspicious bystanders in at least five different ways that this is a relatively safe fuel tank and not a dangerous bomb!


Once again I'm very happy for Eduard's engineering, the antennae aren't for the faint-hearted but it could have been a lot worse if fit hadn't been so good. I bet on installing these last to avoid knocking them off during the build process!


Magnus
Joel_W
Staff MemberAssociate Editor
AUTOMODELER
_VISITCOMMUNITY
New York, United States
Joined: December 04, 2010
KitMaker: 11,666 posts
AeroScale: 7,410 posts
Posted: Friday, March 23, 2018 - 09:08 PM UTC
Magnus,
your stencils are absolutely 1st rate. And the combination of stencils and decals worked perfectly.

When I 1st saw the picture of those gas tanks, the amount of stenciling just jumped right out at me. You did a great job on them, as they look like they were stenciled on as well.

Those antennas do look rather fragile, but so far so good.

Joel
BlackWidow
_VISITCOMMUNITY
European Union
Joined: August 09, 2009
KitMaker: 1,732 posts
AeroScale: 1,336 posts
Posted: Saturday, March 24, 2018 - 12:54 AM UTC
Magnus, great job again on your 110. But honestly I would feel a lot better if these antennas would be in 1/32 scale. But I know, they're not .... I had even problems with the antennas of my 1/48 Do 215 Nightfighter ....

Torsten
Littorio
_VISITCOMMUNITY
England - South East, United Kingdom
Joined: September 15, 2004
KitMaker: 4,728 posts
AeroScale: 1,351 posts
Posted: Saturday, March 24, 2018 - 02:17 AM UTC
Magnus outstanding paint work, looking forward to seeing this finished.

Looking at your work reminds me that I must finish my 110D