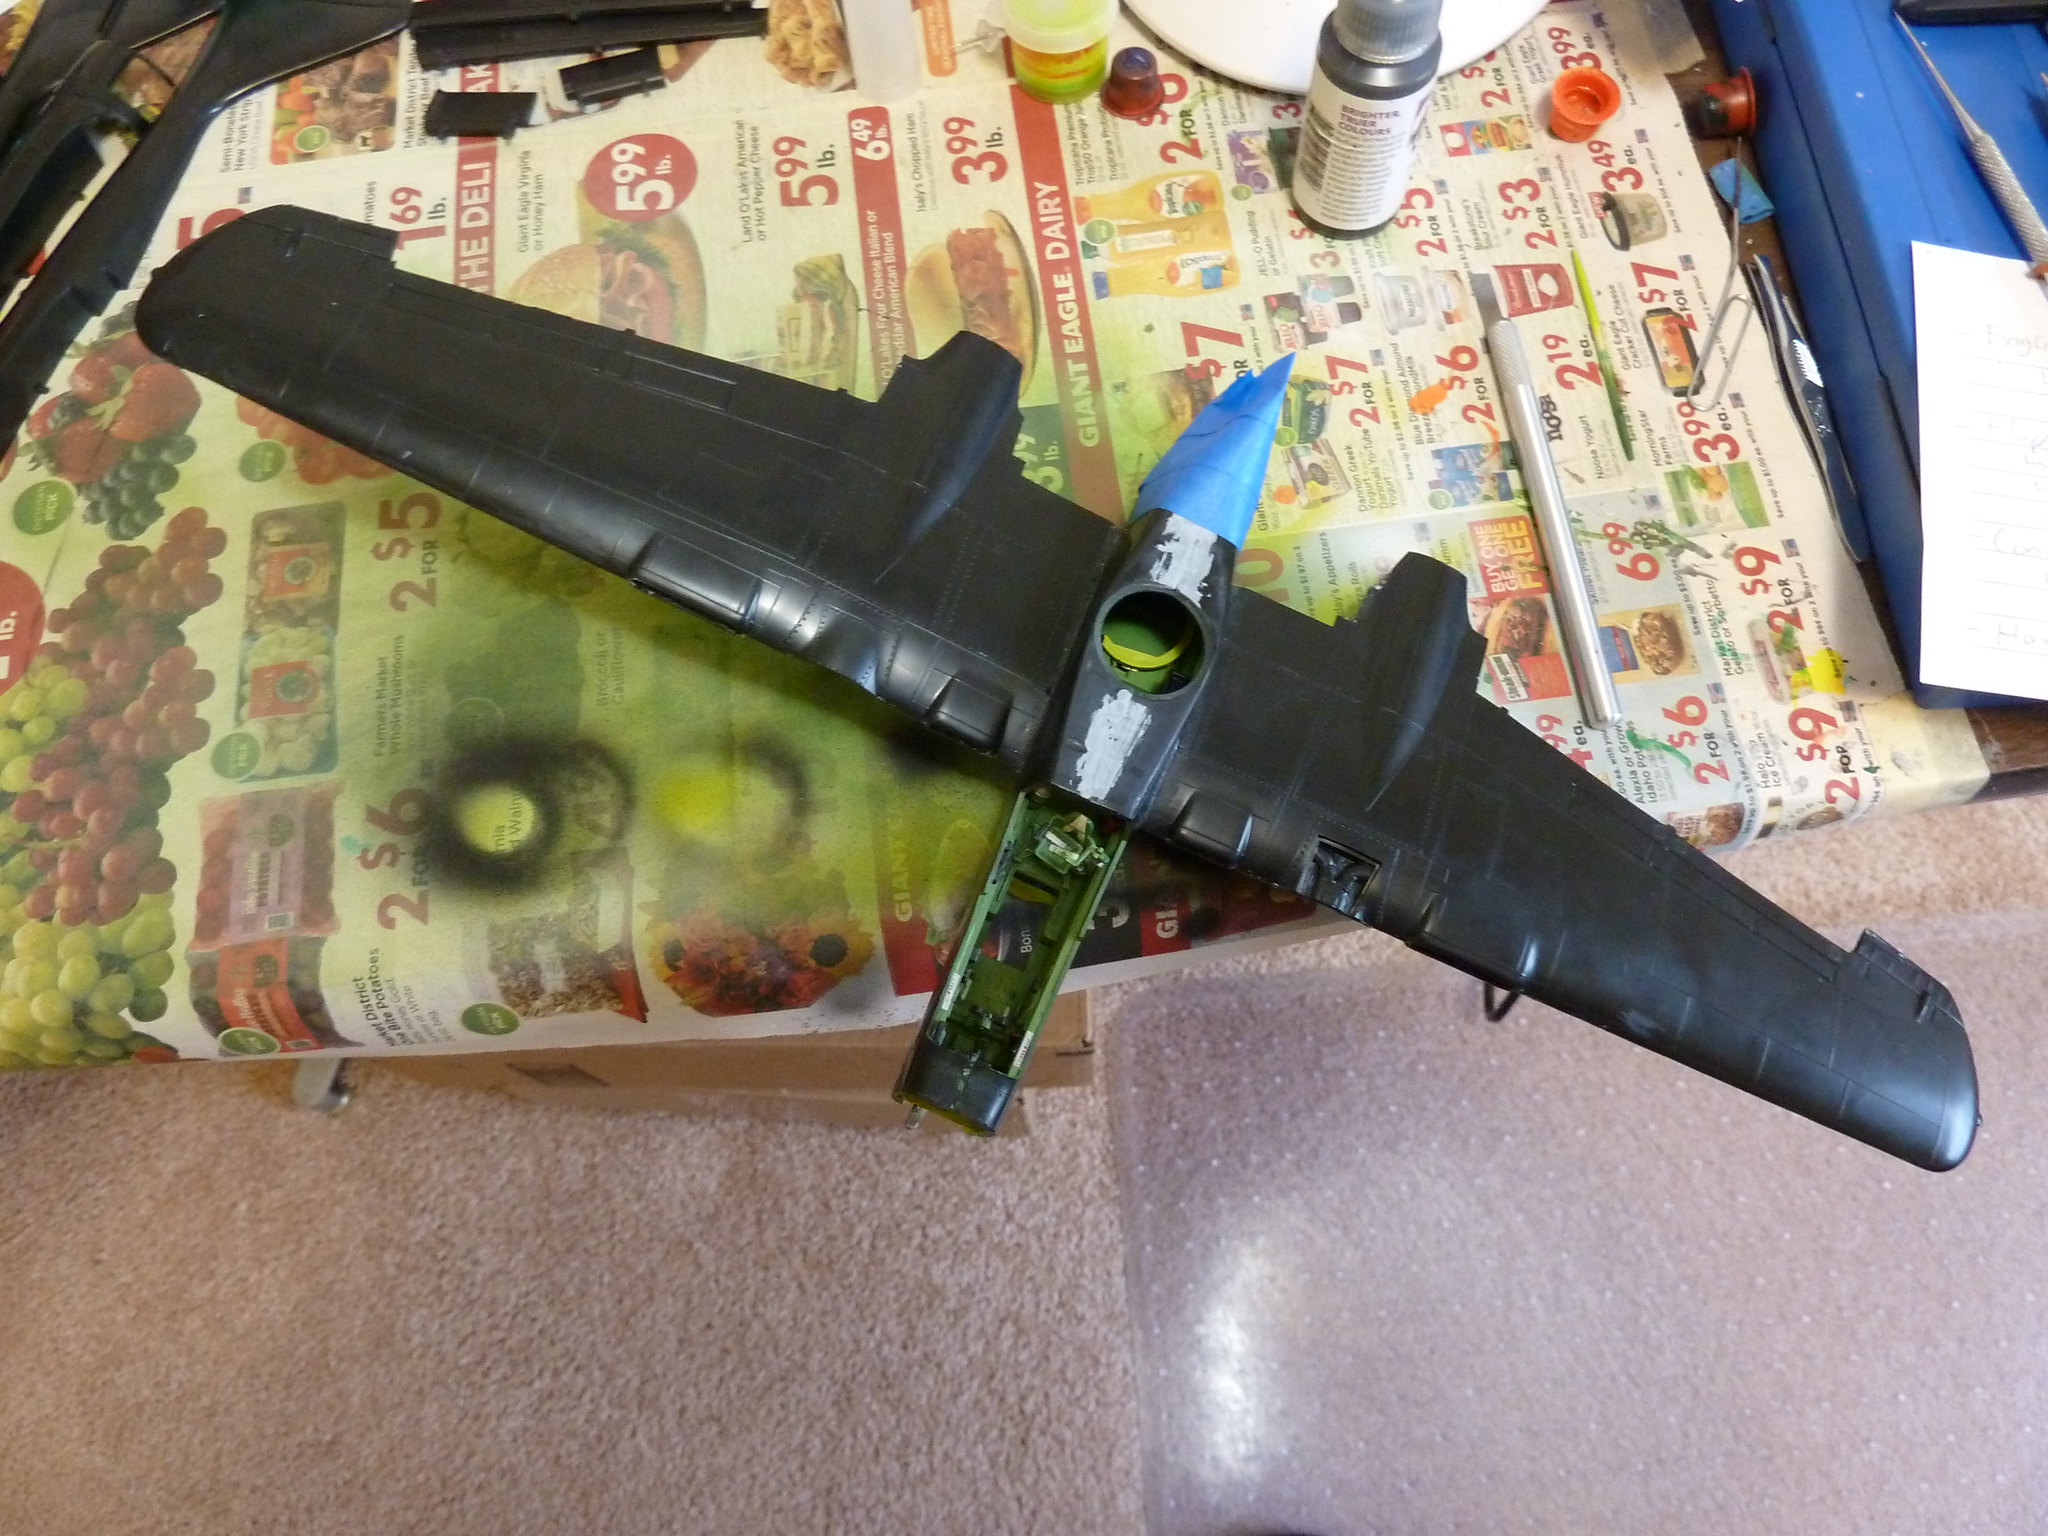
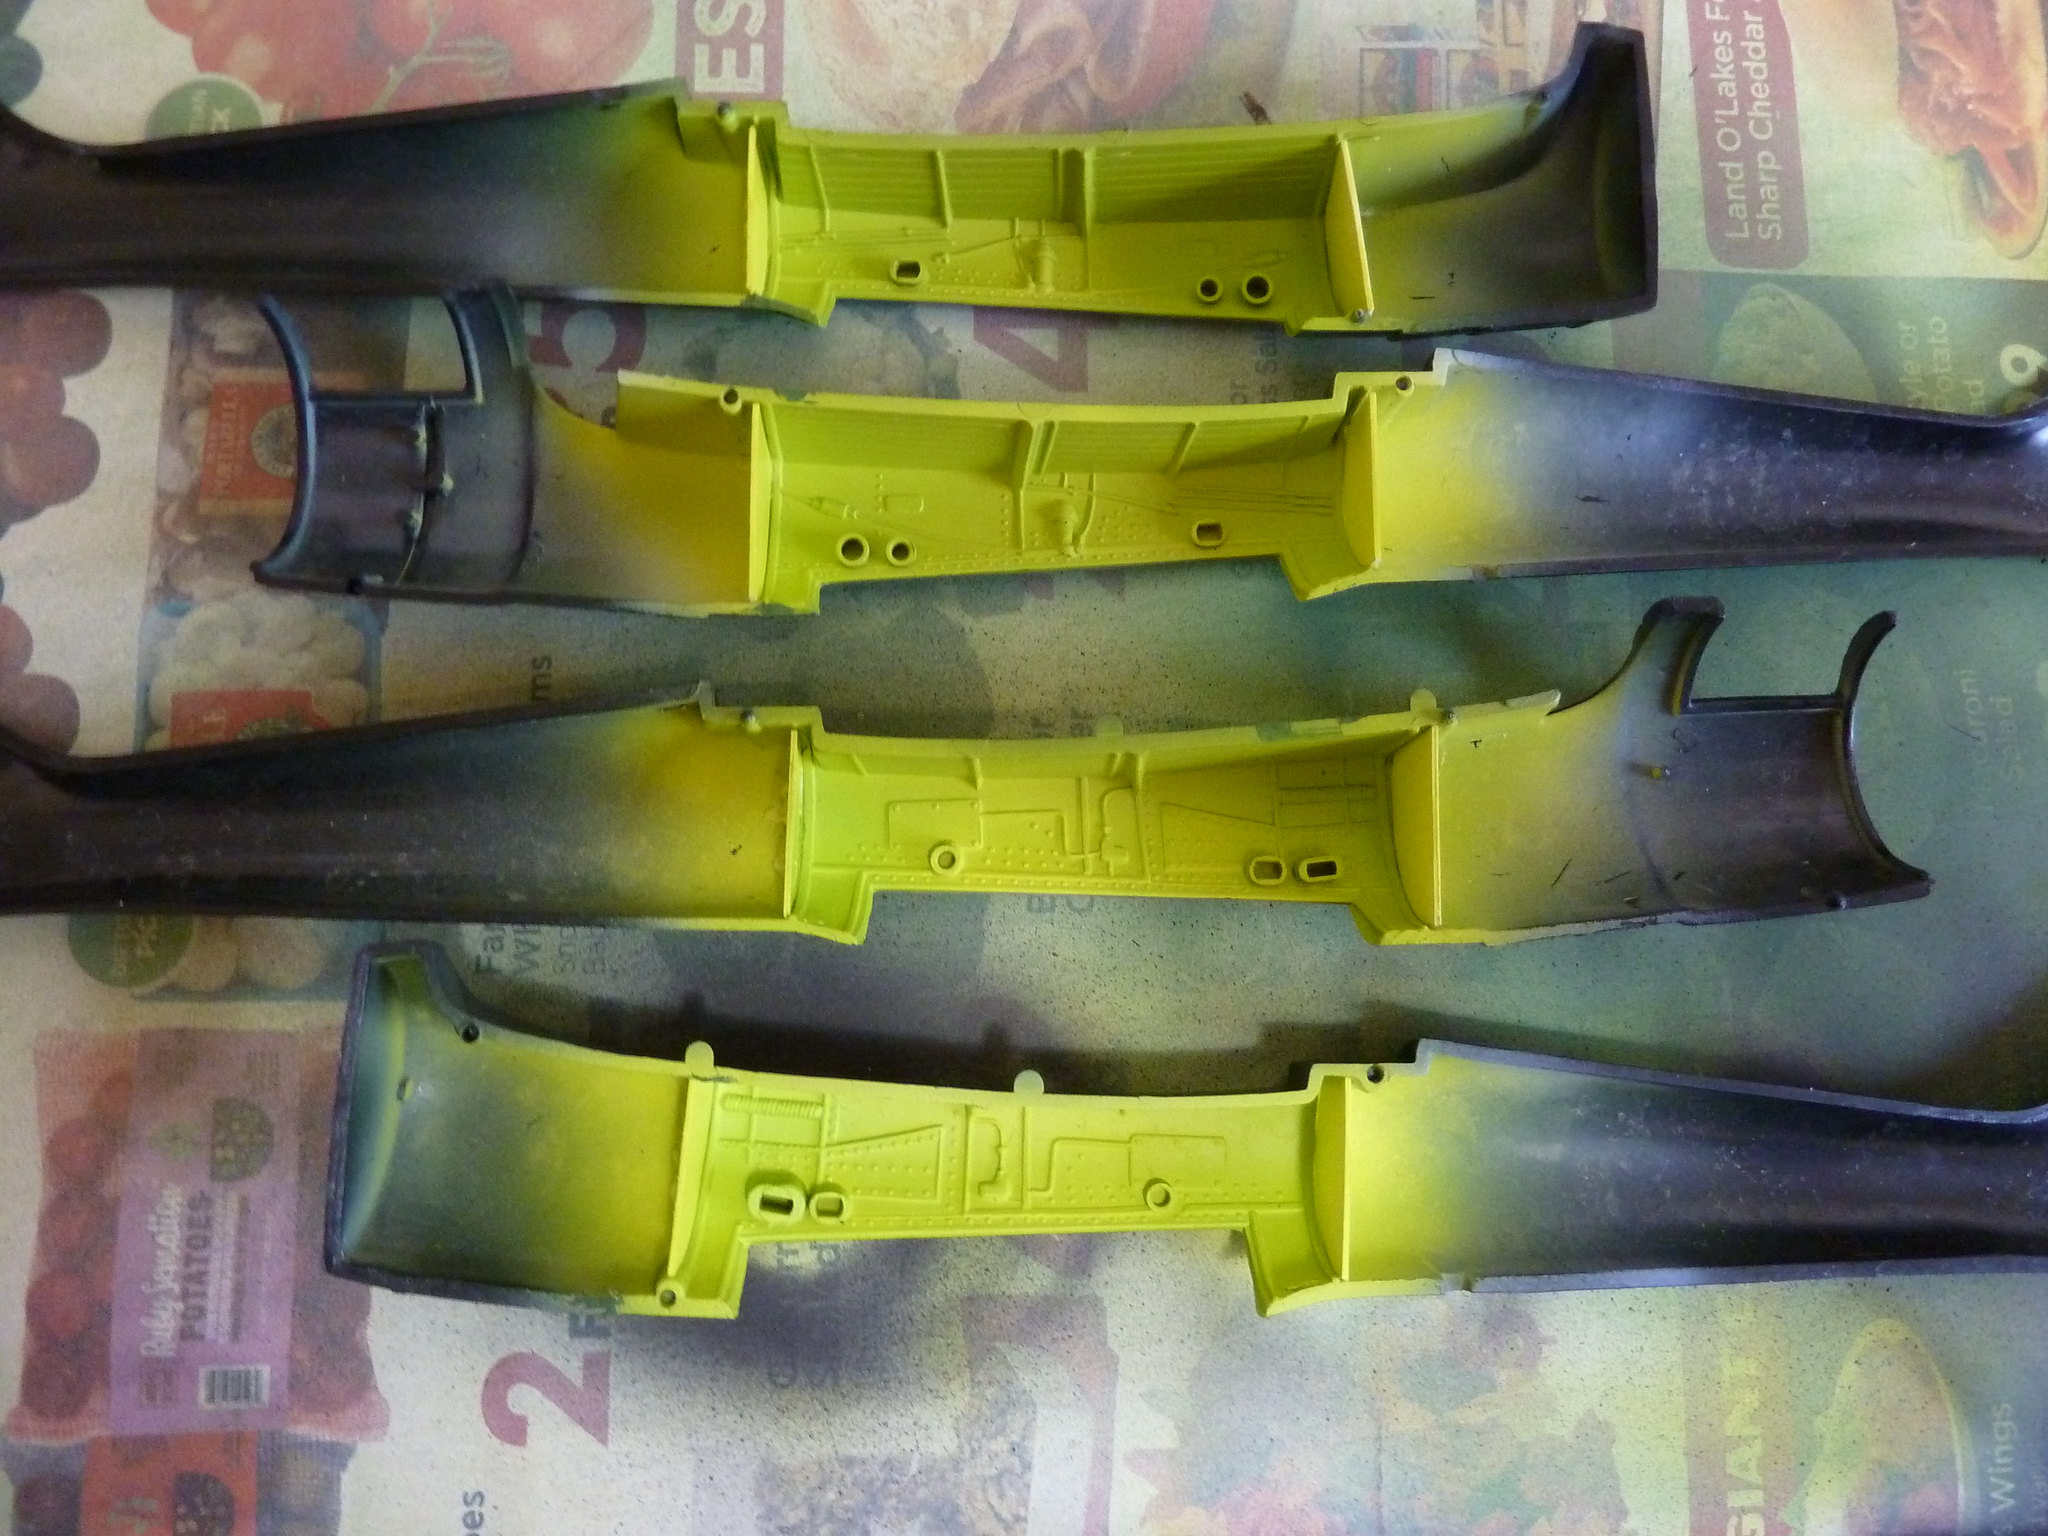
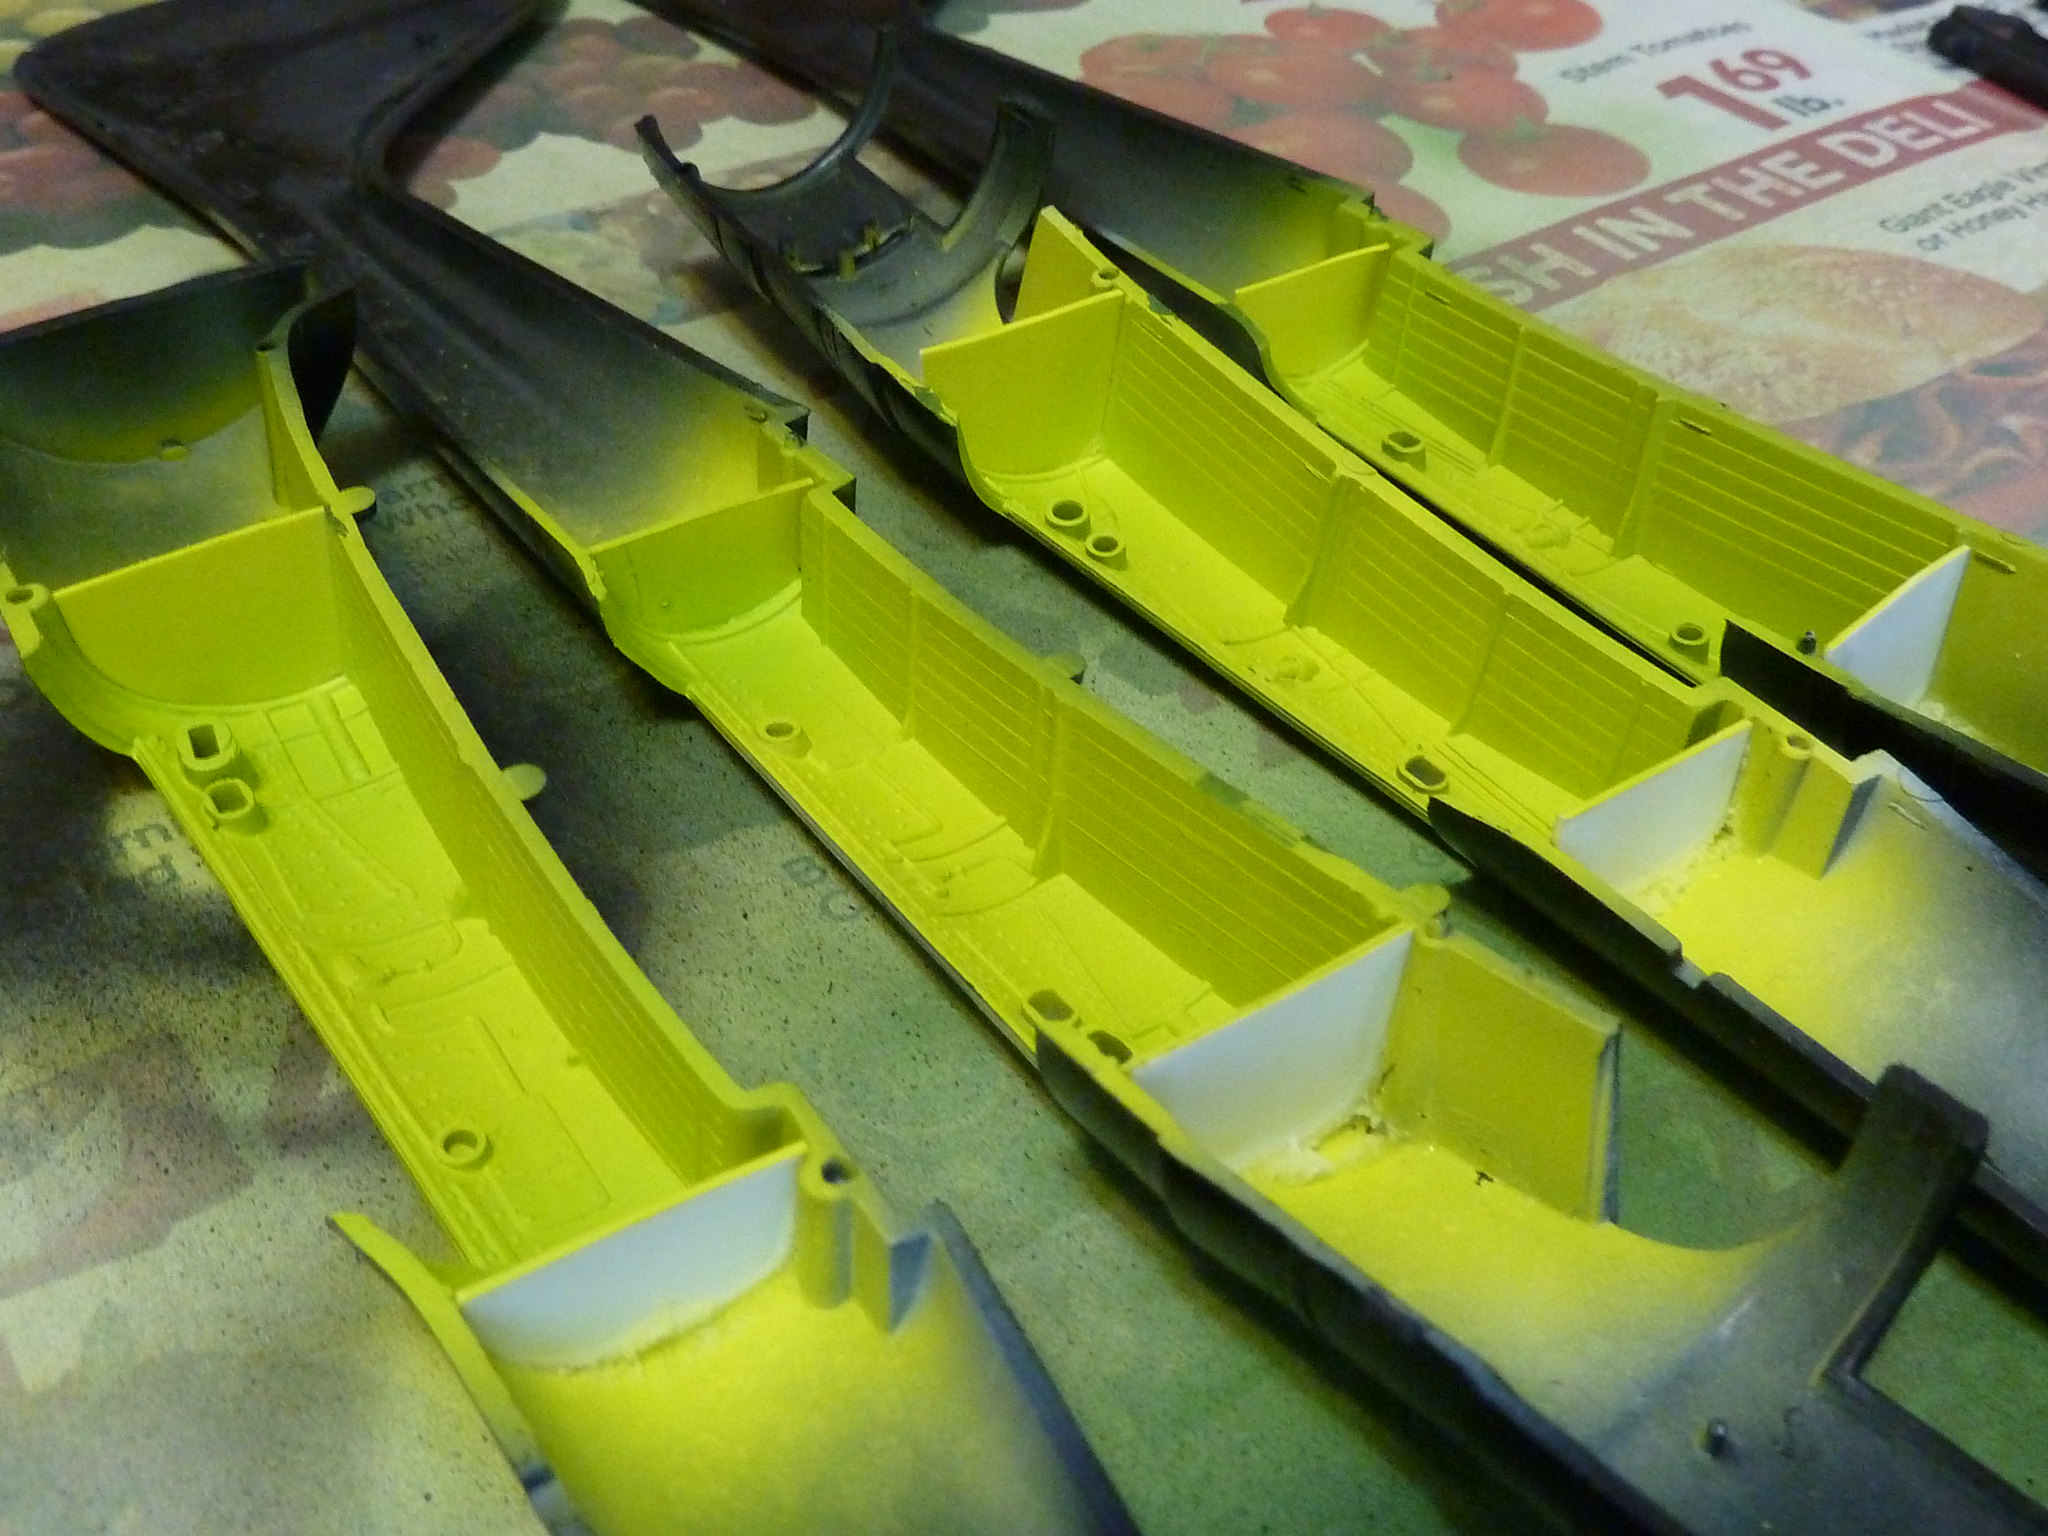
Looking good around here!
Not like I don't have enough to do, but IF I'm crazy enough to jump into this one as well, I have three main contenders:
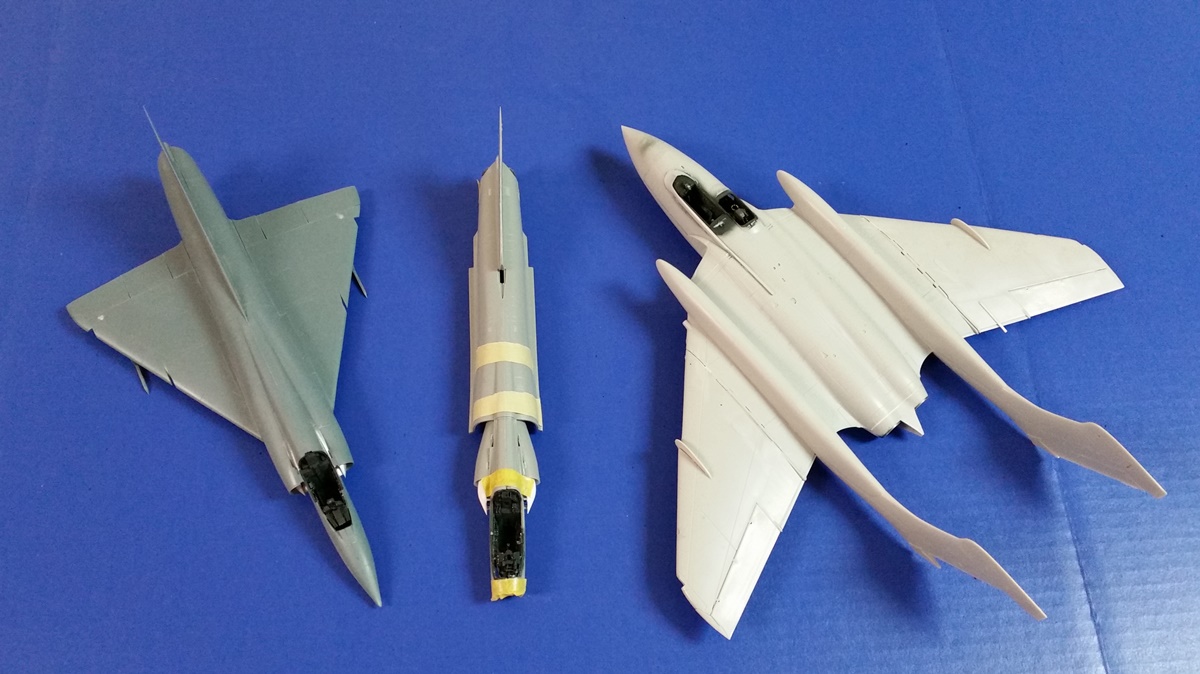
Left to right: Eduard Mirage IIIC, Wingman Nesher, and Airfix Sea Vixen, all in 1/48.
Anyone got any strong opinions?
Michael
Air Campaigns
Want to start or join a group build? This is where to start.
Hosted by Frederick Boucher, Michael Satin
Hangar Queen 8
MichaelSatin
Campaigns Administrator
Colorado, United States
Joined: January 19, 2008
KitMaker: 3,909 posts
AeroScale: 2,904 posts
Joined: January 19, 2008
KitMaker: 3,909 posts
AeroScale: 2,904 posts
Posted: Sunday, February 11, 2018 - 03:52 AM UTC
Posted: Sunday, February 11, 2018 - 04:25 AM UTC
Hi Michael!
Go crazy! Start with the Vixen. I've always liked it, just never had the moxey to do one!
Posted: Sunday, February 11, 2018 - 05:10 AM UTC
FWIW, for the last two Hanger Queens,I've picked the one closest to being finished. Don't really want my Hanger Queens to repeat.
GaryKato
California, United States
Joined: December 06, 2004
KitMaker: 3,694 posts
AeroScale: 163 posts
Joined: December 06, 2004
KitMaker: 3,694 posts
AeroScale: 163 posts
Posted: Sunday, February 11, 2018 - 05:11 AM UTC
I vote for the Sea Vixen too! I have wanted to do a Sea Vixen since the first IPMS Region IX contest that I went to.
MichaelSatin
Campaigns Administrator
Colorado, United States
Joined: January 19, 2008
KitMaker: 3,909 posts
AeroScale: 2,904 posts
Joined: January 19, 2008
KitMaker: 3,909 posts
AeroScale: 2,904 posts
Posted: Sunday, February 11, 2018 - 05:27 AM UTC
Quoted Text
I vote for the Sea Vixen too! I have wanted to do a Sea Vixen since the first IPMS Region IX contest that I went to.
Wow,Gary, long time no see!
Well, so far the Sea Vixen is winning the vote in a runaway.
Michael
Willard79
Wellington, New Zealand
Joined: June 01, 2014
KitMaker: 189 posts
AeroScale: 179 posts
Joined: June 01, 2014
KitMaker: 189 posts
AeroScale: 179 posts
Posted: Sunday, February 11, 2018 - 05:42 AM UTC
Sea Vixen. 'Cause it's funny lookin'.
MichaelSatin
Campaigns Administrator
Colorado, United States
Joined: January 19, 2008
KitMaker: 3,909 posts
AeroScale: 2,904 posts
Joined: January 19, 2008
KitMaker: 3,909 posts
AeroScale: 2,904 posts
Posted: Sunday, February 11, 2018 - 05:53 AM UTC
Quoted Text
Sea Vixen. 'Cause it's funny lookin'.
OK, that's a valid viewpoint. I prefer to think of it as elegant in an unusual configuration.
Michael
Willard79
Wellington, New Zealand
Joined: June 01, 2014
KitMaker: 189 posts
AeroScale: 179 posts
Joined: June 01, 2014
KitMaker: 189 posts
AeroScale: 179 posts
Posted: Sunday, February 11, 2018 - 06:37 AM UTC
Quoted Text
Quoted TextSea Vixen. 'Cause it's funny lookin'.
OK, that's a valid viewpoint. I prefer to think of it as elegant in an unusual configuration.
Michael
I'll concede it has a certain allure...but no more.
Nito74
Lisboa, Portugal
Joined: March 04, 2008
KitMaker: 5,386 posts
AeroScale: 635 posts
Joined: March 04, 2008
KitMaker: 5,386 posts
AeroScale: 635 posts
Posted: Sunday, February 11, 2018 - 05:49 PM UTC
Well Michael, pick the one you might finish.. you have enough plastic there for a H-Queen 9 , I would like to see that Mirage done, and the Vixen too...
Just have fun with those kits !
Buckeye198
Ohio, United States
Joined: May 02, 2010
KitMaker: 596 posts
AeroScale: 197 posts
Joined: May 02, 2010
KitMaker: 596 posts
AeroScale: 197 posts
Posted: Friday, February 16, 2018 - 11:52 PM UTC
I'm looking to join the campaign, if you'll allow me...mine isn't a hangar queen in the traditional sense. My entry would be Monogram's P-61 in 1/48, either the second or third kit I built by myself. It ended up pretty FUBAR and got thrown away before I finished it. I still have a number of parts from it in my spares box, plus the unused decals. So my "hangar queen" is really more of a "redemption song," as I bought another kit to try to make now what I screwed up about 15 years ago. Again, I realize this isn't what most people think of with hangar queens...but I DID in fact start building the P-61, never finished it, and want to have a P-61 on my shelf now!
Feel free to debate this...I will accept any outcome.
Posted: Tuesday, February 27, 2018 - 06:20 AM UTC
Hi all,
A bit of an update, I went through the Queen's and it turns out the lowest hanging queen was the Academy F-16! The decals have arrived, but due to the poor kit decals I'll be making masks to do the red white and blue, with the Thunderbird underneath. It's no wonder to me how this ended up as a Queen! I'm not sure about the rest of the community, but to me, it seems that the older Academy kits are a step above the 60's and 70's Monograms regarding surface detail, and step below regarding fit. Anyway, I'll be trundling along with more sanding and filling...
Robby, as you know I've given some considerable thought to your request. The Hangar Queen campaign by its nature has lots of grey areas. Personally, I think that in this hobby the goal is bring the build to a completion. I recall the sage words of a good buddy "Tis easier to buy, than to build.", that said, if you've got the parts and decals and you're motivated to bring it all together, I'm for it. Granted, this takes the campaign guideline to it's loosest interpretation, but if nobody chimes in within the next 2 days, go for it!
Till then enjoy this wonderful hobby!
Posted: Tuesday, February 27, 2018 - 08:49 AM UTC
Hey I say go for it! That's likely to be the oldest "Hangar queen" we'll get! And you can't beat it for the nostalgia as well. I get a real kick out of the then and now facet of building skills.
Oh and Michael? Dude it has to be the Sea Vixen .... can't go past a moniker like that!
Buckeye198
Ohio, United States
Joined: May 02, 2010
KitMaker: 596 posts
AeroScale: 197 posts
Joined: May 02, 2010
KitMaker: 596 posts
AeroScale: 197 posts
Posted: Friday, March 02, 2018 - 09:12 PM UTC
I was hoping for more of a dialogue with this...I think it's a unique rule challenge and thought I could get more opinions out of the community. I'm still glad to entertain further discussion if anyone has opinions. In the meantime, John and Chris, thank you for your blessings I still have a few builds I'm finishing up right now, but I think I can get my Black Widow 2.0 up and running by the end of the year!
Posted: Friday, March 02, 2018 - 10:04 PM UTC
Robby, FWIW, Hanger Queen is about finishing projects. I think I started last year with 30 queens. Some close to finished and at least one with nothing done but paint in the wheel wells... I managed to get 2 done, and ended the year with 29 queens.
My number one target this year is an F8F Bearcat that is just shy of paint and decals. I just need to replace the 20mm cannons with some AM and it's ready to paint and decal. So while you are starting from a fresh kit, you are trying to complete a project, so I'm fine with it.
GaryKato
California, United States
Joined: December 06, 2004
KitMaker: 3,694 posts
AeroScale: 163 posts
Joined: December 06, 2004
KitMaker: 3,694 posts
AeroScale: 163 posts
Posted: Friday, March 02, 2018 - 11:20 PM UTC
Quoted Text
I'm looking to join the campaign, if you'll allow me...mine isn't a hangar queen in the traditional sense. My entry would be Monogram's P-61 in 1/48, either the second or third kit I built by myself. It ended up pretty FUBAR and got thrown away before I finished it. I still have a number of parts from it in my spares box, plus the unused decals. So my "hangar queen" is really more of a "redemption song," as I bought another kit to try to make now what I screwed up about 15 years ago. Again, I realize this isn't what most people think of with hangar queens...but I DID in fact start building the P-61, never finished it, and want to have a P-61 on my shelf now!
Feel free to debate this...I will accept any outcome.
In my opinion, it would not count, otherwise anything would count. It should have been started already to be in the spirit of this campaign. Age if the kit itself plays no part in it.
goofmuilwijk
Zuid-Holland, Netherlands
Joined: April 19, 2013
KitMaker: 179 posts
AeroScale: 34 posts
Joined: April 19, 2013
KitMaker: 179 posts
AeroScale: 34 posts
Posted: Saturday, March 03, 2018 - 12:48 AM UTC
It could of course be the idea behind another campaign: redemption. I think i have seen something like this before here on Kitmaker. Build a new version of a kit you made as a kid and have fond (or otherwise) memories of. I'm sure we all have kits we think of and wish we had our current level of skill (assuming that your current skill level - whatever that may be - is higher than when you were a wee lad )
Posted: Saturday, March 03, 2018 - 06:43 PM UTC
I am going to get this Vulturax drone done. It has been in the painting lineup for almost a year now. Planning on getting both the base and drone done.
More to follow soon
More to follow soon
Posted: Friday, March 09, 2018 - 02:35 AM UTC
I have one question. After the starting photo is posted can I pull it apart to get at the cockpit and engines to improve them? If not that is fine. My entry will be a Northrop T38 Talon. It was started for the Very Civil campaign. This specific aircraft was owned by the Boeing Company.
GaryKato
California, United States
Joined: December 06, 2004
KitMaker: 3,694 posts
AeroScale: 163 posts
Joined: December 06, 2004
KitMaker: 3,694 posts
AeroScale: 163 posts
Posted: Friday, March 09, 2018 - 09:04 AM UTC
I would think it's OK. There's no rule that you can't put more detail in places already assembled.
Posted: Friday, March 09, 2018 - 06:50 PM UTC
Hi Darrell,
Absolutely! Your starting picture is just that, where you're starting from. How you finish it is up to you. Just load up some progress pictures, I know I'd love to see what your doing to the T-38!
I've got a P-47 in the bullpen, the plane was ruined when the final clear "shattered" (never seen it before or since), so my first thing will be to post the pic and ask the community if they've ever seen such a thing (no replies from the 56th P-47 group build) then it's getting stripped, and done as something different.
Jesper, that is a cool looking drone. I'll be watching with interest!
A quick update on my Queen of Misery. I tinted the glass, a first! Got the 3 parts for the fin/rudder together, and wouldn't you know it! Lousy fit, so more sand fill and repeat for me. Pictures and commentary to follow.
Have fun!
Buckeye198
Ohio, United States
Joined: May 02, 2010
KitMaker: 596 posts
AeroScale: 197 posts
Joined: May 02, 2010
KitMaker: 596 posts
AeroScale: 197 posts
Posted: Wednesday, March 21, 2018 - 03:31 AM UTC
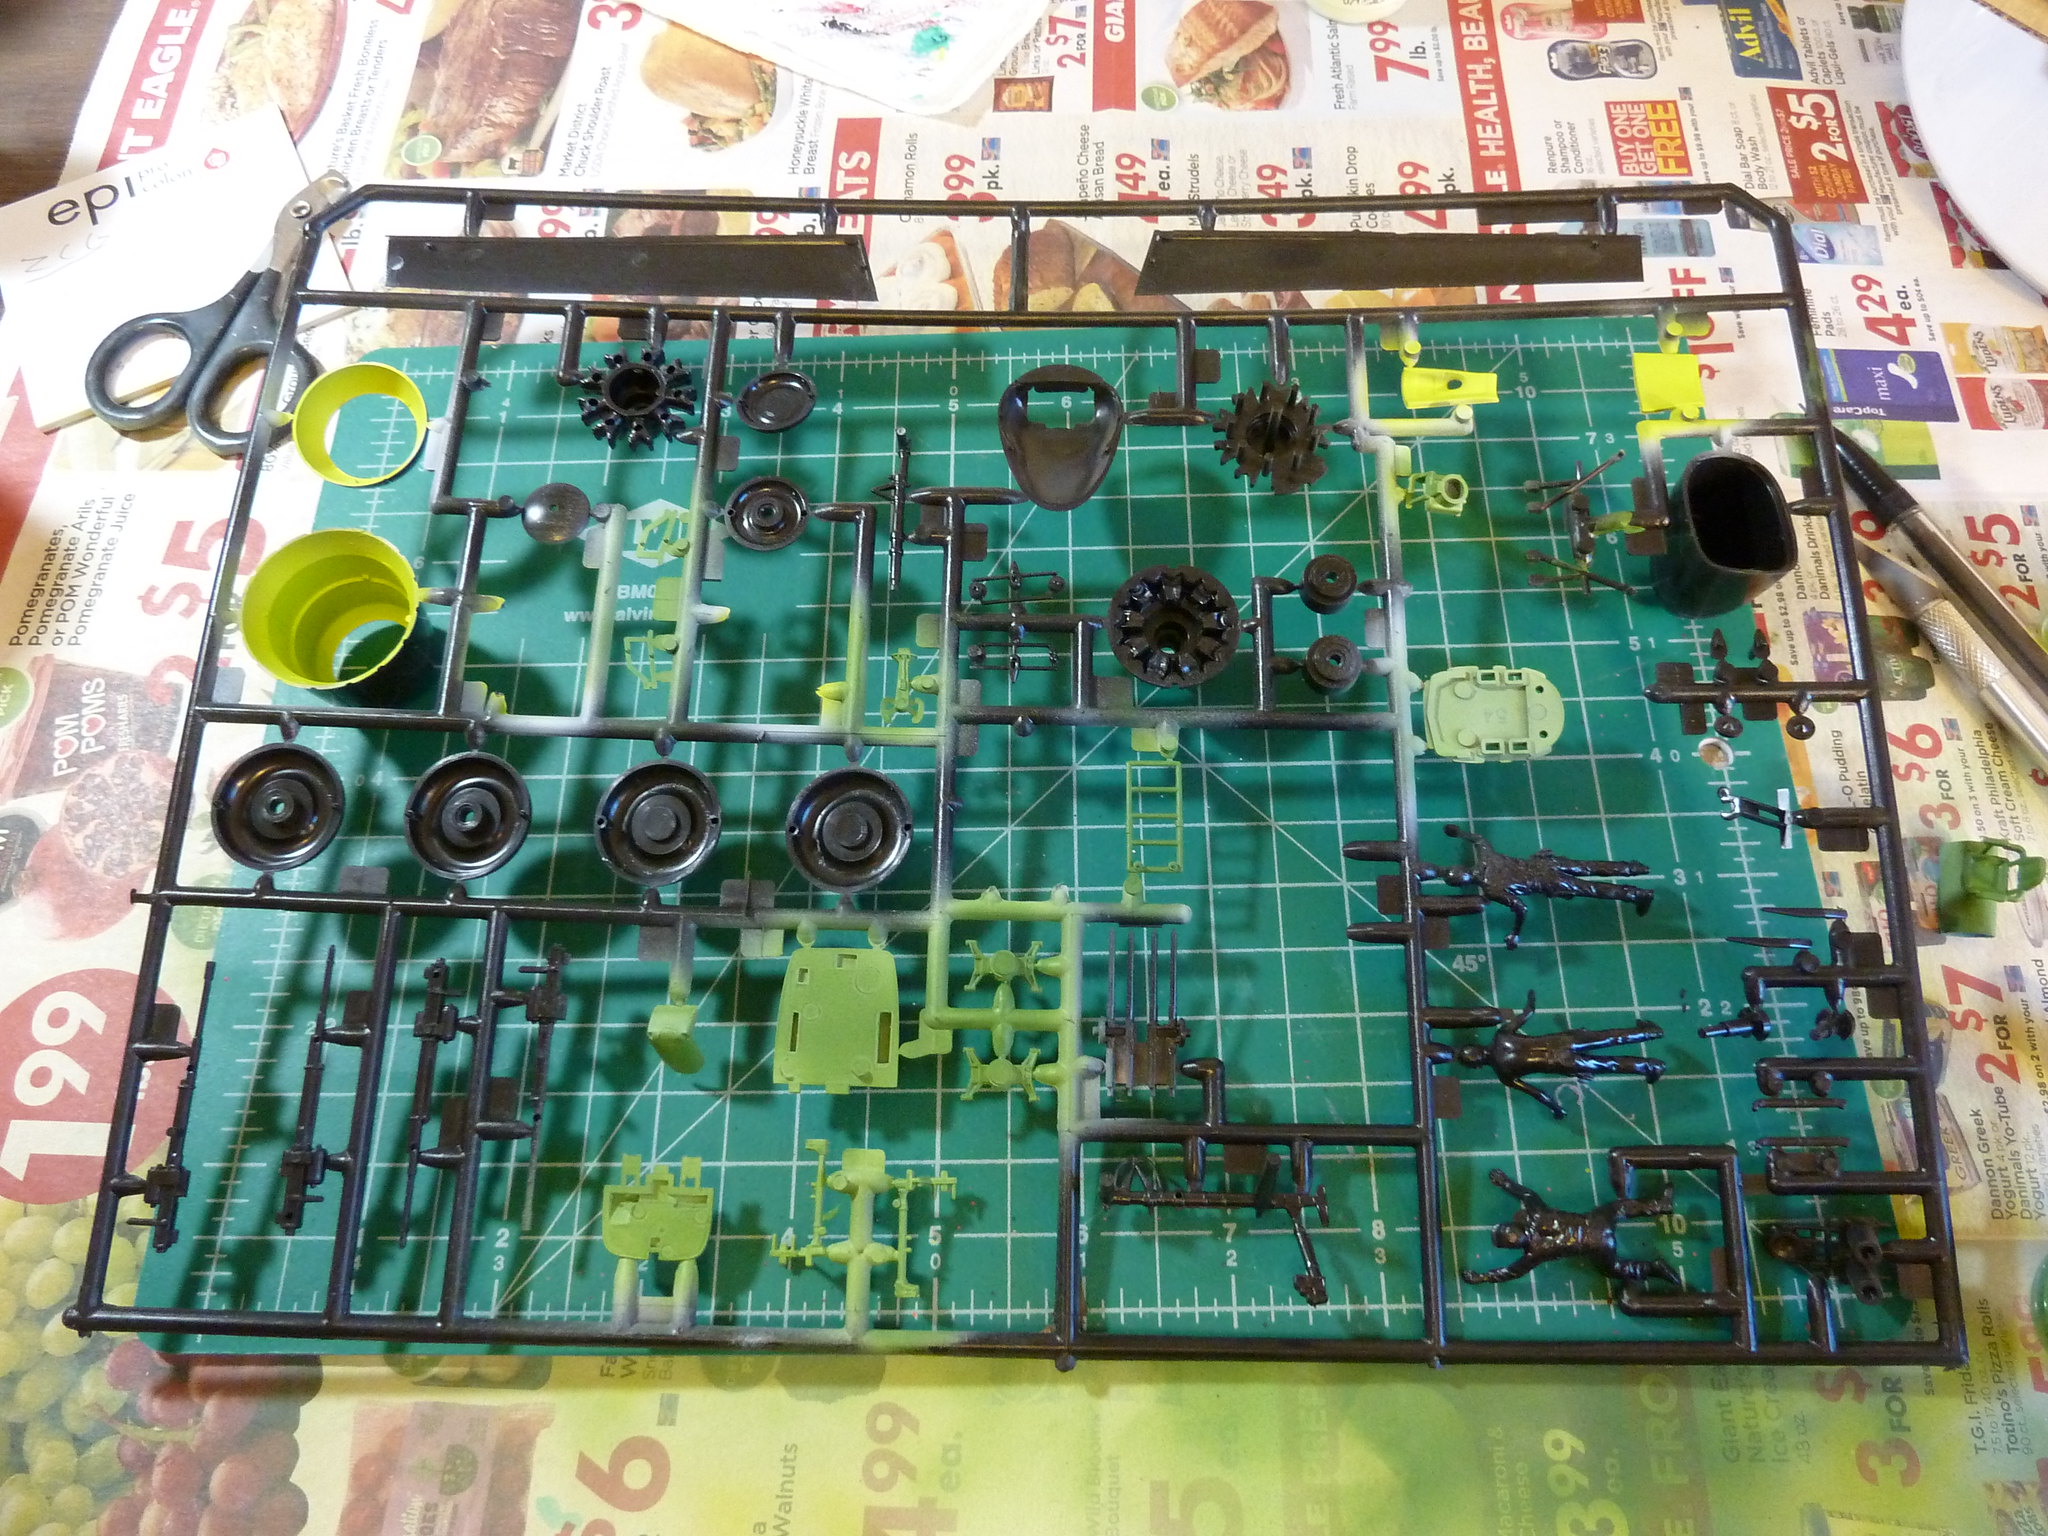
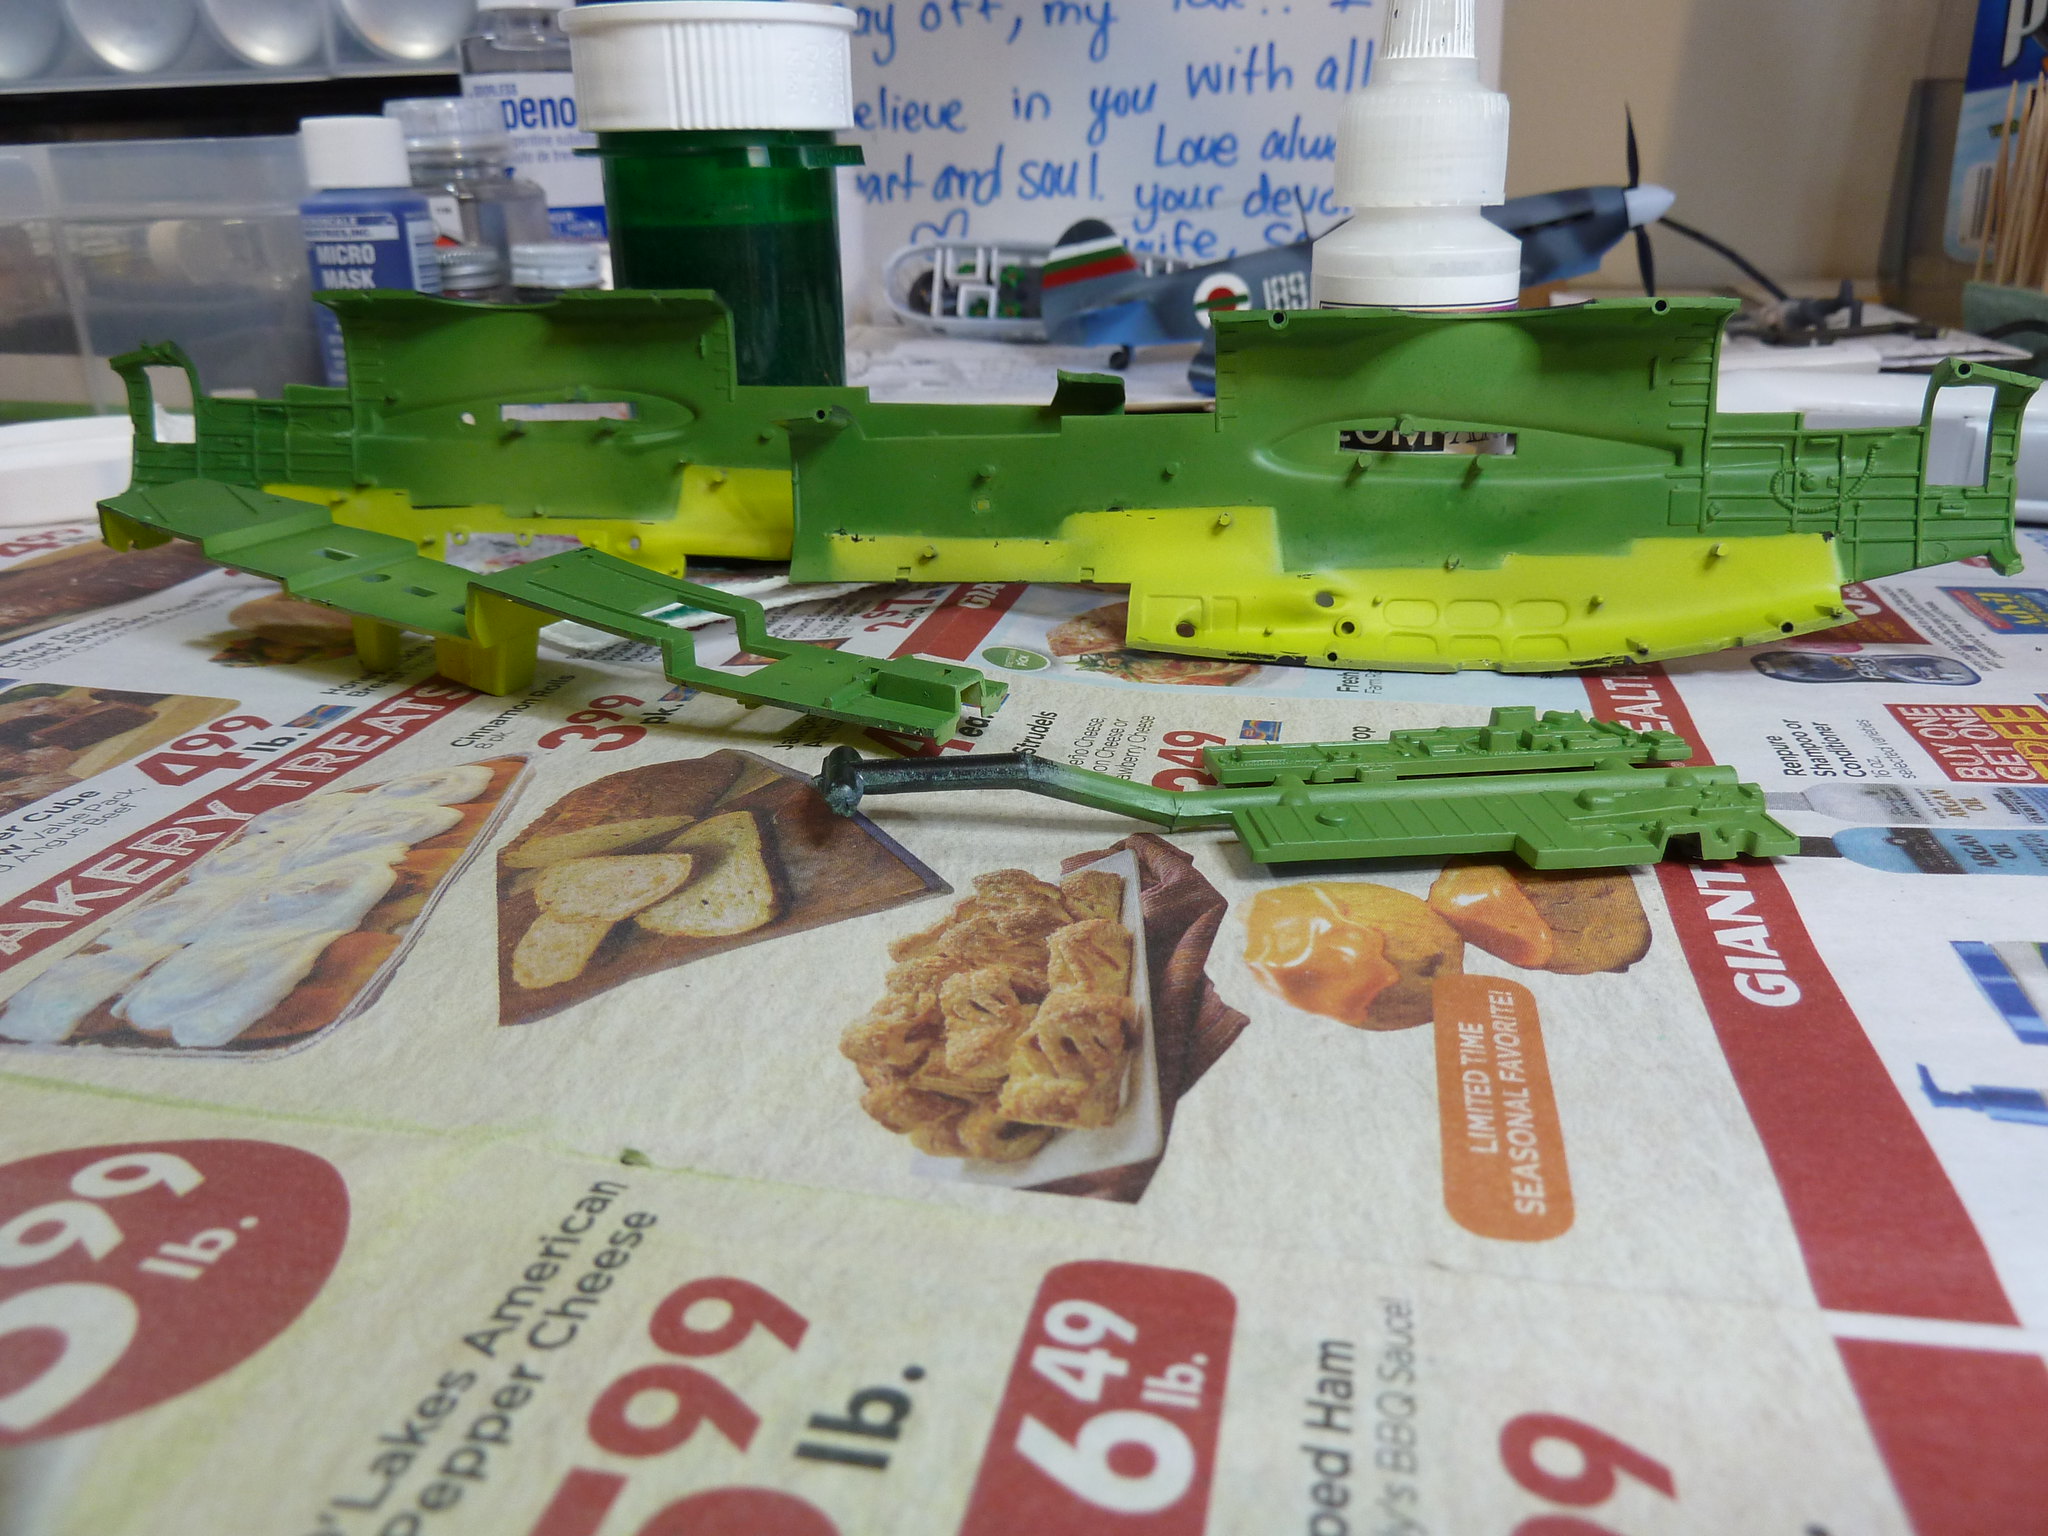
Again, thanks to those who gave me the go-ahead on my entry Here's what I'm working with now, just the zinc chromate parts are painted. Green for crew areas, yellow for other interior spaces.
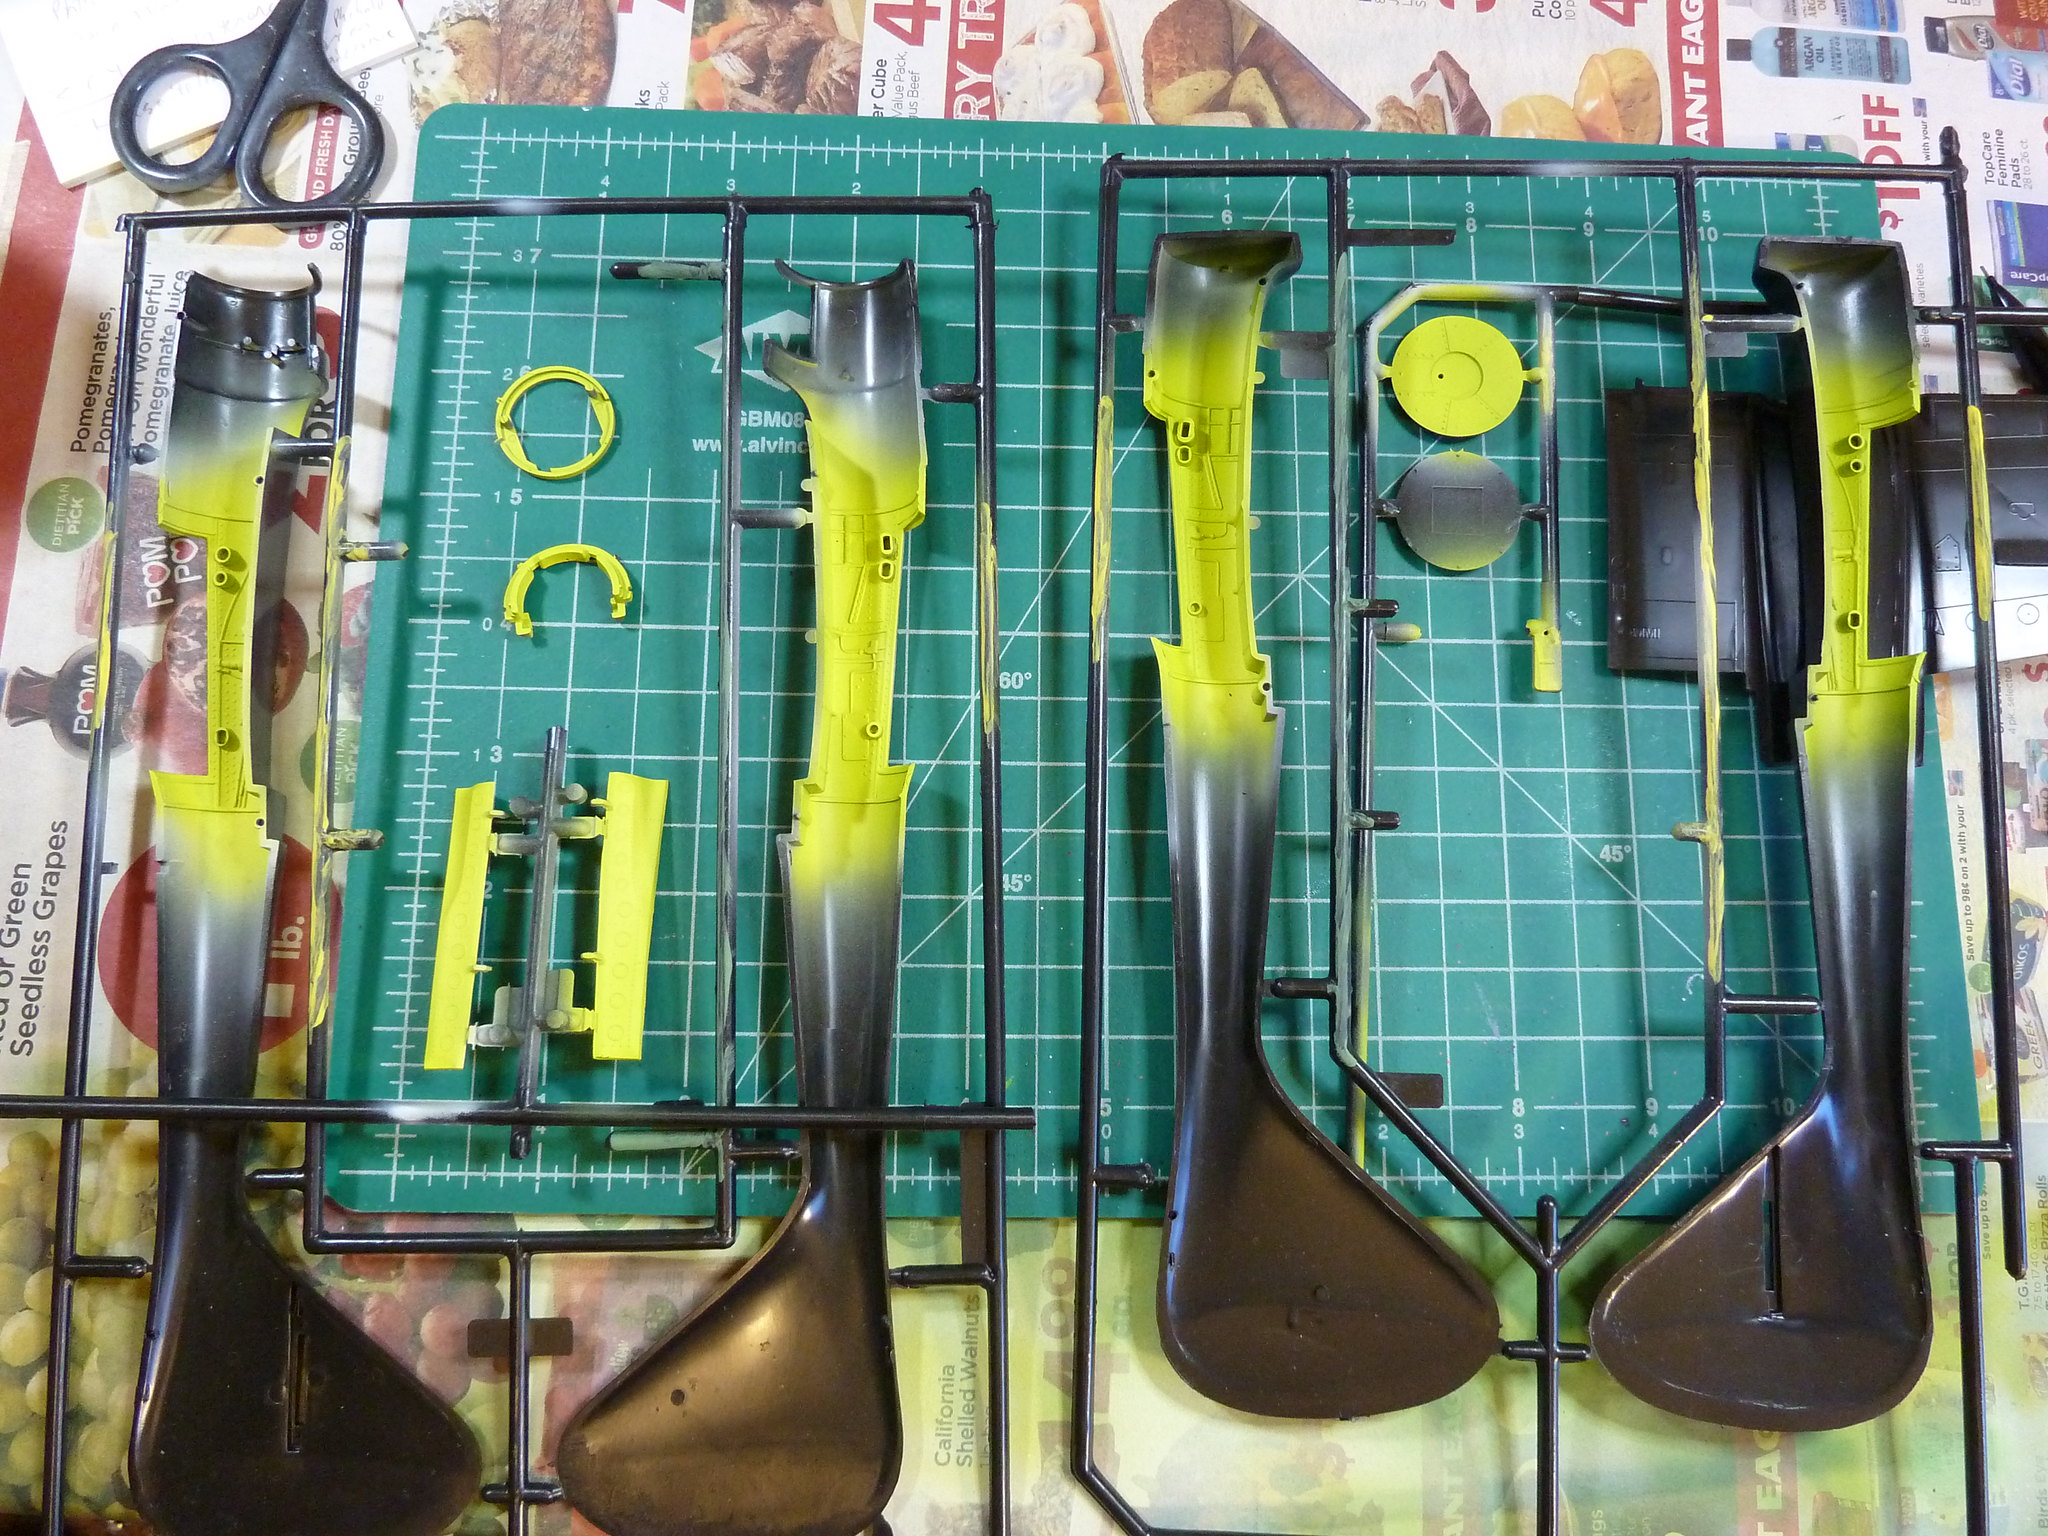
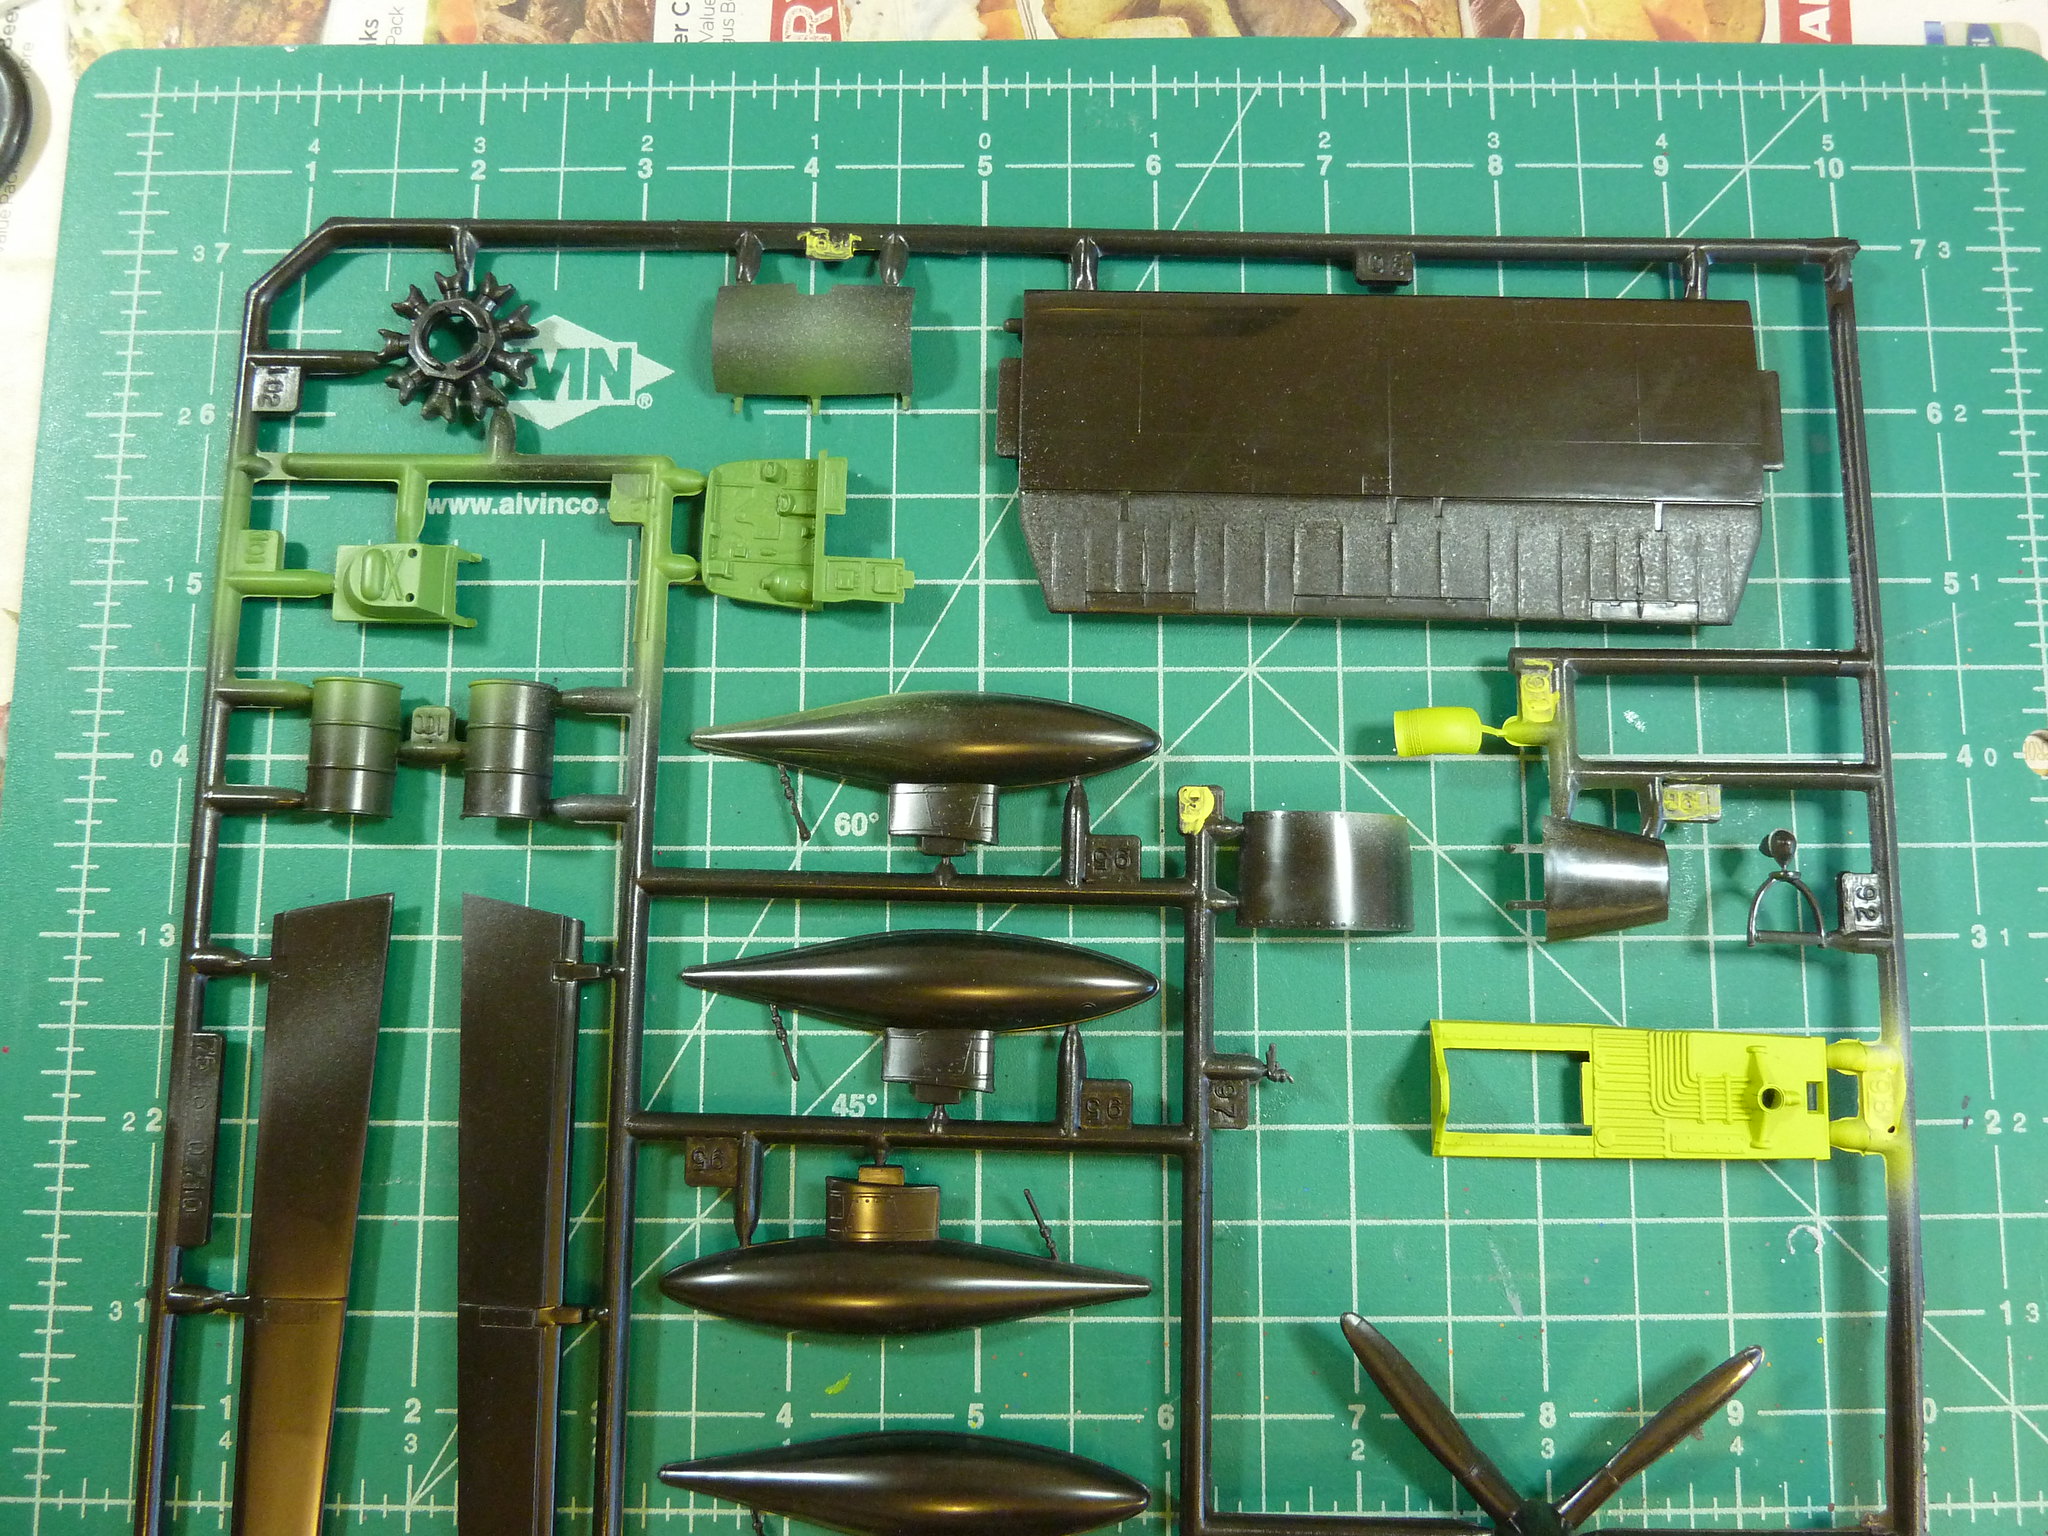
Looking over the kit quickly shows moderate and generalized surface detail, a good amount of pin marks, and SO MUCH FLASH on these sprues. The age of these molds is truly showing, especially compared to all the Tamigawa kits out now. But I knew what I was getting myself into...hopefully I can put together a decent looking bird from these chunky sprues.
MLD
Vermont, United States
Joined: July 21, 2002
KitMaker: 3,569 posts
AeroScale: 419 posts
Joined: July 21, 2002
KitMaker: 3,569 posts
AeroScale: 419 posts
Posted: Wednesday, March 21, 2018 - 04:45 AM UTC
wrassled the gallery dragon into submission..
Two pics of the Cobra uploaded.
Got to finish this Merkava and then back to the Coast Guard Hind...
Two pics of the Cobra uploaded.
Got to finish this Merkava and then back to the Coast Guard Hind...
Buckeye198
Ohio, United States
Joined: May 02, 2010
KitMaker: 596 posts
AeroScale: 197 posts
Joined: May 02, 2010
KitMaker: 596 posts
AeroScale: 197 posts
Posted: Monday, April 09, 2018 - 01:35 AM UTC
Kinda quiet round these parts...hope everyone's just hard at work with their builds
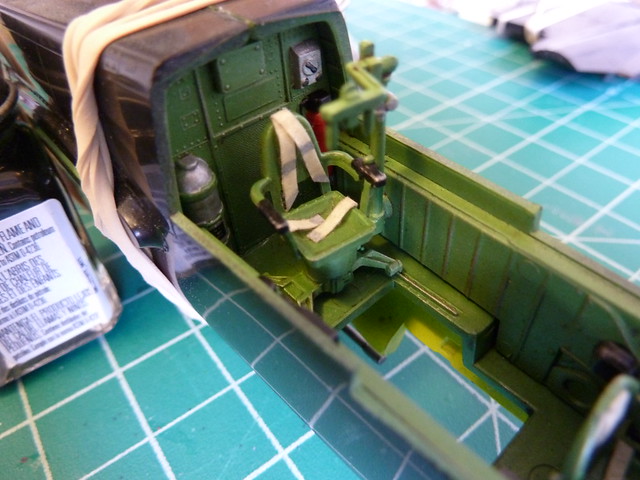
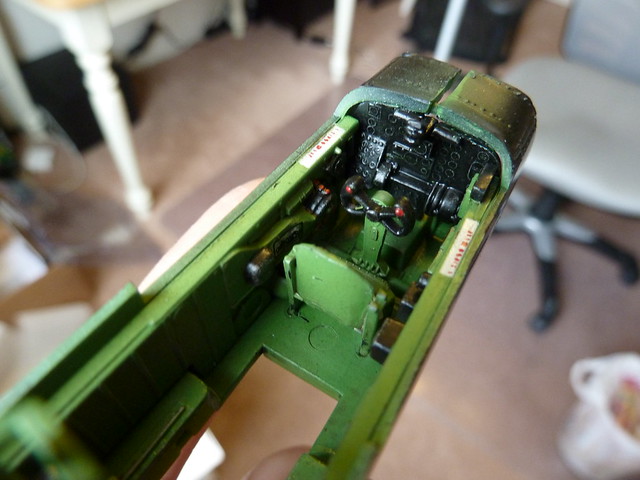
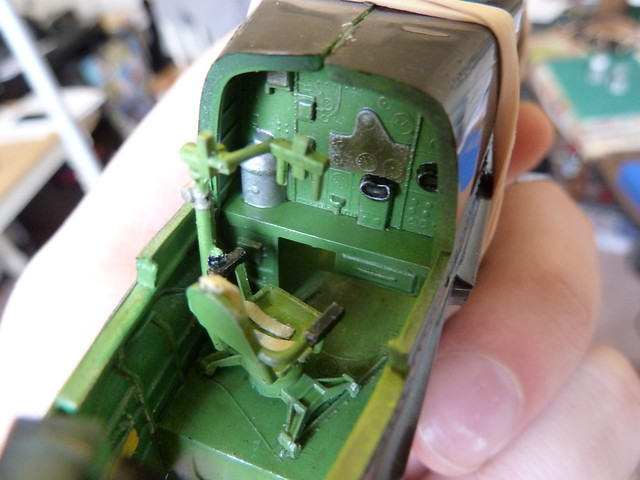
I'm making slow progress with the P-61. Honestly it's just hard to get motivated on this kit. The amount of work to put into this kit in order to get a result that I'd describe as "distant and out of focus" or "generally accepted as a Black Widow"...it's a lot for me right now.
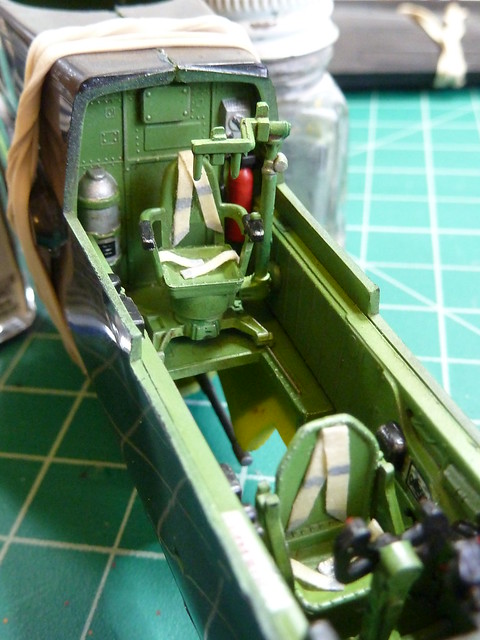
But I got probably the most tedious section complete, the crew compartments! The bulk of my time was spent removing mold seams and pin marks, and even still I missed a few throughout. In places, the ejector pin marks were so pronounced that they looked like intentional detailing. I did my best on the cleanup, assembly was easy enough, and detail painting was done by hand with enamels. I did an oil wash over the walls and floors (I'm very new to oil washing, but I think it worked well) and drybrushed aluminum throughout, particularly on the chair runners. Harnesses are my usual masking tape with aluminum buckles painted on.
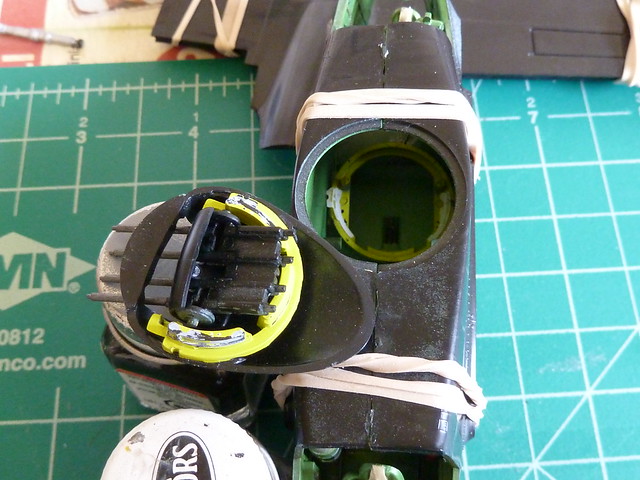
While gluing the fuselage halves together, the dorsal turret is supposed be sandwiched into place and remain movable. A combo of inadequate glue and excessive mandatory manipulation resulted in the "sandwich" falling apart. Now I need to find a way to glue the turret back onto the stabilizing ring, which is stuck inside the fuselage. I have a feeling it's going to require a maneuver like Michelangelo and the Sistine Chapel.
And yes, I am well aware that I need to make a proper photobooth already
GaryKato
California, United States
Joined: December 06, 2004
KitMaker: 3,694 posts
AeroScale: 163 posts
Joined: December 06, 2004
KitMaker: 3,694 posts
AeroScale: 163 posts
Posted: Monday, April 09, 2018 - 04:09 AM UTC
I know how you feel! I am working on Tamiya's 1/20 Brabham BT46 for the Garage Queens 2018 campaign and finding the same things on this kit.
Hang in there.
Hang in there.
Buckeye198
Ohio, United States
Joined: May 02, 2010
KitMaker: 596 posts
AeroScale: 197 posts
Joined: May 02, 2010
KitMaker: 596 posts
AeroScale: 197 posts
Posted: Wednesday, April 18, 2018 - 08:49 PM UTC
A bit more progress. The plane is finally starting to look like a plane! Fuselage is closed up, wings attached, and gaps and ridges puttied and sanded down. I wasn't too careful with the dihedral though. Despite that, the molds set the angle pretty nicely. Pretty surprising, given how poorly the rest of the kit has aged.
(Interesting note, it appears that my model was kitbashed from multiple releases. I bought it from my local model shop's discount pile. It had the original 1974 Monogram box and instructions, some sprues stamped 1974, others stamped 2001, decals marked 11/86.)
I also started detailing the booms a bit. I made internal partitions, my first experiment scratchbuilding with sheet styrene.
I'm also working on correcting the cowling rings...the left is closed, and the right is open. Not looking to do much more than open the left side, I do want this to be as OOB as possible.