_GOTOBOTTOM
Air Campaigns
Want to start or join a group build? This is where to start.
OFFICIAL: Mighty Eighth Campaign
Redhand
#522
_VISITCOMMUNITY
New Jersey, United States
Joined: January 20, 2013
KitMaker: 1,460 posts
AeroScale: 1,443 posts
Posted: Monday, May 25, 2020 - 01:04 PM UTC

Quoted Text

I have decided on 41-24605, "KNOCK-OUT DROPPER" of the 359th BS/303rd BG. This was an original 303rd aircraft.


I will follow this with interest Karl. I am thinking of doing the 303rd's Aluminum B-17G Idaliza using the HK 1/48th kit.


I have the decal sheet from Kitsworld, and the April 13, 1944 mission to Schweinfurt was "memorable."


She's a 100+ mission ship, too.
b17-peter
#392
_VISITCOMMUNITY
Hessen, Germany
Joined: January 09, 2013
KitMaker: 696 posts
AeroScale: 608 posts
Posted: Thursday, May 28, 2020 - 08:21 AM UTC
Really impressive, Brian! Good luck for your build, I will follow it
john41492
#442
_VISITCOMMUNITY
Malacca, Malaysia
Joined: July 20, 2015
KitMaker: 363 posts
AeroScale: 335 posts
Posted: Monday, June 01, 2020 - 04:30 PM UTC
Hi All,

Well I went and asked for an extension, and didn't even post updated pics! Ooops!

Last I updated this was with an airframe undergoing serious filling! So, just prior to asking for the extension, I had wrapped up the painting.

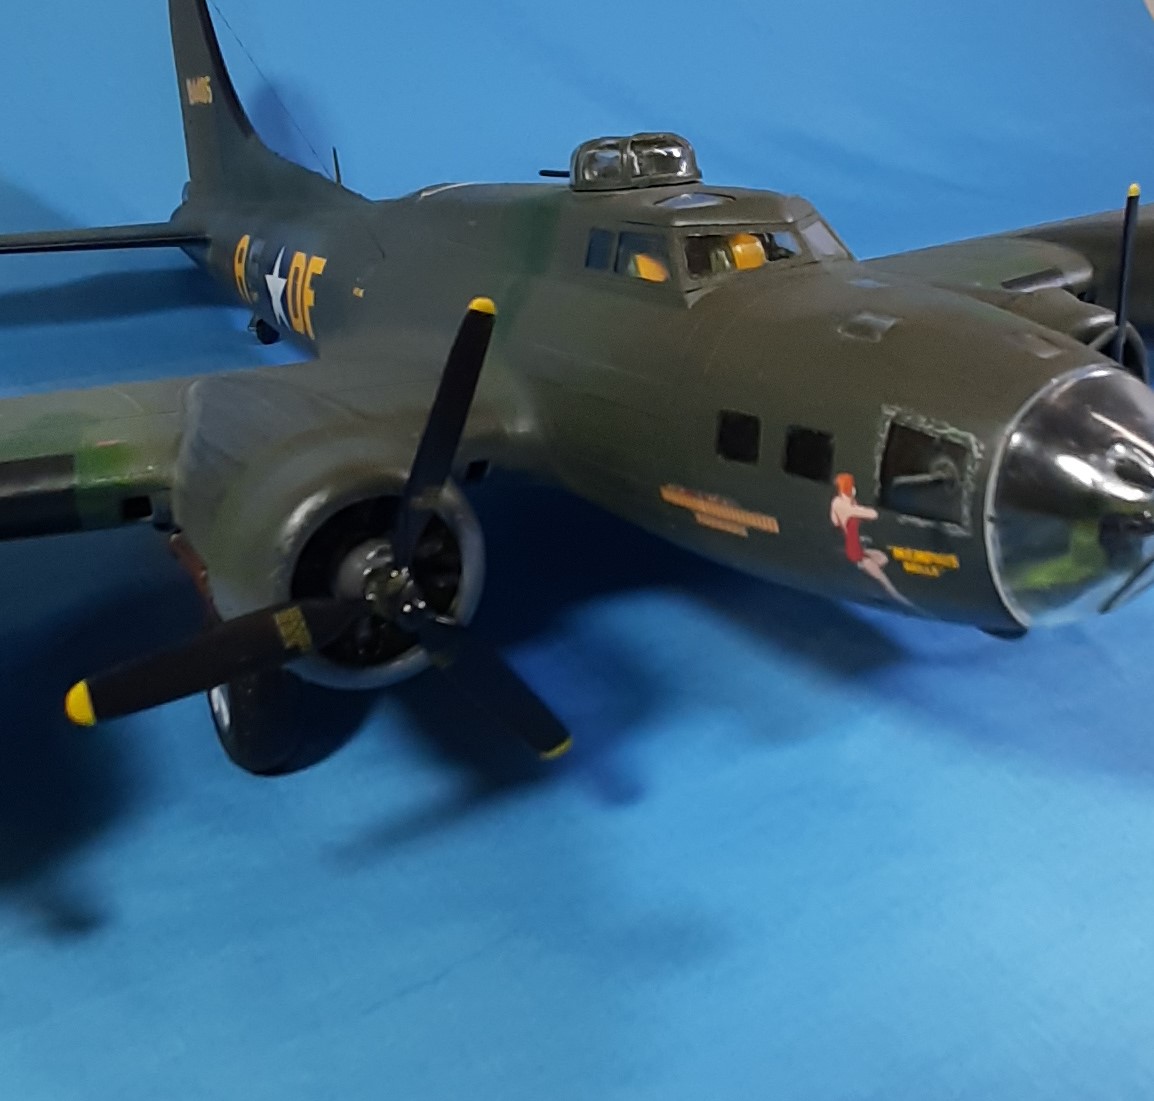
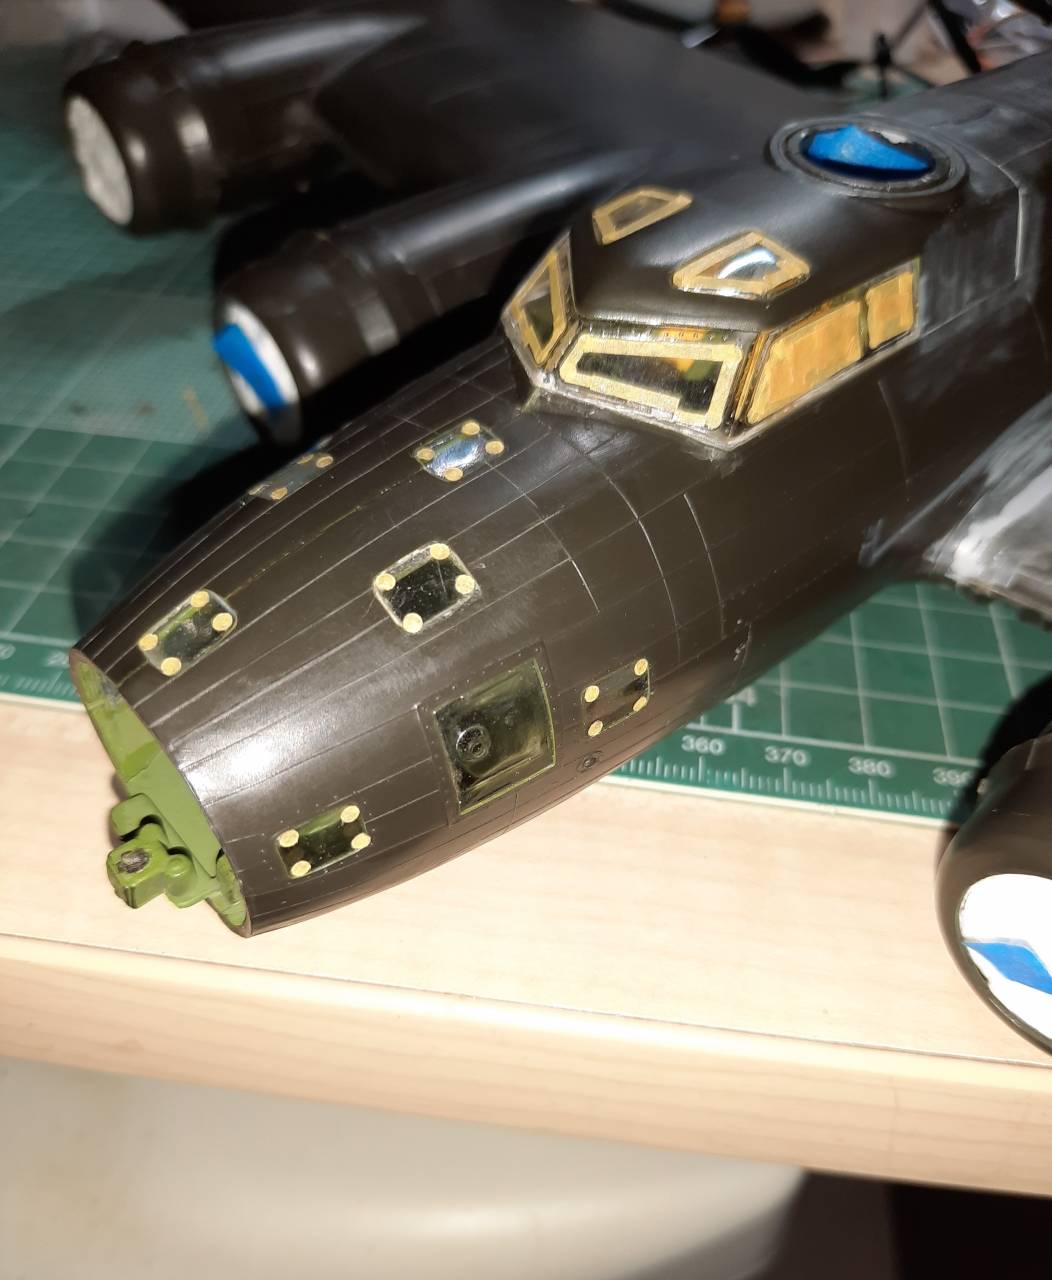
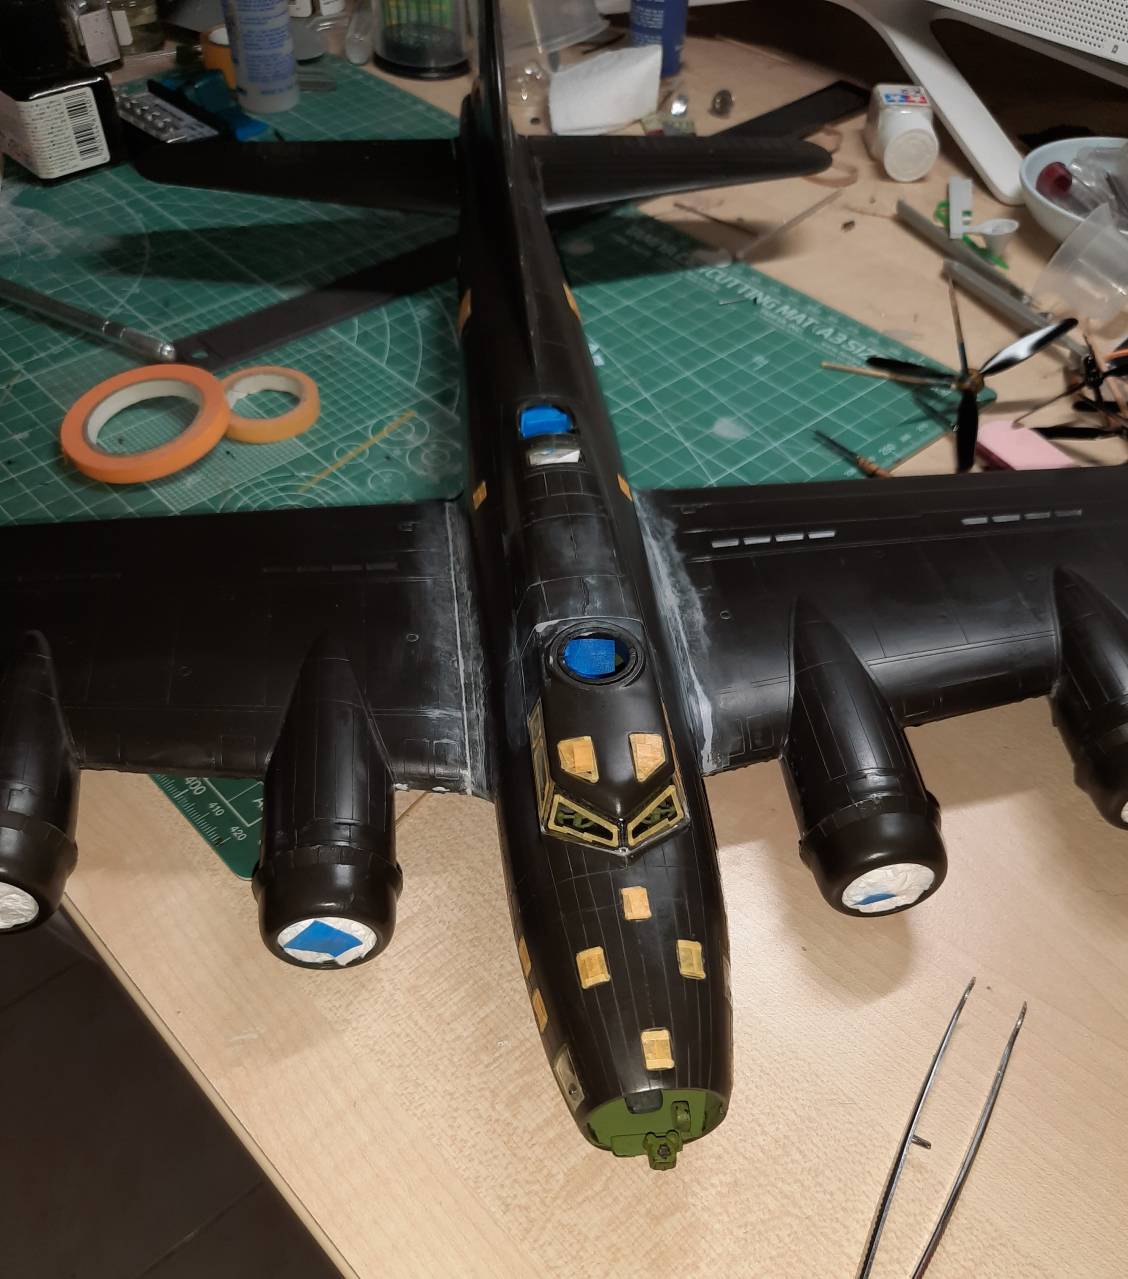
In order to give this a good realistic paint job, I needed to mask well, and there's a surprisingly large amount of glass on this thing. I gave the Eduard masks made for the B-17G, and would have to say "DON'T DO IT!!" They don't fit, and would be a waste of time and money, save it for the G variant.

To do the windows, I punched out some small circles, and placed them on the glass, this would then be followed using thin strips of tape, and finally filling in the rest with bigger parts. This actually went faster that doing a 1/48 Zero! It also allows for the rounded windows to be realistically masked.


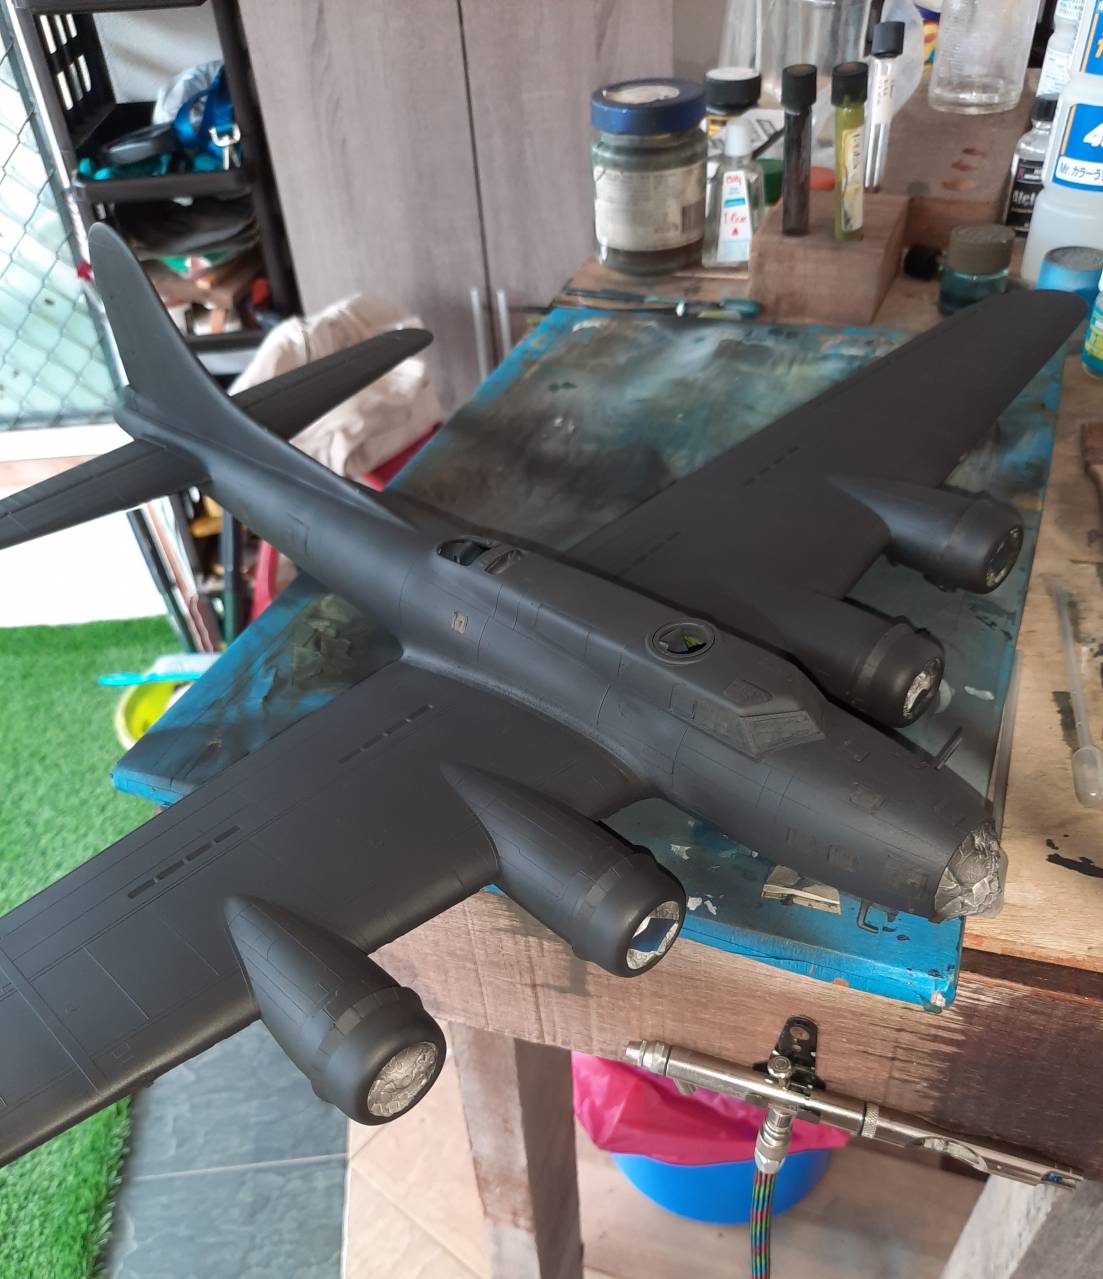
I black based the paint job, using MS1500 black. It goes down nice and using an old clean tee shirt I gave it a rub down to smooth things out. This works fine, though, in my opinion if you're going for a NMF that is like a polished NMF, you may wish to use something like gloss black.

This is a big plane, and this also means that lots of paint will be used to get a good base coat down. In this case I used 19 ml! Granted, this will be the highest amount of a single paint used.


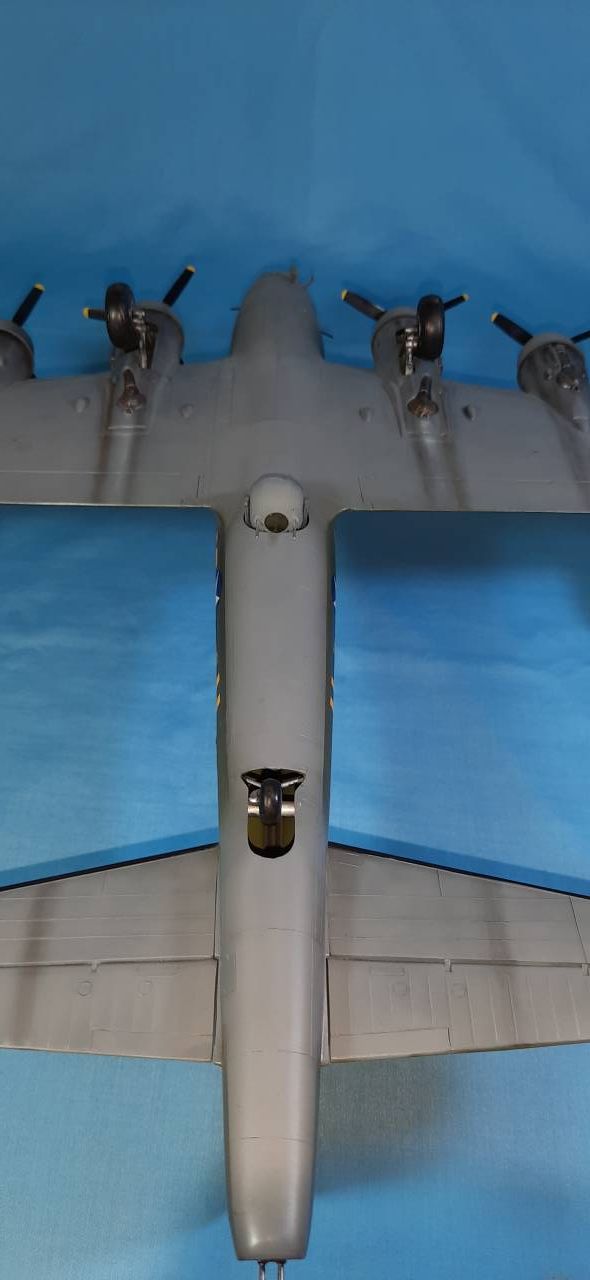
Next, I masked off the de-icing boot areas. Wings, stabilizers, and rudder, the most difficult being the curved portions of the rudder. This was done with Tamiya and Mr Tape. On my samples of Mr. Tape, I notice that it doesn't seem to adhere as well as Tamiya, though it could just be the tape from the LHS (sitting in a humid environment too long).

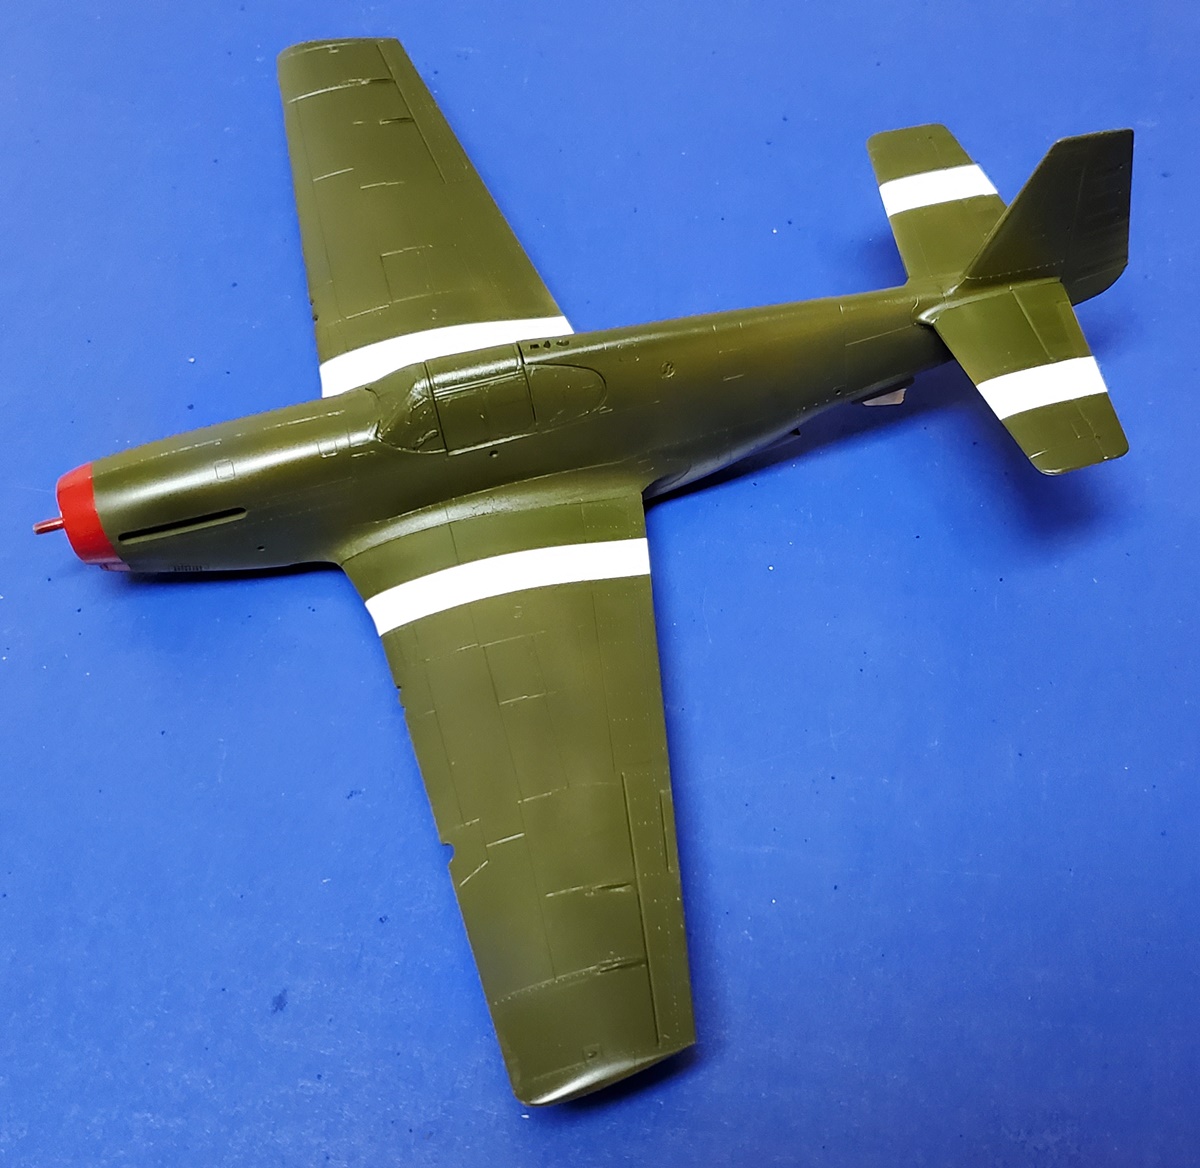
Next I painted the underside Neutral grey (Tamiya XF-53). This went down without a hitch.


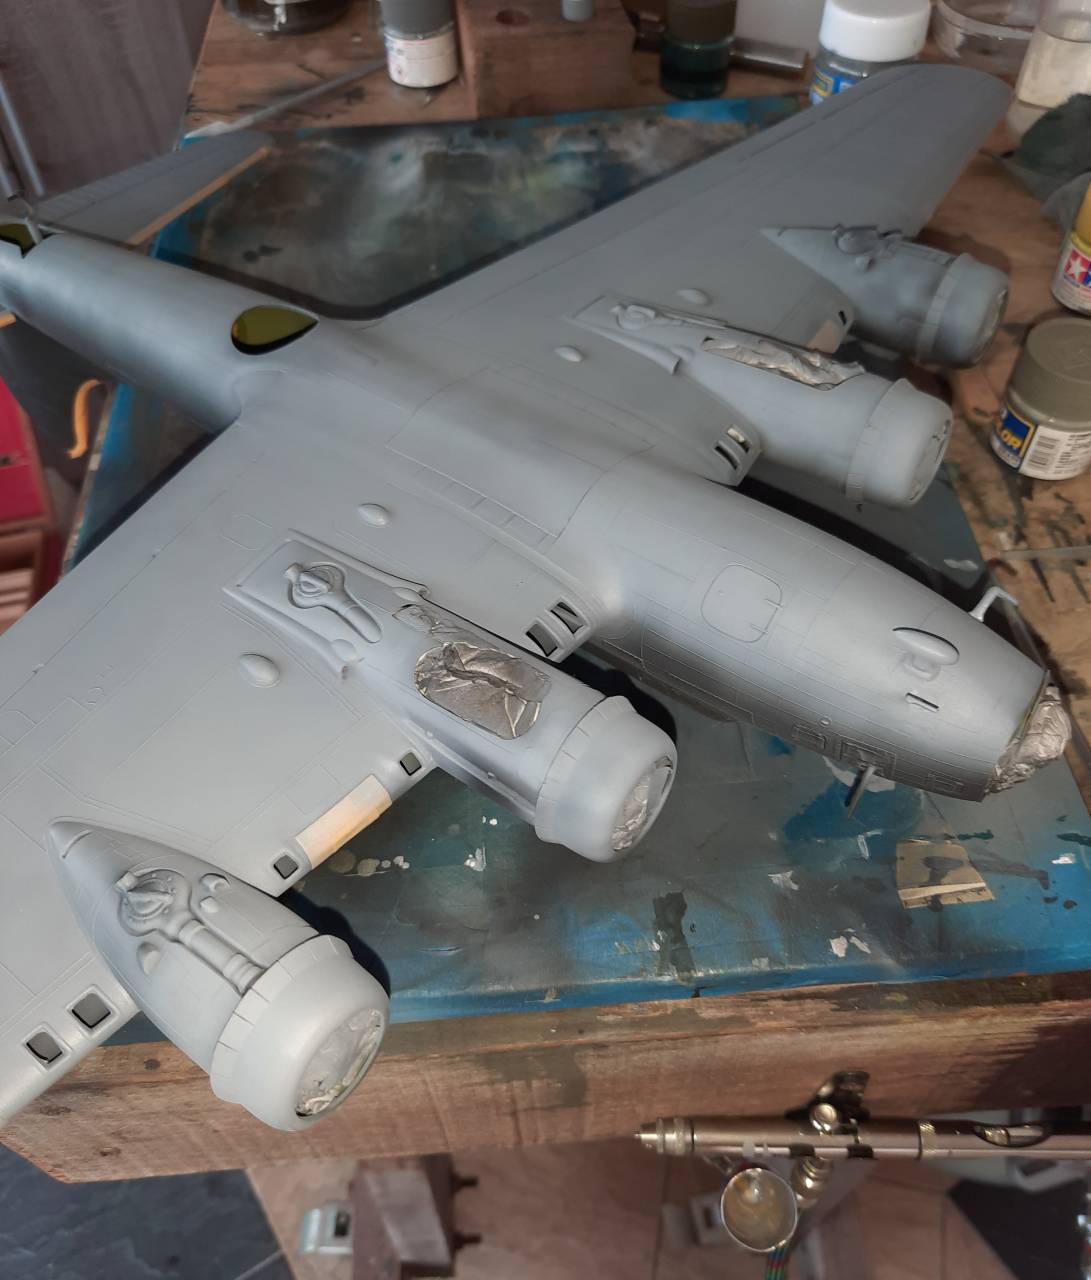
Then I flipped her over, and proceeded to do the fabric covered control surfaces. This was a mix of lightened Olive Drab (Tamiya XF-62 + XF-2, about 2+1 ml, diluted 1:4 with MS thinner). I used the OD mix as the primary for the whole plane, though during the basing stage I did add other colors as noted. For the fabric I added some yellow-green (XF-4)


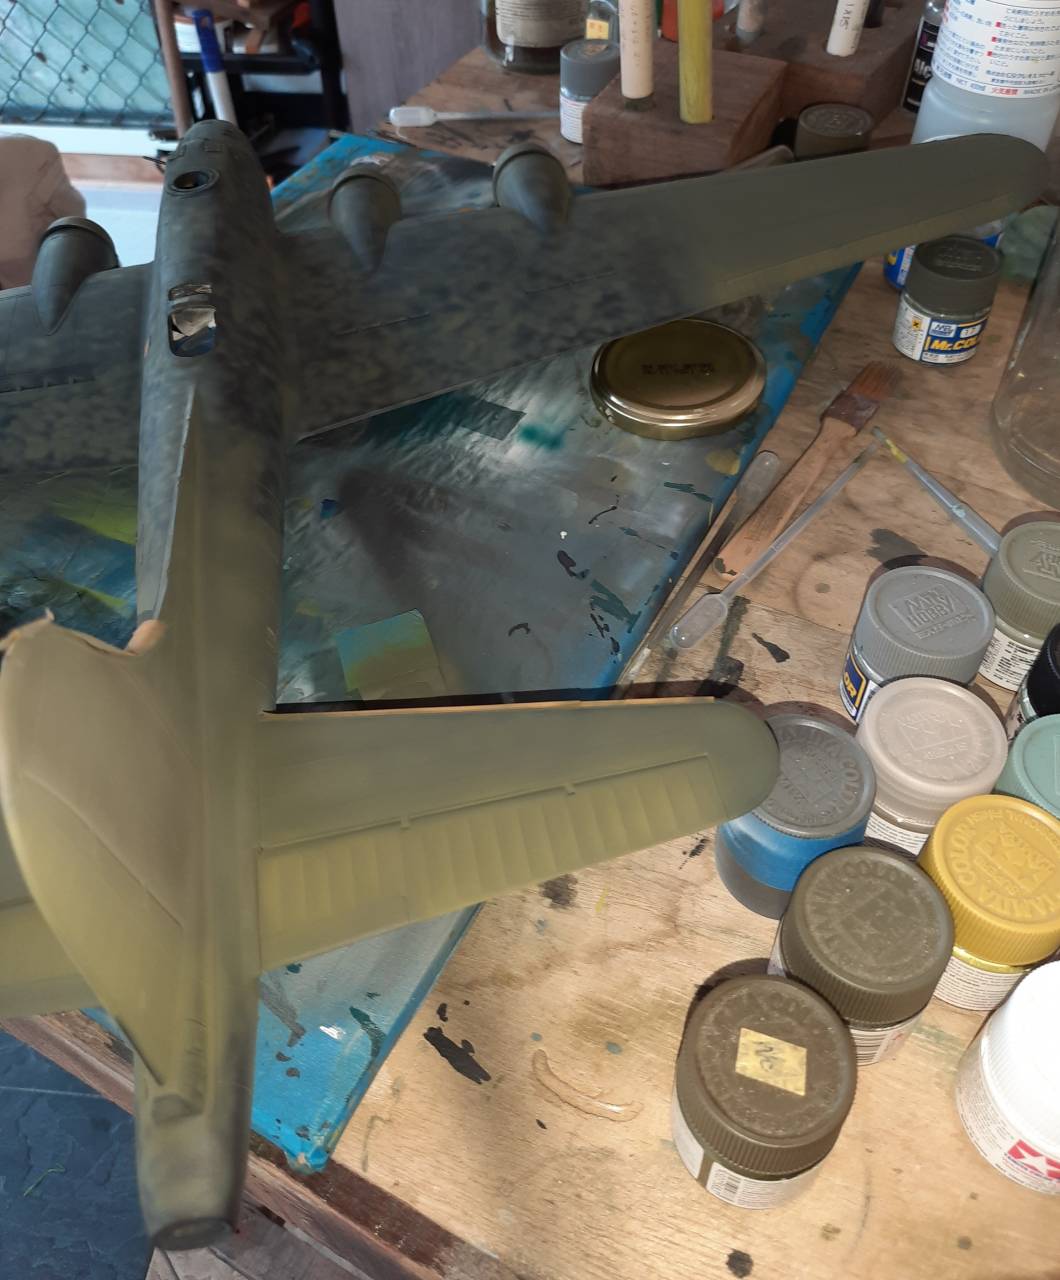
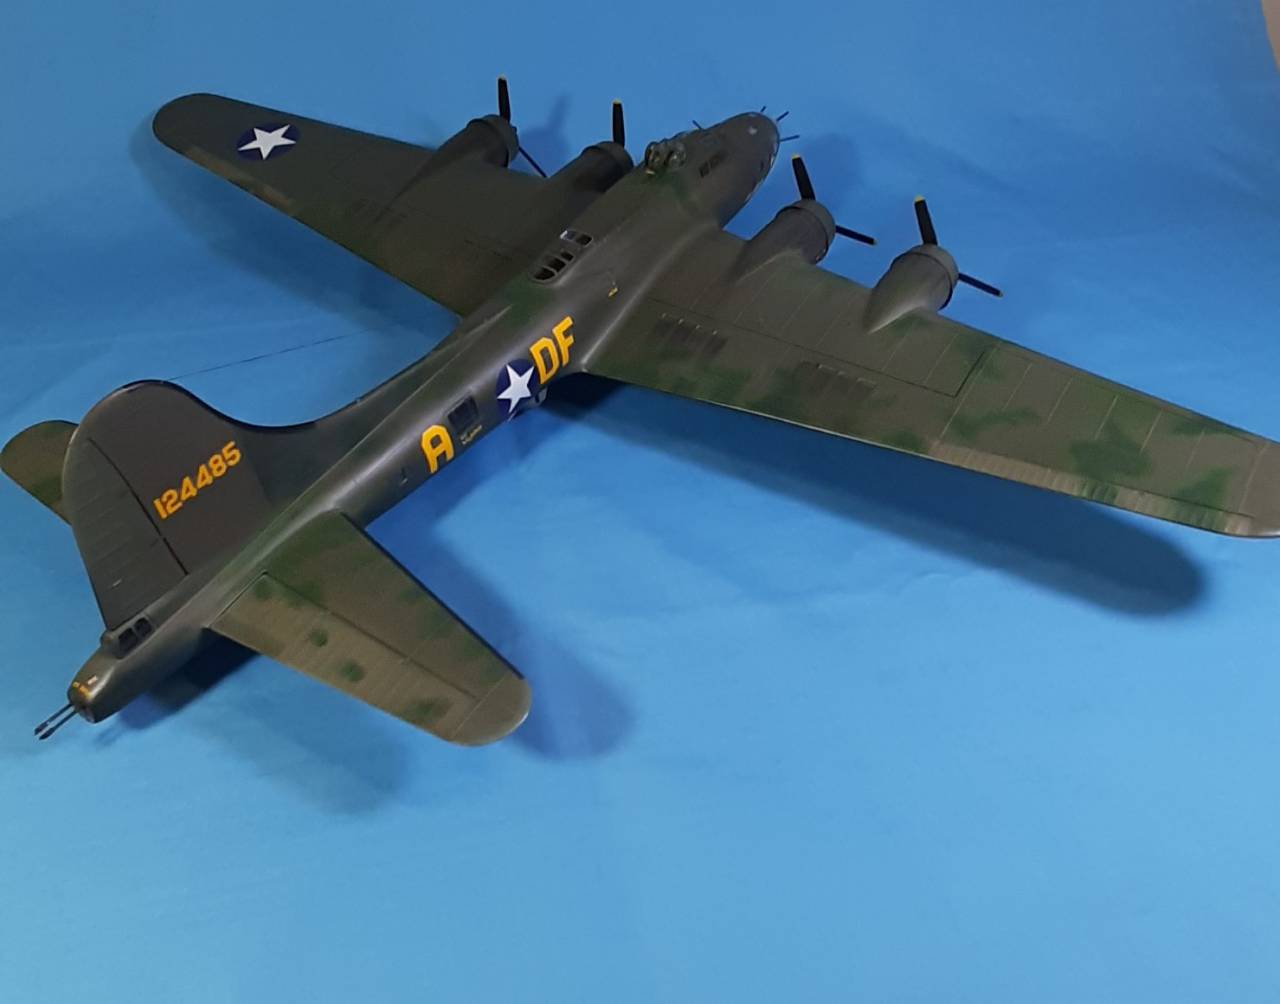
Satisfied with the color I masked these off and went for the tail. On the Belle, the tail was replaced and photo's show this to look very different from the OD on the plane. Most likely it was just new OD, though I chose to give it a coat of Khaki Drab, which looks pretty convincing I think.

This was also masked over, and finally I was able to do the rest of the lightened OD. The total volume of paint top and bottom was about 9 ml each! Lots of real estate here, which has me thinking that it may be more economical for me to start mixing my own lacquer paints! Ugh.

Next I went and did the splotches that were done in Medium green, my closest paint was Mr Color Field Green. After doing it I was appalled! The color was atrocious, and just didn't look right at all!


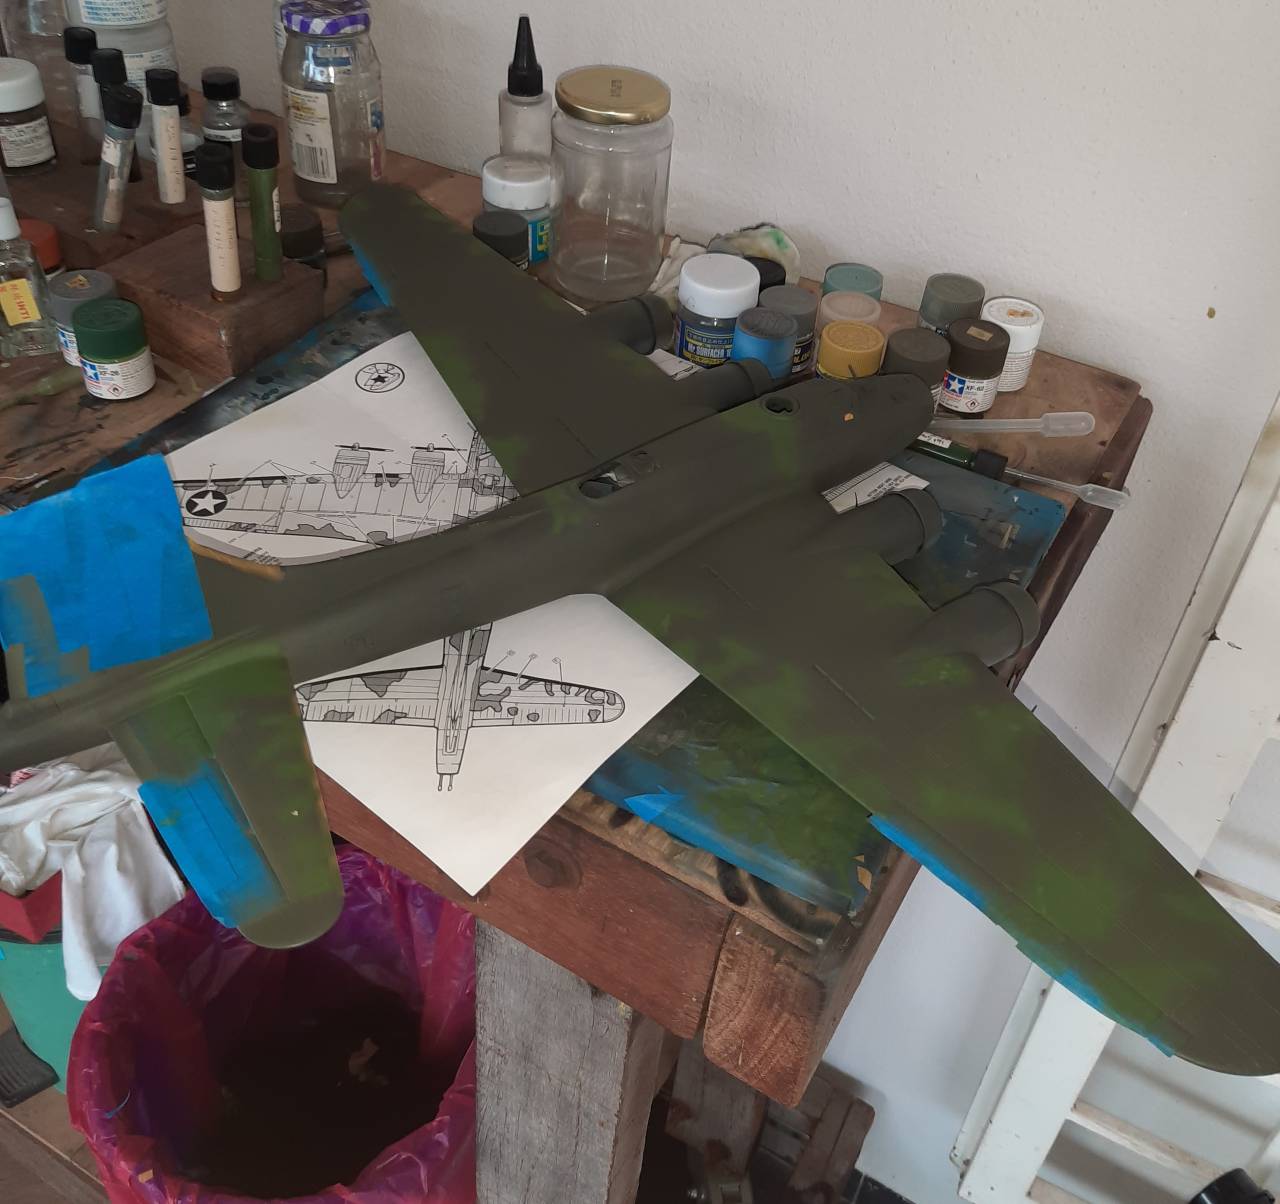
After much consulting with my beloved, mixing, and going out to the sunshine holding bottles of paint up to each other and making the neighbors really wonder how crazy I am, I decided on Tamiya Deep Green (XF-26). This looked much better, and all I did was lightly go over the existing field green. So I'm sure that there is some of the field green peaking through to tint the deep green.


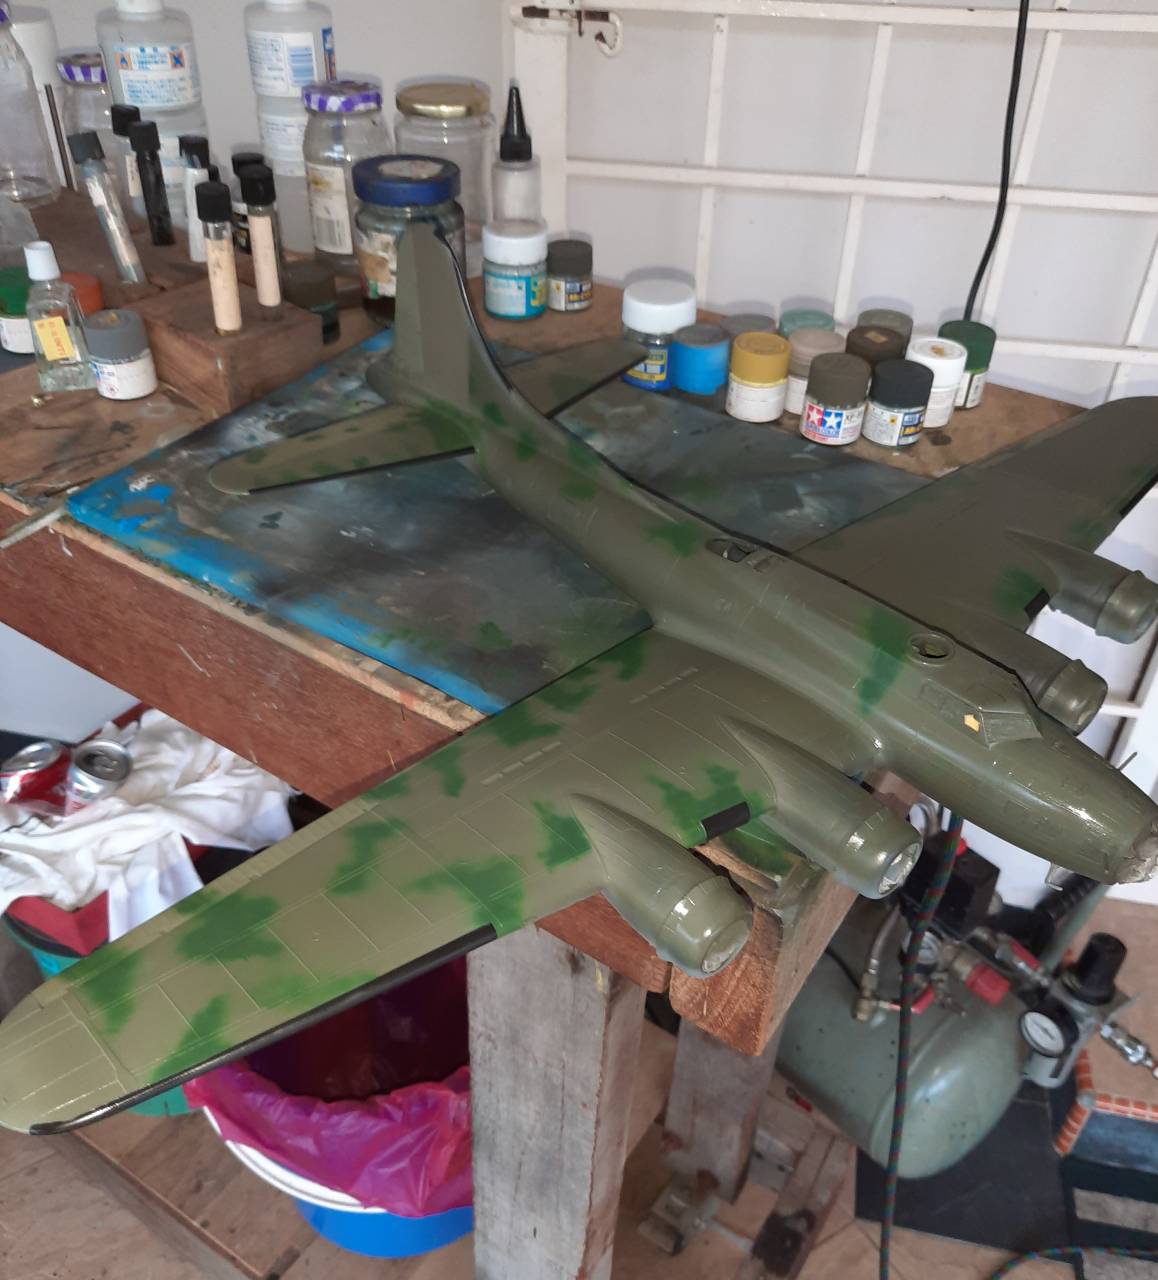
With that I removed the masks, and was pleased. I proceeded to gloss the bird using my high humidity mix of 7 ml Future (Pledge Floor Care Finish) 3 ml of Isopropyl alcohol (70% w/v) and one drop of dish soap to help break any surface tension.

I'm now in the midst of decaling. I'm starting with the Kit's world B-17F stencil set. They are nice, but the walkways are murder! That's all for now, more to come!

Stay safe, and have fun!

John
md72
#439
_VISITCOMMUNITY
Washington, United States
Joined: November 05, 2005
KitMaker: 4,950 posts
AeroScale: 3,192 posts
Posted: Monday, June 01, 2020 - 06:12 PM UTC
I'm doing Academy's 84th Fighter Squadron T-bolt. They offer a load out of 2 bombs, and a choice of a 108 or 75 gallon fuel tank. Would that be a normal load for a bomber escort mission? Wouldn't they have carried as much fuel as possible and left the bombs for ground support missions?
john41492
#442
_VISITCOMMUNITY
Malacca, Malaysia
Joined: July 20, 2015
KitMaker: 363 posts
AeroScale: 335 posts
Posted: Monday, June 01, 2020 - 07:08 PM UTC
Hey Mark,

Escort duty would be fuel, then strafe targets of opportunity on the way back.

If it's the bubble top version go with the flattened 108 gal on the center line. Razorback's tended to use the paper tanks imprenented with aluminium. Before these tanks they used the 75, looks the same as a P-40's, which were what they had early on.
Again check your sources. And a great source is our very own SIG P-47 Heaven!
md72
#439
_VISITCOMMUNITY
Washington, United States
Joined: November 05, 2005
KitMaker: 4,950 posts
AeroScale: 3,192 posts
Posted: Tuesday, June 02, 2020 - 08:31 AM UTC
Thanks John. I got a similar, but more detailed answer from Lampie over on Sosig. I'm thinking that I'll go with a single center-line 108 gal tank, sand the ridges off of the pylons and just paint the exposed bottom a dull aluminum.
MichaelSatin
Staff MemberCampaigns Administrator
AEROSCALE
_VISITCOMMUNITY
Colorado, United States
Joined: January 19, 2008
KitMaker: 3,909 posts
AeroScale: 2,904 posts
Posted: Monday, June 08, 2020 - 08:29 AM UTC
Some progress on the Accurate Miniatures P-51B. Unfortunately, there's a change of plans with the markings. I tried to use the kit decal for the seat belts and it shattered, so I think the decals are too old and shot. Happily, I have several after market sheets for 8th AF Mustangs, so I'm switching the build to Capt. Duane Beeson's P-51B from the 334th FS, 4FG in the spring of 1944.


As you can see, I've made a shot at adding the fairings in front of the ailerons. I think I overdid it a bit, but hopefully they'll look OK under some paint. Also, the lower wing is a bit warped, so I have glued the top wings as solid as a can to the fuselage, then I'll glue the bottom with to those. That should take care of it.


I made some simple tape seat belts to replace the decals. I plan to build this one with a closed canopy.

Michael
MichaelSatin
Staff MemberCampaigns Administrator
AEROSCALE
_VISITCOMMUNITY
Colorado, United States
Joined: January 19, 2008
KitMaker: 3,909 posts
AeroScale: 2,904 posts
Posted: Wednesday, June 24, 2020 - 07:22 AM UTC
Here's where I am on the Accurate Miniatures P-51B:


Not sure if I'm gonna make it. I'm pushing ahead on the Tamiya kit for the Big Three, so I don't know if I can get both done. We'll see.

Michael
MichaelSatin
Staff MemberCampaigns Administrator
AEROSCALE
_VISITCOMMUNITY
Colorado, United States
Joined: January 19, 2008
KitMaker: 3,909 posts
AeroScale: 2,904 posts
Posted: Sunday, June 28, 2020 - 11:57 AM UTC
Well, ya never know...


Michael
YankeeSteve
#511
_VISITCOMMUNITY
Michigan, United States
Joined: July 10, 2018
KitMaker: 52 posts
AeroScale: 51 posts
Posted: Monday, June 29, 2020 - 03:12 PM UTC
Urban Drew's Detroit Miss!! Thanks for the opportunity! Did some experiments on this one.... Vallejo metals....easy to work with and VERY forgiving!!

RhinoSpit
_VISITCOMMUNITY
Bas-Rhin, France
Joined: September 22, 2016
KitMaker: 224 posts
AeroScale: 191 posts
Posted: Tuesday, June 30, 2020 - 03:28 AM UTC
I've finished !


john41492
#442
_VISITCOMMUNITY
Malacca, Malaysia
Joined: July 20, 2015
KitMaker: 363 posts
AeroScale: 335 posts
Posted: Tuesday, June 30, 2020 - 05:03 PM UTC
Hi Folks!

There's some really great builds of the Might 8th AF here! Really like the finale. Great work everyone!!

I did finish the Belle two weeks ago, though due to its shear size getting decent photos has been on the hard side. Sadly, most had to be cropped.

I tried to get this as close to what it looked like at the end of its 25 missions. It's close, though this kit made for some work, the decals (the 2 sets were more than the kit!), really make it what it is. So, warts and all!

Revell's B-17F done as "Memphis Belle" circa 1943.


I hope you enjoy! Thanks for a great campaign honoring those that flew with the Mighty 8th!

Stay safe and keep having fun!
md72
#439
_VISITCOMMUNITY
Washington, United States
Joined: November 05, 2005
KitMaker: 4,950 posts
AeroScale: 3,192 posts
Posted: Tuesday, June 30, 2020 - 05:35 PM UTC
Sneaking yp on the finish line. Just a couple more fiddly bits to go.
md72
#439
_VISITCOMMUNITY
Washington, United States
Joined: November 05, 2005
KitMaker: 4,950 posts
AeroScale: 3,192 posts
Posted: Wednesday, July 01, 2020 - 02:40 PM UTC
Finito. Fin. Getan. Done. Just under the wire. Last night a midnight PDT.


One of my better efforts.


Well scrap, the server is busy no uploads for a while.
MichaelSatin
Staff MemberCampaigns Administrator
AEROSCALE
_VISITCOMMUNITY
Colorado, United States
Joined: January 19, 2008
KitMaker: 3,909 posts
AeroScale: 2,904 posts
Posted: Thursday, July 02, 2020 - 06:18 AM UTC
Well, I guess I didn't make it. For a change.

Time to wrap this one up. Thanks to all who participated and congrats to those who finished! Ribbons have been awarded, so if you didn't get one and think you should have, let me know.

See you around the site!!

Michael
md72
#439
_VISITCOMMUNITY
Washington, United States
Joined: November 05, 2005
KitMaker: 4,950 posts
AeroScale: 3,192 posts
Posted: Thursday, July 02, 2020 - 08:11 AM UTC
Ribbon looks nice up thee. Thanks Michael! Congratulations to all who finished. It was nice watching your builds take place. See you next time!
john41492
#442
_VISITCOMMUNITY
Malacca, Malaysia
Joined: July 20, 2015
KitMaker: 363 posts
AeroScale: 335 posts
Posted: Thursday, July 02, 2020 - 06:01 PM UTC
Great campaign folks! Remember! If you didn't get finished, you can always join up on Hangar Queen 10, going on till the end of the year.

Take care!
 _GOTOTOP