Hello, Everyone!

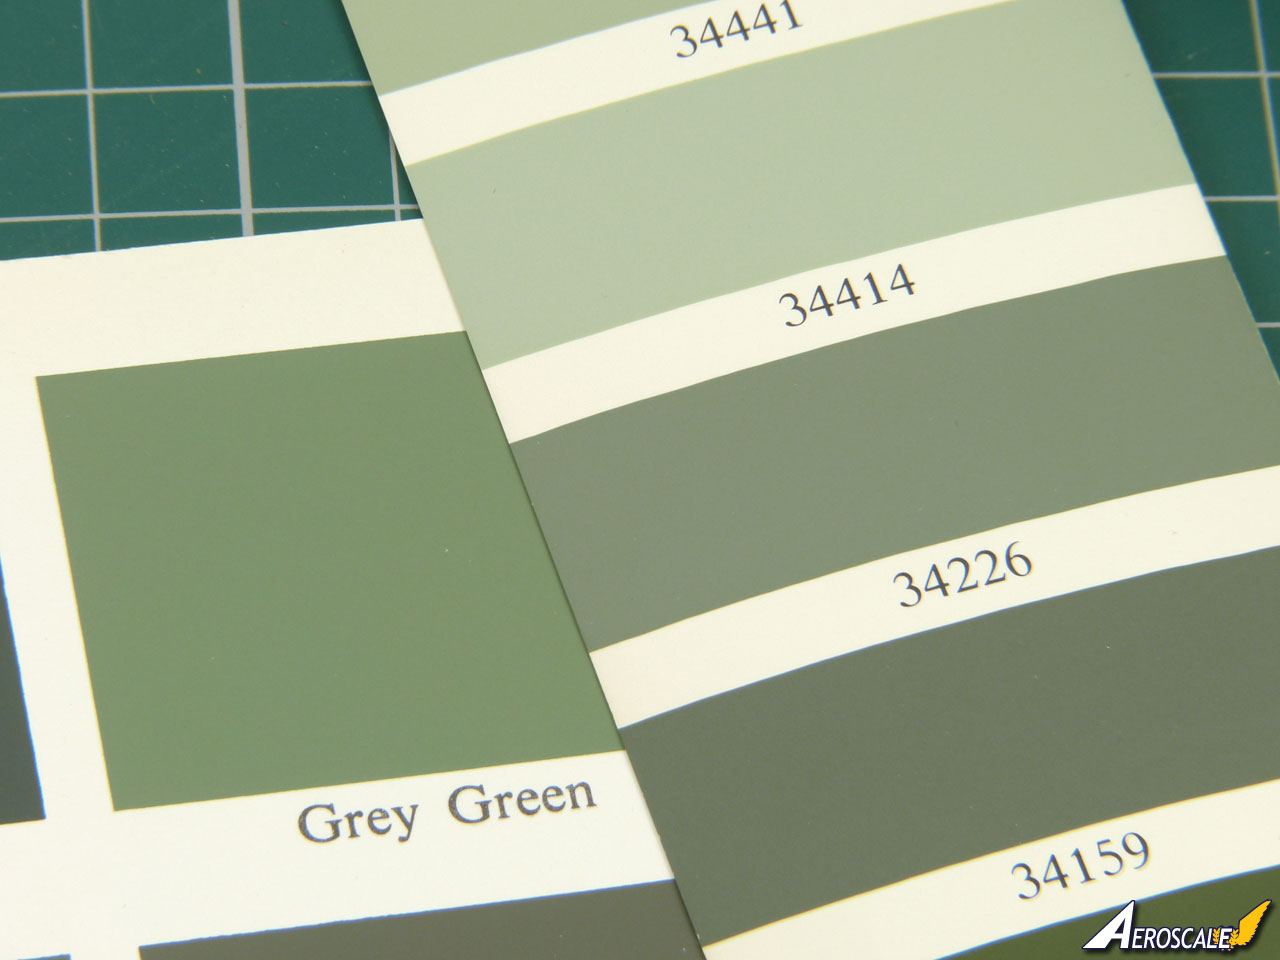
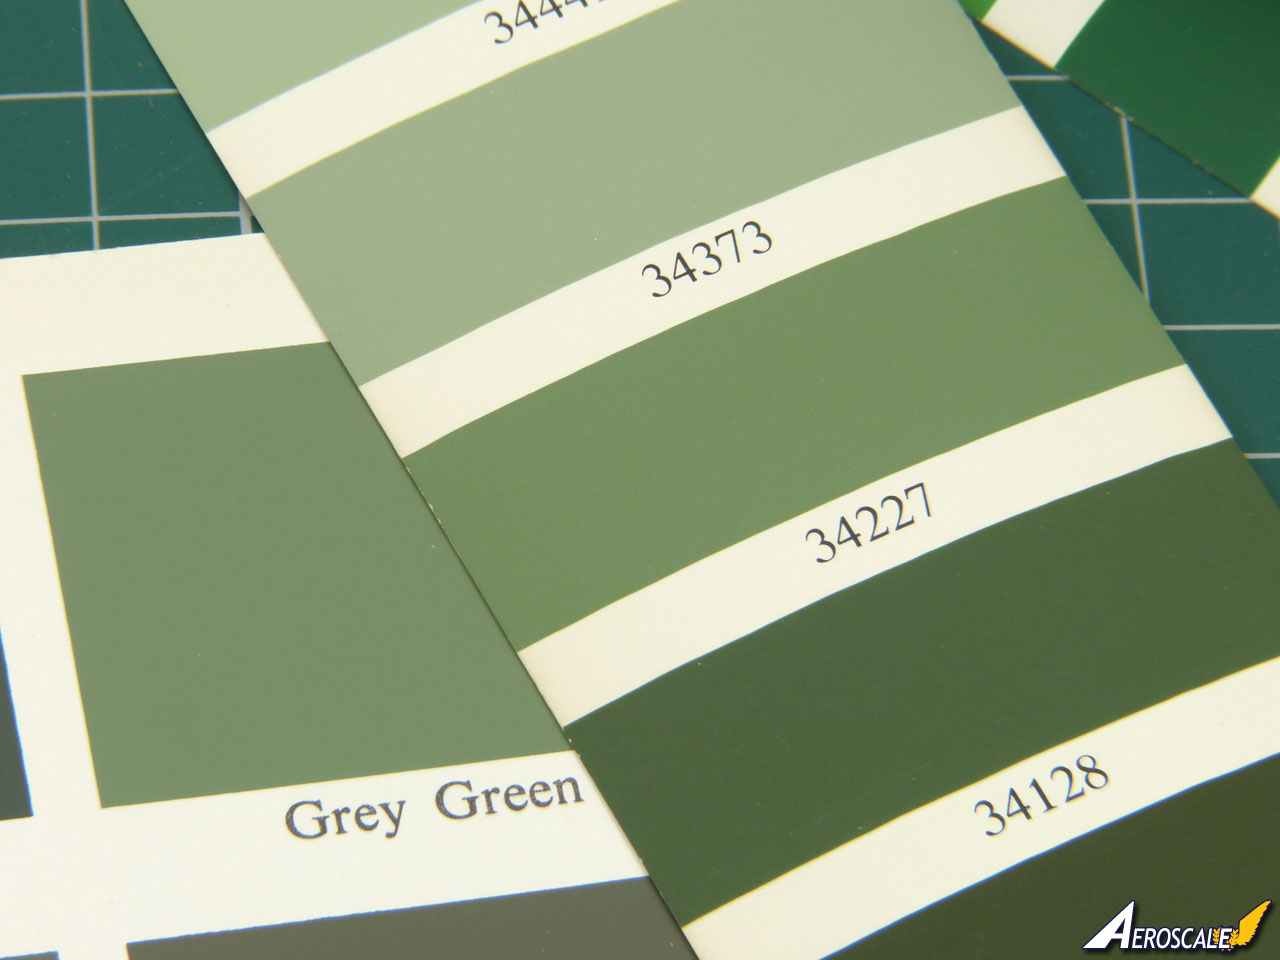
MY GOODNESS, Rowan! An EXCELLENT presentation! These color comparisons are OUTSTANDING!

If I had my way, I'd LOVE to see THESE kinds of color comparisons in EVERY model review and/or build!
I've always said that color perception is subjective; THIS is why I've always, and I DO mean ALWAYS "mix and match" my own EXTERIOR colors. I haven't used the vast majority of my colors "straight out of the bottle" since I was a little snot-nose back in the early 1960s!

Back then, we only had the basic colors to work with- Green, Red, Blue, Yellow, Black, White, Brown- You get the idea... Olive Drab? Forget it! Mix your own, Stupid!
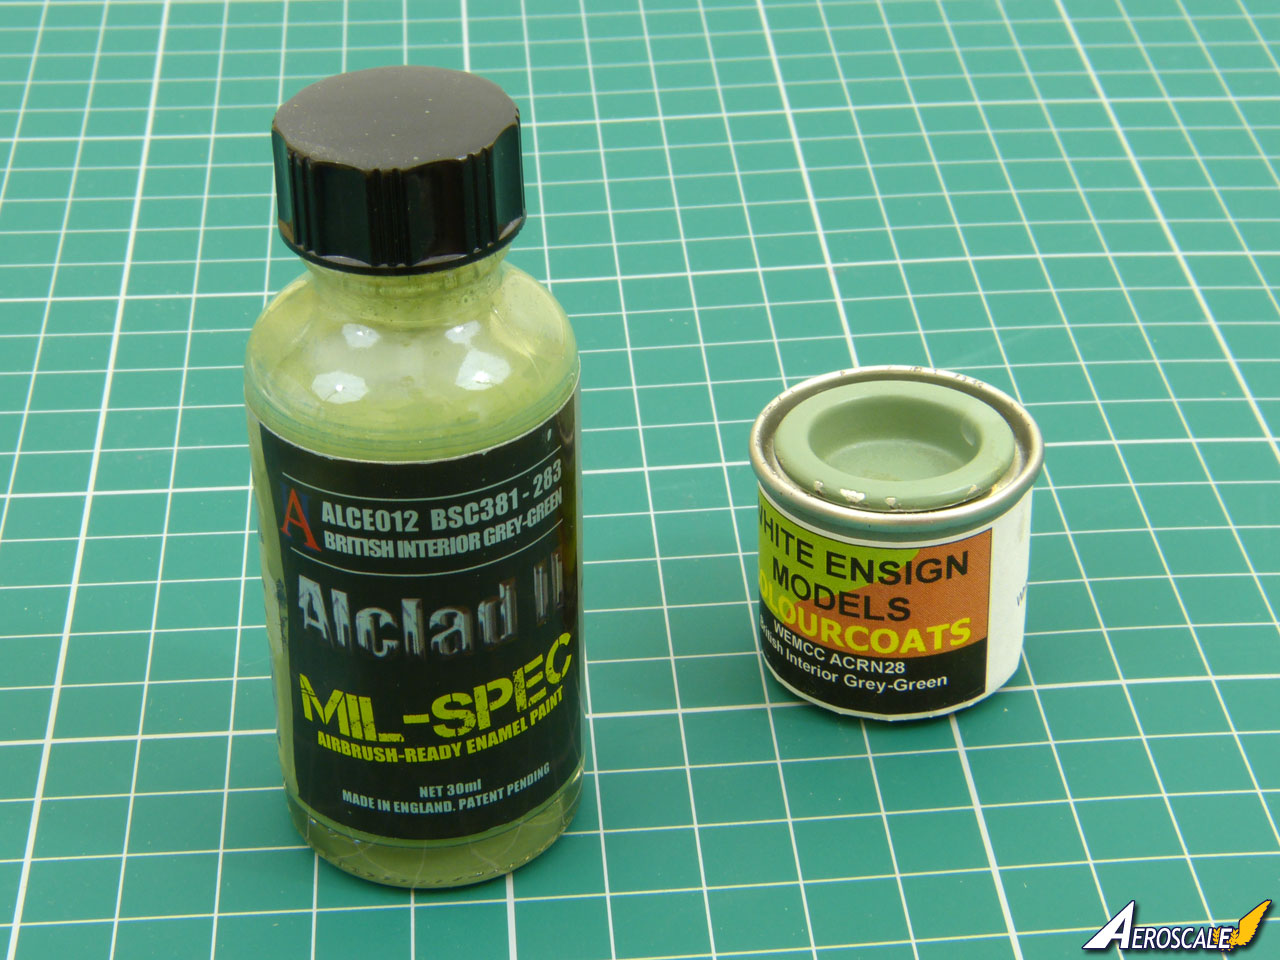
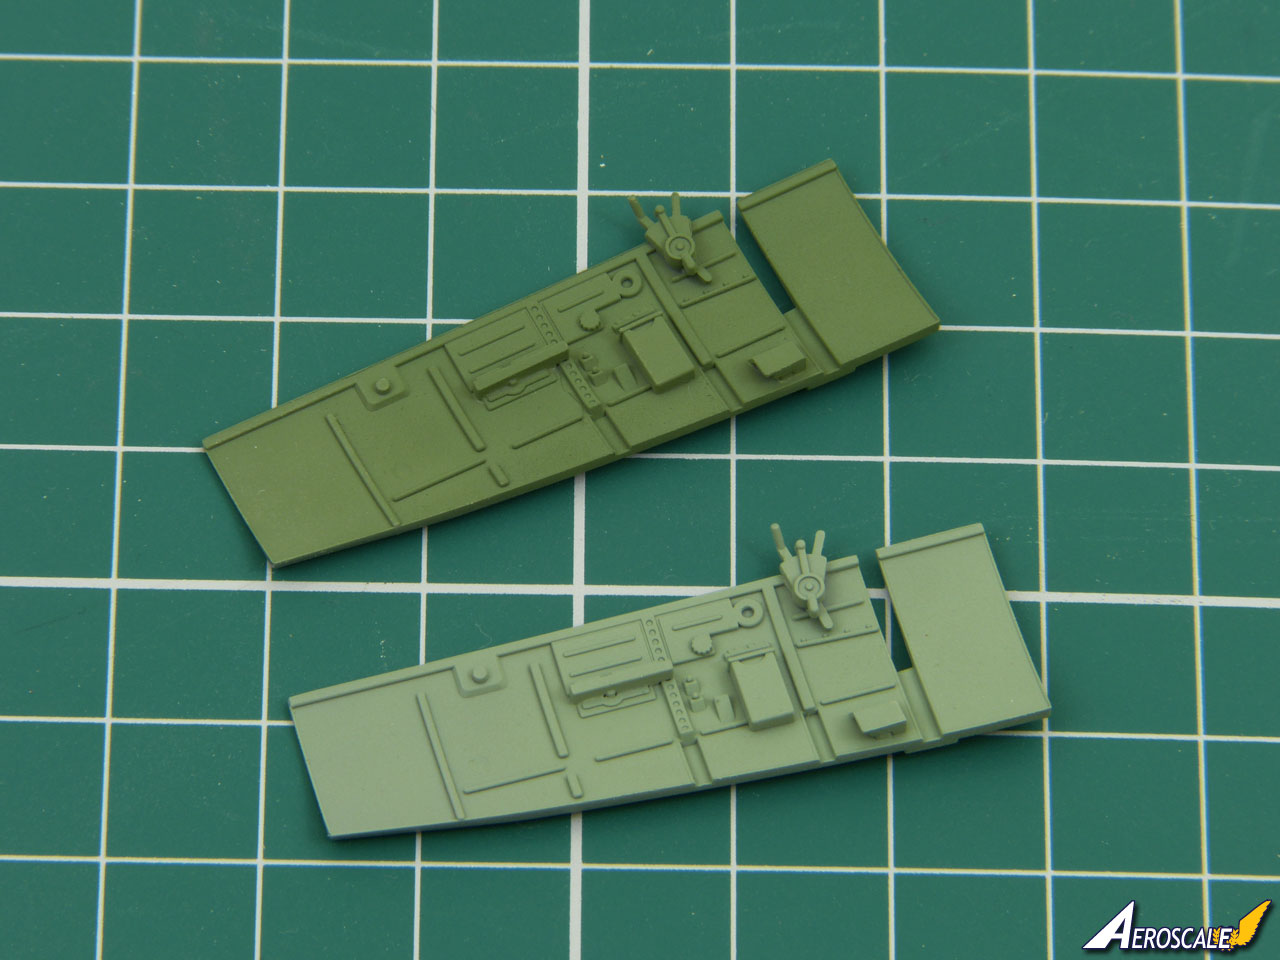
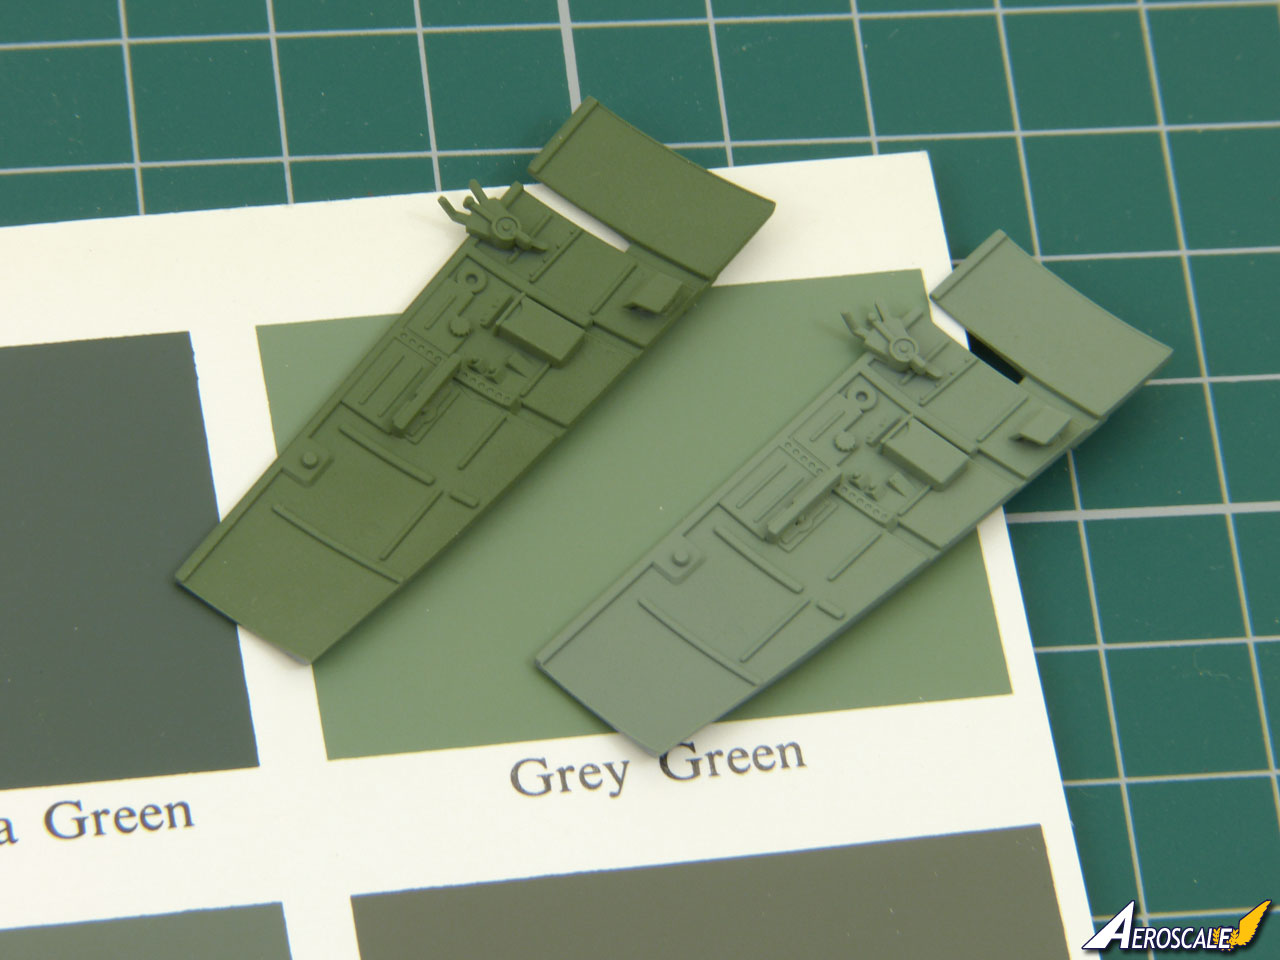
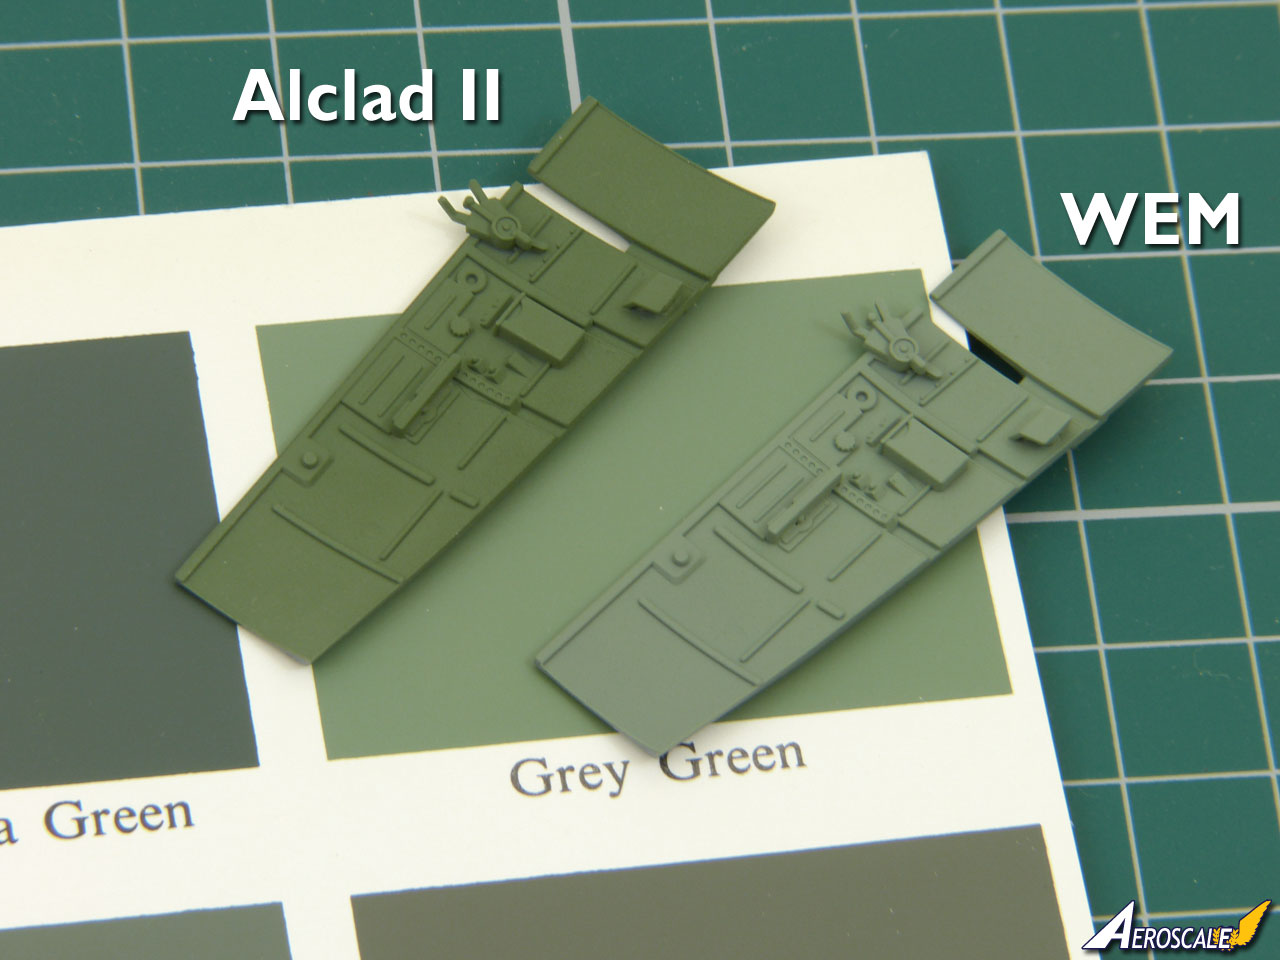
Going by Rowan's color-comparisons, my personal choice for the Cockpit would be to use the WEM "Gray-Green" as my "base-color". Just a personal preference, that's all...
Now this has always been "a bone of contention" between myself and my EX-COMPATRIOTS over on "ARMORAMA":
I really, REALLY dislike overall "washes"; I only use "pin-washes", such as when I particularly want to emphasize out-sized panels or doors, or picking out details on Engines and such- I find overall-washes to be messy and they are all too quick to ruin good work on flatter surfaces. I much prefer to paint my "base color", and after a sufficient drying-time, I "shadow" with DRY Artists' Pastel powders, applied with a variety of different sized red sable brushes. Now of course, red sables are expensive. But then, as actor Liam Neeson said in "Schindler's List" while playing the part of "Oskar Schindler":
"Nice things cost money..."
After "shading", I then apply a sprayed-on clear-coat as a fixative. I especially like TESTORS 1960 Lusterless Flat Clear in the spray-can for this type of work. This is a clear lacquer, so make sure there is plenty of ventilation in your work-area and WEAR a respirator with the appropriate filters! Now, the great thing about applying this fixative is that the fixative will actually BLEND the "shaded" areas of the previous work with the base-coat, making the two of them appear smoother and more shadow-like. A light misting is all it takes. It's a really nice visual-effect, which I came upon more by accident than by calculation! Just dumb luck, I guess!!!
Once this has dried, which really doesn't take long at all, I will "highlight" with a very subtle dry-brushing of a lighter color.
In the specific cases of British Cockpits, I've always used TESTORS Model Master II Enamel 2062 RAF Interior Green as my base color. It's a nice, "generic" base color for British WWII Cockpits, I think. I will then "shade" with a darker pastel-powder mix, or straight black pastel powder in the darker recesses. Then, my "fixative-spray" is applied, after which I will "highlight" by very lightly dry-brushing with Model Master II 2049 RAF Sky "Type S", to which I have added a tiny touch of White pastel powder on the tip of my brush to the mix on my Artists' Palette in order to keep a "dead-flat-sheen". Once this has dried, which is almost immediately on account of the powder, ANOTHER Flat clear-coat is applied. Once this has dried, I will then pick out the various details which need to be painted in their various different colors; Controls, Electrical Boxes, Oxygen Regulators, Wiring, etc. Then, and only then, I will even more subtly apply the barest hint of "wear-and-tear" with a Silver or Aluminum (OK, "Aluminium"
) dry-brushing over points which will actually see "wear" on 1:1 scale aircraft. These same techniques can be applied to virtually anything else using the appropriate base and highlighting colors...
OK, I admit this seems to be very time consuming, and it really IS!
But the extra efforts and final results are really very rewarding when all is said and done. More than likely I'm crazy, but the best part about being crazy is LIKING IT!
Just "sharing" with you, fellas! Some of you may want to try this way of doing things, but I do have to admit that pre-and-post-shading are much quicker...
Once again, I have to express my sincere Thanks to Rowan for providing this info and his "take" on the various paint-colors and for his reference materials! THIS is what I call "going the extra mile"...
VR, Dennis