Early Aviation
Discuss World War I and the early years of aviation thru 1934.
Hosted by Jim Starkweather
A right Royal Fokker!
TreadHead
Colorado, United States
Joined: January 12, 2002
KitMaker: 5,000 posts
AeroScale: 370 posts
Joined: January 12, 2002
KitMaker: 5,000 posts
AeroScale: 370 posts
Posted: Friday, June 30, 2006 - 02:50 AM UTC
God, I love this thread!!
I mean it....it's like walkin' down the aisles of a candy store......
Tread.
Posted: Saturday, July 01, 2006 - 02:57 PM UTC
And still more to come, soon I hope. I've been finding little things that need doing before attatching the wheels and wings. I have finally drilled out the forward fuselage, for the aileron control wires and I have painted the darker wood colour on the prop but I think I have tried to be too cleaver but I'll leave that up to you all to decide, as I haven't got time to re-do it.
Mal
Mal
Posted: Sunday, July 02, 2006 - 01:31 AM UTC
Well I have been working on it for most of the day, but I don't seem to have got anywhere. I finally gave up, for the time being, when I managed to break on of the guns. It's fixable but I took it as a sign that I should leave well alone for the moment.
Jean-Luc, did you have any problems fitting the port side gun? The cartridge ejection shute seems to be in the way. I have trimmed it a little but I think I need to take more off. The ammo can is sitting correctly in the fuselage and the starboard gun and shute seem ok, though I have only test fitted them.
Mal
Posted: Sunday, July 02, 2006 - 02:19 AM UTC
Quoted Text
Jean-Luc, did you have any problems fitting the port side gun? The cartridge ejection shute seems to be in the way. I have trimmed it a little but I think I need to take more off.
Hi Mal!
Yes I remember having the same problem! Forgot to mention it, sorry! It was a tight fit and I had to cut and sand some plastic to get a satisfying result.
The final work can be quite frustrating on a WW1 model. It looks almost finished but you have to glue all the small parts, do the rigging etc... It's very confusing because you don't know where to start to get the model finished. I often make a list at the end of a build to have an overview. WW2 plane models are more friendly in that matter! :-)
Jean-Luc
JackFlash
Colorado, United States
Joined: January 25, 2004
KitMaker: 11,669 posts
AeroScale: 11,011 posts
Joined: January 25, 2004
KitMaker: 11,669 posts
AeroScale: 11,011 posts
Posted: Sunday, July 02, 2006 - 02:09 PM UTC
Quoted Text
Well I have been working on it for most of the day, but I don't seem to have got anywhere. I finally gave up, for the time being, when I managed to break on of the guns. It's fixable but I took it as a sign that I should leave well alone for the moment.
Jean-Luc, did you have any problems fitting the port side gun? The cartridge ejection chute seems to be in the way. I have trimmed it a little but I think I need to take more off. The ammo can is sitting correctly in the fuselage and the starboard gun and shute seem ok, though I have only test fitted them.
Mal
Hey Mal;
The Spandaus can be a bit perplexing but let me see if I can help. I find it best not to attach the empty belt chutes until the last step in the gun installation. Install the guns with the ammunition feed chutes first. Then when those are set - add the empty belt tubes. (Not cartridge.)
For everyones benefit, Empty shells were not collected on German aircraft. The shells were expelled from a port under the breech into a tray that emptied out over the sides of the fuselage. The canvas belts that held the cartridge casing were relived of their empty shells and the shells were collected in a bin located infront of the ammunition box. Refer to the open cockpit / fuselage halves that we have posted earlier in this thread.
Note the members of #3 AFC Sqdn inspecting the Spandaus from the crashed Fokker Dr.I 425/17. Note the fellows at left and what is between them under the Spandau breech. That curved tray that surved as the guide to cast off expelled / empty shells.
Quick quiz: Anyone know who flew Dr.I 425/17 when it was brought down?
JackFlash
Colorado, United States
Joined: January 25, 2004
KitMaker: 11,669 posts
AeroScale: 11,011 posts
Joined: January 25, 2004
KitMaker: 11,669 posts
AeroScale: 11,011 posts
Posted: Sunday, July 02, 2006 - 02:40 PM UTC
Here is another shot that includes the Spandaus again. Note the curved tray.
Images courtesy of Rosebud's aviation image site.
Posted: Sunday, July 02, 2006 - 05:51 PM UTC
Quoted Text
Quick quiz: Anyone know who flew Dr.I 425/17 when it was brought down?
The Red Baron
Lucky13
Scotland, United Kingdom
Joined: June 01, 2006
KitMaker: 1,707 posts
AeroScale: 1,119 posts
Joined: June 01, 2006
KitMaker: 1,707 posts
AeroScale: 1,119 posts
Posted: Sunday, July 02, 2006 - 09:07 PM UTC
Quoted Text
The Red Baron
Shoot! You beat me to it.....
:-)
Posted: Sunday, July 02, 2006 - 10:01 PM UTC
Hi Stephen
What's the significance of the different muzzles on the guns?
All the best
Rowan
What's the significance of the different muzzles on the guns?
All the best
Rowan
Posted: Monday, July 03, 2006 - 12:33 AM UTC
Thanks for those pics and the explanation about links and empty cartridge cases, all make perfect sense now
I knew I should have re-checked this thread first as the position of the link collection chute is show in this pic, posted earlier by Stephen and actually show correctly in the Instructions.
It appears to enter the fuselage outside of where both Jean-Luc and I have attempted to position them DOH! Anyway it's done now and although very frustrating it looks OK. If I had checked the instructions I wouldn't have cocked it up, you live and learn
Jean-Luc, I notice that you fixed the wheel struts before the cabane(?) struts (fuselage to wing). When I test fitted the wheel struts it appeared that the forward ones butted up to the forward cabane(?) strut. If this is the case shouldn't the forward cabane(?) strut, and therefore the wing, be positioned first? I would prefere to fix the undercarriage first and I can see that it would be possible to do by fixing the rear wheeel struts first, then aligning the forward ones so that they are parallel and alighned correctley. Did you have any problems doing the wheel struts first?
I have got the starboard gun repaired and both are now positioned (the Starboard one was no problem at all I have also added the tail skid so I'm now ready to add wheels and wings. I must admit to feeling slightly apprehensive about adding the wing, mainly because, as Jean-Luc points out, it needs to be accurately positioned, and I have no means of, accurately, checking alignment. I will see if I can borrow a set square from work tomorrow. After all my procrastinating I bet it goes on easy peesy
Mal
I knew I should have re-checked this thread first as the position of the link collection chute is show in this pic, posted earlier by Stephen and actually show correctly in the Instructions.
It appears to enter the fuselage outside of where both Jean-Luc and I have attempted to position them DOH! Anyway it's done now and although very frustrating it looks OK. If I had checked the instructions I wouldn't have cocked it up, you live and learn
Jean-Luc, I notice that you fixed the wheel struts before the cabane(?) struts (fuselage to wing). When I test fitted the wheel struts it appeared that the forward ones butted up to the forward cabane(?) strut. If this is the case shouldn't the forward cabane(?) strut, and therefore the wing, be positioned first? I would prefere to fix the undercarriage first and I can see that it would be possible to do by fixing the rear wheeel struts first, then aligning the forward ones so that they are parallel and alighned correctley. Did you have any problems doing the wheel struts first?
I have got the starboard gun repaired and both are now positioned (the Starboard one was no problem at all I have also added the tail skid so I'm now ready to add wheels and wings. I must admit to feeling slightly apprehensive about adding the wing, mainly because, as Jean-Luc points out, it needs to be accurately positioned, and I have no means of, accurately, checking alignment. I will see if I can borrow a set square from work tomorrow. After all my procrastinating I bet it goes on easy peesy
Mal
Posted: Monday, July 03, 2006 - 01:34 AM UTC
Quoted Text
Jean-Luc, I notice that you fixed the wheel struts before the cabane(?) struts (fuselage to wing).
Hi Mal!
Yes, I found it easier to place the wheel assembly before the upper wing. I first glued the four wheel struts on the axle wing. Then I checked with the fuselage without gluing it and leaved it to dry. I found the undercarriage to fuselage fit very good. There is a small "step" where the wheel strut meets the fuselage. Above this step, the cabane strut will be positionned later. I think there is a detail "drawing" in the instructions for that.
Jean-Luc
JackFlash
Colorado, United States
Joined: January 25, 2004
KitMaker: 11,669 posts
AeroScale: 11,011 posts
Joined: January 25, 2004
KitMaker: 11,669 posts
AeroScale: 11,011 posts
Posted: Monday, July 03, 2006 - 02:45 AM UTC
The Red Baron is correct. But then again if there is an icon to WWI aviation most of the time a red triplane does spring to mind. Wheteher it is intact or crashed.
Alright Mal! the anticipation is thick! I'll be downstairs tonight working on my Camels.
JackFlash
Colorado, United States
Joined: January 25, 2004
KitMaker: 11,669 posts
AeroScale: 11,011 posts
Joined: January 25, 2004
KitMaker: 11,669 posts
AeroScale: 11,011 posts
Posted: Monday, July 03, 2006 - 07:35 AM UTC
Quoted Text
Hi Stephen What's the significance of the different muzzles on the guns?
I am of the opinion that someone had removed one of the flash suppressors as a trophy.
JackFlash
Colorado, United States
Joined: January 25, 2004
KitMaker: 11,669 posts
AeroScale: 11,011 posts
Joined: January 25, 2004
KitMaker: 11,669 posts
AeroScale: 11,011 posts
Posted: Monday, July 03, 2006 - 11:57 PM UTC
Quoted Text
Stephen, I forgot to send you the spare decals! I will do that as soon as possible. Sorry I just forgot about that and seeing Mal's Fokker made me remember again! Jean-Luc
Thanks Jean-Luc they arrived yesterday!
Posted: Tuesday, July 04, 2006 - 03:04 AM UTC
Ok the wheel struts and wheel wing are on I had a re-think after Jean-Lucs post as I did prefer the idea of attaching the wheels first. My problem was gluing the struts to the wheel wing first. As test fitted they were not quite in the correct position, I needed a glue that was sufficiently slow setting to allow me alter the position, before gluing the struts into position on the forward fuselage. Tube cement might have done it, but it's a bit messy and I don't have any, thick CA will work but still doesn't give long enough working time and once set there would be no going back. I used PVA glue, which will setsufficiantly strong and it rmaind workable long enough for me to position the struts, phew I haven't yet attached the wings, as I want to make sure that the wheel struts are well set, I have no excuses now so tomorrow should see the top wing on. Whether I will finish or not remains to be seen but I don't want to rush, now, and undo what has been done. I will take pics in the morning and try and post tomorrow evening
Mal
Mal
Posted: Wednesday, July 05, 2006 - 01:00 AM UTC
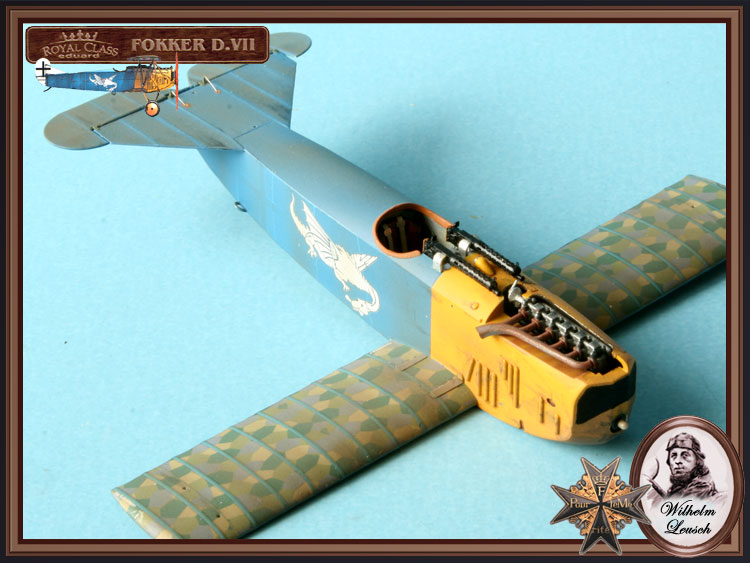
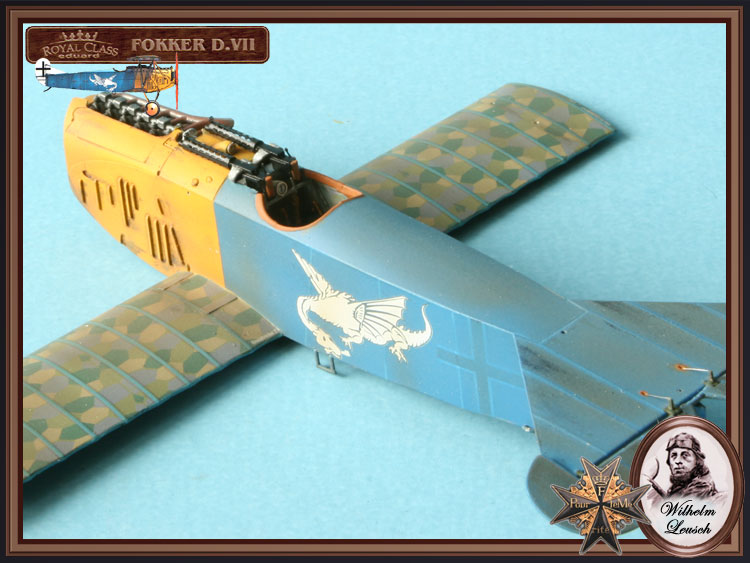
Well here are a few pics of the guns and the wheel wing and struts attached.
I attached the "N" struts this evening but not the wing, I want to give the CA used on the "N" struts plenty of time to harden and I need to drybrush the guns and the radiator front.
Mal
I attached the "N" struts this evening but not the wing, I want to give the CA used on the "N" struts plenty of time to harden and I need to drybrush the guns and the radiator front.
Mal
Lucky13
Scotland, United Kingdom
Joined: June 01, 2006
KitMaker: 1,707 posts
AeroScale: 1,119 posts
Joined: June 01, 2006
KitMaker: 1,707 posts
AeroScale: 1,119 posts
Posted: Wednesday, July 05, 2006 - 01:20 AM UTC
Looking fantastic Mal!!
JackFlash
Colorado, United States
Joined: January 25, 2004
KitMaker: 11,669 posts
AeroScale: 11,011 posts
Joined: January 25, 2004
KitMaker: 11,669 posts
AeroScale: 11,011 posts
Posted: Wednesday, July 05, 2006 - 02:36 AM UTC
Very nice detail Mal!
Repainted
Östergötland, Sweden
Joined: April 04, 2006
KitMaker: 1,058 posts
AeroScale: 1,004 posts
Joined: April 04, 2006
KitMaker: 1,058 posts
AeroScale: 1,004 posts
Posted: Wednesday, July 05, 2006 - 07:45 PM UTC
Looking real good. Keep on
Lars
silent for the moment
Lars
silent for the moment
Posted: Wednesday, July 05, 2006 - 10:55 PM UTC
This morning,before going to work, I test fitted the top wing and it appears to be in perfect alignment How pleased am I. I've had the antisipation, all day, of adding the wing and finishing but, as I finish early tomorrow I am going to wait until then. I just feel that I prefer doing it then rather than work into the night. Whatever happens I should get this finished and post pics on Saturday.
A question Stephen, there is a rigging wire, on the replica, from the top of the fin post to the tailplane, it is not shown on the Eduard instructions. Did this exist on the real aircraft?
Mal
A question Stephen, there is a rigging wire, on the replica, from the top of the fin post to the tailplane, it is not shown on the Eduard instructions. Did this exist on the real aircraft?
Mal
JackFlash
Colorado, United States
Joined: January 25, 2004
KitMaker: 11,669 posts
AeroScale: 11,011 posts
Joined: January 25, 2004
KitMaker: 11,669 posts
AeroScale: 11,011 posts
Posted: Thursday, July 06, 2006 - 04:13 AM UTC
Hey Mal! Yes there were cable bracings. The image at left is an OAW in Allied hands and the cable has been replaced by a small strut. Probably by the allies.
Posted: Friday, July 07, 2006 - 03:39 PM UTC
Well I have been having a really hard time, nothing has been going right and I have spent ages gust getting all the control cables fitted. I started out with my prefered medium for this type of thing, invisible mending thread, but the CA just didn't seem to want to glue it. I ended up using 2thou stainless wire, but I wasn't happy with it. It was far to shiny and stiff and didn't look right. I ended up stretching some silver sprue which worked much better. I have spent this morning replacing the Stainless wire with stretched sprue. But my problems continue with knocking off one of the upper wing aileron control horns (found it after an hours search!!) and burning through the crosse wires on the gear struts, when trying to heat them to tighten them (they didn't need it either).
My problem now is that I have installed Invisible thread into the top wing, for the aileron control wires, I just hope that I will be able to get them taught when I fix the top wing
Thanks for that Stephen, I was just checking here before adding the top wing. I have some relatives visiting in...............well about now actually, so wish me luck for after they have gone, as I will be adding the bracing wire on the tail and the top wing
Mal
My problem now is that I have installed Invisible thread into the top wing, for the aileron control wires, I just hope that I will be able to get them taught when I fix the top wing
Quoted Text
Hey Mal! Yes there were cable bracings.
Thanks for that Stephen, I was just checking here before adding the top wing. I have some relatives visiting in...............well about now actually, so wish me luck for after they have gone, as I will be adding the bracing wire on the tail and the top wing
Mal
Lucky13
Scotland, United Kingdom
Joined: June 01, 2006
KitMaker: 1,707 posts
AeroScale: 1,119 posts
Joined: June 01, 2006
KitMaker: 1,707 posts
AeroScale: 1,119 posts
Posted: Friday, July 07, 2006 - 07:40 PM UTC
I just missed the postman with my Royal Fokkers!!! Now I need to wait until Monday to get my hands on them.....
In case that you hear something, that's just me lying down on the floor kicking and screaming......
Posted: Saturday, July 08, 2006 - 11:06 PM UTC
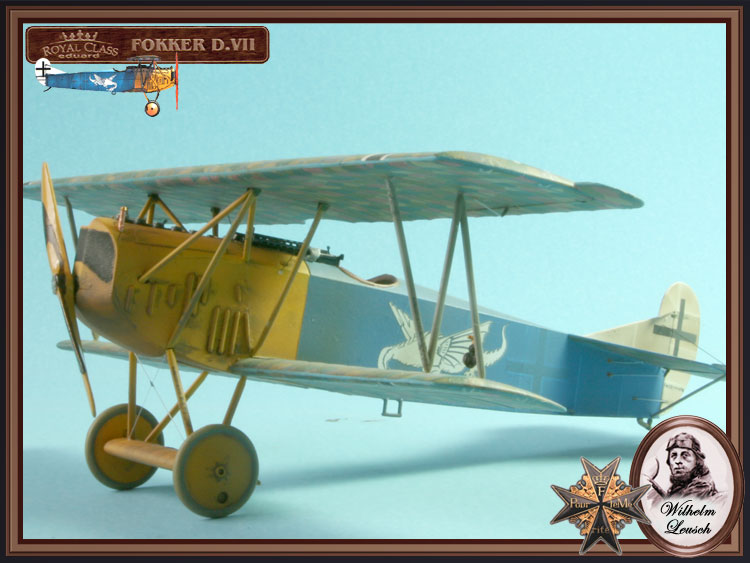
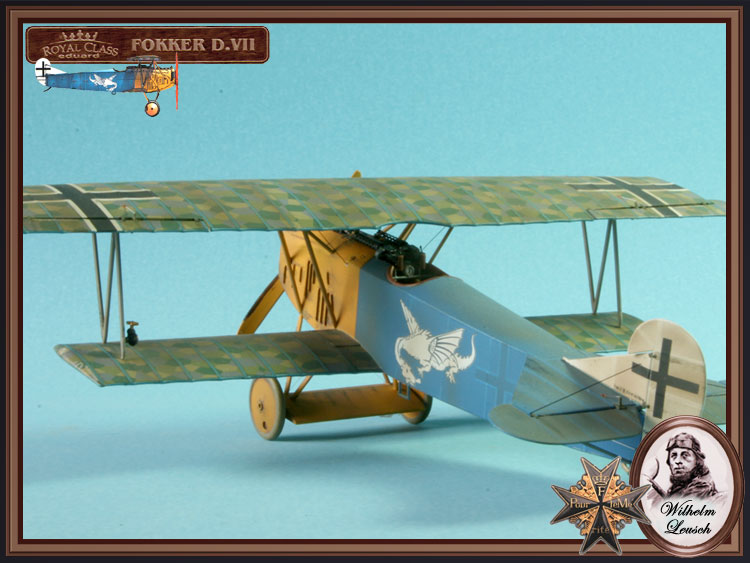
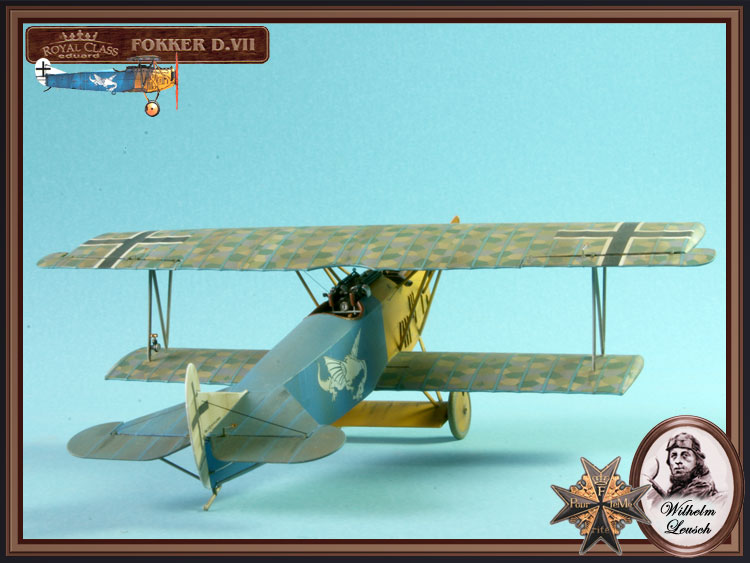
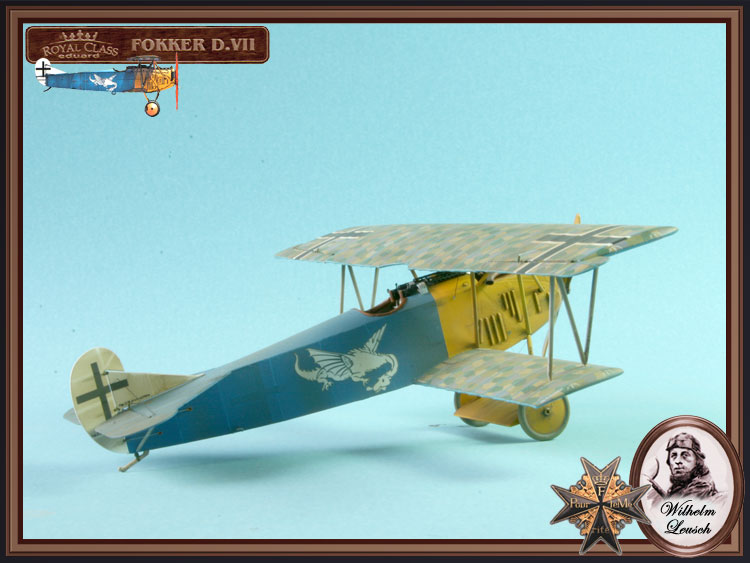
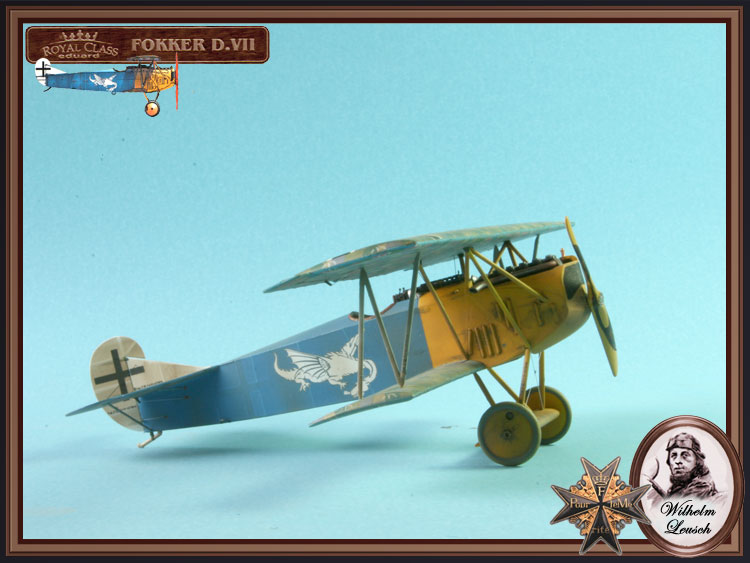
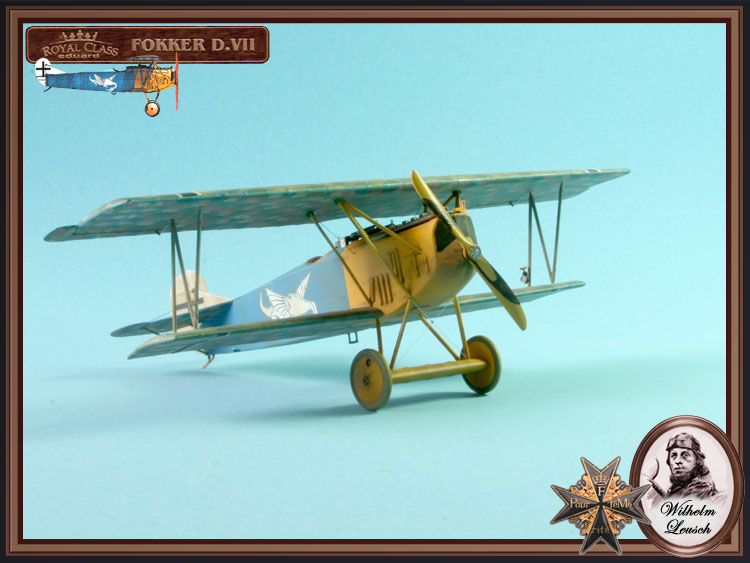
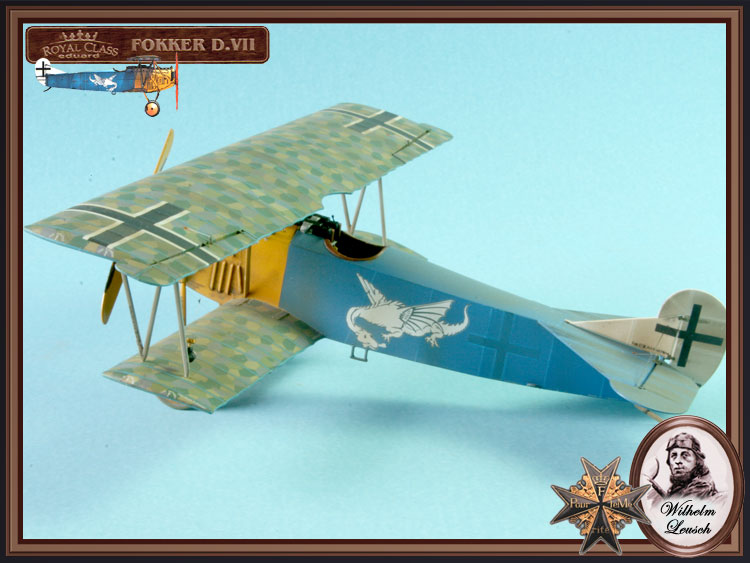
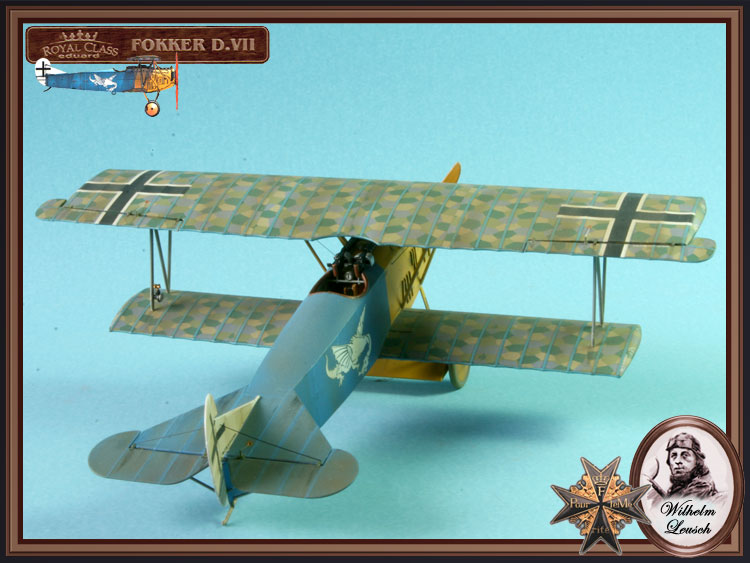
Well I finally got it finished, although it has taken me longer than I would have liked this is about the quickest that I have built anything, so I, for one, am quite pleased. Although it is not perfect, by a long way, I’m happy with the way it has turned out, as it was always going to be a case of “flattening the learning curve” on my first WW I subject. My biggest problem has really been with the control cables. As I said previously my preferred medium, invisible mending thread just wouldn’t stick with CA, so I tried with 2thou stainless wire. CA glued this with no problem but it didn’t look right. The solution was stretched sprue, but this caused a couple of problems, as you will see from my last post, but my problems didn’t end there. I used 2 lengths, on each forward fuselage side; to represent the aileron control wires. I was not entirely happy with how they looked, the 2 together just looked like 1 thicker cable, from most angles. I decided that they were OK however and continued with the wing struts. Invisible thread may have been better for the aileron control wires and these had been fitted into the top wing, before it was glued onto the “N” struts. When I tried to feed them into the holes, that I had previously drill into the forward fuselage, they pulled out of the top wing (I had secured them with CA!). With the top wing already secured I decided to use stretch sprue.
I test fitted the “V” cabane struts and found that the wing needed to move about .25mm one way. When I did this the aileron control wires were pulled, once again, out of there position (this time they had been secured with PVA), lesson learnt, position wing before attaching both ends of control wires.
I had few issues with the struts apart from the fact that I found it a little awkward and next time I shall have the model set at eye level. The one thing that I am really unhappy about is my painting of the wood effect on the propeller. I have tried to be far too ambitious and the colours are all wrong. All is not lost though, as I will strip off the paint and have another go. I have called it finished as is; otherwise it would be another week before I finish. I also think that the weathering, on the tail surfaces is too heavy. This is due to the fact that I masked off the ribs, after the initial coat of blue, so when the weathering spray was applied these ribs were just too light. I, therefore, went back and sprayed more dark earth on the entire surface, which was too much for areas already done. It is probable, however, that the tail surfaces did get muckier, they are close to the ground and they get the “last” of the dirty air, which is how I see it.
Last pics then:
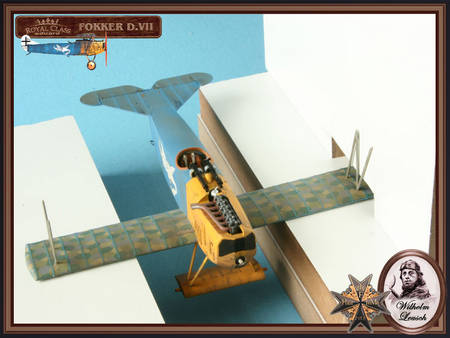
Not having any Leggo I used these off cuts of MDF to check the “N” strut alignment
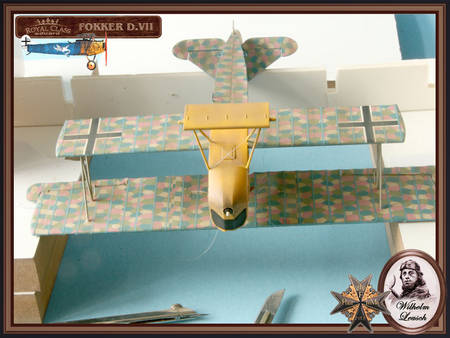
Top wing fitted, you can see the invisible thread “aileron control wires” before I ragged them out
Finished pics:
Mal
Posted: Saturday, July 08, 2006 - 11:29 PM UTC
Well done Mal!
Looks fabulous.
Its been great fun watching this thread and its great to see your Fokker finally finished,(try saying that after a few beers!)
I hope the guys from Eduard are as happy about how this build has gone as all of us.
Can we have some Spitfires now?
:-) :-)
Congratulations mate on a job well done.
Nige