

Lance, yes I tried to say in an earlier post earlier to fit the coaming before wood graining but it came too late I think. Still you have coped very well considering.
Roden's decals are known to be rather fracturous, I heard the later ones were better, some overspray them with acrilic laquer before use I think. I would suggest using quite hot water to loosen them from their backing and tamp them down with a kitchen towel soaked in hot water.
Keith
Early Aviation
Discuss World War I and the early years of aviation thru 1934.
Discuss World War I and the early years of aviation thru 1934.
Hosted by Jim Starkweather
KoTS GB 2011 Albatros D.III lcarroll

Kornbeef

Joined: November 06, 2005
KitMaker: 1,667 posts
AeroScale: 1,551 posts

Posted: Friday, June 03, 2011 - 07:45 PM UTC
mtnflyer

Joined: March 08, 2009
KitMaker: 394 posts
AeroScale: 360 posts
Posted: Saturday, June 04, 2011 - 02:24 AM UTC
Hi there Lance. Sure looks like your having some modeling trials bucking-up your admirable efforts, although your making excellent comebacks. Well done, indeed. I do like your cockpit coaming; far better than the molded one. And thanks for the heads up with Roden decals.
Removed by original poster on 06/04/11 - 14:13:57 (GMT).

lcarroll
Joined: July 26, 2010
KitMaker: 1,032 posts
AeroScale: 1,025 posts

Posted: Saturday, June 04, 2011 - 03:35 AM UTC
Quoted Text
Lance, yes I tried to say in an earlier post earlier to fit the coaming before wood graining but it came too late I think. Still you have coped very well considering.
Roden's decals are known to be rather fracturous, I heard the later ones were better, some overspray them with acrilic laquer before use I think. I would suggest using quite hot water to loosen them from their backing and tamp them down with a kitchen towel soaked in hot water.
Keith
Keith,
Yes, got your warning on the coaming and panel fit too late however I think I can get through this with reasonable results. As for the decals, I'll be much relieved once the second "winged sword" is safely in place and sealed over, as the rest are generic crosses etc and the spares box will provide nicely.
I did increase the water temp after the first setback with the wing cross; it helps however my thoughts after a night's rest are that these ones are old and will require some very careful handling for sure. Minimal re-positioning will be the key.
My overall comment at this stage is that this kit requires a reasonably high skill level to produce good results, it's a little rough in places. I chose to start back into the game with it mostly to gain back my former skills and get "back into the saddle" as the cowboys say. I didn't want to risk a WNW kit on this start-up phase but in retrospect wish I had, might have gone a little more smoothly for sure. Ah well, it's only a model and as I said earlier, I'm having fun. I hope to get the decals completed today and will be sure to provide a further update in the next couple of days.
BTW, good to hear from you, I was getting concerned as the Kornbeef Wire has been pretty quiet of late!
Cheers,
Lance
lcarroll
Joined: July 26, 2010
KitMaker: 1,032 posts
AeroScale: 1,025 posts
Posted: Saturday, June 04, 2011 - 03:54 AM UTC
Quoted Text
Hi there Lance. Sure looks like your having some modeling trials bucking-up your admirable efforts, although your making excellent comebacks. Well done, indeed. I do like your cockpit coaming; far better than the molded one. And thanks for the heads up with Roden decals.
Guy,
Thanks, some of the comebacks/recoveries are better then the others but overall, she's acceptable at this stage. Have you buttoned up your coaming/engine panels yet? How was the fit? (I'm wondering if my kit was really "off ' or if many of the problems may have been self-induced when I built up the framing assembly for the front end and engine mounts and/or cut it up into separate panels.)
I hope your decals are better then mine; I'm going to increase the water temp a lot per Kornbeef's suggestion and will let you know if the results are better.
Last, an overall thought regarding results so far. I need to re-think the CA glue thing (how to apply and maintain control over excess) and perhaps thin down my enamels even more or switch to acrylics exclusively. I'm very envious of the "clean" appearance of most of the subjects on the site and hope to get at least close to their standards.
Will update soon on the decals Chapter 2.
Cheers,
Lance
Kornbeef
Joined: November 06, 2005
KitMaker: 1,667 posts
AeroScale: 1,551 posts
Posted: Saturday, June 04, 2011 - 07:40 AM UTC
yes the WNW decals fit nicely BTW if you choose a later option for the DV or DVa then you have plenty spare Iron crosses to play with.
lcarroll
Joined: July 26, 2010
KitMaker: 1,032 posts
AeroScale: 1,025 posts
Posted: Saturday, June 04, 2011 - 08:41 AM UTC
Quoted Text
yes the WNW decals fit nicely BTW if you choose a later option for the DV or DVa then you have plenty spare Iron crosses to play with.
Not sure where I'll go on color schemes; I hope to eventually have a DII,III, V, and Va done and capture all the variations from wing Cam, lozenge, and woodgrain full/partial and overpainted fus. within the 4. As you say the WNW kits have some spares and I have the Pfalz as well. I bought the Pheon Set #1 and am leaning towards a DVa in the Jasta 18 or 59 scheme per your comment which will free up even more old style crosses. With the imminent WNW releases and what I've stashed it's approaching a " too much to do, so little time" situation. Oh well, could be much worse.
Cheers,
Lance
mtnflyer
Joined: March 08, 2009
KitMaker: 394 posts
AeroScale: 360 posts
Posted: Saturday, June 04, 2011 - 09:30 AM UTC
I need to re-think the CA glue thing (how to apply and maintain control over excess)[/quote]
Lance. Did you ever see one of these? The best darn Precision Glue Applicator on the market, courtesy of the wife's sewing box :
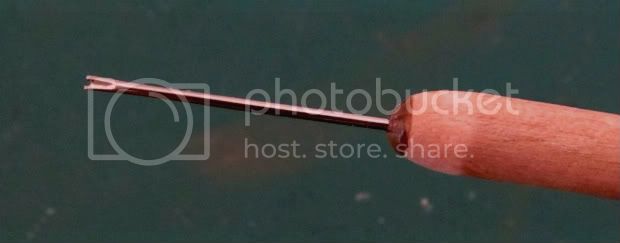
Just a trimmed needle epoxyed into a 1/4" dowel. Squeeze a drop of glue onto the head; don't stick it in the glue. Store bought applicators don't come close. I know, I've bought them before.
Lance. Did you ever see one of these? The best darn Precision Glue Applicator on the market, courtesy of the wife's sewing box :
Just a trimmed needle epoxyed into a 1/4" dowel. Squeeze a drop of glue onto the head; don't stick it in the glue. Store bought applicators don't come close. I know, I've bought them before.
lcarroll
Joined: July 26, 2010
KitMaker: 1,032 posts
AeroScale: 1,025 posts
Posted: Saturday, June 04, 2011 - 03:06 PM UTC
Quoted Text
I need to re-think the CA glue thing (how to apply and maintain control over excess)
Lance. Did you ever see one of these? The best darn Precision Glue Applicator on the market, courtesy of the wife's sewing box :
Just a trimmed needle epoxyed into a 1/4" dowel. Squeeze a drop of glue onto the head; don't stick it in the glue. Store bought applicators don't come close. I know, I've bought them before. [/quote]
Guy,
Now, that's news! I'll cobble 1 or 2 together first thing tomorrow morning. Makes good sense and the logic is clear. Thanks for the help, I owe you one for sure!
Cheers,
Lance
lcarroll
Joined: July 26, 2010
KitMaker: 1,032 posts
AeroScale: 1,025 posts
Posted: Sunday, June 05, 2011 - 03:49 AM UTC
A little more progress late yesterday before I settled in front of the TV for the Stanley Cup Game.
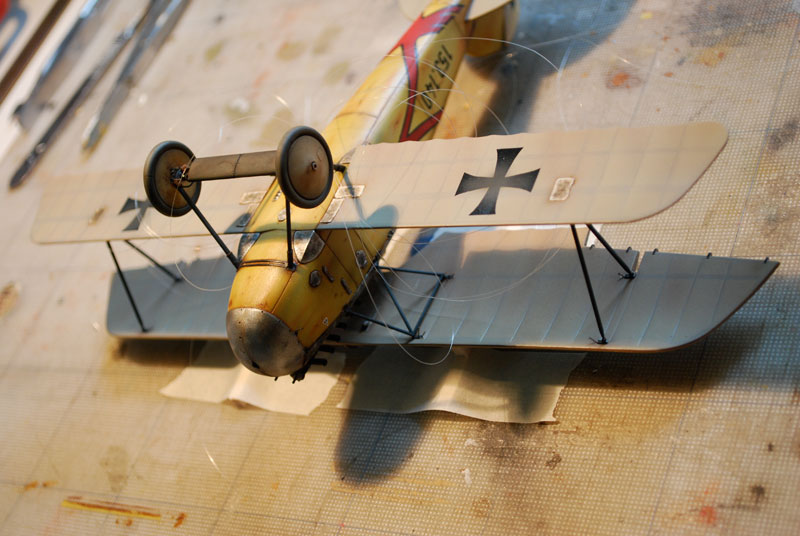
Thankfully the rest of the decals are on however not without lots of scrambling and a few short unprintable words. On the bright side the breaks, tears, and imperfections should be easily repaired with a little careful touch up painting and once oversprayed, secure. The lower wing crosses were discovered in my spares box; actually upper wing crosses from my Eduard 1/48 Albatros DVa of 10 or so years back. These behaved wonderfully despite their age and having been stuffed in a cardboard box for so long, which says a lot for Eduard's quality.
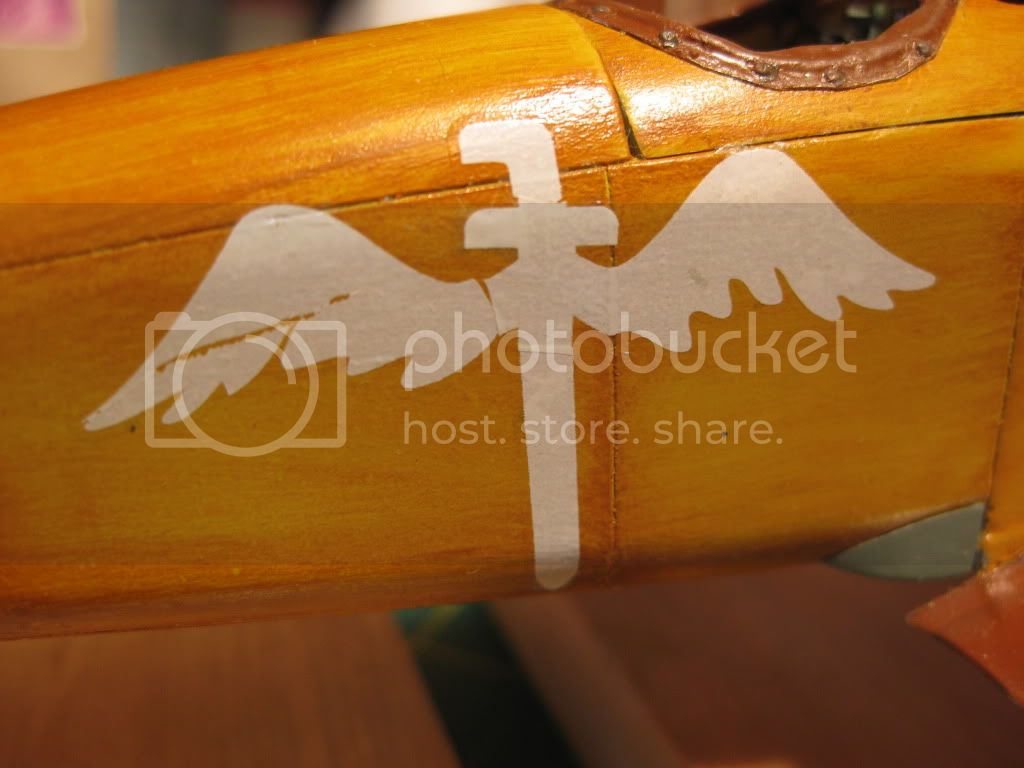
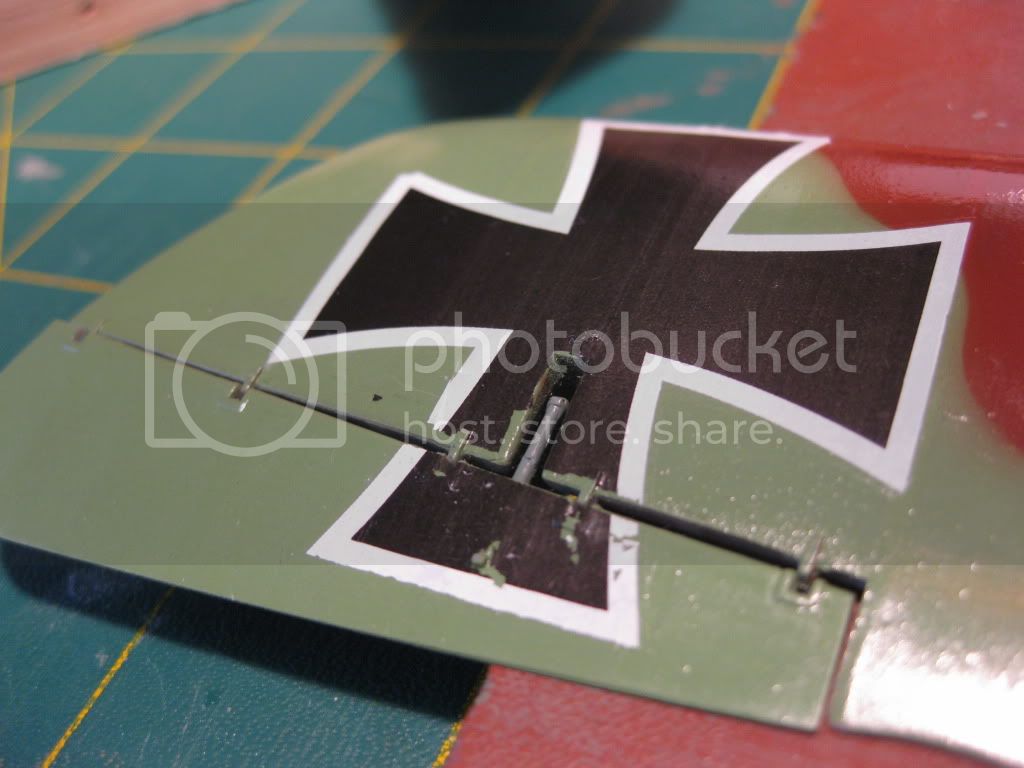
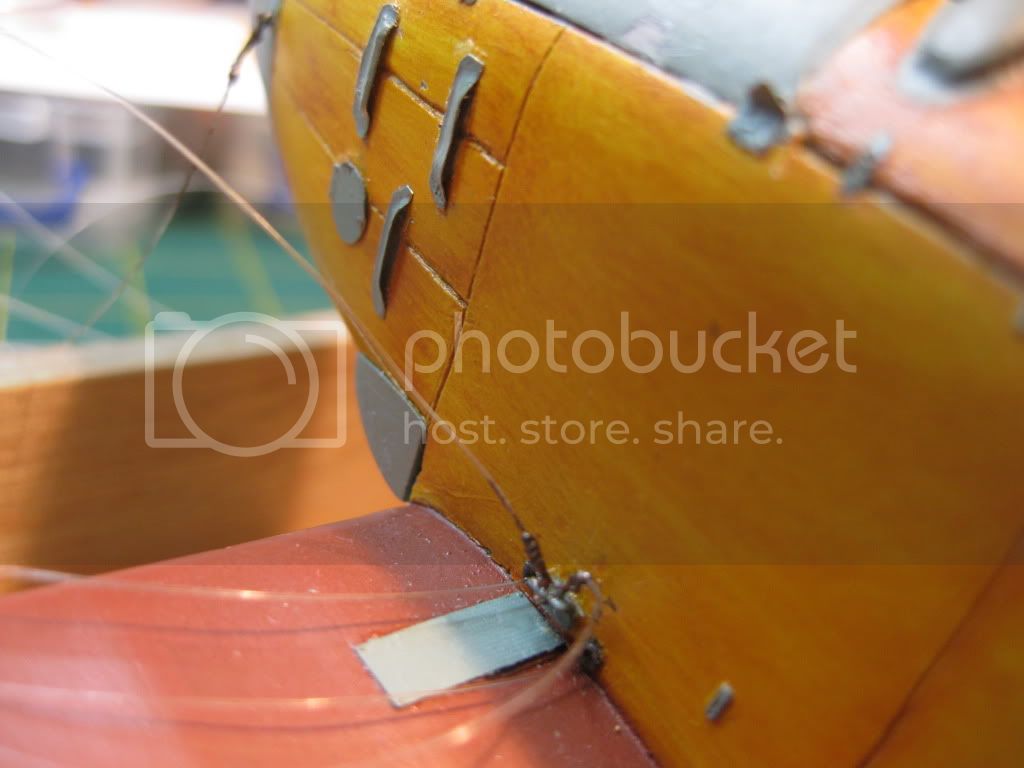
Three quick photos below; the good (Lower Wing), the bad (Right side fuselage) and the ugly (upper wing/aileron crosses) All as I say easily repaired. I'll be hopefully touching them up before launching off into the work arena shortly for two days; will update with the results of the repairs later in the week.
The Good............ Lower Wing Cross compliments of Eduard
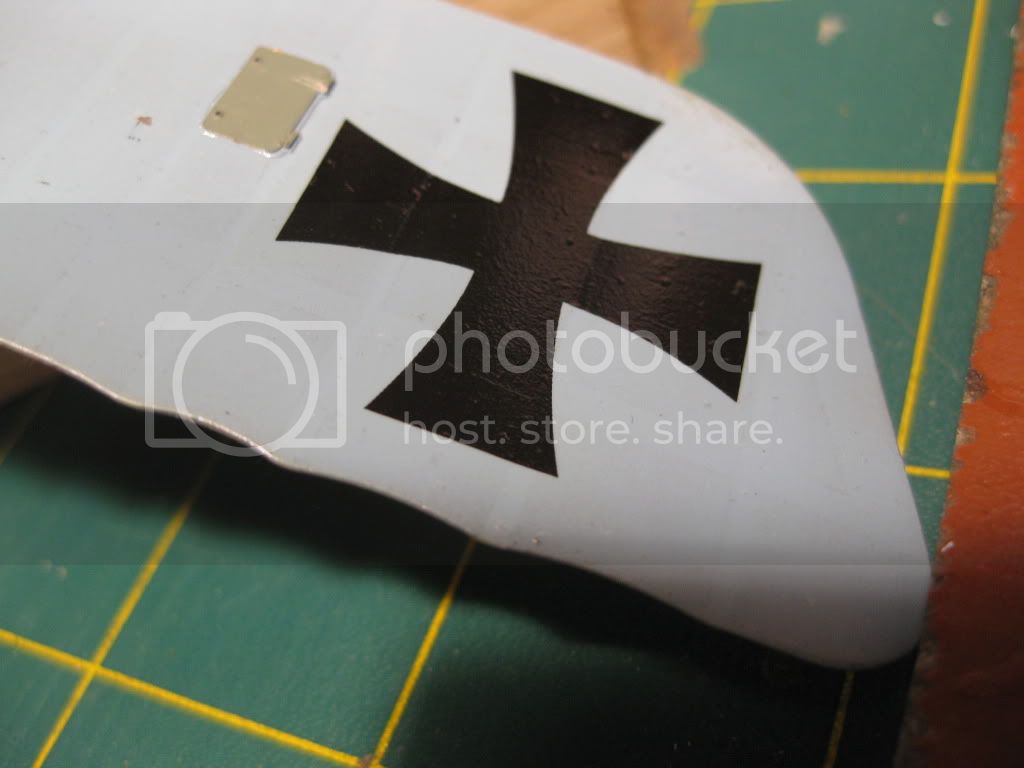
The Bad........Right Fus. emblem which shattered into four pieces as can be seen (Cross was OK)
The Ugly.............Upper wing crosses and ailerons (both sides bad)
And now, having raided SWMBO's Sewing Box, I want to cobble together a few of Guy's (MtnFlyer) neat little glue applicators. This sites ready availability of suggestions and solutions from fellow members continues to impress me to no end; sincere Thanks to you all!
Cheers,
Lance
Thankfully the rest of the decals are on however not without lots of scrambling and a few short unprintable words. On the bright side the breaks, tears, and imperfections should be easily repaired with a little careful touch up painting and once oversprayed, secure. The lower wing crosses were discovered in my spares box; actually upper wing crosses from my Eduard 1/48 Albatros DVa of 10 or so years back. These behaved wonderfully despite their age and having been stuffed in a cardboard box for so long, which says a lot for Eduard's quality.
Three quick photos below; the good (Lower Wing), the bad (Right side fuselage) and the ugly (upper wing/aileron crosses) All as I say easily repaired. I'll be hopefully touching them up before launching off into the work arena shortly for two days; will update with the results of the repairs later in the week.
The Good............ Lower Wing Cross compliments of Eduard
The Bad........Right Fus. emblem which shattered into four pieces as can be seen (Cross was OK)
The Ugly.............Upper wing crosses and ailerons (both sides bad)
And now, having raided SWMBO's Sewing Box, I want to cobble together a few of Guy's (MtnFlyer) neat little glue applicators. This sites ready availability of suggestions and solutions from fellow members continues to impress me to no end; sincere Thanks to you all!
Cheers,
Lance
Kornbeef
Joined: November 06, 2005
KitMaker: 1,667 posts
AeroScale: 1,551 posts
Posted: Sunday, June 05, 2011 - 04:39 AM UTC
Lance, if you check ref pics you'll see a lot of marings look handpainted and patchy so dont worry overly about touchups an getting things perfect. Soldier on my friend.
K
K

wing_nut

Joined: June 02, 2006
KitMaker: 1,212 posts
AeroScale: 468 posts
Posted: Sunday, June 05, 2011 - 12:36 PM UTC
Lance you seem to be taking those little modeling gremlins on in fine fashion. Those sewing needle tools are high up in the list of most used tools on my bench. One for glue and another for zip kicker. Once you make them you'll wonder how you got on without them.

warreni

Joined: August 14, 2007
KitMaker: 5,926 posts
AeroScale: 2,201 posts

Posted: Sunday, June 05, 2011 - 02:19 PM UTC
Keep at it Lance.
@ Guy, your wife has 1/4in dowel in her sewing box??
@ Guy, your wife has 1/4in dowel in her sewing box??
lcarroll
Joined: July 26, 2010
KitMaker: 1,032 posts
AeroScale: 1,025 posts
Posted: Monday, June 06, 2011 - 04:14 AM UTC
Keith,
Totally agree with your observations on "hand painted " markings; that's what is keeping me optimistic at this stage.
Marc,
Havn't tried them yet but produced 3 of the little devils. Genius! My Wifes sewing box didn't have any dowel either, BTW.
Warren,
Will keep at it for sure. It's amazing how bad things look at shutdown and, the next day, not so very bad at all.
Thanks for looking and for the feedback Guys. I'll be back at it tomorrow and updates to follow.
Cheers,
Lance
warreni
Joined: August 14, 2007
KitMaker: 5,926 posts
AeroScale: 2,201 posts
Posted: Monday, June 06, 2011 - 08:48 AM UTC
Now I am not normally one to criticise anyone's work but did Roden give you different Albatross Werke transfers for each side of the tail? The ones in the WNW Albatross are different and the one in your picture is the opposite to what they suggest... I wouldn't normally tell anyone that sort of picky stuff, but you seem to be putting so much effort into this one I thought I would let you know.
Cheers
Warren
Cheers
Warren
lcarroll
Joined: July 26, 2010
KitMaker: 1,032 posts
AeroScale: 1,025 posts
Posted: Tuesday, June 07, 2011 - 06:19 AM UTC
Quoted Text
Now I am not normally one to criticise anyone's work but did Roden give you different Albatross Werke transfers for each side of the tail? The ones in the WNW Albatross are different and the one in your picture is the opposite to what they suggest... I wouldn't normally tell anyone that sort of picky stuff, but you seem to be putting so much effort into this one I thought I would let you know.
Cheers
Warren
Good eye, Warren, it went by me completely! The Roden sheet has the Werke emblems identical as decal #11. On rushing into my WNW DV package I discovered that there are 2 opposite printed versions supplied (#s 43 and 44) such that, if you check the Profile of either side, the "bird" is flying forward ie. towards the nose. Same in the DVa box for decals #46 &47. Quick check of about a dozen references confirms that the Roden presentation is incorrect. This, if my fuzzy mind can get around it, means that my left side is presently incorrect as you noted, the right side is however correct.
AMS rears it's ugly head...........off with one or both and rob a WNW Set; the absence later can be worked around however the schemes for the WNW's are still to be determined thus workarounds are possible.
I'll be all over this ASAP. I could say that I'm building out of the box and ignore it all, but where's the fun in that?
Thanks, and "keep lookin", I appreciate it.
Cheers,
Lance
warreni
Joined: August 14, 2007
KitMaker: 5,926 posts
AeroScale: 2,201 posts
Posted: Tuesday, June 07, 2011 - 09:08 AM UTC
The only reason I knew about it Lance was that I am building the WNW D.V at the moment and remembered the two different decals.
Glad to be of assistance Sir!
Glad to be of assistance Sir!
lcarroll
Joined: July 26, 2010
KitMaker: 1,032 posts
AeroScale: 1,025 posts
Posted: Thursday, June 09, 2011 - 01:42 AM UTC
Update )of sorts)
Seems that, like Terri, "The Girl", my Internet Provider is having problems. I'm down to about 10% capability at present and technical help is promised "in the next few business days". Can't open any but the smallest of topics and posting of photos etc is impossible. Am at the rigging stage; will update when the techies fix this mess!
Cheers All,
Lance

thegirl
Joined: January 19, 2008
KitMaker: 6,743 posts
AeroScale: 6,151 posts
Posted: Friday, June 10, 2011 - 12:17 PM UTC
Turning out not to bad so far ! Looking forward to more progress !
lcarroll
Joined: July 26, 2010
KitMaker: 1,032 posts
AeroScale: 1,025 posts
Posted: Saturday, June 11, 2011 - 04:45 AM UTC
Thanks Terri. Things stalled out a bit at present; have some outside gardening chores assigned for today.
Did get almost half of the eyelet turnbuckle ends drilled and installed. When I finished the first batch I realised I was " launching and loosing" approx. 4 for every one installed and had bought certainly not enough from Bob's to make it
Stopped at that stage, did some experimenting, and am now turning out my own at a fast rate. Much happier with that approach however I need to figure out Warreni's EBay supplier for the brass tubing .......can,t seem to get "buy now" function on the link. I,ve tried your QTip method and my technique is producing a sub standard by far product at present!
Will update as soon as the supplier fixes this %$#%$%$$^%# Internet thing.
Takes me 20 minutes for a quick words only message as this.
Cheers,
Lance
lcarroll
Joined: July 26, 2010
KitMaker: 1,032 posts
AeroScale: 1,025 posts
Posted: Thursday, June 16, 2011 - 07:50 AM UTC
Time for an update; lots of progress but not nearly close to the finish line.
The first new step was one forward which was, in a way, two backwards. I was completely taken with the chipped paint effect and decided I just had to have some of it. Having got, as usual, some great advice and info on the "how to" I applied a base coat of CDL on portions of the wheel covers and flat aluminum on the (previously finished) lower wing fairings and engine cowlings. After a 48 hour drying period it was on with the hairspray followed by the finish color of Albatross grey-green. It worked reasonably well for a first attempt however I can see where more experience will make for better results in future projects. The wheel covers will be getting some pigment to tone down the effect closer to the completion point.
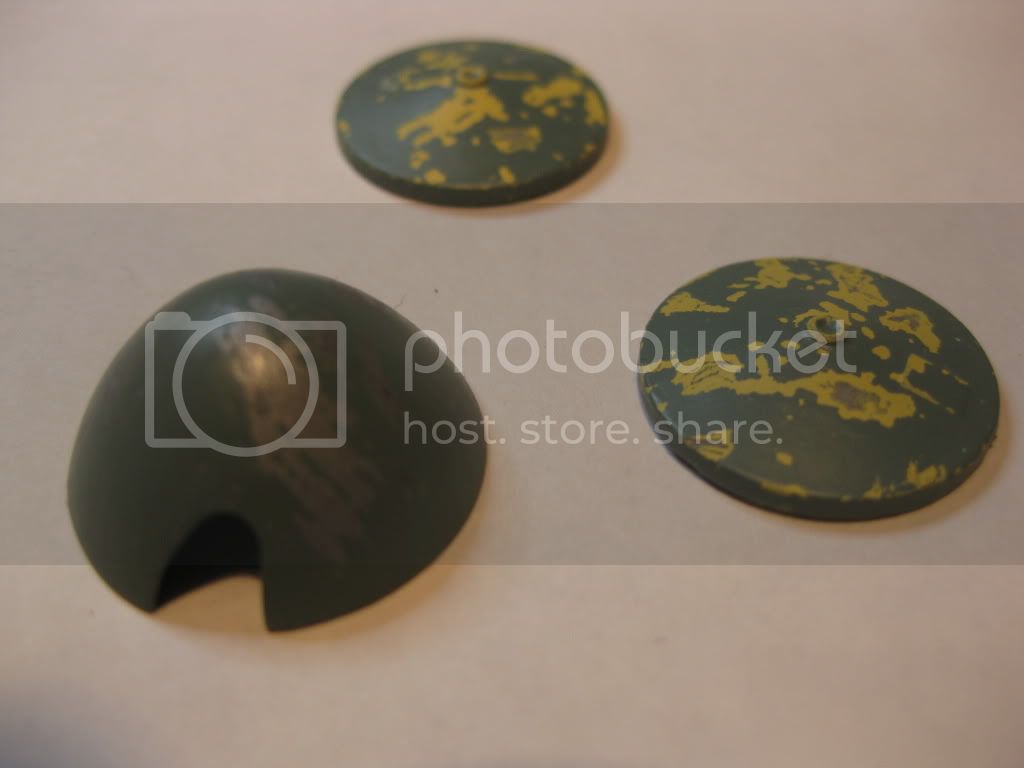
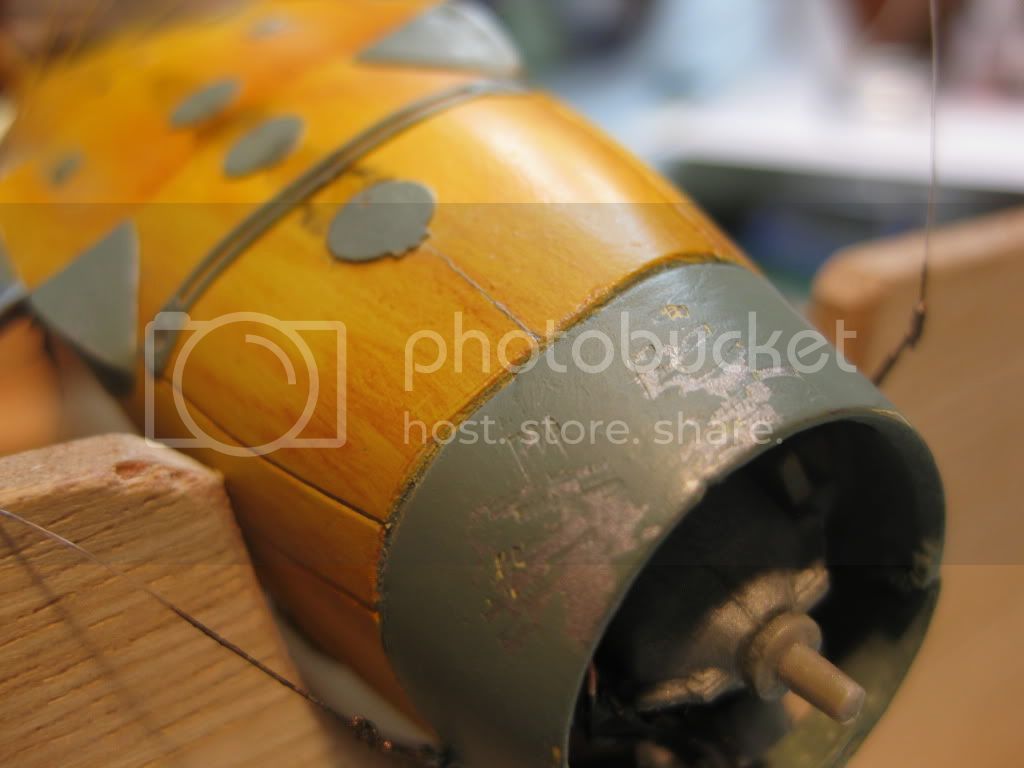
Following are before and after shots of the cowlings......
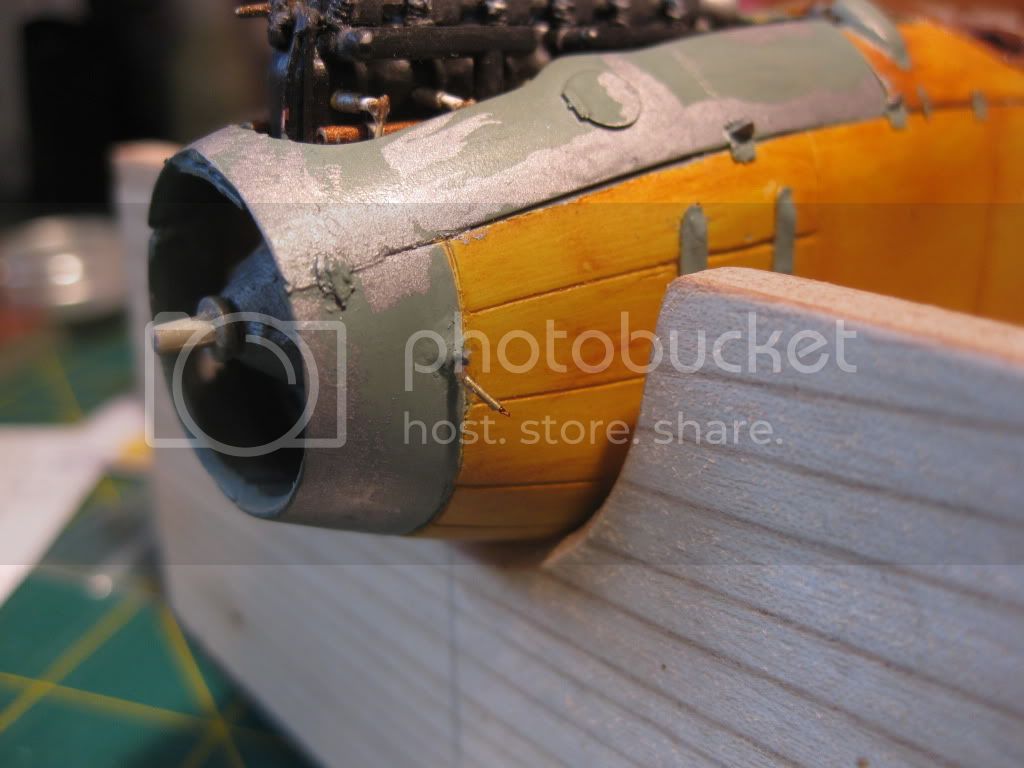
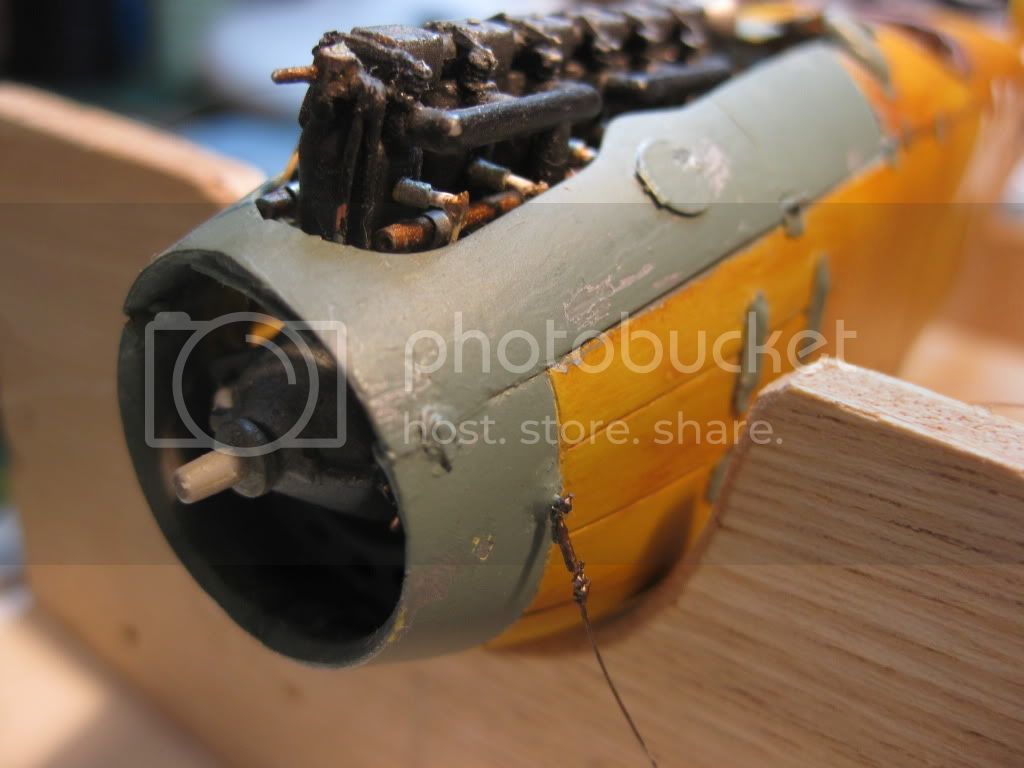
I also added just a bit of oil staining to the lower nose area; lots of touchup still required on the ring cowling chipping portion and that crack on the wooden portion, like the proverbial bad cat, keeps coming back! Just another note to self..............
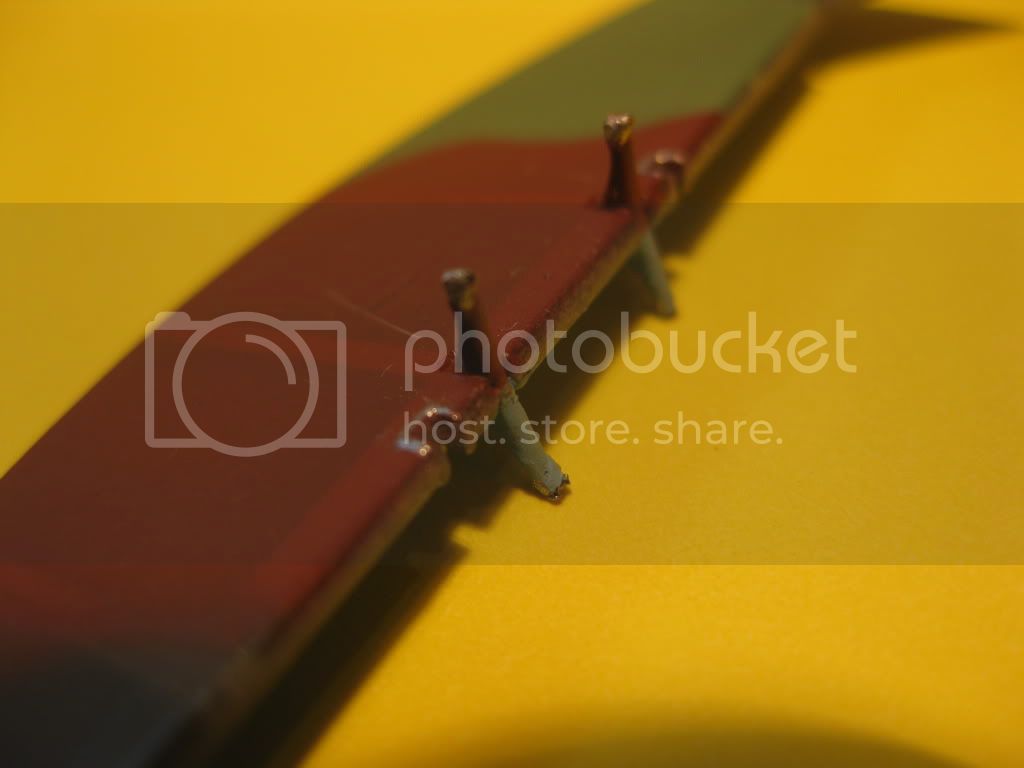
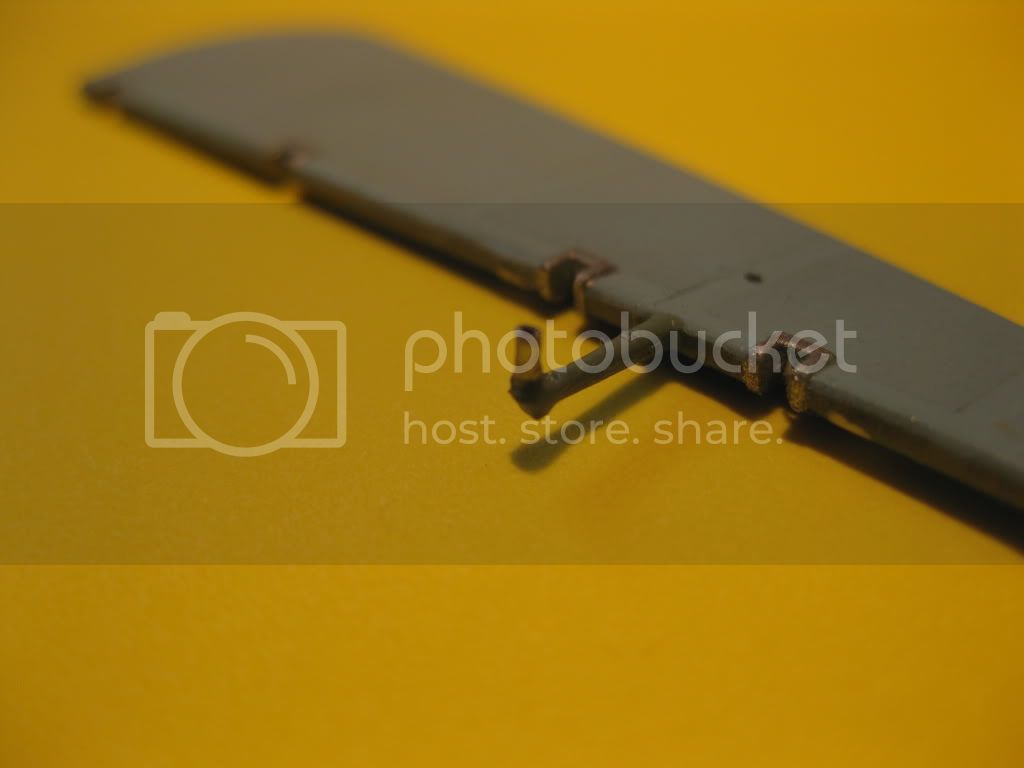
At this point, having only brief bits of time for the desk, I spent a little effort at touch ups for the components awaiting later installation. The fractured decals got cleaned up a little, control surface hinges a touch of flat metal, spent a little effort on highlighting the Spandaus, (back to the drawing board on the hilighting of the guns I'm afraid - no pictures of them due to potential comic effect!) Note: For those with an eagle eye the bit of dog hair on the elevator was provided by Thor, the mighty wonder dog who is usually close to me and not by Roden. Just love the little guy but need to restrict his access to the work area.
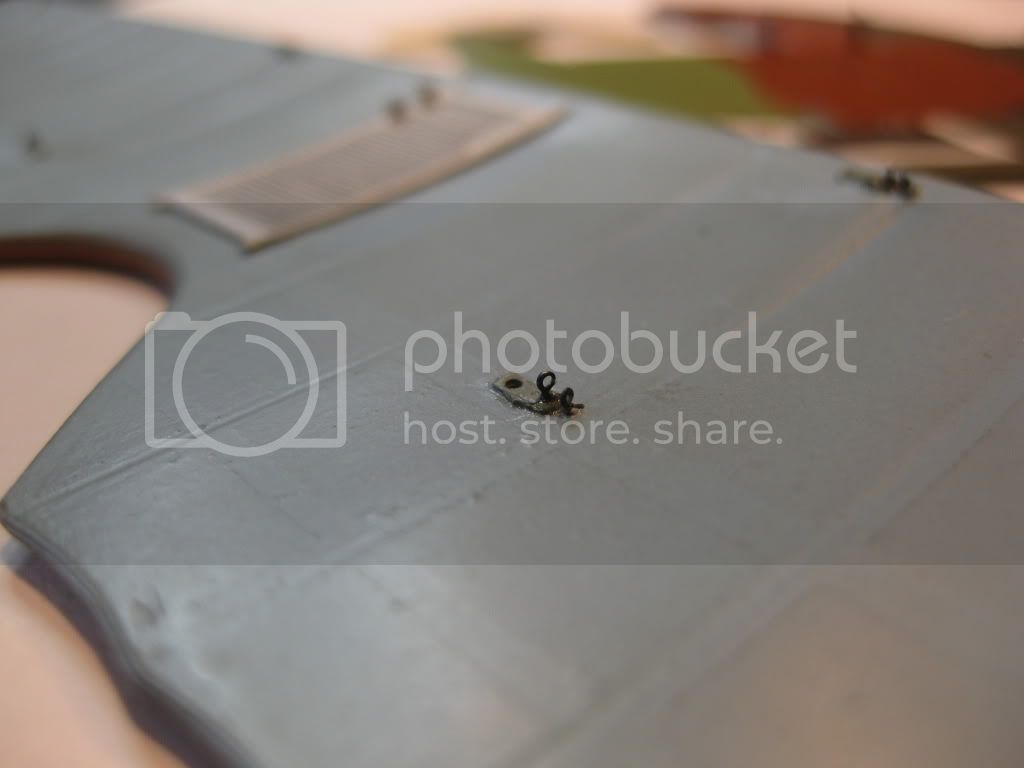
Next phase, much later then planned was to complete the instal of the turnbuckles/eyelets for the pre rigging phase. As mentioned in another thread approximately 4 turnbuckles got "pulted"for every one succesfully installed. Realising that my package from Bob's would never see me to the end a break for a self administered tutorial on making my own was taken; thankfully I mastered the technique and cobbled together a stash of about 40 spares.
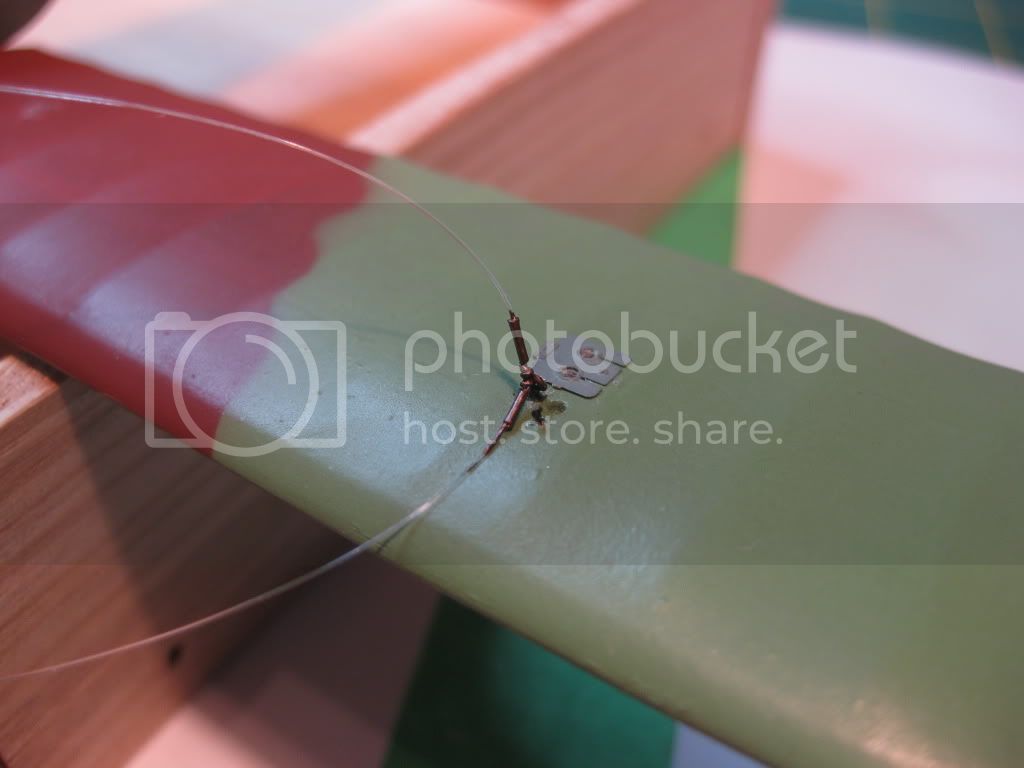
Once that phase was completed I moved on to the pre-rigging of one end of each wire. My plan is to complete the other end after top wing attachment.
This morning dawned cold and windy with rain thrown in to the mix so, after SWMBO departed for work, I did several cartwheels, rubbed my hands together in glee, and settled in for a full uninterrupted day of modelling. The next illustration, to borrow a phrase from Stephen, indicates "a little bit of fun"!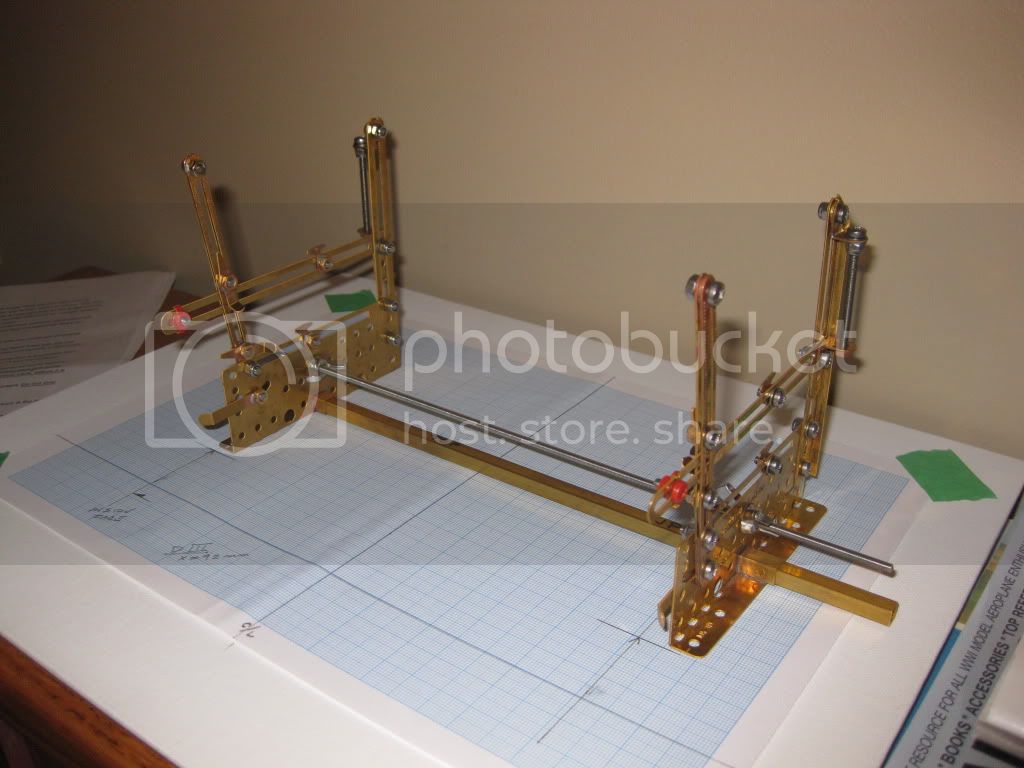
I had been playing with this particular toy off and on for the past week; Aeroclub's Bi-plane Assembly Jig, a very well produced little rig however nothing a person can just pull out of the box and start using for sure. Fortunately the instructions are well layed out I beleive this little beauty is going to prove very usefull in reducing the delta between the number of fingers required and the number the creator gave me. I have almost completed the adjustments to fit the beast properly, lock her in, and get on with the struts and top wing mounting. WIP at this point. Prior to final mounting I want to install the guns and re-instal the several engine bits that were dinged off inadvertantly.
So, good friends, the next update will hopefully show the upper wing attached and may well be titled "Mr Bean does the rigging and final assembly of a two bay biplane". Once the wings are on I'll attach the wires to the upper buckles.
Speaking of rigging I'm using 4 pound test fishing monofil.(.008 inches/.20 mm) which is the largest I can thread through a .5 mm tube without completely breaking down into tears. If anyone has a moment I'd really appreciate some advice on how to paint it; I've read that Tamiya paint pens work very well but the nearest source is 3 hours of travel one way. In the past I've used a dark grey enamel however it tends to bead if too thin and clump if too thick. Any and all advice welcome; thanks for looking and, as always, feel free to add hints, observations, and the benefit of your experience.
Cheers,
Lance
The first new step was one forward which was, in a way, two backwards. I was completely taken with the chipped paint effect and decided I just had to have some of it. Having got, as usual, some great advice and info on the "how to" I applied a base coat of CDL on portions of the wheel covers and flat aluminum on the (previously finished) lower wing fairings and engine cowlings. After a 48 hour drying period it was on with the hairspray followed by the finish color of Albatross grey-green. It worked reasonably well for a first attempt however I can see where more experience will make for better results in future projects. The wheel covers will be getting some pigment to tone down the effect closer to the completion point.
Following are before and after shots of the cowlings......
I also added just a bit of oil staining to the lower nose area; lots of touchup still required on the ring cowling chipping portion and that crack on the wooden portion, like the proverbial bad cat, keeps coming back! Just another note to self..............
At this point, having only brief bits of time for the desk, I spent a little effort at touch ups for the components awaiting later installation. The fractured decals got cleaned up a little, control surface hinges a touch of flat metal, spent a little effort on highlighting the Spandaus, (back to the drawing board on the hilighting of the guns I'm afraid - no pictures of them due to potential comic effect!) Note: For those with an eagle eye the bit of dog hair on the elevator was provided by Thor, the mighty wonder dog who is usually close to me and not by Roden. Just love the little guy but need to restrict his access to the work area.
Next phase, much later then planned was to complete the instal of the turnbuckles/eyelets for the pre rigging phase. As mentioned in another thread approximately 4 turnbuckles got "pulted"for every one succesfully installed. Realising that my package from Bob's would never see me to the end a break for a self administered tutorial on making my own was taken; thankfully I mastered the technique and cobbled together a stash of about 40 spares.
Once that phase was completed I moved on to the pre-rigging of one end of each wire. My plan is to complete the other end after top wing attachment.
This morning dawned cold and windy with rain thrown in to the mix so, after SWMBO departed for work, I did several cartwheels, rubbed my hands together in glee, and settled in for a full uninterrupted day of modelling. The next illustration, to borrow a phrase from Stephen, indicates "a little bit of fun"!
I had been playing with this particular toy off and on for the past week; Aeroclub's Bi-plane Assembly Jig, a very well produced little rig however nothing a person can just pull out of the box and start using for sure. Fortunately the instructions are well layed out I beleive this little beauty is going to prove very usefull in reducing the delta between the number of fingers required and the number the creator gave me. I have almost completed the adjustments to fit the beast properly, lock her in, and get on with the struts and top wing mounting. WIP at this point. Prior to final mounting I want to install the guns and re-instal the several engine bits that were dinged off inadvertantly.
So, good friends, the next update will hopefully show the upper wing attached and may well be titled "Mr Bean does the rigging and final assembly of a two bay biplane". Once the wings are on I'll attach the wires to the upper buckles.
Speaking of rigging I'm using 4 pound test fishing monofil.(.008 inches/.20 mm) which is the largest I can thread through a .5 mm tube without completely breaking down into tears. If anyone has a moment I'd really appreciate some advice on how to paint it; I've read that Tamiya paint pens work very well but the nearest source is 3 hours of travel one way. In the past I've used a dark grey enamel however it tends to bead if too thin and clump if too thick. Any and all advice welcome; thanks for looking and, as always, feel free to add hints, observations, and the benefit of your experience.
Cheers,
Lance
thegirl
Joined: January 19, 2008
KitMaker: 6,743 posts
AeroScale: 6,151 posts
Posted: Saturday, June 18, 2011 - 02:52 AM UTC
She is looking very sweet so far Lance !
lcarroll
Joined: July 26, 2010
KitMaker: 1,032 posts
AeroScale: 1,025 posts
Posted: Saturday, June 18, 2011 - 03:58 AM UTC
Quoted Text
She is looking very sweet so far Lance !
Thank you for the encouragement Terri. She's a little rougher around the edges then I'd like however I am using this as an opportunity to get moving in the hobby actively again (and use the new techniques I've picked up on our site) and have done that. Just about every mistake or bit of bad work possible has been part of the build but most are fixable and , most important, I'm having fun which is what it's all about. What I have learned on this one and the feedback from others will result in better overall results on the next.
I beleive I'm enjoying the inputs to the forum and replies as much or more then the actual building. It's great to share and get others views.
Cheers,
Lance
lcarroll
Joined: July 26, 2010
KitMaker: 1,032 posts
AeroScale: 1,025 posts
Posted: Monday, June 20, 2011 - 04:56 AM UTC
Another quick update; progress is slow however so far (with a lot of one step forward & two backwards) I'm getting there.
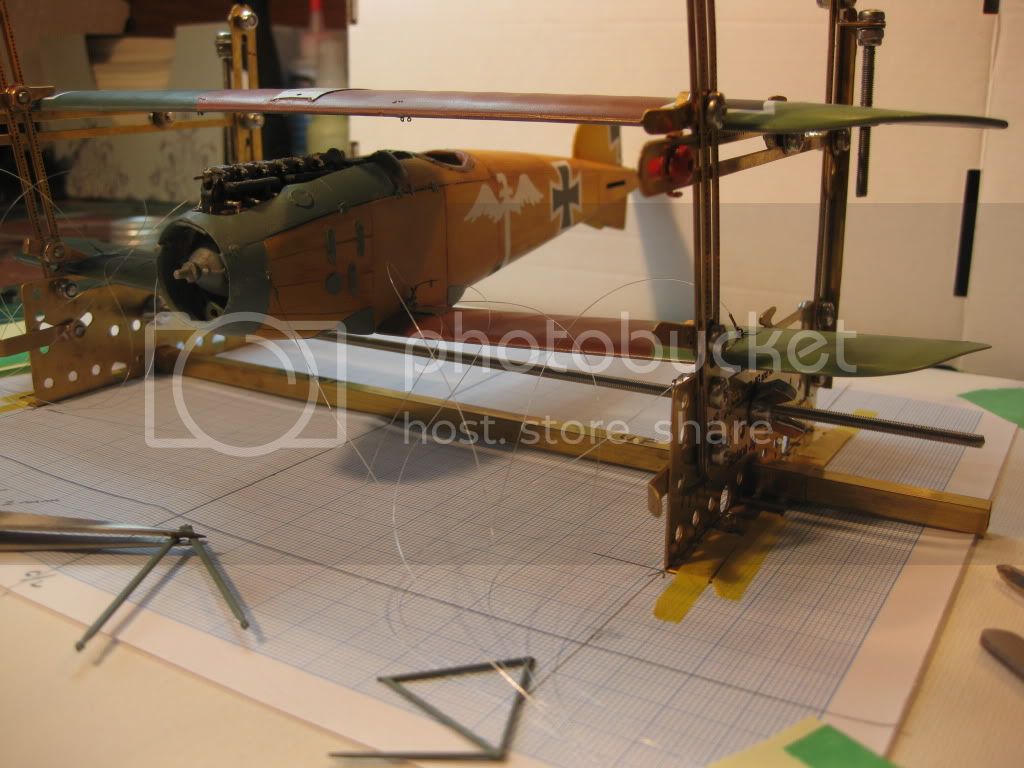
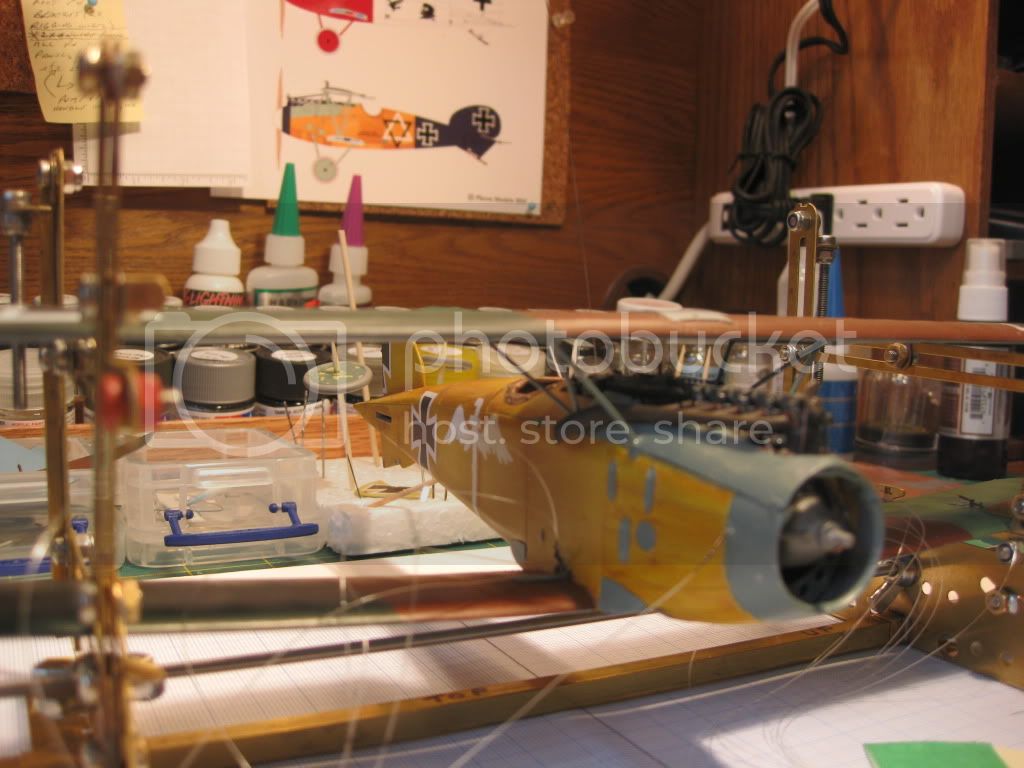
The guns are installed, bumped off engine parts and exhaust installed and the strut assembly has commenced. I elected to use Marc Rocca's fine idea of cobbling together a jig to mount the cabanes (Thanks Wingnut!) and the brass assembly jig for final installation and the "V"struts on the outer wings. The cabanes were a total pain; despite my best efforts the solution was to relocate two of the lower attachment points and the left side diagonal member had to be cut, shortened, and reinstalled to get a true fit and parallel top and bottom wing alignment using the upper wing attachment points as indicated on the mould. The photo shows the jig during the "form and fitment" stage.
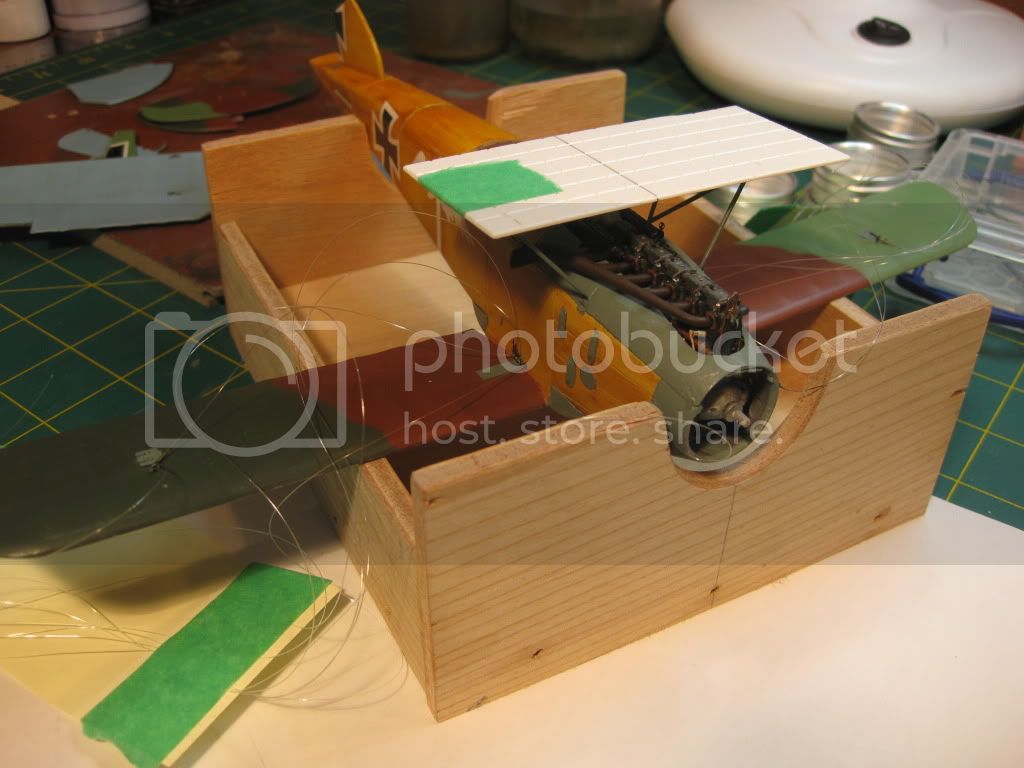
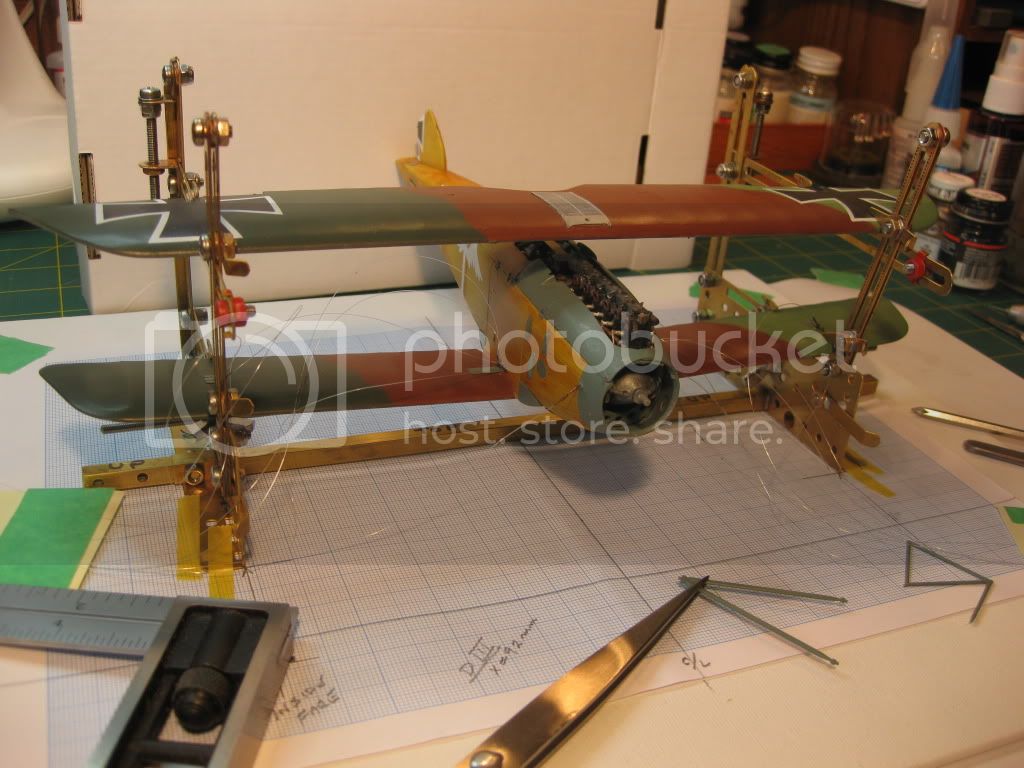
After attaching the cabanes to the upper wing attachment points the beast was mounted in the assembly jig for "V"strut completion which is as she presently sits.
This is the point where the fun just starts as the spacing between upper and lower wings is approximately 3-4mm less then the length of the struts. The wing alignments are true, dihedral good, and the spacing between them appears to be correct checking with the Datafile 3 views, and the fuselage attachment points are at the correct heights on the fuselage. I have concluded that the dimensions of the struts (one or both cabanes and ' V"s) are not correct which, with this kit, comes as no surprise. There is, however, slight warping (upwards) of the bottom wings which is apparent on a front profile view and I figure accounts for 1-2 mm of the problem. I just thought of and noticed this thus the edit. Not the first example of warping I've encountered on this build as the forward fuselage had a similar imperfection
Having pulled the outer struts from my encore DII Kit (both plastic and metal) my plan for today is to shorten the supplied "V " struts to fit and use one of the Encore sets as a backup for the rebuilding of them if required. Then I can get on with the rigging completion.
She's still a "bear" to say the very least; has anyone else had this problem?
Still in all surmountable but this little man is sure looking forward to a newer and hopefully smoother build!
Cheers, and Thanks for looking; helpful comments and/or just plain sympathy most welcome!
Lance
The guns are installed, bumped off engine parts and exhaust installed and the strut assembly has commenced. I elected to use Marc Rocca's fine idea of cobbling together a jig to mount the cabanes (Thanks Wingnut!) and the brass assembly jig for final installation and the "V"struts on the outer wings. The cabanes were a total pain; despite my best efforts the solution was to relocate two of the lower attachment points and the left side diagonal member had to be cut, shortened, and reinstalled to get a true fit and parallel top and bottom wing alignment using the upper wing attachment points as indicated on the mould. The photo shows the jig during the "form and fitment" stage.
After attaching the cabanes to the upper wing attachment points the beast was mounted in the assembly jig for "V"strut completion which is as she presently sits.
This is the point where the fun just starts as the spacing between upper and lower wings is approximately 3-4mm less then the length of the struts. The wing alignments are true, dihedral good, and the spacing between them appears to be correct checking with the Datafile 3 views, and the fuselage attachment points are at the correct heights on the fuselage. I have concluded that the dimensions of the struts (one or both cabanes and ' V"s) are not correct which, with this kit, comes as no surprise. There is, however, slight warping (upwards) of the bottom wings which is apparent on a front profile view and I figure accounts for 1-2 mm of the problem. I just thought of and noticed this thus the edit. Not the first example of warping I've encountered on this build as the forward fuselage had a similar imperfection
Having pulled the outer struts from my encore DII Kit (both plastic and metal) my plan for today is to shorten the supplied "V " struts to fit and use one of the Encore sets as a backup for the rebuilding of them if required. Then I can get on with the rigging completion.
She's still a "bear" to say the very least; has anyone else had this problem?
Still in all surmountable but this little man is sure looking forward to a newer and hopefully smoother build!
Cheers, and Thanks for looking; helpful comments and/or just plain sympathy most welcome!
Lance

OEFFAG_153

Joined: February 19, 2010
KitMaker: 1,473 posts
AeroScale: 1,450 posts
Posted: Monday, June 20, 2011 - 08:16 AM UTC
Hi Lance
Ouch I feel your pain sometimes I really hate putting on the top wing I had similar headaces with my WNW DV builds... But with the Roden DIII I've never had any big problems... Maybe it would'nt help with your warp but this might be useful none the less?
Well heres how I've done it in the past with the three DIIIs I've built:
First of all I lay the top wing down flat on my desk underside up use some small blocks to get it at the right height then tape it down so its all secured to the desk.
Then I put the interplane V-struts in place on the lower wings using a slow epoxy glue make sure they are secured well into the wing first. Drill out the location point, and instert a pin if you like (I usually do)
Turn the whole thing uside down, and mate the locating pins into the taped down wing on the desk.
Make sure its all level and sound the plane rests pretty well on the stabeliser in the back, and the blocks under the upper wing keeps it all at the right height.
Now its fairly easy to locate the cabanes into their positions. Dry fit first then glue them onto the mountings on the body I use either the same epoxy, or cyano here. It can be a bit fiddly at this stage but with a bit of care it works.
(heres how it looks on my desk)
Let the whole thing cure then once the struts are set, remove the plane again you now have struts that sits at the correct angle for your kit.
Then put some glue in the locating points on the upper wing still secure on your desk turn the body upside down and locate the struts their points.
Once the glue has set, your done.
Its actually very painless and as the cabanes are possible to adjust a bit to accomodate the angle of the upperwing and the V struts you can also accomodate for some of the differences in height and angle you've described.
Longwinded rambling on my part sorry hope I haven't lost you along the way somewhere, and that it might be useful to you or someone else.
Best Regards and best of luck with your wing.
Mikael
 |

WEB HOSTING BY


Copyright ©2021 AeroScale and Kitmaker Network, a subsidiary of Silver Star Enterprises
All Rights Reserved. Please read our Conditions of Use and Privacy Policy.
All Rights Reserved. Please read our Conditions of Use and Privacy Policy.