

1⁄48Su-24M
7
Comments
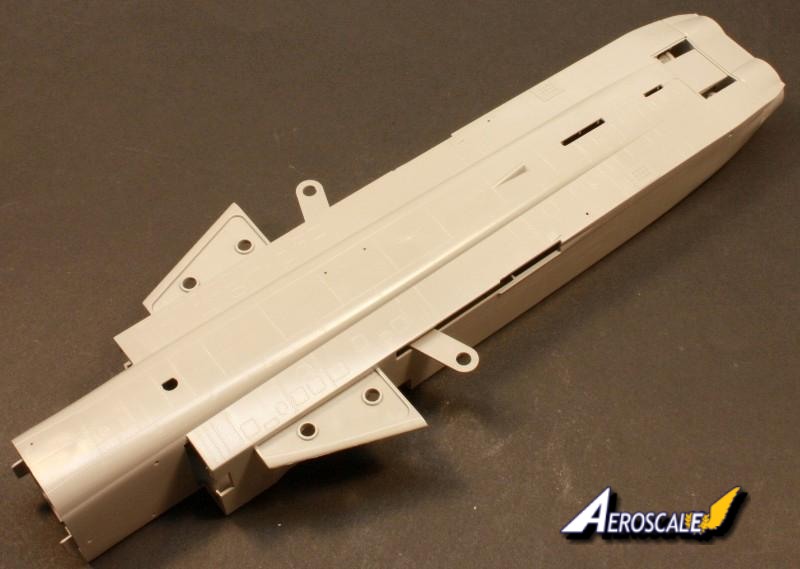
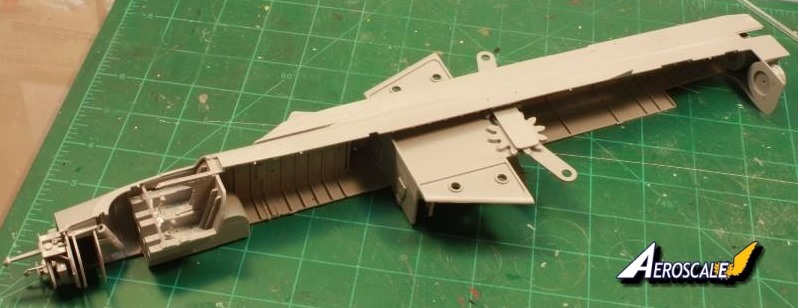
The fuselage is broke into four pieces; two forward sections for the cockpit area, and two for the fuselage aft of the cockpit. There are lots of seams and lot of chances to really screw something up here. Why they molded it this way is beyond me, but it can be dealt with. Glue the forward fuselage halves to their respective rear fuselage halves and let them dry completely while you work on other areas of the model
trust me, there is plenty to work on while this dries.
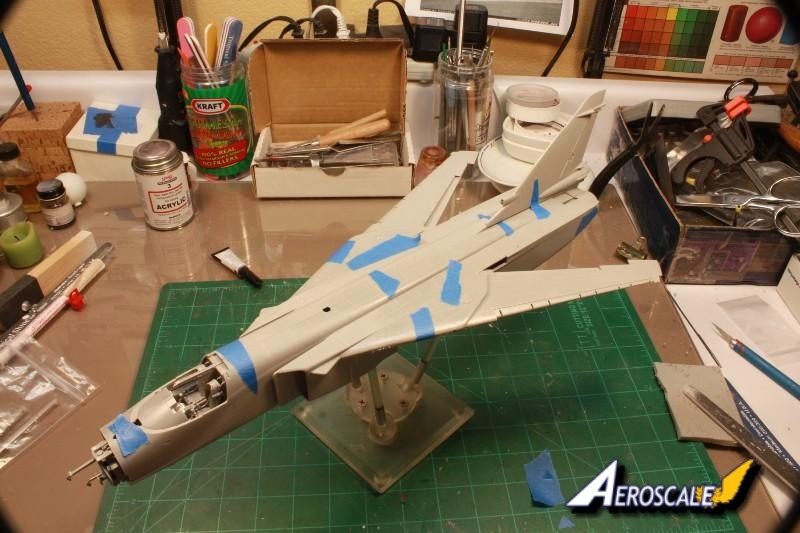
I have browsed other modeling websites and found a lot of negative things being said about the kit. Shape issues, engines are wrong, spine is too flat etc. etc. etc. The one thing I can comment on as I can actually see it for myself is the engines. Based on photos I pulled from the web, they are too far apart. Does this affect the rest of the kit? No. It still looked like a Fencer to me when I finished. As to the other issues, others will definitely know more. I was just happy to see a 1/48 Fencer arrive upon my doorstep. I can arguably say it is the best 1/48 scale Fencer out there its the only one that Im aware of.
While my fuselage halves were drying I tackled the complex main landing gear. Im not sure complex is adequate enough to describe these things. Again you have a couple of choices when building them; use the plastic reinforcement rods or the white metal ones. Kind of a no brainer for me white metal it was. The reinforcement rods are trapped between the main gear legs which require cleaning up the resulting seam line. Not a huge problem, it just takes some time and patience as it is pretty tight in a couple areas. The legs are akin to the nose gear in that they are very busy too. Again, some additional hydraulic lines would really add to the overall effect of the landing gear. There is more I will relay about the landing gear a little farther into the article and it aint pretty.
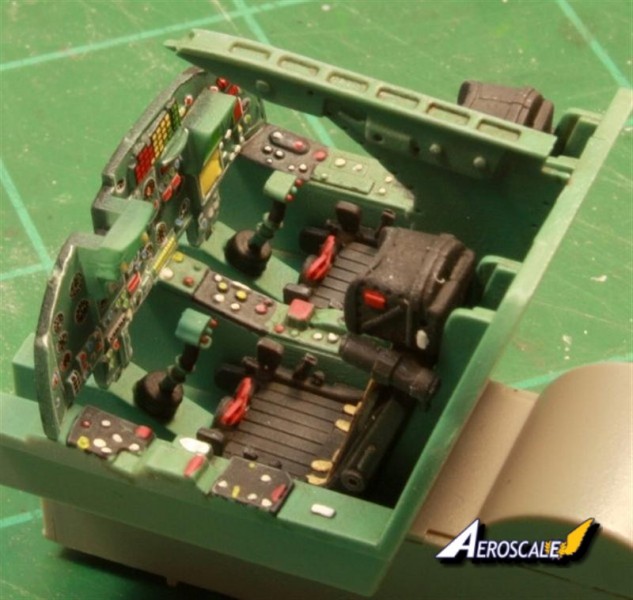
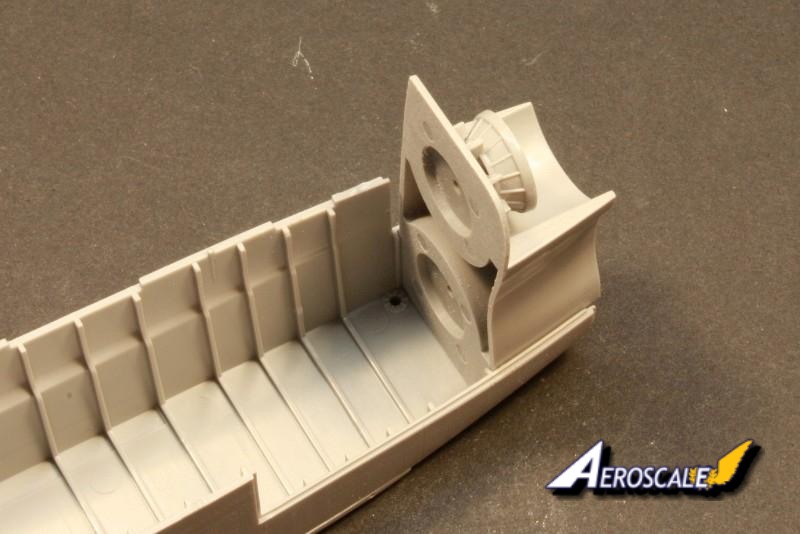
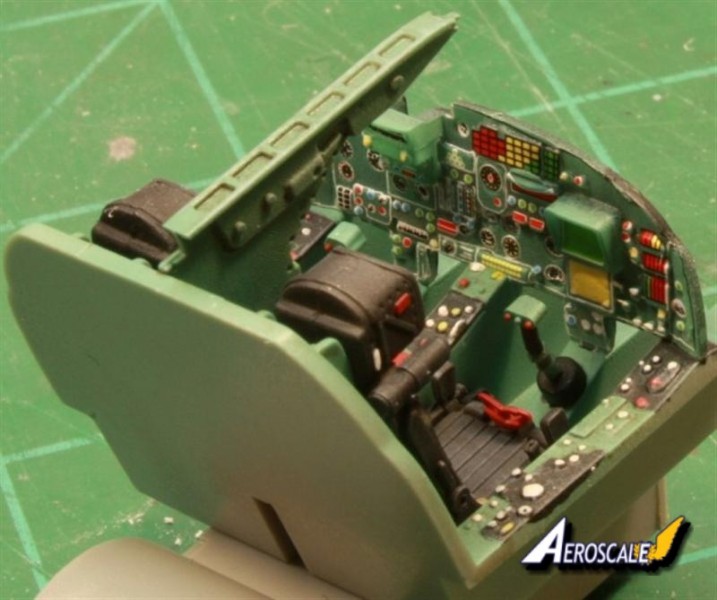
I went backwards one step and assembled the nicely detailed radar. I built it and installed it later in the build, but in hindsight I would leave it out if I had to do over again. The hinge area for the nose is hokey looking at best when it is opened up, (All it is, is a tab the fits into a slot on the fuselage lip) hence my decision to close things up. Your mileage may vary. The main landing gear bay is very nicely detailed for what it is, but it is lacking a lot of plumbing that the 1:1 item has. Super-detailers will have a field day here. I would also recommend painting this thing before you trap it in the fuselage as the fuselage openings are minimal to get an airbrush in there. The swing wing feature is very simple and attaches to the top of the main landing gear bay. The two gears/cogs are held in place by a securing tab. There is no need to glue this tab down. I did and had to tear it apart as my Tamiya Super Thin oozed out and onto the gears. When the whole contraption is placed into the fuselage, the securing tab snugs itself into the top part of the fuselage thereby holding the gears in place again, learn from my mistake. Trust me there are more to follow.
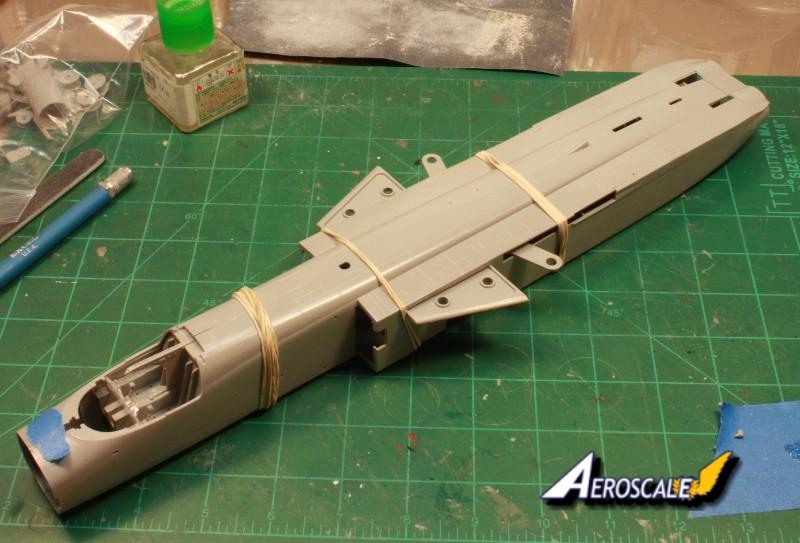
By this point we are into step ten of the assembly. Everything is trapped between the lengthy fuselage halves. I didnt mention the exhausts as they were pretty straight forward in assembly. The only hiccup being I had to thin down part of the mounting tab to fit the slot in the fuselage. It took all of 3 or 4 passes with a sanding stick to do so it was not a big deal. You will need to paint the cans prior to assembly though. Now, in step ten there is a small note at the bottom left of the instruction sheet to cut/remove a small panel on the port side of the fuselage part A2. This is for adding a small scoop later in the build. I missed this. The fuselage is about 2 football fields long, or at least it seems that way. There is very little gluing surface and or mounting/alignment tabs to work with. If I had to do this part over again, I would add styrene tabs everywhere I could. As it is I didnt and was rewarded with some hills and valleys to deal with using putty. The end result wasnt too bad, but it caused a lot more work than I would have liked yep, another mistake. Are you seeing a pattern yet? Its ok to laugh really.
I have browsed other modeling websites and found a lot of negative things being said about the kit. Shape issues, engines are wrong, spine is too flat etc. etc. etc. The one thing I can comment on as I can actually see it for myself is the engines. Based on photos I pulled from the web, they are too far apart. Does this affect the rest of the kit? No. It still looked like a Fencer to me when I finished. As to the other issues, others will definitely know more. I was just happy to see a 1/48 Fencer arrive upon my doorstep. I can arguably say it is the best 1/48 scale Fencer out there its the only one that Im aware of.
While my fuselage halves were drying I tackled the complex main landing gear. Im not sure complex is adequate enough to describe these things. Again you have a couple of choices when building them; use the plastic reinforcement rods or the white metal ones. Kind of a no brainer for me white metal it was. The reinforcement rods are trapped between the main gear legs which require cleaning up the resulting seam line. Not a huge problem, it just takes some time and patience as it is pretty tight in a couple areas. The legs are akin to the nose gear in that they are very busy too. Again, some additional hydraulic lines would really add to the overall effect of the landing gear. There is more I will relay about the landing gear a little farther into the article and it aint pretty.
I went backwards one step and assembled the nicely detailed radar. I built it and installed it later in the build, but in hindsight I would leave it out if I had to do over again. The hinge area for the nose is hokey looking at best when it is opened up, (All it is, is a tab the fits into a slot on the fuselage lip) hence my decision to close things up. Your mileage may vary. The main landing gear bay is very nicely detailed for what it is, but it is lacking a lot of plumbing that the 1:1 item has. Super-detailers will have a field day here. I would also recommend painting this thing before you trap it in the fuselage as the fuselage openings are minimal to get an airbrush in there. The swing wing feature is very simple and attaches to the top of the main landing gear bay. The two gears/cogs are held in place by a securing tab. There is no need to glue this tab down. I did and had to tear it apart as my Tamiya Super Thin oozed out and onto the gears. When the whole contraption is placed into the fuselage, the securing tab snugs itself into the top part of the fuselage thereby holding the gears in place again, learn from my mistake. Trust me there are more to follow.
By this point we are into step ten of the assembly. Everything is trapped between the lengthy fuselage halves. I didnt mention the exhausts as they were pretty straight forward in assembly. The only hiccup being I had to thin down part of the mounting tab to fit the slot in the fuselage. It took all of 3 or 4 passes with a sanding stick to do so it was not a big deal. You will need to paint the cans prior to assembly though. Now, in step ten there is a small note at the bottom left of the instruction sheet to cut/remove a small panel on the port side of the fuselage part A2. This is for adding a small scoop later in the build. I missed this. The fuselage is about 2 football fields long, or at least it seems that way. There is very little gluing surface and or mounting/alignment tabs to work with. If I had to do this part over again, I would add styrene tabs everywhere I could. As it is I didnt and was rewarded with some hills and valleys to deal with using putty. The end result wasnt too bad, but it caused a lot more work than I would have liked yep, another mistake. Are you seeing a pattern yet? Its ok to laugh really.


About the Author


FROM: CALIFORNIA, UNITED STATES
After a several year break from the hobby I have happily returned to it. Slowly, but surely getting my mojo back.
Comments

Very good job.Pre-shading came out really well.
Build On,
Justin
MAY 22, 2010 - 02:30 AM
Thanks Justin, but no pre-shading done on this one. It was all post shading and lots of it too.
"Q"
MAY 22, 2010 - 11:55 AM
Great build, Matt. This is one big beast, but one of the more sleak and beautiful Soviet jets.
Thanks for sharing
MAY 27, 2010 - 01:35 AM
Thanks for the kind words Jesper. It was a challenging and yet rewarding build. Lots of things I would change if I had it to do over again. Thanks again, "Q"
MAY 27, 2010 - 12:14 PM

Again, one of the BEST build reviews I've ever seen. This particular kit is still a bit pricey for me, but I'm sure in a couple of years when it's been on the market for a while one will make it's way to my stash. In all honesty Trumpeter should pay you for this one Q. I'm sure you're in depth review has sold quite a few of these kits for them.
Hermon
MAY 31, 2010 - 10:35 AM
Thanks for the kind words Hermon. I was just glad to get the chance to build and ultimately finish it. It isn't a bad kit in my eyes, just extremely complex in some areas; areas that I should have slowed down a wee bit on.. lol. Glad you liked the review.
"Q"
JUN 01, 2010 - 02:37 AM
Copyright ©2021 by Matthew Quiroz. Images also by copyright holder unless otherwise noted. The views and opinions expressed herein are solely the views and opinions of the authors and/or contributors to this Web site and do not necessarily represent the views and/or opinions of AeroScale, KitMaker Network, or Silver Star Enterrpises. Images also by copyright holder unless otherwise noted. Opinions expressed are those of the author(s) and not necessarily those of AeroScale. All rights reserved. Originally published on: 2010-05-19 00:00:00. Unique Reads: 14367

WEB HOSTING BY


Copyright ©2021 AeroScale and Kitmaker Network, a subsidiary of Silver Star Enterprises
All Rights Reserved. Please read our Conditions of Use and Privacy Policy.
All Rights Reserved. Please read our Conditions of Use and Privacy Policy.