

1⁄48Su-24M
7
Comments
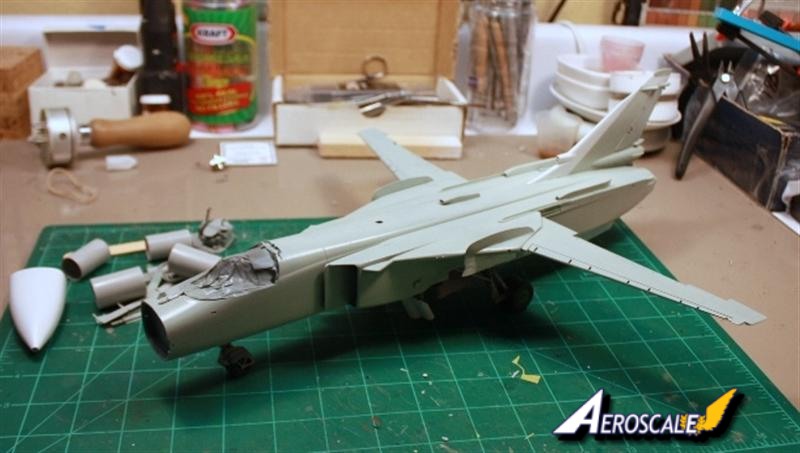
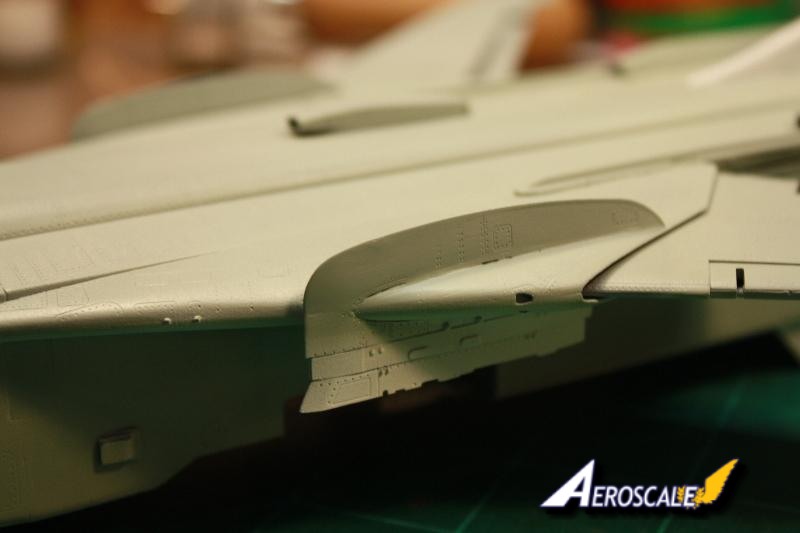
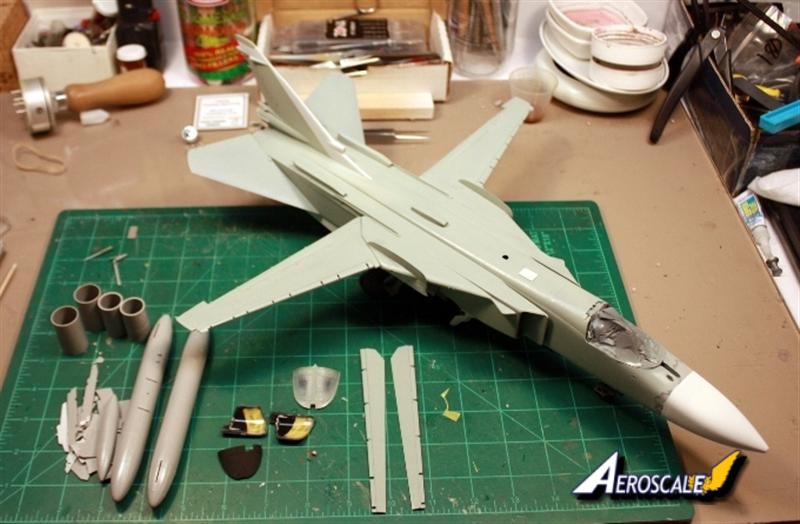
The Fencer is far enough along that I can add some paint to her. I decide on a nice medium gray ala Krylon rattle can. After masking off the cockpit area I lay down a nice even coat all the way around and let this dry overnight. While it is drying I start choosing from the plethora of weapons to arm this thing with. To say you are provided with a lot of weapons to choose from is like saying the ocean has a lot of fish. I believe every weapon the Fencer was designed to carry is included in this kit. The vast majority of the box weight is due to these sprues. The only trouble is decided which ones to use; more on this later.
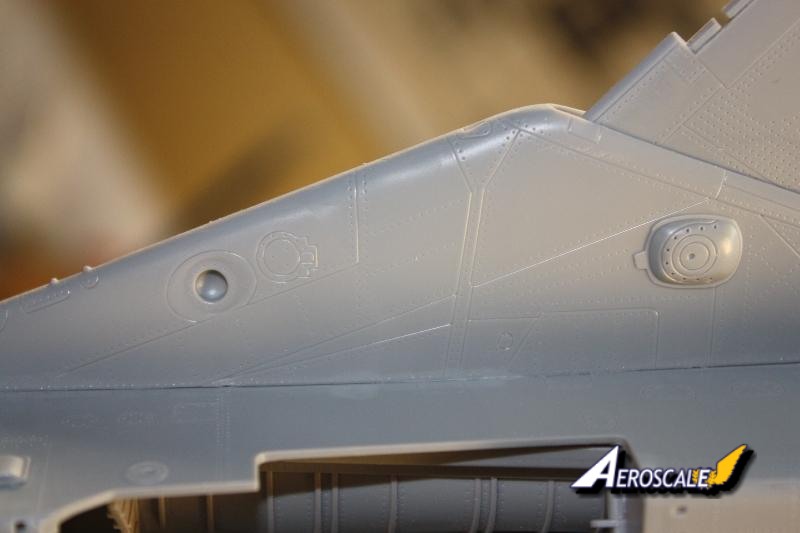
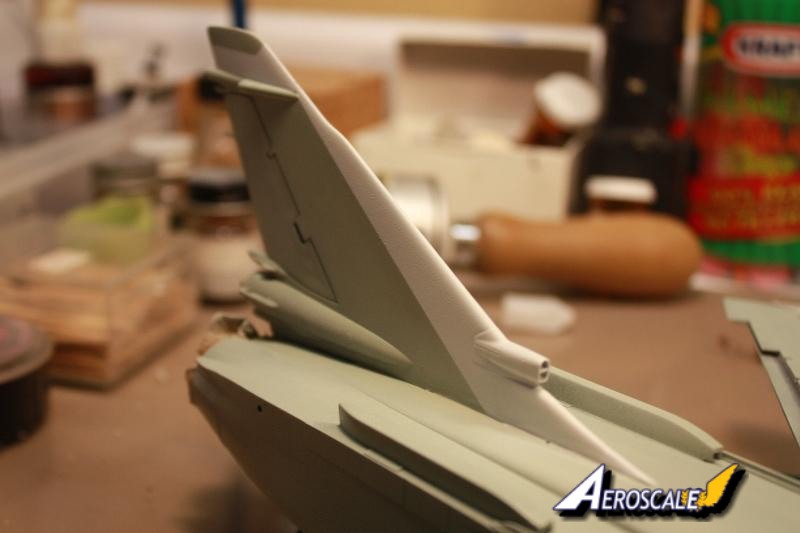
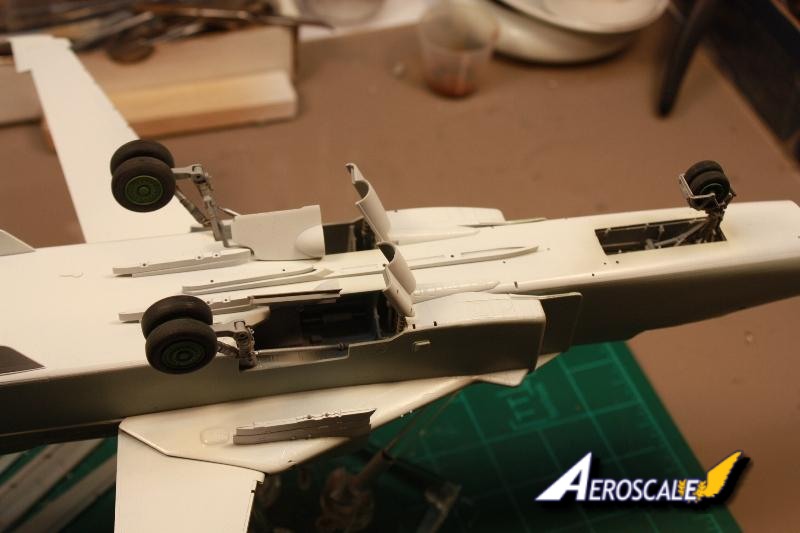
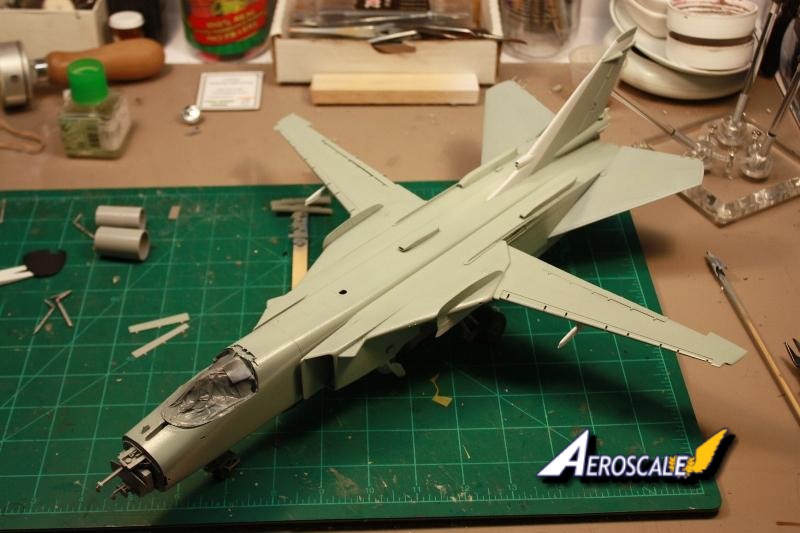
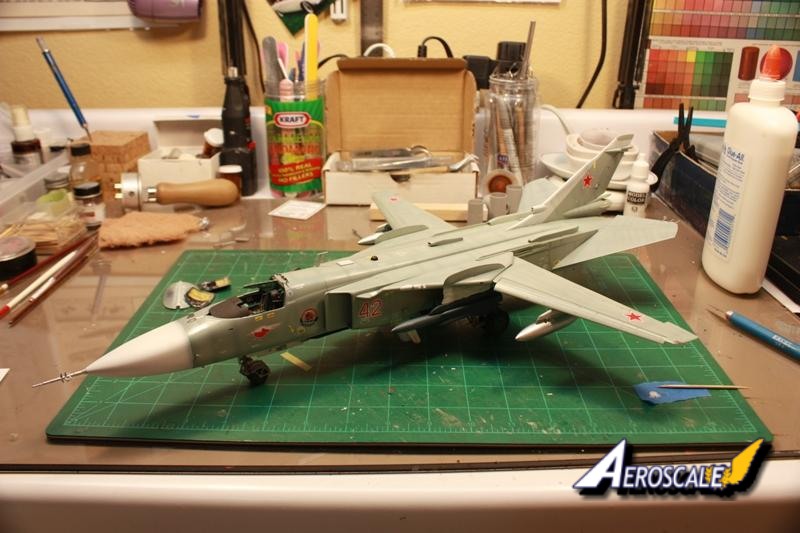
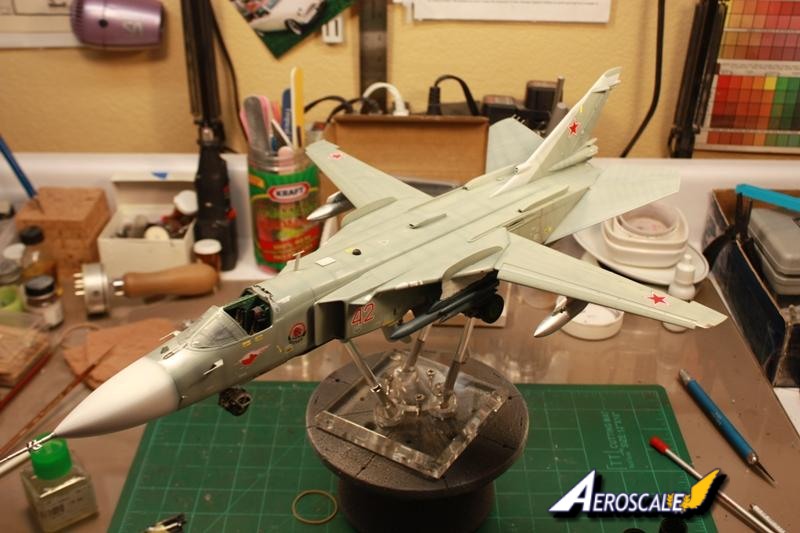
With the primer now dry I look over the plane for areas needing some help. I am happy to find there arent many. A few minutes work with a Scotch-brite pad and all is well. The wheel wells are painted with a light gray and it is here I realize that I should have painted them prior to install as it is an extremely tight opening to paint through. Lesson learned. I do the best I can with painting the wheel wells and set it aside to dry while I choose my paints for the remainder of the session. Luckily the bottom of the aircraft I chose is white as I have a fresh can of Tamiya flat white primer on hand. The wheel wells are masked off with some tissue and a good healthy coat of flat white primer is applied to all the lower surfaces of the plane. The wings and elevators are still separate at this point. If you have not used Tamiyas primer, I highly recommend it as the pigment is extremely fine, lays down well and dries quickly. After the white had dried, I masked off the white areas using Tamiya and 3m Blue Painters tape for the large areas. The top color used was Model Master 16473, Aircraft Gray. Yes, it is a gloss color as indicated by the 1 in the number. I cut my paints with lacquer thinner which helps the paint dry a bit quicker, even the gloss colors. The plane was now painted in her colors so it was time to let her dry overnight.
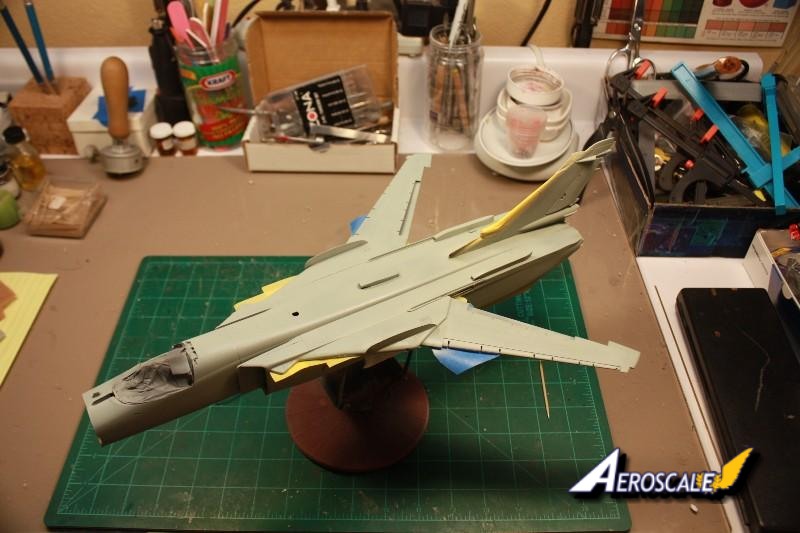
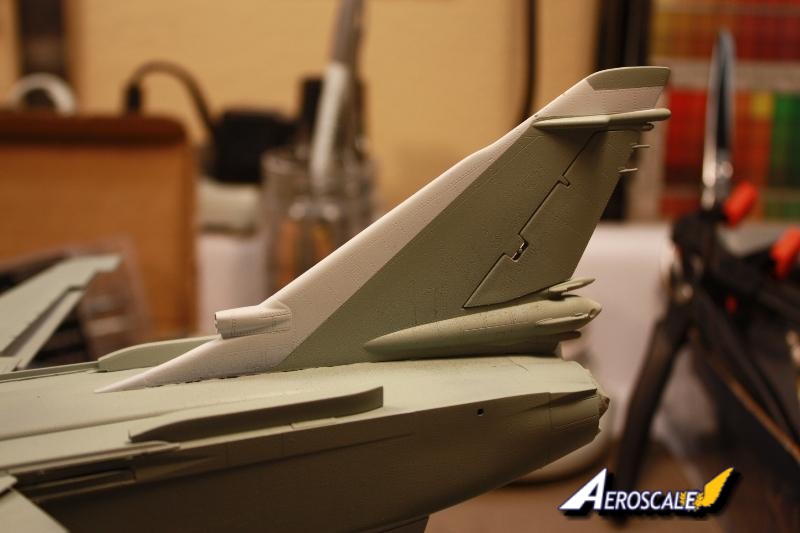
The following day it was time to do the weathering on this big beast. My normal routine for weathering panel lines is to post shade them. I have tried the pre-shading method in the past and it just never worked for me. My usual formula is to use flat black as my shading color mixed with lacquer thinner. The ratio I shoot this at is about 9:1, meaning 9 parts thinner to 1 part paint. It is more like tinted thinner than thinned paint. I changed my routine for this build though as I felt flat black would be too stark. I chose Model Master Intermediate Blue (FS35164) as my shading color. It proved to be an excellent choice. I used Floquil Israeli Gray for the flat white bottom surfaces. This too proved to be a good choice. To post shade everything took the better part of 2 plus hours as I had to make multiple passes over each panel line.
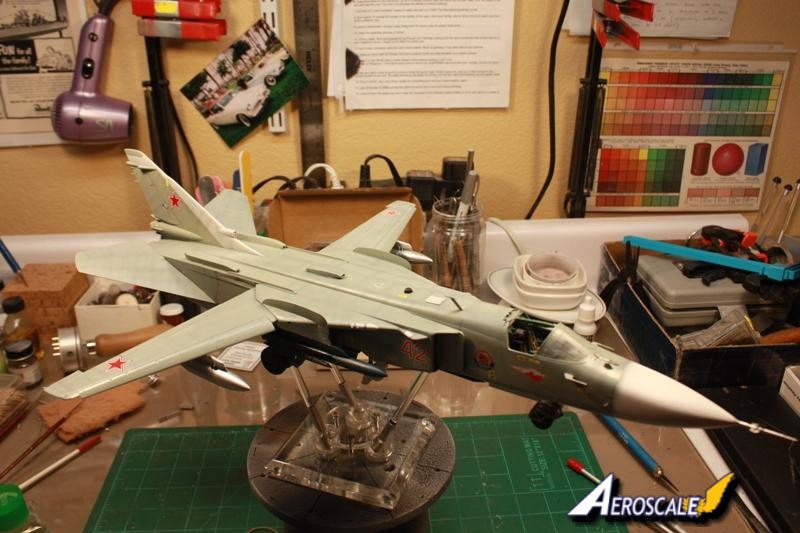
Now that the post shading was complete it was time to add the decals. I found a new go to product I have been using for my gloss coats instead of Future. It is another Krylon product called Crystal Clear Acrylic Gloss. This stuff is great. For $5 I get a huge can that is more than enough to do several models and it dries quickly. I dont have to deal with cleaning my airbrush either which is an added bonus. Four light coats produced a nice glossy sheen on the Fencer and about an hour later she was ready to receive her first decals.
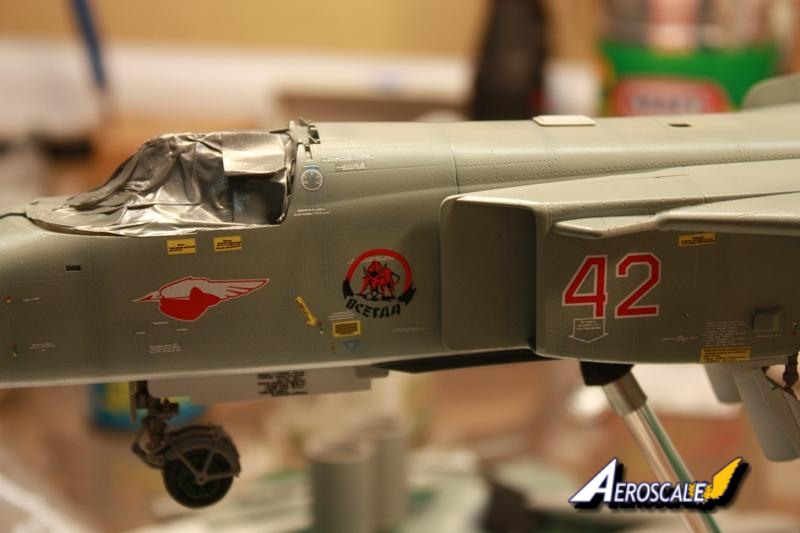
I havent built many if any Trumpeter aircraft, but if the decals are any indication of what is in other aircraft kits, boy howdy, they are some good stuff! I was extremely happy with how the decals laid down. I began on the port side at the nose and worked my way back. It took me roughly an hour and a half to do one whole side. When I got to the back of the plane, I checked the decals on the nose and all of them had snuggled down into the recesses of the panel lines and I could see no trace of decal carrier film. They looked painted on. I was impressed. The elevator position markings on the side of the fuselage gave me a little concern and they are somewhat long and thin. This usually equates to the decals folding in on themselves, or tearing easily. No such problems once I got them out of the water. They laid down into position easily and looked as good as the rest of the decals did. I stopped with my decaling operations for the night content with what I had done on the port side of the aircraft and let everything dry overnight.
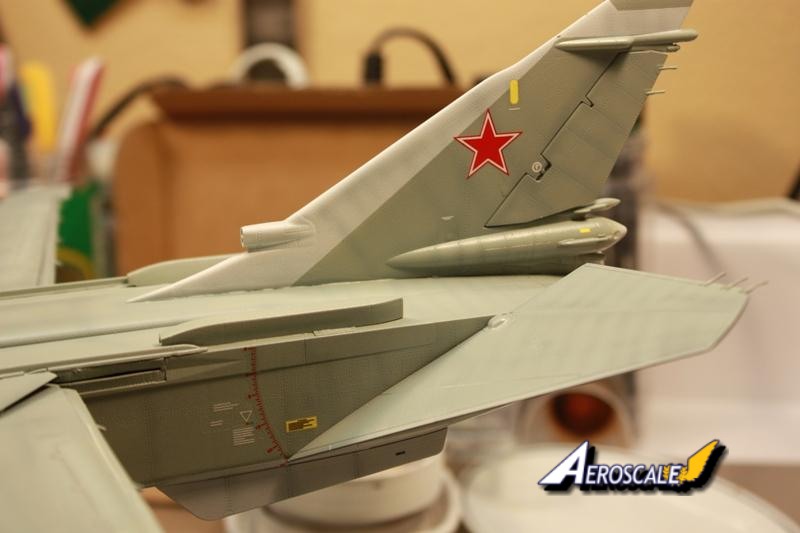
I jumped into the starboard side of the planes decals the following afternoon after getting home from class. I was happy to see the remainder of the decals had snuggled into position overnight. I went to work in adding the decals to the starboard side of the plane, and in about 90 minutes I had that side complete and set everything aside to dry overnight. There was still plenty of time to continue working on this beast so I decided to tackle the weapons. I initially was going to use the two fuel tanks that hand under the wing shoulders, but could not figure out how or what pylons to use as the kit suggested ones, dont match up to the portion under the wing fences. I did decide to use the two radar pods for the outer wing pylons as those fit as shown in the instructions. I finally chose to use the Kh-31 Missiles for the shoulder mounted weapons. I found a picture of a Fencer on-line sporting these and it looked cool. Good enough for me. I only used a total of four items on my plane. There is plenty of room for additional ordinance to be hung along the fuselage, and there is more than enough left in the box should I choose to build more and add them later.
With the primer now dry I look over the plane for areas needing some help. I am happy to find there arent many. A few minutes work with a Scotch-brite pad and all is well. The wheel wells are painted with a light gray and it is here I realize that I should have painted them prior to install as it is an extremely tight opening to paint through. Lesson learned. I do the best I can with painting the wheel wells and set it aside to dry while I choose my paints for the remainder of the session. Luckily the bottom of the aircraft I chose is white as I have a fresh can of Tamiya flat white primer on hand. The wheel wells are masked off with some tissue and a good healthy coat of flat white primer is applied to all the lower surfaces of the plane. The wings and elevators are still separate at this point. If you have not used Tamiyas primer, I highly recommend it as the pigment is extremely fine, lays down well and dries quickly. After the white had dried, I masked off the white areas using Tamiya and 3m Blue Painters tape for the large areas. The top color used was Model Master 16473, Aircraft Gray. Yes, it is a gloss color as indicated by the 1 in the number. I cut my paints with lacquer thinner which helps the paint dry a bit quicker, even the gloss colors. The plane was now painted in her colors so it was time to let her dry overnight.
The following day it was time to do the weathering on this big beast. My normal routine for weathering panel lines is to post shade them. I have tried the pre-shading method in the past and it just never worked for me. My usual formula is to use flat black as my shading color mixed with lacquer thinner. The ratio I shoot this at is about 9:1, meaning 9 parts thinner to 1 part paint. It is more like tinted thinner than thinned paint. I changed my routine for this build though as I felt flat black would be too stark. I chose Model Master Intermediate Blue (FS35164) as my shading color. It proved to be an excellent choice. I used Floquil Israeli Gray for the flat white bottom surfaces. This too proved to be a good choice. To post shade everything took the better part of 2 plus hours as I had to make multiple passes over each panel line.
Now that the post shading was complete it was time to add the decals. I found a new go to product I have been using for my gloss coats instead of Future. It is another Krylon product called Crystal Clear Acrylic Gloss. This stuff is great. For $5 I get a huge can that is more than enough to do several models and it dries quickly. I dont have to deal with cleaning my airbrush either which is an added bonus. Four light coats produced a nice glossy sheen on the Fencer and about an hour later she was ready to receive her first decals.
I havent built many if any Trumpeter aircraft, but if the decals are any indication of what is in other aircraft kits, boy howdy, they are some good stuff! I was extremely happy with how the decals laid down. I began on the port side at the nose and worked my way back. It took me roughly an hour and a half to do one whole side. When I got to the back of the plane, I checked the decals on the nose and all of them had snuggled down into the recesses of the panel lines and I could see no trace of decal carrier film. They looked painted on. I was impressed. The elevator position markings on the side of the fuselage gave me a little concern and they are somewhat long and thin. This usually equates to the decals folding in on themselves, or tearing easily. No such problems once I got them out of the water. They laid down into position easily and looked as good as the rest of the decals did. I stopped with my decaling operations for the night content with what I had done on the port side of the aircraft and let everything dry overnight.
I jumped into the starboard side of the planes decals the following afternoon after getting home from class. I was happy to see the remainder of the decals had snuggled into position overnight. I went to work in adding the decals to the starboard side of the plane, and in about 90 minutes I had that side complete and set everything aside to dry overnight. There was still plenty of time to continue working on this beast so I decided to tackle the weapons. I initially was going to use the two fuel tanks that hand under the wing shoulders, but could not figure out how or what pylons to use as the kit suggested ones, dont match up to the portion under the wing fences. I did decide to use the two radar pods for the outer wing pylons as those fit as shown in the instructions. I finally chose to use the Kh-31 Missiles for the shoulder mounted weapons. I found a picture of a Fencer on-line sporting these and it looked cool. Good enough for me. I only used a total of four items on my plane. There is plenty of room for additional ordinance to be hung along the fuselage, and there is more than enough left in the box should I choose to build more and add them later.


About the Author


FROM: CALIFORNIA, UNITED STATES
After a several year break from the hobby I have happily returned to it. Slowly, but surely getting my mojo back.
Comments

Very good job.Pre-shading came out really well.
Build On,
Justin
MAY 22, 2010 - 02:30 AM
Thanks Justin, but no pre-shading done on this one. It was all post shading and lots of it too.
"Q"
MAY 22, 2010 - 11:55 AM
Great build, Matt. This is one big beast, but one of the more sleak and beautiful Soviet jets.
Thanks for sharing
MAY 27, 2010 - 01:35 AM
Thanks for the kind words Jesper. It was a challenging and yet rewarding build. Lots of things I would change if I had it to do over again. Thanks again, "Q"
MAY 27, 2010 - 12:14 PM

Again, one of the BEST build reviews I've ever seen. This particular kit is still a bit pricey for me, but I'm sure in a couple of years when it's been on the market for a while one will make it's way to my stash. In all honesty Trumpeter should pay you for this one Q. I'm sure you're in depth review has sold quite a few of these kits for them.
Hermon
MAY 31, 2010 - 10:35 AM
Thanks for the kind words Hermon. I was just glad to get the chance to build and ultimately finish it. It isn't a bad kit in my eyes, just extremely complex in some areas; areas that I should have slowed down a wee bit on.. lol. Glad you liked the review.
"Q"
JUN 01, 2010 - 02:37 AM
Copyright ©2021 by Matthew Quiroz. Images also by copyright holder unless otherwise noted. The views and opinions expressed herein are solely the views and opinions of the authors and/or contributors to this Web site and do not necessarily represent the views and/or opinions of AeroScale, KitMaker Network, or Silver Star Enterrpises. Images also by copyright holder unless otherwise noted. Opinions expressed are those of the author(s) and not necessarily those of AeroScale. All rights reserved. Originally published on: 2010-05-19 00:00:00. Unique Reads: 14367

WEB HOSTING BY


Copyright ©2021 AeroScale and Kitmaker Network, a subsidiary of Silver Star Enterprises
All Rights Reserved. Please read our Conditions of Use and Privacy Policy.
All Rights Reserved. Please read our Conditions of Use and Privacy Policy.