

1⁄48Su-24M
7
Comments
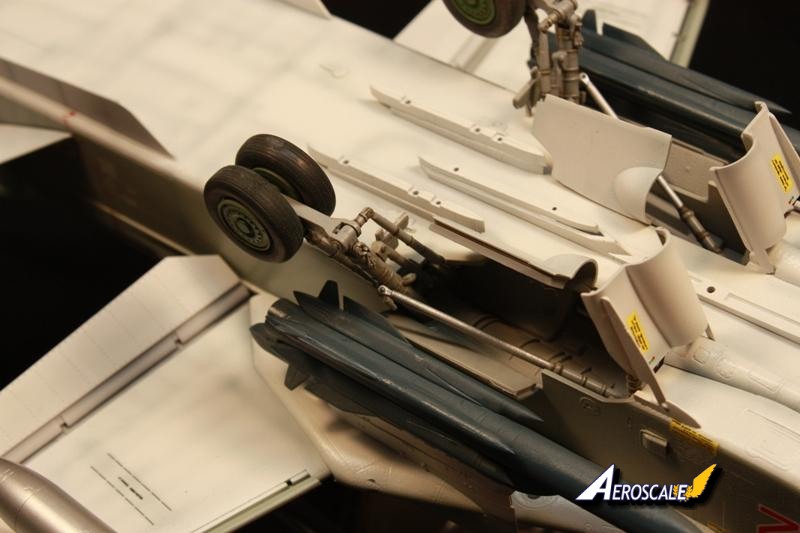
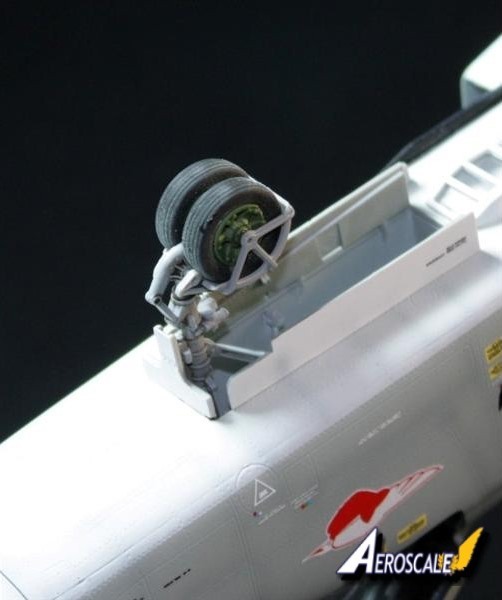
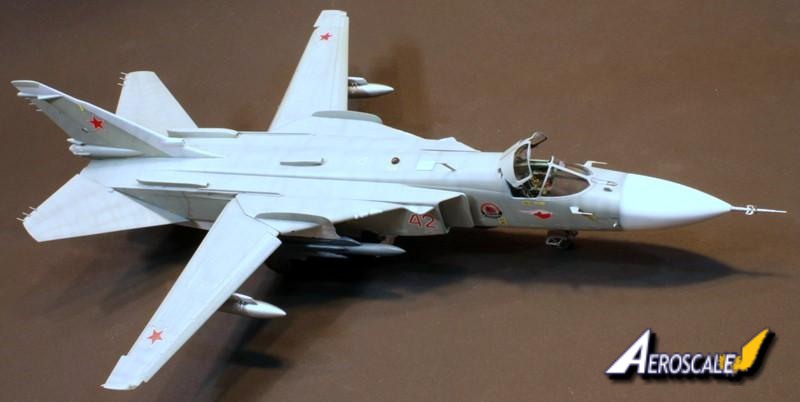
I returned to the fencer the following day once the decals had completely dried to add the complex landing gear. This would prove to be a lesson in patience and determination and one that I would ultimately have to concede on. The main landing gear doesnt fit into dedicated slots per se. They are an insert tab A into slot B affair, and depending on how far you insert tab A into slot B will determine just how well or not so well your landing gear fit
period. What I learned while doing this install, is that one should install as many of the retraction arms onto the main landing gear before-hand
and do this dry or with minimal glue. Then install the main gear into their slots, and then glue the opposite end of the retraction arms onto their respective spots. If you glue the main gear sans retraction legs firmly into place, and decide to add the retraction arms later once everything has had a chance to dry, you might find that the main gear were inserted too far into their slot, and now the retraction arms are too short to make the span. How do I know this
? Take a guess. I was able to flood the gear with some liquid cement to soften things up and eventually remove my landing gear legs enough that I could get the retracts mounted. Well, most of the retracts were mounted. There were two that no matter what I did, I could not manipulate them into position and get them secured. Rather than risk tearing everything else out just to get these arms installed, I opted to leave them out and chalk it up to experience. There are enough arms and struts and other assorted stuff down there that they really arent noticeable when it is sitting on its wheels.
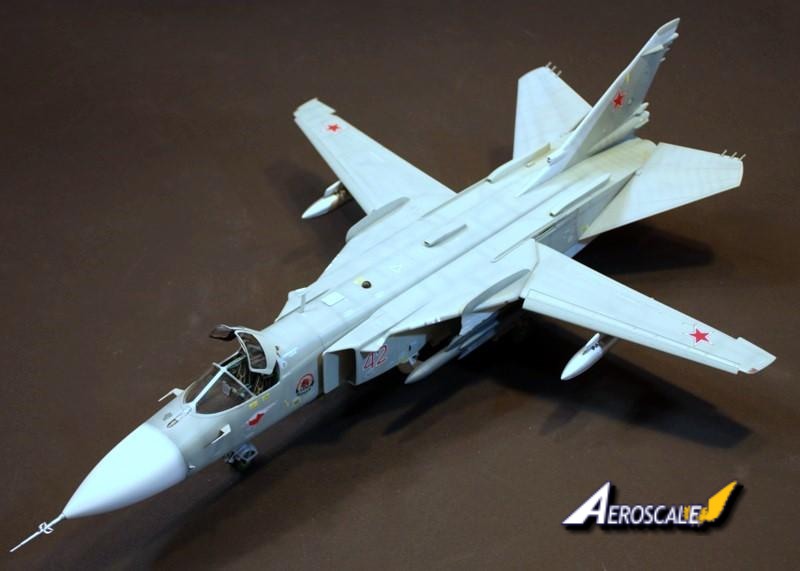
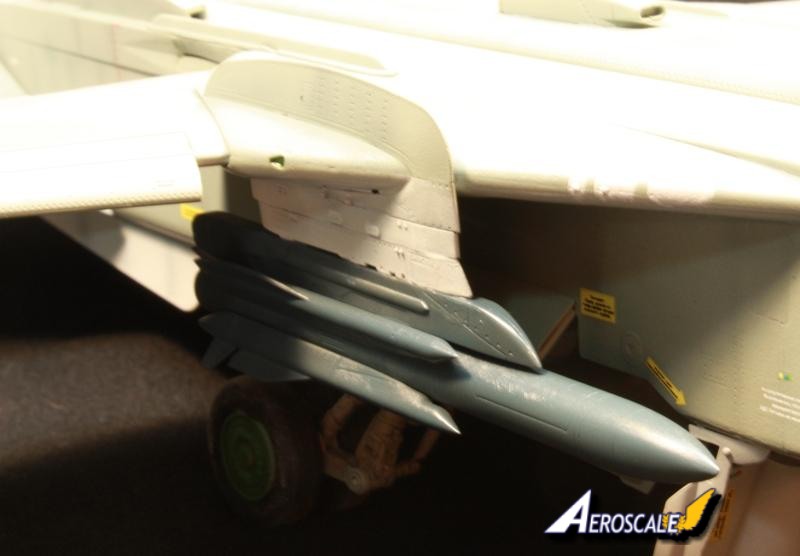
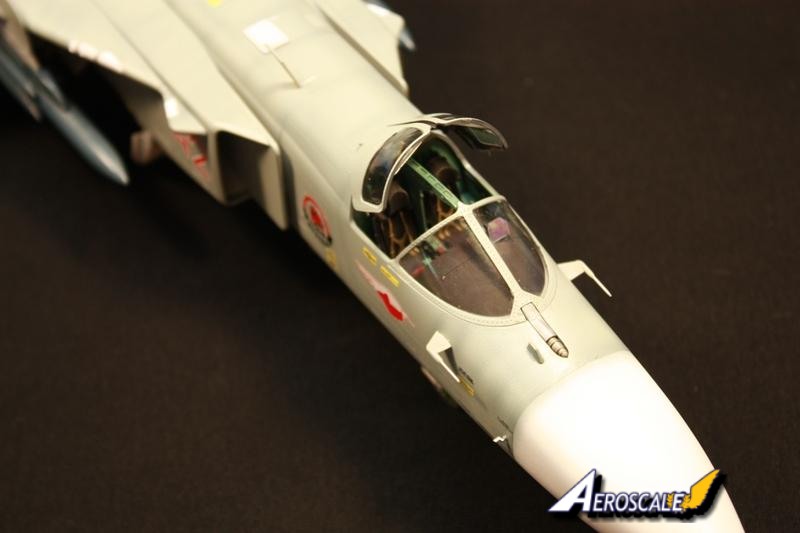
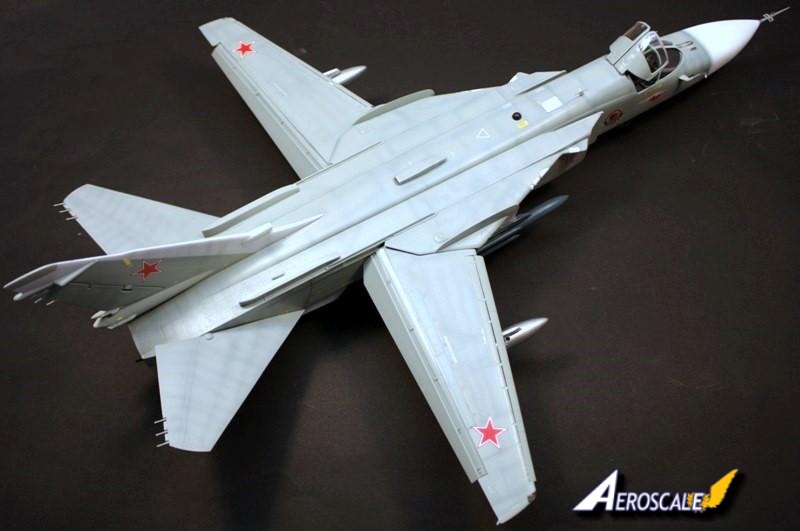
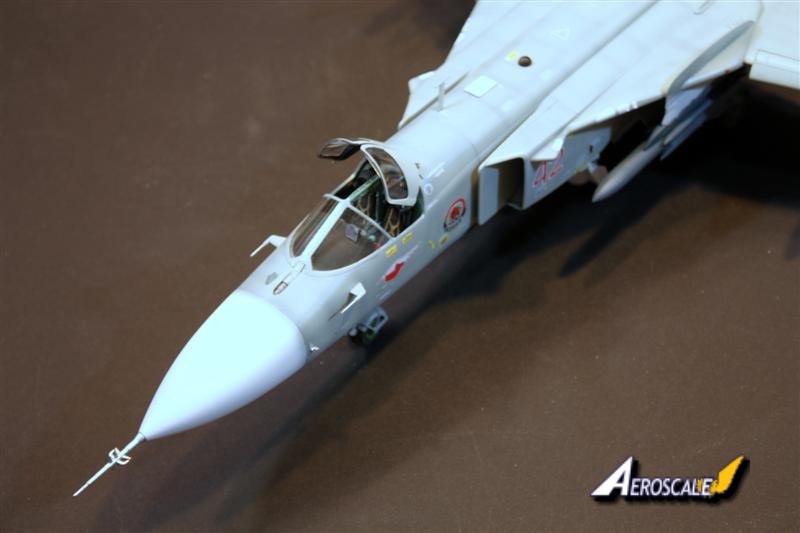
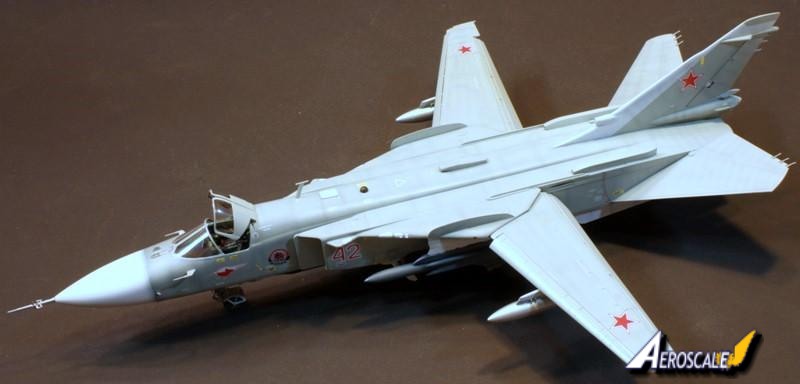
At this point the Fencer is so close to being finished that I can actually see the light at the end of the tunnel. I hope it isnt a train. The weapons were painted and installed following the landing gear legs, and the slats and flaps were added following the weapons. All that remained was to add the canopy and windscreen and she would be complete. I have been using Future as a means of gluing canopies and windscreens to my planes for some time now. The benefits of it are that it is clear, flows exceptionally well along seam lines, and dries quickly. I attached the windscreen and touched a small amount of Future to one corner and let capillary action do the rest. I added a small rubber band to hold things in place while it cured. After about 20 minutes I cut the rubber band free and the windscreen was sitting securely where it should be. The rear opening canopies were installed next using a small drop of CA on their hinge points. I had applied accelerator to the fuselage prior so things would stick when stuck It worked like a charm as the canopies found their mark and when I let go, they stayed in place without so much as a wiggle.
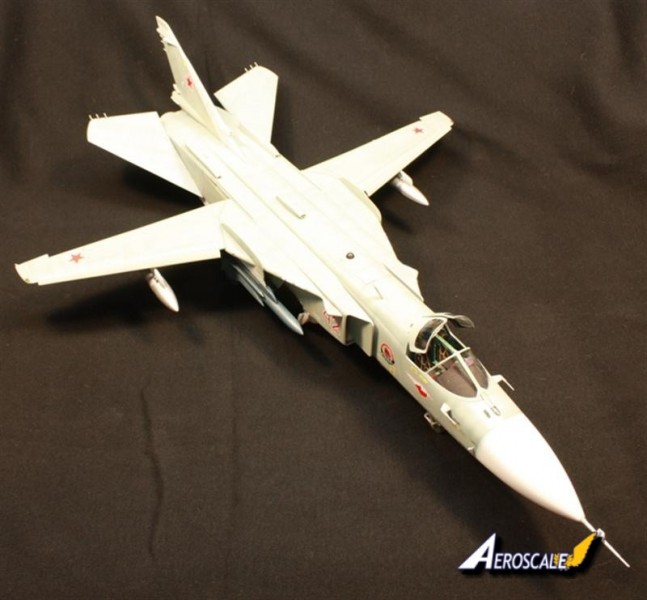
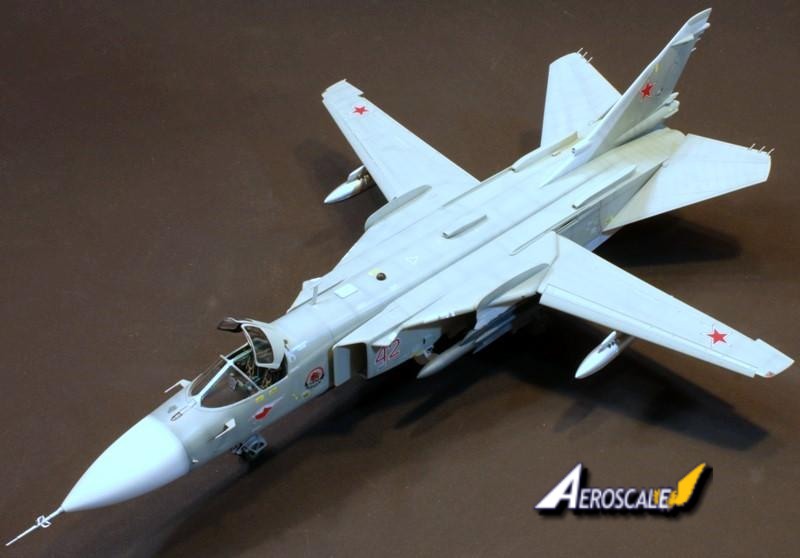
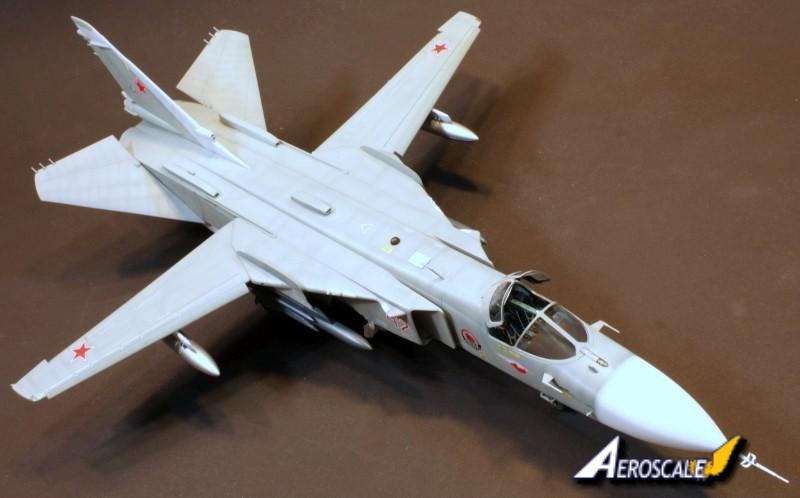
The final items added were all the small fiddly bits such as the nose probe and a couple small blade antennas. The elevators were slid into the respective slots and then positioned. I added the radar pods under the wings, and stepped back to admire the Fencer. It was done.
I didnt cover all aspects of what I did during the build such as specific colors for the landing gear, wheels etc. I wanted to highlight the areas that I felt would be most important to other builders such as the complex landing gear, nose gear parts, slots in the wing shoulders etc.
If there is something that I didnt mention and you would like me to elaborate on, feel free to contact me and Ill do my best to answer your questions. Thanks for following along on my build log, and providing me with what feedback you did, it was greatly appreciated.
At this point the Fencer is so close to being finished that I can actually see the light at the end of the tunnel. I hope it isnt a train. The weapons were painted and installed following the landing gear legs, and the slats and flaps were added following the weapons. All that remained was to add the canopy and windscreen and she would be complete. I have been using Future as a means of gluing canopies and windscreens to my planes for some time now. The benefits of it are that it is clear, flows exceptionally well along seam lines, and dries quickly. I attached the windscreen and touched a small amount of Future to one corner and let capillary action do the rest. I added a small rubber band to hold things in place while it cured. After about 20 minutes I cut the rubber band free and the windscreen was sitting securely where it should be. The rear opening canopies were installed next using a small drop of CA on their hinge points. I had applied accelerator to the fuselage prior so things would stick when stuck It worked like a charm as the canopies found their mark and when I let go, they stayed in place without so much as a wiggle.
The final items added were all the small fiddly bits such as the nose probe and a couple small blade antennas. The elevators were slid into the respective slots and then positioned. I added the radar pods under the wings, and stepped back to admire the Fencer. It was done.
I didnt cover all aspects of what I did during the build such as specific colors for the landing gear, wheels etc. I wanted to highlight the areas that I felt would be most important to other builders such as the complex landing gear, nose gear parts, slots in the wing shoulders etc.
If there is something that I didnt mention and you would like me to elaborate on, feel free to contact me and Ill do my best to answer your questions. Thanks for following along on my build log, and providing me with what feedback you did, it was greatly appreciated.


About the Author


FROM: CALIFORNIA, UNITED STATES
After a several year break from the hobby I have happily returned to it. Slowly, but surely getting my mojo back.
Comments

Very good job.Pre-shading came out really well.
Build On,
Justin
MAY 22, 2010 - 02:30 AM
Thanks Justin, but no pre-shading done on this one. It was all post shading and lots of it too.
"Q"
MAY 22, 2010 - 11:55 AM
Great build, Matt. This is one big beast, but one of the more sleak and beautiful Soviet jets.
Thanks for sharing
MAY 27, 2010 - 01:35 AM
Thanks for the kind words Jesper. It was a challenging and yet rewarding build. Lots of things I would change if I had it to do over again. Thanks again, "Q"
MAY 27, 2010 - 12:14 PM

Again, one of the BEST build reviews I've ever seen. This particular kit is still a bit pricey for me, but I'm sure in a couple of years when it's been on the market for a while one will make it's way to my stash. In all honesty Trumpeter should pay you for this one Q. I'm sure you're in depth review has sold quite a few of these kits for them.
Hermon
MAY 31, 2010 - 10:35 AM
Thanks for the kind words Hermon. I was just glad to get the chance to build and ultimately finish it. It isn't a bad kit in my eyes, just extremely complex in some areas; areas that I should have slowed down a wee bit on.. lol. Glad you liked the review.
"Q"
JUN 01, 2010 - 02:37 AM
Copyright ©2021 by Matthew Quiroz. Images also by copyright holder unless otherwise noted. The views and opinions expressed herein are solely the views and opinions of the authors and/or contributors to this Web site and do not necessarily represent the views and/or opinions of AeroScale, KitMaker Network, or Silver Star Enterrpises. Images also by copyright holder unless otherwise noted. Opinions expressed are those of the author(s) and not necessarily those of AeroScale. All rights reserved. Originally published on: 2010-05-19 00:00:00. Unique Reads: 14367

WEB HOSTING BY


Copyright ©2021 AeroScale and Kitmaker Network, a subsidiary of Silver Star Enterprises
All Rights Reserved. Please read our Conditions of Use and Privacy Policy.
All Rights Reserved. Please read our Conditions of Use and Privacy Policy.