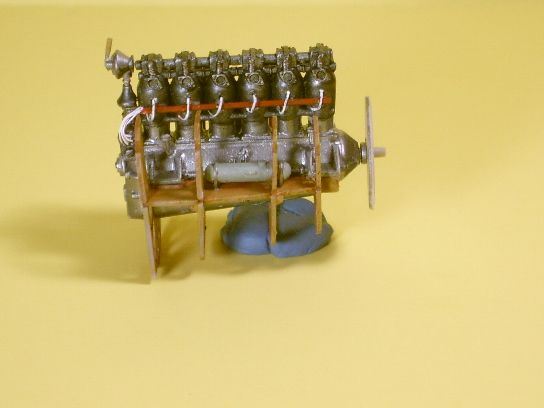
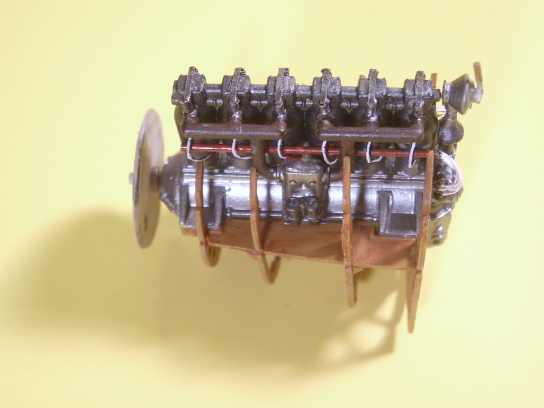
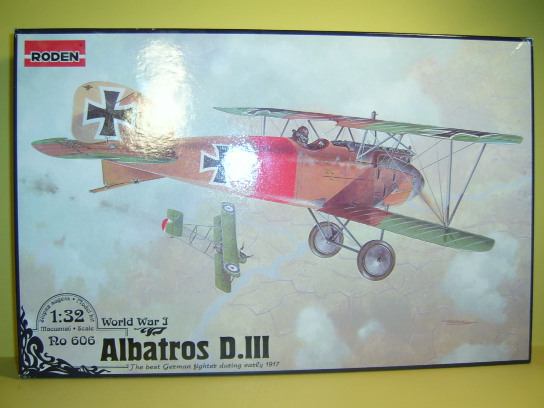
Construction begins with the engine assembly in steps 1-6. Roden would have you add parts to the right side in step 1, then progress to the left side, and finally assemble the engine. I chose to do a more standard assembly sequence and glue the right and left halves together and then add the details. Borrowing heavily from Brad Cancian's build notes I added plug wires and replaced part number 6Z with plastic rod. One thing to mention here is that Roden shows you attaching the radiator return pipe,part 7B to the bottom right hand engine half. I did not follow this as the pipe is FAR TOO short to attach at this point and meet the wing in later steps. Looking at Brad's build I noticed he also skipped this so I believe that Roden got this wrong in their directions.
I skipped steps 7&8 temporarily, to assemble the formers and engine supports per step 9. The supports were given a coat of Testors wood, and then a wash of artists tube oils Burnt Sienna for the wood effect.One thing to note is that some modelers use Japan drier to speed up the process. I have found that Testors Model Masters Airbrush thinner used instead of Turps decreases drying time but leaves plenty of time to work and rework the oils untill you are satisfied. One thing to note is that the directions show the tabs on part 45A pointing to the front. If you assemble this former as directed it is backwards with the short cut off side to the left instead of the right to make room for the exhaust pipes.
The motor was painted with Testors Model Masters Non-Buffing Gun Metal for the cylinders, and Gunze Metalics for the crakcase and details. I have not quite finished this as I do intend to add the fuel regulator? to the BACK of the engine, correct I think for the Mercedes DIII 160hp ? Stephen your comments here are welcome! I will add a wash of artists oils to simulate Oil stains and generally dirty this area up, as well as add the manufacturers detail plates supplied in the Eduard PE set. Speaking of the PE I have the excellent Tom's model works set, kindly donated by Tom's, and ordered the Eduard set. The Tom's set includes seat belt buckles more on these later, machine gun cooling jackets and details, a couple of interior details, and a lot of great exterior details. Eduard offered some excellent details not on the Toms set for both the interior and exterior and I felt a combination of the two would be good. I Love the Albatros

Attached see the details of the Engine:


Plug wires and Valve Springs were made with small gauge wire.
RAGIII


