Official: Phabulous Phantom Thread

#041
Kobenhavn, Denmark
Joined: July 20, 2006
KitMaker: 10,069 posts
AeroScale: 3,788 posts
Posted: Monday, June 16, 2008 - 11:16 PM UTC
Ayhan, you are making excellent progress.
It is a great idea to make one Phantom for each country that used them. However, it might be a little timeconsuming

Looking forward to see more

Campaign'oholic - 252+ campaigns completed
Istanbul, Turkey / Türkçe
Joined: December 22, 2004
KitMaker: 1,241 posts
AeroScale: 616 posts
Posted: Tuesday, June 17, 2008 - 04:08 AM UTC
I have time:] My two Brit birds are going on the way fine. The Esci one had it's puttywork done. I am willing to fix the Fujimi one too. By the way I discovered I also assambeled the other Fujimi(Which is a B and gonna be VF-84) so I am starting to it too.
Realy nice looking SEA by the way Ayhan(I always feel funny adressing a native in English but it is an international forum eh?) . The engine warning line seemed a little undersized though.
NVNC ID VIDES NVNC NE VIDES

">
England - South East, United Kingdom
Joined: June 27, 2006
KitMaker: 2,487 posts
AeroScale: 575 posts
Posted: Tuesday, June 17, 2008 - 09:36 AM UTC
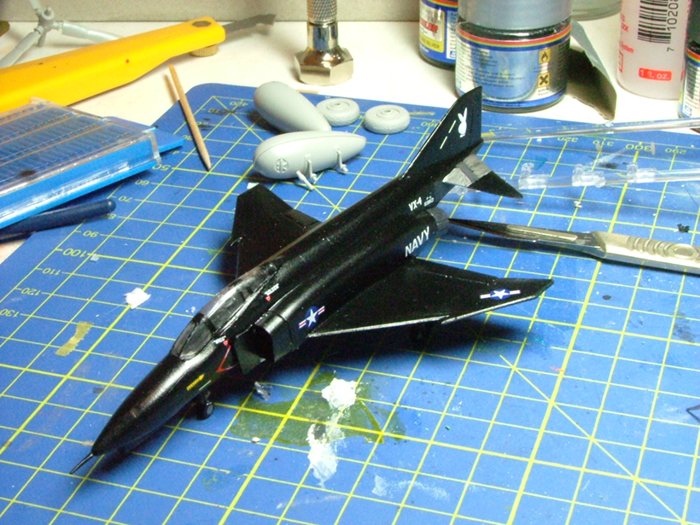
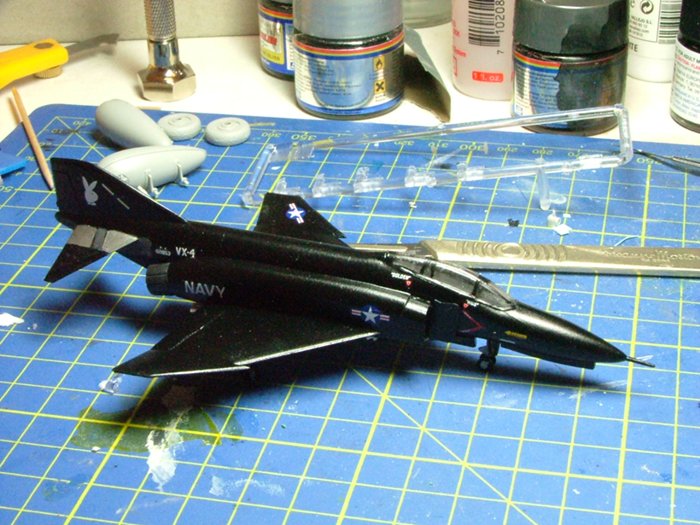
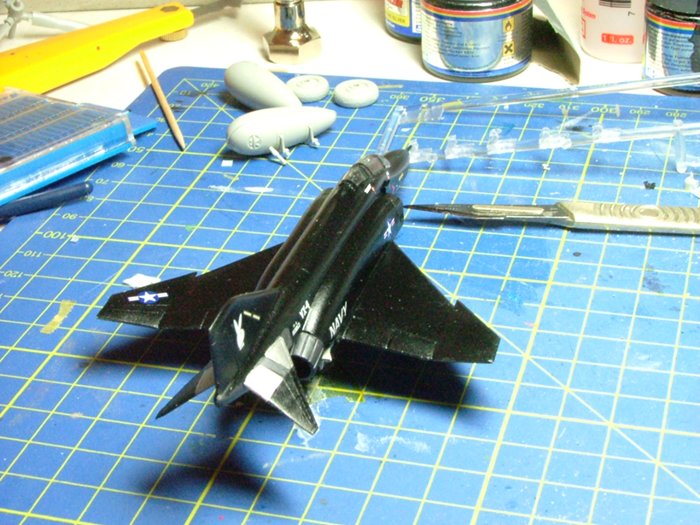
I've thrown together this little beauty (?) from an old minicraft kit and some spare decals. It's indicative of Vandy 1.
Not the best, but i've enjoyed it. If time allows i'll do another bigger one before the end of the campaign
Andy
It's not the same, better, but not the same...
IPMS NO 10636
Östergötland, Sweden
Joined: April 18, 2006
KitMaker: 708 posts
AeroScale: 678 posts
Posted: Tuesday, June 17, 2008 - 09:50 AM UTC
Hi all!
Wow, Already many nice builds on the way!
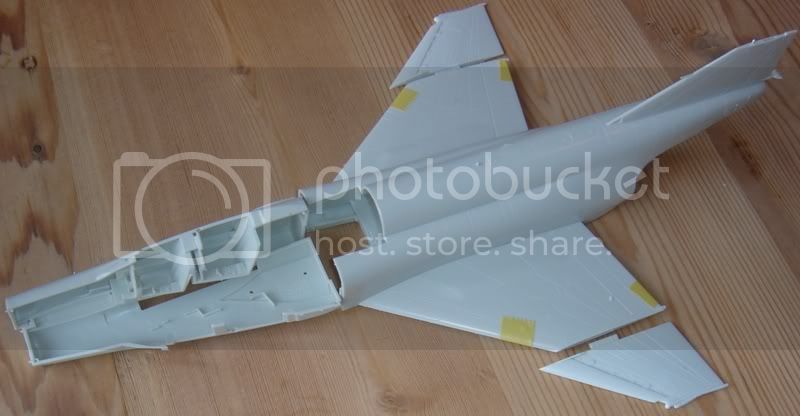
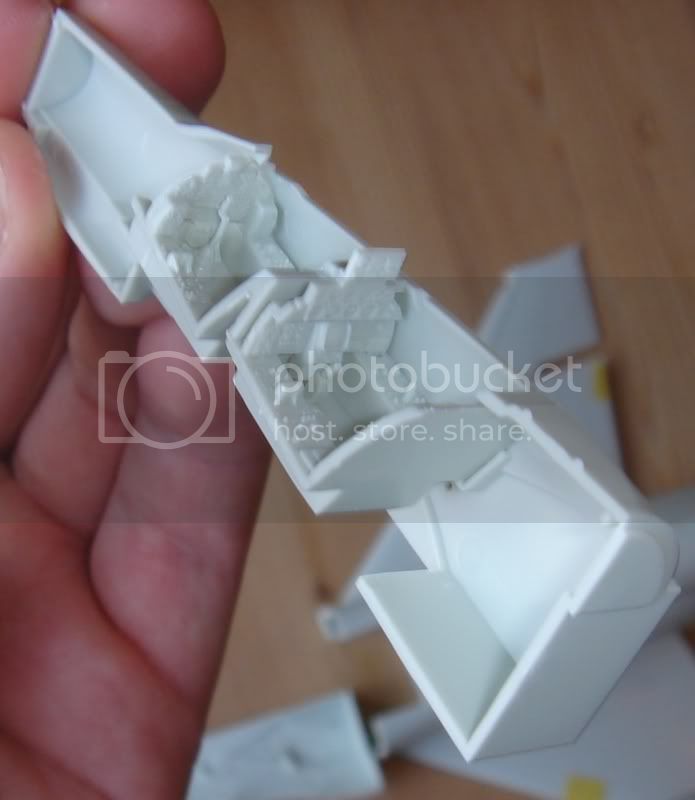
Here´s my kit;

But, as I can´t imagine a Phantom in grey, I´ll use this as starting point for this;

"Betty Lou" , an early F-4E with short nose cannon in SEA-cammo.
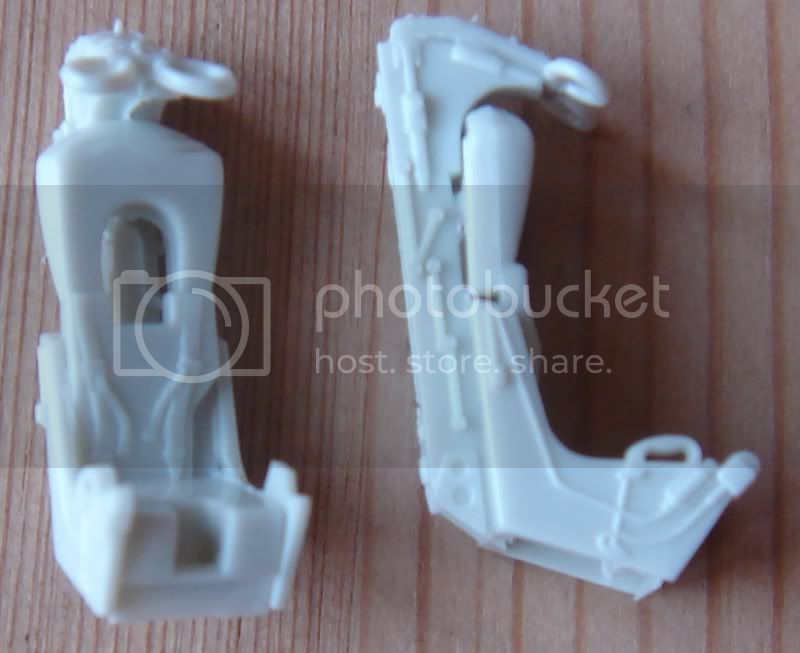
The decals and a pair of new seats from Avionix (former Black Box) will be the only additions;

Soon I´ll get going, but I have a couple of other builds to complete too!
Cheers!


Stefan E


#041
Kobenhavn, Denmark
Joined: July 20, 2006
KitMaker: 10,069 posts
AeroScale: 3,788 posts
Posted: Tuesday, June 17, 2008 - 11:22 PM UTC
Looks nice, Andy. A sweet little black bunny


Excellent choice of camouflage and markings, Stefan. One of the most attractive camouflages for the Phantom.
Looking forward to see more

Campaign'oholic - 252+ campaigns completed
England - South East, United Kingdom
Joined: September 15, 2004
KitMaker: 4,728 posts
AeroScale: 1,351 posts
Posted: Wednesday, June 18, 2008 - 08:47 AM UTC
Some nice builds going on here and should be very colourful.
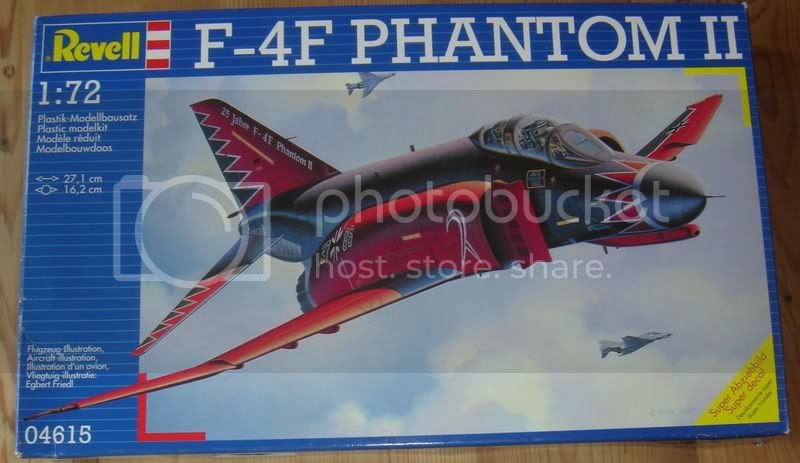
Small update on my first F-4F, paint finished, gear and tanks left to finish and attach then markings to be applied.
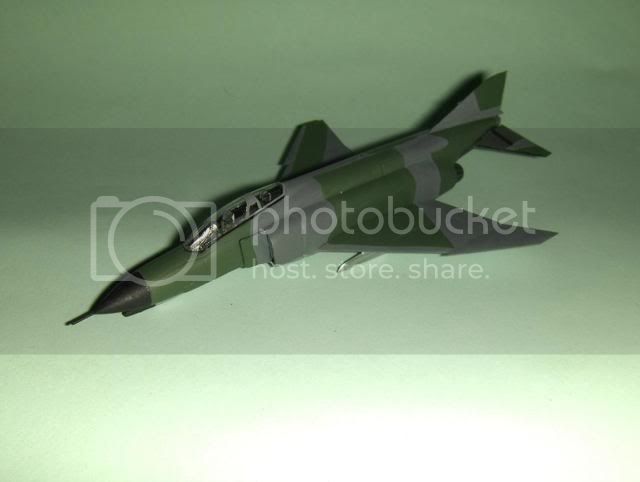
Ciao
Luciano
On the bench...
Italeri A129 Mangusta
British Bulldog Spitfire theme build
Ontario, Canada
Joined: August 17, 2003
KitMaker: 753 posts
AeroScale: 174 posts
Posted: Wednesday, June 18, 2008 - 09:46 AM UTC
Little update on my phantom. Gloss varnish and first phase decals applied to model. Decals are (National markings and flag) from "Turquoise Decals".
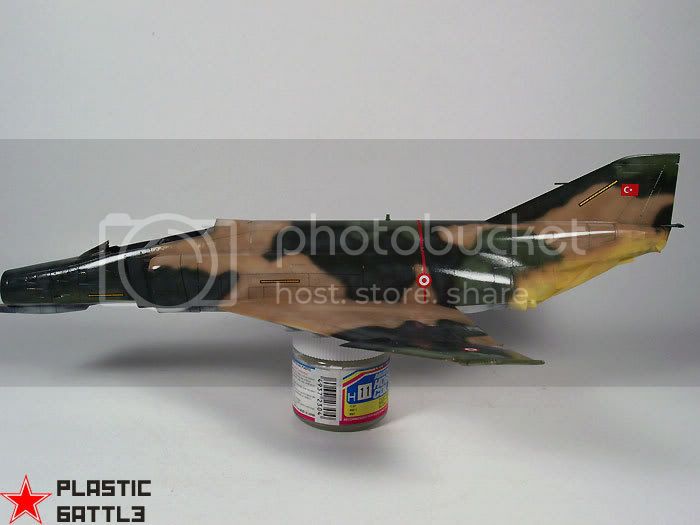
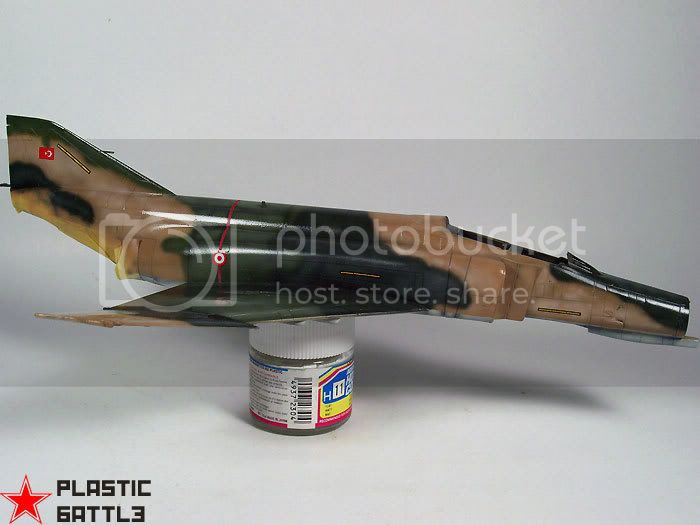

#041
Kobenhavn, Denmark
Joined: July 20, 2006
KitMaker: 10,069 posts
AeroScale: 3,788 posts
Posted: Thursday, June 19, 2008 - 05:35 AM UTC
Campaign'oholic - 252+ campaigns completed
England - South East, United Kingdom
Joined: September 15, 2004
KitMaker: 4,728 posts
AeroScale: 1,351 posts
Posted: Friday, June 20, 2008 - 10:50 AM UTC
Woops noticed that the canopy was not finished. Thats now done and it's had a coat of Klear.
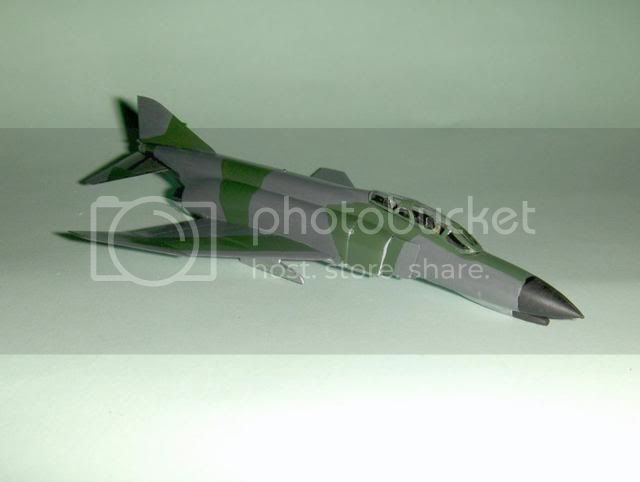
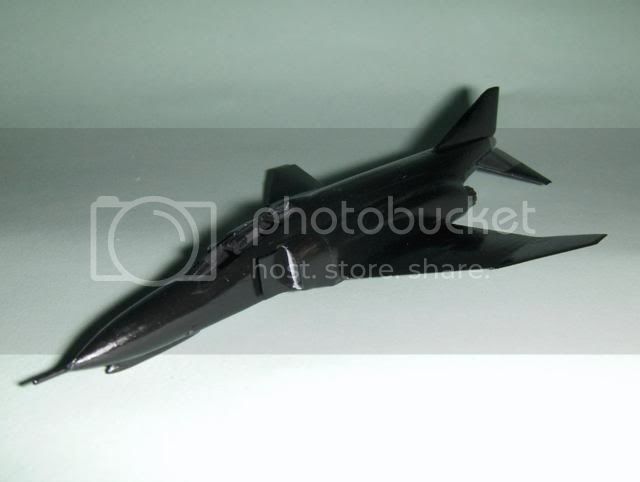
OK progress on number two, black finish applied after a bit of a nightmare with some gloss vanish which required a lot of sanding to get rid of bobbals caused by the varnish. Luckly that I only applied the varnish to one wing first

Its recieved a coat of Klear and is ready for decals, gear, canopy and weapon load still to be finished and attached.
Ciao
Luciano
On the bench...
Italeri A129 Mangusta
British Bulldog Spitfire theme build
Victoria, Australia
Joined: June 28, 2007
KitMaker: 171 posts
AeroScale: 113 posts
Posted: Friday, June 20, 2008 - 09:04 PM UTC
Hey all its great to see the models so far.
i have done a little bit of my cockpit so far, im just waiting on getting some colors.
Atoplu i must say that is an extreemy beutiful model. Keep up the good work so far guys all the models are looking great

kits in progress: 1/72 F-4S
: 1/72 F-4F

#041
Kobenhavn, Denmark
Joined: July 20, 2006
KitMaker: 10,069 posts
AeroScale: 3,788 posts
Posted: Friday, June 20, 2008 - 11:55 PM UTC
Campaign'oholic - 252+ campaigns completed
Victoria, Australia
Joined: June 28, 2007
KitMaker: 171 posts
AeroScale: 113 posts
Posted: Monday, June 23, 2008 - 12:26 AM UTC
kits in progress: 1/72 F-4S
: 1/72 F-4F
Istanbul, Turkey / Türkçe
Joined: December 22, 2004
KitMaker: 1,241 posts
AeroScale: 616 posts
Posted: Tuesday, June 24, 2008 - 05:25 AM UTC
Iııı Jesper I am pretty sorry for being this late but I think you misplaced the control sticks. The directions seem wrong. Could you re check them?
NVNC ID VIDES NVNC NE VIDES

">
Indiana, United States
Joined: May 14, 2007
KitMaker: 3,117 posts
AeroScale: 2,270 posts
Posted: Tuesday, June 24, 2008 - 09:23 AM UTC
I am really, really behind on this one. I am in the middle of three other builds, and experiencing a real lack of time. But I hope to be starting this one in a few weeks.
I will be building a 1/32 Tamiya Phantom II in the colors of the late BG Robin Olds. How is that for ambition when I'm so far behind.
"Treat 'em Rough", Current Builds--Wingnut Rumpler
I am frequently seen with blood shot eyes from staying up past my nap time to get the right colour scheme on my latest WWI model?

#041
Kobenhavn, Denmark
Joined: July 20, 2006
KitMaker: 10,069 posts
AeroScale: 3,788 posts
Posted: Tuesday, June 24, 2008 - 09:52 PM UTC
Ohh no, you will probably make my kit look bad

Anyway, It will still be fun to compare the finished builds.

The kit is great! Really nice details and it has no fit problems what so ever, although I have not fixed the clear parts in place yet, so cannot comment on the fit of those.
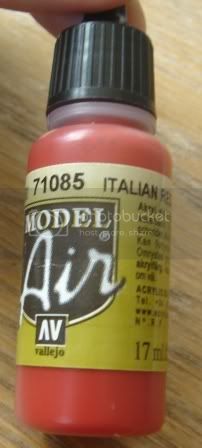
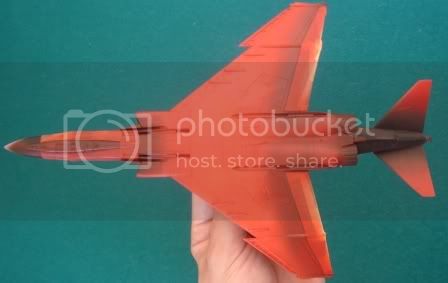
I hit a minor stubling block. I decided to spray the black first as this is easier to mask - then spray the red. This turned out to be a bad idea as the red covers the black colour really bad. Normally I have the opposite problem as my preshading is invisible even with light colours such as light grey.
Anyway, I guess a couple of more coats of red will solve the problem.

I am building my Phantom II without any stores and wheels up. I plan to make some kind of stand that will show of the underside as well as the upper side of the aircraft.
More to follow.....
Campaign'oholic - 252+ campaigns completed
Victoria, Australia
Joined: June 28, 2007
KitMaker: 171 posts
AeroScale: 113 posts
Posted: Tuesday, June 24, 2008 - 10:34 PM UTC
Oh i feel so far behind now. i am still trying to get a price for the mask.
Jesper thanks for that, do you have reference pictures? i have quite a few if you want me to send them to you, the plane not long ago is still kept in new looking order, so i wont be doing much weathering


kinda good for a beginner. Do you have pictures of tour cokpit jesper? i have done some research and found a german F-4F rear panel is not the same as this kit. so if you could help me on some color references that would be great

kits in progress: 1/72 F-4S
: 1/72 F-4F

#041
Kobenhavn, Denmark
Joined: July 20, 2006
KitMaker: 10,069 posts
AeroScale: 3,788 posts
Posted: Wednesday, June 25, 2008 - 08:45 PM UTC
James, I would really like to see some reference pictures. I have not been able to locate any of this particular aircraft. Although it might be a little too late as I will take of the masking today after the basic colour scheme is on. But might be helpful for the details.

German cockpits seems to be the same colour as US cockpits based on the instructions. I am away from all my normal paint selection, so I must admit that simply went for some greys I mixed to look right.
Hope the below pictures help.
 PHANTOM II FRONT COCKPIT PHANTOM II REAR COCKPIT
 Campaign'oholic - 252+ campaigns completed
Ohio, United States
Joined: January 03, 2008
KitMaker: 150 posts
AeroScale: 119 posts
Posted: Friday, June 27, 2008 - 08:08 AM UTC
DISASTER!!!
I finally got a chance to start on my plain jane Monogram F-4J "Mig Killer". Well, I had started to paint the cockpit a long time ago, and it was horrible, so I dunked the cockpit tub in some solvent, very soon after to be distracted by my dog and my mother. Well, long story short, I came back to find my cockpit tub in a very smooth pile of soft plastic at the bottom of the bowl.
Needless to say, I need a cockpit! I'm gonna see what I can find in the aftermarket, but maybe someone has one for a monogram kit they don't need? that would be super swell!!!!!
I'm also being overwhelmed by all of the stores on this thing. I've actually never completed a jet before (except a 1/48 SR-71..... Long story), and in fact I don't think I've ever even built a plane with a bomb hanging from it. So this sanding and finishing of so many of the same thing is wearing on me!!
Hope to have pics up soon
Victoria, Australia
Joined: June 28, 2007
KitMaker: 171 posts
AeroScale: 113 posts
Posted: Sunday, June 29, 2008 - 12:29 AM UTC
Sorry to hear bout that bad news Eric, hope you get another cocpit soon. if you dont come up with something in the time for the campaign i will be happy to give you more time.
Jesper i have some really good pics for you as reference, took me a whole night to find these

hope they help


This is an interesting one, dose they kit instruction tell you to paint those white lines?


if they dont load just go to my album on the kitmaker network
kits in progress: 1/72 F-4S
: 1/72 F-4F

#041
Kobenhavn, Denmark
Joined: July 20, 2006
KitMaker: 10,069 posts
AeroScale: 3,788 posts
Posted: Sunday, June 29, 2008 - 03:24 AM UTC
Sorry to hear about your cockpit trouble, Eric. I hope you find a solution.
As a last resort you can cover the cockpits with a blanket or tarp. I have seen that in some pictures from Vietnam, but cannot find the picture now. No doubt the cockpits could get extremely warm in the sun and that is probably why they were covered.
James, thanks for the pictures. They are great.

Notice how the red colour looks different in the different photos. Very interesting - I think I have used the right red colour with a more darker hue.
I do not have the white line on my Photos. I have already applied the varnish and is ready for the decals. I cannot decide if I want to paint the white line now - I am affraid it will look strange and destroy the uniformity of the finish if I apply it on top of the varnish.
Campaign'oholic - 252+ campaigns completed
Indiana, United States
Joined: May 14, 2007
KitMaker: 3,117 posts
AeroScale: 2,270 posts
Posted: Sunday, June 29, 2008 - 07:17 AM UTC
Eric)-Sorry to hear about your globular cockpit. I think all of us have a similar story hiding in our past.
"Treat 'em Rough", Current Builds--Wingnut Rumpler
I am frequently seen with blood shot eyes from staying up past my nap time to get the right colour scheme on my latest WWI model?
Victoria, Australia
Joined: June 28, 2007
KitMaker: 171 posts
AeroScale: 113 posts
Posted: Sunday, June 29, 2008 - 10:22 PM UTC
Hey jesper, i think some of the camera qualities may be at play there with the colors, i picked the clearest ones possible. happy to help. sorry for not getting them to you sooner for those white lines, thats the only picture that shows them.
kits in progress: 1/72 F-4S
: 1/72 F-4F
Georgia, United States
Joined: January 05, 2006
KitMaker: 96 posts
AeroScale: 61 posts
Posted: Monday, June 30, 2008 - 12:42 AM UTC
Hello guys. I don't have any pictures yet...still trying to figure out how to get some on this site. Can somebody explain? Anyhow, I had similar tragedy beset me as I was getting started on my build - Hasegawa 1/72 F-4S - the family dog was in the hobby room with me when I decided to open up the bag containing the clear parts & decal sheet. I was being clever in thinking I would take the decals with me to work so I could oogle them during breaks. Yeah I know, what a job. Well what I didn't see was the front canopy as it flew across the room landing in the vicinity of the dog. Yep you guessed it...in about 15 seconds my wife is calling from the living room and wants to know what "Sugar" is nawing on. Well I immediately get this sick, sinking feeling like I'm in the bottom of a very bad loop and then discover that "Sugar" has put a nice hole dead center the front canopy. Much cursing and loathing follows!!
No worries...I have decided to clean up the mess with putty and I am simply going to paint the clear parts a nice shade of blue like what you see on the solid wood dsplay models one can buy for the office display. Not the best thing but at least the dog lives and the kit is not going to the boneyard. Meanwhile I picked up another Hasegawa 1/72 kit from lhs - Luftwaffe commerative scheme - and may build it if I have time to get it complete for this build.
About the cockpit photos...when I was a crew chief on the F-4E back in the early 80's, I don't remember the ejection handle between the legs being so big. Trouble is my memory seems to be aging like the rest of me and maybe I just don't 'member so good!
Hey, speaking of memory....when does this build reach the finish line???
Have a phabolous day everyone.

Georgia, United States
Joined: January 05, 2006
KitMaker: 96 posts
AeroScale: 61 posts
Posted: Monday, June 30, 2008 - 12:53 AM UTC
It's me again. Forgot to mention - there goes that whole memory issue flairing up - there is a cool site in cyberspace dealing with ejection seats that has some really neat photos and detailed data on the Martin Baker seats used in the Phantom II. Just google ejection seats and should pop up...really a wealth of info. Great site to add to favorites.
Good morning gents and be cool!


#041
Kobenhavn, Denmark
Joined: July 20, 2006
KitMaker: 10,069 posts
AeroScale: 3,788 posts
Posted: Monday, June 30, 2008 - 08:44 PM UTC
Quoted Text
Hey jesper, i think some of the camera qualities may be at play there with the colors, i picked the clearest ones possible. happy to help. sorry for not getting them to you sooner for those white lines, thats the only picture that shows them.
Hi James, when I started on the decals I actually noted that the white lines are included as decals. Somehow I missed that first time I checked. They are quite difficult to get to fit and get the lines straight, but I have succeed on the upper wings. Also the decals are quite high quality as the lines stay white and do not turn pink or grey depending on the red/black undersurface.
I will will try to get it to fit on the lower wings.
Photos will follow shortly.

Campaign'oholic - 252+ campaigns completed





 Sorry if it takes a little longer to download the tread


 Its recieved a coat of Klear and is ready for decals, gear, canopy and weapon load still to be finished and attached.


 Anyway, It will still be fun to compare the finished builds.


 kinda good for a beginner. Do you have pictures of tour cokpit jesper? i have done some research and found a german F-4F rear panel is not the same as this kit. so if you could help me on some color references that would be great


 hope they help


