1:32 Roden GB 2008 Albatros D.I
North Carolina, United States
Joined: June 19, 2007
KitMaker: 604 posts
AeroScale: 600 posts
Posted: Thursday, September 04, 2008 - 11:19 AM UTC
Larsa,
In all of my years using milliput I have never heard of freezing the leftover! What a great tip!! Thanks,
RAGIII
PS< You don't know how many sand bags, cannon balls etc. I have made that I will never use just trying not to waste the leftover

Östergötland, Sweden
Joined: April 04, 2006
KitMaker: 1,058 posts
AeroScale: 1,004 posts
Posted: Monday, September 08, 2008 - 07:35 PM UTC
Victoria, Australia
Joined: November 26, 2006
KitMaker: 608 posts
AeroScale: 602 posts
Posted: Monday, September 08, 2008 - 09:58 PM UTC
Ooooh,
Lookin' good there Larsa.
Cheers,
Hugh
North Carolina, United States
Joined: June 19, 2007
KitMaker: 604 posts
AeroScale: 600 posts
Posted: Tuesday, September 09, 2008 - 01:11 AM UTC
Looking really good! Nice work on the seat and padding!
RAGIII
Östergötland, Sweden
Joined: April 04, 2006
KitMaker: 1,058 posts
AeroScale: 1,004 posts
Posted: Tuesday, September 09, 2008 - 05:54 AM UTC
Thanks guys
Small steps here, but progress.
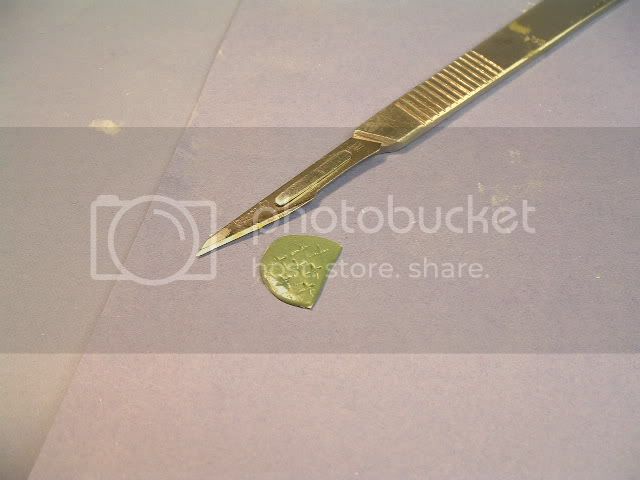
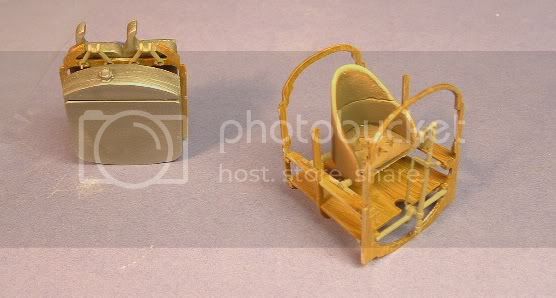
The seat got its paint on. I used Humbrol flesh and leather in a fifty-fifty mix. This would be the basecolour. Adding a few drops of black to the mix and carefully fixed the inside was done wile the basecolour still was wet. Tomorrow Ill install the belts.
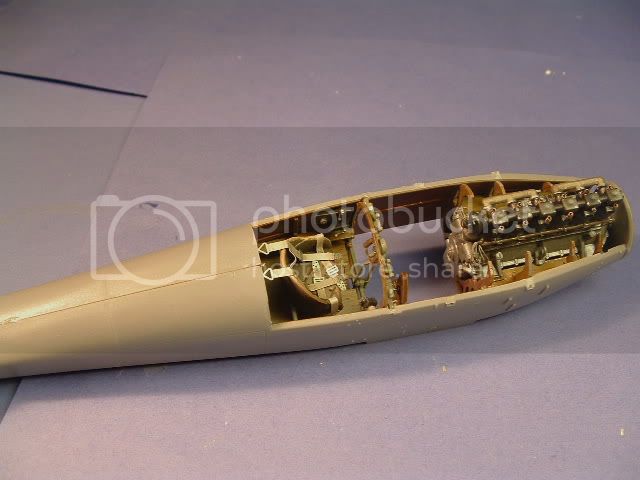
Fueltank and ammo is painted up and drying so that does will be installed after the seat section. I will carefully measure the distance for the gun mount. On the DIII kit the mount was just 2mm of. This discovery was done late in the build off many modellers.


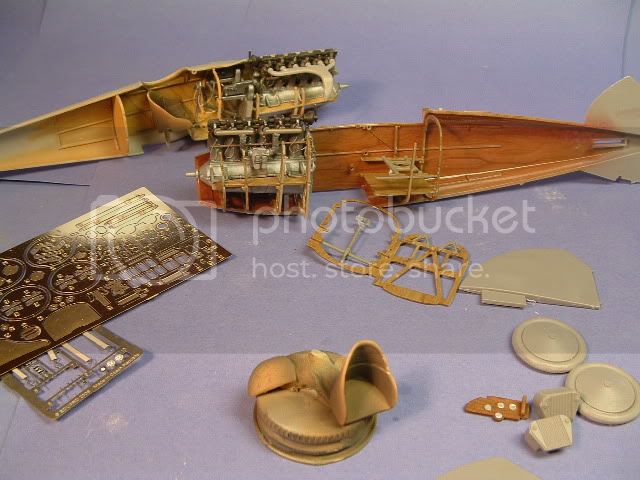
ps Tha Pfalz is not part off this build, so ignore that, I used it just to hold up the fuselage off the Albie. The Palz is just another story
Cheers
Larsa
Colorado, United States
Joined: January 25, 2004
KitMaker: 11,669 posts
AeroScale: 11,011 posts
Posted: Tuesday, September 09, 2008 - 07:37 AM UTC
Two stunning builds, side by side. And you want us to ignore one of them. Hmmmm someone is building a 1/32 Pfalz D.III and teasing us with the progress.

Here is the first thread on the subject at Aeroscale.
Click Here.". . .The most important thing is to know why you build and then get the most that you can out of building." via D.D.
Östergötland, Sweden
Joined: April 04, 2006
KitMaker: 1,058 posts
AeroScale: 1,004 posts
Posted: Tuesday, September 09, 2008 - 08:11 AM UTC

Instead for Tv-dinner, this is just a sideproject
The whole build is just a big fun. When the Pfalz is ready you guys will have the pics and the story.......
cheers
Larsa
Östergötland, Sweden
Joined: April 04, 2006
KitMaker: 1,058 posts
AeroScale: 1,004 posts
Posted: Thursday, September 11, 2008 - 05:41 AM UTC
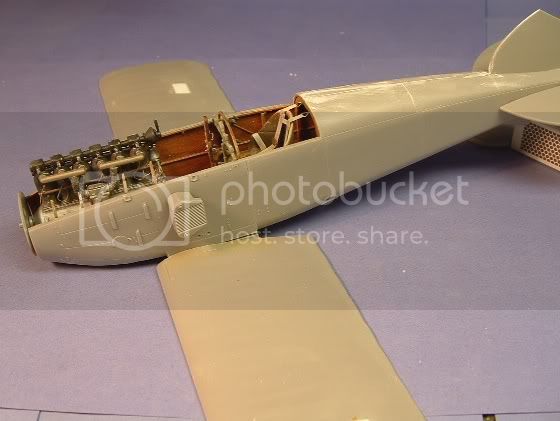
Hi
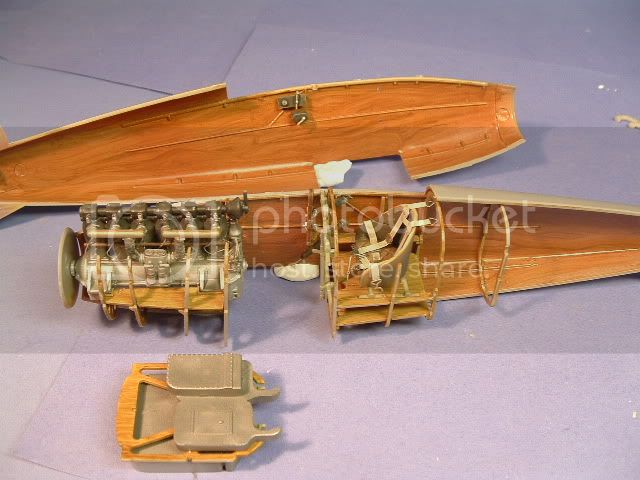
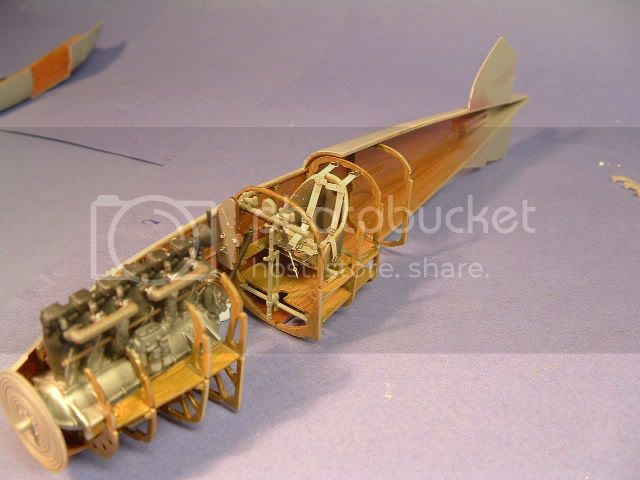
Now the fun part start, putting things together and get scared about how things looking together. You guys who sharp-eyed can see that theres two different colours off wood inside the fuselage. Thats an experiment from me. I wanted to have that reddish tone in the woodgraining on the outside off the fuselage, so I had too test on something. The reddish2 tone is done with some tiny clear Crimson red from Humbrol, just a drop off red got into the jar with clear varnish and out came this candy like finish.


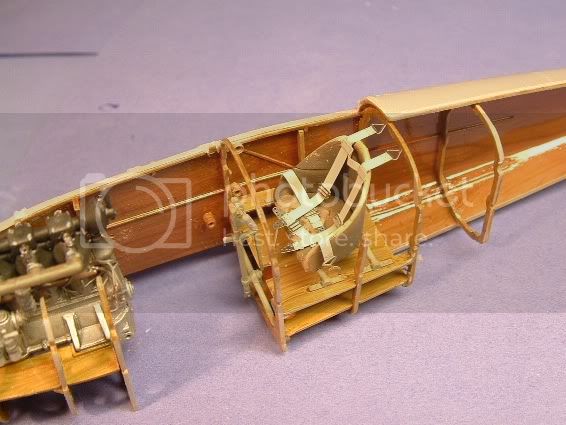
So from here there is just Rock and roll I think, now we can get some progress.
Cheers guys
Larsa Q
Alberta, Canada
Joined: January 19, 2008
KitMaker: 6,743 posts
AeroScale: 6,151 posts
Posted: Thursday, September 11, 2008 - 05:59 AM UTC
Awesome Lars ! I like how the two tone for the wood stands out . Adds depth to it . and shows the different types of wood used to good effect !
Looking forward to the rest .
Cheers

Colorado, United States
Joined: January 25, 2004
KitMaker: 11,669 posts
AeroScale: 11,011 posts
Posted: Thursday, September 11, 2008 - 08:31 AM UTC
Excellent Larsa! Which scheme will you go with and are you aware that the early production D.I types had a different header tank above the motor?
". . .The most important thing is to know why you build and then get the most that you can out of building." via D.D.
North Carolina, United States
Joined: June 17, 2006
KitMaker: 478 posts
AeroScale: 391 posts
Posted: Thursday, September 11, 2008 - 09:25 AM UTC
It's gorgeous, Lars!
Besides the wood, I really really like that seat.
Regards
Steve
1/350 USS San Francisco on Slipways
1/350 HMS Warspite in Research Mode
1/32 P-39D stalled
North Carolina, United States
Joined: June 19, 2007
KitMaker: 604 posts
AeroScale: 600 posts
Posted: Thursday, September 11, 2008 - 02:05 PM UTC
Quoted Text
Excellent Larsa! Which scheme will you go with and are you aware that the early production D.I types had a different header tank above the motor?
Larsa, Nicely done so far, great looking interior.
Stephen, You have my attention! I have been looking over my Albatros Fighters Data file and have not run into this! Please enlighten at least me?????
RAGIII
Colorado, United States
Joined: January 25, 2004
KitMaker: 11,669 posts
AeroScale: 11,011 posts
Posted: Thursday, September 11, 2008 - 02:43 PM UTC
These were seen on the earliest production airframes Alb. D.381/16 - 392/16. Check out images and compare.
". . .The most important thing is to know why you build and then get the most that you can out of building." via D.D.
Östergötland, Sweden
Joined: April 04, 2006
KitMaker: 1,058 posts
AeroScale: 1,004 posts
Posted: Thursday, September 11, 2008 - 08:26 PM UTC
Hi Folks
The version I am going for is the only one with the unpainted wooden fuselgae. Thats Lt. Walter Höhne 390/16, thats make me into the same bush as RAGIII I guess. Going thrue my datafiles last nigth and cant find those images, so if you can stephen help is needed!!!!
Larsa Q
Colorado, United States
Joined: January 25, 2004
KitMaker: 11,669 posts
AeroScale: 11,011 posts
Posted: Friday, September 12, 2008 - 10:01 AM UTC
Greetings all;
The good thing is that if Larsa is doing D. 390/16 (Höne's machine)
it did have the triangular expansion header tank. But Several of the earliest in the series (like the machine flown by Ltn. Colling and the Crown Prince Karl Friedrich) employed the expansion header tank infront of the first cylinder. For images see p.26, 33, 35 & 65 especially in Osprey's Aviation Elite Units #26 Jagdstaffel 2.
Also see "Aviation Awards of Imperial Germany in WWI by Neal O'Connor"
Vol. V Pp.209-210 & Vol. VI p.319.
#26 review #26 thread ". . .The most important thing is to know why you build and then get the most that you can out of building." via D.D.
Östergötland, Sweden
Joined: April 04, 2006
KitMaker: 1,058 posts
AeroScale: 1,004 posts
Posted: Friday, September 12, 2008 - 07:40 PM UTC
Thank´s Stephen
Just ordered that book.So now it´s more Rock and Roll for me.
Larsa
Östergötland, Sweden
Joined: April 04, 2006
KitMaker: 1,058 posts
AeroScale: 1,004 posts
Posted: Monday, September 15, 2008 - 12:40 AM UTC
North Carolina, United States
Joined: June 19, 2007
KitMaker: 604 posts
AeroScale: 600 posts
Posted: Monday, September 15, 2008 - 01:30 AM UTC
Great looking interior! This one seems to be coming together nicely. Just out of curiosity, are you finding it easier to build the D1 with your experience from your DIII build?
RAGIII
Östergötland, Sweden
Joined: April 04, 2006
KitMaker: 1,058 posts
AeroScale: 1,004 posts
Posted: Monday, September 15, 2008 - 01:55 AM UTC
I must say with the DIII still in some kind off memory this one is fairly easy build, atleast what I have done yet.There´s still some building ahead
Larsa Q
North Carolina, United States
Joined: June 17, 2006
KitMaker: 478 posts
AeroScale: 391 posts
Posted: Monday, September 15, 2008 - 01:59 AM UTC
Outstanding!

Regards
Steve
1/350 USS San Francisco on Slipways
1/350 HMS Warspite in Research Mode
1/32 P-39D stalled
Östergötland, Sweden
Joined: April 04, 2006
KitMaker: 1,058 posts
AeroScale: 1,004 posts
Posted: Monday, September 15, 2008 - 02:04 AM UTC
Thanks Steve
There´s still some bits to go on this before we can open the beercans
Larsa Q
North Carolina, United States
Joined: June 17, 2006
KitMaker: 478 posts
AeroScale: 391 posts
Posted: Monday, September 15, 2008 - 02:17 AM UTC
I already opened the beer cans for mine.
Needed the beer can itself, so of course had to EMPTY it.
Regards
Steve
1/350 USS San Francisco on Slipways
1/350 HMS Warspite in Research Mode
1/32 P-39D stalled
Alberta, Canada
Joined: January 19, 2008
KitMaker: 6,743 posts
AeroScale: 6,151 posts
Posted: Monday, September 15, 2008 - 02:26 AM UTC
Lars , this one is coming along rather nicely . Excecllent work !
Östergötland, Sweden
Joined: April 04, 2006
KitMaker: 1,058 posts
AeroScale: 1,004 posts
Posted: Monday, September 15, 2008 - 02:42 AM UTC
If you need the empty can
then it´s okey to have the beer.I love this hobby. Thanks Terri,There´s more to come
Larsa Q
Östergötland, Sweden
Joined: April 04, 2006
KitMaker: 1,058 posts
AeroScale: 1,004 posts
Posted: Monday, September 15, 2008 - 06:17 AM UTC
Hi
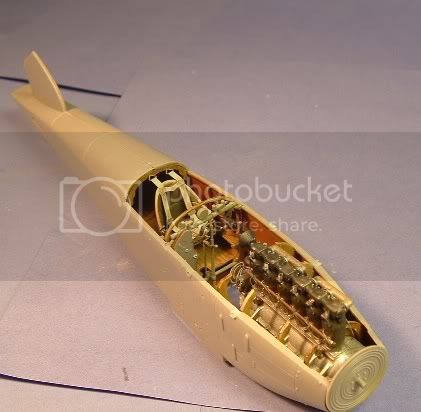
Too get the lower wing to fit properly I had too grind away some plastic on the centre off the inside. The bulkheads from the engine and the seat going to low and will interfere with the centre off the wing. This was an easy fix with the dremel.
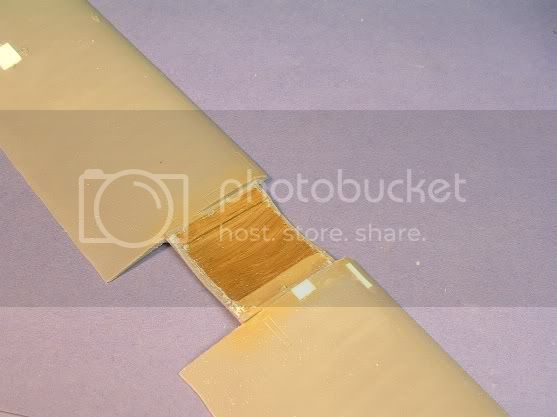
Just more dry testing the bits and peices
Larsa Q