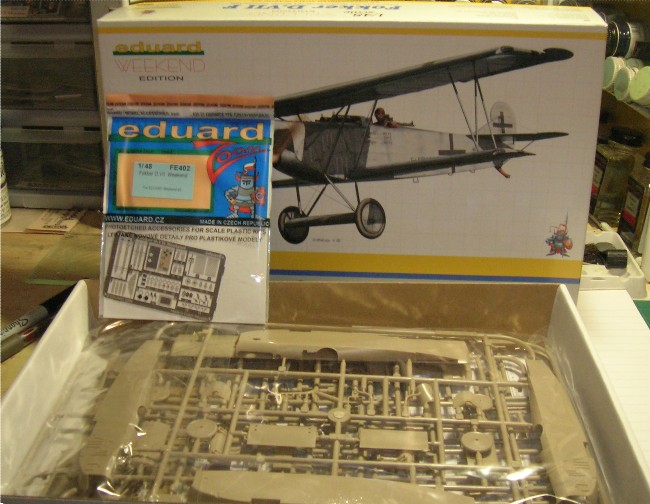
Eduard 1/48 #8482 Fok. D.VII Weekend kit
Colorado, United States
Joined: January 25, 2004
KitMaker: 11,669 posts
AeroScale: 11,011 posts
Posted: Sunday, July 27, 2008 - 03:20 PM UTC
Quoted Text
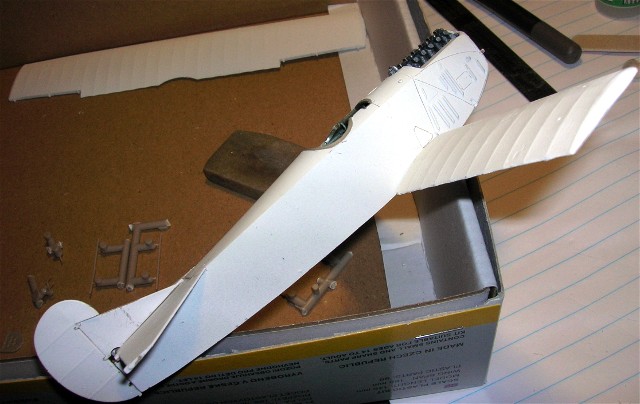
Here we assemble the lower wing parts (PP A 2 & 3, B 1.) One could actually insert spars held in place with double sided tape or glued in place. This type of wing assembly is great for the modeler who wants to simulate damage. By thinning down the inner surfaces, internal structure is easy to replicate. Also, before putting the lower wing together sand the vertical edge of the lower wing halves at the roots of all lower wing components (PP A 2 & 3, B 1.) The unmodified fit between the lower wing an fuselage is tight and cause anhedral just like the Roden kit. This fix will eliminate the fit problem. Do Not narrow the whole fuselage by taking away from the center union area.
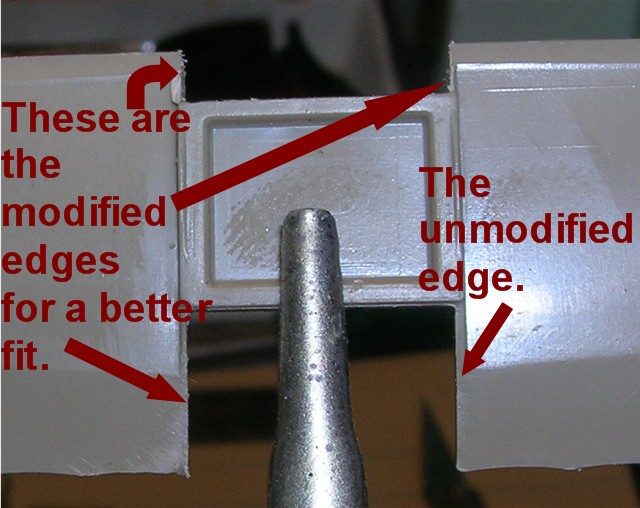
Here three edges are modified and one edge is shown unmodified to let you know how much you need to remove.
One further word of caution. You still may have a bit of sanding to do on the upper surface halves at the root ends described above. But do it even after the upper and lower halves of the lower wing are united. A simple emery board comes in handy here. When the plastic is pulled from the mold minor bumps , and bulges can occur in the plastic. Careful and deliberate efforts here will yield good results.
". . .The most important thing is to know why you build and then get the most that you can out of building." via D.D.
Colorado, United States
Joined: January 25, 2004
KitMaker: 11,669 posts
AeroScale: 11,011 posts
Posted: Sunday, July 27, 2008 - 11:32 PM UTC
Note the height of the cylinders for the BMW IIIa in this image of Göring's 5125/18
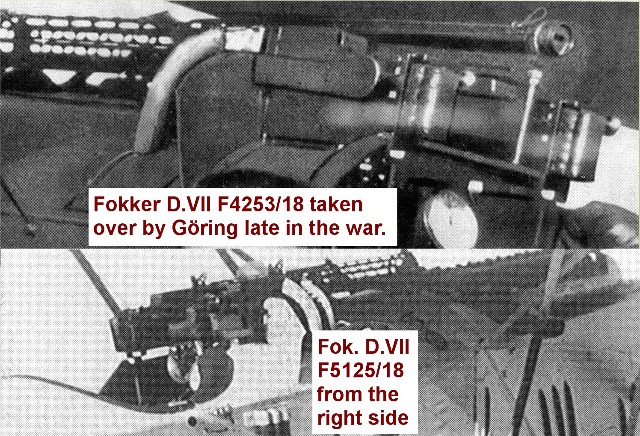
I had to raise my engine cylinders as well.
". . .The most important thing is to know why you build and then get the most that you can out of building." via D.D.
Colorado, United States
Joined: January 25, 2004
KitMaker: 11,669 posts
AeroScale: 11,011 posts
Posted: Sunday, July 27, 2008 - 11:36 PM UTC
Ok to fit the radiator to the fuselage here is a bit of fun.
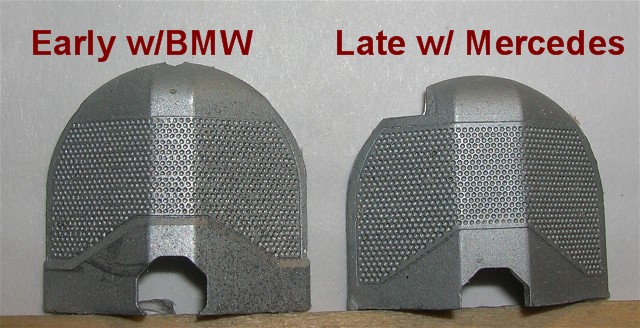
To get the right profile for D.5125/18 which do you use? Right since the cylinders are higher now you have to modify the one on the left for the early installaton of the BMW. Note its taller than the one for the Mercedes.
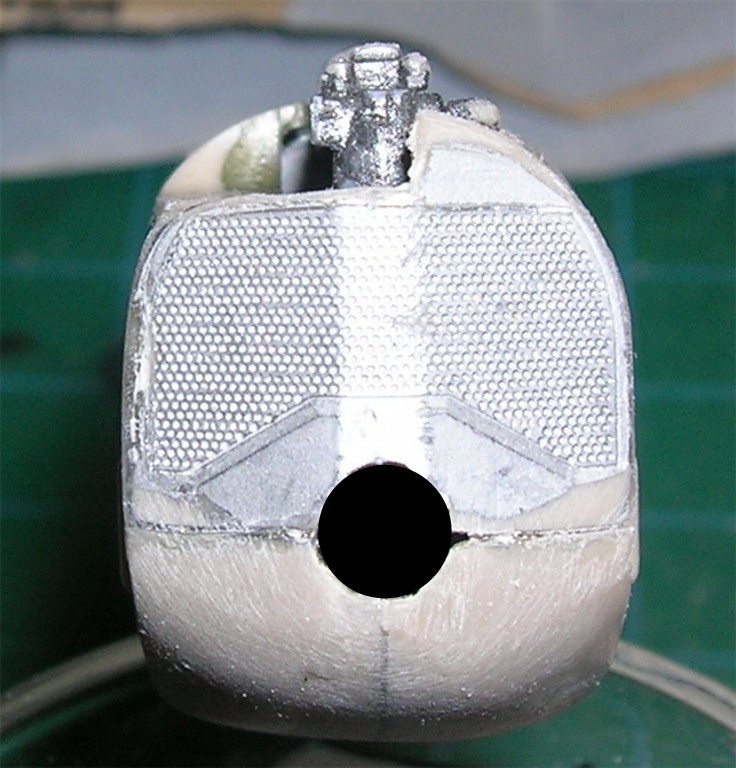
But you still have to cut it down becaus its too high.
". . .The most important thing is to know why you build and then get the most that you can out of building." via D.D.
Colorado, United States
Joined: January 25, 2004
KitMaker: 11,669 posts
AeroScale: 11,011 posts
Posted: Sunday, July 27, 2008 - 11:44 PM UTC
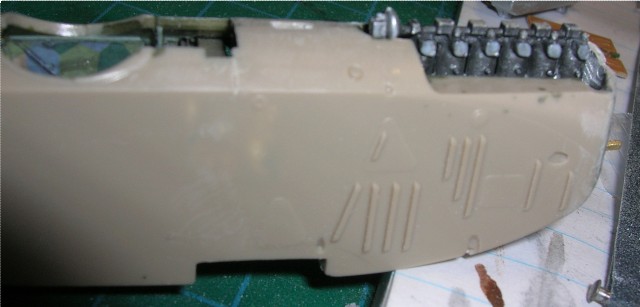
Ok since I had to raise the cylinders next I will have to raise the guns. BUT! that means the ammo feeds and the gun braces will have to be raised too. Fun ain't it?
So I used some standard PE ammo boxes from Copper State models fret I have for the Fokker D.V. and I'll use some scratchbuilt feeds that I have already from some other projects.
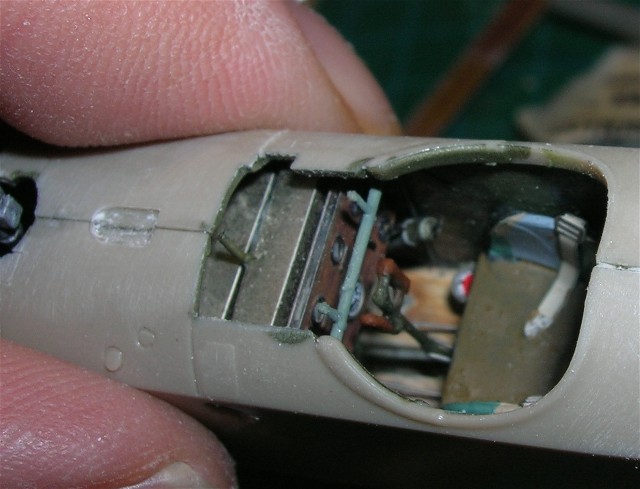

The fuzzies are from the vigorous sanding of seam eradication and will not be present at the end of the build.
". . .The most important thing is to know why you build and then get the most that you can out of building." via D.D.
Victoria, Australia
Joined: November 26, 2006
KitMaker: 608 posts
AeroScale: 602 posts
Posted: Monday, July 28, 2008 - 11:16 AM UTC
Looking good Stephen!
Isn't research fun? It makes any build just that bit more interesting.
Can I assume that we are, in direct condradiction to an earlier statement never to do such a thing, going to finish this as Goerings machine? I do not mean this as a criticism you understand, I just want to be clear.
Cheers,
Hugh
Colorado, United States
Joined: January 25, 2004
KitMaker: 11,669 posts
AeroScale: 11,011 posts
Posted: Monday, July 28, 2008 - 01:35 PM UTC
Quoted Text
Looking good Stephen! Isn't research fun? It makes any build just that bit more interesting. Can I assume that we are, in direct condradiction to an earlier statement never to do such a thing, going to finish this as Goerings machine? I do not mean this as a criticism you understand, I just want to be clear. Cheers, Hugh
No worries Hugh, here is a bit from several posts back on 7.26 .08.
Quoted Text
". . .While I am going with an all white scheme now, there will be a bit of a surprise in the mix. I will spend some time carefully trying to texture and weather this kit. For personal reasons I will be changing the identity of this machine to show what you can do with kit serial numbers with a historical touch.
". . .The most important thing is to know why you build and then get the most that you can out of building." via D.D.
Colorado, United States
Joined: January 25, 2004
KitMaker: 11,669 posts
AeroScale: 11,011 posts
Posted: Tuesday, July 29, 2008 - 07:16 PM UTC
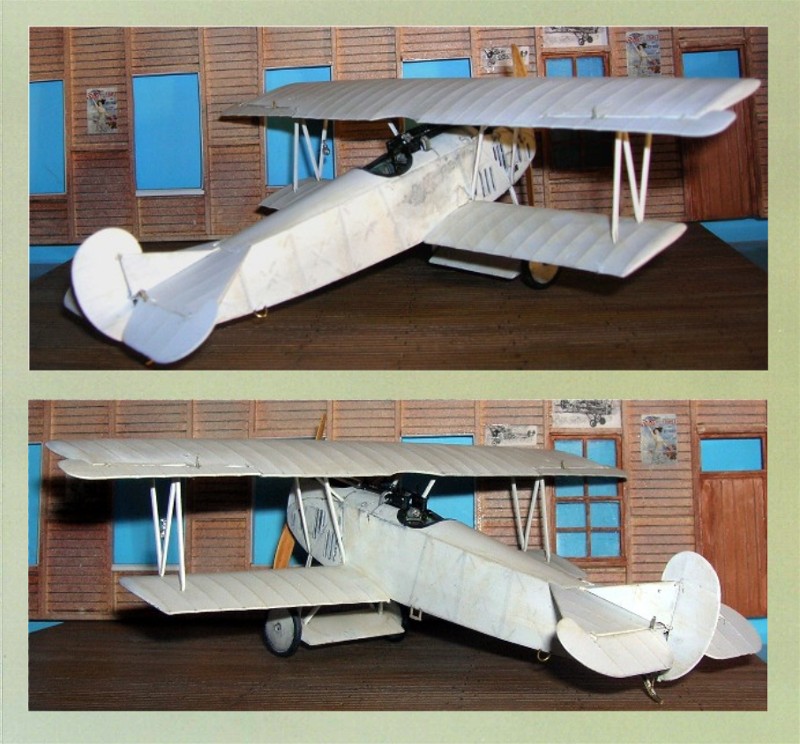
The white has gone on well on most components

The lower wing went on without a hitch.

". . .The most important thing is to know why you build and then get the most that you can out of building." via D.D.
Victoria, Australia
Joined: November 26, 2006
KitMaker: 608 posts
AeroScale: 602 posts
Posted: Tuesday, July 29, 2008 - 08:05 PM UTC
Hey Stephen,
Does the Lower Wing tend to sag as Rodens does?
Quoted Text
No worries Hugh, here is a bit from several posts back on 7.26 .08.
Quoted Text
--------------------------------------------------------------------------------
". . .While I am going with an all white scheme now, there will be a bit of a surprise in the mix. I will spend some time carefully trying to texture and weather this kit. For personal reasons I will be changing the identity of this machine to show what you can do with kit serial numbers with a historical touch.
--------------------------------------------------------------------------------
While I am not a fan of Göring's by any stretch of the imagination, I am trying to help others if this is the machine they want to build. Mine will ultimately be finished with a different serial and overall scheme.
Aha! Missed that bit.
Cheers,
Hugh
Colorado, United States
Joined: January 25, 2004
KitMaker: 11,669 posts
AeroScale: 11,011 posts
Posted: Tuesday, July 29, 2008 - 08:52 PM UTC
Quoted Text
Hey Stephen,
Does the Lower Wing tend to sag as Rodens does?. . .Cheers, Hugh
No worries Hugh! As mentioned concerning the lower wing fit it does have to be altered. The fit with the Eduard and the Roden Fokker D.VII kit is TIGHT! Unmodified they will result in the wing tips being pointed downward - Anhedral.
". . .The most important thing is to know why you build and then get the most that you can out of building." via D.D.
Colorado, United States
Joined: January 25, 2004
KitMaker: 11,669 posts
AeroScale: 11,011 posts
Posted: Tuesday, July 29, 2008 - 08:55 PM UTC
From page 1.
Quoted Text
"Here we assemble the lower wing parts (PP A 2 & 3, B 1.) . . . The unmodified fit between the lower wing an fuselage is tight and cause anhedral just like the Roden kit. This fix will eliminate the fit problem. Do Not narrow the whole fuselage by taking away from the center union area. "
"Here three edges are modified and one edge is shown unmodified to let you know how much you need to remove."
". . .The most important thing is to know why you build and then get the most that you can out of building." via D.D.
Alberta, Canada
Joined: January 19, 2008
KitMaker: 6,743 posts
AeroScale: 6,151 posts
Posted: Thursday, July 31, 2008 - 05:16 AM UTC
Wow , looking really great Stephen . I always enjoy your wonderful builds.
Colorado, United States
Joined: January 25, 2004
KitMaker: 11,669 posts
AeroScale: 11,011 posts
Posted: Thursday, July 31, 2008 - 07:17 AM UTC
Thank you Terri.
Next I have mounted the guns per the BMW layout. I also have began to add some colour.

". . .The most important thing is to know why you build and then get the most that you can out of building." via D.D.
Colorado, United States
Joined: January 25, 2004
KitMaker: 11,669 posts
AeroScale: 11,011 posts
Posted: Thursday, July 31, 2008 - 07:28 AM UTC
To finish up the radiator I will have to add a solid center section the curves up over the headcap and add the filler spout. After that The top wing and I may get this finished up by the weekend. This type of radiator for the BMW was built by Neuen Industrie Werke (NIW) of Berlin.
". . .The most important thing is to know why you build and then get the most that you can out of building." via D.D.
Indiana, United States
Joined: May 14, 2007
KitMaker: 3,117 posts
AeroScale: 2,270 posts
Posted: Thursday, July 31, 2008 - 01:09 PM UTC
That white sure weathers up nicely.
"Treat 'em Rough", Current Builds--Wingnut Rumpler
I am frequently seen with blood shot eyes from staying up past my nap time to get the right colour scheme on my latest WWI model?
Alberta, Canada
Joined: January 19, 2008
KitMaker: 6,743 posts
AeroScale: 6,151 posts
Posted: Thursday, July 31, 2008 - 04:58 PM UTC
looks neat ! How and what did you use for the weathering ? The effect looks really sharp . I did not a bad job on my white on the D.V , still need improvements I didn't get the effect I was looking for . Can you shade some light on this ?


Colorado, United States
Joined: January 25, 2004
KitMaker: 11,669 posts
AeroScale: 11,011 posts
Posted: Friday, August 01, 2008 - 03:41 AM UTC
Quoted Text
looks neat ! How and what did you use for the weathering ? The effect looks really sharp . I did not a bad job on my white on the D.V , still need improvements I didn't get the effect I was looking for . Can you shade some light on this ?
Greetings Ms. Terri,
Maybe it is time we had a weathering tutorial thread. We could get input from all of our talent here? As for this little kit, we all know white shows everything. The idea I have that it is better to stain solid colour areas rather than other methods. While I have discussed texturing before with this build is is essential that everything be done with the idea that subtle is better than heavy applications.
So far I have used a very weak black wash and an even weaker orange brown (Testors 1166 small bottle) the shadows behind the vertical fuselage ribs are representive of shadows and exhaust. When these machines start up the exhaust sworls around the fuselage as it trundles forward. White aquires a yellow tint when aging or is exposed to certain fumes.
A round of light sanding is next with a final attempt at blending or softening the stains then a seal of several layers of a clear dullcote. This comes from just observing the reactions of paint coverings on everyday items and understanding why reactions take place. For instance On an all-black Fokker D.VII you could use the same combinations of colours but in reverse proportion. The washes would be the black, white and brown. I did this recently on a build for my EOW project. Yet the base colour of black is actually not a true black but has a touch of white in it to give a slate grey - black. So the black stain will be more apparant. In other words all of these colours can be found in weathering because they are contrasts to the base colours. White is easy it contrasts almost any thing but you have to explain how it got there. Dirt, ash, exhaust, field grass, mud, fuel, oil, even steam or hot water sources react differently to painted or unpainted surfaces.
One further note on this subject. The artists conception of the profile is seen on the box art and in the instructions. He / she even applied the exhaust staining. It gives the term "out of the box" a whole new angle.
". . .The most important thing is to know why you build and then get the most that you can out of building." via D.D.
Victoria, Australia
Joined: November 26, 2006
KitMaker: 608 posts
AeroScale: 602 posts
Posted: Friday, August 01, 2008 - 01:02 PM UTC
Hey Stephen,
A weathering thread would be great.
There is no way that white would have stayed clean for long. I reckon that you could even afford to go further, especially around the Engine.
Cheers,
Hugh
Alberta, Canada
Joined: January 19, 2008
KitMaker: 6,743 posts
AeroScale: 6,151 posts
Posted: Friday, August 01, 2008 - 01:43 PM UTC
I like the sound of a weathering thread , what a great idea . Thanks for the pointers Stephen . Before I did very little in the lines of weathering until a while back . I love this site , always learning something new !

Colorado, United States
Joined: January 25, 2004
KitMaker: 11,669 posts
AeroScale: 11,011 posts
Posted: Friday, August 01, 2008 - 02:50 PM UTC
Well I am at work and the top wing that was mounted earlier today is curing up. Normally I would replace the cabane struts with extruded brass rod (airfoil shaped). But to keep it on track for a finish this weekend I scrapped off the mold seams and continued to march. Tonight I will work on the undercarriage. After that some rigging and the decals I have chosen.
Here is a bit of fun on the subject right here at Aeroscale.
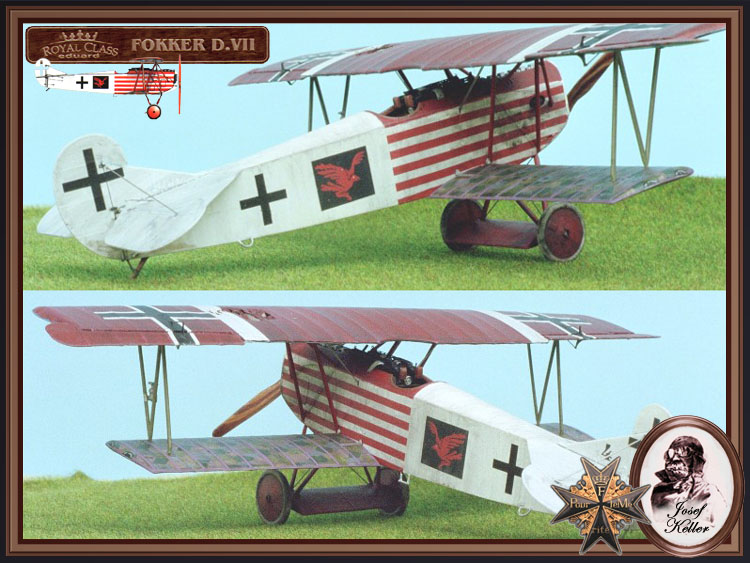
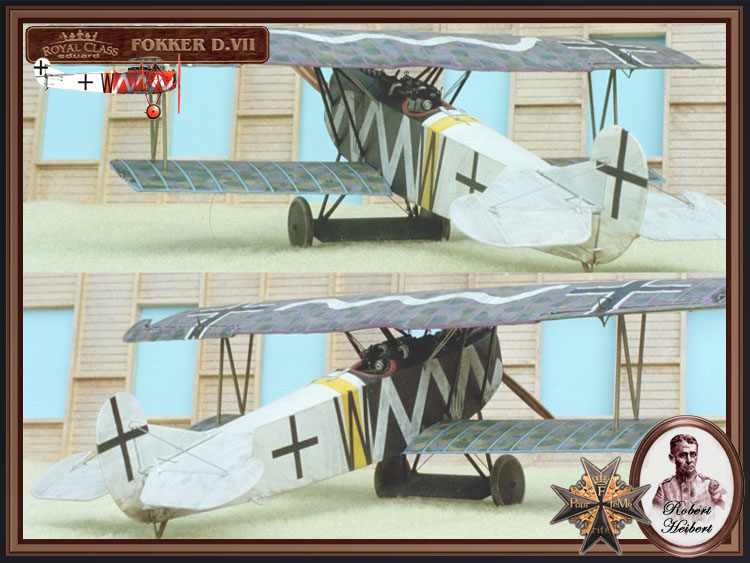
Just for the sake of having them in one place. For more reading on the various license built Fokker D.VII represented in
1:48 kit form.
Click here I Eduard Royal Feature
Click here II Eduard OAW Feature
Click here III Eduard Schwerin Dual Combo review
Click here IV Roden Schwerin kit #415 Feature
Click here V Eduard Schwerin Weekend kit blog
Click here VI Eduard 2nd OAW issue Review
Click here VII Eduard MAG Dual Combo Review
Click here VIII Eduard Johannistahl Review
Click here IX DML / Dragon Kit Review
Click here X Hasegawa Kit Review
Click here XI Jager Kit Review
Click here XII Roden Early Schwerin kit Review
Click here XIII Eduard OAW 1st Issue Review
Click here XIV Eduard mid OAW Limited Edition
1:28 scale kit Click here XV Revell Kit Review.
1:32 scale kit Click here XVIWNW Schwerin 32011
Click here XVII WNW Alb. 32027
Click here XVIII WNW OAW 32030
Here is a walkaround of a restored Fokker D.VII (Alb.) 8417/18
I think that is all available Reviews & Features at this time. More later no doubt! (Updated 5/13)
". . .The most important thing is to know why you build and then get the most that you can out of building." via D.D.
Colorado, United States
Joined: January 25, 2004
KitMaker: 11,669 posts
AeroScale: 11,011 posts
Posted: Saturday, August 02, 2008 - 02:19 PM UTC
Things are going well with the build. Under carriage is in place and I have added some spare PE control horns from Copper State Models. Hand grabs were made from brass wire and the kit footstep added. Before I doing the rigging I will be adding the crosses and some other decals. So after I get home tonight I will shoot some images and try to get them posted and get on with decals and rigging.
". . .The most important thing is to know why you build and then get the most that you can out of building." via D.D.
Colorado, United States
Joined: January 25, 2004
KitMaker: 11,669 posts
AeroScale: 11,011 posts
Posted: Saturday, August 02, 2008 - 03:35 PM UTC
Quoted Text
That white sure weathers up nicely.
". . .The most important thing is to know why you build and then get the most that you can out of building." via D.D.
Removed by original poster on 08/12/12 - 01:45:27 (GMT).
Colorado, United States
Joined: January 25, 2004
KitMaker: 11,669 posts
AeroScale: 11,011 posts
Posted: Sunday, August 03, 2008 - 01:53 AM UTC
This is the basic kit with some PE.

". . .The most important thing is to know why you build and then get the most that you can out of building." via D.D.
Colorado, United States
Joined: January 25, 2004
KitMaker: 11,669 posts
AeroScale: 11,011 posts
Posted: Sunday, August 03, 2008 - 01:55 AM UTC
There is still a bit of touch-up then the decals and finishing the rigging.
". . .The most important thing is to know why you build and then get the most that you can out of building." via D.D.
Indiana, United States
Joined: May 14, 2007
KitMaker: 3,117 posts
AeroScale: 2,270 posts
Posted: Sunday, August 03, 2008 - 10:30 AM UTC
Nice pics Stephen. I see Pershing has left the building.
"Treat 'em Rough", Current Builds--Wingnut Rumpler
I am frequently seen with blood shot eyes from staying up past my nap time to get the right colour scheme on my latest WWI model?


