Chance-Vought F4U-5N Corsair Hasegawa 1/48
Germany
Joined: September 07, 2005
KitMaker: 5,609 posts
AeroScale: 5,231 posts
Posted: Saturday, August 01, 2009 - 11:09 PM UTC
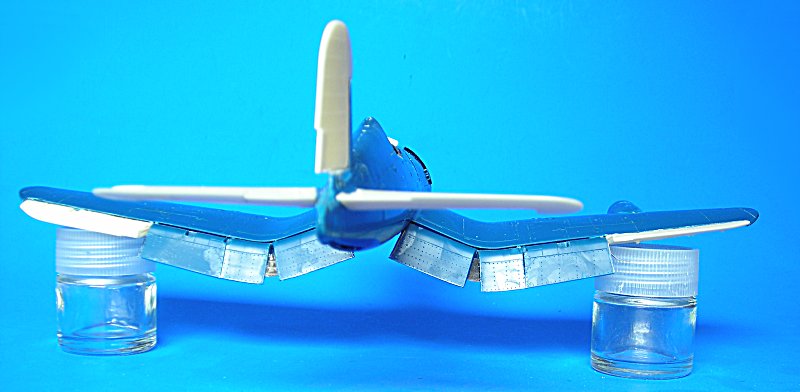
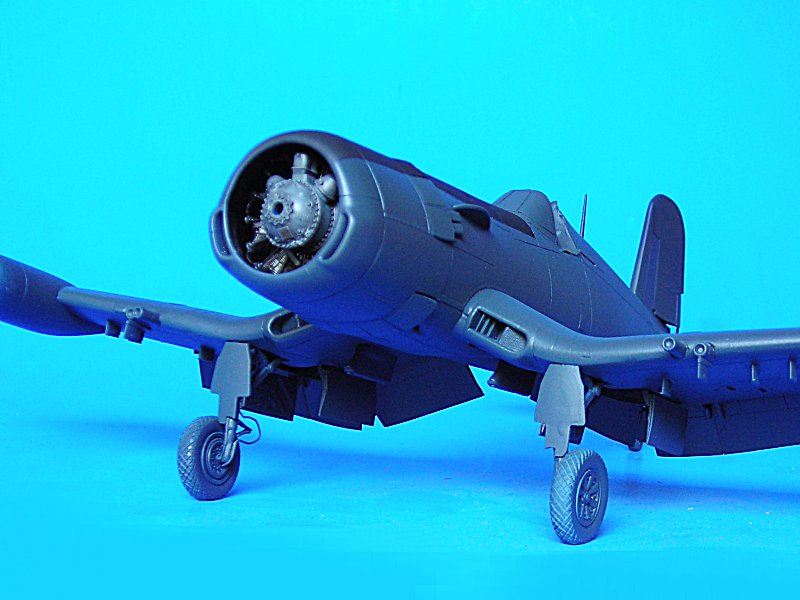
Today I added all the flaps and ailerons. Some PE work and my trusted motor tool also had to do some work to thin the plasic parts where the Pavla ailerons had to be installed. Furthermore the hard points for the rockets and droptanks/ bombs were attached. i will probably only install two drop tanks .. when you go after "Bedcheck Charlie" you probably won't need some explosives beneath your rear ... I anyone has more info on that I would like to hear from you!
I also mounted the Mk.20 gun sight and the two boxes besides it ...
all the best
Steffen
DULCE ET DECORUM EST PRO HOBBY MORI
Scotland, United Kingdom
Joined: February 07, 2008
KitMaker: 1,699 posts
AeroScale: 1,384 posts
Posted: Sunday, August 02, 2009 - 05:09 AM UTC
Where dropped flaps normal for a parked corsair like the mustang?
Gotta love the aggressive pugnatious stance of the corsair. Military
aircraft should look mean and ugly.
Germany
Joined: September 07, 2005
KitMaker: 5,609 posts
AeroScale: 5,231 posts
Posted: Sunday, August 02, 2009 - 05:19 AM UTC
Many thanks J-P .... makes it less lonely here

I have seen many pictures with flaps down .. not sure if it was the norm though ...
BTW I like the look of the Corsair and do not find her ugly, in contrary one of my favorite aircraft (might be because of "Baa, Baa Black Sheep" ) .. though the late versions look kinda brute
Quoted Text
(...) aircraft should look mean and ugly.
So you would have liked the Boeing entry for the JSF better? OTOH it explaines a lot of British a/c design

cheers
Steffen
DULCE ET DECORUM EST PRO HOBBY MORI
Scotland, United Kingdom
Joined: February 07, 2008
KitMaker: 1,699 posts
AeroScale: 1,384 posts
Posted: Sunday, August 02, 2009 - 07:31 AM UTC
haha
Agreed! anything by blackburn being a case in point. The spitfire is the exception to prove the rule.
I have to also agree it seems very quiet on aeroscale this past few weeks. Perhaps I should do some
modelling and less typing then.
Germany
Joined: September 07, 2005
KitMaker: 5,609 posts
AeroScale: 5,231 posts
Posted: Sunday, August 02, 2009 - 07:38 AM UTC
Quoted Text
The spitfire is the exception to prove the rule..
Well, it is half a German design
He 70! ....
cheers
Steffen
DULCE ET DECORUM EST PRO HOBBY MORI
Missouri, United States
Joined: November 24, 2008
KitMaker: 564 posts
AeroScale: 510 posts
Posted: Sunday, August 02, 2009 - 12:48 PM UTC
looks great thus far, love a corsair all dirtied up with those split flaps...like a bird of prey coming in for a landing
Nothing quite like getting lost in plastic
On the bench:Revell 1/48 P-38 Lightning built as an F-5B
Next:??
Germany
Joined: September 07, 2005
KitMaker: 5,609 posts
AeroScale: 5,231 posts
Posted: Sunday, August 02, 2009 - 10:02 PM UTC
Many thanks Shawn!
I am not sure if I will succeed in weathering .. pretty difficult on such a dark surface, but I will try and check Chucks Helldiver thread again (hope the pix are still there).
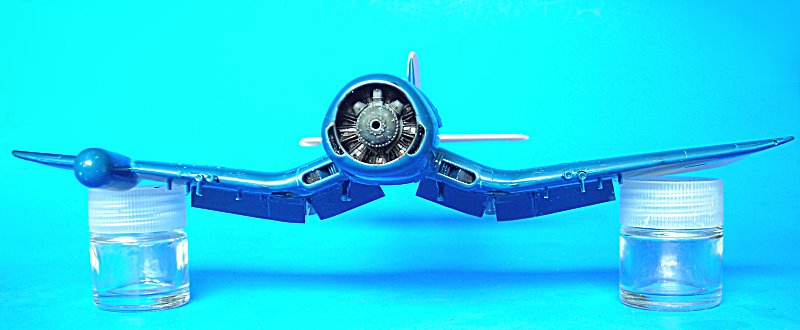
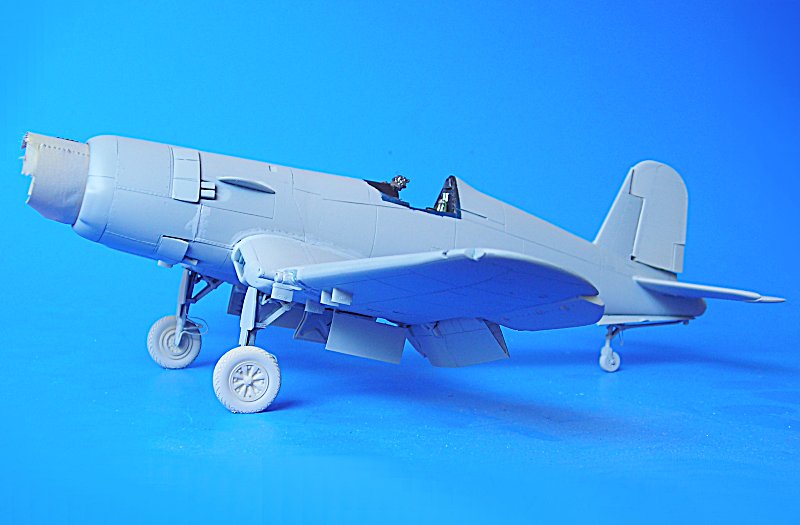
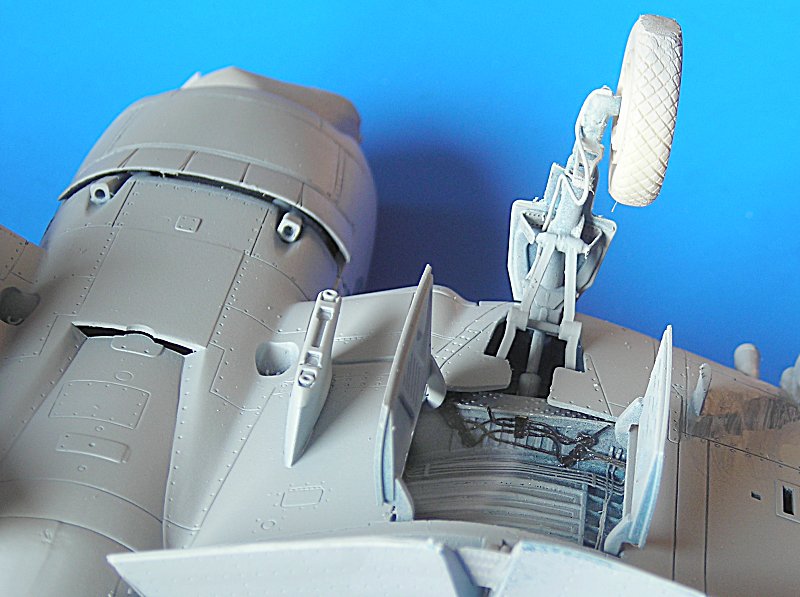
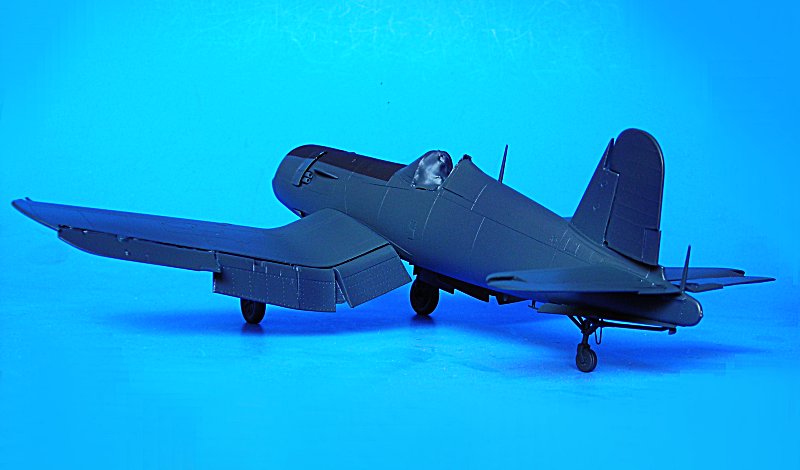
Yesterday evening I played a bit with the under carriage. Tthe tail strut looks strange but it is glued as per instructions .. will check my material again. The main wheels (Ultracast late style diamond pattern) are just test fit and not glued yet.
more u/c work to do .. especially getting rid of the ejector pin marks in the doors
all the best
Steffen
DULCE ET DECORUM EST PRO HOBBY MORI
Missouri, United States
Joined: November 24, 2008
KitMaker: 564 posts
AeroScale: 510 posts
Posted: Monday, August 03, 2009 - 11:49 AM UTC
great stance
although I agree with the tail strut comment, it looks to be canted forward when from what I've seen the run perpendicular to the botom of the til wheel gear doors, aka 90 degrees to the ground
Nothing quite like getting lost in plastic
On the bench:Revell 1/48 P-38 Lightning built as an F-5B
Next:??
Germany
Joined: September 07, 2005
KitMaker: 5,609 posts
AeroScale: 5,231 posts
Posted: Monday, August 03, 2009 - 08:16 PM UTC
Hi Shawn
Nope, I checked my references, it is correct. In all pictures the tail wheel strut is angled against the ground. I guess it is 90° to the longitudinal axis . Still it looks strange

Yesterday i worked on the wheel bay covers to get the ejector pin marks ironed out. then I glued them on. I'll take a pic later today .. now I have to organize some paint ...
all the best
Steffen
DULCE ET DECORUM EST PRO HOBBY MORI
Scotland, United Kingdom
Joined: February 07, 2008
KitMaker: 1,699 posts
AeroScale: 1,384 posts
Posted: Tuesday, August 04, 2009 - 01:20 AM UTC
It looks a little too forward facing,
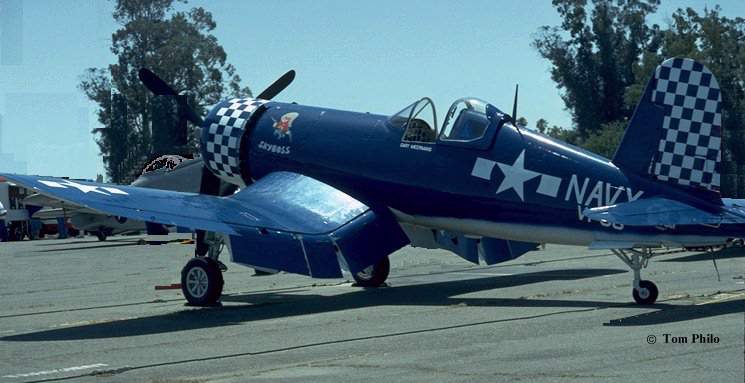
or this
or this

Where it is more perpendicular to the ground. still should be a little forward. It looks odd even on those photographs
Update:
Looks like it matches the angle the main u/c legs make with the ground
North Carolina, United States
Joined: January 13, 2003
KitMaker: 1,036 posts
AeroScale: 286 posts
Posted: Tuesday, August 04, 2009 - 02:09 AM UTC
The angle of the strut look right. I think the reason it looks off is the strut looks like it was molded a little too long. Meaning that there is no weight bearing on the stut.
Maybe you could shorten it or sand a flat spot in the tail wheel showing some weight bearing on the strut.
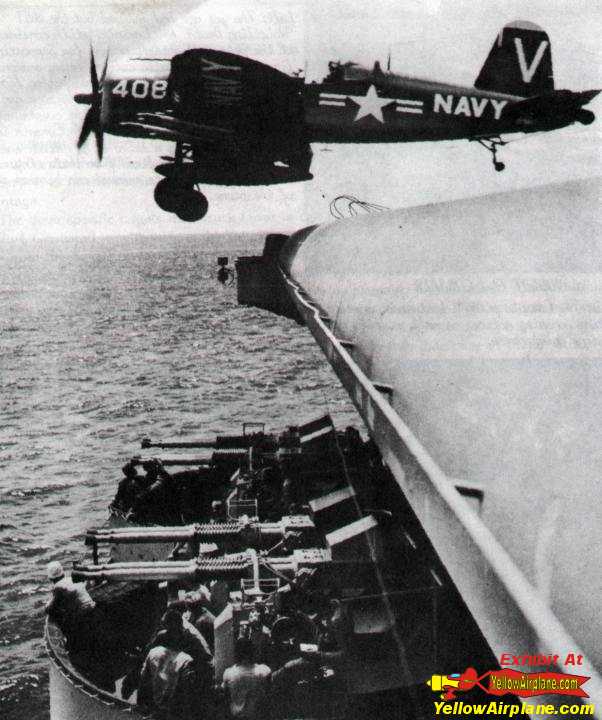
Looking at the pictures the on with the carrier launch. Looks like the strut is straight as the one on the model. Where the others show a shorter strut with a wheel bulge.
I think she looks great either way. Just thought I would throw that out there to see if it helped.
Paul

There are only 2 rules to flying:
1: Take off is ALWAYS optoinal.
2: Landing is ALWAYS mandatory
Semper Fi
WarlockOut
Germany
Joined: September 07, 2005
KitMaker: 5,609 posts
AeroScale: 5,231 posts
Posted: Tuesday, August 04, 2009 - 02:11 AM UTC
Thanks J-P
the first one is definity no dash 5 and I am not sue about the others. i checked the Corsair Kagero vol 2 in the F4U-5 section and on all pic I found there the leg is "leaning backward" (i.e. the wheel seem to be farther forward than the leg) but I think the problem is how Hasegawa attached the wheel to the strut ... (the angle is much steeper than it should be)
but you know what .. I do not care. I have not done a mistake (it is just one part so how could I do something wrong) and in spite of structural strength I won't change anything here. It might be also a matter of how it is photographed. in some pix it looks nice in some it does look like my model .. I will take one or two pix soon when the primer has set a bit.
cheers
Steffen
DULCE ET DECORUM EST PRO HOBBY MORI
Scotland, United Kingdom
Joined: February 07, 2008
KitMaker: 1,699 posts
AeroScale: 1,384 posts
Posted: Tuesday, August 04, 2009 - 02:26 AM UTC
yeah it was just a quick look I had and having glimpsed shots of your library I'm sure you may have a page or two on corsairs

I'll be happy to see some paint on rather than worry about tail wheel angles
Germany
Joined: September 07, 2005
KitMaker: 5,609 posts
AeroScale: 5,231 posts
Posted: Tuesday, August 04, 2009 - 02:32 AM UTC
Thank you Paul! (and John-Paul)
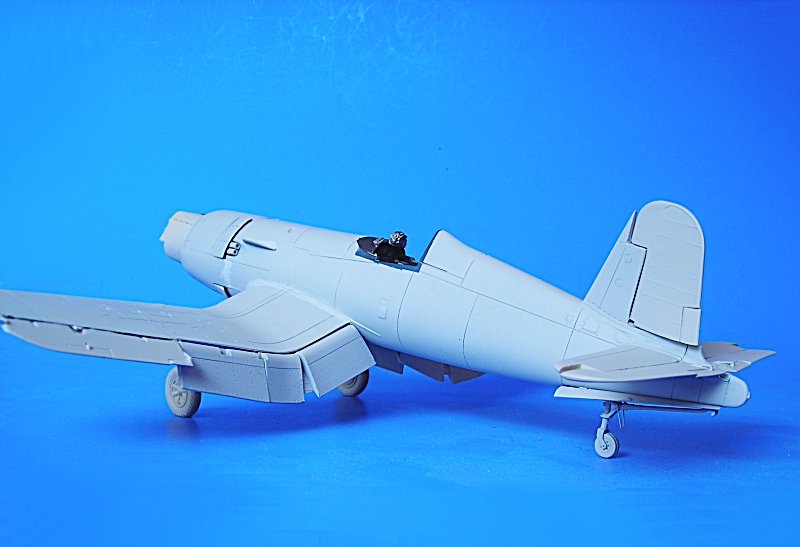
as I wrote I think the tail wheel fork is off angle which makes a lot of the high/strange appearance. but I do not think I will change it.
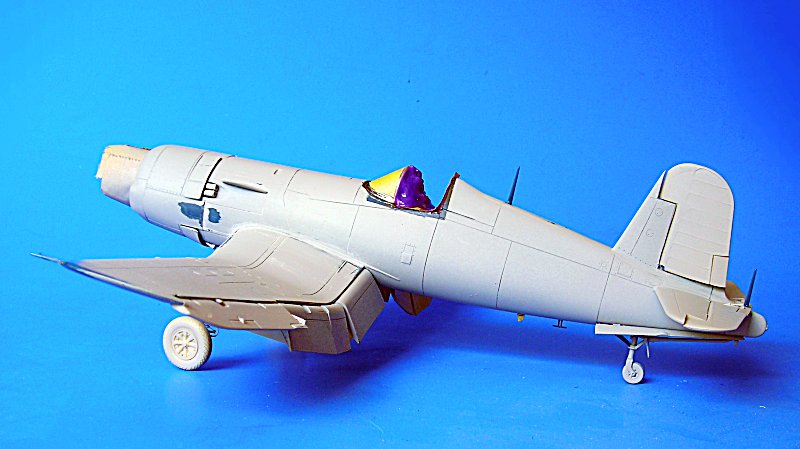
I just took a few pix to show some progress. Still to mount some PE parts, antennas, position lights and so on .. and of course the Canopy, which will make it look like a Corsair finally.
thanks for the hints guys!!
all the best
Steffen
DULCE ET DECORUM EST PRO HOBBY MORI
Germany
Joined: September 07, 2005
KitMaker: 5,609 posts
AeroScale: 5,231 posts
Posted: Tuesday, August 04, 2009 - 07:11 AM UTC
hello again
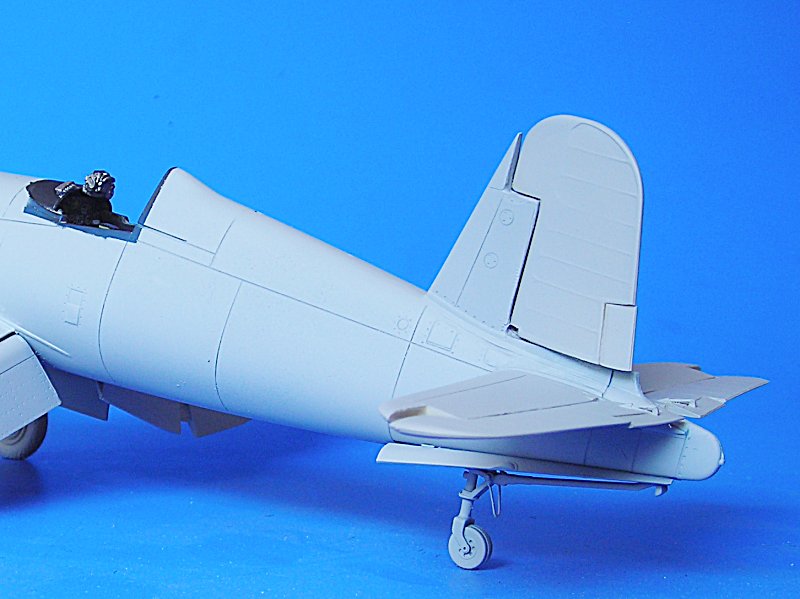
I have two more pix of what i did today. the first pic shows one of the wheel bays where I installed the last PE, Quite a bit of that stuff included here. This is one of the old Eduard sets that had very useful stuff for a good price.
And then I added teh position lights. you might have noticed in th eprevious posts that I had cut out the full plastic edges. Now I took a clear sprue, heated it (with a lighter) and pressed it in the indents. I glued it in with superglue (after i had painted the cutout silver) and roghly shaped it with my motor tool and a sanding device. Then I polished it with sticks .. now it looks like this;
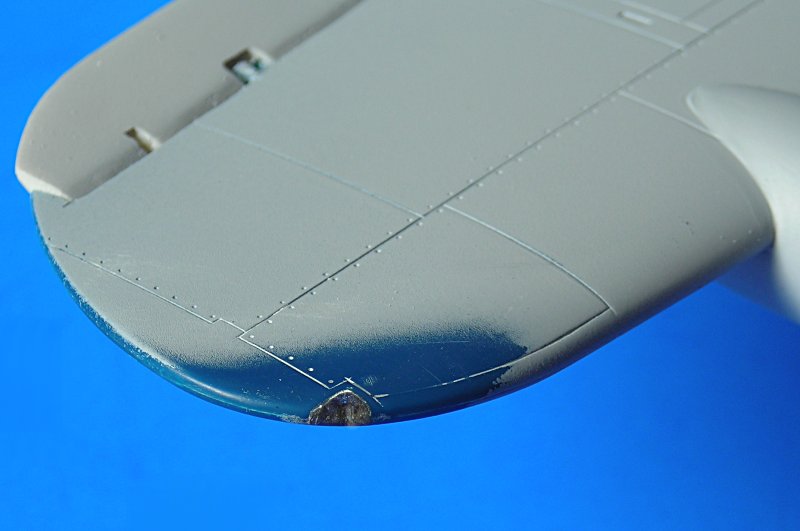
it will be finally painted red and green (or was that blue ... must check that)
all the best
Steffen
DULCE ET DECORUM EST PRO HOBBY MORI
Attica, Greece / Ελλάδα
Joined: May 01, 2008
KitMaker: 1,437 posts
AeroScale: 1,241 posts
Posted: Tuesday, August 04, 2009 - 11:00 AM UTC
Germany
Joined: September 07, 2005
KitMaker: 5,609 posts
AeroScale: 5,231 posts
Posted: Wednesday, August 05, 2009 - 03:54 AM UTC
Many thanks Nick!
I do not consider myself fast, OTOH compared to some other projects this is speed of light. Well and "great" is probably also not the correct term. I just build for fun, as good as I can but surely not great. Have a look at Chuck's or Jean-Luc' threads .. or Rowan's (even if he seldom finishes something) .. I work dirty and very simple when compared to those. And there are a bunch other people here and elsewhere who are just great.
So onward with my little project. Not much to see, but I have added some more parts. Even found a strut that I forgot at the tail wheel (but it does not change the appearance) .. so it is a two parts assembly (plus two PE from the Eduard set) .... I think I will spray some black today and maybe some blue tomorrow morning ... did not find the correct colour at my LHS so I went with the "Lufthansablau" from the Revell instructions .. curious how it will look. I will probably have to add a bit more blue and black .
all the best
Steffen
DULCE ET DECORUM EST PRO HOBBY MORI
Scotland, United Kingdom
Joined: February 07, 2008
KitMaker: 1,699 posts
AeroScale: 1,384 posts
Posted: Wednesday, August 05, 2009 - 06:02 AM UTC
Hi again steffen.
what did you use as primer? The panel lines look nice and defined still. do you deepen them?
Germany
Joined: September 07, 2005
KitMaker: 5,609 posts
AeroScale: 5,231 posts
Posted: Wednesday, August 05, 2009 - 06:12 AM UTC
Hi J-P
I use an automotive primer from the rattle can and I did not do anything to the panel lines. I am not totally satisfied with the primer, as it does not stick as good as I would like it to be, but it is very smooth and levels very nicely (no runs and stuff) so I will empty the bottle and then look for something new. I also use Citadel primer from the rattle can, but the white stuff has a tendency to have a grainy finish .. of course this can be polished .. but it is extra work (maybe it is just a bad bottle..). The black primer works very well though.
all the best
Steffen
DULCE ET DECORUM EST PRO HOBBY MORI
Germany
Joined: September 07, 2005
KitMaker: 5,609 posts
AeroScale: 5,231 posts
Posted: Wednesday, August 05, 2009 - 08:48 PM UTC
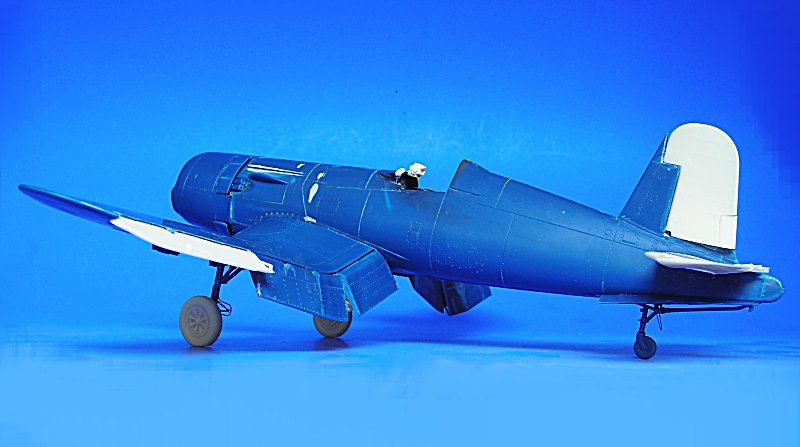
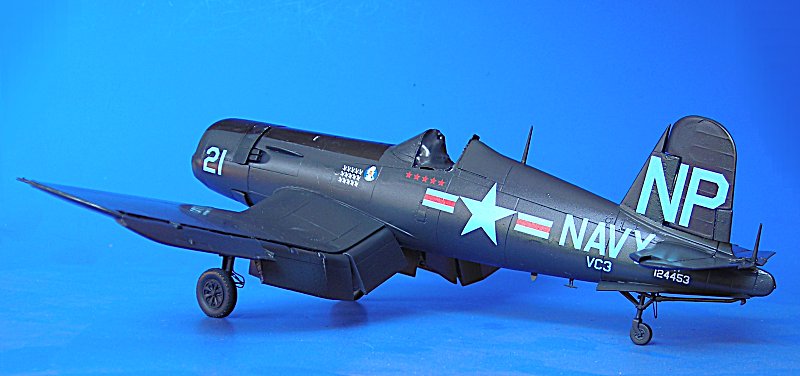
O.k. Time for some colour
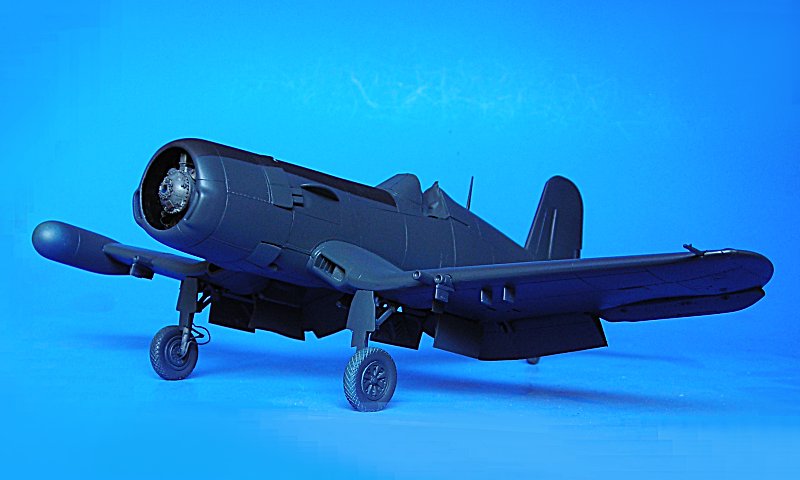
Yesterday I first airbrushed the anti glare panel in flat black. Then I masked it and airbrushed a mix with Revells Lufthansa blue, black (maybe 40%) and blue ... first it did not look bad but the longer I looked at it the more it bothered me. The tone was not that bad, but it had far too much red in it .. so shortly past midnight I've had it and got out the airgun again (I know spraying at nite has some disadvantages ... ) I have some bottles of ANA623 from JPS so one of thes came out and a few minutes later it looked much better, so I could finally get some sleep
It still looks good to me this morning so I am happy:
Today I will attend a small Aeroscale meeting at Marcs place and take it with me .. so there will be few news today. If it survives the trip I will give it a Klear coat this evening and start decaling tomorrow.
all the best
Steffen
DULCE ET DECORUM EST PRO HOBBY MORI
Germany
Joined: September 07, 2005
KitMaker: 5,609 posts
AeroScale: 5,231 posts
Posted: Friday, August 07, 2009 - 05:03 AM UTC
Seems there is not much interest again ...
Today I added some decals. The CAM Stuff worked really good with Daco orange, so i hope all will be well. Still a few of the markings to add and the stencils tomorrow ...
of course that is not all I did today. I bought a T-plate from Marc yesterday and worked a little on it to be the base for my ICM 109F-2 "Mölders" .. lacking money kept me from buing a PSP base for my Corsair

and as you already see here I painted the Ultra cast figure of said pilot .. It is a beautiful resin model .. but I am just too bad at painting figures. Still considering my non existent talent I am quite happy how it turned out ...


all the best
Steffen
DULCE ET DECORUM EST PRO HOBBY MORI
Scotland, United Kingdom
Joined: February 07, 2008
KitMaker: 1,699 posts
AeroScale: 1,384 posts
Posted: Friday, August 07, 2009 - 05:17 AM UTC
That's quite a good likeness. Maybe a little heavy for molders but the face and posture looks very convincing.
I'll have to keep an eye out for that one. You are really flying with the corsair. I wish I could get more bench time
but with visitors and home building and work and kids there has been very little lately. Family always comes
first but I'd just like a little time lost in the building process.
Germany
Joined: September 07, 2005
KitMaker: 5,609 posts
AeroScale: 5,231 posts
Posted: Friday, August 07, 2009 - 05:57 AM UTC
Hi J-P
Quoted Text
That's quite a good likeness. Maybe a little heavy for molders but the face and posture looks very convincing.
Hmm, I guess the pix are fooling you here. The figure is almost spot on: He is leaning backwards and with his hands in his pockets it might look a little like myself with 50kg less .. but as I wrote .. the person is very well met. It is molded after a well known photo where Mölders just received notice that one of his pilots did not make it back to the Gartenzaun (own base) and his fate unknown ..
Quoted Text
I wish I could get more bench time but with visitors and home building and work and kids there has been very little lately. Family always comes first but I'd just like a little time lost in the building process.
I totally agree .. I wish I had a job and a family ... we are just never happy with what we have ...
all the best
Steffen
DULCE ET DECORUM EST PRO HOBBY MORI
Moselle, France
Joined: May 15, 2005
KitMaker: 5,653 posts
AeroScale: 4,347 posts
Posted: Friday, August 07, 2009 - 12:17 PM UTC
Hi Steffen,
The finish of the Corsair looks very convincing and I think you made a great job on the figure as well. But what happened between the last two pictures? Did you changed the settings of your camera in between? The leather jacket has two different colors!? Another good example that shows not to trust the colors of a model shown in the internet.
When do you think will you get your Corsair finished?
Jean-Luc

Better think one hour and build five minutes...
Than think five minutes and build an hour!
Germany
Joined: September 07, 2005
KitMaker: 5,609 posts
AeroScale: 5,231 posts
Posted: Friday, August 07, 2009 - 09:14 PM UTC
Guten Morgen jean-Luc
Thank you for your kind comment!
Quoted Text
But what happened between the last two pictures? Did you changed the settings of your camera in between? The leather jacket has two different colors!? Another good example that shows not to trust the colors of a model shown in the internet.
it is a matter of post production. I do not recall exactly, but I think I shifted the last pic a bit to red as it turned out a little too blue (or vice versa I shifted the other pic towards blue). Furthermore I "optimized" the pic on my equipment, especially the non calibrated monitor, so it might look totally different on your flat screen or mobile phone...
Quoted Text
When do you think will you get your Corsair finished?
thats a good question .. maybe tomorrow .. maybe in 5 years .. who knows..
all the best
Steffen
DULCE ET DECORUM EST PRO HOBBY MORI