Chance-Vought F4U-5N Corsair Hasegawa 1/48
Germany
Joined: September 07, 2005
KitMaker: 5,609 posts
AeroScale: 5,231 posts
Posted: Friday, March 27, 2009 - 09:40 AM UTC
Hi all
I started this ... well, I really do not remember... must be after 20081004 when I got the AM stuff ... maybe I posted it somewhere here??? Not sure if this counts for the campaign? Anyway here are a few pix. I work on it when the Focke Wulfs bore me.
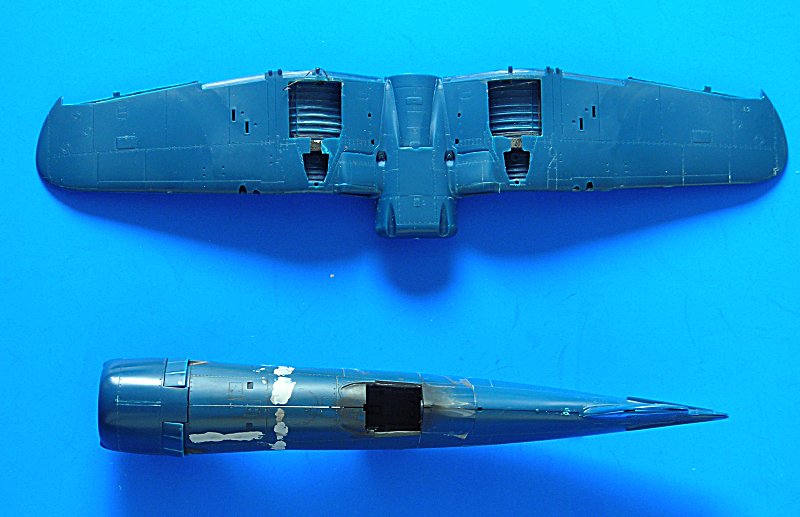
F4U-5N (Revell/Hasegawa plus TD pit, Eduard set, Ultracast wheels, Pavla control surfaces, Sqn canopy),
all the best
Steffen
DULCE ET DECORUM EST PRO HOBBY MORI
California, United States
Joined: August 25, 2008
KitMaker: 369 posts
AeroScale: 104 posts
Posted: Friday, March 27, 2009 - 10:27 AM UTC
Nice start.It 's very interesting and informative to see the progress on a build. I learn from everything I see in the photos. Thanks for posting them.
matt
On The Bench:
1/32 F-105D "Memphis Belle II"
Germany
Joined: September 07, 2005
KitMaker: 5,609 posts
AeroScale: 5,231 posts
Posted: Friday, March 27, 2009 - 06:58 PM UTC
Many thanks Matt
the model is quite nice the only down side so far is the tool split in the front cowling (Hasegawa did it to get more late F4Us from one tool) ... I've already done several putty/sanding rounds and the step is still visible ... maybe I just live with it after I have sanded it this time.
all the best
Steffen
DULCE ET DECORUM EST PRO HOBBY MORI
Tennessee, United States
Joined: July 27, 2006
KitMaker: 92 posts
AeroScale: 91 posts
Posted: Monday, March 30, 2009 - 02:44 AM UTC
I had some very serious issues with the cowl/fuselage area myself:
The upper seam:
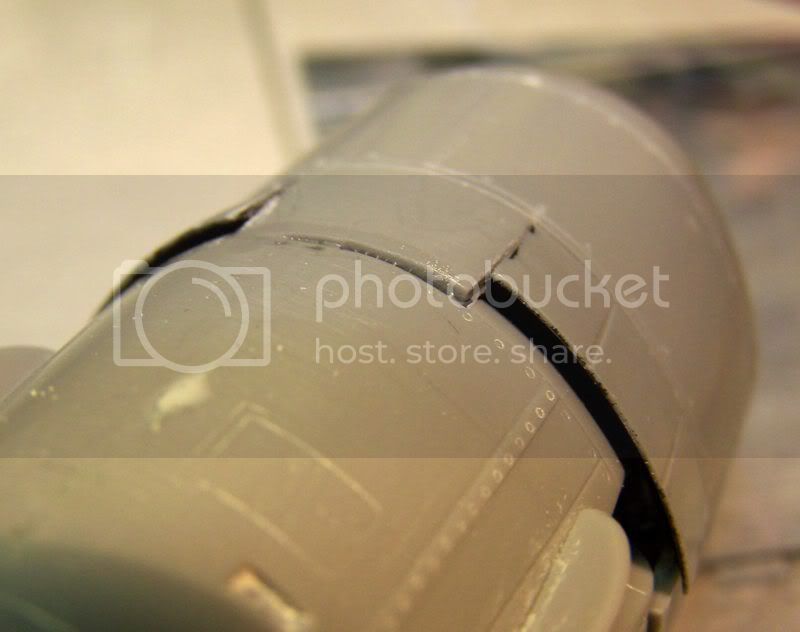
Right side:
[

Left nose seam:

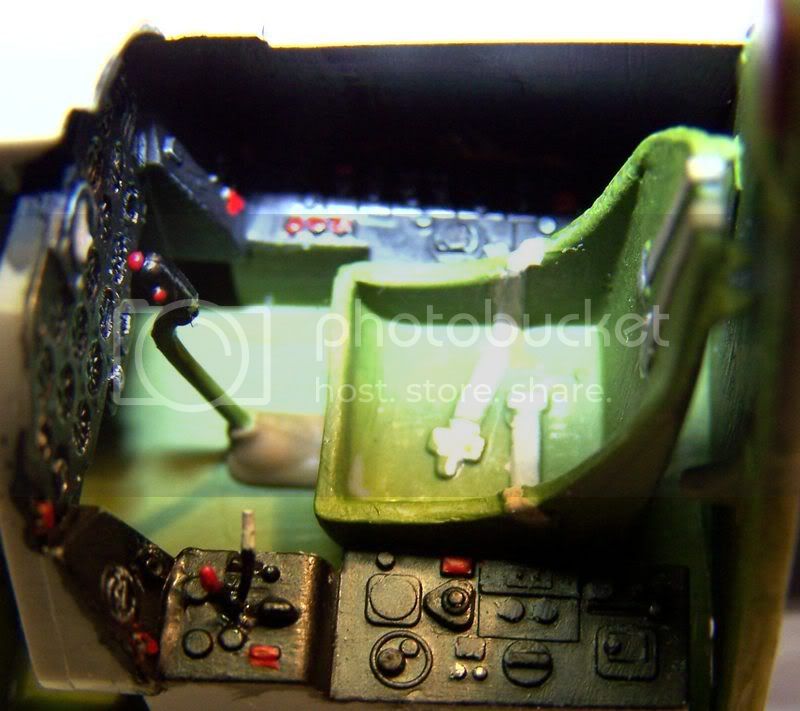
The cockpit, however was very nice:
Don McIntyre
Clarksville, Tennessee
Germany
Joined: September 07, 2005
KitMaker: 5,609 posts
AeroScale: 5,231 posts
Posted: Monday, March 30, 2009 - 03:24 AM UTC
Thank you Don!!
Somehow this pix look familiar .. did we already exchange thoughts over at HS?
Dryfit seems pretty o.k. on my bird but I will include a small shim just to be on the safe side..
As for the cockpit colour: I thought this should be all black?!
all the best
Steffen
DULCE ET DECORUM EST PRO HOBBY MORI
Tennessee, United States
Joined: July 27, 2006
KitMaker: 92 posts
AeroScale: 91 posts
Posted: Tuesday, March 31, 2009 - 01:37 AM UTC
Steffen,
I did post these over on Hyperscale! Good memory! For the cockpit I went with interior green below the side consoles and black above. Those nose and cowling/fuselage seams gave me fits, I hope yours fits better than mine. You'll probably need some shims on the wing root intakes as well. I fit them so that they fit best on the top (no filler) and then filled the underside seams. It looks like you did the same with yours now that I look at your photos again.
Don McIntyre
Clarksville, Tennessee
Germany
Joined: September 07, 2005
KitMaker: 5,609 posts
AeroScale: 5,231 posts
Posted: Tuesday, March 31, 2009 - 03:38 AM UTC
Hi Don
Many thanks for the additional hints ... there is nothing glued yet, well, except the rear bulkhead and the cockpit side walls. So I am still open for corrections and hints.
The tool gap ist most annoying .. would have been better if Hasegawa had left them separate so that I could get the gaps at more sanding friendly spots (like on their darned P-40 series) ... I have to browse my emails If I can find the post with the shim described as this seemed to be a good solution for the cowl fit problem.
all the best
Steffen
DULCE ET DECORUM EST PRO HOBBY MORI
Germany
Joined: September 07, 2005
KitMaker: 5,609 posts
AeroScale: 5,231 posts
Posted: Sunday, July 26, 2009 - 02:14 AM UTC
Bump
I will be resuming this project when I have done the Fw190A-4 "Turbo". I think I have reduced the mold line to an acceptable level and I just did a few things in the cockpit.
So if you have good hints, please post them as I do only know very few things on post WW2 aircraft.
Thank You!
more to come soon.
all the best
Steffen
DULCE ET DECORUM EST PRO HOBBY MORI
Germany
Joined: September 07, 2005
KitMaker: 5,609 posts
AeroScale: 5,231 posts
Posted: Sunday, July 26, 2009 - 04:18 AM UTC
As promised a small update
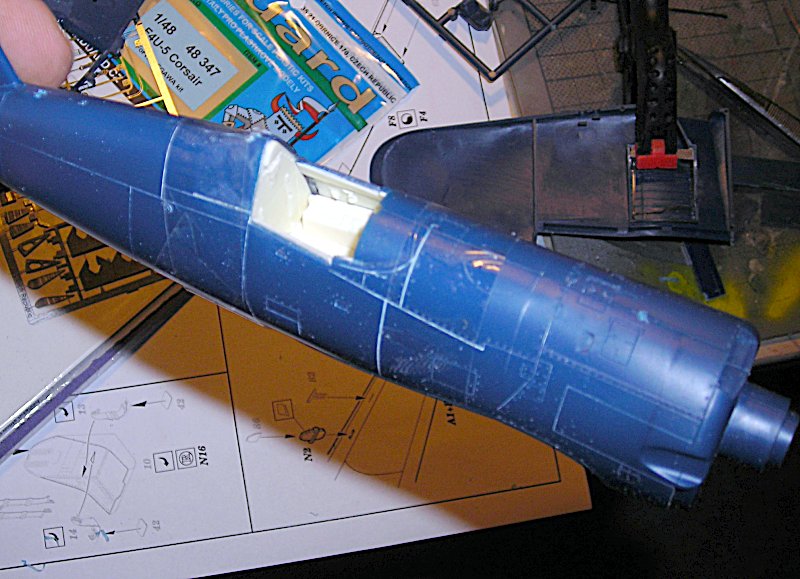
I fabricated a shim for the front fuselage, so that it will be wide enough to fit the cowl nicely (no pic yet). I will probably also include a spreader at the mold seam but I first have to get the fuselage together to see if it is necessary or not.
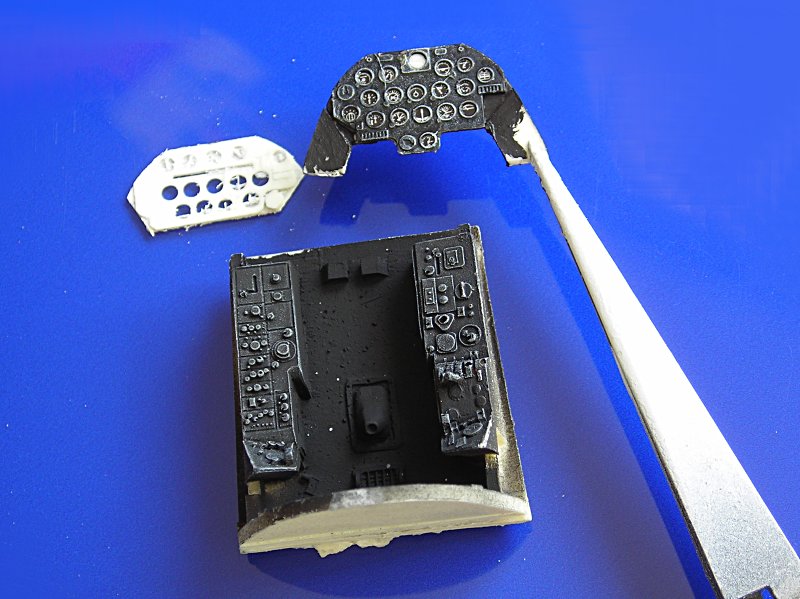
I also fiddled a bit with the cockpit. Sadly the F4U-5N dash from my TD set is missing, so I used the standard -5 dash and sawed the instruments away. Instead I installed the Eduard instrument panel (looks better anyway). Everything is just drybrushed but will get some detail painting later.
comments welcome
all the best
Steffen
DULCE ET DECORUM EST PRO HOBBY MORI
Tennessee, United States
Joined: July 27, 2006
KitMaker: 92 posts
AeroScale: 91 posts
Posted: Tuesday, July 28, 2009 - 02:30 AM UTC
Looking good, Steffen. I have made absolutely no progress on my F4U-5N...

Don McIntyre
Clarksville, Tennessee
Germany
Joined: September 07, 2005
KitMaker: 5,609 posts
AeroScale: 5,231 posts
Posted: Tuesday, July 28, 2009 - 02:44 AM UTC
Thanks Don!
I want to progress on my build, but instead I am searching the darn interweb for hours to find a cockpit layout or picture or somthing, to find out which knobs have to have what colour (cockpit of course). I was about to ask on HS, but as you just posted: any idea?
cheers
Steffen
DULCE ET DECORUM EST PRO HOBBY MORI
Germany
Joined: September 07, 2005
KitMaker: 5,609 posts
AeroScale: 5,231 posts
Posted: Tuesday, July 28, 2009 - 07:38 AM UTC
O.k. another small update.
the seat hat quite a few blubbles, which I filled with CA glue and smeared over as there is no way of sanding it.
@ Don: Despite your explanation on HS I still do not know where to put some red dots .. stupid me
Also I did not get how to mount part 11 on the left console

I am probably just too blind to decipher that small instruction leaf in the TD set its 4 by 5 cm with a pic of the parts and 4 steps of construction ... and without a proper ref. I just cannot get it.

bad day ... better stop for today
all the best
Steffen
DULCE ET DECORUM EST PRO HOBBY MORI
England - East Anglia, United Kingdom
Joined: November 09, 2006
KitMaker: 295 posts
AeroScale: 276 posts
Posted: Wednesday, July 29, 2009 - 12:19 AM UTC
Looks great to me Steffen.
How did you do the instrument faces, as they've come out great.
Howard
Germany
Joined: September 07, 2005
KitMaker: 5,609 posts
AeroScale: 5,231 posts
Posted: Wednesday, July 29, 2009 - 12:24 AM UTC
Hi Howard
Well I replaced the instrument panel with the Eduard PE+ film .. see a few posts above.
A friend will hopefully send me a scan from the D&S so I can proceed tomorow afternoon .. fingers crossed..
all the best
Steffen
DULCE ET DECORUM EST PRO HOBBY MORI
Germany
Joined: September 07, 2005
KitMaker: 5,609 posts
AeroScale: 5,231 posts
Posted: Wednesday, July 29, 2009 - 07:24 AM UTC
So here we go
I got a cockpit drawing and painted the thing accordingly. It is probably not 100% correct, but as close as I can get.
BTW I just see that the instrument panel moved (maybe during one of the test fittings).

It is now glued in and hopefully not to see very good .. I'll check that tomorrow ...

all the best
Steffen
DULCE ET DECORUM EST PRO HOBBY MORI
Germany
Joined: September 07, 2005
KitMaker: 5,609 posts
AeroScale: 5,231 posts
Posted: Thursday, July 30, 2009 - 12:58 AM UTC
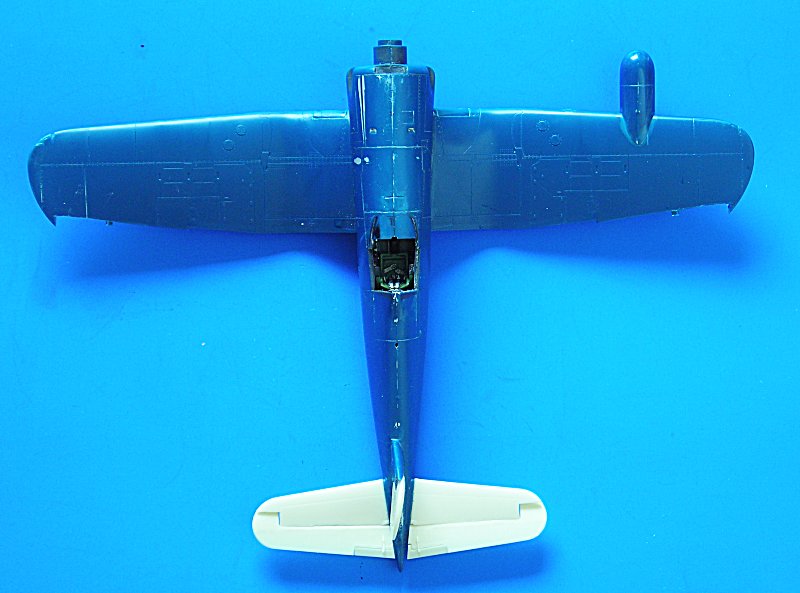
Today it looks already like an aircraft .. kind of ..
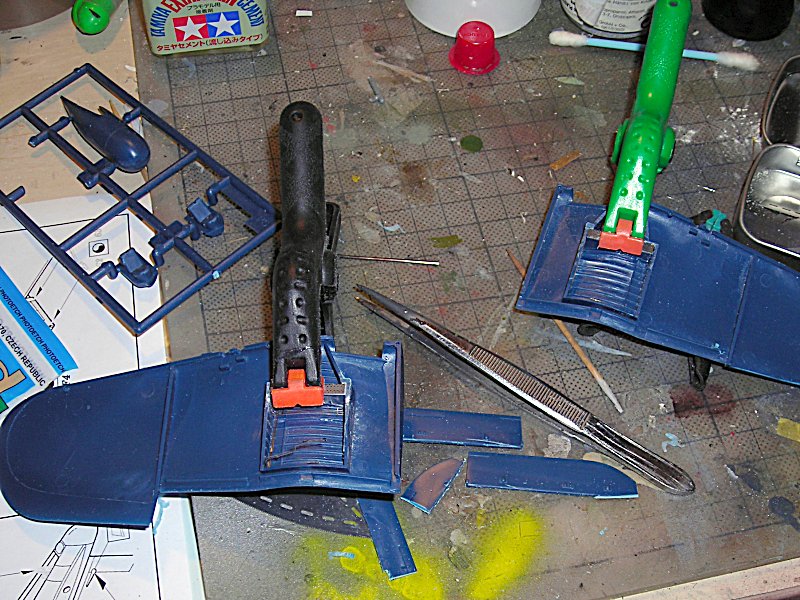
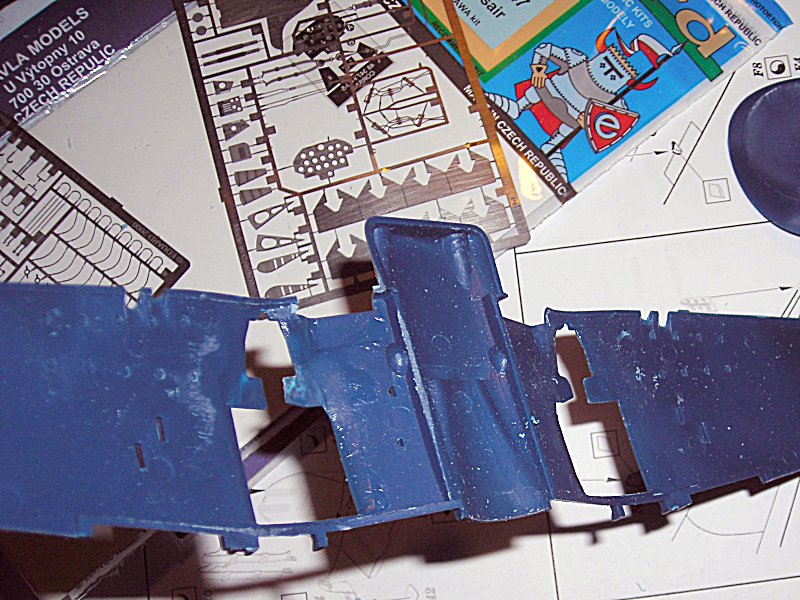
I glued in the pit and closed the fuselage yesterday. Today I added all the putty nad a spreader which is situated at the tool split to make the whole hood "straight and smooth". furthermore I cut the rudder as the Pavla replacements will be installed. Hope I did not forget to open important mounting holes ....

and as always, feel free to comment on it .... no matter what, you will know when I am p...ed

all the best
Steffen
DULCE ET DECORUM EST PRO HOBBY MORI
Germany
Joined: September 07, 2005
KitMaker: 5,609 posts
AeroScale: 5,231 posts
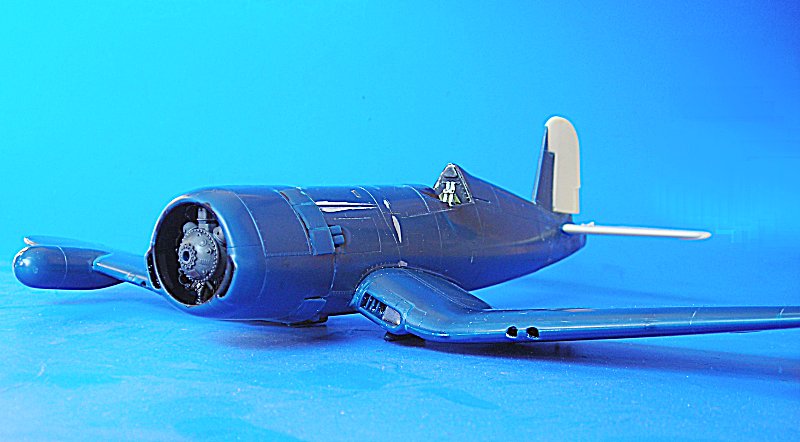
Posted: Thursday, July 30, 2009 - 09:43 PM UTC
Well, on some threads you just seam to play alone .. I know some people are watching so i just keep going on.
Progress is slow, but steady and thus the model looks more and more like a Corsair
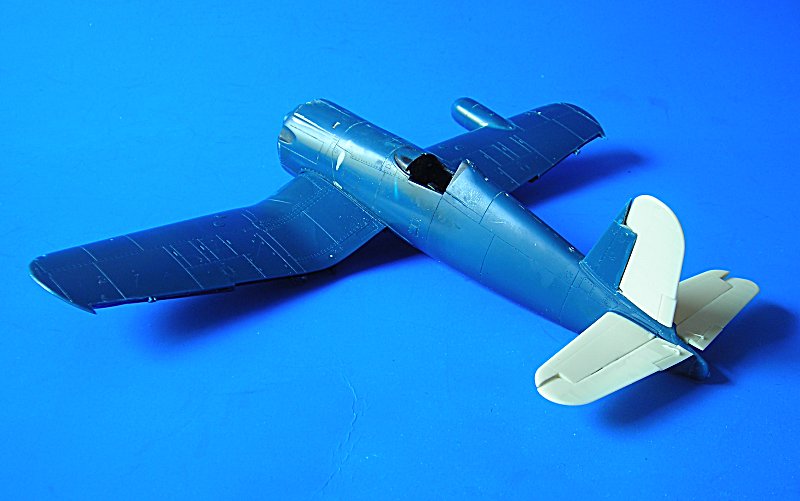
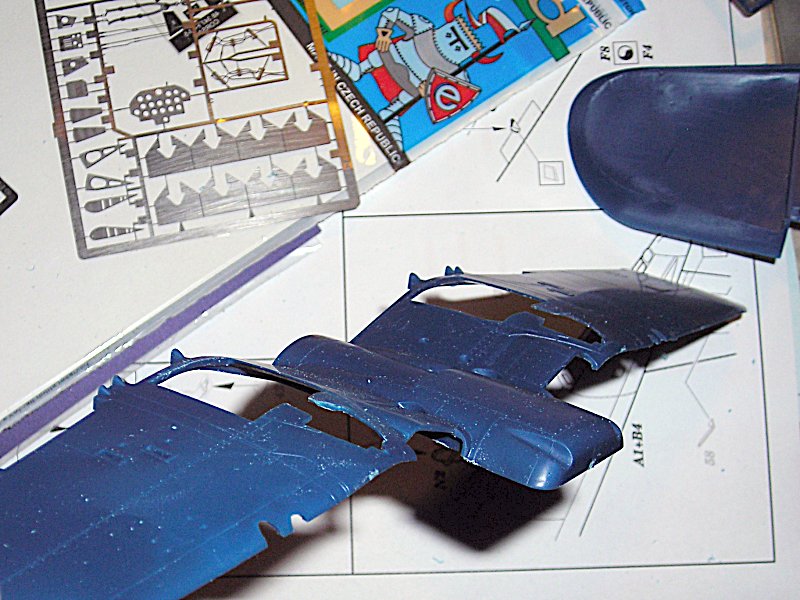
Here is a pic of the front. I laminated thin plasticard until i go the proper sized for the shim. I cut off the engine mount and reglued it (checking the position with the cowl). As you can see it fits quite nicely witth the wing part. BTW the drops are just water as I removed some sanding residue for the pictures.
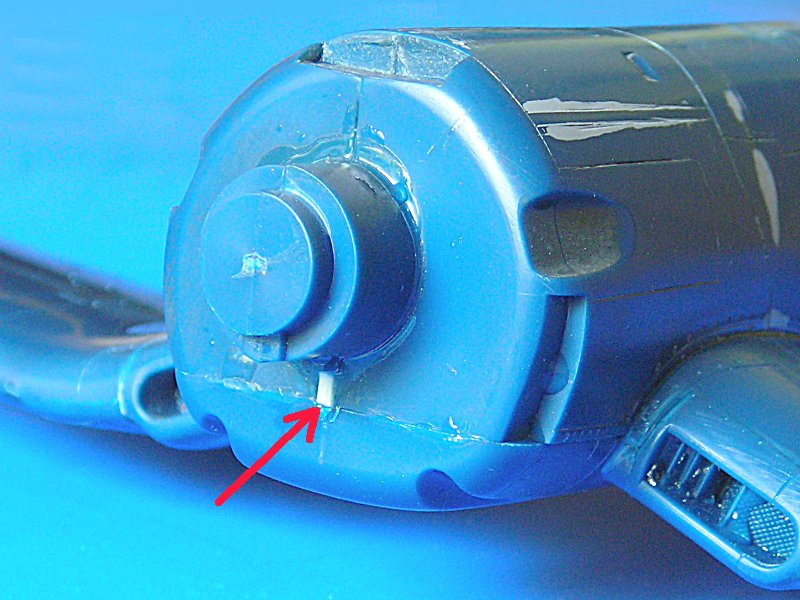
Well the last pic shows the result of the spreader I glued in at the height of the tool split, but I should have taken before/after shots. The side line of the fuselage had a very pronounced kink, which is now a bit less extreme (spread about 1mm)
I might become a bit slower now, as I have to do some cutting and PE work for the u/c ....
all the best
Steffen
DULCE ET DECORUM EST PRO HOBBY MORI
England - East Anglia, United Kingdom
Joined: November 09, 2006
KitMaker: 295 posts
AeroScale: 276 posts
Posted: Friday, July 31, 2009 - 12:22 AM UTC
Hi Steffen
She's a Corsair now mate
Looks great mate and I'm looking forward to paint now

I wish I could get a good night on my Wurger

It's not gone great the past two nights.
Oh well, you have days like that.
Howard
Germany
Joined: September 07, 2005
KitMaker: 5,609 posts
AeroScale: 5,231 posts
Posted: Friday, July 31, 2009 - 01:00 AM UTC
Thank you, Howard!
But there is still a lot to do and it will take some more time until I can even think of painting it .... at the moment I am playing a bit with the engine to get the cowling on ... and then there is the u/c stuff .. some ejector marks to remove and also some PE to install. also still a bit of the pit missing ... plus bits'n' pieces
all the best
Steffen
DULCE ET DECORUM EST PRO HOBBY MORI
Scotland, United Kingdom
Joined: February 07, 2008
KitMaker: 1,699 posts
AeroScale: 1,384 posts
Posted: Friday, July 31, 2009 - 01:11 AM UTC
Ah we are all watching. Not like a raucous crowd but in silent anticipation of the finale.
Good fettling. I see the shim to widen the cowling but what is the spreader for?
Germany
Joined: September 07, 2005
KitMaker: 5,609 posts
AeroScale: 5,231 posts
Posted: Friday, July 31, 2009 - 01:28 AM UTC
Hi J-P
Hasegawa constructed the injection moulding tool with inserts so they could get several late Corsairs from the same mould. This resulted in a gap you have to fill and a "kink" in the forward fuselage that looks strange. just look at some of the pix above and you might notice it. I do not like that break in the side, so I put in teh spreader to make the whole thing look a bit more streamlined. Maybe the shim made the look worse, but I like it now with shim and spreader.
I know, pix would have been better ...
all the best
Steffen
P.S. I see from the clicks this page gets, that a few people are watching .. so I was not that "nervous". But I like to get some feedback, especially when I do something wrong or as a warning.
DULCE ET DECORUM EST PRO HOBBY MORI
Germany
Joined: September 07, 2005
KitMaker: 5,609 posts
AeroScale: 5,231 posts
Posted: Saturday, August 01, 2009 - 12:39 AM UTC
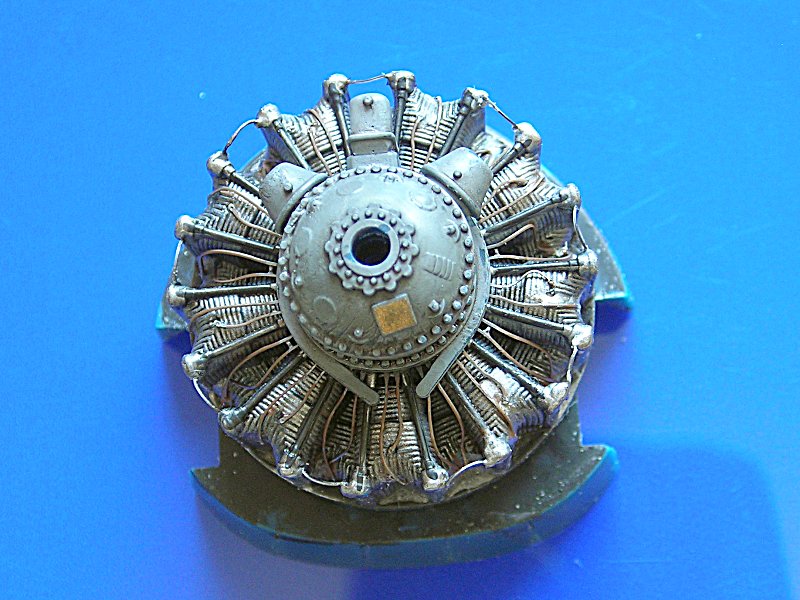
Just a short update. I installed Eduards PE parts to the engine .. pretty fiddly work .. especially if you are hamfisted like myself... thats why it took quite a while
all the best
Steffen
DULCE ET DECORUM EST PRO HOBBY MORI
Moselle, France
Joined: May 15, 2005
KitMaker: 5,653 posts
AeroScale: 4,347 posts
Posted: Saturday, August 01, 2009 - 01:03 AM UTC
Hi Steffen,
The engine looks good!

Did you already paint the wiring? It doesn't look as flat as usual...
Jean-Luc

Better think one hour and build five minutes...
Than think five minutes and build an hour!
Germany
Joined: September 07, 2005
KitMaker: 5,609 posts
AeroScale: 5,231 posts
Posted: Saturday, August 01, 2009 - 01:19 AM UTC
Vielen Dank!
yes the wiring is already painted. i had no idea what colour it had, so I just used brown ....
cheers
Steffen
DULCE ET DECORUM EST PRO HOBBY MORI
Germany
Joined: September 07, 2005
KitMaker: 5,609 posts
AeroScale: 5,231 posts
Posted: Saturday, August 01, 2009 - 06:32 AM UTC
Hi all
what a lame day on Aeroscale ... well not much of a progress but I glued the cowl to the machine
cheers
Steffen
DULCE ET DECORUM EST PRO HOBBY MORI


