KotS GB 2012 Halb. CL.II -Stephen
Warszawa, Poland
Joined: May 21, 2010
KitMaker: 16 posts
AeroScale: 15 posts
Posted: Wednesday, May 23, 2012 - 08:48 PM UTC
Colorado, United States
Joined: January 25, 2004
KitMaker: 11,669 posts
AeroScale: 11,011 posts
Posted: Thursday, May 24, 2012 - 01:38 AM UTC
Hello Piotr! Thanks for the image!
". . .The most important thing is to know why you build and then get the most that you can out of building." via D.D.
Colorado, United States
Joined: January 25, 2004
KitMaker: 11,669 posts
AeroScale: 11,011 posts
Posted: Thursday, May 24, 2012 - 01:38 AM UTC
For the kit parts. 1st you dent the discs into cups. Then you fold the PE along the union and bend the pairs so that the pairs are at right angles and from above they look like a cross "
+".

". . .The most important thing is to know why you build and then get the most that you can out of building." via D.D.
Colorado, United States
Joined: January 25, 2004
KitMaker: 11,669 posts
AeroScale: 11,011 posts
Posted: Tuesday, May 29, 2012 - 01:55 AM UTC
Now we add some basic colours to the figures.

". . .The most important thing is to know why you build and then get the most that you can out of building." via D.D.
Colorado, United States
Joined: January 25, 2004
KitMaker: 11,669 posts
AeroScale: 11,011 posts
Posted: Tuesday, May 29, 2012 - 01:59 AM UTC
Now with the kit landing gear replaced with Green tipped "STRUTZ" extruded brass. And most of the rigging in place we moved into the last steps.


". . .The most important thing is to know why you build and then get the most that you can out of building." via D.D.
Colorado, United States
Joined: January 25, 2004
KitMaker: 11,669 posts
AeroScale: 11,011 posts
Posted: Tuesday, May 29, 2012 - 02:04 AM UTC
While there is still the rudder and elevator cables to attach there are still a few parts that need to be added as well. The propeller laminations and spinner, radio antenna & lead are just a couple in the box to be added. Several script and detail decals must be added as well. Then the gun ring and its supports.


". . .The most important thing is to know why you build and then get the most that you can out of building." via D.D.
Alberta, Canada
Joined: July 26, 2010
KitMaker: 1,032 posts
AeroScale: 1,025 posts
Posted: Tuesday, May 29, 2012 - 06:59 AM UTC
Looking mighty fine Stephen! Unique and pleasing to the eye. Got to love that Strutz trick as well, it sure increases the structural integrity a lot.
Cheers,
Lance

Officially Retired as of 20 August 2013 and looking forward to some un-interrupted bench time. Currently starting Roden's Nieuport 28 and hoping to follow that with another WNW Fokker DVII.
Västra Götaland, Sweden
Joined: February 19, 2010
KitMaker: 1,473 posts
AeroScale: 1,450 posts
Posted: Tuesday, May 29, 2012 - 07:05 PM UTC
Very, very cool looking Stephen I just love the flames!
Mikael
_________________________________________________________
Just finished the Wingnut Wings Taube. On to the Junkers D.1
Colorado, United States
Joined: January 25, 2004
KitMaker: 11,669 posts
AeroScale: 11,011 posts
Posted: Friday, June 01, 2012 - 01:27 PM UTC
Thank you for the generous remarks. Well the kit is almost done. All that is left now is the tail unit rigging and the top & lower wing strut cap facades. The Propellers in the kit are Niendorf, Heine, and Wolff. Only the Niendorf, and Wolff seem applicable to the various shcemes from this kit.
". . .The most important thing is to know why you build and then get the most that you can out of building." via D.D.
Colorado, United States
Joined: January 25, 2004
KitMaker: 11,669 posts
AeroScale: 11,011 posts
Posted: Tuesday, June 05, 2012 - 09:55 PM UTC
KIt Propellers and some decals The round ones at the bottom are the Halberstadter Werke Logos

Here an old favorite figure has found a new pose. Holding an ammo reel and handing up the flare pistol.

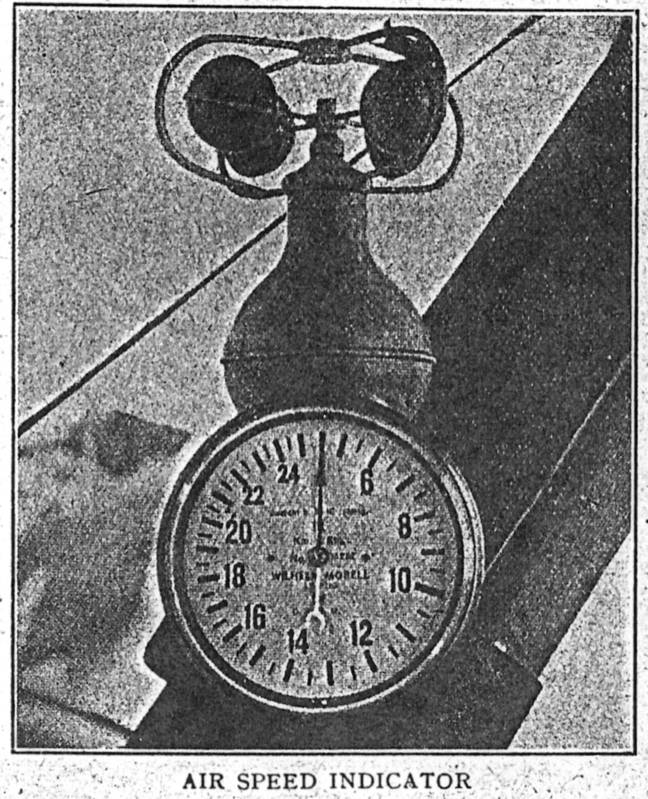
The loose cowling and the kit Air Speed indicator.

". . .The most important thing is to know why you build and then get the most that you can out of building." via D.D.
Colorado, United States
Joined: January 25, 2004
KitMaker: 11,669 posts
AeroScale: 11,011 posts
Posted: Tuesday, June 05, 2012 - 09:59 PM UTC
". . .The most important thing is to know why you build and then get the most that you can out of building." via D.D.
West Virginia, United States
Joined: December 18, 2006
KitMaker: 1,121 posts
AeroScale: 1,063 posts
Posted: Tuesday, June 05, 2012 - 11:33 PM UTC
Very nice build Stephen, love those figures too.
Mark
Västra Götaland, Sweden
Joined: February 19, 2010
KitMaker: 1,473 posts
AeroScale: 1,450 posts
Posted: Wednesday, June 06, 2012 - 12:12 AM UTC
Congratulations on finishing Stephen. She is looking mighty fine, and the scene with the figures feels very convincing to me!
Mikael
_________________________________________________________
Just finished the Wingnut Wings Taube. On to the Junkers D.1
Alberta, Canada
Joined: July 26, 2010
KitMaker: 1,032 posts
AeroScale: 1,025 posts
Posted: Wednesday, June 06, 2012 - 04:02 AM UTC
Officially Retired as of 20 August 2013 and looking forward to some un-interrupted bench time. Currently starting Roden's Nieuport 28 and hoping to follow that with another WNW Fokker DVII.
Texas, United States
Joined: February 01, 2007
KitMaker: 365 posts
AeroScale: 356 posts
Posted: Wednesday, June 06, 2012 - 04:27 AM UTC
Stephen,
Congratulations my old friend she's one Outstanding beauty. It's been a great pleasure to follow your thread from beginning to end. You never disappoint as always Master Level craftsmanship and skills.
Highest Regards,
Gregory Jouette

X 10
Bas-Rhin, France
Joined: May 21, 2006
KitMaker: 472 posts
AeroScale: 471 posts
Posted: Wednesday, June 06, 2012 - 06:20 AM UTC
Quoted Text
Pilot will be a modified Jaguar German pilot with a Microsculpt generic head.

Bravo for the diorama and your very informative building.
I think the observer seems very "steep" (stiff?!).... maybe with right arm folded over the ring of the machine gun.
Microsculpt makes and sells generic head ??? Where can I find them ?
Regards.
Colorado, United States
Joined: January 25, 2004
KitMaker: 11,669 posts
AeroScale: 11,011 posts
Posted: Wednesday, June 06, 2012 - 07:07 AM UTC
Thanks Mark, Mikael, Lance, Gregory & Louis.
Microsculpt has been working with some resin heads. I don't think he is selling them yet. But check with him at Microsulpt.com
See the first post
here. ". . .The most important thing is to know why you build and then get the most that you can out of building." via D.D.
England - South East, United Kingdom
Joined: November 06, 2005
KitMaker: 1,667 posts
AeroScale: 1,551 posts
Posted: Wednesday, June 06, 2012 - 10:15 AM UTC
A great end to a long road Stephen, thanks for a very enlightening blog, I picked up quite a few pointers as you went along.
Great.
Keith
Still can't cure the AMS even with sausage finger implants & olde eyes.
Colorado, United States
Joined: January 25, 2004
KitMaker: 11,669 posts
AeroScale: 11,011 posts
Posted: Wednesday, June 06, 2012 - 11:17 AM UTC
Thanks Keith. The great thing is we can all learn from each other here. Long build is right. January 07, 2010 - June 6, 2012. So many other things intervene.
". . .The most important thing is to know why you build and then get the most that you can out of building." via D.D.
Alberta, Canada
Joined: January 19, 2008
KitMaker: 6,743 posts
AeroScale: 6,151 posts
Posted: Saturday, June 09, 2012 - 12:35 PM UTC
Hi Stephen ,
I really enjoy following your build on this one .
She looks sharp with the flames , an eye catcher for sure !
Terri
Warszawa, Poland
Joined: May 21, 2010
KitMaker: 16 posts
AeroScale: 15 posts
Posted: Tuesday, June 19, 2012 - 03:31 AM UTC
Hello Stephen,
Fine work!
Figures bring more life into the to the model.
Maybe now the Halberstadt CL.IV?
First Mirage Hobby kit # 481314 Halb. CLIV Rol. (long fuselage version) is ready to the market.
I like CL.II however, the Halberstadt CL.IV is more colorful and have more interesting personal markings...

Mirage hobby CL.IV model is more advanced than CL.II and I wish to make it my self (ASAP when I find some time).

Best regards
Piotr M
Colorado, United States
Joined: January 25, 2004
KitMaker: 11,669 posts
AeroScale: 11,011 posts
Posted: Wednesday, June 27, 2012 - 03:26 PM UTC
Thank you Piotr! I look forward the release of the Mirage Halb. CL.IV!
". . .The most important thing is to know why you build and then get the most that you can out of building." via D.D.