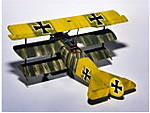
1:48 Mirage Halberstadt CL.II - Mark
Arizona, United States
Joined: December 12, 2008
KitMaker: 1,423 posts
AeroScale: 1,319 posts
Posted: Monday, March 22, 2010 - 01:17 AM UTC

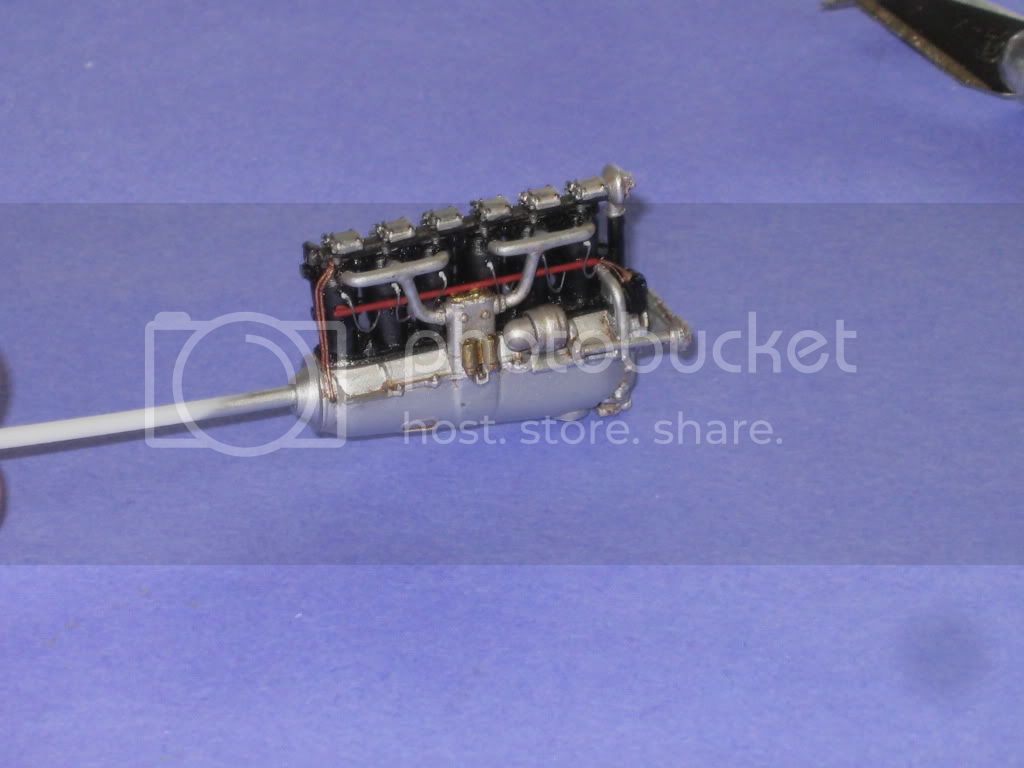
Engine looks good Mark. Don't you hate it when you get that far, and there is a glitch like that. It is probably purposefully, as you mentioned for the piping to the radiator. The gap looks really big in the picture, but in reality it probably isn't. Once the piping is in, you could build it up with white glue or Testors Canopy cement as an alternative to fililng and sanding. Just an idea.

We few, we happy few........
New York, United States
Joined: December 15, 2006
KitMaker: 365 posts
AeroScale: 344 posts
Posted: Wednesday, March 24, 2010 - 01:27 PM UTC
Mark,
This is turning out to be a great build on one of my favorite aircraft. Excellent.
Dwayne
North Carolina, United States
Joined: June 19, 2007
KitMaker: 604 posts
AeroScale: 600 posts
Posted: Thursday, March 25, 2010 - 08:27 AM UTC
Mark,
Excellent build! Very informative and looks great! Looking forward to more.
RAGIII
West Virginia, United States
Joined: December 18, 2006
KitMaker: 1,121 posts
AeroScale: 1,063 posts
Posted: Thursday, March 25, 2010 - 01:07 PM UTC
Thanks everyone. I sure am having fun with it and I appreciate the input.
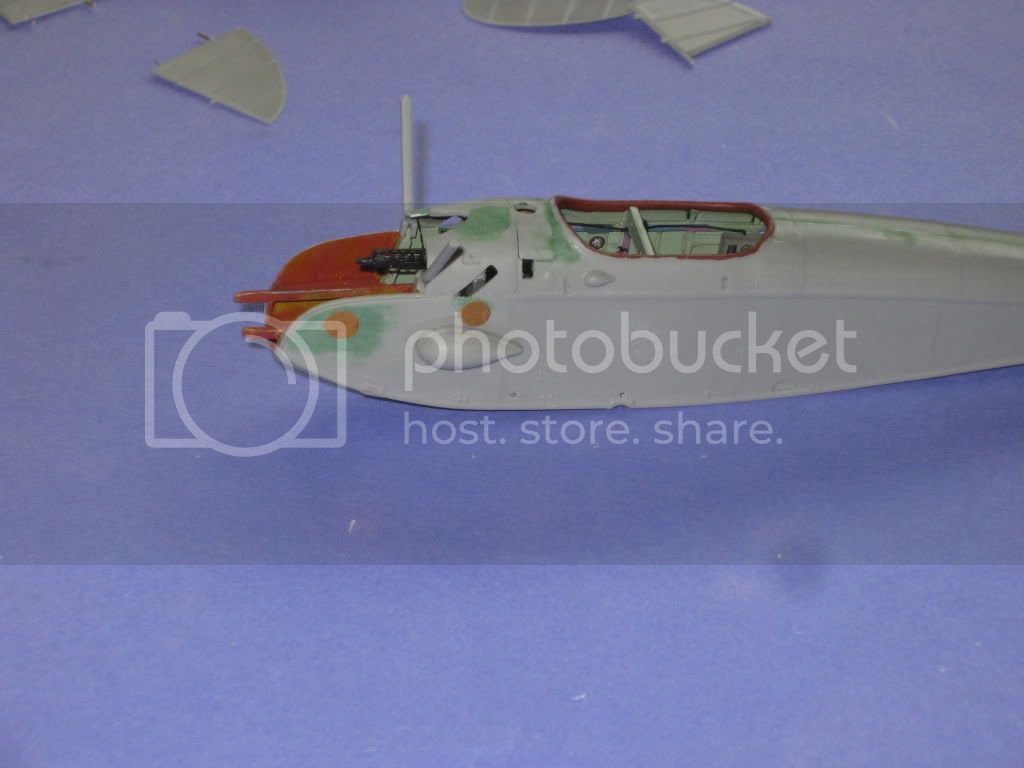
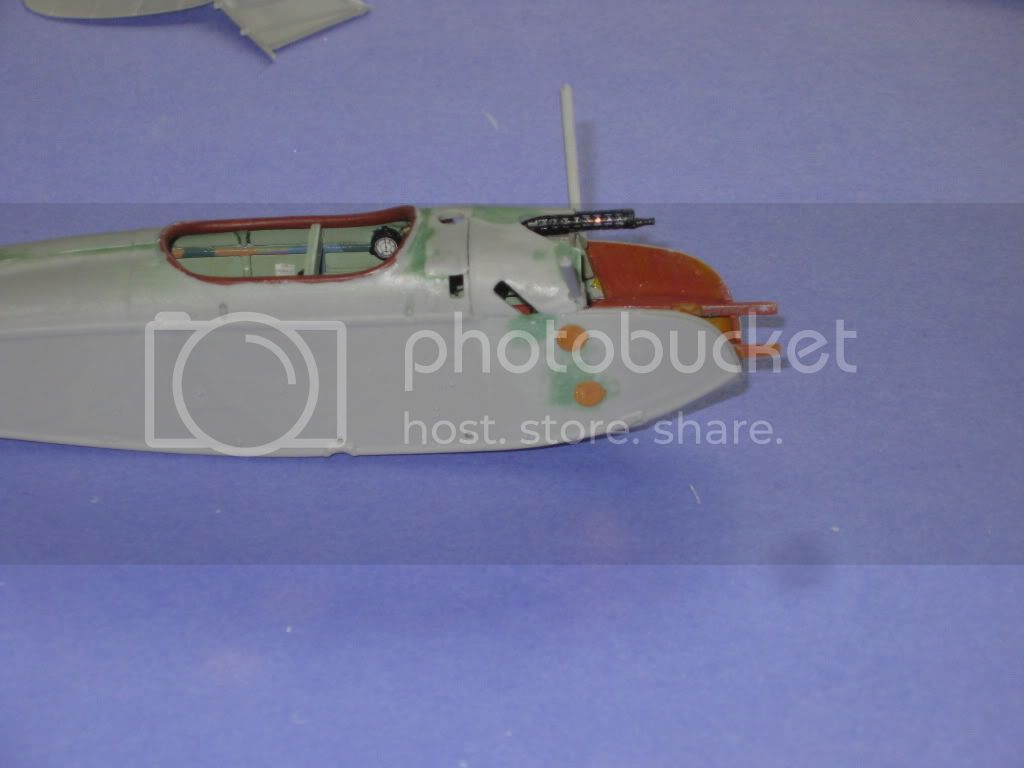
Here's a little update. I remedied the gap in the cowling by sanding down the upper cowling to a downward angle just a little, added a small piece of sheet styrene, then bent the engine cowling up (under hot water to help it keep shape) so it would meet the piece of styrene. That way the cowling will maintain it's contour. I have a little more putty and sanding to finish it off.
I won't worry about the seam, it looks like there is one there in photos of the aircraft.
Mark
Colorado, United States
Joined: January 25, 2004
KitMaker: 11,669 posts
AeroScale: 11,011 posts
Posted: Thursday, March 25, 2010 - 03:40 PM UTC
Quoted Text
Cowling suggestions welcomed..............
More soon,
Mark
The reason it is like this is for the later two gun set up.
". . .The most important thing is to know why you build and then get the most that you can out of building." via D.D.
Västra Götaland, Sweden
Joined: February 19, 2010
KitMaker: 1,473 posts
AeroScale: 1,450 posts
Posted: Thursday, March 25, 2010 - 07:02 PM UTC
Hi Mark,
Really great bulid so far, I like how the interior and engine turned out. Good save on the cowling too. Oh and I agree with Terri the flames version would look good

Best Regards
Mikael
_________________________________________________________
Just finished the Wingnut Wings Taube. On to the Junkers D.1
West Virginia, United States
Joined: December 18, 2006
KitMaker: 1,121 posts
AeroScale: 1,063 posts
Posted: Thursday, March 25, 2010 - 11:34 PM UTC
Quoted Text
Quoted Text
Cowling suggestions welcomed..............
More soon,
Mark
The reason it is like this is for the later two gun set up.
Stephen,
That's what I thought. I know the gun was mounted on either side of the engine on the actual aircraft, (Was that pilot preference or aircraft builder preference?) I noticed there are two sets of cowlings provided too.
Mark
West Virginia, United States
Joined: December 18, 2006
KitMaker: 1,121 posts
AeroScale: 1,063 posts
Posted: Thursday, March 25, 2010 - 11:36 PM UTC
Quoted Text
Hi Mark,
Really great bulid so far, I like how the interior and engine turned out. Good save on the cowling too. Oh and I agree with Terri the flames version would look good
Best Regards
Mikael
Thanks Mikael,
OK, you and Terri have talked me into it. Flames it will be.
Mark
Colorado, United States
Joined: January 25, 2004
KitMaker: 11,669 posts
AeroScale: 11,011 posts
Posted: Friday, March 26, 2010 - 06:46 AM UTC
Quoted Text
Stephen, That's what I thought. I know the gun was mounted on either side of the engine on the actual aircraft, (Was that pilot preference or aircraft builder preference?). . .
Factory installations had them on the pilot's left. Unlikely that there were any field modifications to the Spandau gun location. Some later production CL.II types had the two gun variants. Its likely these machines were for ground stafing.
". . .The most important thing is to know why you build and then get the most that you can out of building." via D.D.
West Virginia, United States
Joined: December 18, 2006
KitMaker: 1,121 posts
AeroScale: 1,063 posts
Posted: Sunday, March 28, 2010 - 01:56 PM UTC
England - South East, United Kingdom
Joined: November 06, 2005
KitMaker: 1,667 posts
AeroScale: 1,551 posts
Posted: Sunday, March 28, 2010 - 08:38 PM UTC
Loking very nice....Beautiful work as is normal for you Mark.
K
Still can't cure the AMS even with sausage finger implants & olde eyes.
Arizona, United States
Joined: December 12, 2008
KitMaker: 1,423 posts
AeroScale: 1,319 posts
Posted: Monday, March 29, 2010 - 01:22 AM UTC
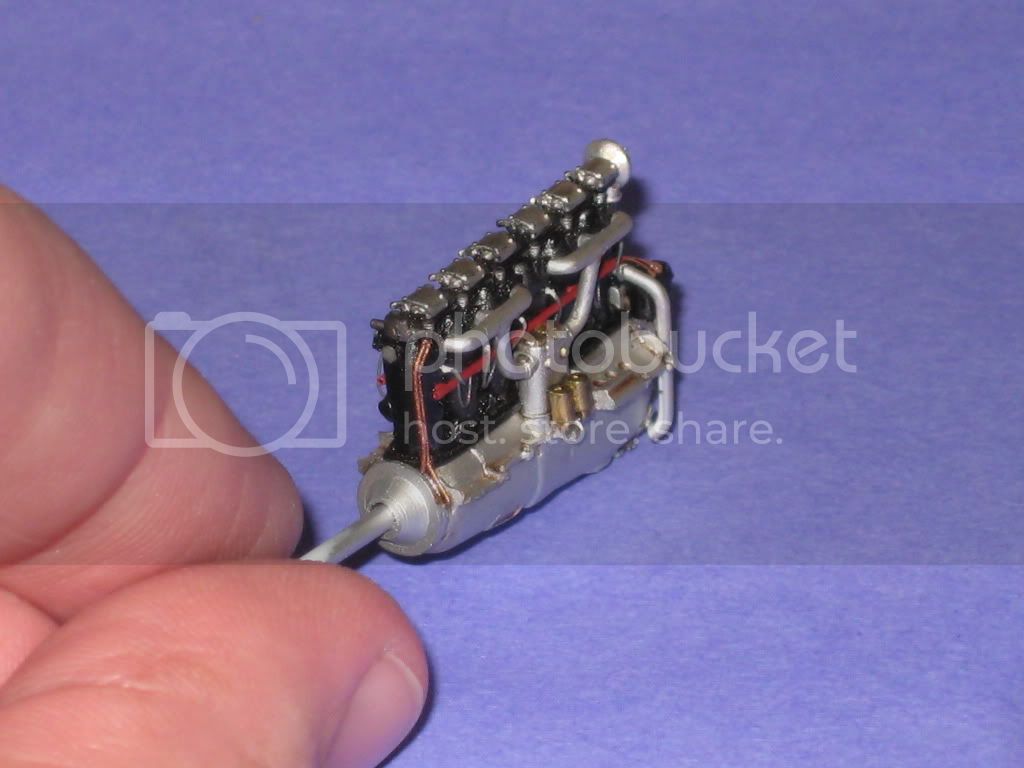
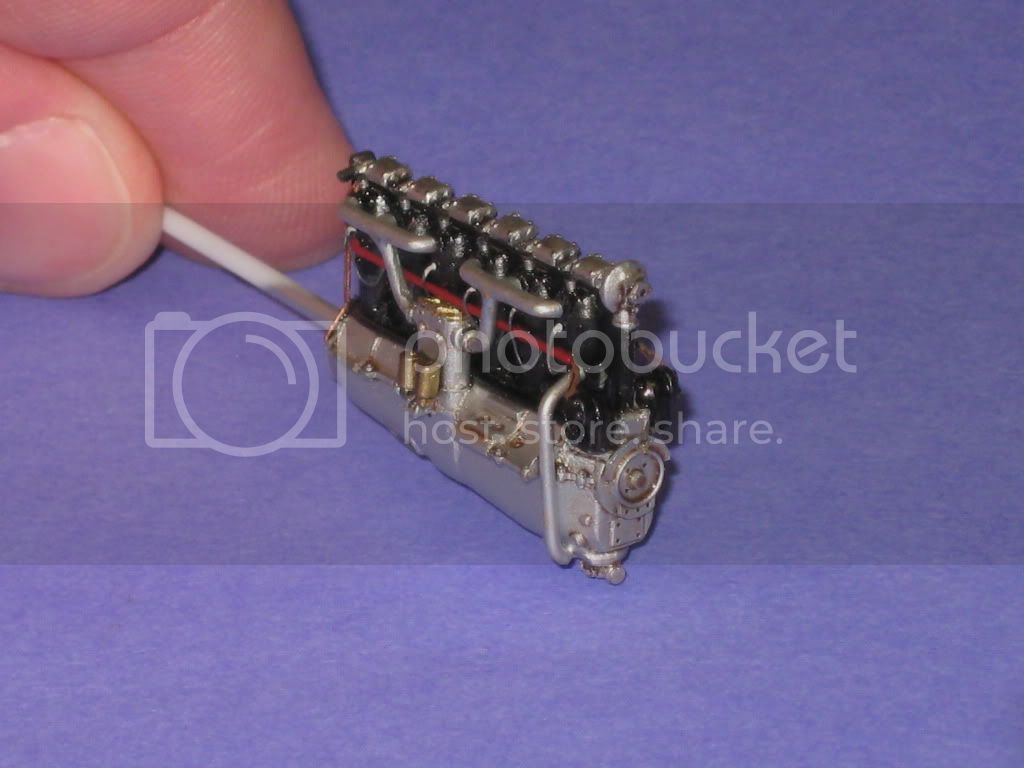
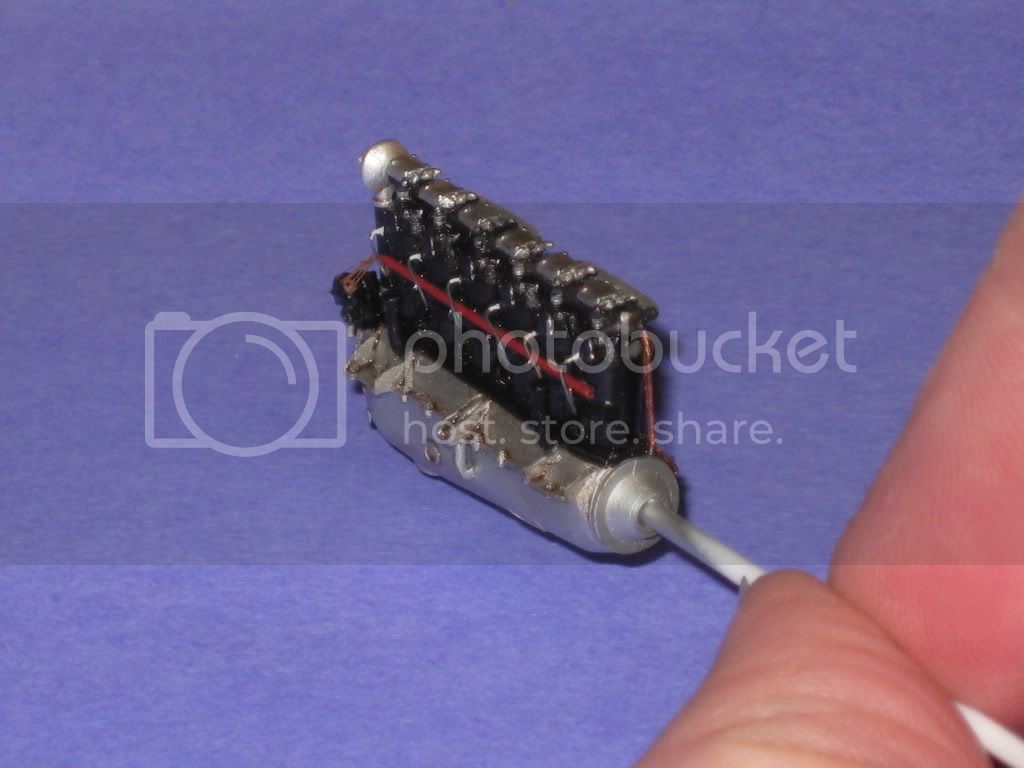
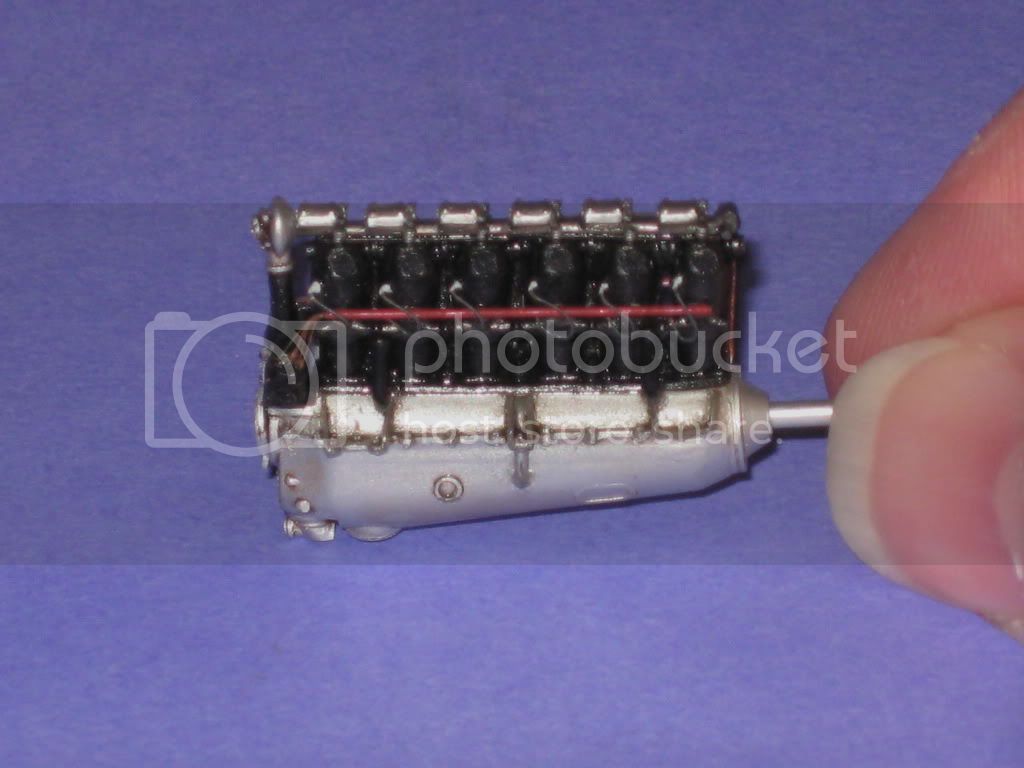
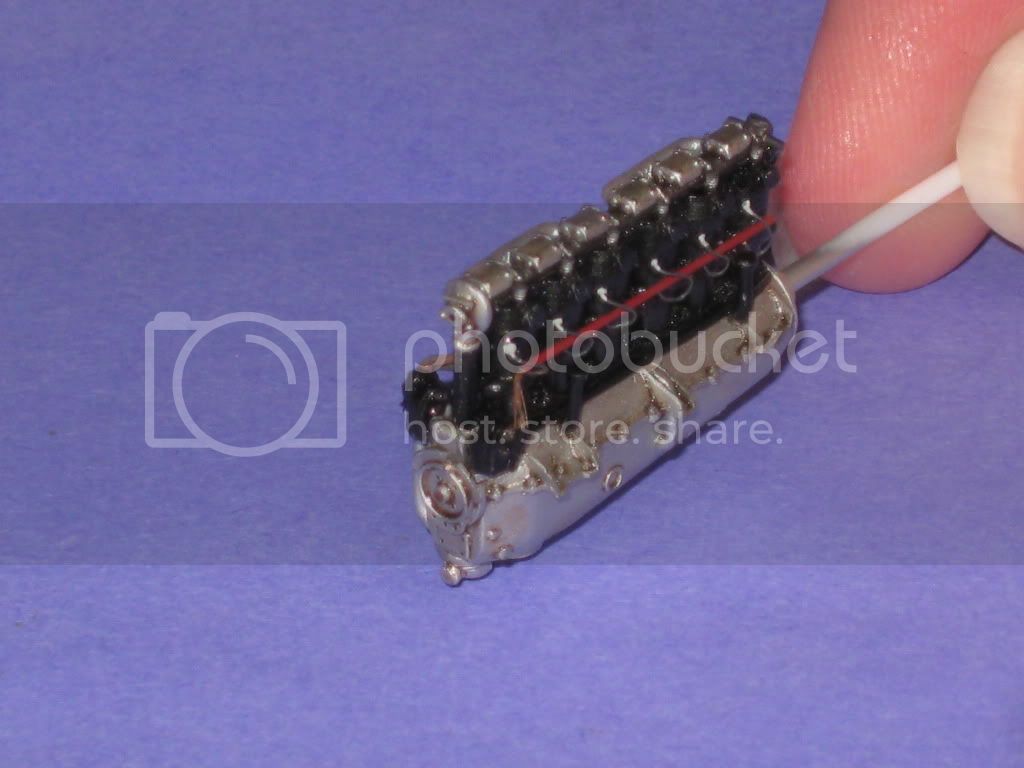
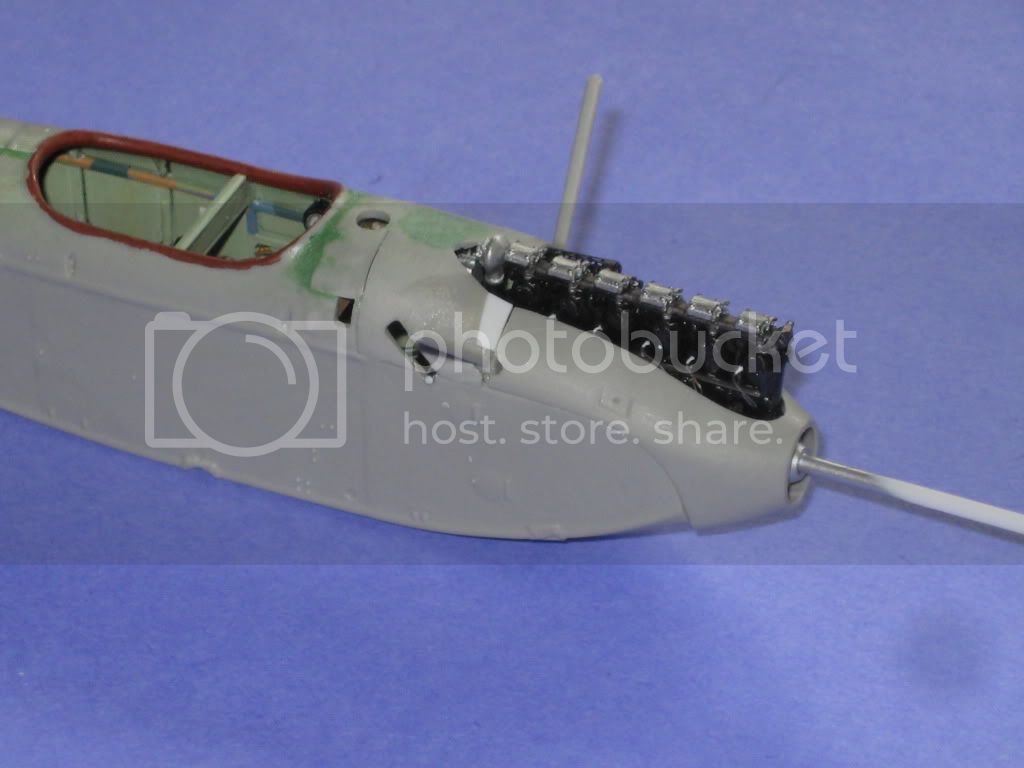
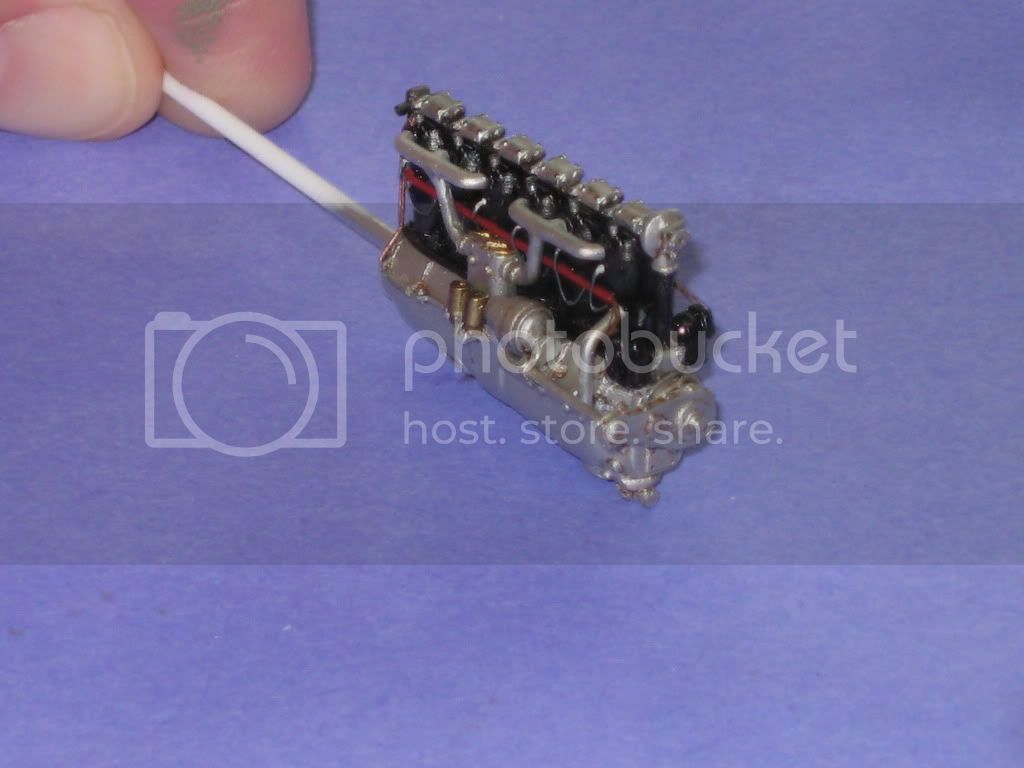
Excellent work on the Engine!
We few, we happy few........
Alberta, Canada
Joined: January 19, 2008
KitMaker: 6,743 posts
AeroScale: 6,151 posts
Posted: Monday, March 29, 2010 - 01:41 AM UTC
Very nicely done with the detailing on the engine Mark
West Virginia, United States
Joined: December 18, 2006
KitMaker: 1,121 posts
AeroScale: 1,063 posts
Posted: Monday, March 29, 2010 - 01:58 AM UTC
Thanks Keith, Mark and Terri!
I just realized, since I will be doing the flames profile, I'll need to install the wireless radio in the observers staion and generator on the engine. No problem. I'll update soon.
Mark
West Virginia, United States
Joined: December 18, 2006
KitMaker: 1,121 posts
AeroScale: 1,063 posts
Posted: Monday, March 29, 2010 - 02:27 AM UTC
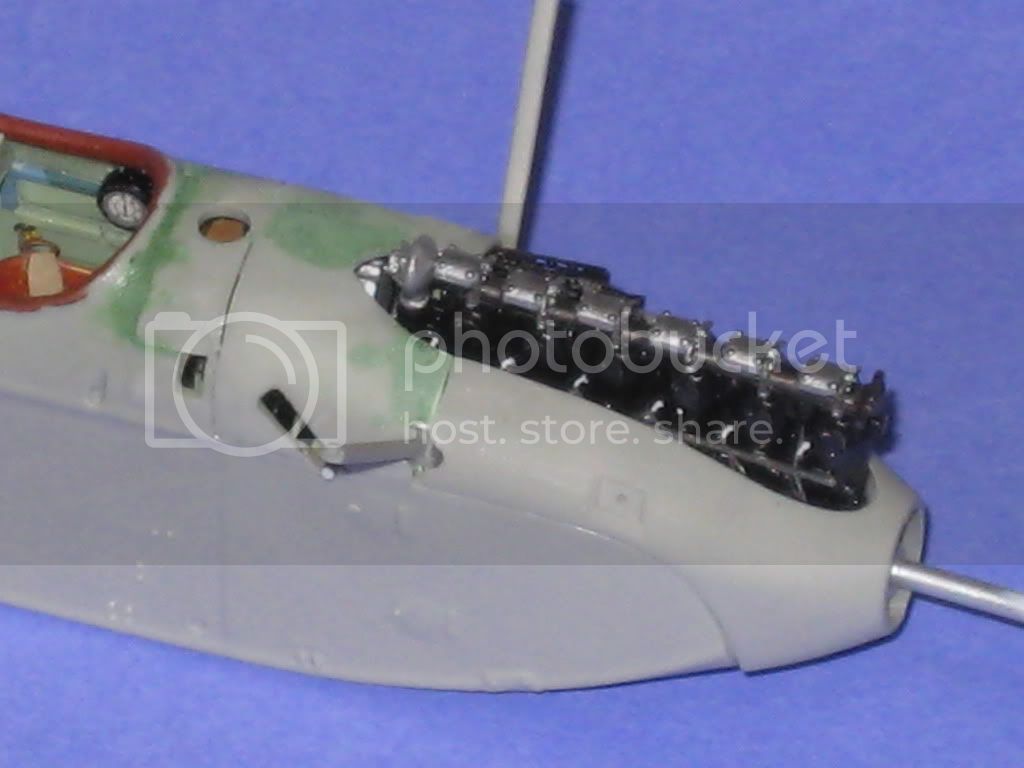
OK, here is the generator installed on the engine.....................
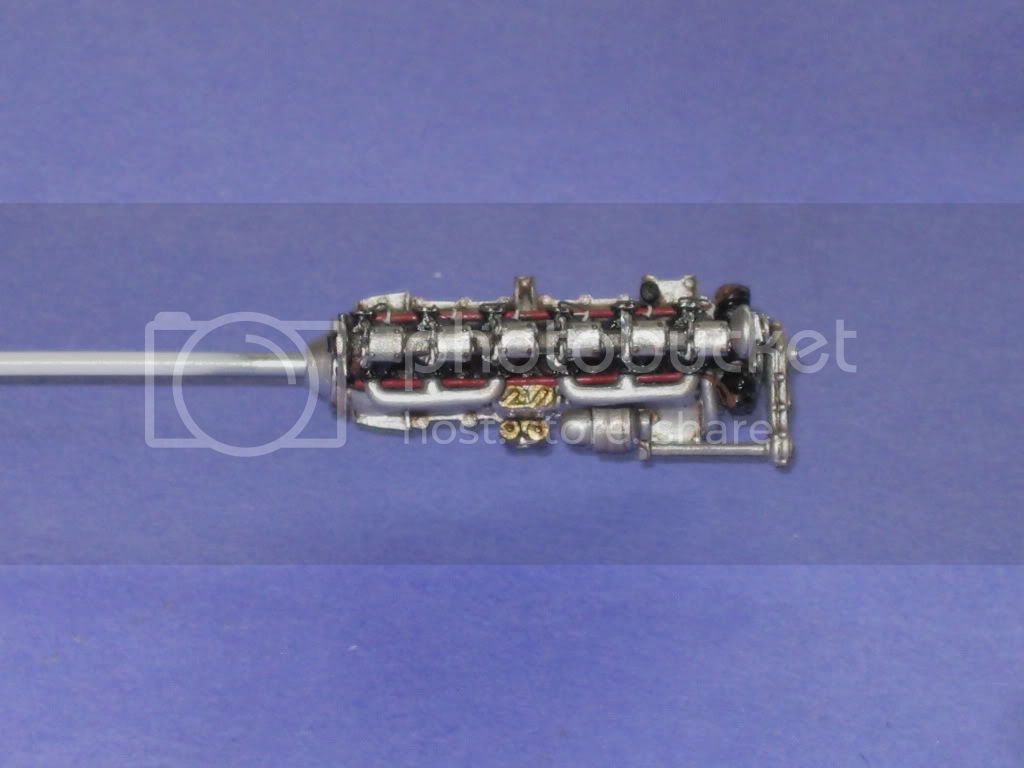
Next, I'll detail the radio.
Mark
Joined: December 23, 2007
KitMaker: 1,596 posts
AeroScale: 1,275 posts
Posted: Monday, March 29, 2010 - 02:46 AM UTC
Stunning work Mark, that's what I call "true modeling"
West Virginia, United States
Joined: December 18, 2006
KitMaker: 1,121 posts
AeroScale: 1,063 posts
Posted: Monday, March 29, 2010 - 02:59 AM UTC
Thanks Michal! I'm really having fun with it.
Here is the radio..........................
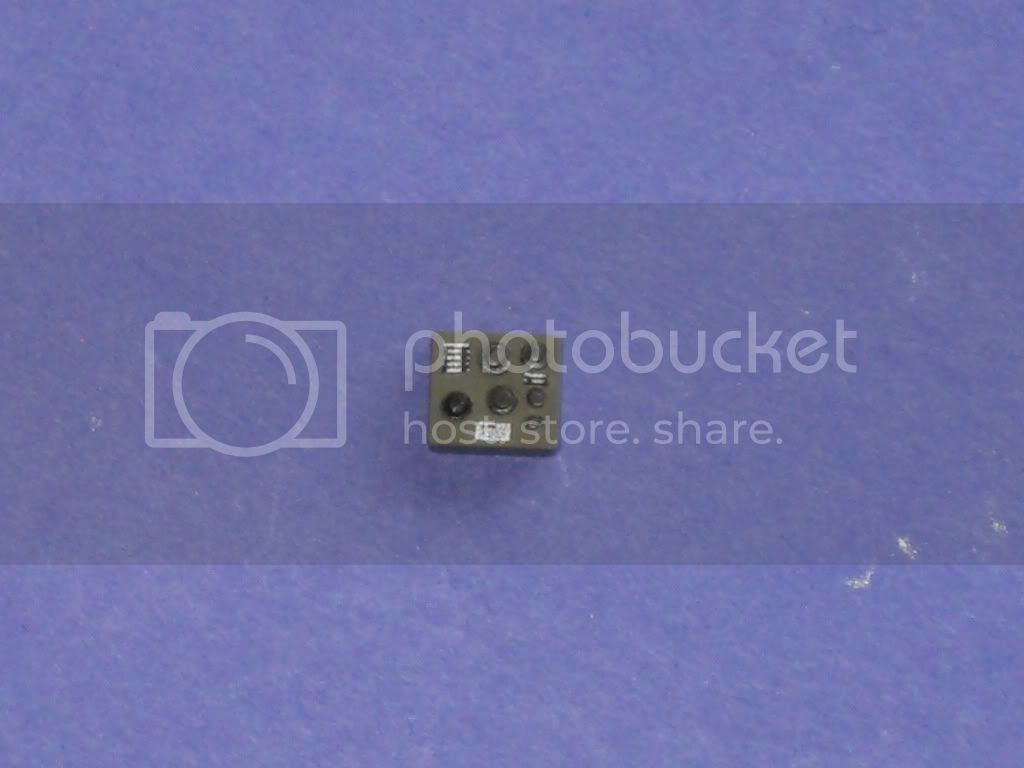
I'll wire it up and install it into the fuselage tonight.
Mark
Milano, Italy
Joined: November 30, 2007
KitMaker: 642 posts
AeroScale: 382 posts
Posted: Monday, March 29, 2010 - 04:20 AM UTC
Quoted Text
I'll wire it up and install it into the fuselage tonight.
Where the hell do you find those small scale valves, I wonder??????

Edo
West Virginia, United States
Joined: December 18, 2006
KitMaker: 1,121 posts
AeroScale: 1,063 posts
Posted: Monday, April 05, 2010 - 07:17 AM UTC
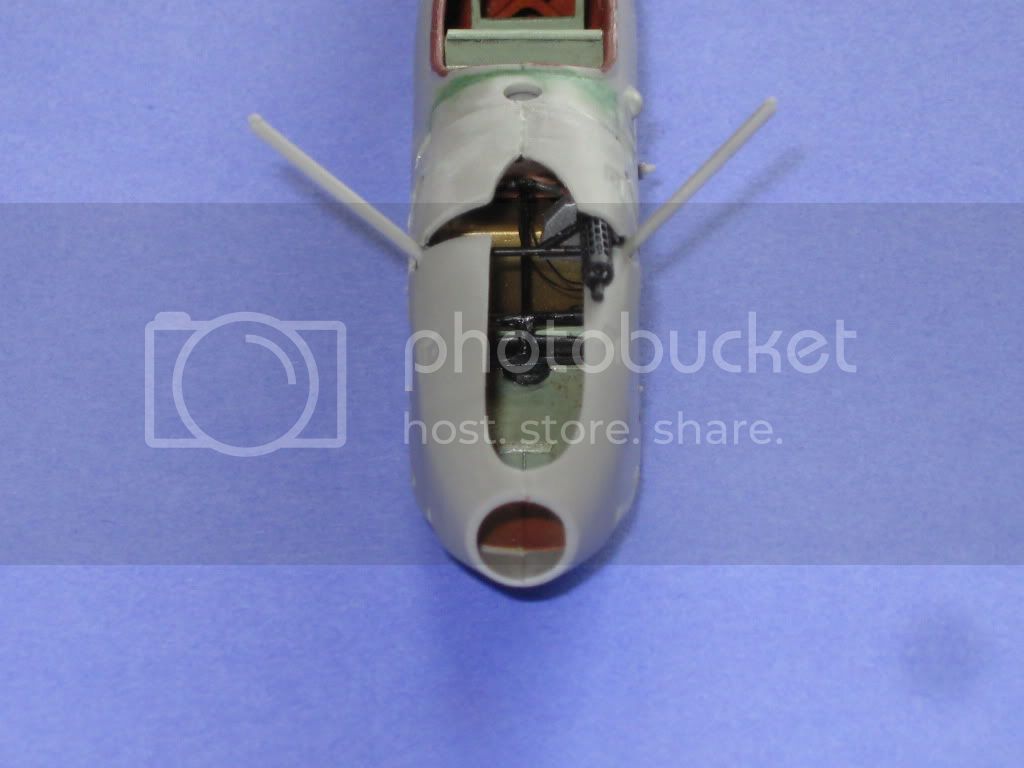
I finally had time to install the radio.
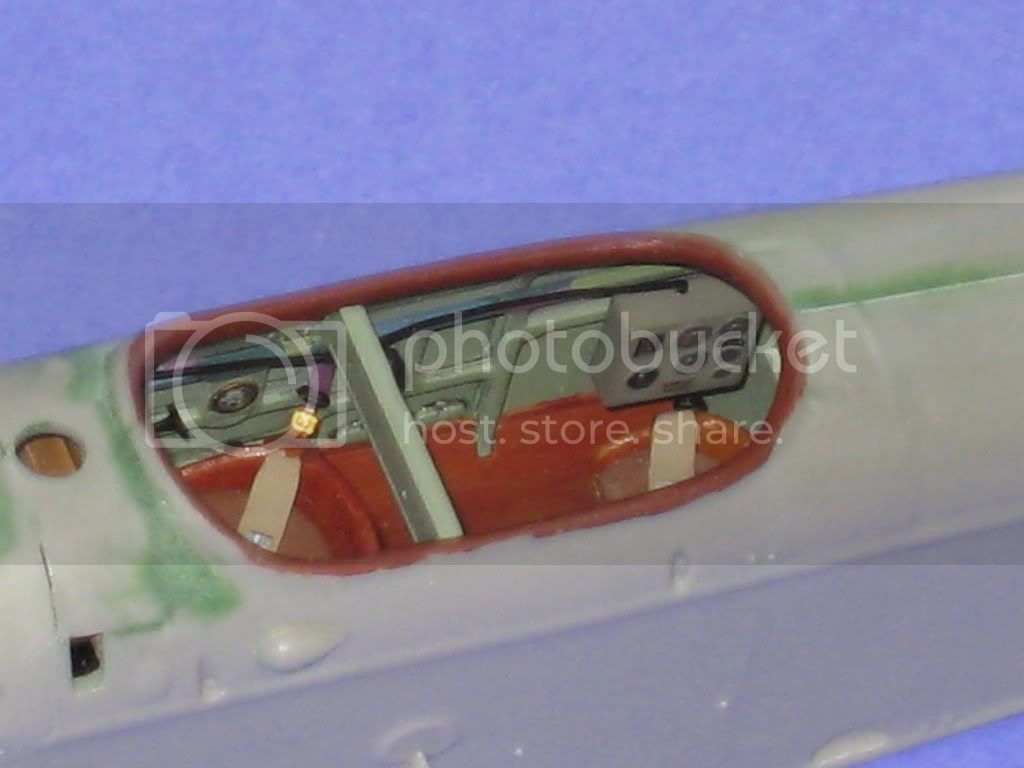
I had to add a shim to the cowling bottom to widen it out some because it was a little too tight to fit the fuselage. I'll have to deal with the spinner at some point.

Mark
West Virginia, United States
Joined: December 18, 2006
KitMaker: 1,121 posts
AeroScale: 1,063 posts
Posted: Sunday, April 18, 2010 - 12:07 PM UTC
England - South East, United Kingdom
Joined: November 06, 2005
KitMaker: 1,667 posts
AeroScale: 1,551 posts
Posted: Sunday, April 18, 2010 - 12:28 PM UTC
lookin mighty fine.....

Still can't cure the AMS even with sausage finger implants & olde eyes.
Alberta, Canada
Joined: January 19, 2008
KitMaker: 6,743 posts
AeroScale: 6,151 posts
Posted: Monday, April 19, 2010 - 03:23 AM UTC
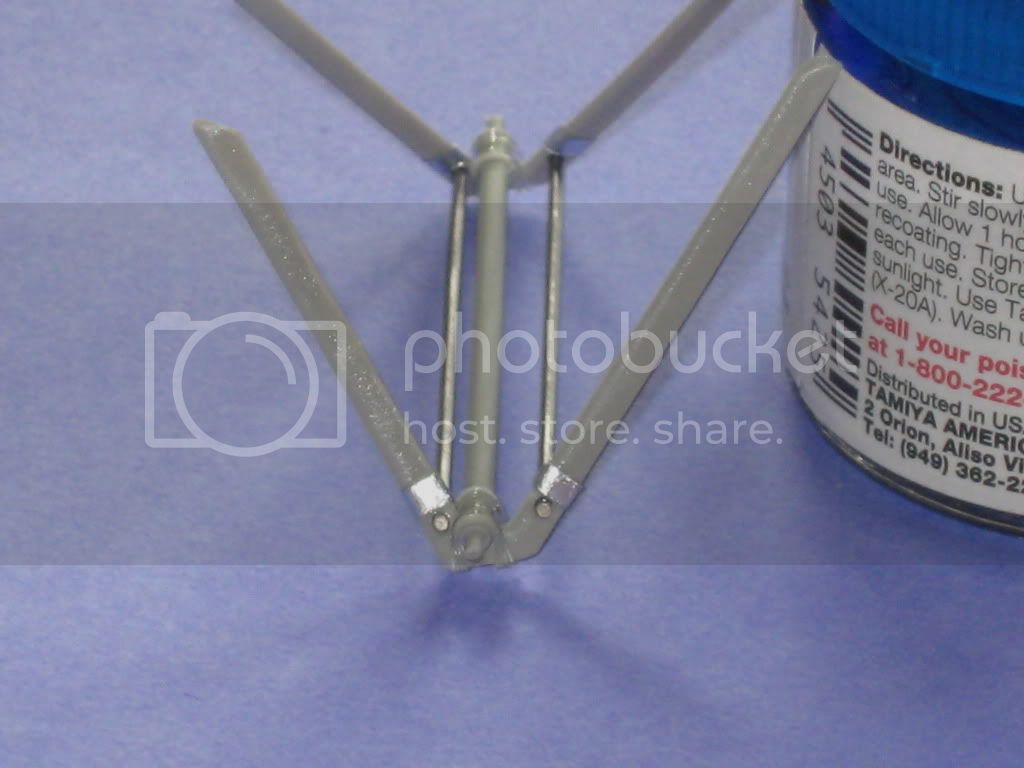
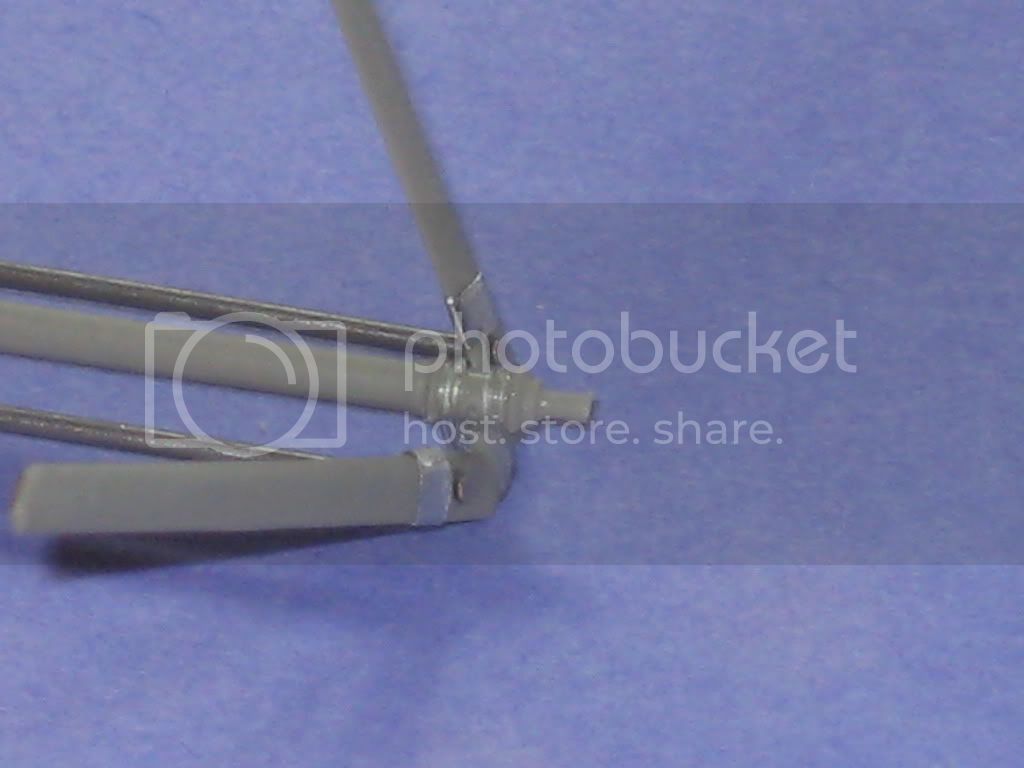
Nice detailing to the landing gear Mark . Coming along very well so far

Thessaloniki, Greece / Ελλάδα
Joined: April 15, 2008
KitMaker: 90 posts
AeroScale: 89 posts
Posted: Monday, April 19, 2010 - 04:21 AM UTC
http://www.facebook.com/pages/Agioplanes/353328611448659
West Virginia, United States
Joined: December 18, 2006
KitMaker: 1,121 posts
AeroScale: 1,063 posts
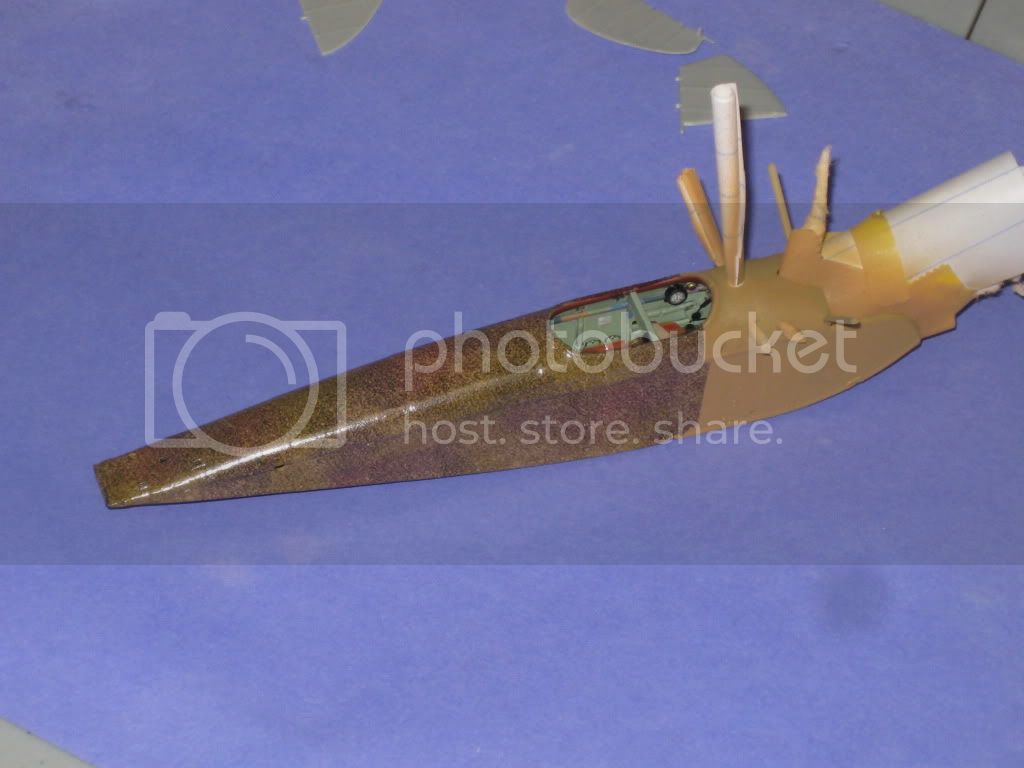
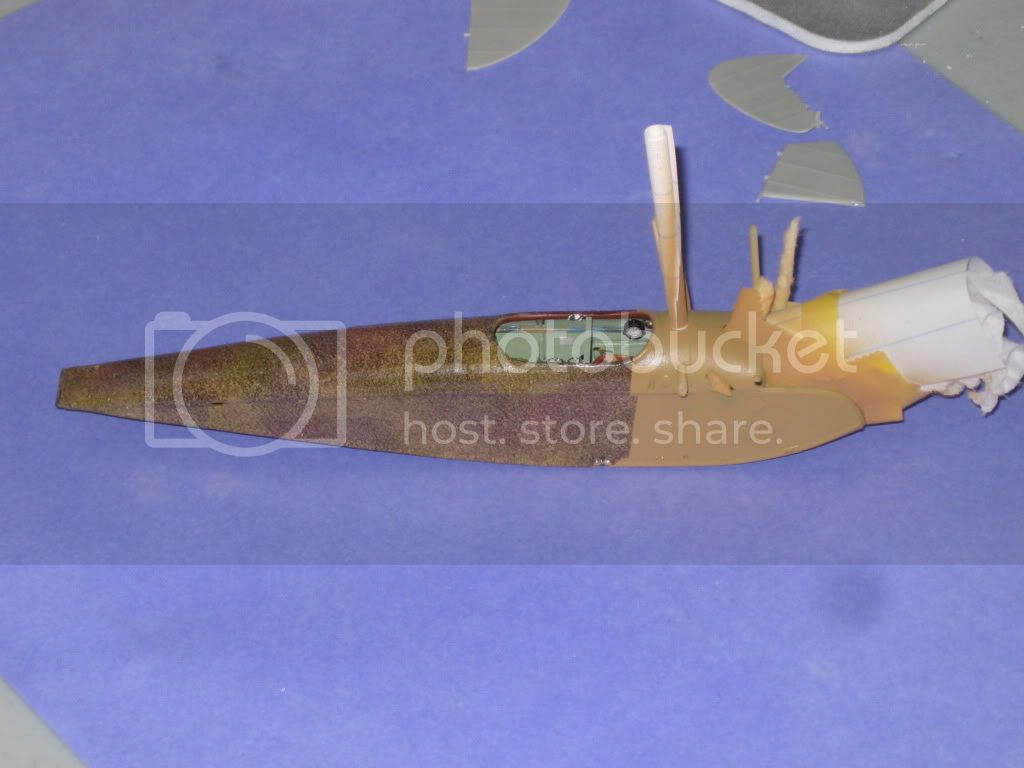
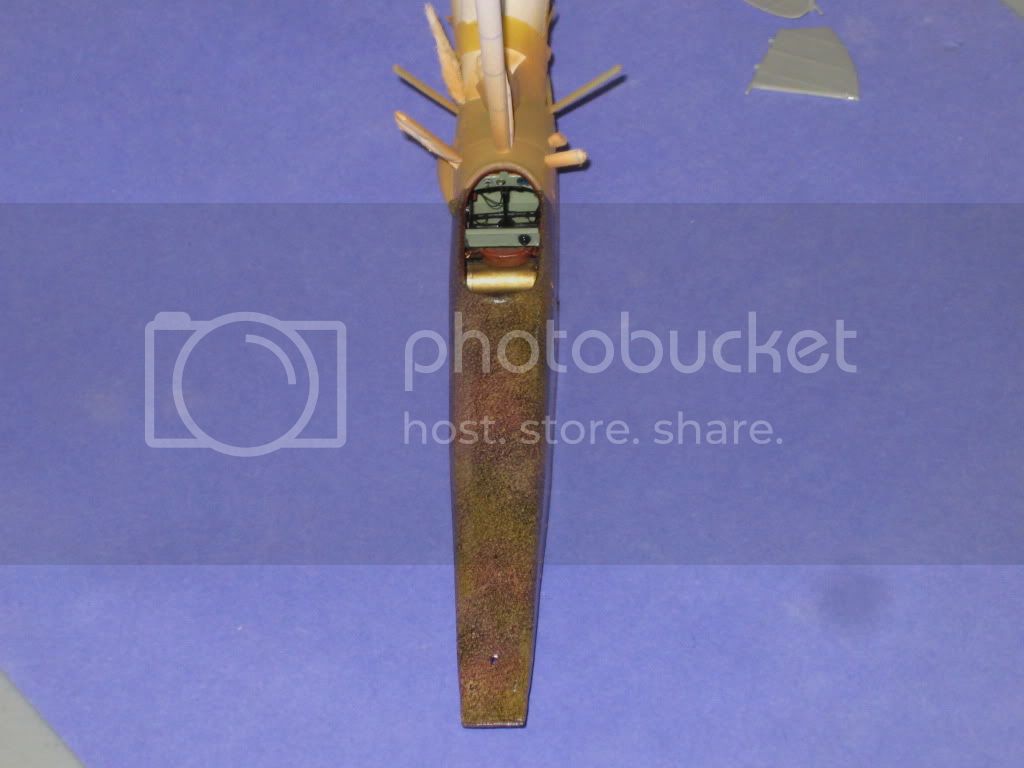
Posted: Thursday, April 22, 2010 - 03:40 PM UTC
Colorado, United States
Joined: January 25, 2004
KitMaker: 11,669 posts
AeroScale: 11,011 posts
Posted: Thursday, April 22, 2010 - 05:31 PM UTC
Greetings Mark,
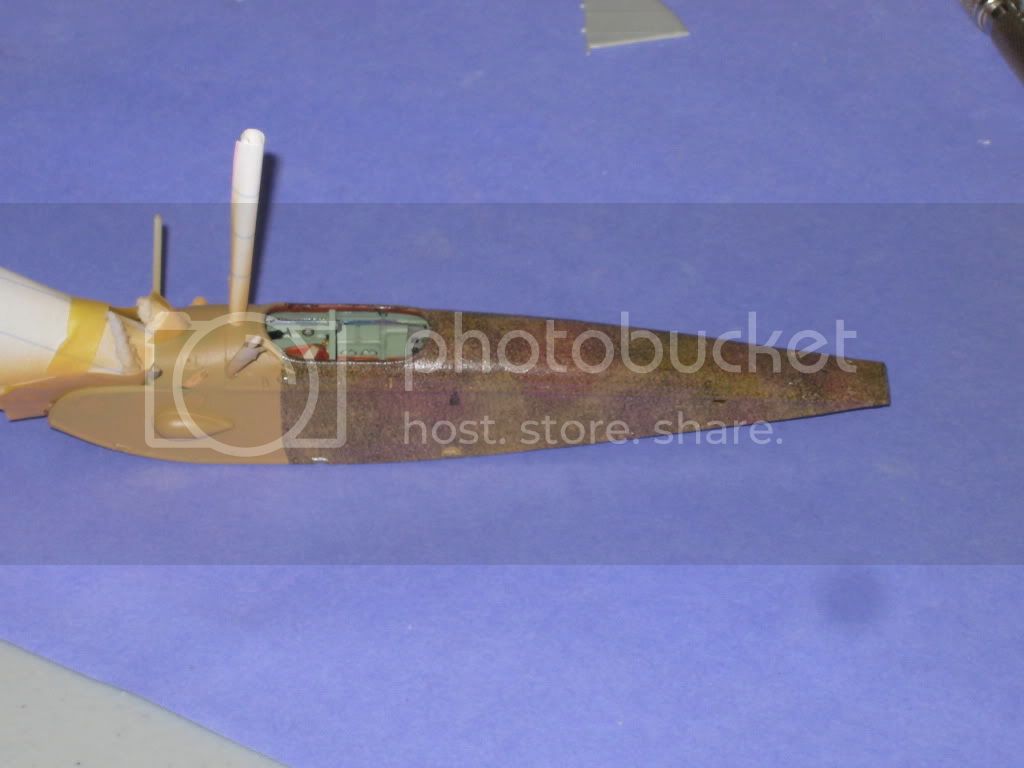
Tell us about the fuselage mottle decal. How many pieces did you use? Do they need Microsol or set? Was there a positive reaction? Anything negative to watch out for?
". . .The most important thing is to know why you build and then get the most that you can out of building." via D.D.