

World War II
Discuss WWII and the era directly before and after the war from 1935-1949.
Discuss WWII and the era directly before and after the war from 1935-1949.
Hosted by Rowan Baylis
Ju 388- Planet Models 1/48 Resin

JPTRR

#051


Joined: December 21, 2002
KitMaker: 7,772 posts
AeroScale: 3,175 posts
Posted: Saturday, February 05, 2011 - 09:29 AM UTC
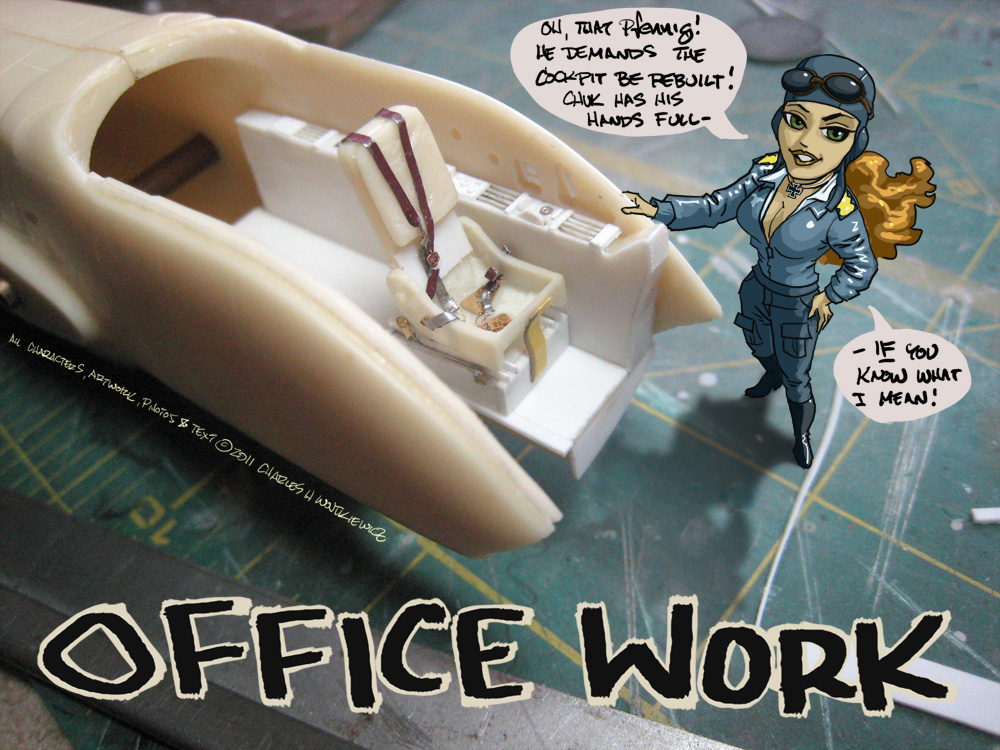
The return of Chuck, Hannah, Fritzi, and the irascible Pfennig! What a great way to ring in the new year!


ninjrk
Joined: January 26, 2006
KitMaker: 1,381 posts
AeroScale: 20 posts
Posted: Wednesday, February 09, 2011 - 03:32 AM UTC
Wonderful! I gleaned an awful lot of tremendously helpful tips from your last build, so tackling a reputedly challenging resin kit should just give me more techniques to steal!
Matt
Matt

panamadan
Joined: July 20, 2004
KitMaker: 1,513 posts
AeroScale: 12 posts
Posted: Wednesday, February 09, 2011 - 02:23 PM UTC
Resin does look like a big challenge to build.
Dan
Dan

Tobar
Joined: October 17, 2002
KitMaker: 192 posts
AeroScale: 70 posts
Posted: Thursday, February 17, 2011 - 08:56 AM UTC
Hay Chuck...
Glad to see your starting a new build...
Can't wait to see how this turns out....
Glad to see your starting a new build...
Can't wait to see how this turns out....

MrMtnMauler
Joined: January 15, 2011
KitMaker: 224 posts
AeroScale: 223 posts

Posted: Thursday, February 17, 2011 - 11:16 AM UTC
Seriously outstanding, you have inspired me to transcend the world of resin from injection plastic. Do you have a recommendation for kit for an an old salt to try my hand at resin aircraft. I just can't not try this type of build. Thanks for any mentoring you can give me. Jim
chukw1
Joined: November 28, 2007
KitMaker: 817 posts
AeroScale: 729 posts
Posted: Friday, February 18, 2011 - 04:17 AM UTC
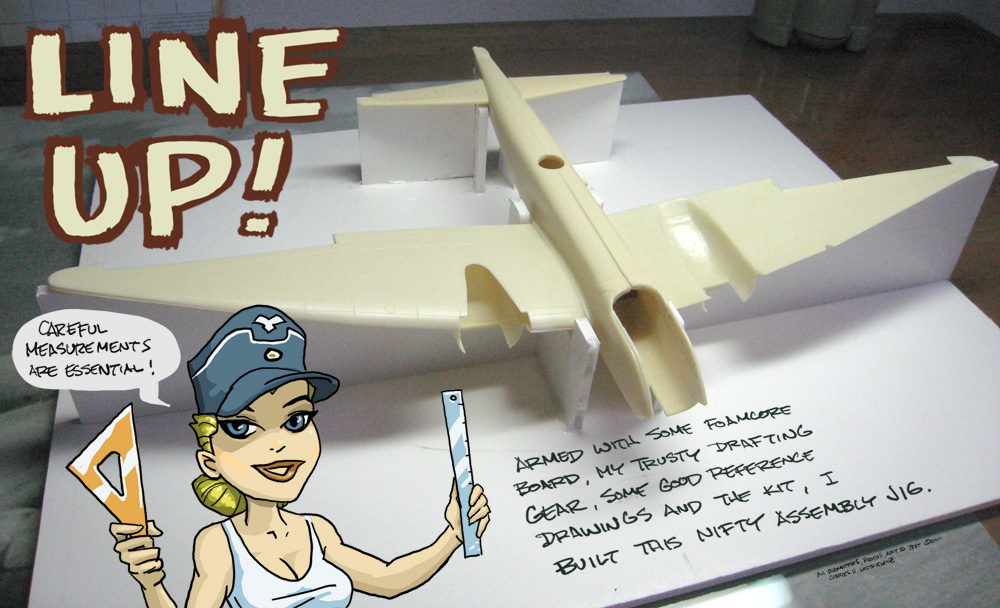
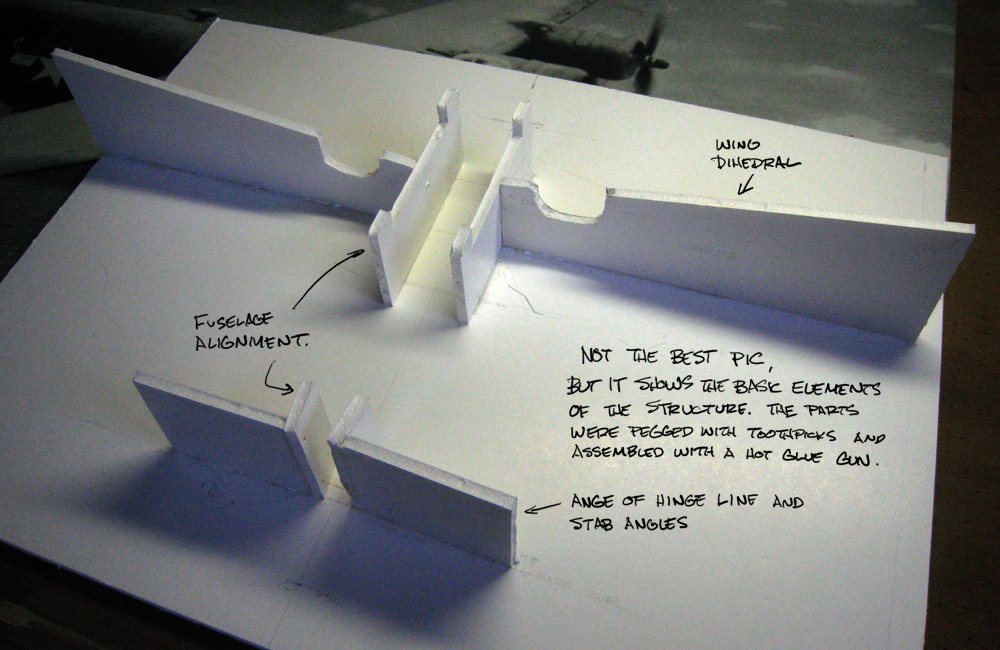
Thanks you my friends- thanks! This kit does indeed have it's challenges, but nothing a bit of effort and thought can't overcome. I didn't get a lot of modeling time last weekend, but I did build an assembly jig to make sure everything's going to fit. It looks something like an architectural model of an ancient Atlantean tomb or something. Now I can get down to brass tacks in the cockpit!
Jim, if you're ready to try a resin jobbie, play to your strengths. If you like prop fighters- try one in this wonderful medium. If you're a blowtorch fan, well- you get my drift. I've somehow drifted into the world of medium twin bombers, so here I am with this beastie. It's my first all-resin kit, so bear with me as I stumble through the job.
Cheers!
chuk

MrMtnMauler
Joined: January 15, 2011
KitMaker: 224 posts
AeroScale: 223 posts
Posted: Friday, February 18, 2011 - 06:27 AM UTC
Roger that Chuk, I have my orders :-) Stay tuned and be warned, I may just be bugging you for more tips. Good time to be a modeler though, eh??
Jim
Jim
chukw1
Joined: November 28, 2007
KitMaker: 817 posts
AeroScale: 729 posts
Posted: Monday, March 07, 2011 - 03:19 PM UTC
Life has been busy- and unpredictable lately! here's an update, at long last.


panamadan
Joined: July 20, 2004
KitMaker: 1,513 posts
AeroScale: 12 posts
Posted: Monday, March 07, 2011 - 05:01 PM UTC
Craftsman like work here Chuck! On to the Kubel soon?
Dan
Dan

Gremlin56
Joined: October 30, 2005
KitMaker: 3,897 posts
AeroScale: 564 posts
KitMaker: 3,897 posts
AeroScale: 564 posts
Posted: Thursday, March 10, 2011 - 07:17 AM UTC
Magic Chuck, really inspiring to see a true master at work !
cheers,
Julian
cheers,
Julian
chukw1
Joined: November 28, 2007
KitMaker: 817 posts
AeroScale: 729 posts
Posted: Sunday, March 27, 2011 - 08:08 AM UTC
Shucks- and thanks!
I would have posted this last week if not for a monsoon rain that caused a short in an outside receptacle that could have burned down the house! As it is, all is well with just a few scorch marks- whew! I was two-thirds done with the intro cartoon, too- lost that when the circuit breaker tripped. Oh, well, Hauptmann Hannah's back to introduce this much-delayed update- read on!


I would have posted this last week if not for a monsoon rain that caused a short in an outside receptacle that could have burned down the house! As it is, all is well with just a few scorch marks- whew! I was two-thirds done with the intro cartoon, too- lost that when the circuit breaker tripped. Oh, well, Hauptmann Hannah's back to introduce this much-delayed update- read on!

jhoog59
Joined: November 13, 2005
KitMaker: 189 posts
AeroScale: 129 posts

Posted: Sunday, March 27, 2011 - 08:33 AM UTC
great work your attention to detail is amazing.
chukw1
Joined: November 28, 2007
KitMaker: 817 posts
AeroScale: 729 posts
Posted: Sunday, April 10, 2011 - 02:37 PM UTC
Thanks, jhoog!
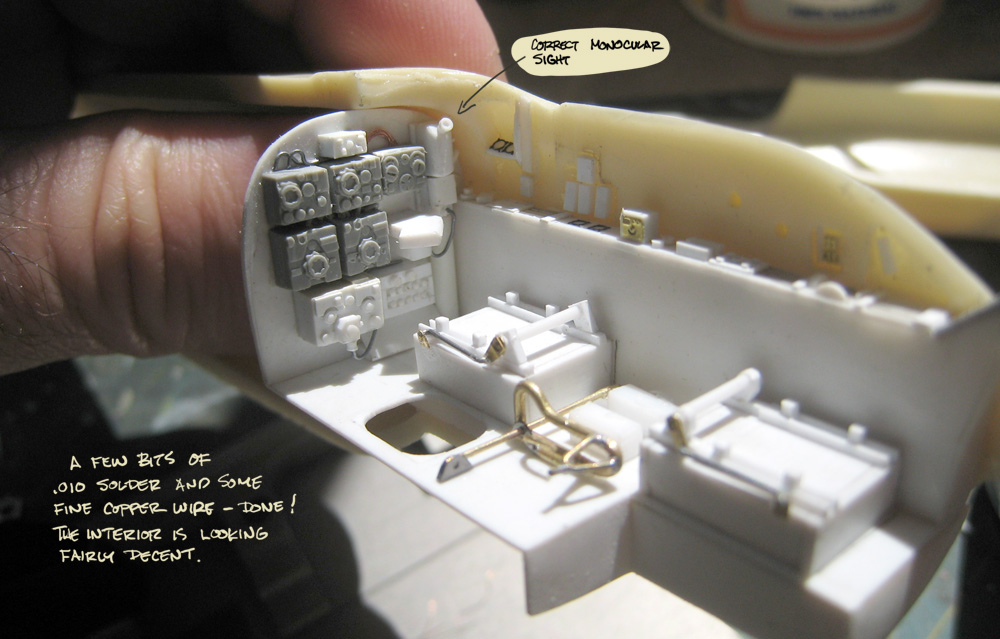
I just couldn't switch back to my other build, so here's a bonus update- enjoy! BTW, the seat cushions in the last pic are milliput, and are a work in progress.
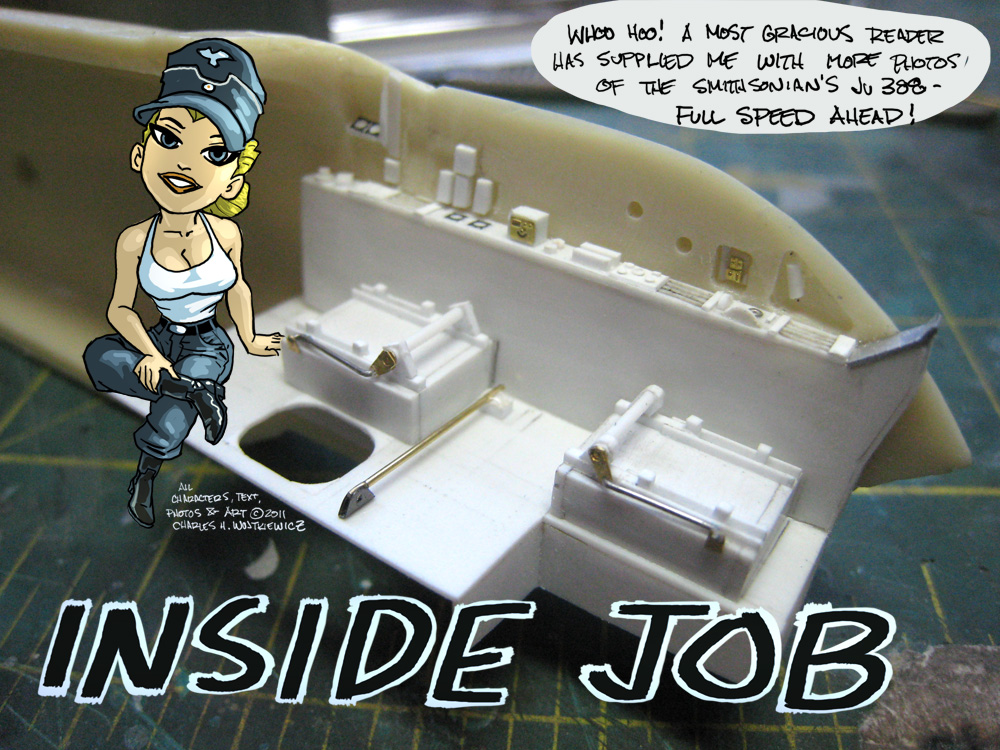

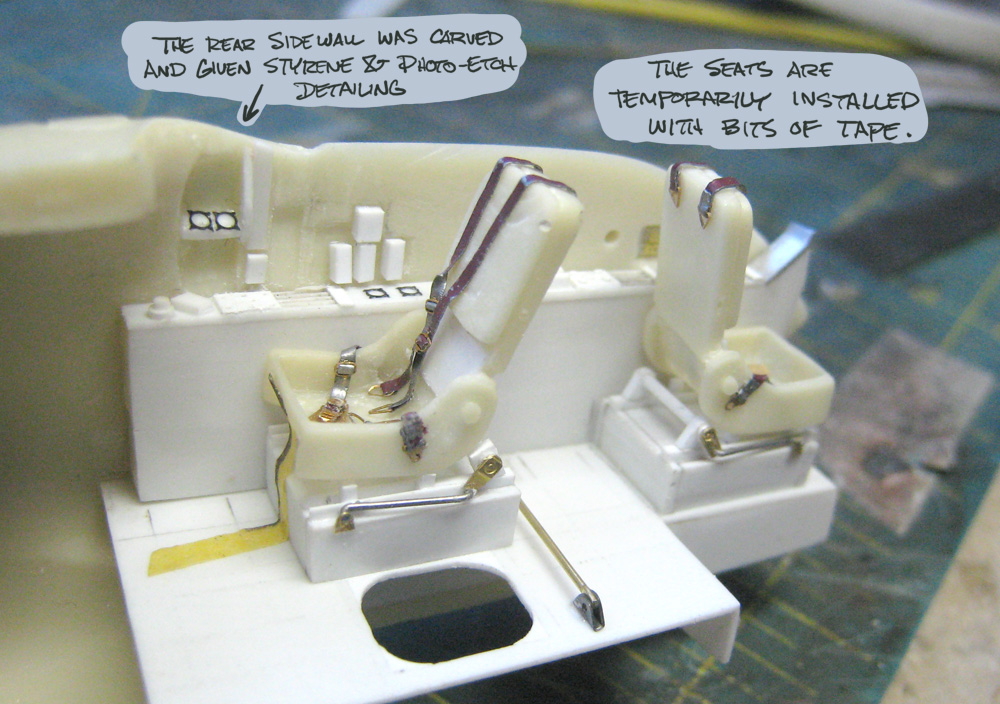

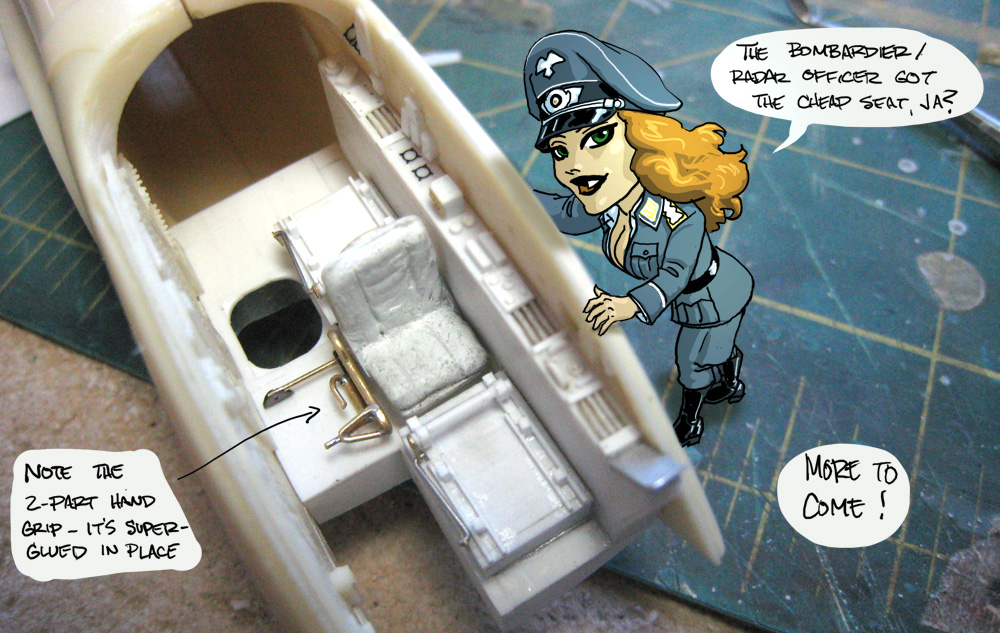
I just couldn't switch back to my other build, so here's a bonus update- enjoy! BTW, the seat cushions in the last pic are milliput, and are a work in progress.

GastonMarty

Joined: April 19, 2008
KitMaker: 595 posts
AeroScale: 507 posts
Posted: Sunday, April 10, 2011 - 03:42 PM UTC
Beautiful detail work on that cockpit, Chuck! Can't get enough to see how a resin kit goes together...
I really apprehend how the symmetry of everything will work out in the assembly of the major components, which is what scares me the most about resin kits and the hated cyano glue that allows no adjustment, because it either seizes or not... Remember all the troubles of your Me-410? Brrr... In French modeling circles we call that step "la mise en croix"-"to put unto a cross", which I think could be a veiled reference to crucifixion...
I hope this one will not again be worthy of the name...
Good luck!
Gaston

robot_

Joined: March 08, 2009
KitMaker: 719 posts
AeroScale: 691 posts
Posted: Sunday, April 10, 2011 - 09:32 PM UTC
Great update Chuck! Thanks for another excellent thread.
Gaston: Adding alignment pins for the fuselage or rod/tube spars for wings like Chuck described on the first page should mean everything is aligned, making CA fine to use. However, you could use epoxy for the major joints like the fuselage halves if you wanted.
Gaston: Adding alignment pins for the fuselage or rod/tube spars for wings like Chuck described on the first page should mean everything is aligned, making CA fine to use. However, you could use epoxy for the major joints like the fuselage halves if you wanted.
GastonMarty
Joined: April 19, 2008
KitMaker: 595 posts
AeroScale: 507 posts
Posted: Monday, April 11, 2011 - 08:49 PM UTC
Yes Ben you often hear of epoxy being used, but I have never actually seen it used in a build that I can recall... I definitely would like to see it explained.
I worry about the fluifity of the epoxy, because in any kit the slightest over-thickness can easily throw the entire assembly off kilter (Testor's tube glue is thick but melts plastic, so it can be "squished": I wonder if epoxy "squishes" that well)...
Whatever you do, don't overly rely on kit-supplied spars for symmetry! Monogram's spars are usually death incarnate on symmetry as well...
For self-made spars I would say to trust them only if they hold the wings perfectly laterally and in pitch without glue, both sides at once, as the simple act of holding the wings can mislead you about how they "sit" once actually glued...
Also the hands get in the way of judging the true symmetry, which is the biggest reason to have them hold perfectly tight "dry". I can't count the number of times my hands being in the way convinced me the symmetry was OK until I saw the results "hands off" and glued!
Many big kits have in-built assymetries which don't help, and the bigger the kit the bigger the headache... Revell's 1/48th JU-52 has one wingtip much fatter than the other (at least 4 inches!), which means the entire wing tapper is not symmetrical...
Still one of the best kits ever though... But for some reason I couldn't get it to be symmetrical after hours of bending this way and that...
Gaston
jhoog59
Joined: November 13, 2005
KitMaker: 189 posts
AeroScale: 129 posts
Posted: Thursday, April 14, 2011 - 09:39 PM UTC
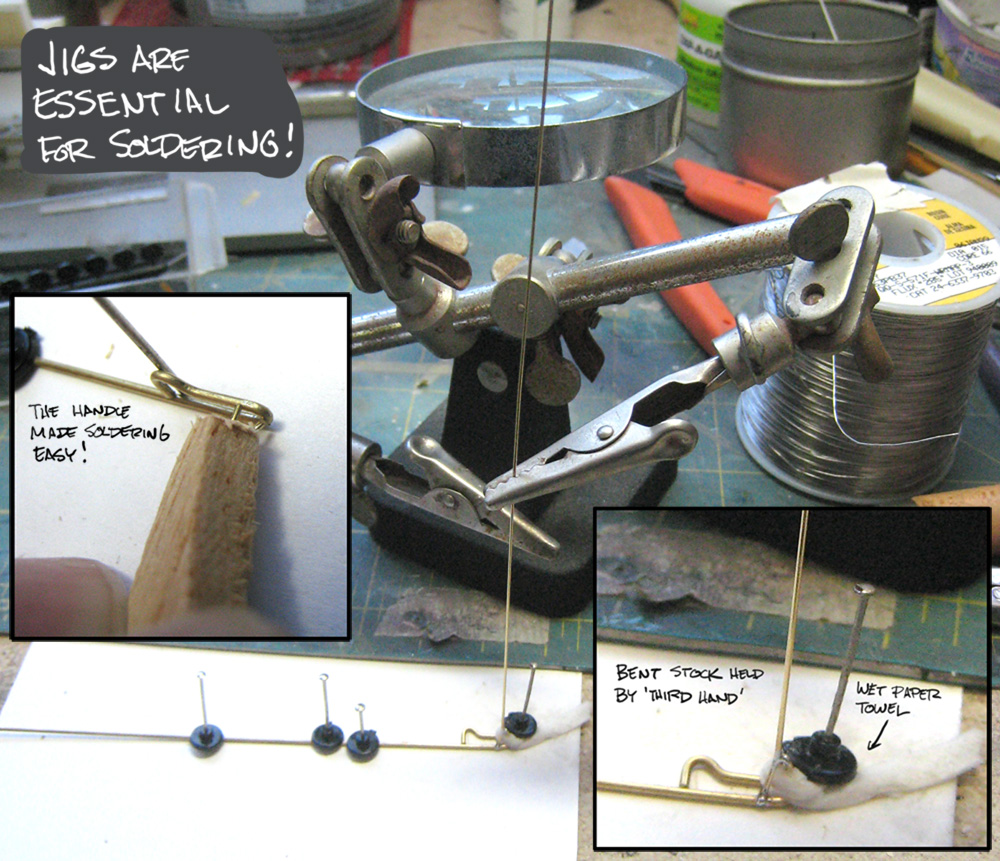
Great stuff check that soldering work of yours bows my mind.
Jim
Jim
GastonMarty
Joined: April 19, 2008
KitMaker: 595 posts
AeroScale: 507 posts
Posted: Tuesday, April 19, 2011 - 06:36 PM UTC
Hello again Chuck!
I just considered purchasing this kit but gave it a pass for now: It is actually excellent but just a bit too expensive, and the clear parts require epoxy resin glue which, as I mentionned above, I am not too familiar with...
In my research I came up with this amazing build on the "Hellenic Modelling" site, and a comparison led me to observe an easy to fix problem that could be of use to you: The spinners look either like they are a bit too long, or like they put the prop blades a bit too far from the cowling:
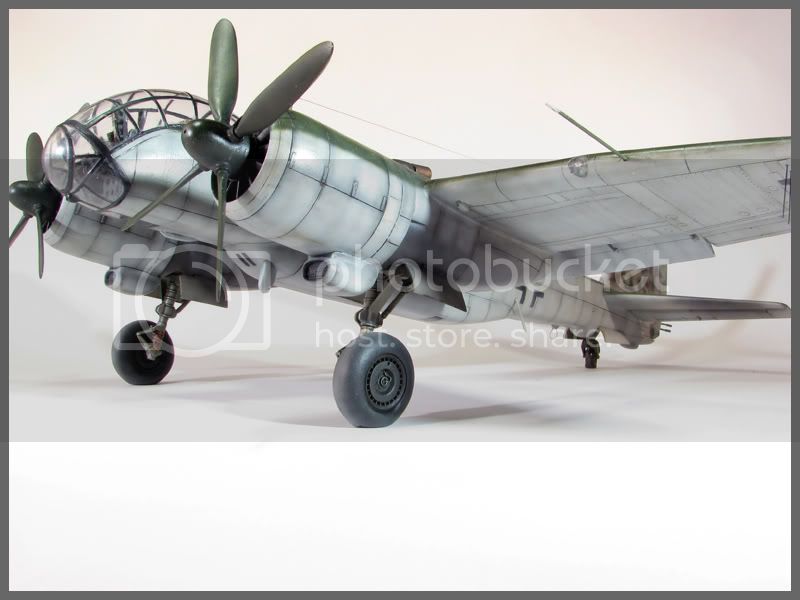
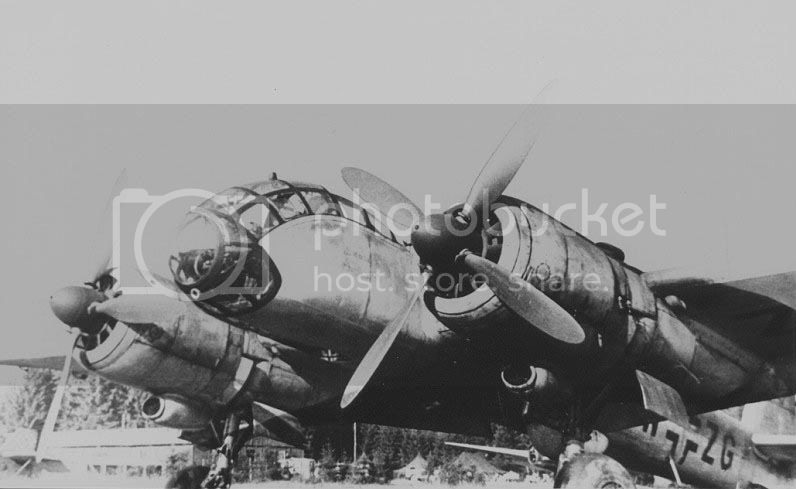
A pretty easy fix for you I would imagine... It's a very good kit kit generally, and said to be easier than the Dragon kit by Brett Green!...
Gaston
P.S. Beware of something else: I noticed on Brett's kit that the gap over the top of the right aileron is uneven, and this has been confirmed by the Greek modeller: The wing is out of straight in section at the aileron there:
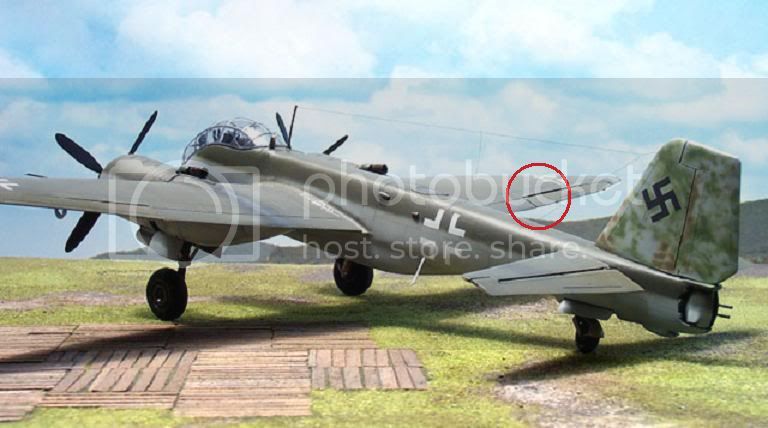
This is also visible in plan view... There was also a surface "dip" reported by the Greek modeller on the underside of the left wing here:
http://www.helmo.gr/index.php?option=com_deeppockets&task=catContShow&cat=24&id=1143&Itemid=36
Strangely enough, I think the upper right wing problem is only mentionned here in this other version of his WIP:
http://www.helmo.gr/index.php?option=com_deeppockets&task=catContShow&cat=30&id=996&Itemid=36
I hope this helps!
Gaston
chukw1
Joined: November 28, 2007
KitMaker: 817 posts
AeroScale: 729 posts
Posted: Wednesday, April 20, 2011 - 03:40 AM UTC
Thanks, Gentlemen!
Gaston, alignment was a key worry for me- that's why I built that foamcore jig. That should eliminate a lot of guesswork when it comes to that fateful day of assembly!
The spinners are smooth castings, so trimming the rear to match the photos will be relatively easy. Your sharp eye saves the day here- I would have missed it! I've saved the photos you've linked here- I'm curious to see if my kit has the same depression in the wing- and I'll definitely have a look at that aileron facing!
I'm embroiled in a big storyboarding project at work that may well spill over into my modeling weekend- and my next update will be on my 1/35 diorama project that's running over on Armorama. linkname http://armorama.kitmaker.net/forums/167483&page=1

dcandal

Joined: September 07, 2006
KitMaker: 918 posts
AeroScale: 688 posts

Posted: Wednesday, April 20, 2011 - 04:04 AM UTC
Excellent advances Chuck, really nice!!!!!

Raptor01
Joined: September 20, 2004
KitMaker: 17 posts
AeroScale: 11 posts
Posted: Wednesday, April 20, 2011 - 06:32 AM UTC
Great Job Chuck, your scratch skills are outstanding. Keep posting pix, you are working out the kinks for me. I have 2 Planet Ju 388's the K & L and am in the planning stage for my next build. I may take a different route and adapt the Dragon Ju 188's wing and tail surfaces to Planet's resin fuselage. Between the Ju 388 on Hellenic Modellers site and your WIP, I have all the instruction I need. Great Work!
John
John
chukw1
Joined: November 28, 2007
KitMaker: 817 posts
AeroScale: 729 posts
Posted: Sunday, May 01, 2011 - 03:35 PM UTC
Thanks, Daniel!
Raptor, you have some work ahead of you, it seems! The wings have very different nacelles, but I think you clear past the firewalls. Hope you do post pics when you get going!
Kind of a quickie today- fighting crazy allergies!


Raptor, you have some work ahead of you, it seems! The wings have very different nacelles, but I think you clear past the firewalls. Hope you do post pics when you get going!
Kind of a quickie today- fighting crazy allergies!
Holdfast
#056

Joined: September 30, 2002
KitMaker: 8,581 posts
AeroScale: 4,913 posts

Posted: Sunday, May 01, 2011 - 08:54 PM UTC
Hi Chuk,
Stunning work, as usual. Millie is impressed too and is itching to cut the masks for this
Stunning work, as usual. Millie is impressed too and is itching to cut the masks for this


shivadog

Joined: August 09, 2009
KitMaker: 42 posts
AeroScale: 41 posts

Posted: Monday, May 02, 2011 - 03:16 AM UTC
It looks beatiful Chuck!
jhoog59
Joined: November 13, 2005
KitMaker: 189 posts
AeroScale: 129 posts
Posted: Tuesday, May 03, 2011 - 03:13 AM UTC
You never cease to amaze chuck.
 |

WEB HOSTING BY


Copyright ©2021 AeroScale and Kitmaker Network, a subsidiary of Silver Star Enterprises
All Rights Reserved. Please read our Conditions of Use and Privacy Policy.
All Rights Reserved. Please read our Conditions of Use and Privacy Policy.