KotS GB 2011 Junkers J.I dmopath
Alberta, Canada
Joined: January 19, 2008
KitMaker: 6,743 posts
AeroScale: 6,151 posts
Posted: Monday, April 11, 2011 - 11:40 AM UTC
Most excellent progress sir !
She is looking really sweet Dennis , interoir and engine are super . Like how the exhaust stack turned out

Kentucky, United States
Joined: July 02, 2010
KitMaker: 175 posts
AeroScale: 174 posts
Posted: Monday, April 11, 2011 - 11:57 AM UTC
Thanks Terri
In a few days we'll see if my airbrushing skills can measure up...
"I took German in school...but I can't understand the way these foreigners speak it." The Dawn Patrol (1938)
Dennis O'C
Kentucky, United States
Joined: July 02, 2010
KitMaker: 175 posts
AeroScale: 174 posts
Posted: Sunday, May 01, 2011 - 12:16 PM UTC
"I took German in school...but I can't understand the way these foreigners speak it." The Dawn Patrol (1938)
Dennis O'C
New Jersey, United States
Joined: June 02, 2006
KitMaker: 1,212 posts
AeroScale: 468 posts
Posted: Sunday, May 01, 2011 - 01:58 PM UTC
1st time or 50th time... looks my-t fine
Colorado, United States
Joined: January 25, 2004
KitMaker: 11,669 posts
AeroScale: 11,011 posts
Posted: Sunday, May 01, 2011 - 02:19 PM UTC
I like it!

". . .The most important thing is to know why you build and then get the most that you can out of building." via D.D.
Kentucky, United States
Joined: July 02, 2010
KitMaker: 175 posts
AeroScale: 174 posts
Posted: Monday, May 02, 2011 - 04:50 AM UTC
Thank you, Marc and Stephen, for your kind comments

"I took German in school...but I can't understand the way these foreigners speak it." The Dawn Patrol (1938)
Dennis O'C
England - South East, United Kingdom
Joined: November 06, 2005
KitMaker: 1,667 posts
AeroScale: 1,551 posts
Posted: Monday, May 02, 2011 - 07:23 AM UTC
Looking nicely done, I'm sure it will blend nicely once you start to weather it in.
Looking forward to your next update.
Keith
Still can't cure the AMS even with sausage finger implants & olde eyes.
Kentucky, United States
Joined: July 02, 2010
KitMaker: 175 posts
AeroScale: 174 posts
Posted: Monday, May 02, 2011 - 01:37 PM UTC
Thanks Keith
The build should go a little quicker now that the part I dreaded (airbrushing streaks) is finished.
"I took German in school...but I can't understand the way these foreigners speak it." The Dawn Patrol (1938)
Dennis O'C
Västra Götaland, Sweden
Joined: February 19, 2010
KitMaker: 1,473 posts
AeroScale: 1,450 posts
Posted: Tuesday, May 03, 2011 - 02:21 AM UTC
Hi Dennis – I really like what I see. First time or not – that cammo looks very convincing to me

Keep it coming as it evolves...
Best Regards
Mikael
_________________________________________________________
Just finished the Wingnut Wings Taube. On to the Junkers D.1
Kentucky, United States
Joined: July 02, 2010
KitMaker: 175 posts
AeroScale: 174 posts
Posted: Tuesday, May 03, 2011 - 06:00 AM UTC
Thanks Mikael

If I can keep mine looking as sharp as your build, I'll be more than happy.

"I took German in school...but I can't understand the way these foreigners speak it." The Dawn Patrol (1938)
Dennis O'C
Alberta, Canada
Joined: January 19, 2008
KitMaker: 6,743 posts
AeroScale: 6,151 posts
Posted: Thursday, May 05, 2011 - 01:23 AM UTC
Looking really sweet sof far Dennis !
Love the purple !
Kentucky, United States
Joined: July 02, 2010
KitMaker: 175 posts
AeroScale: 174 posts
Posted: Thursday, May 05, 2011 - 06:12 AM UTC
Hi Terri and thanks

Although I would like to take the credit, I have to thank Hugo Junkers for the color choices.

"I took German in school...but I can't understand the way these foreigners speak it." The Dawn Patrol (1938)
Dennis O'C
Kentucky, United States
Joined: July 02, 2010
KitMaker: 175 posts
AeroScale: 174 posts
Posted: Thursday, May 26, 2011 - 01:48 PM UTC
I had a feeling something like this might happen

What a disaster!

This batch of decals is the worst I have ever worked with, and that includes the BattleAxe ones. I could not get them to seat into the corrugations on the wings after three base coats of Future (my usual prep). I tried everything-hair dryer at low and high speeds, pressure, finally even dilute Microsol and Set. No luck. All they did was tear. I was able to get the torn arms to realign, then I put some future on the seal them. All they did then was bubble up. So I chipped away that which was loose and salvaged what was left on the wings. I think I can fix that.

The fuselage is another matter. I have never seen silvering as bad as this. To make matters worse, the Future only exacerbated the problem, so I used ammonia to get it off. Surprisingly, the decals stayed put and the paint wasn't stripped.
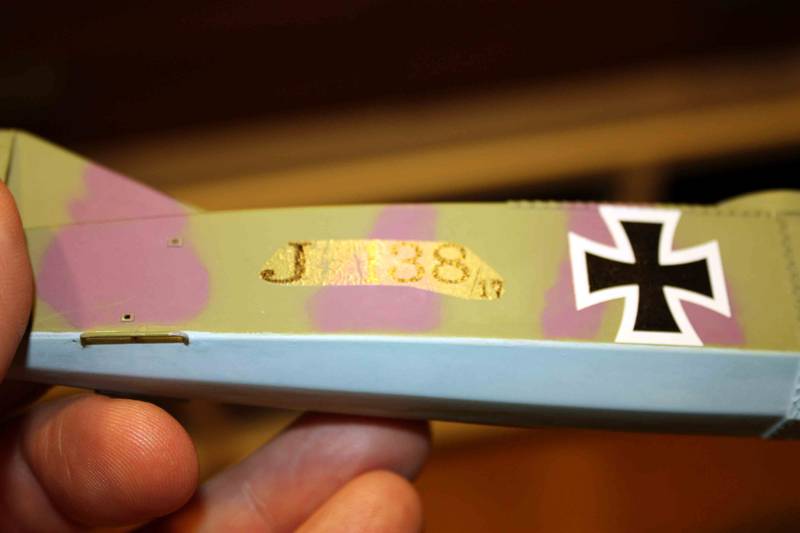
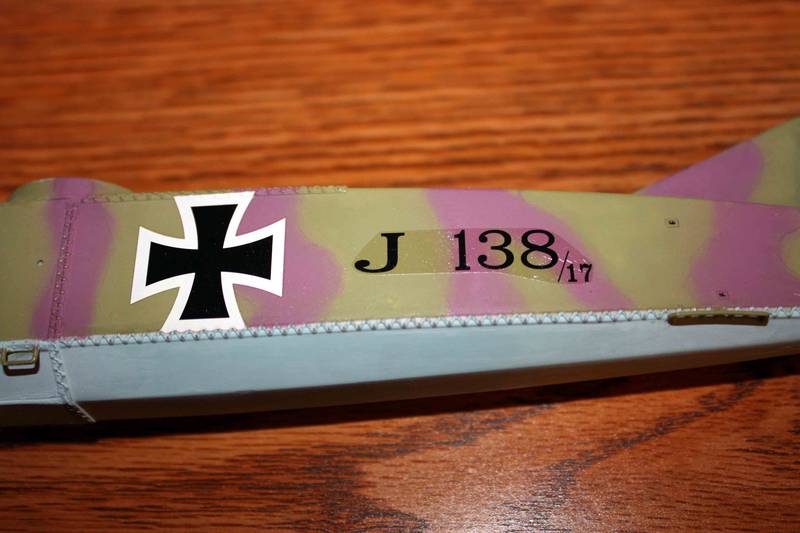
I am close to throwing in the towel. After staring at the fuselage and then the trash can, I decided to cool off over a 24 hour period. I will try to paint around the black J 138/17, accept the result for what it is and finish the airplane, with the hope that it will be good enough for the shelf. My other option is to strip off the J 138/17 decals (hopefully without the paint), then buy another set from Wing Nuts and try to replace them. Otherwise, for me at this discouraging point, this group build will end prematurely...
"I took German in school...but I can't understand the way these foreigners speak it." The Dawn Patrol (1938)
Dennis O'C
Colorado, United States
Joined: January 25, 2004
KitMaker: 11,669 posts
AeroScale: 11,011 posts
Posted: Thursday, May 26, 2011 - 07:37 PM UTC
The choice to cool down will be the best choice. From the Laws of Modeling 101.
". . .17.) Tossing a finished, expensive model kit against the furthest wall in your basement at 90mph is the most sincerest form of self-criticism. But doesn't live up to the acclaimed rush that is supposed to follow. . ."
". . .The most important thing is to know why you build and then get the most that you can out of building." via D.D.
Arizona, United States
Joined: December 12, 2008
KitMaker: 1,423 posts
AeroScale: 1,319 posts
Posted: Friday, May 27, 2011 - 12:48 AM UTC
Hi Dennis:
So sorry to read about the decal issue. Always a crap shoot it seems. The cooling off period is a good idea, If nothing else, strip off the decals, and go with another marking, or work your plan and get another sheet from WNW. In the mean time, a great opportunity to start another kit for the KOTS build.
The last thing you want to do is trash can it. You have spent a lot of time on this and all of that work will be lost. I have never thrown a kit away due to frustration, after a good nights sleep it all looks different.
Good luck Dennis
Best
Mark
We few, we happy few........
New Jersey, United States
Joined: June 02, 2006
KitMaker: 1,212 posts
AeroScale: 468 posts
Posted: Friday, May 27, 2011 - 01:10 AM UTC
To quote The Humungus... "Just walk away."
Don't do anything rash. This is just one of those tests the modeling gods toss at us from time to time because they have nothing better to do.
Kentucky, United States
Joined: July 02, 2010
KitMaker: 175 posts
AeroScale: 174 posts
Posted: Friday, May 27, 2011 - 11:43 AM UTC
Thanks Marc, Mark and Stephen. The cooling off period is over.
A corollary to rule 17 is that it is difficult to destroy an $80 airplane and then explain the loss to your wife...
The model has a heartbeat. Salvage has begun on the wings and it looks better than I thought it would.
I have been able to procure a new set of J 138/17 decals from a friend who is doing a different scheme on his J-1. Now all I have to do is get the sick decals off the fuselage sides without causing too much damage...
"I took German in school...but I can't understand the way these foreigners speak it." The Dawn Patrol (1938)
Dennis O'C
Västra Götaland, Sweden
Joined: February 19, 2010
KitMaker: 1,473 posts
AeroScale: 1,450 posts
Posted: Friday, May 27, 2011 - 09:13 PM UTC
HI Dennis – sorry to read about your troubles, its always such a letdown when the decals mess up an otherwise fine looking model.
I had silvering problems with the some of the small decals on my WNW – LVG, but nothing as bad as what you've seem to have experienced here.
Glad that it seems to work itself out after all. I guess depending on the level of weathering you do, it wount be very noticable on the finished model.
I think these things always seem much worse in your own eyes – noticing things you know is there, but are almost invisible to others...
– Stick with it it'll be a great model in the end

Mikael
_________________________________________________________
Just finished the Wingnut Wings Taube. On to the Junkers D.1
Västra Götaland, Sweden
Joined: February 19, 2010
KitMaker: 1,473 posts
AeroScale: 1,450 posts
Posted: Friday, May 27, 2011 - 09:19 PM UTC
Oh – just remembered a trick that I've used once or twice with OK results over irregular surfaces. Read about it somewhere on the net I guess..
Use a Q-tip soaked in water. Heat it up over a candle (it wount catch fire as long as it stays wet). Then press onto the offending decal. Usually this seem to shrink the decal and conform it over the surface.
Perhaps a bit late in the game for this build though...
Mikael
_________________________________________________________
Just finished the Wingnut Wings Taube. On to the Junkers D.1
Kentucky, United States
Joined: July 02, 2010
KitMaker: 175 posts
AeroScale: 174 posts
Posted: Saturday, May 28, 2011 - 07:06 AM UTC
Hi Mikael

and thanks for comments and suggestion.
Well, I may have pulled it off

The wings are pretty much finished to the point that they look satisfactory to me. It least it was a black color. Overspraying with a semi-gloss should blend the flat paint and gloss decal nicely.
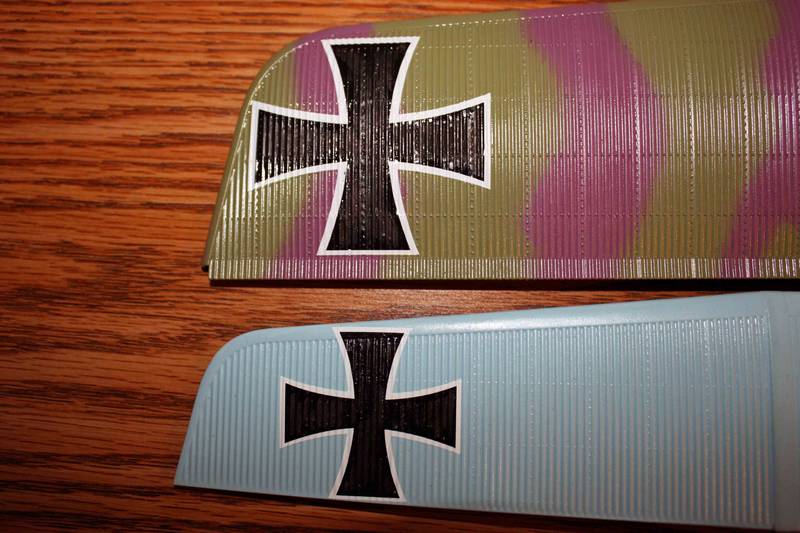
I was sweating out the decals on the fuselage. I tinkered with 409 cleaner, WD40, Goo-be-Gone and they wouldn't seem to budge. So I threw up my hands, stuck on some low tac masking tape, closed my eyes and pulled. Off they came!
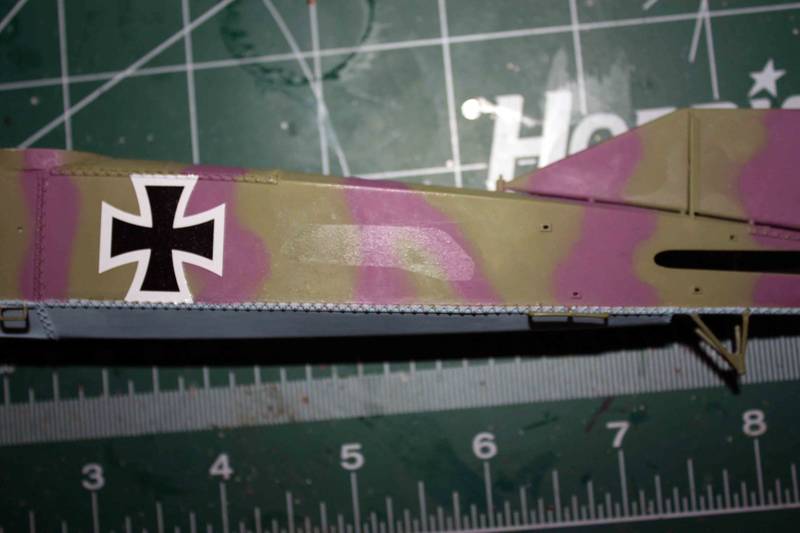
So now I'll clean off the residual gloss with some ammonia and we are back in business.
"I took German in school...but I can't understand the way these foreigners speak it." The Dawn Patrol (1938)
Dennis O'C
South Australia, Australia
Joined: August 14, 2007
KitMaker: 5,926 posts
AeroScale: 2,201 posts
Posted: Saturday, May 28, 2011 - 10:06 AM UTC
Hmmm.. That is what clear decal paper does Dennis. I don't call that silvering..

From what I could see all they really needed was some clear to blend them in.. but that is just what I could see from the photos.
I actually stomped on one of my models a few years ago.. Still not happy I did it.. but I felt better at the time.
You may be right, I may be crazy.
Kentucky, United States
Joined: July 02, 2010
KitMaker: 175 posts
AeroScale: 174 posts
Posted: Saturday, May 28, 2011 - 11:39 AM UTC
Hi Warren

I would agree with you except I didn't see the same effect when the initials were applied to the hubs. The fuselage decals had a fair amount of minute bubbles and wrinkling-that may very well have been the skills of the modeler and not the model/decals.
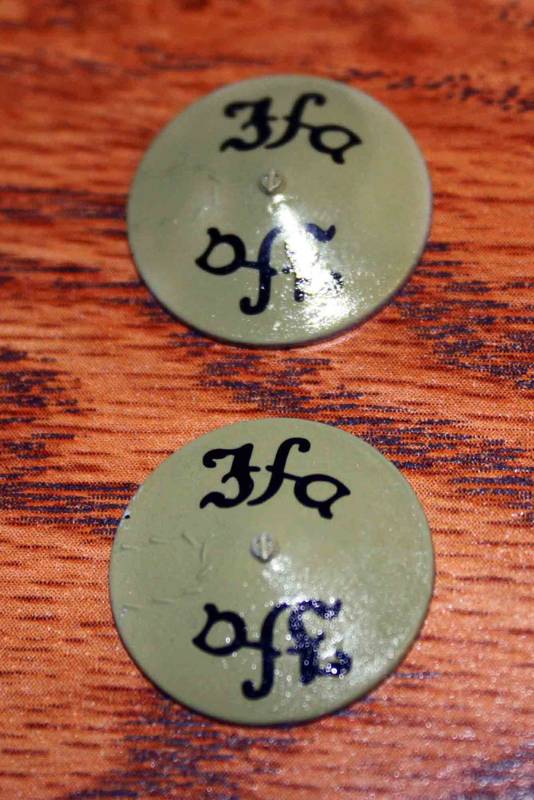
I'm just glad I didn't do (what is called around here by the local hobby club) a "Stompo-Bravo" (trash the kit).
"I took German in school...but I can't understand the way these foreigners speak it." The Dawn Patrol (1938)
Dennis O'C
England - South East, United Kingdom
Joined: November 06, 2005
KitMaker: 1,667 posts
AeroScale: 1,551 posts
Posted: Saturday, May 28, 2011 - 07:54 PM UTC
I think we've all been at that point sometimes, a few moments intense satisfaction before you realise the hours spent before hand.
Cool off, leave it, come back and rethink always seems to work, Terri (the girl) is a fine example of this,
WNW decals seem to respond best to hot water, for area's like those corrugations I would soak them in quite warm then work them into place with a kitchen towel (not the paper type) soaked in boiling water to press them down and work the air from under.
K
Still can't cure the AMS even with sausage finger implants & olde eyes.
Kentucky, United States
Joined: July 02, 2010
KitMaker: 175 posts
AeroScale: 174 posts
Posted: Sunday, May 29, 2011 - 03:22 AM UTC
Thanks for the suggestion, Keith. I hadn't thought about that (really hot water). My guess would be that you don't leave them in very long
That will come in handy when I start the other WNW kits.
At this point I am reapplying the gloss prep for the recently acquired replacement fuselage decals.
I continue to soldier on...
"I took German in school...but I can't understand the way these foreigners speak it." The Dawn Patrol (1938)
Dennis O'C
Västra Götaland, Sweden
Joined: February 19, 2010
KitMaker: 1,473 posts
AeroScale: 1,450 posts
Posted: Sunday, May 29, 2011 - 06:52 AM UTC
Hi Dennis – great save on the wings – they look absolutely fine to me even without any weathering or dull coats...

Mikael
_________________________________________________________
Just finished the Wingnut Wings Taube. On to the Junkers D.1


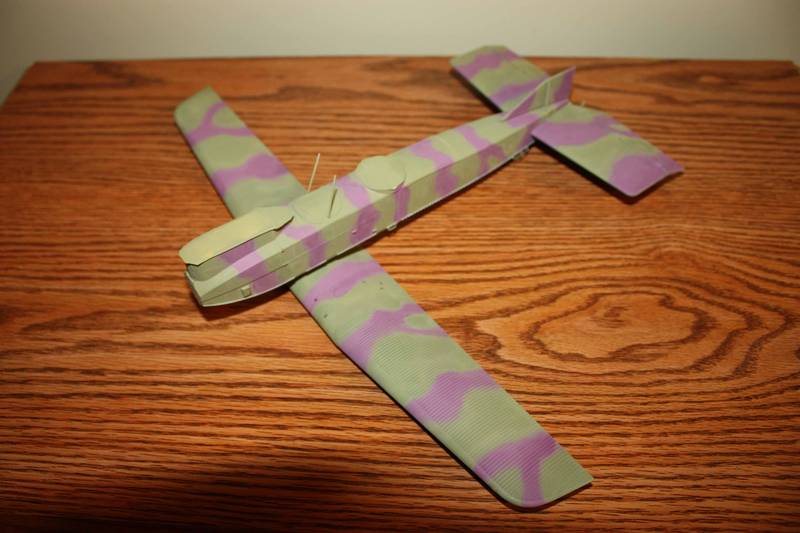


 This batch of decals is the worst I have ever worked with, and that includes the BattleAxe ones. I could not get them to seat into the corrugations on the wings after three base coats of Future (my usual prep). I tried everything-hair dryer at low and high speeds, pressure, finally even dilute Microsol and Set. No luck. All they did was tear. I was able to get the torn arms to realign, then I put some future on the seal them. All they did then was bubble up. So I chipped away that which was loose and salvaged what was left on the wings. I think I can fix that.


 and thanks for comments and suggestion.


