Thanks Mikael
Part of doing this, I think, is figuring out how to get out of scrapes (some of which is trial and error), salvaging as best you can where you messed up and passing on what you learn to others...
Early Aviation
Discuss World War I and the early years of aviation thru 1934.
Discuss World War I and the early years of aviation thru 1934.
Hosted by Jim Starkweather
KotS GB 2011 Junkers J.I dmopath
dmopath

Joined: July 02, 2010
KitMaker: 175 posts
AeroScale: 174 posts

Posted: Sunday, May 29, 2011 - 08:49 AM UTC

PropDuster

Joined: July 14, 2008
KitMaker: 18 posts
AeroScale: 6 posts

Posted: Tuesday, May 31, 2011 - 12:23 PM UTC
To salvage a error and turn it into a sucess is what it is all about, at least on my bench... (I have LOTs of errors, a few sucess, lots of learning) 
Nice work on the wing insigna and side script.

Nice work on the wing insigna and side script.
dmopath

Joined: July 02, 2010
KitMaker: 175 posts
AeroScale: 174 posts

Posted: Wednesday, June 01, 2011 - 06:56 AM UTC
Hi Steve  and thanks
The prep for the replacement script is pretty much done. How those decals settle in will dictate the degree of final success for this salvage mode.
 and thanks
The prep for the replacement script is pretty much done. How those decals settle in will dictate the degree of final success for this salvage mode.

warreni

Joined: August 14, 2007
KitMaker: 5,926 posts
AeroScale: 2,201 posts

Posted: Wednesday, June 01, 2011 - 10:58 AM UTC
Sometimes you get that problem even if you apply a gloss coat. And then at other times you have no troubles even on flat paint. I can never pick what will happen until the first decal goes on.. 

dmopath

Joined: July 02, 2010
KitMaker: 175 posts
AeroScale: 174 posts

Posted: Thursday, June 02, 2011 - 01:34 PM UTC
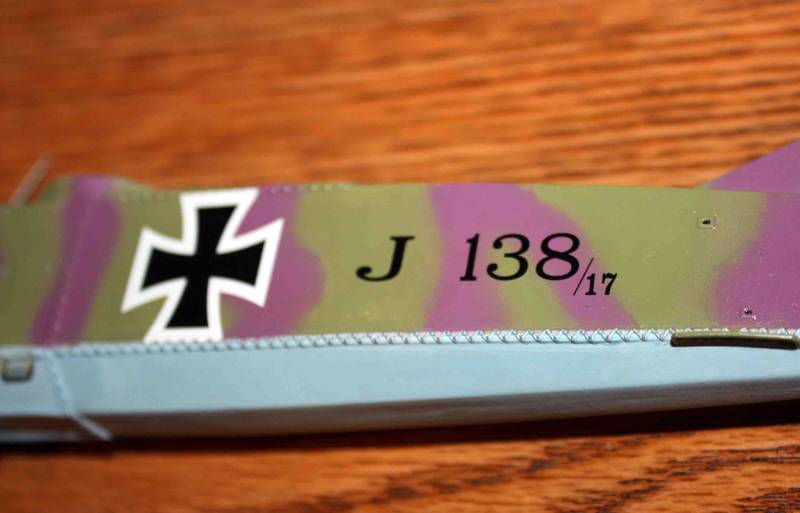
I agree, Warren. I should have had an inkling when I had trouble with the instrument dials seating into the panels. O well, live and learn.
On the other hand, the resuscitation is now complete. The second set went down a lot better than the first...
While I was reapplying gloss coats and waiting for them to dry, I went ahead and assembled the parabellum as it had small parts that I didn't want to lose.
It's a little glossy but that will tamp down with a subsequent application of Dullcoat. Now on to weathering and final assembly. I have to say that I didn't think I would get to this point a couple of weeks ago...
On the other hand, the resuscitation is now complete. The second set went down a lot better than the first...


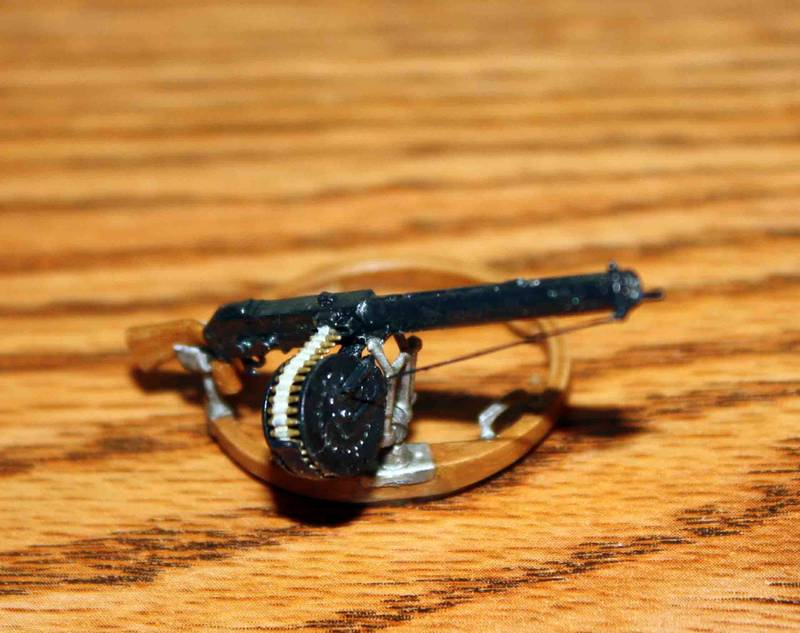
While I was reapplying gloss coats and waiting for them to dry, I went ahead and assembled the parabellum as it had small parts that I didn't want to lose.

It's a little glossy but that will tamp down with a subsequent application of Dullcoat. Now on to weathering and final assembly. I have to say that I didn't think I would get to this point a couple of weeks ago...

warreni

Joined: August 14, 2007
KitMaker: 5,926 posts
AeroScale: 2,201 posts

Posted: Thursday, June 02, 2011 - 01:53 PM UTC
Decals look much better. What did you do to get them so much better?

JackFlash

Joined: January 25, 2004
KitMaker: 11,669 posts
AeroScale: 11,011 posts

Posted: Thursday, June 02, 2011 - 05:34 PM UTC
Very cool. also a good recovery.

PropDuster

Joined: July 14, 2008
KitMaker: 18 posts
AeroScale: 6 posts

Posted: Thursday, June 02, 2011 - 07:03 PM UTC
decals look great
the parabellum looks amazing (bet the rounds were hard to load in that drum )
)
the parabellum looks amazing (bet the rounds were hard to load in that drum
 )
)
Mgunns

Joined: December 12, 2008
KitMaker: 1,423 posts
AeroScale: 1,319 posts

Posted: Friday, June 03, 2011 - 02:08 AM UTC
 Nice save on the decals Dennis. The recovery is noteworthy as is the weapon. The detail of the rounds in the drum is nice. This will come together nicely for you.
Best
Mark
dmopath

Joined: July 02, 2010
KitMaker: 175 posts
AeroScale: 174 posts

Posted: Friday, June 03, 2011 - 07:42 AM UTC
Thanks Warren, Stephen, Steve and Mark for your kind comments and continued interest in my roller coaster journey with this build. 
Warren, the only thing I did different was apply an extra coat of gloss (Future). I wonder if these decals (from a different set) had a better adhesive quality.
Steve, tiny tweezers were necessary to load those individual rounds
Seriously, the drum with the rounds in place gives you an idea of the level of detail (using styrene alone) that is built into these Wing Nuts kits.

Warren, the only thing I did different was apply an extra coat of gloss (Future). I wonder if these decals (from a different set) had a better adhesive quality.
Steve, tiny tweezers were necessary to load those individual rounds

Seriously, the drum with the rounds in place gives you an idea of the level of detail (using styrene alone) that is built into these Wing Nuts kits.

vulkanizer

Joined: December 26, 2009
KitMaker: 144 posts
AeroScale: 109 posts

Posted: Friday, June 03, 2011 - 09:42 AM UTC
I'm so glad that you are successfully survive a problem with decals . Happy ending like in a Hollywood film. I wait with impatience next update 


wing_nut

Joined: June 02, 2006
KitMaker: 1,212 posts
AeroScale: 468 posts

Posted: Sunday, June 05, 2011 - 12:51 PM UTC
Great recovery from your earlier decaling woes.
dmopath

Joined: July 02, 2010
KitMaker: 175 posts
AeroScale: 174 posts

Posted: Monday, June 06, 2011 - 01:19 AM UTC
Thanks Dani and Marc 
After spending the weekend dry brushing hundreds of little rivets, final assembly has finally begun. Pics up in the next couple of days.

After spending the weekend dry brushing hundreds of little rivets, final assembly has finally begun. Pics up in the next couple of days.
dmopath

Joined: July 02, 2010
KitMaker: 175 posts
AeroScale: 174 posts

Posted: Tuesday, June 07, 2011 - 06:33 AM UTC
As promised, here are some new photos. Washes are finished for the moment and final assembly has begun in earnest.
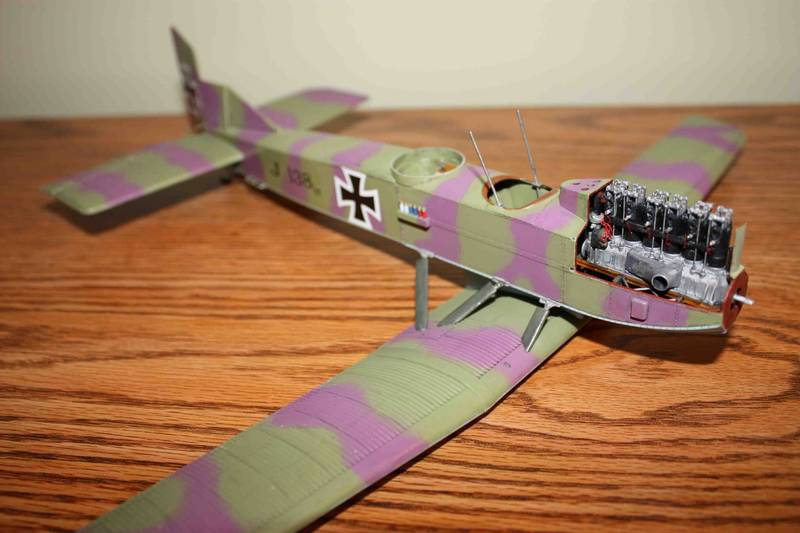
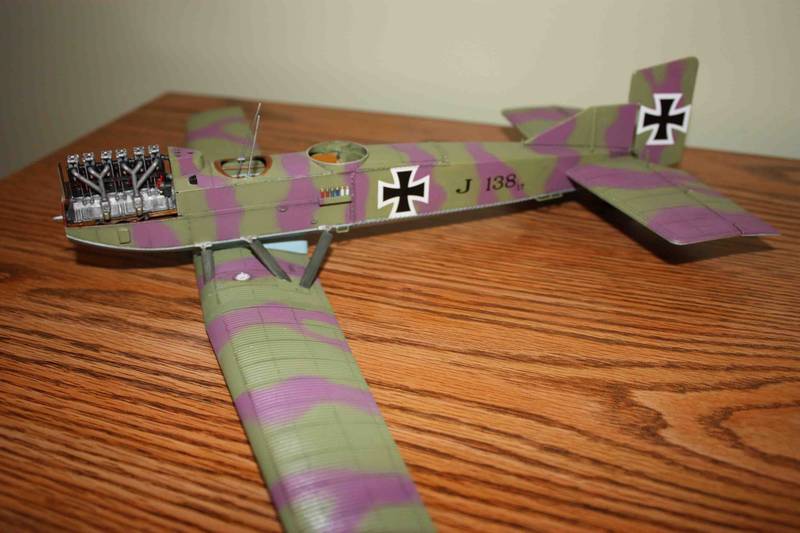
The tail plane and rudder went on without problems. The extension from the lower fuselage had to be thinned somewhat so that the lower wing would fit well. I took some time to make sure the lower wing was level with and perpendicular to the fuselage so that the support/extension struts would line up. They seated pretty well with minimal sanding and shaping.
It seems that the camera brings out the wing rivets much more prominently than they actually appear.
Next up, the center top wing and radiator lines.

OEFFAG_153

Joined: February 19, 2010
KitMaker: 1,473 posts
AeroScale: 1,450 posts

Posted: Tuesday, June 07, 2011 - 11:47 PM UTC
Very sweet looking so far Dennis – it's really coming together very nicely!
Mikael
Mikael
dmopath

Joined: July 02, 2010
KitMaker: 175 posts
AeroScale: 174 posts

Posted: Wednesday, June 08, 2011 - 06:50 AM UTC
Thanks Mikael 
So far the outer struts haven't presented too much of a problem, as long as you keep them in order. It's easy to mix them up.

So far the outer struts haven't presented too much of a problem, as long as you keep them in order. It's easy to mix them up.
CaptainA

Joined: May 14, 2007
KitMaker: 3,117 posts
AeroScale: 2,270 posts

Posted: Friday, June 10, 2011 - 10:10 AM UTC
I had this kit out a few days ago. Trying to decide on a next build. I have to say yours is looking mighty fine. I love the airplane and what you are doing with it. 

thegirl

Joined: January 19, 2008
KitMaker: 6,743 posts
AeroScale: 6,151 posts

Posted: Friday, June 10, 2011 - 12:09 PM UTC
Very nicely done so far Dennis , she is shaping up very well !
Camo turned out really well . Do like how the washed turned out .


Camo turned out really well . Do like how the washed turned out .


dmopath

Joined: July 02, 2010
KitMaker: 175 posts
AeroScale: 174 posts

Posted: Sunday, June 12, 2011 - 09:16 AM UTC
Thanks Terri. I'm glad you like it. I wasn't sure how the scheme would eventually come out but I have to say I'm please with the overall result so far. 
Carl, this kit would be a nice break from all those albatri (or is it "albatrosses?"). It's pretty much a straightforward build-the only major problem I had was the decals-they didn't want to adhere well. Your only problem will be finding a place to put it. It's pretty big. I'm flattered my meager attempt has got you interested in starting your own.
I finished the struts and radiator lines. My suggestions regarding this part of the assembly-follow the instructions closely. Keep the struts in order according to sides, front and back (there are subtle differences for each). Don't sand the attachment points down too much- the holes in the lower wing for the outer struts are not round. They will line them up to the correct angles and attitudes. My order of assembly: Do the outer struts on the lower wing-let dry. Assemble the top center wing (the entire top wing will be too heavy to get the struts and cables to line up easily in the six holes). Let dry. Do the inner "cabine" front upper wing to lower fuselage. Let dry. Then finish with the back upper wing to front fuselage. The long left radiator line fit well without problems. The short back line was a bear. I broke it trying to get it to fit-repaired it, then got it to seat the second time.
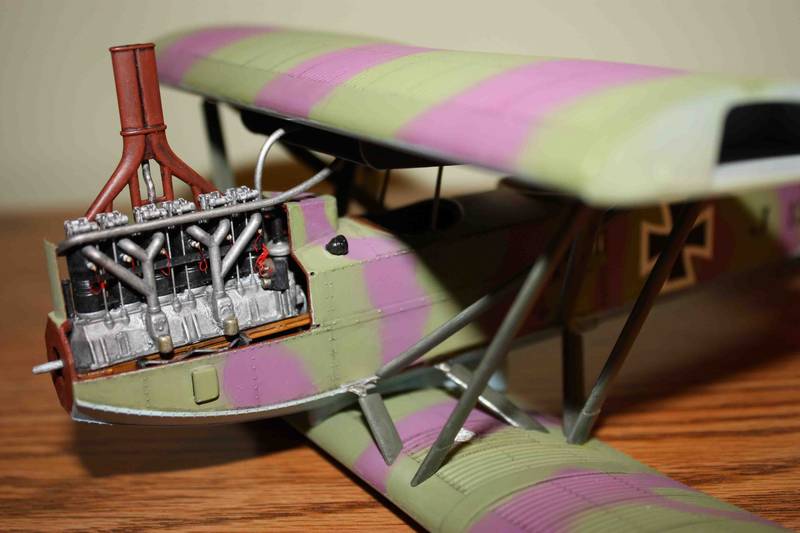
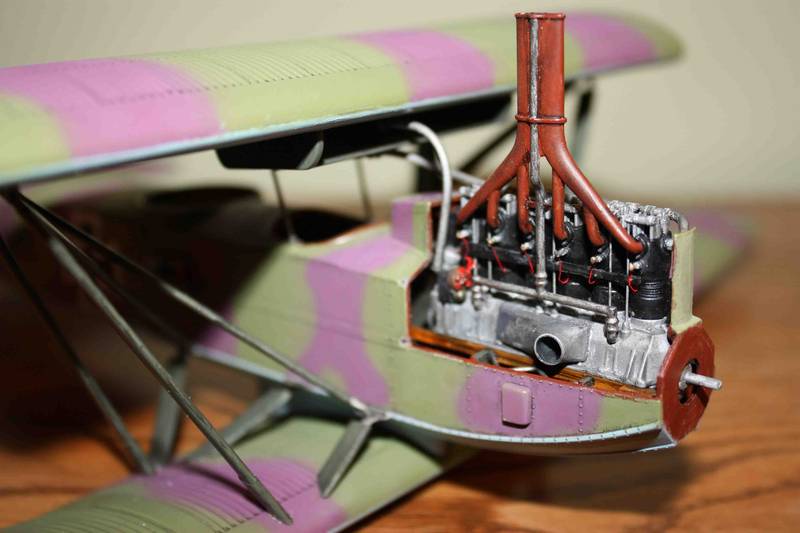
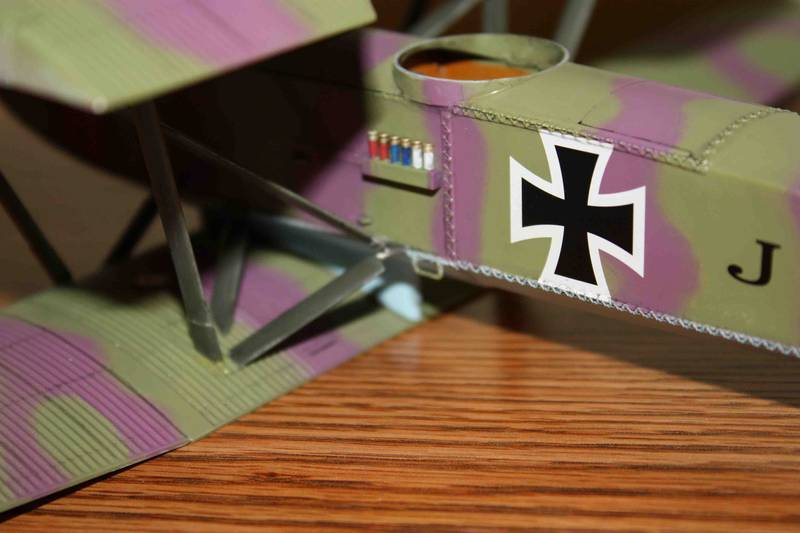
I'm near the finish line. The next batch of photos should be of the finished product.

Carl, this kit would be a nice break from all those albatri (or is it "albatrosses?"). It's pretty much a straightforward build-the only major problem I had was the decals-they didn't want to adhere well. Your only problem will be finding a place to put it. It's pretty big. I'm flattered my meager attempt has got you interested in starting your own.

I finished the struts and radiator lines. My suggestions regarding this part of the assembly-follow the instructions closely. Keep the struts in order according to sides, front and back (there are subtle differences for each). Don't sand the attachment points down too much- the holes in the lower wing for the outer struts are not round. They will line them up to the correct angles and attitudes. My order of assembly: Do the outer struts on the lower wing-let dry. Assemble the top center wing (the entire top wing will be too heavy to get the struts and cables to line up easily in the six holes). Let dry. Do the inner "cabine" front upper wing to lower fuselage. Let dry. Then finish with the back upper wing to front fuselage. The long left radiator line fit well without problems. The short back line was a bear. I broke it trying to get it to fit-repaired it, then got it to seat the second time.


I'm near the finish line. The next batch of photos should be of the finished product.
thegirl

Joined: January 19, 2008
KitMaker: 6,743 posts
AeroScale: 6,151 posts

Posted: Wednesday, June 15, 2011 - 01:32 AM UTC
Well are you done yet ? !
She is one sweet looking build so far ! Did you have any trouble mounting the top wing ? Was reading on a different site that the follow was having iusses with this . From what I have seen on here and the drome there is none .
Looking forwar to seeing the final pictures !
She is one sweet looking build so far ! Did you have any trouble mounting the top wing ? Was reading on a different site that the follow was having iusses with this . From what I have seen on here and the drome there is none .
Looking forwar to seeing the final pictures !
dmopath

Joined: July 02, 2010
KitMaker: 175 posts
AeroScale: 174 posts

Posted: Wednesday, June 15, 2011 - 03:28 AM UTC
Quoted Text
Well are you done yet ? !
She is one sweet looking build so far ! Did you have any trouble mounting the top wing ? Was reading on a different site that the follow was having iusses with this . From what I have seen on here and the drome there is none .
Looking forwar to seeing the final pictures !
Not yet, but we are close

The top wing is complete and I am in the process of filling and painting the seams. It is pretty obvious now that this bad boy is big, and will take a lot of shelf space.
I didn't have too much trouble with the top center part and struts, but I can't imagine trying to fit the struts and cables into a large, heavy completed top wing.

wing_nut

Joined: June 02, 2006
KitMaker: 1,212 posts
AeroScale: 468 posts

Posted: Wednesday, June 15, 2011 - 02:51 PM UTC
Well keep at it cuz it looks sweet as hell right now.

PropDuster

Joined: July 14, 2008
KitMaker: 18 posts
AeroScale: 6 posts

Posted: Wednesday, June 15, 2011 - 05:11 PM UTC
Fine looking build sir.
Awaiting with breathless anticipation your new photos
Awaiting with breathless anticipation your new photos

OEFFAG_153

Joined: February 19, 2010
KitMaker: 1,473 posts
AeroScale: 1,450 posts

Posted: Wednesday, June 15, 2011 - 08:57 PM UTC
Quoted Text
Well keep at it cuz it looks sweet as hell right now.
Second that – very sweet indeed

Mikael
dmopath

Joined: July 02, 2010
KitMaker: 175 posts
AeroScale: 174 posts

Posted: Friday, June 24, 2011 - 01:43 AM UTC
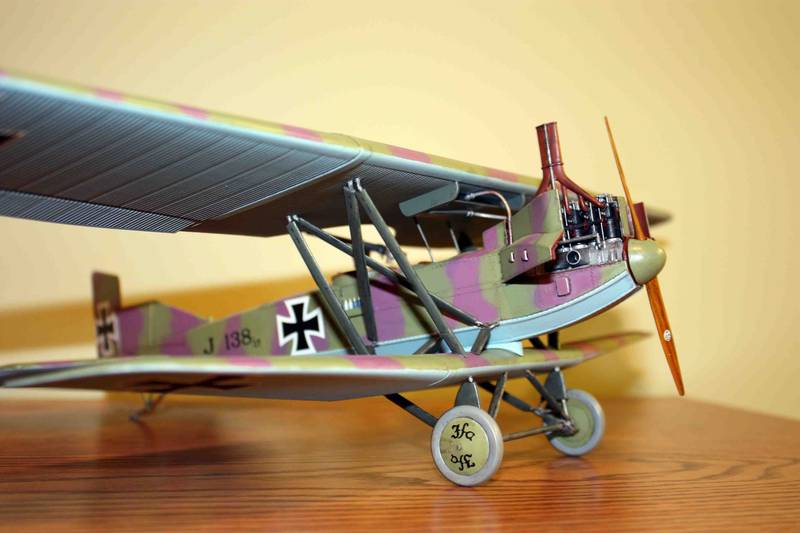
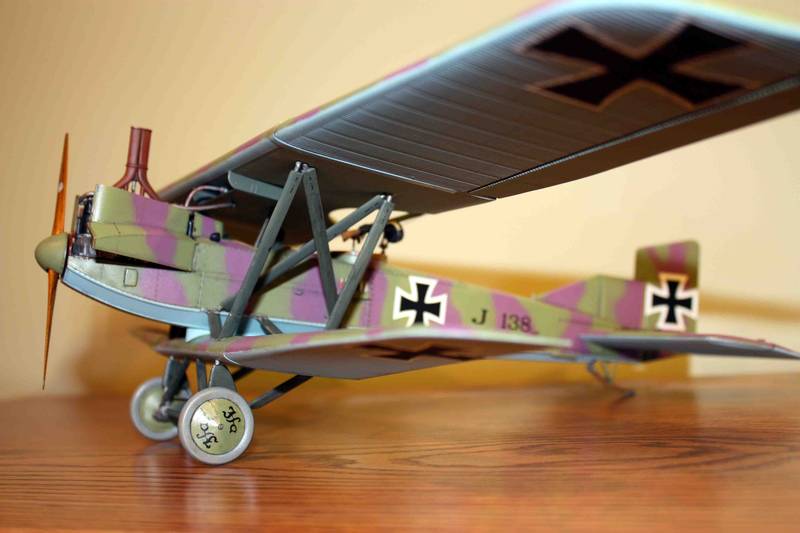

Well, my friends, it is done.
 It has gotten to the point where all I am doing is tinkering with it, and I’ve gotten tired of looking at it.
It took longer than I thought. It didn’t help that I made the mistake of using bonding (CA) cement to place the landing struts on the lower wing. I knew it was wrong when I did it, but I couldn’t stop myself. Of course, they didn’t completely seat into the holes, so I had to saw them off, re-drill the holes and re-cement the struts. The end result isn’t too bad. Interestingly, those little ancillary landing struts provide a fair amount of support. Also, if had it to do over, I would follow the directions and not insert the top lateral wings until the end. Trying to manipulate the airplane with that big heavy wing kept causing various struts to pull out. All in all, I think it came out okay. It’s certainly a better ending than I envisioned when the decals first went on.
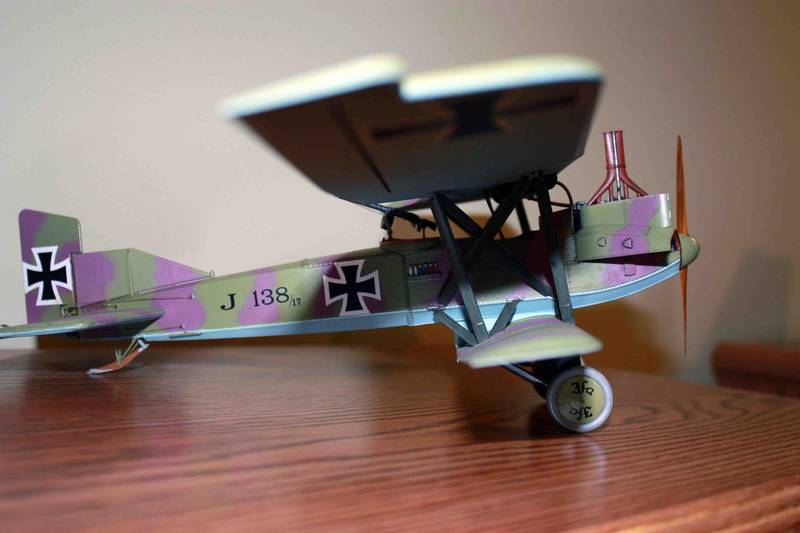
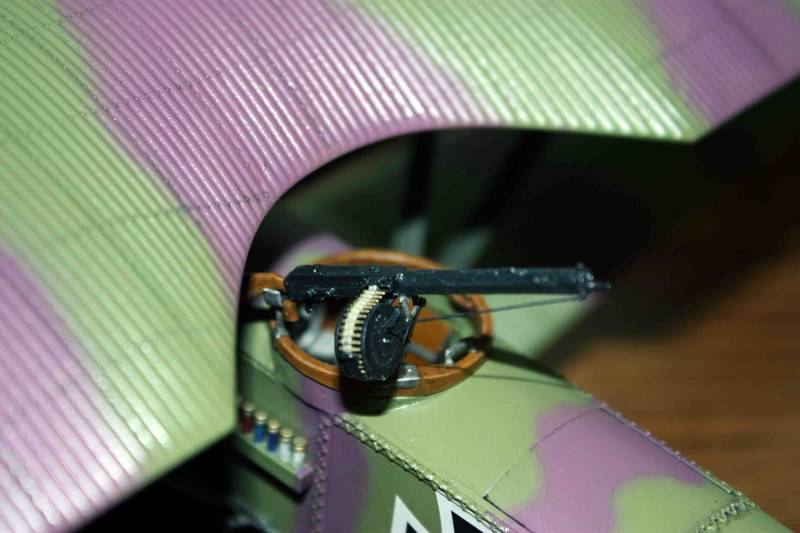
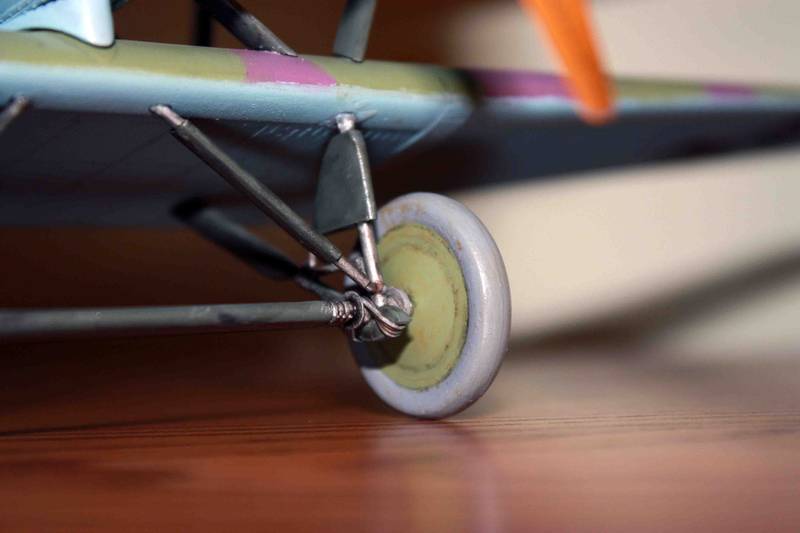
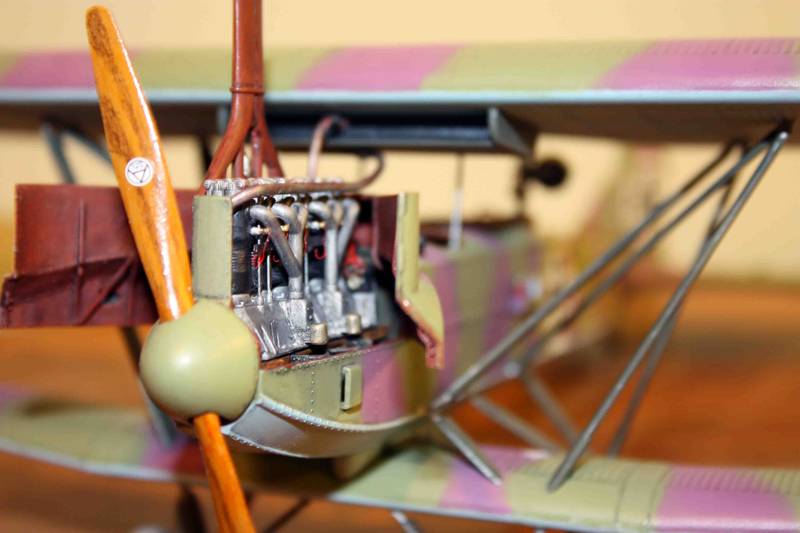
This ends my contribution to the group build. I had hoped to improve my airbrush skills, and I certainly feel more comfortable using it. As a bonus, I’ve learned how to take off coats of Future with ammonia, and to remove defective decals with low-tack tape, without destroying cured acrylic paint.
For those who stopped by from time to time, I hope I gave you ideas to consider if you decide to tackle this kit. For those who offered encouragement to keep soldiering on, many thanks-I probably would not have finished this interesting subject otherwise.
Now on to the next project (the Roden Airco DH2).
 |


