

Air Campaigns
Want to start or join a group build? This is where to start.
Want to start or join a group build? This is where to start.
Hosted by Frederick Boucher, Michael Satin
OFFICIAL: Fighting Falcon Campaign
flyboy92187

Joined: March 30, 2011
KitMaker: 199 posts
AeroScale: 150 posts

Posted: Monday, June 27, 2011 - 10:04 AM UTC
almost like a miniature paper machet? I can see that working rather well, thank you Justin.

markske

Joined: April 14, 2007
KitMaker: 71 posts
AeroScale: 58 posts

Posted: Saturday, July 02, 2011 - 07:22 AM UTC
Quoted Text
Hey Mark,
I keep seeing people having an actual texture on their seats. How do you get the effect? Kinda new at the whole adding detail, and I am wondering how people do it. I am getting a bit sick of seeing just a plastic look on my kits.
-Mike
This seats are frome the cockpit set from wolfpack.
Made some progress.
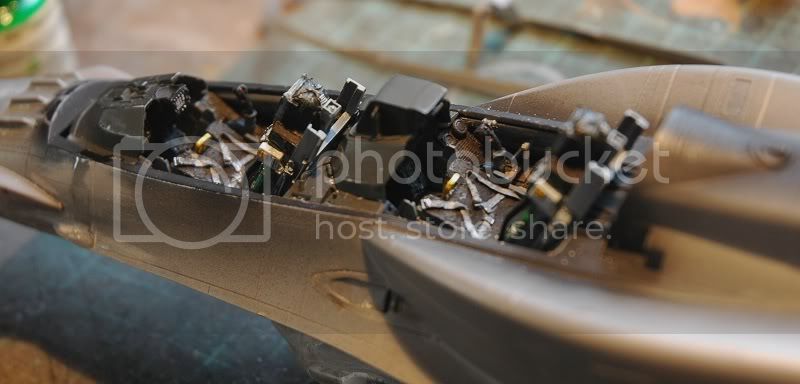

More to come

Mark

Keeperofsouls2099
Joined: January 14, 2009
KitMaker: 2,798 posts
AeroScale: 2,443 posts
Posted: Sunday, July 03, 2011 - 06:46 AM UTC
Good looking missiles excellent work I will be starting soon have to get an f-14 off the bench first

markske
Joined: April 14, 2007
KitMaker: 71 posts
AeroScale: 58 posts
Posted: Saturday, July 09, 2011 - 05:08 AM UTC
More work done.
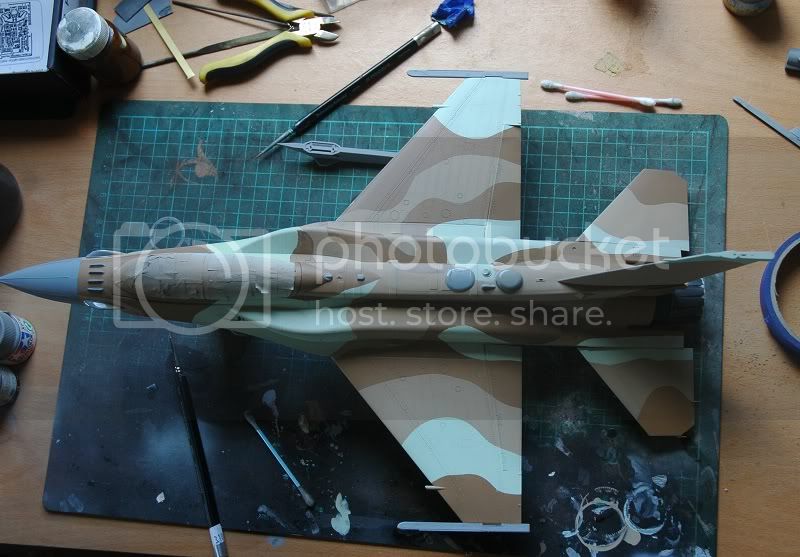

I will start the decals in a few days.
Mark
I will start the decals in a few days.
Mark
Keeperofsouls2099
Joined: January 14, 2009
KitMaker: 2,798 posts
AeroScale: 2,443 posts
Posted: Saturday, July 09, 2011 - 12:15 PM UTC
sweet camo job 
markske
Joined: April 14, 2007
KitMaker: 71 posts
AeroScale: 58 posts
Posted: Monday, July 11, 2011 - 11:21 PM UTC
Thanks it is time to put some decals on.

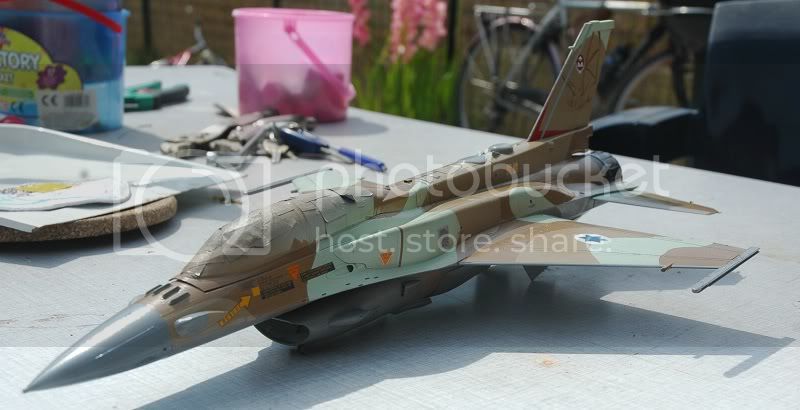

Mark
Mark
Keeperofsouls2099
Joined: January 14, 2009
KitMaker: 2,798 posts
AeroScale: 2,443 posts
Posted: Tuesday, July 12, 2011 - 03:31 AM UTC
Good looking tail Art your build is coming along well 

Blueheeler

Joined: March 18, 2008
KitMaker: 347 posts
AeroScale: 223 posts

Posted: Friday, July 15, 2011 - 02:12 AM UTC
Some brilliant aircraft being built on here!
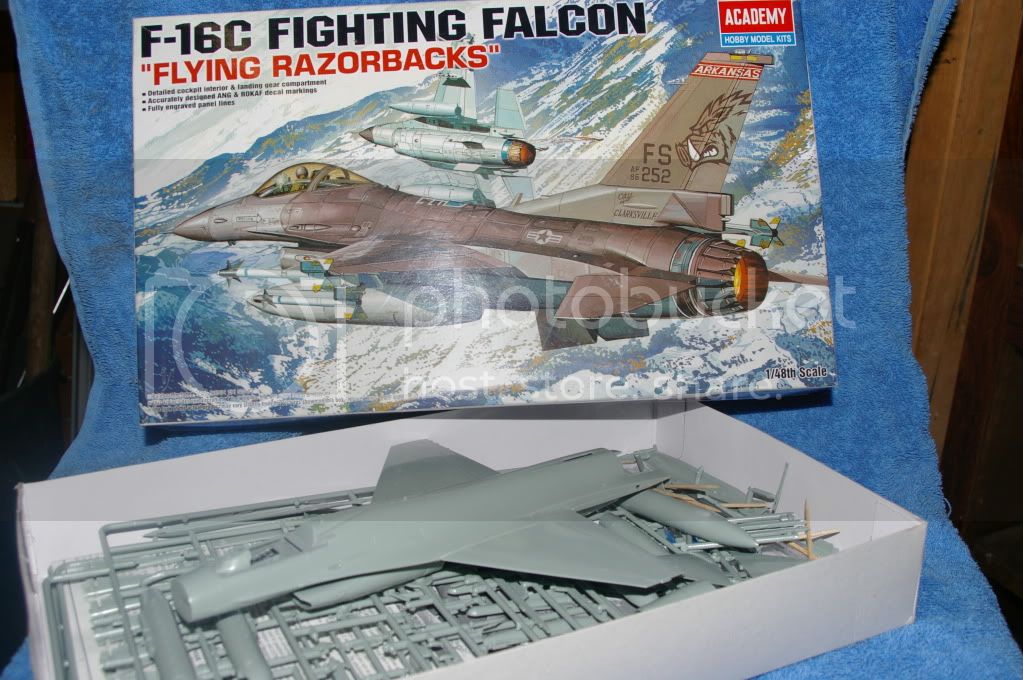
Update on my entry, its an Academy 1/48 F-16C. Still along way to go but just got the camera back up and working so thought had better post progress pics.
Cheers,
Nick.
Update on my entry, its an Academy 1/48 F-16C. Still along way to go but just got the camera back up and working so thought had better post progress pics.
Cheers,
Nick.


russamotto
Joined: December 14, 2007
KitMaker: 3,389 posts
AeroScale: 375 posts

Posted: Friday, July 15, 2011 - 10:10 AM UTC
Lots of really nice work here. It has me a little intimidated as this will be my first major jet build. I've been searching for a block 40 aircraft. Does anyone make one in 1/48? I was thinking of getting the Tamiya kit, which is a block 50/52, but I don't have the faintest idea of how to backdate.

heliman
Joined: June 14, 2010
KitMaker: 702 posts
AeroScale: 29 posts

Posted: Friday, July 15, 2011 - 01:00 PM UTC
Try tamiya's 1/ 48 F-16C/N kit. The kit has parts for block 30 and block 42 in the same box!! Its the aggressor / adversary boxing. The only thing I don't like so far, is the lack of instructions for the weapons...its a training unit.
Block 30 and 40 both have the PW engine right? Both nozzles are included, and intakes!
Jeff
Block 30 and 40 both have the PW engine right? Both nozzles are included, and intakes!
Jeff
markske
Joined: April 14, 2007
KitMaker: 71 posts
AeroScale: 58 posts
Posted: Saturday, July 23, 2011 - 05:38 AM UTC
Some progress.


Mark
Mark
Keeperofsouls2099
Joined: January 14, 2009
KitMaker: 2,798 posts
AeroScale: 2,443 posts
Posted: Sunday, July 24, 2011 - 06:01 AM UTC
more and more impressive with each picture sir!
markske
Joined: April 14, 2007
KitMaker: 71 posts
AeroScale: 58 posts
Posted: Sunday, July 24, 2011 - 07:28 AM UTC
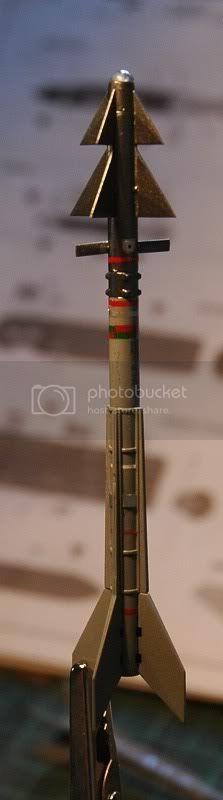
Quoted Text
more and more impressive with each picture sir!
Thanks i do my best.
The big feultank is ready.
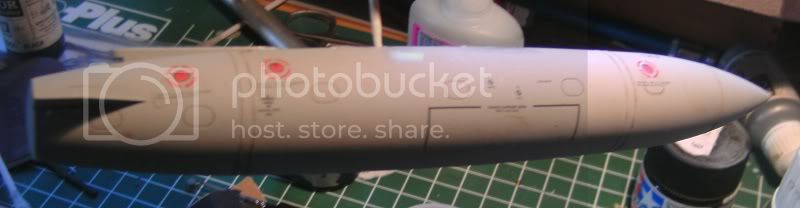
And one of the AMRAAMs ready.
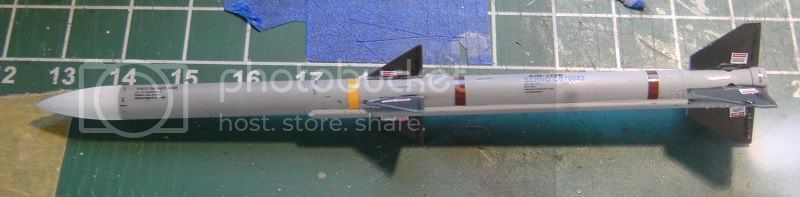
Mark
markske
Joined: April 14, 2007
KitMaker: 71 posts
AeroScale: 58 posts
Posted: Monday, July 25, 2011 - 09:49 PM UTC
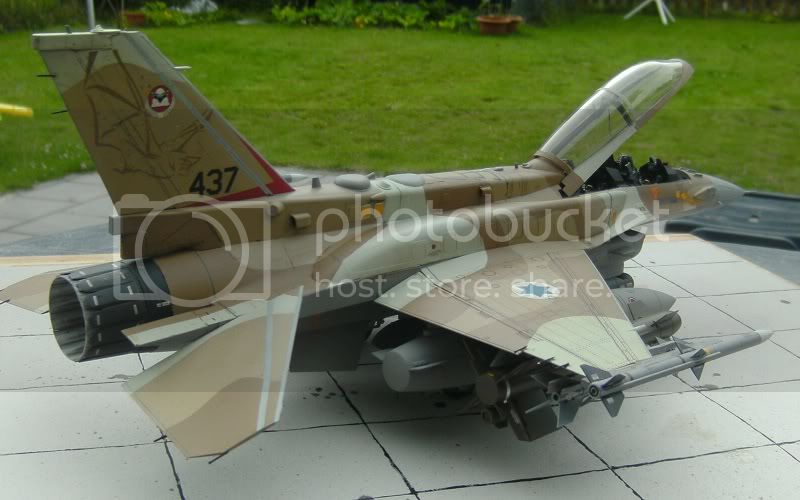
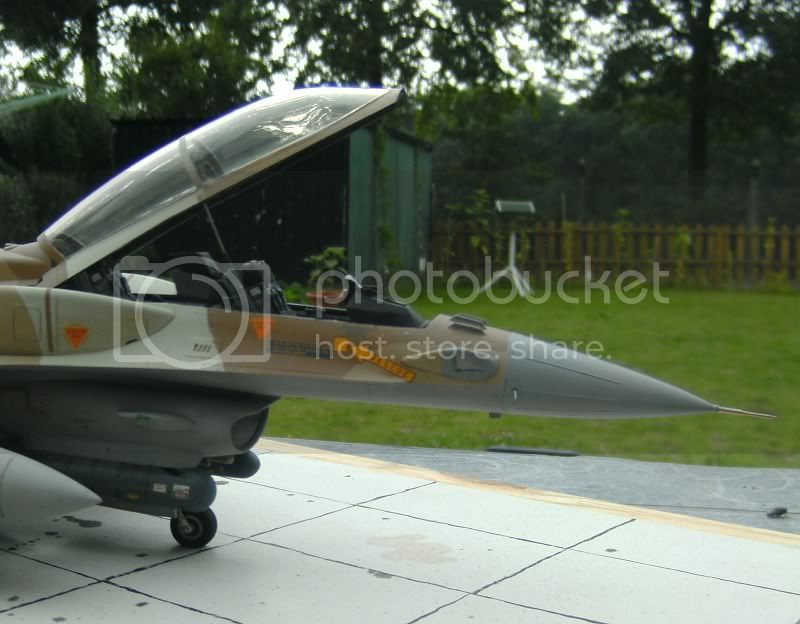
The final pics of this build.

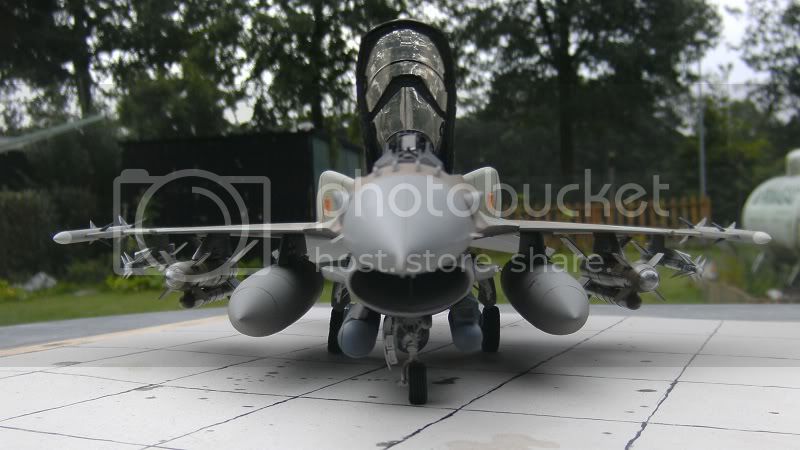
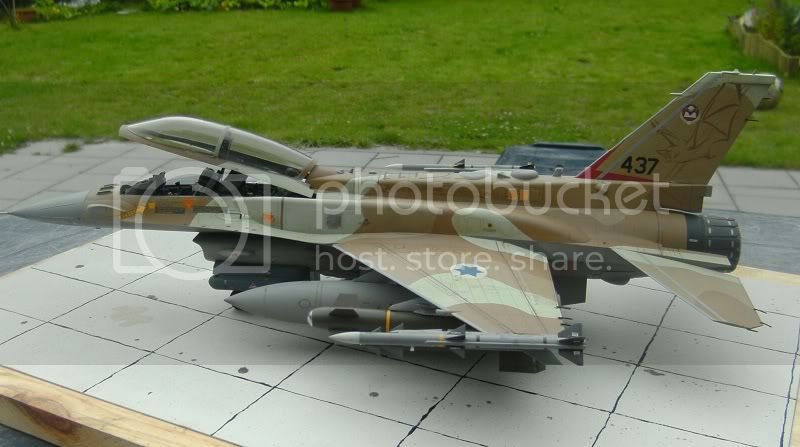

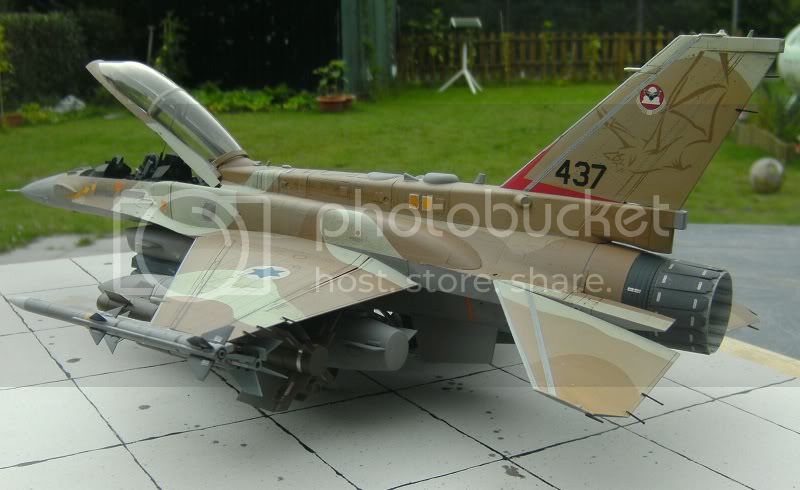
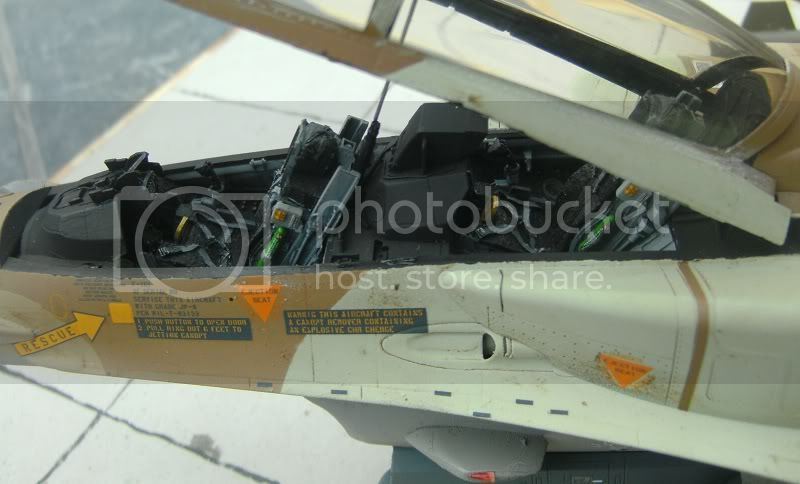

Mark
Mark

RedwingNev

Joined: February 07, 2004
KitMaker: 911 posts
AeroScale: 415 posts

Posted: Wednesday, July 27, 2011 - 09:27 PM UTC
Lovely model Mark. I love seeing these modern Vipers with the big spine and the CFTs and dripping with ordnance - so far away from the original Lightweight Fighter concept! 
Keeperofsouls2099
Joined: January 14, 2009
KitMaker: 2,798 posts
AeroScale: 2,443 posts
Posted: Friday, July 29, 2011 - 12:52 PM UTC
Great job sir very well Executed model Gratz sir!

AussieReg

#007
Joined: June 09, 2009
KitMaker: 8,156 posts
AeroScale: 3,756 posts
Posted: Monday, August 08, 2011 - 02:14 AM UTC
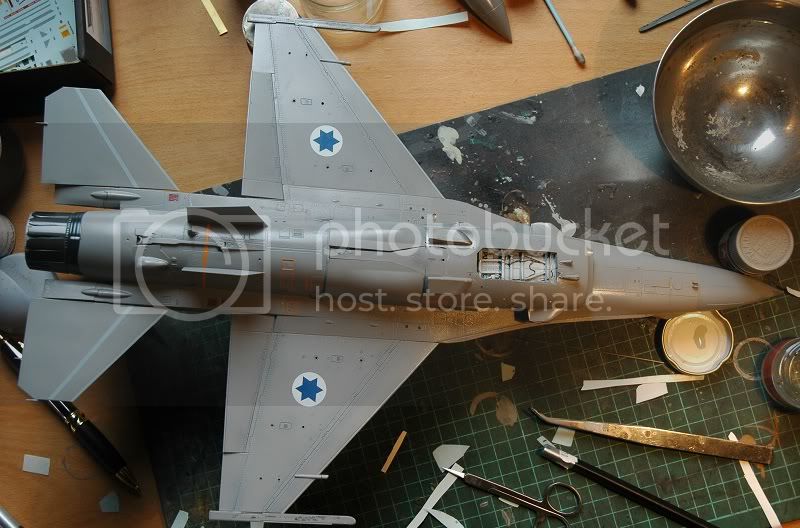
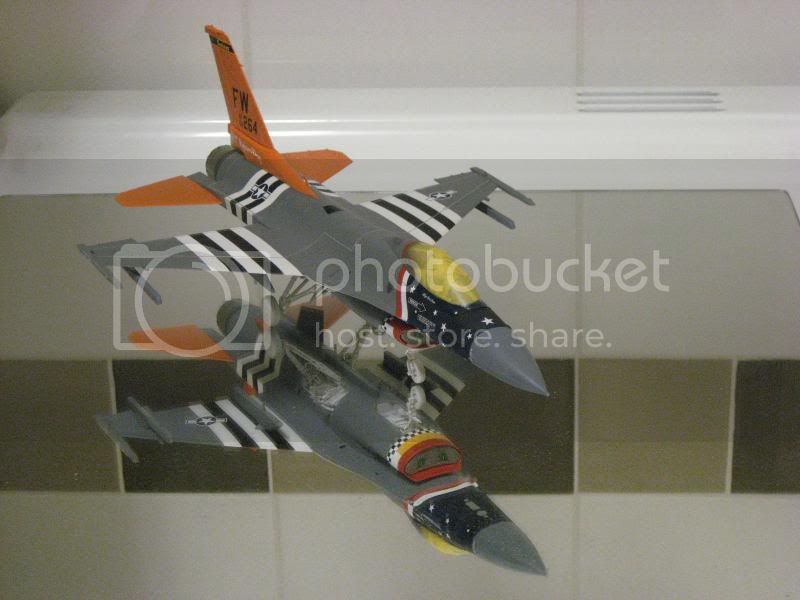
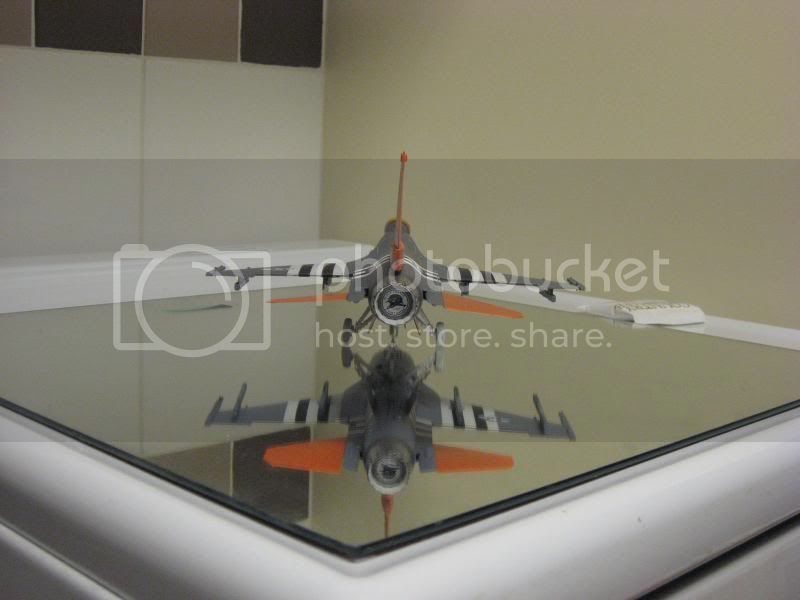
Hey folks, just confirming that I am still alive and doing my bestest to get this done in time ! Basic assembly is complete, my 9yo boy Josh has requested this one be in flight-mode and all weaponed up, so here's where I'm at . . . .

I will be painting the seat and pilot next so the glass can go on, then it's paint time !
Cheers, D
I will be painting the seat and pilot next so the glass can go on, then it's paint time !
Cheers, D

russamotto
Joined: December 14, 2007
KitMaker: 3,389 posts
AeroScale: 375 posts
Posted: Monday, August 08, 2011 - 12:36 PM UTC
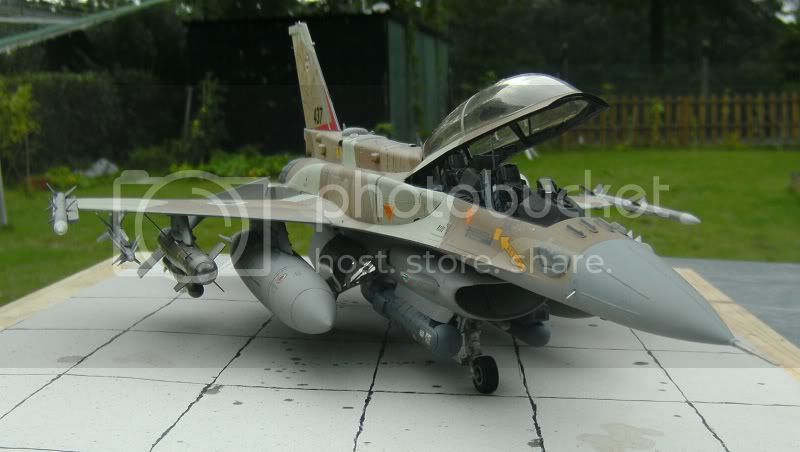
I ordered the Kinetic F-16C Barak(a)? I was told it could be built as either the Israeli version or a standard version block 40. It was also $20 cheaper than the Tamiya ANG kit. I should have it in hand on Wednesday, and then I can start my entry. Afterburner has done a very nice and complete set of decals for the Hill AFB vipers.
Keeperofsouls2099
Joined: January 14, 2009
KitMaker: 2,798 posts
AeroScale: 2,443 posts
Posted: Tuesday, August 09, 2011 - 04:04 AM UTC
D-how are you liking the modern thingies  looking good by the way
My f-14 is almost done then I will be starting my f-16 actually looking forward to this one and hoping i dont miss the dead line
looking good by the wayMy f-14 is almost done then I will be starting my f-16 actually looking forward to this one and hoping i dont miss the dead line

29Foxtrot
Joined: September 19, 2003
KitMaker: 708 posts
AeroScale: 674 posts

Posted: Wednesday, August 10, 2011 - 02:43 AM UTC
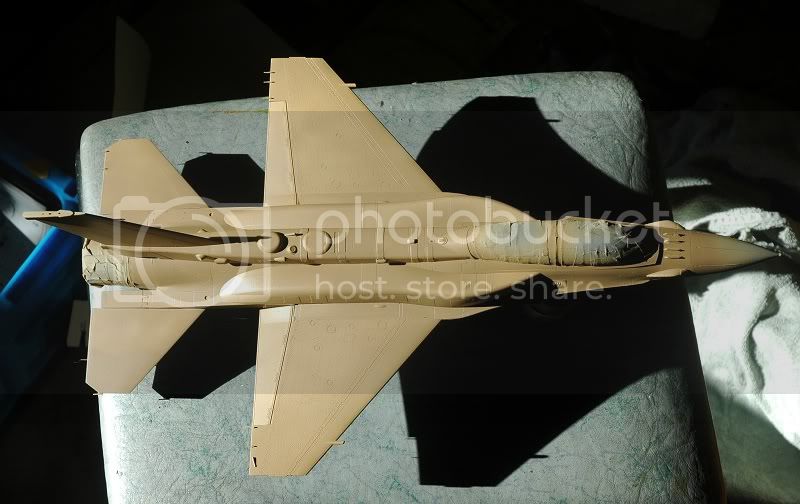
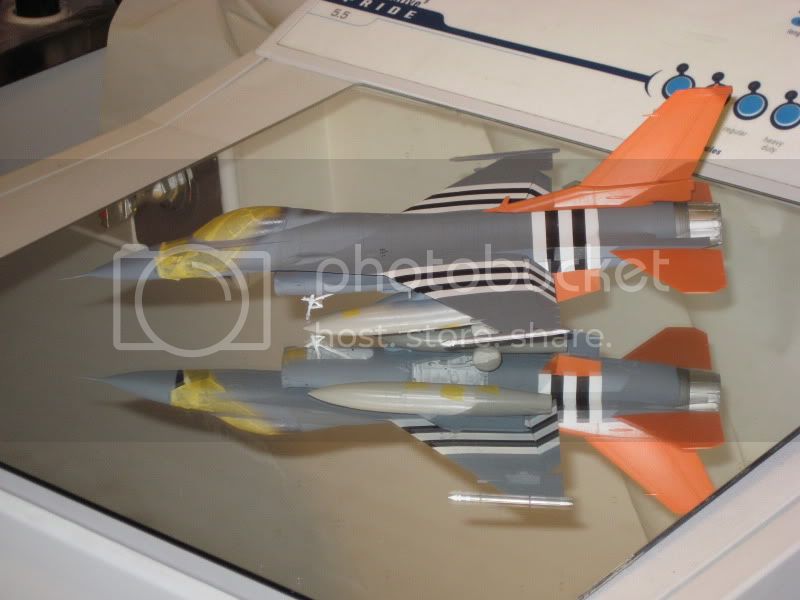
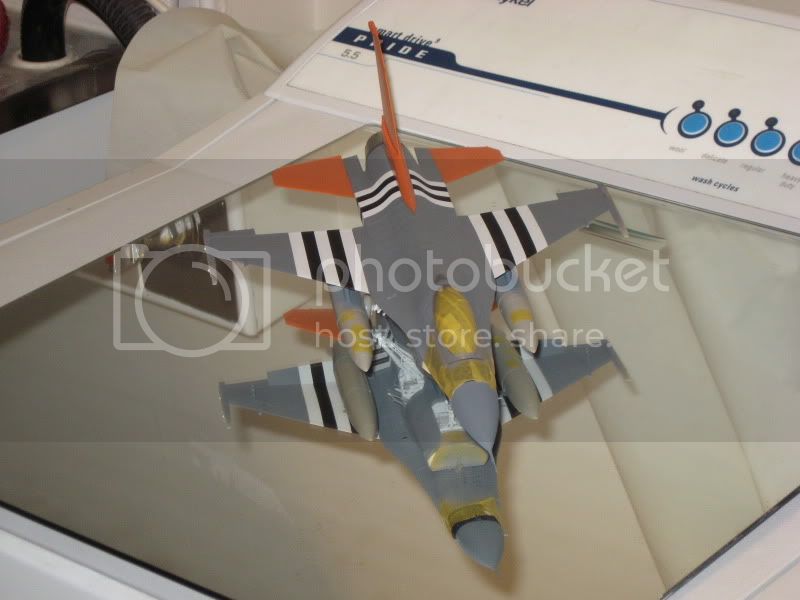
Almost got my bird to the decal stage {even thought the upper colour is a little light in shade}, the external tanks have to be cleaned up and painted along with the outer wing rails. Have a little Insignia Red to add to the canopy frame as well as the Insignia Blue.

29Foxtrot
Joined: September 19, 2003
KitMaker: 708 posts
AeroScale: 674 posts
Posted: Saturday, August 13, 2011 - 02:18 PM UTC
Hi All,
My F-16c is at the clear coat stage.
A couple of touch up's and paint the external stores along with the wing rails.
More to follow later.
My F-16c is at the clear coat stage.
A couple of touch up's and paint the external stores along with the wing rails.
More to follow later.
Keeperofsouls2099
Joined: January 14, 2009
KitMaker: 2,798 posts
AeroScale: 2,443 posts
Posted: Friday, August 19, 2011 - 03:54 PM UTC
Sorry it took so long to reply that is a different paint job all together very cool 
29Foxtrot
Joined: September 19, 2003
KitMaker: 708 posts
AeroScale: 674 posts
Posted: Saturday, August 20, 2011 - 12:23 PM UTC
Hi All,
Justin,
Thanks for the comment on the scheme.
I've got some of it's {to} many decals, on {as yet to apply any softner}, 26 stars have to be applied to the blue background of the forward fuselage, the decals are from the AfterBurner sheet #48-058 for the Indiana ANG.
Followed by all the stencils, from both the kit and AM sheets.

Yet to touch up the yellow/red around the lower intake, before applying the blue/white checked band.
Also discovered I have to make both an intake cover {with Snake Eye decals} and an exhaust plug {also with a Snake decal}, for this bird, as the decal sheet supplies both decals and the templates.
More to follow later.
Justin,
Thanks for the comment on the scheme.
I've got some of it's {to} many decals, on {as yet to apply any softner}, 26 stars have to be applied to the blue background of the forward fuselage, the decals are from the AfterBurner sheet #48-058 for the Indiana ANG.
Followed by all the stencils, from both the kit and AM sheets.
Yet to touch up the yellow/red around the lower intake, before applying the blue/white checked band.
Also discovered I have to make both an intake cover {with Snake Eye decals} and an exhaust plug {also with a Snake decal}, for this bird, as the decal sheet supplies both decals and the templates.
More to follow later.
29Foxtrot
Joined: September 19, 2003
KitMaker: 708 posts
AeroScale: 674 posts
Posted: Monday, August 22, 2011 - 10:14 AM UTC
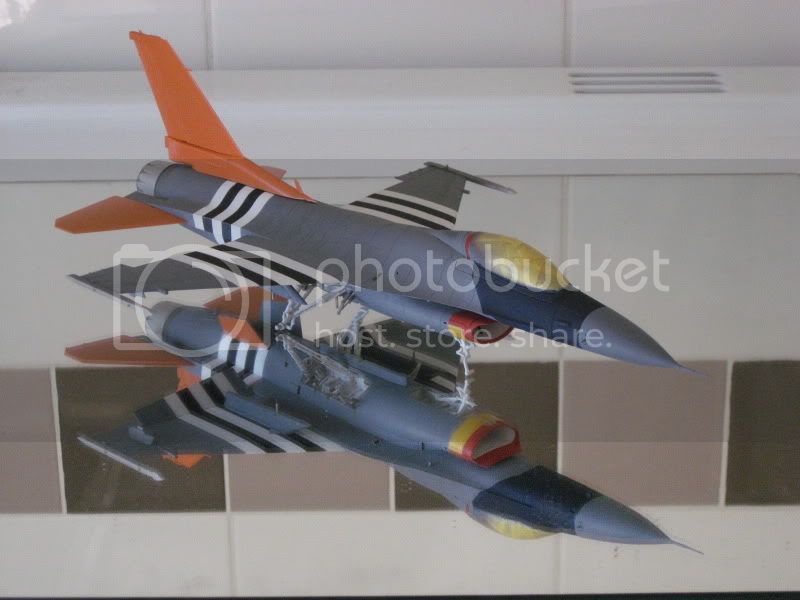
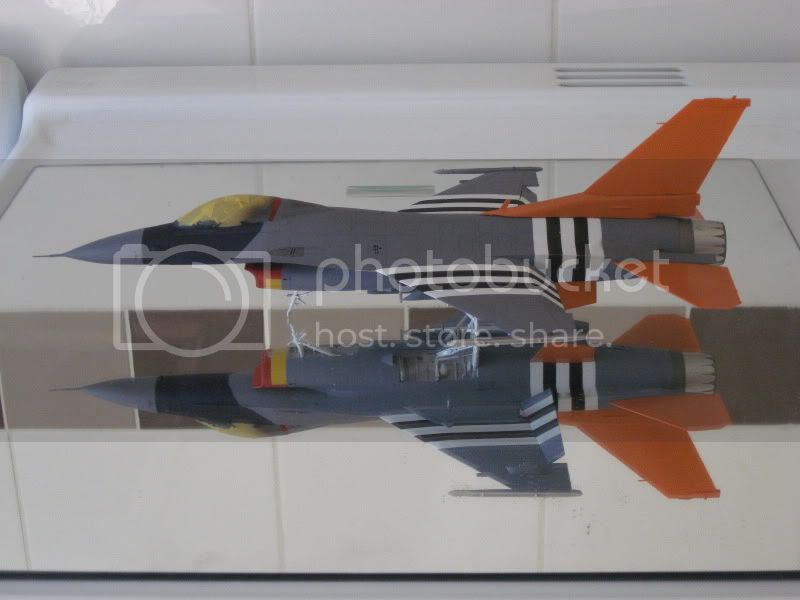
Touched up a few needed places, spent several hours putting the remaining decals to this bird, 21 separate stars in 4 different sizes, 13 separate walkway strips, plus the odd stencil here and there.
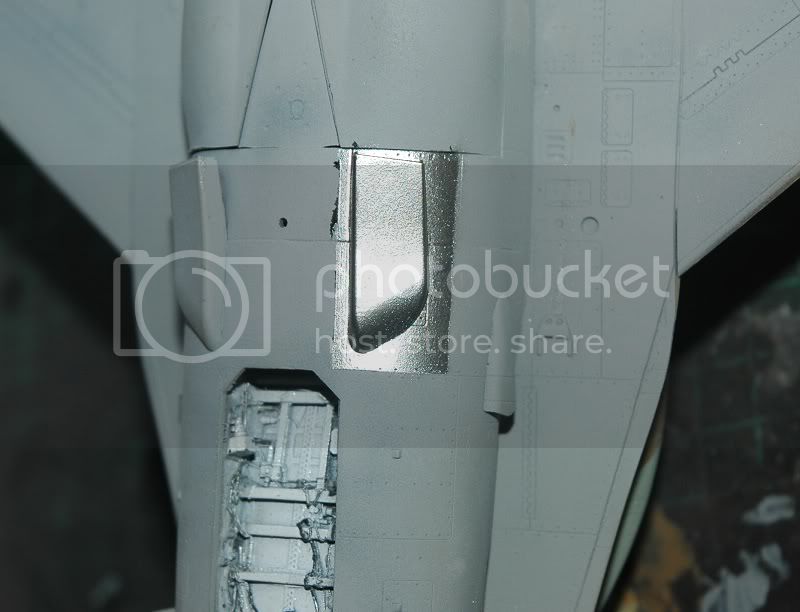
These three pix show how I made up the 'soft coverings' for both the intake and exhaust.
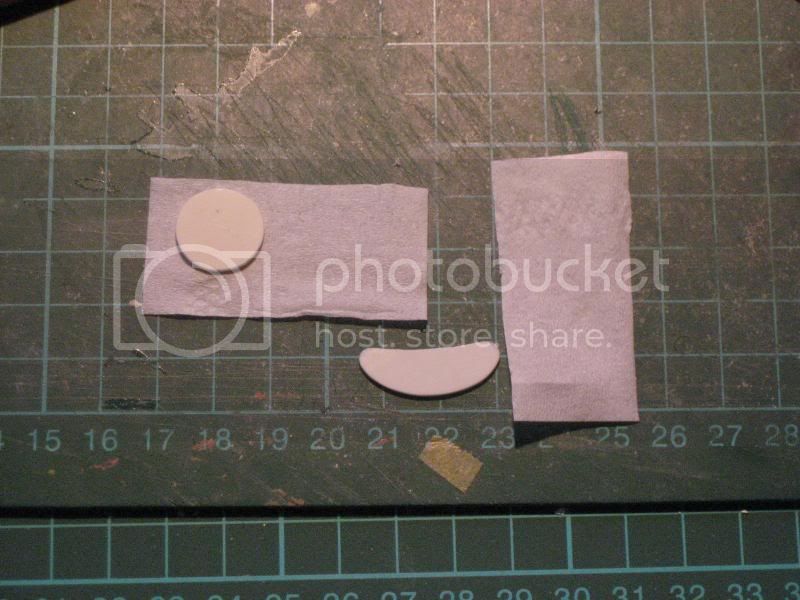
Plasti-card cut to size.
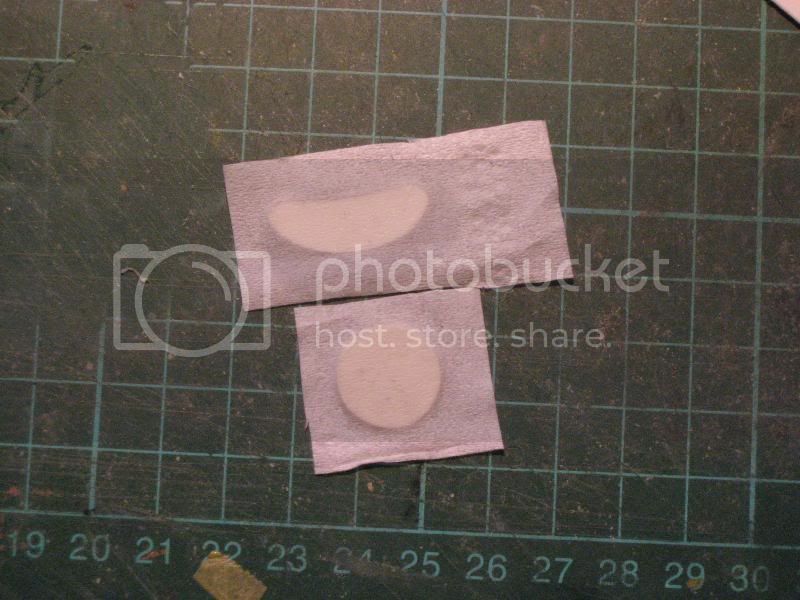
2 ply Tissue glued to plasti-card, {using Tamiya extra thin glue}.

Covers painted with their respective decals.
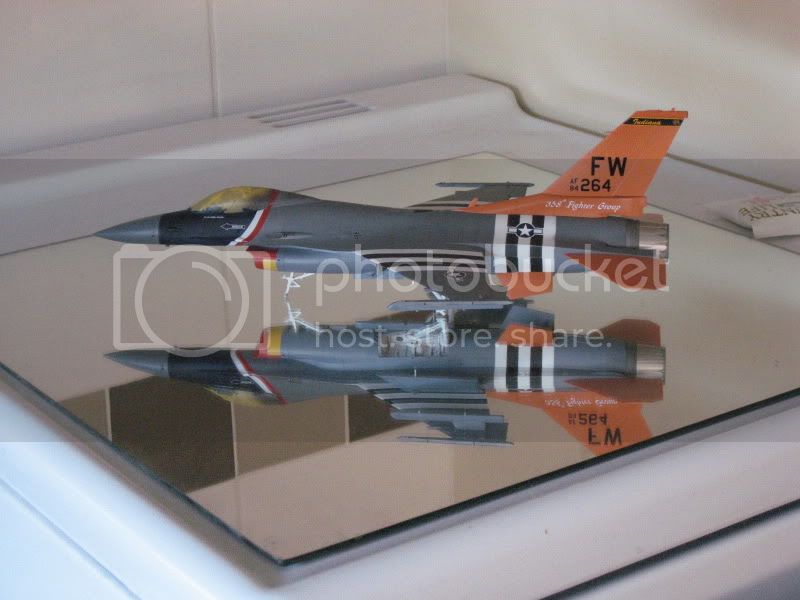
Progress from applying decals to nose, walk way and other stencils.
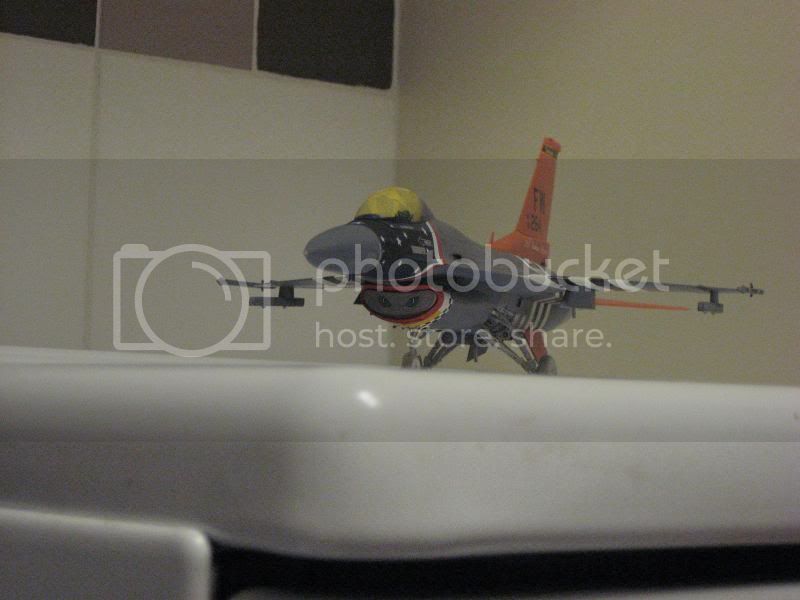
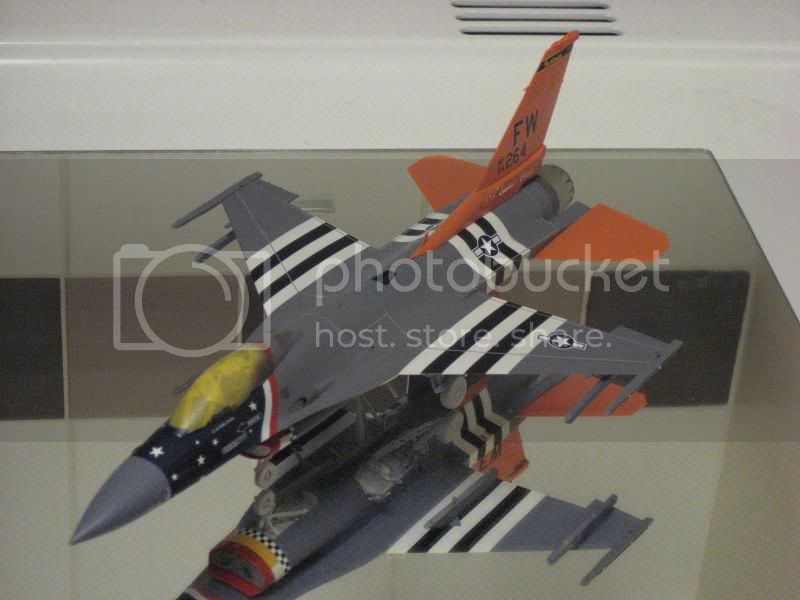
Getting closer to finishing this bird.
These three pix show how I made up the 'soft coverings' for both the intake and exhaust.
Plasti-card cut to size.
2 ply Tissue glued to plasti-card, {using Tamiya extra thin glue}.
Covers painted with their respective decals.
Progress from applying decals to nose, walk way and other stencils.
Getting closer to finishing this bird.
Keeperofsouls2099
Joined: January 14, 2009
KitMaker: 2,798 posts
AeroScale: 2,443 posts
Posted: Monday, August 22, 2011 - 01:27 PM UTC
Very cool looking bird sir good job so far
 |

WEB HOSTING BY


Copyright ©2021 AeroScale and Kitmaker Network, a subsidiary of Silver Star Enterprises
All Rights Reserved. Please read our Conditions of Use and Privacy Policy.
All Rights Reserved. Please read our Conditions of Use and Privacy Policy.